NetSure ITM Installation Manual - Gruber Power
NetSure ITM Installation Manual - Gruber Power
NetSure ITM Installation Manual - Gruber Power

Create successful ePaper yourself
Turn your PDF publications into a flip-book with our unique Google optimized e-Paper software.
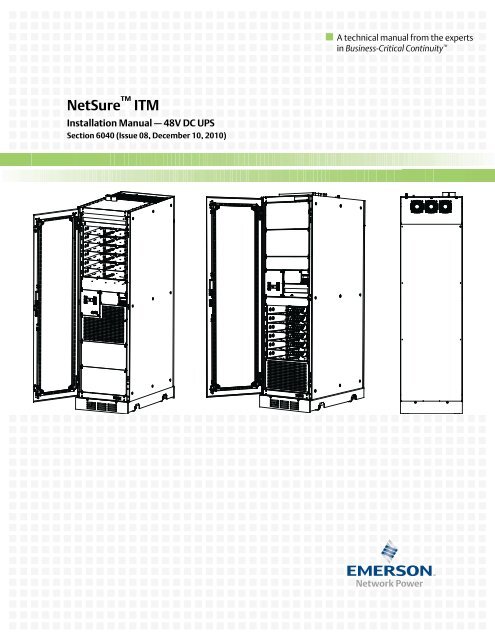
<strong>NetSure</strong> <strong>ITM</strong><br />
<br />
<strong>Installation</strong> <strong>Manual</strong> – 48V DC UPS<br />
Section 6040 (Issue 08, December 10, 2010)
Business-Critical Continuity, Emerson Network <strong>Power</strong>, and the Emerson Network<br />
<strong>Power</strong> logo are trademarks and service marks of Emerson Electric Co.<br />
<strong>NetSure</strong>, NetSpan, NetReach, NetXtend, and NetPerform<br />
are trademarks of Emerson Network <strong>Power</strong>, Energy Systems, North America, Inc.<br />
All other trademarks are the property of their respective owners.<br />
The products covered by this instruction manual are manufactured and/or<br />
sold by Emerson Network <strong>Power</strong>, Energy Systems, North America, Inc.<br />
The information contained in this document is subject to change without notice and may not be<br />
suitable for all applications. While every precaution has been taken to ensure the accuracy and<br />
completeness of this document, Emerson Network <strong>Power</strong>, Energy Systems, North America, Inc.<br />
assumes no responsibility and disclaims all liability for damages resulting from use of this information<br />
or for any errors or omissions. Refer to other local practices or building codes as applicable for the correct<br />
methods, tools, and materials to be used in performing procedures not specifically described in this document.<br />
This document is the property of Emerson Network <strong>Power</strong>, Energy Systems, North America, Inc.<br />
and contains confidential and proprietary information owned by Emerson Network <strong>Power</strong>, Energy<br />
Systems, North America, Inc. Any copying, use or disclosure of it without the written permission<br />
of Emerson Network <strong>Power</strong>, Energy Systems, North America, Inc. is strictly prohibited.<br />
Copyright © 2010, Emerson Network <strong>Power</strong>, Energy Systems, North America, Inc.<br />
All rights reserved throughout the world.
TABLE OF CONTENTS<br />
IMPORTANT SAFETY INSTRUCTIONS . . . . . . . . . . . . . . . . . . . . . . . . . . . . . . . . . . . . . . . . . . . . . . . .1<br />
1.0 INSPECTING THE EQUIPMENT AND STORING FOR DELAYED INSTALLATIONS . . . . . . . . . . . . .4<br />
1.1 External Inspections . . . . . . . . . . . . . . . . . . . . . . . . . . . . . . . . . . . . . . . . . . . . . . . . . . . . . . . . . 4<br />
1.2 Internal Inspections . . . . . . . . . . . . . . . . . . . . . . . . . . . . . . . . . . . . . . . . . . . . . . . . . . . . . . . . . . 4<br />
1.3 Storing for Delayed <strong>Installation</strong> . . . . . . . . . . . . . . . . . . . . . . . . . . . . . . . . . . . . . . . . . . . . . . . . 4<br />
2.0 INSTALLATION DRAWINGS AND RECOMMENDED TOOLS AND TEST EQUIPMENT . . . . . . . . . . .6<br />
2.1 <strong>Installation</strong> Drawings . . . . . . . . . . . . . . . . . . . . . . . . . . . . . . . . . . . . . . . . . . . . . . . . . . . . . . . . 6<br />
2.2 Row-Based <strong>Installation</strong> Example . . . . . . . . . . . . . . . . . . . . . . . . . . . . . . . . . . . . . . . . . . . . . . 11<br />
2.3 Recommended Tools and Test Equipment . . . . . . . . . . . . . . . . . . . . . . . . . . . . . . . . . . . . . . . 12<br />
3.0 POSITIONING THE DC UPS SYSTEM . . . . . . . . . . . . . . . . . . . . . . . . . . . . . . . . . . . . . . . . .13<br />
3.1 General Requirements . . . . . . . . . . . . . . . . . . . . . . . . . . . . . . . . . . . . . . . . . . . . . . . . . . . . . . . 13<br />
3.2 General Guidelines for Positioning the DC UPS Modules . . . . . . . . . . . . . . . . . . . . . . . . . . . 13<br />
3.2.1 Cable Entry. . . . . . . . . . . . . . . . . . . . . . . . . . . . . . . . . . . . . . . . . . . . . . . . . . . . . . . . . . . . . . . . . 13<br />
3.2.2 Environmental Considerations . . . . . . . . . . . . . . . . . . . . . . . . . . . . . . . . . . . . . . . . . . . . . . . . . 13<br />
3.2.3 Mechanical Considerations . . . . . . . . . . . . . . . . . . . . . . . . . . . . . . . . . . . . . . . . . . . . . . . . . . . . 14<br />
3.3 Floor <strong>Installation</strong> . . . . . . . . . . . . . . . . . . . . . . . . . . . . . . . . . . . . . . . . . . . . . . . . . . . . . . . . . . . 14<br />
3.4 Considerations in Moving the DC UPS Module . . . . . . . . . . . . . . . . . . . . . . . . . . . . . . . . . . . 15<br />
3.4.1 Transporting . . . . . . . . . . . . . . . . . . . . . . . . . . . . . . . . . . . . . . . . . . . . . . . . . . . . . . . . . . . . . . . . 15<br />
3.4.2 Moving a DC UPS Module . . . . . . . . . . . . . . . . . . . . . . . . . . . . . . . . . . . . . . . . . . . . . . . . . . . . . 15<br />
3.4.3 Final Positioning. . . . . . . . . . . . . . . . . . . . . . . . . . . . . . . . . . . . . . . . . . . . . . . . . . . . . . . . . . . . . 15<br />
3.5 Overhead Cable Tray Rails . . . . . . . . . . . . . . . . . . . . . . . . . . . . . . . . . . . . . . . . . . . . . . . . . . . 16<br />
3.6 For Top DC Distribution Feed (Top Cabled) Modules Only:<br />
Installing the Supplied Air Duct Assembly . . . . . . . . . . . . . . . . . . . . . . . . . . . . . . . . . . . . . . 17<br />
4.0 ELECTRICAL CONNECTIONS . . . . . . . . . . . . . . . . . . . . . . . . . . . . . . . . . . . . . . . . . . . . . . .18<br />
4.1 Wiring Information and Guidelines . . . . . . . . . . . . . . . . . . . . . . . . . . . . . . . . . . . . . . . . . . . . 18<br />
4.1.1 Cable Lengths (Floor or Cabinet Top to Connection Point Inside DC UPS Module) . . . . . . . 18<br />
4.1.2 Recommended Wire Sizes, Recommended Lugs, and Torque Requirements . . . . . . . . . . . . . 18<br />
4.1.3 Wiring Guidelines. . . . . . . . . . . . . . . . . . . . . . . . . . . . . . . . . . . . . . . . . . . . . . . . . . . . . . . . . . . . 18<br />
4.2 Protective Covers . . . . . . . . . . . . . . . . . . . . . . . . . . . . . . . . . . . . . . . . . . . . . . . . . . . . . . . . . . . 19<br />
4.3 Wiring Connections Locations . . . . . . . . . . . . . . . . . . . . . . . . . . . . . . . . . . . . . . . . . . . . . . . . . 20<br />
4.4 Making Electrical Connections . . . . . . . . . . . . . . . . . . . . . . . . . . . . . . . . . . . . . . . . . . . . . . . . 22<br />
4.4.1 Cabinet Grounding Connection . . . . . . . . . . . . . . . . . . . . . . . . . . . . . . . . . . . . . . . . . . . . . . . . . 22<br />
4.4.2 DC Output Distribution Connections . . . . . . . . . . . . . . . . . . . . . . . . . . . . . . . . . . . . . . . . . . . . 22<br />
4.4.3 AC Input <strong>Power</strong> Connections. . . . . . . . . . . . . . . . . . . . . . . . . . . . . . . . . . . . . . . . . . . . . . . . . . . 24<br />
4.4.4 Optional Alarm/Control Connections (to Primary Module only) . . . . . . . . . . . . . . . . . . . . . . . 26<br />
4.4.5 ACU + Controller Ethernet Connection (to Primary Module only) . . . . . . . . . . . . . . . . . . . . . 29<br />
4.4.6 Optional Emergency <strong>Power</strong> Off (EPO) Connection (to Primary Module only) . . . . . . . . . . . . 30<br />
4.4.7 Battery Connections . . . . . . . . . . . . . . . . . . . . . . . . . . . . . . . . . . . . . . . . . . . . . . . . . . . . . . . . . . 31<br />
4.5 Making Module-to-Module -48VDC and Ground/Return Interconnections<br />
(if system consists of multiple DC UPS modules). . . . . . . . . . . . . . . . . . . . . . . . . . . . . . . . . . 31<br />
4.5.1 -48Vdc and Ground/Return Busbar Interconnects . . . . . . . . . . . . . . . . . . . . . . . . . . . . . . . . . . 31<br />
i
4.6 Making Alarm/Control Interconnections between Modules<br />
(if system consists of multiple DC UPS modules). . . . . . . . . . . . . . . . . . . . . . . . . . . . . . . . . . 34<br />
4.6.1 RS-485 Module-to-Module Interconnect . . . . . . . . . . . . . . . . . . . . . . . . . . . . . . . . . . . . . . . . . . 34<br />
4.6.2 CAN-Bus Module-to-Module Interconnect . . . . . . . . . . . . . . . . . . . . . . . . . . . . . . . . . . . . . . . . 34<br />
4.6.3 BLVD Module-to-Module Interconnect . . . . . . . . . . . . . . . . . . . . . . . . . . . . . . . . . . . . . . . . . . . 35<br />
5.0 INSTALLING PCUS . . . . . . . . . . . . . . . . . . . . . . . . . . . . . . . . . . . . . . . . . . . . . . . . . . . . . .41<br />
6.0 START-UP INSTRUCTIONS . . . . . . . . . . . . . . . . . . . . . . . . . . . . . . . . . . . . . . . . . . . . . . . . .42<br />
6.1 General . . . . . . . . . . . . . . . . . . . . . . . . . . . . . . . . . . . . . . . . . . . . . . . . . . . . . . . . . . . . . . . . . . . 42<br />
6.2 Final Battery Connections . . . . . . . . . . . . . . . . . . . . . . . . . . . . . . . . . . . . . . . . . . . . . . . . . . . . 42<br />
6.2.1 Introduction . . . . . . . . . . . . . . . . . . . . . . . . . . . . . . . . . . . . . . . . . . . . . . . . . . . . . . . . . . . . . . . . 42<br />
6.2.2 Safety. . . . . . . . . . . . . . . . . . . . . . . . . . . . . . . . . . . . . . . . . . . . . . . . . . . . . . . . . . . . . . . . . . . . . . 42<br />
6.2.3 Connecting Batteries . . . . . . . . . . . . . . . . . . . . . . . . . . . . . . . . . . . . . . . . . . . . . . . . . . . . . . . . . 42<br />
6.3 Initially Starting and Verifying DC UPS System Operation. . . . . . . . . . . . . . . . . . . . . . . . . 45<br />
6.3.1 Initially Starting the DC UPS System and Verifying System Operation . . . . . . . . . . . . . . . . 45<br />
7.0 SPECIFICATIONS AND TECHNICAL DATA. . . . . . . . . . . . . . . . . . . . . . . . . . . . . . . . . . . . . . .46<br />
7.1 Agency Approvals . . . . . . . . . . . . . . . . . . . . . . . . . . . . . . . . . . . . . . . . . . . . . . . . . . . . . . . . . . . 46<br />
7.2 Environmental . . . . . . . . . . . . . . . . . . . . . . . . . . . . . . . . . . . . . . . . . . . . . . . . . . . . . . . . . . . . . 46<br />
7.3 Mechanical Characteristics . . . . . . . . . . . . . . . . . . . . . . . . . . . . . . . . . . . . . . . . . . . . . . . . . . . 46<br />
7.4 Monitoring Capability . . . . . . . . . . . . . . . . . . . . . . . . . . . . . . . . . . . . . . . . . . . . . . . . . . . . . . . 47<br />
7.5 Electrical Characteristics. . . . . . . . . . . . . . . . . . . . . . . . . . . . . . . . . . . . . . . . . . . . . . . . . . . . . 48<br />
7.5.1 Termination Type, Recommended Wire Size, Recommended Lugs. . . . . . . . . . . . . . . . . . . . . 48<br />
7.5.2 <strong>Power</strong> Ratings. . . . . . . . . . . . . . . . . . . . . . . . . . . . . . . . . . . . . . . . . . . . . . . . . . . . . . . . . . . . . . . 50<br />
7.5.3 AC Input Specifications . . . . . . . . . . . . . . . . . . . . . . . . . . . . . . . . . . . . . . . . . . . . . . . . . . . . . . . 50<br />
7.5.4 DC Output Specifications. . . . . . . . . . . . . . . . . . . . . . . . . . . . . . . . . . . . . . . . . . . . . . . . . . . . . . 50<br />
7.5.5 Battery Specifications . . . . . . . . . . . . . . . . . . . . . . . . . . . . . . . . . . . . . . . . . . . . . . . . . . . . . . . . 51<br />
8.0 REVISION RECORD . . . . . . . . . . . . . . . . . . . . . . . . . . . . . . . . . . . . . . . . . . . . . . . . . . . . . .52<br />
ii
FIGURES<br />
Figure 1 Outline Drawing . . . . . . . . . . . . . . . . . . . . . . . . . . . . . . . . . . . . . . . . . . . . . . . . . . . . . . . . . . . . . . . . . 7<br />
Figure 2 Bottom DC Distribution Feed Modules . . . . . . . . . . . . . . . . . . . . . . . . . . . . . . . . . . . . . . . . . . . . . . . 9<br />
Figure 3 Top DC Distribution Feed Modules . . . . . . . . . . . . . . . . . . . . . . . . . . . . . . . . . . . . . . . . . . . . . . . . . 10<br />
Figure 4 <strong>NetSure</strong> <strong>ITM</strong> Row-Based DC UPS System <strong>Installation</strong> Example . . . . . . . . . . . . . . . . . . . . . . . 11<br />
Figure 5 Emerson Floor Stands . . . . . . . . . . . . . . . . . . . . . . . . . . . . . . . . . . . . . . . . . . . . . . . . . . . . . . . . . . . 14<br />
Figure 6 Mounting Locations for Overhead Cable Tray Rails. . . . . . . . . . . . . . . . . . . . . . . . . . . . . . . . . . . . 16<br />
Figure 7 Installing Air Duct Assembly . . . . . . . . . . . . . . . . . . . . . . . . . . . . . . . . . . . . . . . . . . . . . . . . . . . . . . 17<br />
Figure 8 Protective Covers . . . . . . . . . . . . . . . . . . . . . . . . . . . . . . . . . . . . . . . . . . . . . . . . . . . . . . . . . . . . . . . 19<br />
Figure 9 Wiring Connections Locations (DC UPS Module with Bottom Feed DC Distribution) . . . . . . . . 20<br />
Figure 10 Wiring Connections Locations (DC UPS Module with Top Feed DC Distribution) . . . . . . . . . . . 21<br />
Figure 11 Cabinet Grounding Connection . . . . . . . . . . . . . . . . . . . . . . . . . . . . . . . . . . . . . . . . . . . . . . . . . . . . 22<br />
Figure 12 DC Output Connections . . . . . . . . . . . . . . . . . . . . . . . . . . . . . . . . . . . . . . . . . . . . . . . . . . . . . . . . . . 23<br />
Figure 13 AC Input <strong>Power</strong> Connection Routing Options. . . . . . . . . . . . . . . . . . . . . . . . . . . . . . . . . . . . . . . . . 25<br />
Figure 14 Installing Conduit Fittings when AC is Fed from the Top . . . . . . . . . . . . . . . . . . . . . . . . . . . . . . . 25<br />
Figure 15 AC Input <strong>Power</strong> Connections . . . . . . . . . . . . . . . . . . . . . . . . . . . . . . . . . . . . . . . . . . . . . . . . . . . . . . 25<br />
Figure 16 Alarm and Control Connections . . . . . . . . . . . . . . . . . . . . . . . . . . . . . . . . . . . . . . . . . . . . . . . . . . . . 26<br />
Figure 17 ACU+ Controller RJ-45 Ethernet Port . . . . . . . . . . . . . . . . . . . . . . . . . . . . . . . . . . . . . . . . . . . . . . 29<br />
Figure 18 EPO Jumper Location. . . . . . . . . . . . . . . . . . . . . . . . . . . . . . . . . . . . . . . . . . . . . . . . . . . . . . . . . . . . 30<br />
Figure 19 Module-Module Interconnect Busbars (DC UPS Module with Bottom Feed DC Distribution) . . 32<br />
Figure 20 Module-Module Interconnect Busbars (DC UPS Module with Top Feed DC Distribution) . . . . . 33<br />
Figure 21 SM-BRC RS-485 Jumper Locations . . . . . . . . . . . . . . . . . . . . . . . . . . . . . . . . . . . . . . . . . . . . . . . . . 34<br />
Figure 22 Alarm/Control Cable Interconnects (cont’d on next page) . . . . . . . . . . . . . . . . . . . . . . . . . . . . . . . 36<br />
Figure 23 System Configuration and Communications Connections . . . . . . . . . . . . . . . . . . . . . . . . . . . . . . . 38<br />
Figure 24 Cabinet Interconnections . . . . . . . . . . . . . . . . . . . . . . . . . . . . . . . . . . . . . . . . . . . . . . . . . . . . . . . . . 39<br />
Figure 25 Signal Cabling and Switch Settings. . . . . . . . . . . . . . . . . . . . . . . . . . . . . . . . . . . . . . . . . . . . . . . . . 40<br />
Figure 26 PCU Handle and Safety Latch . . . . . . . . . . . . . . . . . . . . . . . . . . . . . . . . . . . . . . . . . . . . . . . . . . . . . 41<br />
Figure 27 Making Final Battery Shelf Battery Interconnect Link Connections . . . . . . . . . . . . . . . . . . . . . . 43<br />
Figure 28 Field Battery Monitoring Lead Connections to the SiteWeb BRC Unit. . . . . . . . . . . . . . . . . . . 44<br />
iii
TABLES<br />
Table 1 DC UPS Module "Base Configuration Part Numbers"<br />
and "Configured System Spec. Numbers" . . . . . . . . . . . . . . . . . . . . . . . . . . . . . . . . . . . . . . . . . . . . . 5<br />
Table 2 Distance to Connection Points inside the DC UPS Module . . . . . . . . . . . . . . . . . . . . . . . . . . . . . . 18<br />
Table 3 Programmable Digital Inputs . . . . . . . . . . . . . . . . . . . . . . . . . . . . . . . . . . . . . . . . . . . . . . . . . . . . . 27<br />
Table 4 Programmable Relay Outputs . . . . . . . . . . . . . . . . . . . . . . . . . . . . . . . . . . . . . . . . . . . . . . . . . . . . . 28<br />
Table 5 IB2 Board Communications Address Settings . . . . . . . . . . . . . . . . . . . . . . . . . . . . . . . . . . . . . . . . 29<br />
Table 6 ACU+ Controller RJ-45 Ethernet Port . . . . . . . . . . . . . . . . . . . . . . . . . . . . . . . . . . . . . . . . . . . . . . 29<br />
Table 7 DC UPS System Environmental Characteristics . . . . . . . . . . . . . . . . . . . . . . . . . . . . . . . . . . . . . . 46<br />
Table 8 DC UPS System Mechanical Characteristics (per module) . . . . . . . . . . . . . . . . . . . . . . . . . . . . . . 46<br />
Table 9 Shipping Dimensions and Weights . . . . . . . . . . . . . . . . . . . . . . . . . . . . . . . . . . . . . . . . . . . . . . . . . 47<br />
Table 10 AC Input and AC Input Grounding (per DC UPS module) . . . . . . . . . . . . . . . . . . . . . . . . . . . . . . 48<br />
Table 11 Cabinet Frame Grounding (per DC UPS module). . . . . . . . . . . . . . . . . . . . . . . . . . . . . . . . . . . . . . 48<br />
Table 12 DC Distribution (Distribution Circuit Breaker Option - per circuit breaker position) . . . . . . . . . 49<br />
Table 13 DC Distribution (Distribution Fuse Option - per fuse position). . . . . . . . . . . . . . . . . . . . . . . . . . . 49<br />
Table 14 Alarm/Control . . . . . . . . . . . . . . . . . . . . . . . . . . . . . . . . . . . . . . . . . . . . . . . . . . . . . . . . . . . . . . . . . . 49<br />
Table 15 <strong>Power</strong> Ratings . . . . . . . . . . . . . . . . . . . . . . . . . . . . . . . . . . . . . . . . . . . . . . . . . . . . . . . . . . . . . . . . . . 50<br />
Table 16 AC Input Specifications . . . . . . . . . . . . . . . . . . . . . . . . . . . . . . . . . . . . . . . . . . . . . . . . . . . . . . . . . . 50<br />
Table 17 DC Output Specifications . . . . . . . . . . . . . . . . . . . . . . . . . . . . . . . . . . . . . . . . . . . . . . . . . . . . . . . . . 50<br />
Table 18 Battery Specifications . . . . . . . . . . . . . . . . . . . . . . . . . . . . . . . . . . . . . . . . . . . . . . . . . . . . . . . . . . . . 51<br />
iv
IMPORTANT SAFETY INSTRUCTIONS<br />
SAVE THESE INSTRUCTIONS<br />
This manual contains important instructions that should be followed during installation of your Net-<br />
Sure <strong>ITM</strong> Row-Based DC UPS system.<br />
Read this manual thoroughly before installing the DC UPS system. Retain this manual for use by<br />
installing personnel.<br />
!<br />
WARNING<br />
The DC UPS system should be installed by a qualified technician in accordance with the<br />
information contained in this document.<br />
!<br />
WARNING<br />
Special safety precautions are required for procedures involving handling and installation of<br />
the DC UPS system. Observe all safety precautions in this manual before handling or<br />
installing the DC UPS system.<br />
!<br />
WARNING<br />
Exercise extreme care when handling DC UPS modules (cabinets) to avoid equipment damage<br />
or injury to personnel. The DC UPS module weighs 3240 lb. (1470 kg), fully loaded.<br />
Be aware of module weight and locate center of gravity symbols<br />
before handling the DC UPS module. Test lift and balance the module<br />
before transporting. Never tilt module more than 10 degrees from vertical.<br />
!<br />
WARNING<br />
All power and control wiring should be installed by a qualified electrician. All power<br />
and control wiring must comply with the National Electrical Code (NEC) and applicable local<br />
codes.<br />
Maximum load must not exceed that shown on the DC UPS module rating label.<br />
Maximum output short circuit current is 7000 amperes.<br />
!<br />
WARNING<br />
High Ground Leakage Current:<br />
Ground connection is essential before connecting the input supply.<br />
This equipment must be grounded in accordance with the NEC and applicable local codes.<br />
!<br />
CAUTION<br />
Ground leakage current exceeds 3.5 mA and is less than 30 mA.<br />
Transient and steady-state ground leakage currents, which may occur when starting the<br />
equipment, should be taken into account when selecting instantaneous residual current<br />
circuit breakers (RCCBs) or residual current devices (RCDs).<br />
RCCBs must be selected sensitive to DC unidirectional pulses (Class A) and insensitive to<br />
transient current pulses.<br />
Note also that the ground leakage currents of the load will be carried by this RCCB or RCD.<br />
1
!<br />
CAUTION<br />
This equipment is fitted with RFI suppression filters.<br />
This unit complies with the limits for a Class A digital device, pursuant to Part 15 Subpart J<br />
of the FCC rules. These limits provide reasonable protection against harmful interference in a<br />
commercial environment. This unit generates, uses and radiates radio frequency energy and,<br />
if not installed and used in accordance with this instruction manual, may cause harmful<br />
interference to radio communications. This unit is not designed for use in a residential area.<br />
Operation of this unit in a residential area may cause harmful interference that the User<br />
must correct at his own expense.<br />
!<br />
WARNING<br />
In case of fire involving electrical equipment, use only carbon dioxide fire extinguishers or<br />
those approved for use in fighting electrical fires.<br />
Battery Compartment Precautions<br />
Batteries are factory installed in the DC UPS module. Final battery connections will be made by<br />
Emerson after the DC UPS module is installed. DO NOT MAKE BATTERY CONNECTIONS. The following<br />
precautions apply to the battery compartment that is part of the DC UPS module.<br />
!<br />
WARNING<br />
Special safety precautions are required for procedures involving handling, installing, and<br />
servicing batteries. Observe all battery safety precautions presented here and in the battery<br />
instruction manual. These precautions should be followed implicitly at all times.<br />
!<br />
WARNING<br />
A battery can present a risk of electrical shock and high short circuit current. Servicing of<br />
batteries should be performed or supervised only by properly trained and qualified personnel<br />
knowledgeable about batteries and the required precautions.<br />
The following precautions should be observed when working on batteries:<br />
• Remove watches, rings and other metal objects.<br />
• Eye protection should be worn to prevent injury from accidental electrical arcs.<br />
• Use tools with insulated handles.<br />
• Wear rubber gloves and boots.<br />
• Do not lay tools or metal parts on top of batteries.<br />
• Disconnect charging source prior to connecting or disconnecting battery terminals.<br />
• Determine if battery is inadvertently grounded. If the battery is inadvertently grounded,<br />
remove source from ground. Contact with any parts of a grounded battery can result in electrical<br />
shock. The likelihood of such shock can be reduced if such grounds are removed during<br />
installation and maintenance (applicable to equipment and remote battery supplies not<br />
having a grounded supply circuit).<br />
• Risk of explosion if battery is replaced with an incorrect type. When replacing batteries,<br />
replace with the same manufacturer and type, or equivalent. See your local Emerson representative<br />
for a list of approved batteries.<br />
• Dispose of used batteries according to the instructions provided with the batteries. Do not<br />
dispose of batteries in a fire. They may explode.<br />
In addition to the hazard of electric shock, gas produced by batteries can be explosive and<br />
sulfuric acid can cause severe burns. Do not open or mutilate batteries. Released electrolyte is<br />
harmful to the skin and eyes, and is toxic. If electrolyte comes into contact with skin, the<br />
affected area should be washed immediately with large amounts of water.<br />
2
!<br />
WARNING<br />
The DC UPS module’s internal batteries are connected and energized even if the DC UPS<br />
module is turned OFF. Battery disconnect fuses are provided inside the DC UPS module. To<br />
minimize the risk of injury, remove the battery disconnect fuses before any off-line servicing<br />
is performed on the unit.<br />
!<br />
WARNING<br />
DO NOT REMOVE BATTERY STRAPS. If a battery cell is replaced, ensure the battery strap<br />
is replaced and appropriately tighten.<br />
• Battery compartments contain non-spillable batteries.<br />
• Keep units upright.<br />
• Do not stack.<br />
• Do not tilt.<br />
Failure to heed this warning could result in smoke, fire, or electric hazard.<br />
Call Emerson before moving DC UPS modules (after initial installation).<br />
3
Inspecting the Equipment and Storing for Delayed <strong>Installation</strong>s<br />
1.0 INSPECTING THE EQUIPMENT AND STORING FOR DELAYED INSTALLATIONS<br />
1.1 External Inspections<br />
1. While the DC UPS system is still on the truck, inspect the equipment and shipping container(s)<br />
for any signs of damage or mishandling. Do not attempt to install the system if damage is<br />
apparent. If any damage is noted, file a damage claim with the shipping agency within 24 hours<br />
and contact Emerson Network <strong>Power</strong> (number located on last pages of this document) to inform<br />
them of the damage claim and the condition of the equipment.<br />
2. Compare the contents of the shipment with the bill of lading. Report any missing items to the<br />
carrier and your local Emerson representative immediately.<br />
1.2 Internal Inspections<br />
1. Remove any packaging material, then visually examine the DC UPS system for transit damage,<br />
both internally and externally. Report any such damage to the shipper and to Emerson<br />
immediately.<br />
2. Check the nameplate inside the DC UPS module (located on the front top right side with front<br />
door open) to verify that the "base configuration part number" and the "configured system spec.<br />
number" correspond to the units ordered. Record the DC UPS module identification numbers and<br />
serial number in the front of this manual. This information is necessary should service be<br />
required. See Table 1.<br />
NOTE<br />
The "base configuration part number" determines how the DC UPS module is physically<br />
configured and the "configured system spec. number" determines how the DC UPS module has<br />
been set up.<br />
3. Check for loose connections or unsecured components in the module.<br />
4. Check for shipping damage to internal components.<br />
1.3 Storing for Delayed <strong>Installation</strong><br />
If the equipment will not be installed immediately, it must be stored indoors where the humidity is no<br />
higher than 95%. The storage area must protect the DC UPS system from excessive moisture.<br />
For optimal battery life, store at a temperature between -4°F to +77°F (-20°C to +25°C) (see 7.2 - Environmental).<br />
!<br />
CAUTION<br />
If the batteries must remain disconnected from the DC UPS module for more than six (6)<br />
months, the batteries must be recharged before use. To charge the batteries, the batteries<br />
must be connected to the DC UPS module and the DC UPS module must be connected to<br />
utility power and started up by qualified personnel.<br />
4
Inspecting the Equipment and Storing for Delayed <strong>Installation</strong>s<br />
Table 1<br />
DC UPS Module "Base Configuration Part Numbers"<br />
and "Configured System Spec. Numbers"<br />
Base Configuration Part Numbers<br />
Part Number<br />
Module<br />
Distribution<br />
Feed<br />
Distribution<br />
No. of AC<br />
Inputs<br />
FAB8010542/2 Primary Top (22) Circuit Breaker 1<br />
FAB8010542/1 Primary Top (22) Circuit Breaker 2<br />
FAB8010542/4 Primary Top (6) Fuse 1<br />
FAB8010542/3 Primary Top (6) Fuse 2<br />
FAB8010540/2 Primary Bottom (22) Circuit Breaker 1<br />
FAB8010540/1 Primary Bottom (22) Circuit Breaker 2<br />
FAB8010540/4 Primary Bottom (6) Fuse 1<br />
FAB8010540/3 Primary Bottom (6) Fuse 2<br />
FAB8010543/2 Expansion Top (22) Circuit Breaker 1<br />
FAB8010543/1 Expansion Top (22) Circuit Breaker 2<br />
FAB8010543/4 Expansion Top (6) Fuse 1<br />
FAB8010543/3 Expansion Top (6) Fuse 2<br />
FAB8010541/2 Expansion Bottom (22) Circuit Breaker 1<br />
FAB8010541/1 Expansion Bottom (22) Circuit Breaker 2<br />
FAB8010541/4 Expansion Bottom (6) Fuse 1<br />
FAB8010541/3 Expansion Bottom (6) Fuse 2<br />
Configured System Spec. Numbers<br />
Spec. Number<br />
Description<br />
582145500-M1 Primary Module<br />
582145500-M2 1st Expansion Module<br />
582145500-M3 2nd Expansion Module<br />
582145500-M4 3rd Expansion Module<br />
5
<strong>Installation</strong> Drawings and Recommended Tools and Test Equipment<br />
2.0 INSTALLATION DRAWINGS AND RECOMMENDED TOOLS AND TEST EQUIPMENT<br />
2.1 <strong>Installation</strong> Drawings<br />
The diagrams in this section illustrate the key mechanical and electrical characteristics of the Net-<br />
Sure <strong>ITM</strong> DC UPS system.<br />
General Notes Applicable to All Illustrations<br />
1. All dimensions are in inches (millimeters).<br />
2. Minimum clearance above unit required for air exhaust is 8 in. (203mm).<br />
3. Keep module within 10 degrees of vertical while handling.<br />
4. Top and bottom cable entry options available.<br />
5. Color - black.<br />
6. Unit bottom is structurally adequate for forklift handling.<br />
7. M12 mounting holes used for seismic anchoring or floor stand.<br />
NOTE<br />
If floor stand is used, the weight of the unit must be supported under all casters.<br />
8. The Primary Module includes side panels. For installations consisting of Expansion Module(s),<br />
one side panel on the Primary Module must be removed and be placed on the end Expansion<br />
Module.<br />
9. Leveling feet are not designed to carry the full weight of the module.<br />
10. Finger-tighten leveler against the floor, then tighten with a wrench less than 2 turns for friction<br />
fit against floor.<br />
11. Control wiring, output cabling, and input cabling must be run separately.<br />
12. Aluminum and copper-clad aluminum cables are not recommended.<br />
13. All wiring is to be in accordance with the NEC and applicable local codes.<br />
6
<strong>Installation</strong> Drawings and Recommended Tools and Test Equipment<br />
Figure 1<br />
Outline Drawing<br />
DC UPS MODULE WITH<br />
BOTTOM FEED DC DISTRIBUTION<br />
DC UPS MODULE WITH<br />
TOP FEED DC DISTRIBUTION<br />
Battery Compartment<br />
Battery Compartment<br />
41.34<br />
(1050)<br />
26.38<br />
(670)<br />
CG<br />
Conduits for<br />
AC Inputs<br />
DC <strong>Power</strong> System<br />
Compartment<br />
41.34<br />
(1050)<br />
26.38<br />
(670)<br />
CG<br />
DC <strong>Power</strong> System<br />
Compartment<br />
Conduits for<br />
AC Inputs<br />
11.81<br />
(300)<br />
11.81<br />
(300)<br />
23.62<br />
(600)<br />
Top View<br />
23.62<br />
(600)<br />
Top View<br />
84.33<br />
(2142)<br />
top<br />
cabled<br />
CENTER OF GRAVITY<br />
TopCabledVersion<br />
X=11.81 (300)<br />
Y=26.38(670)<br />
Z=36.61 (930)<br />
84.72<br />
(2152)<br />
bottom<br />
cabled<br />
40.55<br />
(1030)<br />
(Bottom<br />
cabled)<br />
CG<br />
CG<br />
(top<br />
cabled)<br />
Z<br />
Y<br />
X<br />
Bottom CabledVersion<br />
X=11.81 (300)<br />
Y=26.38(670)<br />
Z=40.55 (1030)<br />
36.61<br />
(930)<br />
11.81<br />
(300)<br />
Front View<br />
See Detail A<br />
for Bottom<br />
Notes:<br />
1. Dimensions areininches (millimeters).<br />
2. Weight (fully loaded): 3240 lbs/1470 kg.<br />
3. Heat Rejection: 18096 BTU/hatfullload (per module).<br />
4. May be installedon concreteslaborraised floor.<br />
7
<strong>Installation</strong> Drawings and Recommended Tools and Test Equipment<br />
Figure 1, Detail A<br />
ANCHORING<br />
Anchoring bracket (4x)<br />
used on concrete floor<br />
(8X)<br />
Hilti HSV 1/2X4 1/2:<br />
Item No.: 00384687<br />
(4X)<br />
Anchoring bolts (4x)<br />
used on raised floor<br />
M12 x 1.75 x 70 Metric Socket Head Cap Screw.<br />
Plain Finish with Allen Drive (hex drive) / Coarse<br />
thread. Grade 12.9.<br />
(4X)<br />
(8X)<br />
M12 X 1.75 Metric Hex Nuts - Grade 10.9 /<br />
Coarse Thread / Zinc Plated.<br />
M12 Metric Flat Washer. Grade 10.9 /<br />
Zinc. D=28mm or 11/8".<br />
Corresponding ½” Imperial Fasteners Can Also be Used<br />
Hole through foot (4x) for<br />
anchoring on raised floor<br />
39.65 (1007)<br />
31.22 (793)<br />
12.99 (330) - 13.39 (340)<br />
19.68 (500)<br />
R 0.28 (7)<br />
0.59 (15)<br />
35.43 (900)<br />
35.43 (900)<br />
8
<strong>Installation</strong> Drawings and Recommended Tools and Test Equipment<br />
Figure 2<br />
Bottom DC Distribution Feed Modules<br />
Battery<br />
Compartment<br />
Conduits for<br />
AC Inputs<br />
DC <strong>Power</strong> System<br />
Compartment<br />
Top<br />
Cold Aisle<br />
HotAisle<br />
PCUs<br />
PCUs<br />
PCUs<br />
PCUs<br />
PCUs<br />
PCUs<br />
AirFlow<br />
Battery<br />
Compartment<br />
BFU<br />
Distr.<br />
Note2<br />
Distr.<br />
35.43<br />
(900)<br />
½” (12mm) Floor<br />
Anchoring Bolts<br />
(4 places)<br />
Front<br />
17.72 (450)<br />
8.86<br />
(225)<br />
19.68<br />
(500)<br />
9.84<br />
(250)<br />
8.86<br />
(225) Optional Floor<br />
9.84<br />
(250)<br />
Opening for<br />
Battery Cooling<br />
Side View<br />
Raised Floor<br />
A<br />
Support<br />
Stand<br />
Notes:<br />
1. Dimensions areininches (millimeters).<br />
2. Do not block airintake openings.<br />
3. Minimum under floor space for underfloor<br />
output cable runs: A=1f (300mm).<br />
4. Run cables not to block air openings for battery<br />
cooling.<br />
9
<strong>Installation</strong> Drawings and Recommended Tools and Test Equipment<br />
Figure 3<br />
Top DC Distribution Feed Modules<br />
Battery<br />
Compartment<br />
DC <strong>Power</strong><br />
System<br />
Compartment<br />
Openings for<br />
Output Cables<br />
Cold Aisle<br />
Distr.<br />
Distr.<br />
HotAisle<br />
AC Input<br />
Conduit Openings<br />
Top<br />
AirFlow<br />
PCUs<br />
PCUs<br />
PCUs<br />
PCUs<br />
PCUs<br />
PCUs<br />
Battery<br />
Compartment<br />
BFU<br />
Side View<br />
Concrete<br />
Floor (slab)<br />
CableTray<br />
Note2<br />
Front<br />
CableRun<br />
CableTraySupports<br />
if Mounted on Topof<br />
Module<br />
35.43<br />
(900)<br />
Front View<br />
Air Exchange<br />
(keep clear)<br />
½” (12mm) Floor<br />
Anchoring Bolts<br />
(4 places)<br />
19.68<br />
(500)<br />
Battery<br />
Compartment<br />
Notes:<br />
1. Dimensions areininches (millimeters).<br />
2. Do not block airintake openings.<br />
CableTray<br />
TopView<br />
23.62<br />
(600)<br />
Openings for<br />
Output Cables<br />
10
2.2 Row-Based <strong>Installation</strong> Example<br />
<strong>Installation</strong> Drawings and Recommended Tools and Test Equipment<br />
The <strong>NetSure</strong> <strong>ITM</strong> DC UPS system provides the flexibility to meet the needs of any data center.<br />
The <strong>NetSure</strong> <strong>ITM</strong> DC UPS system is delivered fully configured for quick and easy field installation.<br />
Multiple DC UPS modules can easily be connected on site in order to increase capacity. Each module<br />
takes only 24" (w) x 41" (d) of floor space, including batteries and primary distribution. The <strong>NetSure</strong><br />
<strong>ITM</strong> DC UPS system is typically installed in the middle or at the end of a row of server racks. This<br />
makes the system uniquely flexible and scalable. Deploy only the capacity that is initially needed;<br />
modules can be added at any time to any row configuration on the data center floor.<br />
Figure 4 depicts a top distribution feed installation powering IT racks. Depending on your site and<br />
budget requirements, the <strong>NetSure</strong> <strong>ITM</strong> DC UPS solution can either be installed as a single deployment,<br />
or incrementally by row. In either scenario, DC distribution cabling to each rack is reduced by<br />
placing the <strong>NetSure</strong> <strong>ITM</strong> DC UPS in-the-row.<br />
Whatever the physical layout of your data center, the <strong>NetSure</strong> <strong>ITM</strong> DC UPS allows for maximum<br />
space for IT equipment. With DC UPS building block modules, you can mix and match configurations<br />
and standard layouts to fit your available space.<br />
Figure 4<br />
<strong>NetSure</strong> <strong>ITM</strong> Row-Based DC UPS System <strong>Installation</strong> Example<br />
11
2.3 Recommended Tools and Test Equipment<br />
<strong>Installation</strong> Drawings and Recommended Tools and Test Equipment<br />
The following tools and test equipment are recommended to install the DC UPS modules.<br />
• Non-Contact Voltage Detector<br />
• Digital Multimeter (DMM), 0 to 60 V dc, 0 to 600 V ac<br />
• NO-OX-ID-A or Approved Equivalent<br />
• Lineman's Scissors<br />
• Lineman's Strippers<br />
• Lineman's Cutters<br />
• Electrician's Insulated Screwdrivers, Phillips, No. 1 and 2<br />
• Electrician's Insulated Screwdrivers, Flat-Blade, Small and Large<br />
• Adjustable Torque Wrench, 1/2" Drive, 0 in-lb to 800 in-lb<br />
• Ratchet, 1/2" Drive<br />
• Insulated Nut Driver Set<br />
• Crimping Tool with Dies from 350 kcmil to 2 AWG<br />
• Torx Screwdrivers or Bits: TX10 and TX20<br />
• 17 mm Wrench or Socket for M10 Bolts and Nuts (for circuit breaker distribution)<br />
• 19 mm Wrench or Socket for M12 Bolts and Nuts (for fuse distribution)<br />
• 24 mm Wrench for Pallet.<br />
• Hexagonal mm Bit for the Air Duct.<br />
• Hexagonal Bit for the AC Input Breaker.<br />
12
Positioning the DC UPS System<br />
3.0 POSITIONING THE DC UPS SYSTEM<br />
This section describes the environmental and mechanical considerations that must be taken into<br />
account when planning the positioning and cabling of the DC UPS system. This section also provides<br />
procedures for physical installation of the DC UPS cabinet.<br />
Because every site is unique, some subsections present a guide to general procedures and practices<br />
that should be observed by the installing engineer, rather than step-by-step installation instructions.<br />
3.1 General Requirements<br />
• The installer should be familiar with the installation requirements and techniques to be used in<br />
securing the DC UPS module (cabinet) to the floor. It is up to the customer to determine the<br />
requirements for anchoring the cabinet to the specific type of floor at the site, select proper<br />
anchors, and to investigate the proper use of the anchor.<br />
• This product is intended only for installation in a Restricted Access Location on or above a noncombustible<br />
surface.<br />
• Front and rear access is required for installation and operation (see Clearances in this section).<br />
3.2 General Guidelines for Positioning the DC UPS Modules<br />
Choose a location for the DC UPS system that offers:<br />
• Easy connection to inputs, outputs, and alarms.<br />
• Air circulation sufficient to expel heat produced by the DC UPS system.<br />
• Protection against moisture and excessive humidity.<br />
• Protection against dust and other particulate matter.<br />
• Enough space to service the DC UPS system (see Clearances in this section).<br />
• Compliance with fire prevention regulations and practices.<br />
3.2.1 Cable Entry<br />
DC distribution and alarm cables enter the DC UPS module from the top or bottom, depending on<br />
module configuration (top distribution feed or bottom distribution feed).<br />
AC input cables can enter either at the top or bottom. Conduit openings are provided in both locations.<br />
3.2.2 Environmental Considerations<br />
Before installing the DC UPS system, verify that the room satisfies the environmental conditions<br />
stipulated in 7.2 - Environmental, paying particular attention to the ambient temperature and air<br />
exchange system. Also refer to 7.2 - Environmental for details on heat dissipation.<br />
The DC UPS system should be installed in a cool, dry, clean-air environment with adequate ventilation<br />
to keep the ambient temperature within the specified operating range +23°F to +95°F (-5°C to<br />
+35°C).<br />
• Batteries are installed in the DC UPS module’s battery compartment. Temperature is a major factor<br />
in determining battery life and capacity. Battery manufacturers recommend an operating<br />
temperature of 77°F (25°C). Ambient temperatures higher than this reduce battery life; temperatures<br />
lower than this reduce battery capacity. For optimal battery performance and service life,<br />
inlet air temperature to the battery compartment (from the front of the system) should be maintained<br />
between +68°F to +77°F (+20°C to +25°C).<br />
The DC UPS module is cooled by internal fans. Cooling air enters the system through the front of the<br />
unit and is exhausted out the top. To permit proper air flow and prevent overheating, do NOT block or<br />
cover the ventilation openings or blow air down onto the unit. Ventilation clearance above the unit<br />
must be a minimum of 8 in. (203mm).<br />
13
3.2.3 Mechanical Considerations<br />
Positioning the DC UPS System<br />
The DC UPS system can be comprised of up to four (4) modules (cabinets), depending upon your<br />
power requirements. All modules used are the same size and are designed to be positioned side-byside<br />
to form an aesthetically appealing equipment suite. The system always contains one (1) Primary<br />
Module. For increased power demands, up to three (3) Expansion Modules may be added. Locate the<br />
Primary Module at the far left or far right of the row. Remove the side panel from the Primary Module<br />
from the side that will face adjacent Expansion Modules. Place the first Expansion Module next to the<br />
Primary Module. Place additional Expansion Modules (if required) next to each other. Install the side<br />
panel removed from the Primary Module to the open side of the last Expansion Module in the row.<br />
Clearances<br />
There are no ventilation grilles on the sides of the DC UPS module. The DC UPS modules may be<br />
placed with the sides touching or against a wall.<br />
To enable routine tightening of power terminations within the DC UPS module, make sure there is<br />
sufficient clearance in front and rear of the DC UPS module to permit free passage of personnel and<br />
that the front door can be fully opened.<br />
Leave a minimum of 8 in. (203mm) between the top of the DC UPS module and the ceiling to permit<br />
adequate air circulation above the unit. Emerson recommends against using air conditioning or other<br />
systems that blow air onto the top of the unit.<br />
Leave a minimum of 36 in. (914 mm) between the back of the DC UPS module and a wall to permit<br />
adequate air circulation for the battery compartment fans and facilitate maintenance access.<br />
3.3 Floor <strong>Installation</strong><br />
NOTE<br />
When the DC UPS system consists of multiple modules, the switches inside the modules are<br />
pre-set at the factory to identify the module as the Primary Module, 1st Expansion Module, 2nd<br />
Expansion Module, or 3rd Expansion Module. When placing modules, refer to the nameplate<br />
identification number (see Table 1) to ensure the Primary Module is placed on the end, and<br />
Expansion Modules are place in sequential order.<br />
Refer also to 3.1 - General Requirements.<br />
The diagrams in 2.0 - <strong>Installation</strong> Drawings and Recommended Tools and Test Equipment<br />
show the location of holes in the base plate for bolting the DC UPS module to the floor.<br />
If the module is to be placed on a raised floor, it should be mounted on a floor stand that will support<br />
the equipment point loading. Refer to the cabinet-bottom views in 2.0 - <strong>Installation</strong> Drawings and<br />
Recommended Tools and Test Equipment to design this pedestal. Contact your ENP Sales Representative<br />
for a floor stand designed for this system (see Figure 5).<br />
Figure 5<br />
Emerson Floor Stands<br />
P/N 547822<br />
24” Tall Floor Stand<br />
P/N 547823<br />
36” Tall Floor Stand<br />
14
Positioning the DC UPS System<br />
3.4 Considerations in Moving the DC UPS Module<br />
3.4.1 Transporting<br />
Ensure that the DC UPS module weight is within the designated surface weight loading (lb./ft 2 or kg/<br />
cm 2 ) of any handling equipment. The DC UPS module weighs 3240 lb. (1470 kg), fully loaded.<br />
!<br />
WARNING<br />
Ensure that any equipment that will be used to move the DC UPS module has sufficient<br />
lifting capacity. Ensure adequate personnel and lifting equipment are available when taking<br />
the module off its shipping pallet. The module presents a tipping hazard. Do not tilt the<br />
module further than 10 degrees from vertical.<br />
3.4.2 Moving a DC UPS Module<br />
Cabinet Preparation<br />
1. Inspect the cabinet as described in 1.1 - External Inspections and 1.2 - Internal Inspections.<br />
2. Remove the front and rear bottom panels to gain access to the bolts securing the cabinet to the<br />
pallet.<br />
Moving DC UPS Module from Shipping Pallet<br />
Use lifting equipment, such as a forklift or similar equipment, appropriately rated for the weight of<br />
the load to move the DC UPS cabinet from its shipping pallet.<br />
When moving a DC UPS cabinet with a forklift or similar equipment, make sure that the fork is of<br />
sufficient length for the pallet size and capable of lifting the cabinet. Also use a forklift with adjustable<br />
forks or a narrow type.<br />
1. Close the front door.<br />
2. Slide the forklift into place.<br />
3. Unbolt the cabinet from the pallet.<br />
4. Lift the cabinet. The pallet should drop off from its own weight.<br />
5. Carefully move the DC UPS module to its installation location or set the DC UPS module down on<br />
its casters if it is to be rolled into position.<br />
Moving DC UPS Module to <strong>Installation</strong> Location<br />
The DC UPS module may be rolled on its casters when moving the unit a short distance. For longer<br />
distances, move the DC UPS module with a forklift or similar equipment to ease the relocation and to<br />
reduce vibration.<br />
3.4.3 Final Positioning<br />
The DC UPS module is fitted with casters. Take care to prevent movement when unbolting<br />
the module from its shipping pallet. The casters are strong enough for movement across even<br />
surfaces only. Casters may fail if they are subjected to shock loading, such as being dropped or<br />
rolled over holes in the floor or obstructions. Such failure may cause the unit to tip over,<br />
injuring personnel and damaging the equipment.<br />
!<br />
WARNING<br />
Batteries are factory installed in the DC UPS module’s battery compartment. Care must be<br />
taken when maneuvering modules with batteries. Keep such moves to a minimum. See<br />
Battery Compartment Precautions on page 2.<br />
Note that the DC UPS modules sit on four casters. When the DC UPS module has been finally positioned,<br />
ensure that the adjustable stops are set so that the DC UPS module will remain stationary<br />
and stable.<br />
15
Positioning the DC UPS System<br />
3.5 Overhead Cable Tray Rails<br />
Refer to Figure 6 for mounting locations for overhead cable tray rails.<br />
Figure 6<br />
Mounting Locations for Overhead Cable Tray Rails<br />
Brackets can be used to secure<br />
rails for overhead cable trays, drill<br />
as required.<br />
Holes for 1/4” thread-forming<br />
screws to secure rails for<br />
overhead cable trays.<br />
Customer supplied<br />
conduit fittings<br />
16
Positioning the DC UPS System<br />
3.6 For Top DC Distribution Feed (Top Cabled) Modules Only:<br />
Installing the Supplied Air Duct Assembly<br />
The Air Duct Assembly must be installed in DC UPS modules configured for top DC distribution feed<br />
(top cabled). The Air Duct Assembly allows air to be drawn from the bottom front of the DC UPS module<br />
and up into the battery compartment for cooling. Refer to Figure 7, and install the supplied Air<br />
Duct Assembly.<br />
Figure 7<br />
Installing Air Duct Assembly<br />
Note: If AC power cables are fed from the bottom, install AC power cables before installing air duct.<br />
Note: The rubber parts of the air duct assembly may be lubricated with water before sliding the air duct halves into place.<br />
Procedure:<br />
1) Remove bottom front and rear panels from the DC UPS module.<br />
2) Partially slide the half of the air duct assembly with vents into the<br />
front bottom compartment of the DC UPS module (power compartment bottom).<br />
3) Install and secure the supplied bracket with the supplied screws.<br />
4) Slide the half of the air duct assembly with vents completely into the DC UPS module,<br />
and secure with the supplied screws.<br />
Install supplied bracket after<br />
partially sliding assembly in.<br />
<strong>Power</strong> Compartment Half<br />
Secure with supplied screws.<br />
5) Slide the remaining half of the air duct assembly into the<br />
rear bottom compartment of the DC UPS module (battery compartment bottom).<br />
6) Secure the air duct half just installed with the supplied screws.<br />
Secure with supplied screws.<br />
Battery Compartment Half<br />
Air Duct Assembly<br />
Battery Compartment Half<br />
<strong>Power</strong> Compartment Half<br />
Installed View<br />
17
Electrical Connections<br />
4.0 ELECTRICAL CONNECTIONS<br />
The DC UPS system requires grounding, DC output distribution, AC input power, alarm/control, and<br />
battery wiring once it has been mechanically installed.<br />
If the system consists of multiple DC UPS modules, battery and ground/return busbars must be interconnected<br />
and alarm/control interconnect wiring between modules must be made.<br />
4.1 Wiring Information and Guidelines<br />
4.1.1 Cable Lengths (Floor or Cabinet Top to Connection Point Inside DC UPS Module)<br />
To help calculate the total cable length required, refer to Table 2 for the distance from the floor or<br />
cabinet top to selected connection points inside the DC UPS module. Determine the cable length<br />
required to reach the DC UPS module, then add the appropriate length from the table and adequate<br />
slack for repair and maintenance.<br />
Table 2<br />
Distance to Connection Points inside the DC UPS Module<br />
Connection Point<br />
inside DC UPS<br />
Module<br />
Distance - Bottom<br />
DC Distribution Feed Module<br />
From Floor<br />
in. (mm)<br />
From Top of Module<br />
in. (mm)<br />
Distance - Top<br />
DC Distribution Feed Module<br />
From Floor<br />
in. (mm)<br />
From Top of Module<br />
in. (mm)<br />
4.1.2 Recommended Wire Sizes, Recommended Lugs, and Torque Requirements<br />
The main factors affecting the choice and size of wires are voltage, current (also taking into account<br />
overcurrent), room temperature, and installation conditions.<br />
The power cables of the system must be sized with respect to the following:<br />
• AC Input Cables - The AC input cables must be sized for the module’s maximum input current.<br />
• DC Output Distribution Cables - The DC output distribution cables must be sized for the module’s<br />
output breakers or fuses.<br />
• Battery Cables - The DC UPS module contains a battery compartment. Battery cables are factory<br />
supplied and sized accordingly.<br />
Refer to Termination Type, Recommended Wire Size, Recommended Lugs on page 48 for recommended<br />
wire sizes and recommended lugs. Refer to the illustrations in this section for torque<br />
requirements.<br />
4.1.3 Wiring Guidelines<br />
AC Input 79 (2000) 138 (3500) 157 (4000) 59 (1500)<br />
DC Output 28 (700) N/A N/A 28 (700)<br />
Grounding 79 (2000) 138 (3500) 157 (4000) 59 (1500)<br />
Alarm/Control 59 (1500) N/A N/A 47 (1200)<br />
NOTE<br />
The above referenced section gives nominal currents for determining the size of DC UPS<br />
module power cables. Other important factors to consider include cable route length and<br />
coordination with protective devices.<br />
The following are guidelines only and are superseded by the NEC and applicable local codes where<br />
applicable.<br />
• The grounding cable connecting the DC UPS module to the main ground system must follow the<br />
most direct route possible.<br />
• Consider using paralleled smaller cables for heavy currents—this can ease installation.<br />
18
SUITABLE FOR MOUNTING ON CONCRETE<br />
OR OTHER NON-COMBUSTIBLE SURFACE ONLY.<br />
SU IT ABLE F OR M OU N T IN G ON C ON C R ET E<br />
OR OT H ER N O N -C O M BU ST IBLE SU R F AC E ON LY.<br />
Electrical Connections<br />
• When laying power cables, do not form coils; this will help avoid increasing formation of electromagnetic<br />
interference. Positive and negative cables should be run together.<br />
• Alarm/control wiring and power wiring must be run separately.<br />
Output and input cables must be run separately.<br />
4.2 Protective Covers<br />
Wiring connection access requires removing protective covers from the DC UPS module. When making<br />
electrical connections, remove the appropriate protective cover, as shown in Figure 8.<br />
Replace all protective covers after all electrical connections have been made and checked.<br />
Figure 8<br />
Protective Covers<br />
Protective Cover<br />
Protective Cover<br />
Protective Cover<br />
Protective Cover<br />
Protective Cover<br />
Protective Cover<br />
Protective Cover<br />
Protective Cover<br />
Protective Cover<br />
Protective Cover<br />
Front View<br />
(Bottom Cabled Configuration)<br />
Front View<br />
(Top Cabled Configuration)<br />
Rear View<br />
AC Input<br />
Protective Cover<br />
Dual AC Input<br />
Circuit Breaker Option<br />
Protective Cover View<br />
(Top cabled configuration shown,<br />
bottom cabled configuration similar.)<br />
AC Input Protective<br />
Cover Removed<br />
19
4.3 Wiring Connections Locations<br />
Electrical Connections<br />
The DC UPS module input and output cable connections are easily accessible from the front of the<br />
unit for installation. Refer to Figure 9, Figure 10, Figure 11, Figure 12, Figure 13, Figure 15,<br />
Figure 16, Figure 17, and Figure 18 for connection locations. The DC UPS module contains a battery<br />
compartment. Battery cables are factory supplied and connected to the DC UPS module. Final<br />
connections to the batteries are made in the procedure in 6.2 - Final Battery Connections. Battery<br />
connections are done from the rear of the DC UPS module.<br />
Figure 9<br />
Wiring Connections Locations (DC UPS Module with Bottom Feed DC Distribution)<br />
AC Input<br />
Conduit Openings<br />
(AC input cables<br />
may also enter at<br />
bottom of cabinet.)<br />
Module Cabinet<br />
Grounding<br />
AC Input<br />
(to circuit breakers)<br />
Alarm/Control<br />
Cabling Channel<br />
DC Output<br />
Circuit Breaker (Fuse)<br />
Busbars (-48VDC)<br />
Ground/Return<br />
Busbars<br />
ISO View<br />
(panels removed)<br />
ISO View<br />
(panels removed)<br />
AC Input Conduit Opening<br />
2"<br />
Recommended Coupling:<br />
Raco Type 2628 (Grainger 3LV08)<br />
or Thomas Betts Type TK126US<br />
AC Input<br />
Circuit Breaker(s)<br />
AC Input Circuit<br />
Breaker Cover<br />
AC Input Channel<br />
Battery Compartment and Base<br />
Removed in Illustrations for Clarity<br />
Front View<br />
(door removed)<br />
Alarm/Control Connections<br />
(to ACU+ IB2 Interface Board)<br />
(Primary Module only)<br />
ACU+ Controller<br />
(Primary Module only)<br />
Battery Fuses (3)<br />
(Battery leads factory<br />
connected and routed to<br />
Battery Compartment.)<br />
Load Distribution Devices<br />
DCCB01 - DCCB11 (Top Row)<br />
DCCB12 - DCCB22 (Bottom Row)<br />
(DC distribution breakers shown,<br />
large fuses available.)<br />
Battery Return and Load Return<br />
(Battery return leads factory<br />
connected and routed to<br />
Battery Compartment.)<br />
20
SUITABLE F O R MO UNT ING O N CO NCRET E<br />
O R O THER NO N-COMBUSTIBLE SURF ACE O NLY.<br />
Figure 10 Wiring Connections Locations (DC UPS Module with Top Feed DC Distribution)<br />
AC Input Conduit<br />
Openings (AC input<br />
cables may also enter<br />
at bottom of cabinet,<br />
conduit supplied<br />
routed to bottom<br />
of cabinet.)<br />
Ground/Return<br />
Busbars<br />
DC Output<br />
Circuit Breaker (Fuse)<br />
Busbars (-48VDC)<br />
Module Cabinet<br />
Grounding<br />
Electrical Connections<br />
DC Output<br />
Cable Openings<br />
Alarm/Control<br />
Cabling Channel<br />
AC Input<br />
(to circuit breakers)<br />
ISO View<br />
(panels removed)<br />
Battery Compartment and Base<br />
Removed in Illustrations for Clarity<br />
AC Input Channel<br />
AC Input Circuit<br />
Breaker Cover<br />
AC Input<br />
Circuit Breaker(s)<br />
ISO View<br />
(panels removed)<br />
Battery Return and Load Return<br />
(Battery return leads factory<br />
connected and routed to<br />
Battery Compartment.)<br />
Load Distribution Devices<br />
DCCB01 - DCCB11 (Top Row)<br />
DCCB12 - DCCB22 (Bottom Row)<br />
(DC distribution breakers shown,<br />
large fuses available.)<br />
Alarm/Control Connections<br />
(to ACU+ IB2 Interface Board)<br />
(Primary Module only)<br />
ACU+ Controller<br />
(Primary Module only)<br />
AC Input Conduit Opening<br />
2"<br />
Recommended Coupling:<br />
Raco Type 2628 (Grainger 3LV08)<br />
or Thomas Betts Type TK126US<br />
Battery Fuses (3)<br />
(Battery leads factory<br />
connected and routed to<br />
Battery Compartment.)<br />
Front View<br />
(door removed)<br />
21
4.4 Making Electrical Connections<br />
Electrical Connections<br />
!<br />
CAUTION<br />
The electrical connections described in this section must be performed by authorized<br />
electricians or qualified technical personnel. Follow the NEC and applicable local codes. If you<br />
have any difficulties, contact your local Emerson representative or Emerson Services.<br />
Before making electrical connections, do the following for each DC UPS module.<br />
• Open the front door. For bottom cable installations, remove the lower front panel. For all installations,<br />
remove protective panels as required (see 4.2 - Protective Covers).<br />
• Ensure the main AC input circuit breaker(s) is in the OFF position.<br />
• Ensure all PCU AC input circuit breakers are in the OFF position.<br />
• Ensure the three (3) battery disconnect fuses are removed.<br />
• Ensure all distribution circuit breakers are in the OFF position or distribution fuses are removed.<br />
4.4.1 Cabinet Grounding Connection<br />
The cabinet grounding connection is made to a stud located on the top of the DC UPS module, as<br />
shown in Figure 11. A cabinet grounding cable must be connected to this stud, per site requirements.<br />
Tighten the connection to the torque indicated in Figure 11.<br />
Each module also contains a separate stud located on each side to connect the supplied grounding<br />
strap between DC UPS modules, if desired.<br />
All modules and cable conduit should be grounded in accordance with the NEC and all applicable<br />
local codes.<br />
!<br />
WARNING<br />
Failure to follow proper grounding procedures can result in electric shock hazard to personnel<br />
or the risk of fire, should a ground fault occur.<br />
NOTE<br />
Proper grounding significantly reduces electromagnetic interference problems in systems.<br />
Figure 11 Cabinet Grounding Connection<br />
Studs for Connecting<br />
Grounding Strap<br />
between Modules<br />
5/16” (M8) Studs.<br />
Recommended Torque is<br />
204-221 in-lbs (23-25 Nm).<br />
Module Cabinet<br />
Grounding Stud<br />
3/8” (M10) Stud.<br />
Recommended Torque is<br />
407-434 in-lbs (46-49 Nm).<br />
Customer supplied<br />
conduit fittings<br />
Module Top View<br />
4.4.2 DC Output Distribution Connections<br />
Connect the DC output distribution cables between the DC UPS module and the loads as required.<br />
These connections are made to the output circuit breaker or fuse busbars and the ground/return busbar,<br />
as shown in Figure 9 or Figure 10. Refer to Figure 12 for a view of the busbar terminations.<br />
Tighten the connections to the torque indicated in Figure 12.<br />
!<br />
WARNING<br />
If the load equipment will not be ready to accept power on the arrival of the commissioning<br />
engineer, then ensure that the system output cables are safely isolated.<br />
22
Electrical Connections<br />
Figure 12 DC Output Connections<br />
DISTRIBUTION CIRCUIT BREAKERS<br />
DC UPS MODULE WITH<br />
TOP FEED DC DISTRIBUTION<br />
DC UPS MODULE WITH<br />
BOTTOM FEED DC DISTRIBUTION<br />
1”<br />
DC Output (-48Vdc)<br />
(per distribution position)<br />
to distribution device busbar<br />
1"<br />
1”<br />
DC Output Return<br />
(per distribution position)<br />
to ground/return busbars<br />
1”<br />
Terminals are 3/8” (M10) studs.<br />
Recommended Torque is 407-434 in-lbs (46-49 Nm).<br />
DC UPS MODULE WITH<br />
TOP FEED DC DISTRIBUTION<br />
DISTRIBUTION FUSES<br />
(optional)<br />
DC UPS MODULE WITH<br />
BOTTOM FEED DC DISTRIBUTION<br />
1.5”<br />
1 .75"<br />
1 .75"<br />
1.7 5"<br />
1 .75"<br />
1 .75"<br />
DC Output (-48Vdc)<br />
(per distribution position)<br />
to distribution device busbar<br />
1 .75"<br />
1.5”<br />
DC Output Return<br />
(per distribution position)<br />
to ground/return busbars<br />
Terminals are 1/2” (M12) studs.<br />
Recommended Torque is 690-743 in-lbs (78-84 Nm).<br />
23
4.4.3 AC Input <strong>Power</strong> Connections<br />
!<br />
WARNING<br />
AC input power connections must be performed by a qualified electrician.<br />
AC Input Overcurrent Protective Device<br />
Electrical Connections<br />
Before connecting AC input cables to the DC UPS module, ensure that you are aware of the<br />
location and operation of the overcurrent protection devices that connect these cables to the<br />
power distribution panel. Before connecting AC input cables, de-energize and lockout or<br />
tagout these overcurrent protection devices.<br />
Do not apply AC input power to the DC UPS module before the arrival of the commissioning<br />
engineer.<br />
!<br />
CAUTION<br />
To reduce the risk of fire, connect AC input only to a circuit provided with correct amperes<br />
maximum branch circuit overcurrent protection in accordance with the NEC, ANSI/NFPA 70.<br />
External overcurrent protection for the AC input circuit is to be provided by the customer. Refer to<br />
AC Input Specifications on page 50 for maximum input current ratings. Each DC UPS module is<br />
provided with one or two internal 150A AC input circuit breaker.<br />
AC Input Connections<br />
AC input leads can enter the DC UPS module from the top or from the bottom. Refer to Figure 13 for<br />
an AC input routing diagram. Figure 14 provides a diagram for installing conduit fittings when AC<br />
is fed from the top.<br />
One or two AC input breakers are provided (depending on module configuration). Refer to Figure 15<br />
for an AC input connections diagram. Tighten the connections to the torque indicated in Figure 15.<br />
Note that a cover needs to be removed to access the circuit breakers as shown in Figure 8.<br />
• Connect Feed A AC input supply cables between the power distribution panel and the DC UPS<br />
module’s internal Feed A input circuit breaker (Feed A: L1, L2, L3 terminals).<br />
• If the DC UPS module is configured for two AC input feeds, connect the optional Feed B AC input<br />
supply cables between the power distribution panel and the DC UPS module’s internal Feed B<br />
input circuit breaker (Feed B: L1, L2, L3 terminals).<br />
24
Electrical Connections<br />
Figure 13 AC Input <strong>Power</strong> Connection Routing Options<br />
DC UPS MODULE WITH<br />
TOP FEED DC DISTRIBUTION<br />
AC enters at top.<br />
DC UPS MODULE WITH<br />
BOTTOM FEED DC DISTRIBUTION<br />
AC enters at top.<br />
Battery Compartment<br />
65kAic<br />
Circuit<br />
Breaker<br />
Run AC Cables<br />
from Top OR Bottom<br />
Battery Compartment<br />
65kAic<br />
Circuit<br />
Breaker<br />
Run AC Cables<br />
from Top OR Bottom<br />
AC enters at bottom.<br />
AC enters at bottom.<br />
Figure 14 Installing Conduit Fittings when AC is Fed from the Top<br />
1) Remove cover plate.<br />
Note: Cut cover plate in half if<br />
only one conduit being installed.<br />
2) Install one or two customer provided<br />
conduit fittings to supplied conduit plate.<br />
Customer provided<br />
conduit fittings.<br />
3) Secure conduit plate with conduit<br />
fittings installed to top of cabinet.<br />
Note: If only one conduit being installed,<br />
re-install plate that was cut in half.<br />
Figure 15 AC Input <strong>Power</strong> Connections<br />
DC UPS MODULE WITH<br />
BOTTOM FEED DC DISTRIBUTION<br />
DC UPS MODULE WITH<br />
TOP FEED DC DISTRIBUTION<br />
GND<br />
Stud<br />
factory wiring<br />
L1 L2 L3 L1 L2 L3<br />
AC IN A AC IN B<br />
A<br />
Feed<br />
GND<br />
Stud<br />
B (optional)<br />
Feed<br />
AC INPUT<br />
380/480VAC, 3 Phase, 50/60Hz<br />
AC INPUT<br />
380/480VAC, 3 Phase, 50/60Hz<br />
GND<br />
Stud<br />
A<br />
Feed<br />
AC IN A<br />
L1 L2 L3<br />
factory wiring<br />
B<br />
Feed (optional)<br />
AC IN B<br />
L1 L2 L3<br />
GND<br />
Stud<br />
One or two AC input circuit breakers are provided (depending on module configuration).<br />
Two ground studs (5/16” [M8]) are provided attached to the sides of the enclosure surrounding the AC input circuit breaker(s).<br />
Recommended torque is 124 in-lbs (14 Nm) for AC input circuit breaker connection.<br />
Recommended torque is 204-221 in-lbs (23-25 Nm) to grounding studs.<br />
25
4.4.4 Optional Alarm/Control Connections (to Primary Module only)<br />
Electrical Connections<br />
Alarm/control connections are made to the ACU+ Controller Customer Interface Board (IB2). The IB2<br />
board provides connection points for digital inputs and relay outputs. System required connections<br />
are factory wired to the IB2 board. The customer may wire to un-used digital input and relay outputs,<br />
if desired. The IB2 board is located in an enclosure above the ACU+ Controller (see Figure 9 or<br />
Figure 10). To access these connections, loosen the captive fastener on the front of the enclosure and<br />
slide the IB2 board partially out of the shelf. Note that a wireway is provided to route the wires to the<br />
IB2 board, as shown in see Figure 9 or Figure 10. Connect external alarm/control wiring to terminal<br />
blocks J3-J9 of the IB2 board, as required. Refer to Figure 16.<br />
Figure 16 Alarm and Control Connections<br />
Top View<br />
ACU+ IB2 Interface Board<br />
Customer Input/Output (I/O) Connections<br />
7<br />
J9<br />
N O C N C<br />
5 3 1<br />
R elay O utputs<br />
5 3 1<br />
J8 J7 J6<br />
N O C N C N O C N C N O C N C<br />
5 3 1 5 3 1 5 3 1<br />
D igital Inputs<br />
8 7 6 5 4 3 2 1<br />
J5 J4 J3<br />
5 3 1 5 3 1 5 3 1<br />
-<br />
NC = Norm ally Closed<br />
COM = Com mon<br />
NO = Normally Open<br />
All relay contacts are shown<br />
with the relay deenergized.<br />
6 4 2 6 4 2 6 4 2 6 4 2<br />
N O C N C N O C N C N O C N C N O C N C<br />
8 6 4 2<br />
6 4 2 6 4 2 6 4 2<br />
+<br />
J12<br />
Tem p.<br />
P robe #2<br />
J11<br />
Tem p.<br />
P robe #1<br />
to ACU+<br />
O N<br />
S W 1<br />
Terminals are M2 screws.<br />
Recommended Torque is 1.92-2.16 in-lbs (0.22-0.25 Nm).<br />
Wire size range is 26 AWG to 16 AWG (0.14 mm^2 to 1.0 mm^2).<br />
Digital Input Connections<br />
Up to eight (8) digital inputs may be connected to the IB2 board. Digital inputs that have factory connections<br />
are listed in Table 3. A blank column in Table 3 is also provided if you want to document<br />
custom connections to un-used digital inputs.<br />
• Observe proper polarity per Table 3. For example, if alarm No. 1 uses a BR+ signal, the alarm<br />
lead must be connected on the + terminal of input 1 and a continuous –48V signal must be connected<br />
on the – terminal of input 1. Inversely, if alarm No. 1 uses a –48V signal, the alarm lead<br />
must be connected on the – terminal of input 1 and a continuous BR+ signal must be connected on<br />
the + terminal of input 1.<br />
• The digital inputs can be configured to provide an alarm when the signal is applied (HIGH) or<br />
removed (LOW), as described in the DC UPS User <strong>Manual</strong>.<br />
26
Electrical Connections<br />
Table 3<br />
Programmable Digital Inputs<br />
Programmable<br />
Digital Input<br />
Pin No.<br />
Dedicated to...<br />
Customer<br />
Custom Digital Input<br />
1<br />
J3-1 –<br />
J3-2 +<br />
Available for Customer<br />
Custom Digital Input<br />
2<br />
J3-3 –<br />
J3-4 +<br />
Available for Customer<br />
Custom Digital Input<br />
3<br />
J3-5 –<br />
J3-6 +<br />
Available for Customer<br />
Custom Digital Input<br />
4<br />
J4-1 –<br />
J4-2 +<br />
PCU EPO<br />
factory wired<br />
5<br />
J4-3 –<br />
J4-4 +<br />
Fan Supply Alarm<br />
factory wired<br />
6<br />
J4-5 –<br />
J4-6 +<br />
Fan Alarm<br />
factory wired<br />
7<br />
J5-1 –<br />
J5-2 +<br />
Available for Customer<br />
Custom Digital Input<br />
8<br />
J5-3 –<br />
J5-4 +<br />
Available for Customer<br />
Custom Digital Input<br />
--<br />
J5-5<br />
J5-6<br />
--<br />
Relay Output Connections<br />
The IB2 board provides eight (8) programmable alarm relays with Form-C contacts. Default relay<br />
assignments are documented in Table 4. A blank column in Table 4 is also provided if you want to<br />
document a custom configuration. Alarm relay contacts are rated for 2A @ 30VDC and 0.5A @<br />
125VAC (60W maximum power consumption).<br />
• Each relay can be individually configured to activate for any system alarm condition.<br />
• Refer to DC UPS User <strong>Manual</strong> for programming instructions.<br />
27
Electrical Connections<br />
Table 4<br />
Programmable Relay Outputs<br />
Programmable<br />
Relay Output<br />
Pin No.<br />
Alarms Assigned<br />
to this Relay (Default)<br />
Alarms Assigned<br />
to this Relay (Custom)<br />
1<br />
J6-5 NO<br />
J6-3 COM<br />
J6-1 NC<br />
All alarms programmed with<br />
alarm severity of "major alarm".<br />
Relay de-energizes during an<br />
alarm condition.<br />
2<br />
J6-6 NO<br />
J6-4 COM<br />
J6-2 NC<br />
All alarms programmed with<br />
alarm severity of "minor alarm".<br />
Relay de-energizes during an<br />
alarm condition.<br />
3<br />
J7-5 NO<br />
J7-3 COM<br />
J7-1 NC<br />
All alarms programmed with<br />
alarm severity of "observation<br />
alarm". Relay energizes during<br />
an alarm condition.<br />
J7-6 NO<br />
4<br />
J7-4 COM<br />
Available for Customer<br />
Custom Setting<br />
J7-2 NC<br />
J8-5 NO<br />
5<br />
J8-3 COM<br />
Available for Customer<br />
Custom Setting<br />
J8-1 NC<br />
J8-6 NO<br />
6<br />
J8-4 COM<br />
Available for Customer<br />
Custom Setting<br />
J8-2 NC<br />
J9-5 NO<br />
7<br />
J9-3 COM<br />
Available for Customer<br />
Custom Setting<br />
J9-1 NC<br />
J9-6 NO<br />
8<br />
J9-4 COM<br />
Available for Customer<br />
Custom Setting<br />
J9-2 NC<br />
28
IB2 Board DIP Switch Settings (for reference only)<br />
Electrical Connections<br />
Dip Switch SW1 on the IB2 board is used to set the communications address for this board (Table 5).<br />
In this system, both switches of SW1 are to be set in the OFF position. Refer to Figure 16 for SW1<br />
location.<br />
Table 5<br />
IB2 Board Communications Address Settings<br />
DIP Switch SW1<br />
1 2<br />
Board Number<br />
OFF OFF 1<br />
ON OFF 2<br />
OFF ON 3<br />
ON ON na<br />
IB2 Board LED Indicators (for reference only)<br />
The IB2 board has a green LED indicator which is lit in normal operation and flashes when the IB2<br />
board is communicating with the Controller.<br />
4.4.5 ACU + Controller Ethernet Connection (to Primary Module only)<br />
The ACU+ Controller provides a Web Interface via an Ethernet connection to a TCP/IP network. An<br />
RJ-45 10BaseT jack is provided on the front of the ACU+ Controller for connection into a customer's<br />
network running TCP/IP. This jack has a standard Ethernet pin configuration scheme, twisted pair.<br />
Refer to Figure 9 or Figure 10 for location of the ACU+. Refer to Figure 17 for location and Table 6<br />
for pinouts of the Ethernet port. Use shielded Ethernet cable (grounded at both ends). Note that the<br />
ACU+ Controller’s RJ-45 jack is connected to chassis ground.<br />
Figure 17 ACU+ Controller RJ-45 Ethernet Port<br />
Ethernet Port (RJ-45)<br />
ESC<br />
ENT<br />
Table 6<br />
Port Pin<br />
Number<br />
ACU+ Controller RJ-45 Ethernet Port<br />
Name<br />
Definition<br />
1 Tx+ Write Signal +<br />
2 Tx- Write Signal -<br />
3 Rx+ Read Signal +<br />
4 -- no connection<br />
5 -- no connection<br />
6 Rx- Read Signal -<br />
7 -- no connection<br />
8 -- no connection<br />
29
SUITABLE FOR MOUNTING ON CONCRETE<br />
OR OTHER NON-COMBUSTIBLE SURFACE ONLY.<br />
4.4.6 Optional Emergency <strong>Power</strong> Off (EPO) Connection (to Primary Module only)<br />
Electrical Connections<br />
The DC UPS module has an Emergency <strong>Power</strong> Off (EPO) function operated by a remote contact provided<br />
by the User.<br />
If the EPO function is desired, locate the EPO jumper in the Primary Module (see Figure 18).<br />
Remove the EPO jumper (the jumper connects from the bottom terminal of the EPO terminal block<br />
and the bottom of EPO Fuse F11). Connect a customer provided external normally closed switch<br />
between the bottom terminal of the EPO terminal block and the bottom of the EPO Fuse.<br />
The following occurs when the EPO switch is opened.<br />
• The battery LVD contactor in each DC UPS module opens, disconnecting the battery from each<br />
module.<br />
• The PCUs in each DC UPS module shut down after 5 seconds.<br />
!<br />
WARNING<br />
The EPO circuit operates with -48Vdc. There is -48Vdc present on the terminals the EPO<br />
jumper connects to. There is -48Vdc present on these same terminals that an external EPO<br />
switch will be connected to.<br />
NOTE<br />
The external EPO switch wiring must be double-insulated. The wire must be 600V, 18-16 AWG<br />
stranded for maximum runs between 82 and 197 feet (25-60m), respectively.<br />
The Emergency Stop action within the DC UPS module opens the battery LVD contactor and<br />
shuts down the PCUs. It does not internally disconnect the input power supply. To disconnect<br />
ALL power to the DC UPS module, open the upstream feeder breaker(s) when the remote EPO<br />
is activated.<br />
Figure 18 EPO Jumper Location<br />
1 11<br />
12<br />
SEE DETAIL A<br />
22<br />
DETAIL A<br />
Components Behind Cover<br />
EPO Fuse<br />
EPO<br />
Terminal<br />
Block<br />
EPO<br />
Jumper<br />
Top DC Distribution Feed Shown,<br />
Bottom DC Distribution Feed Similar<br />
Front View<br />
(door removed)<br />
30
4.4.7 Battery Connections<br />
Electrical Connections<br />
Batteries are factory installed and connected. Final connections to the batteries are made in the procedure<br />
presented in 6.2 - Final Battery Connections.<br />
4.5 Making Module-to-Module -48VDC and Ground/Return Interconnections<br />
(if system consists of multiple DC UPS modules)<br />
4.5.1 -48Vdc and Ground/Return Busbar Interconnects<br />
1. Install the provided -48Vdc Interconnect Busbar(s) between the -48Vdc busbars located in each<br />
adjacent DC UPS module. Refer to Figure 19 (DC UPS module with bottom feed DC distribution)<br />
and Figure 20 (DC UPS module with top feed DC distribution). Torque to the values listed in the<br />
illustrations.<br />
2. Install the provided Ground/Return Interconnect Busbar(s) between the ground/return busbars<br />
located in each adjacent DC UPS module. Refer to Figure 19 (DC UPS module with bottom feed<br />
DC distribution) and Figure 20 (DC UPS module with top feed DC distribution). Torque to the<br />
values listed in the illustrations.<br />
31
Electrical Connections<br />
Figure 19 Module-Module Interconnect Busbars (DC UPS Module with Bottom Feed DC Distribution)<br />
-48Vdc Busbar<br />
Hardware Build-Up<br />
M10 Nut<br />
(electro zinc treatment with bright chromate)<br />
M10 Belleville Lock Washer<br />
DIN 6796-10.5 STEEL<br />
(electro zinc treatment with bright chromate)<br />
Torque to 418 in-lbs (47.3 Nm)<br />
-48Vdc<br />
Busbar<br />
Ground/Return Busbar<br />
Hardware Build-Up<br />
M10 x 30mm Bolt<br />
(electro zinc treatment with bright chromate)<br />
M10 Belleville Lock Washer<br />
DIN 6796-10.5 STEEL<br />
(electro zinc treatment with bright chromate)<br />
Torque to 418 in-lbs (47.3 Nm)<br />
Ground/Return<br />
Busbar<br />
Battery Compartment and Base<br />
Removed in Illustrations for Clarity<br />
-48Vdc Interconnect Busbar<br />
(can be installed on left and/or<br />
right side of module)<br />
Ground/Return Interconnect Busbar<br />
(can be installed on left and/or<br />
right side of module)<br />
32
SUITABLE F O R MO UNT ING O N CO NCRET E<br />
O R O THER NO N-COMBUST IBLE SURF ACE O NLY.<br />
Electrical Connections<br />
Figure 20 Module-Module Interconnect Busbars (DC UPS Module with Top Feed DC Distribution)<br />
Ground/Return<br />
Busbar<br />
-48Vdc Busbar<br />
Hardware Build-Up<br />
M10 Nut<br />
(electro zinc treatment with bright chromate)<br />
M10 Belleville Lock Washer<br />
DIN 6796-10.5 STEEL<br />
(electro zinc treatment with bright chromate)<br />
Torque to 418 in-lbs (47.3 Nm)<br />
-48Vdc<br />
Busbar<br />
-48Vdc<br />
Busbar<br />
Ground/Return Busbar<br />
Hardware Build-Up<br />
M10 x 30mm Bolt<br />
(electro zinc treatment with bright chromate)<br />
M10 Belleville Lock Washer<br />
DIN 6796-10.5 STEEL<br />
(electro zinc treatment with bright chromate)<br />
Torque to 418 in-lbs (47.3 Nm)<br />
Battery Compartment and Base<br />
Removed in Illustrations for Clarity<br />
Ground/Return Interconnect Busbar<br />
(can be installed on left and/or<br />
right side of module)<br />
-48Vdc Interconnect Busbar<br />
(can be installed on left and/or<br />
right side of module)<br />
33
4.6 Making Alarm/Control Interconnections between Modules<br />
(if system consists of multiple DC UPS modules)<br />
Electrical Connections<br />
Make the following module-to-module alarm/control interconnections as required. Refer to Figure 22<br />
for an interconnect diagram. See also the Cabinet Interconnections illustration in Figure 23,<br />
Figure 24, and Figure 25.<br />
4.6.1 RS-485 Module-to-Module Interconnect<br />
Primary Module to 1st Expansion Module<br />
1. Locate the long RS-485 interconnect cable (RPM 628 415/2) (yellow/white wire twisted pair) coiled<br />
up on the right side of the Primary Module.<br />
2. Route this cable through the openings in the sides of the cabinets to the 1st Expansion Module.<br />
3. Connect this cable to the mating RS-485 interconnect cable connected to the SM-AC located in the<br />
1st Expansion Module (yellow/white wire twisted pair).<br />
1st Expansion Module to 2nd Expansion Module<br />
1. Locate the long RS-485 interconnect cable (RPM 628 415/2) (yellow/white wire twisted pair) coiled<br />
up on the right side of the 1st Expansion Module.<br />
2. Route this cable through the openings in the sides of the cabinets to the 2nd Expansion Module.<br />
3. Connect this cable to the mating RS-485 interconnect cable connected to the SM-AC located in the<br />
2nd Expansion Module (yellow/white wire twisted pair).<br />
Additional Expansion Modules<br />
1. Make similar connections between each adjacent Expansion Module.<br />
SM-BRC RS-485 Termination Resistor Setting in Last DC UPS Module<br />
1. A jumper on the SM-BRC circuit board is used for selecting a termination resistor for the RS-485<br />
connection. RS-485 termination is disabled when the jumper is across pins 1 and 2 (default). It is<br />
enabled when the jumper is across pins 2 and 3. See Figure 21 for the location of the jumper.<br />
In most cases, RS-485 termination is not necessary because maximum baud rate is 19200 bps<br />
(default is 9600). RS-485 termination is recommended when intermittent communications occur.<br />
If there are intermittent communications errors, it is recommended to set the termination resistor<br />
on the SM-BRC in the last module to the enabled position (jumper between pins 2 and 3) instead<br />
of the factory disabled position (jumper between pins 1 and 2).<br />
Figure 21 SM-BRC RS-485 Jumper Locations<br />
4.6.2 CAN-Bus Module-to-Module Interconnect<br />
CAN-Bus End Resistor (move only if more than one DC UPS module)<br />
1. Locate the short CAN-Bus interconnect cable jumper connected to the SM-DU+ in the Primary<br />
Module (black/white wire twisted pair located behind the SM-DU+ sheetmetal enclosure and<br />
34
Electrical Connections<br />
exiting the top of the SM-DU+). Remove the CAN-Bus End Resistor plugged into this cable only if<br />
there are Expansion Modules.<br />
2. Locate the short CAN-Bus interconnect cable jumper connected to the SM-DU in the last (end)<br />
Expansion Module (black/white wire twisted pair located behind the SM-DU sheetmetal<br />
enclosure). Plug the CAN-Bus End Resistor into this cable.<br />
1st Expansion Module to Primary Module<br />
1. Locate the long CAN-Bus interconnect cable (RPM 628 351/1) coiled up on the right side of the 1st<br />
Expansion Module (black/white wire twisted pair).<br />
2. Route this cable through the openings in the sides of the cabinets to the Primary Module.<br />
3. Route this cable through the top lip of the Primary Module’s SM-DU+ sheetmetal enclosure.<br />
4. Connect this cable to the mating CAN-Bus interconnect cable connected to the SM-DU+ in the<br />
Primary Module (black/white wire twisted pair located behind the SM-DU+ sheetmetal enclosure<br />
and exiting the top of the SM-DU+).<br />
2nd Expansion Module to 1st Expansion Module<br />
1. Locate the long CAN-Bus interconnect cable (RPM 628 351/1) coiled up on the right side of the<br />
2nd Expansion Module (black/white wire twisted pair).<br />
2. Route this cable through the openings in the sides of the cabinets to the 1st Expansion Module.<br />
3. Connect this cable to the mating CAN-Bus interconnect cable connected to the SM-DU in the 1st<br />
Expansion Module (black/white wire twisted pair located behind the SM-DU sheetmetal<br />
enclosure).<br />
Additional Expansion Modules<br />
1. Make similar connections between each remaining Expansion Module.<br />
4.6.3 BLVD Module-to-Module Interconnect<br />
1st Expansion Module to Primary Module<br />
1. Locate the BLVD control interconnect cable (RPM 628 466/3) coiled up on the right side of the 1st<br />
Expansion Module (the Expansion Module’s BLVD cable is factory connected to the bottom<br />
connector on the LVD Relay Board, and exits at the back of the LVD Relay Board’s sheetmetal<br />
enclosure).<br />
2. Route this cable through the openings in the sides of the cabinets to the Primary Module.<br />
3. Route the cable through the back of the Primary Module’s LVD Relay Board sheetmetal<br />
enclosure.<br />
4. Connect this cable to the mating BLVD control interconnect cable (RPM 628 465/3) in the<br />
Primary Module (the Primary Module’s BLVD cable is factory connected to the bottom connector<br />
located on the LVD Relay Board).<br />
2nd Expansion Module to 1st Expansion Module<br />
1. Locate the BLVD control interconnect cable (RPM 628 466/3) coiled up on the right side of the 2nd<br />
Expansion Module (the Expansion Module’s BLVD cable is factory connected to the bottom<br />
connector on the LVD Relay Board, and exits at the back of the LVD Relay Board’s sheetmetal<br />
enclosure).<br />
2. Route this cable through the openings in the sides of the cabinets to the 1st Expansion Module.<br />
3. Route the cable through the back of the 1st Expansion Module’s LVD Relay Board sheetmetal<br />
enclosure.<br />
4. Connect this cable to the mating BLVD control interconnect cable (RPM 628 465/3) in the 1st<br />
Expansion Module (the 1st Expansion Module’s BLVD cable is factory connected to the bottom<br />
connector located on the LVD Relay Board).<br />
Additional Expansion Modules<br />
1. Make similar connections between each remaining Expansion Module.<br />
35
SUITABLE FO R MO UNTING O N CO NCRET E<br />
O R O THER NO N-COMBUSTIBLE SURFACE O NLY.<br />
SUIT ABLE F O R MO UNT ING O N CO NCRET E<br />
O R O THER NO N-COMBUSTIBLE SURFACE O NLY.<br />
Electrical Connections<br />
Figure 22 Alarm/Control Cable Interconnects (cont’d on next page)<br />
1 11<br />
CAN-Bus<br />
Black/White Wire Twisted Pair<br />
(RPM 628 351/1)<br />
located coiled up on right side of<br />
Expansion Module cabinet (mating<br />
connector located behind Detail A cover)<br />
Cable Runs this Direction<br />
1 11<br />
12<br />
22<br />
12<br />
22<br />
SEE DETAIL A<br />
RS-485<br />
Yellow/White Wire Twisted Pair<br />
(RPM 628 415/2)<br />
located coiled up on right side of<br />
Primary Module cabinet (mating<br />
connector located on SM-AC)<br />
Cable Runs this Direction<br />
SM-AC<br />
SEE DETAIL A<br />
LVD<br />
Relay<br />
Board<br />
BLVD<br />
LVD<br />
Relay<br />
Board<br />
Cable Runs this Direction<br />
BLVD Control Cable<br />
(RPM 628 465/3)<br />
BLVD Control Cable<br />
(RPM 628 466/3)<br />
located coiled up<br />
on right side of<br />
Expansion Module<br />
cabinets<br />
Front View<br />
Primary Module<br />
(door removed)<br />
Note: Cabinets must be installed next to each other, shown<br />
apart here for clarity of control cabling interconnections.<br />
Front View<br />
Expansion Module<br />
(door removed)<br />
DETAIL A<br />
Components Behind Cover<br />
LVD Relay Board<br />
Can-Bus End Resistor<br />
(if no Expansion Module)<br />
CAN-Bus<br />
Black/White Wire<br />
Twisted Pair<br />
(Primary Module)<br />
DETAIL A<br />
Components Behind Cover<br />
LVD Relay Board<br />
SM-DU+<br />
SM-DU+<br />
BLVD Control Cable<br />
(RPM 628 465/3)<br />
BLVD Control Cable<br />
(RPM 628 466/3)<br />
(Expansion Modules Only)<br />
BLVD Control Cable<br />
(RPM 628 465/3)<br />
36
SUITABLE FO R MO UNTING O N CO NCRETE<br />
O R O THER NO N-COMBUSTIBLE SURFACE O NLY.<br />
SUITABLE F O R MO UNTING O N CO NCRETE<br />
O R O THER NO N-COMBUSTIBLE SURFACE O NLY.<br />
Electrical Connections<br />
Figure 18 Alarm/Control Cable Interconnects (cont’d from previous page)<br />
Note: Cabinets must be installed next<br />
to each other, shown apart here<br />
for clarity of control cabling<br />
interconnections.<br />
1 11<br />
CAN-Bus<br />
Black/White Wire Twisted Pair<br />
(RPM 628 351/1)<br />
located coiled up on right side of<br />
2nd Expansion Module cabinet (mating<br />
connector located on SM-DU)<br />
Cable Runs this Direction<br />
1 11<br />
12<br />
22<br />
12<br />
22<br />
SEE DETAIL A<br />
RS-485<br />
Yellow/White Wire Twisted Pair<br />
(RPM 628 415/2)<br />
located coiled up on right side of<br />
1st Expansion Module cabinet (mating<br />
connector located on SM-AC)<br />
Cable Runs this Direction<br />
SEE DETAIL A<br />
SM-DU<br />
(Expansion Modules only)<br />
SM-AC<br />
LVD<br />
Relay<br />
Board<br />
BLVD<br />
LVD<br />
Relay<br />
Board<br />
Cable Runs this Direction<br />
BLVD Control Cable<br />
(RPM 628 465/3)<br />
Connectors<br />
Located on<br />
SM-DU (top view)<br />
BLVD Control Cable<br />
(RPM 628 466/3)<br />
located coiled up<br />
on right side of<br />
Expansion Module<br />
cabinets<br />
Front View<br />
1st Expansion Module<br />
(door removed)<br />
CAN-Bus Black/White<br />
Wire Twisted Pair<br />
(Expansion Module)<br />
Front View<br />
2nd Expansion Module<br />
(door removed)<br />
DETAIL A<br />
Components Behind Cover<br />
LVD Relay Board<br />
Can-Bus End Resistor<br />
(moved from Primary Module<br />
to last Expansion Module)<br />
DETAIL A<br />
Components Behind Cover<br />
LVD Relay Board<br />
CAN-Bus<br />
Black/White Wire<br />
Twisted Pair<br />
(Primary Module)<br />
SM-DU+<br />
SM-DU+<br />
BLVD Control Cable<br />
(RPM 628 465/3)<br />
BLVD Control Cable<br />
(RPM 628 466/3)<br />
(Expansion Modules Only)<br />
BLVD Control Cable<br />
(RPM 628 465/3)<br />
37
Electrical Connections<br />
Figure 23 System Configuration and Communications Connections<br />
38
Electrical Connections<br />
Figure 24 Cabinet Interconnections<br />
39
Electrical Connections<br />
Figure 25 Signal Cabling and Switch Settings<br />
40
Installing PCUs<br />
5.0 INSTALLING PCUS<br />
!<br />
WARNING<br />
In order to prevent damage to the latching mechanism, do not use excessive force on the PCU<br />
handle when pushing the PCU into the cabinet.<br />
PCUs are hot swappable. They can be installed with the system operating.<br />
Procedure<br />
1. Place the PCU into an unoccupied mounting position without sliding it in completely.<br />
2. Push the “Safety Latch Release” located on the front of the PCU "UP". Refer to Figure 26 for an<br />
illustration.<br />
3. Gently push the PCU into the mounting location until it stops.<br />
4. Note that the PCU will NOT be completely seated in the mounting location until the next step is<br />
performed.<br />
5. Push the “Safety Latch Release” located on the front of the PCU "DOWN". Gently push the PCU<br />
into the mounting location until it is completely seated.<br />
6. Push the PCU’s handle in and secure the PCU to the cabinet by tightening the captive fastener<br />
located on the handle.<br />
7. Repeat the above steps for each PCU being installed in the DC UPS module.<br />
8. After the PCUs are physically installed, they are ready for operation immediately after power is<br />
supplied to them.<br />
Figure 26 PCU Handle and Safety Latch<br />
Handle<br />
Captive<br />
Fastener<br />
Safety<br />
Latch<br />
Release<br />
Handle<br />
Safety<br />
Latch<br />
Pin<br />
41
Start-Up Instructions<br />
6.0 START-UP INSTRUCTIONS<br />
6.1 General<br />
The <strong>NetSure</strong> <strong>ITM</strong> DC UPS system must be fully installed and commissioned before startup. The<br />
start-up procedure consists of making final battery connections, initially starting the system, and verifying<br />
system operation. Emerson Network <strong>Power</strong> will perform ALL start-up procedures, including<br />
making final battery connections.<br />
The following are general guidelines for Emerson technicians.<br />
6.2 Final Battery Connections<br />
6.2.1 Introduction<br />
Each DC UPS module contains a battery compartment. The battery compartment consists of six battery<br />
shelves that house (4) 6V batteries, each. Batteries are factory installed and wired for (3) -48VDC<br />
battery strings. Also provided is a 800A battery disconnect fuse for each string.<br />
6.2.2 Safety<br />
Special care should be taken when working with the batteries associated with the DC UPS module.<br />
See the precautions in the battery instruction manual and in Battery Compartment Precautions<br />
at the beginning of these instructions.<br />
6.2.3 Connecting Batteries<br />
Battery Leads<br />
The batteries are factory installed and most battery interconnections are factory made. The following<br />
interconnections need to made during installation to complete the battery electrical path to the DC<br />
UPS module. Initial battery torque is 97 in-lbs (11 Nm) for the Emerson EB4 6V200.<br />
1. Refer to Figure 27 and connect the supplied Battery Interconnect Links between the indicated<br />
Battery Shelves. For each connection:<br />
a. Install the faston ring lugs on top of the battery links as shown in Figure 27.<br />
b. Tighten the connections to the torque indicated in Figure 27.<br />
c. Place the plastic cover over the battery terminals and interconnect link.<br />
2. Refer to Figure 27 and connect the factory wired battery monitoring leads to the previously<br />
installed faston terminals.<br />
3. Check the torque on all remaining battery terminals (factory connections). Torque to value<br />
indicated in Figure 27.<br />
DO NOT INSTALL THE BATTERY FUSES BEFORE THE EQUIPMENT HAS BEEN COM-<br />
MISSIONED AND THE PROCEDURE IN "6.3.1 - Initially Starting the DC UPS System and<br />
Verifying System Operation" IS PERFORMED.<br />
42
Start-Up Instructions<br />
Figure 27 Making Final Battery Shelf Battery Interconnect Link Connections<br />
DC UPS Module Rear View (B attery Compartment)<br />
Typical Monitoring<br />
Lead Connections<br />
Lead Labeled<br />
1.5+ (Battery One Link)<br />
2.5+ (Battery Two Link)<br />
3.5+ (Battery Three Link)<br />
Red<br />
Monitoring<br />
Lead<br />
Temperature<br />
Sensor Lead<br />
(white and<br />
white/black<br />
leads)<br />
Black<br />
Monitoring<br />
Lead<br />
Bolt<br />
Lock Washer<br />
Flat Washer<br />
Double Tab Washer<br />
Single Tab Washer<br />
Interconnect<br />
Strap<br />
Final Battery Shelf Interconnections<br />
1) Connect supplied Battery Interconnect<br />
Links between these points.<br />
2) Place faston ring lugs for factory wired<br />
battery monitoring leads on top of<br />
interconnect link as shown in illustration.<br />
DO NOT PLACE BETWEEN LINK AND<br />
BATTERY TERMINALS.<br />
3) Torque to 97 in-lbs (11 Nm).<br />
Battery<br />
Terminal<br />
Typical Hardware Build-Up<br />
4) Place plastic cover over battery terminals<br />
and interconnect links.<br />
5) Connect battery monitoring leads to faston<br />
terminals as shown in illustration.<br />
6) Check torque on remaining battery terminals<br />
(factory connections).<br />
43
Field Battery Monitoring Lead Connections to<br />
the "SiteWeb BRC with Alber Technology" Unit<br />
Start-Up Instructions<br />
Battery monitoring leads are factory connected to the mating halves of the "SiteWeb BRC with<br />
Alber Technology" unit’s Load Inputs terminal blocks labeled 1, 3, 5, 7 and 2, 4, 6, 8. The DC UPS<br />
module is factory shipped with the mating halves of the BRC’s Load Inputs terminal blocks labeled 1,<br />
3, 5, 7 and 2, 4, 6, 8 disconnected. This is to prevent the batteries from discharging when the system is<br />
not powered.<br />
When the DC UPS module is to be placed into service, open the battery compartment’s top rear access<br />
panel. Locate the disconnected connectors labeled "Load Inputs 1, 3, 5, 7" and "Load Inputs 2, 4, 6, 8".<br />
Plug these connectors into the back of the BRC, as shown in Figure 28. Repeat this procedure for<br />
each DC UPS module in the system.<br />
NOTE<br />
If the system is powered down for an extended period of time, remove the Battery Fuses and<br />
disconnect the BRC’s "Load Inputs Terminal Block 1, 3, 5, 7" and "Load Inputs Terminal<br />
Block 2, 4, 6, 8" so that the batteries do not discharge.<br />
Figure 28 Field Battery Monitoring Lead Connections to the SiteWeb BRC Unit<br />
Connector labeled 2, 4, 6, 8.<br />
Connector labeled 1, 3, 5, 7.<br />
Rear View BRC<br />
Field Battery Monitoring Lead Connections<br />
The DC UPS module is factory shipped with the mating halves<br />
of the BRC’s Load Inputs terminal blocks 1, 3, 5, 7 and 2, 4, 6, 8<br />
disconnected. When ready to place the module into service, locate<br />
and plug the mating halves of the BRC’s Load Inputs terminal blocks<br />
1, 3, 5, 7 and 2, 4, 6, 8 here.<br />
44
6.3 Initially Starting and Verifying DC UPS System Operation<br />
!<br />
WARNING<br />
During this procedure the output terminals will become live.<br />
6.3.1 Initially Starting the DC UPS System and Verifying System Operation<br />
Start-Up Instructions<br />
If any load equipment is connected to the DC UPS module output terminals, please check<br />
with the load user and ascertain whether it is safe to apply power to the load. If the load is not<br />
ready to receive power, then ensure that it is safely isolated from the DC UPS module output<br />
terminals.<br />
Procedure<br />
1. Open the front door on each DC UPS module.<br />
2. Apply AC input power to each DC UPS module by closing the external AC disconnect(s) or<br />
protective device(s) that supplies power to each DC UPS module. If the dual AC input feed option<br />
is furnished, there will be two (2) devices per DC UPS module.<br />
3. On each DC UPS module, close the main AC input circuit breaker. If the dual AC input feed<br />
option is furnished, a safety latch is provided on the circuit breakers to prevent both circuit<br />
breakers from being placed in the ON position. Slide the latch over to allow the desired circuit<br />
breaker to be turned ON.<br />
4. On each DC UPS module, close all PCU AC input circuit breakers. Note that each circuit breaker<br />
feeds two (2) PCUs.<br />
5. In the Primary DC UPS module, once the ACU+ Controller is powered on, a starting... screen<br />
appears followed by a language screen.<br />
English<br />
Press “” or “” to select the desired language. Press ENT to confirm the selection. If no key is<br />
pressed within 30 seconds, the ACU+ Controller automatically selects the displayed language.<br />
Refer to the DC UPS User <strong>Manual</strong> (Section 6047) for ACU+ Controller local menu operating<br />
instructions.<br />
Once initialized, the ACU+ Main Screen displays.<br />
Float<br />
09:20:20<br />
53.4V 404A<br />
Auto<br />
Main Screen<br />
N oAlarm<br />
E N T<br />
E S C<br />
Main Menu<br />
M A IN M E N U<br />
S tatus<br />
Settings<br />
Energy Saving<br />
<strong>Manual</strong><br />
CustomizeMenu<br />
Press or<br />
to browse through<br />
MAIN MENU.<br />
Press ENT to<br />
enter Sub-Menu.<br />
6. With an external meter, measure battery voltage.<br />
7. Adjust the system’s float voltage to within approximately 0.5V of battery voltage.<br />
8. In each DC UPS module, install the three battery disconnect fuses.<br />
9. Adjust the system’s float voltage to 54.5Vdc.<br />
10. In each DC UPS module, place each distribution circuit breaker to the ON position or install all<br />
distribution fuses.<br />
11. In the Primary DC UPS module, verify that there are no alarms present on the ACU+ local<br />
display.<br />
45
Specifications and Technical Data<br />
7.0 SPECIFICATIONS AND TECHNICAL DATA<br />
7.1 Agency Approvals<br />
The <strong>NetSure</strong> <strong>ITM</strong> DC UPS system has the following agency approval ratings:<br />
• EN 60 950-1:2006<br />
• UL 60 950-1<br />
• UL 1801 (This unit is UL Listed ["c UL"] as a DC <strong>Power</strong> Distribution Center. This unit meets the<br />
requirements of CSA 22.2, No. 225 and is tested and Certified by UL ["c UL"] as a Custom Built<br />
<strong>Power</strong> Distribution Center.)<br />
7.2 Environmental<br />
The <strong>NetSure</strong> <strong>ITM</strong> DC UPS system is designed to operate under the following environmental conditions<br />
without damage or degradation in electrical operating characteristics:<br />
Table 7<br />
DC UPS System Environmental Characteristics<br />
System Operating Temperature<br />
System Storage Temperature (optimal)<br />
Relative Humidity<br />
Operating Elevation<br />
Audible Noise < 60dB<br />
Heat Rejection at Full Load<br />
EMI<br />
7.3 Mechanical Characteristics<br />
Table 8<br />
Form Factor<br />
Unit Dimensions<br />
Unit Weight<br />
Airflow<br />
Cable Entry<br />
Color<br />
+23°F to +95°F (-5°C to +35°C)<br />
Recommended Operation with Battery (Air Inlet):<br />
+68°F to +77°F (+20°C to +25°C)<br />
-4°F to +77°F (-20°C to +25°C)<br />
0 to 95%, non-condensing<br />
6562 ft (2000m) at full power<br />
18,096 BTU/hr. (5.3kW) per module<br />
FCC Class A<br />
DC UPS System Mechanical Characteristics (per module)<br />
Protection Grade<br />
(with open/closed front doors)<br />
Rack<br />
Inches: 83H x 24W x 41D<br />
(Millimeters: 2100H x 600W x 1040D)<br />
3240 lb (1470 kg)<br />
560 CFM (950 m3/h)<br />
Bottom or Top<br />
Black (Z-0350)<br />
IP 20<br />
46
Specifications and Technical Data<br />
System<br />
Size<br />
Table 9<br />
Shipping Dimensions and Weights<br />
70KW 140KW 210KW 280KW<br />
Module<br />
w/<br />
Batteries<br />
(1) Module:<br />
Inches:<br />
92H x 29W x 47D<br />
Millimeters:<br />
2337H x 737W x 1194D<br />
Weight:<br />
3307lb (1500kg)<br />
(2) Modules,<br />
per module:<br />
Inches:<br />
92H x 29W x 47D<br />
Millimeters:<br />
2337H x 737W x 1194D<br />
Weight:<br />
3307lb (1500kg)<br />
(3) Modules,<br />
per module:<br />
Inches:<br />
92H x 29W x 47D<br />
Millimeters:<br />
2337H x 737W x 1194D<br />
Weight:<br />
3307lb (1500kg)<br />
(4) Modules,<br />
per module:<br />
Inches:<br />
92H x 29W x 47D<br />
Millimeters:<br />
2337H x 737W x 1194D<br />
Weight:<br />
3307lb (1500kg)<br />
PCUs<br />
12 PCUs:<br />
Pallet (12 PCUs):<br />
Inches:<br />
22H x 44W x 48D<br />
Millimeters:<br />
559H x 1118W x 1219D<br />
Weight:<br />
258lb (117kg)<br />
24 PCUs:<br />
Pallet (24 PCUs):<br />
Inches:<br />
38H x 44W x 48D<br />
Millimeters:<br />
965H x 1118W x 1219D<br />
Weight:<br />
486lb (220kg)<br />
36 PCUs:<br />
1st Pallet (30 PCUs):<br />
Inches:<br />
46H x 44W x 48D<br />
Millimeters:<br />
1168H x 1118W x 1219D<br />
Weight:<br />
600lb (272kg)<br />
48 PCUs:<br />
1st Pallet (30 PCUs):<br />
Inches:<br />
46H x 44W x 48D<br />
Millimeters:<br />
1168H x 1118W x 1219D<br />
Weight:<br />
600lb (272kg)<br />
2nd Pallet (6 PCUs):<br />
Inches:<br />
14H x 44W x 48D<br />
Millimeters:<br />
356H x 1118W x 1219D<br />
Weight:<br />
144lb (65kg)<br />
2nd Pallet (18 PCUs):<br />
Inches:<br />
30H x 44W x 48D<br />
Millimeters:<br />
762H x 1118W x 1219D<br />
Weight:<br />
372lb (169kg)<br />
7.4 Monitoring Capability<br />
Standard: Web-based monitoring, alarm reporting via SNMP, and integration with SiteScan via<br />
SiteLink-E module.<br />
Optional: Energy Master Remote Supervision.<br />
47
Specifications and Technical Data<br />
7.5 Electrical Characteristics<br />
7.5.1 Termination Type, Recommended Wire Size, Recommended Lugs<br />
AC Input<br />
Table 10<br />
AC Input and AC Input Grounding (per DC UPS module)<br />
AC Input<br />
Input<br />
Voltage<br />
Maximum<br />
Input<br />
Current<br />
Terminal<br />
Type<br />
Recm.<br />
Wire<br />
Size 1<br />
Conduit Size<br />
480Vac<br />
400Vac<br />
380Vac<br />
92A<br />
110A<br />
116A<br />
Screw<br />
Clamp<br />
2/0 AWG 2"<br />
AC Input Grounding<br />
Input<br />
Voltage<br />
Bolt<br />
Size<br />
Recm.<br />
Wire<br />
Size 1<br />
Conduit<br />
Size<br />
Recommended Lug<br />
(Thomas & Betts P/N)<br />
Compression<br />
1-Hole; 3/8" Bolt<br />
480Vac<br />
400Vac<br />
5/16" (M8) 1/0 AWG 2" 54109<br />
1 Wire sizes based on recommendations of the American National<br />
Standards Institute (ANSI) approved National Fire Protection Association's<br />
(NFPA) National Electrical Code (NEC). Table 310-16 for<br />
copper wire at 90°C conductor temperature operating in ambient of<br />
35°C was used. For other operating ambient temperatures, refer to<br />
the NEC. For operation in countries where the NEC is not recognized,<br />
follow applicable codes.<br />
Equipment grounding conductors must be provided with the AC<br />
input conductors supplied to the module. Frame ground terminals<br />
must be connected to earth ground, not power system neutral.<br />
Equipment grounding conductor size based on recommendations of<br />
the NEC Table 250-122 for copper wire. When aluminum or copper<br />
clad aluminum grounding conductor is used, refer to Table 250 122<br />
for increased conductor size. For operation in countries where the<br />
NEC is not recognized, follow applicable codes.<br />
Cabinet Frame Grounding<br />
Table 11<br />
Bolt<br />
Size<br />
Cabinet Frame Grounding (per DC UPS module)<br />
Recm.<br />
Wire<br />
Size<br />
Recommended Lug<br />
(Thomas & Betts P/N)<br />
Compression<br />
1-Hole; 3/8" Bolt<br />
3/8" (M10) 6 AWG 54136<br />
48
DC Distribution<br />
Table 12<br />
OCP<br />
Device<br />
Rating<br />
Specifications and Technical Data<br />
DC Distribution (Distribution Circuit Breaker Option - per circuit breaker position)<br />
Maximum<br />
Output<br />
Current<br />
@ 54V<br />
Terminal<br />
Bolt<br />
Size<br />
Recm.<br />
Wire Size 1<br />
Lug Requirement<br />
Recommended Lug<br />
(Thomas & Betts P/N)<br />
100A<br />
150A<br />
175A<br />
200A<br />
80A<br />
120A<br />
140A<br />
160A<br />
Load<br />
1/0 AWG<br />
2-Hole, 1" Centers 54209<br />
Return 1-Hole 54109<br />
Load<br />
1/0 AWG<br />
2-Hole, 1" Centers 54209<br />
Return<br />
3/8" (M10)<br />
1-Hole 54109<br />
Load<br />
2/0 AWG<br />
2-Hole, 1" Centers 54210<br />
Return 1-Hole 54110<br />
Load<br />
3/0 AWG<br />
2-Hole, 1" Centers 54211<br />
Return 1-Hole 54111<br />
1 Wire sizes based on recommendations of the American National Standards Institute (ANSI)<br />
approved National Fire Protection Association's (NFPA) National Electrical Code (NEC). Table<br />
310-16 for copper wire at 75°C conductor temperature operating in ambient of 35°C was used. For<br />
other operating ambient temperatures, refer to the NEC. For operation in countries where the NEC<br />
is not recognized, follow applicable codes. Sizes assume one layer of cables in open cable tray. Alternate<br />
sizing may be required for other installation configurations. Refer to the NEC or contact<br />
Emerson Services (contact information provided at the end of this document).<br />
Table 13<br />
OCP<br />
Device<br />
Rating<br />
DC Distribution (Distribution Fuse Option - per fuse position)<br />
Maximum<br />
Output<br />
Current<br />
@ 54V<br />
Terminal<br />
Bolt<br />
Size<br />
Recm.<br />
Wire Size 1<br />
Lug Requirement<br />
Recommended Lug<br />
(Thomas & Betts P/N)<br />
200 160<br />
500 400<br />
Load<br />
Return<br />
Load<br />
Return<br />
1/2" (M12)<br />
3/0 AWG<br />
54265<br />
2-Hole, 1.75" Centers<br />
(2) 250 kcmil (2) 54275<br />
1 Wire sizes based on recommendations of the American National Standards Institute (ANSI)<br />
approved National Fire Protection Association's (NFPA) National Electrical Code (NEC). Table<br />
310-16 for copper wire at 75°C conductor temperature operating in ambient of 35°C was used. For<br />
other operating ambient temperatures, refer to the NEC. For operation in countries where the NEC<br />
is not recognized, follow applicable codes. Sizes assume one layer of cables in open cable tray. Alternate<br />
sizing may be required for other installation configurations. Refer to the NEC or contact<br />
Emerson Services (contact information provided at the end of this document).<br />
Battery<br />
The battery cables are factory provided and sized accordingly.<br />
Alarm/Control<br />
Table 14 Alarm/Control<br />
Screw Size Recm. Wire Size<br />
M2<br />
24-16 AWG<br />
49
Specifications and Technical Data<br />
7.5.2 <strong>Power</strong> Ratings<br />
Table 15<br />
<strong>Power</strong> Ratings<br />
<strong>Power</strong><br />
Rating<br />
Primary<br />
Module 1<br />
Expansion<br />
Module 2<br />
Expansion<br />
Module 3<br />
Expansion<br />
Module 4<br />
Full 70 kW 70 kW 70 kW 70 kW<br />
N + 1 64 kW 70 kW 70 kW 70 kW<br />
7.5.3 AC Input Specifications<br />
Table 16<br />
AC Input Specifications<br />
Phase 3<br />
<strong>Power</strong> Factor<br />
Frequency<br />
Input Voltage – Nominal<br />
Input Voltage – Range<br />
Internal AC Input Breaker Size<br />
Internal AC Input Breaker<br />
AIC Rating<br />
Max Input Current / Module<br />
Inrush Current<br />
Total Harmonic Distortion<br />
0.99 at full load, 0.98 at 50% load<br />
45-65 Hz<br />
400 / 480V, 3 wire + ground<br />
304-530 VAC; shall withstand up to<br />
600 VAC input without damage.<br />
150A<br />
65,000A<br />
Nominal 480V: 115A @ 384V; 92A @ 480V<br />
Nominal 400V: 138A @ 320V; 110A @ 400V<br />
Nominal 380V: 145A @ 304V; 116A @ 380V<br />
Inrush current does not exceed 150% of the<br />
rated input steady state peak value.<br />
7.5.5 Battery Specifications<br />
Table 18<br />
Type<br />
Arrangement<br />
Backup Time<br />
Battery Specifications<br />
VRLA, Emerson Excellence EB4, 200 Ah<br />
3 strings; eight 6V blocks per string<br />
See backup time table at various loads.<br />
Design Life 15 years @ 20°C; 10 years @ 25°C<br />
Recharge Time (to 97% of<br />
nominal capacity)<br />
MECHANICAL<br />
Dimensions<br />
Depth:<br />
Width:<br />
Height:<br />
Weight:<br />
CAPACITY<br />
Less than 3 hours for > 35% load;<br />
Less than 4 hours > 15% load.<br />
377 mm, including connectors and covers<br />
135 mm, including ventilation spacing<br />
250 mm<br />
37 kg<br />
Specifications and Technical Data<br />
Constant <strong>Power</strong> Discharge @ 20°C (w/cell):<br />
End Voltage<br />
Operating Time To End Voltage (minutes)<br />
Per Cell 600 480 360 300 240 180 120 60<br />
Constant Current Discharge @ 20°C (A):<br />
End Voltage<br />
Operating Time To End Voltage (minutes)<br />
Per Cell 600 480 360 300 240 180 120 60<br />
OTHER TECHNICAL FEATURES<br />
• Valve-regulated lead-acid battery with AGM technology.<br />
• Validation in accordance with IEC 896-2.<br />
Battery Back-up Time (minutes)<br />
Load<br />
Single module<br />
Two modules<br />
Three modules<br />
Four modules<br />
70kW<br />
140kW<br />
210kW<br />
280kW<br />
10kW 130 300 480 630<br />
20kW 55 130 210 300<br />
30kW 28 90 130 180<br />
40kW 17 55 90 130<br />
50kW 12 41 70 100<br />
64kW 7 24 50 75<br />
70kW 3 21 43 69<br />
80kW 17 34 55<br />
90kW 14 27 47<br />
100kW 12 22 40<br />
110kW 10 19 34<br />
120kW 8 17 28<br />
134kW 6 16 25<br />
140kW 3 14 22<br />
150kW 12 19<br />
160kW 10 17<br />
170kW 9 15<br />
180kW 8 14<br />
190kW 7 13<br />
204kW 4 11<br />
210kW 2 10<br />
220kW 9<br />
230kW 9<br />
240kW 8<br />
250kW 7<br />
260kW 6<br />
274kW 3<br />
280kW 1<br />
51
Revision Record<br />
8.0 REVISION RECORD<br />
Issue<br />
Change<br />
Number<br />
(ECO)<br />
Description of Change<br />
08 -- Pre-Release<br />
52
NetPerform Optimization Services<br />
At Emerson Network <strong>Power</strong>, we understand the importance of reliable equipment – it’s critical to both<br />
your business and your bottom line. That is why we offer a wide array of services to meet all of your<br />
network infrastructure needs.<br />
Technical Support<br />
Email DCpower.TAC@Emerson.com<br />
OSP.TAC@Emerson.com<br />
Phone 1.800.800.5260<br />
Answers technical product and system<br />
questions; determines status of warranties and<br />
contractual agreements for repair.<br />
Services - Design, Deployment & Optimization<br />
Email ES.Services@Emerson.com Provides quotes and bid responses, order<br />
Phone 1.800.800.1280, option 7<br />
placement and scheduling for design, and<br />
deployment and optimization services.<br />
FreedomCare Secure.EmersonNetwork<strong>Power</strong>.com Download service & maintenance reports<br />
online.<br />
Spare Parts<br />
Email DCpower.Spares@Emerson.com<br />
OSP.Spares@Emerson.com<br />
Phone 1.800.800.1280, option 5<br />
Pricing and PO processing of spare parts,<br />
including but not limited to breakers, cables,<br />
fuses, rectifier fans, misc. breaker and fuse<br />
panels, enclosure fans, doors & switches, etc.<br />
DC <strong>Power</strong> Depot Repair<br />
Email DCpower.Repair@Emerson.com Creates and processes RMAs, determines lead<br />
Phone 1.800.800.1280, option 6<br />
times and pricing, provides repair shipping<br />
information and status.<br />
DC <strong>Power</strong> Product Training<br />
Email DCpower.Training@Emerson.com Requests for quotes, order placement and<br />
scheduling.<br />
Phone 1.800.800.1280, option 8<br />
For More Information<br />
To learn more about service offerings from Emerson Network <strong>Power</strong>, please contact your sales<br />
representative, call 1-800-800-1280 option 7, email ES.Services@Emerson.com or visit<br />
www.EmersonNetwork<strong>Power</strong>.com/EnergySystems.