Max Flo II™ Pump Series - Owner's Manual - Pool Center
Max Flo II™ Pump Series - Owner's Manual - Pool Center
Max Flo II™ Pump Series - Owner's Manual - Pool Center
Create successful ePaper yourself
Turn your PDF publications into a flip-book with our unique Google optimized e-Paper software.
<strong>Max</strong>-<strong>Flo</strong> II <strong>Series</strong> __________________ _____________________________ Page 9 of 16<br />
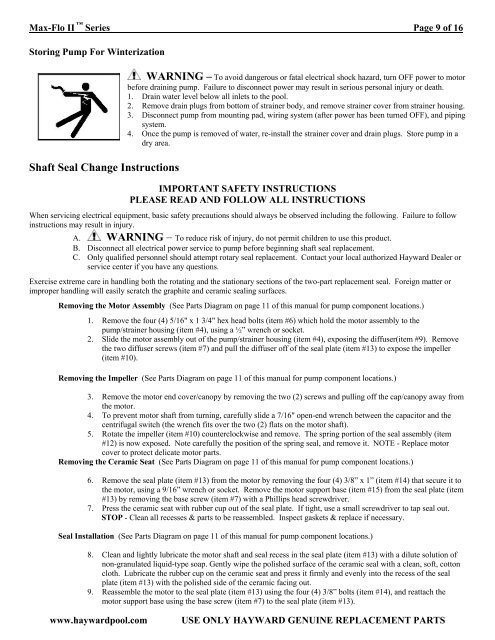
Storing <strong>Pump</strong> For Winterization<br />
Shaft Seal Change Instructions<br />
WARNING – To avoid dangerous or fatal electrical shock hazard, turn OFF power to motor<br />
before draining pump. Failure to disconnect power may result in serious personal injury or death.<br />
1. Drain water level below all inlets to the pool.<br />
2. Remove drain plugs from bottom of strainer body, and remove strainer cover from strainer housing.<br />
3. Disconnect pump from mounting pad, wiring system (after power has been turned OFF), and piping<br />
system.<br />
4. Once the pump is removed of water, re-install the strainer cover and drain plugs. Store pump in a<br />
dry area.<br />
IMPORTANT SAFETY INSTRUCTIONS<br />
PLEASE READ AND FOLLOW ALL INSTRUCTIONS<br />
When servicing electrical equipment, basic safety precautions should always be observed including the following. Failure to follow<br />
instructions may result in injury.<br />
A. WARNING – To reduce risk of injury, do not permit children to use this product.<br />
B. Disconnect all electrical power service to pump before beginning shaft seal replacement.<br />
C. Only qualified personnel should attempt rotary seal replacement. Contact your local authorized Hayward Dealer or<br />
service center if you have any questions.<br />
Exercise extreme care in handling both the rotating and the stationary sections of the two-part replacement seal. Foreign matter or<br />
improper handling will easily scratch the graphite and ceramic sealing surfaces.<br />
Removing the Motor Assembly (See Parts Diagram on page 11 of this manual for pump component locations.)<br />
1. Remove the four (4) 5/16" x 1 3/4" hex head bolts (item #6) which hold the motor assembly to the<br />
pump/strainer housing (item #4), using a ½” wrench or socket.<br />
2. Slide the motor assembly out of the pump/strainer housing (item #4), exposing the diffuser(item #9). Remove<br />
the two diffuser screws (item #7) and pull the diffuser off of the seal plate (item #13) to expose the impeller<br />
(item #10).<br />
Removing the Impeller (See Parts Diagram on page 11 of this manual for pump component locations.)<br />
3. Remove the motor end cover/canopy by removing the two (2) screws and pulling off the cap/canopy away from<br />
the motor.<br />
4. To prevent motor shaft from turning, carefully slide a 7/16" open-end wrench between the capacitor and the<br />
centrifugal switch (the wrench fits over the two (2) flats on the motor shaft).<br />
5. Rotate the impeller (item #10) counterclockwise and remove. The spring portion of the seal assembly (item<br />
#12) is now exposed. Note carefully the position of the spring seal, and remove it. NOTE - Replace motor<br />
cover to protect delicate motor parts.<br />
Removing the Ceramic Seat (See Parts Diagram on page 11 of this manual for pump component locations.)<br />
6. Remove the seal plate (item #13) from the motor by removing the four (4) 3/8” x 1” (item #14) that secure it to<br />
the motor, using a 9/16” wrench or socket. Remove the motor support base (item #15) from the seal plate (item<br />
#13) by removing the base screw (item #7) with a Phillips head screwdriver.<br />
7. Press the ceramic seat with rubber cup out of the seal plate. If tight, use a small screwdriver to tap seal out.<br />
STOP - Clean all recesses & parts to be reassembled. Inspect gaskets & replace if necessary.<br />
Seal Installation (See Parts Diagram on page 11 of this manual for pump component locations.)<br />
8. Clean and lightly lubricate the motor shaft and seal recess in the seal plate (item #13) with a dilute solution of<br />
non-granulated liquid-type soap. Gently wipe the polished surface of the ceramic seal with a clean, soft, cotton<br />
cloth. Lubricate the rubber cup on the ceramic seat and press it firmly and evenly into the recess of the seal<br />
plate (item #13) with the polished side of the ceramic facing out.<br />
9. Reassemble the motor to the seal plate (item #13) using the four (4) 3/8” bolts (item #14), and reattach the<br />
motor support base using the base screw (item #7) to the seal plate (item #13).<br />
www.haywardpool.com<br />
USE ONLY HAYWARD GENUINE REPLACEMENT PARTS


