om, husqvarna, mz6128, 966613103, 2012-09, zero turn: consumer
om, husqvarna, mz6128, 966613103, 2012-09, zero turn: consumer
om, husqvarna, mz6128, 966613103, 2012-09, zero turn: consumer

You also want an ePaper? Increase the reach of your titles
YUMPU automatically turns print PDFs into web optimized ePapers that Google loves.
MAINTENANCE<br />
Cutting Blades<br />
To attain the best mowing effect, it is important that<br />
blades are well sharpened and not damaged.<br />
Replace blades that have been bent or cracked when<br />
hitting obstacles.<br />
Let the service workshop decide whether a blade<br />
with large nicks can be repaired/ground or must be<br />
replaced. Balance the blades after sharpening.<br />
Check the blade mounts.<br />
Blade Replacement<br />
IMPORTANT INFORMATION<br />
The sharpening of blades should be carried<br />
out by an authorized service workshop.<br />
WARNING!<br />
Blades are sharp. Protect your hands<br />
with gloves and/or wrap blades with<br />
a heavy cloth when handling.<br />
3<br />
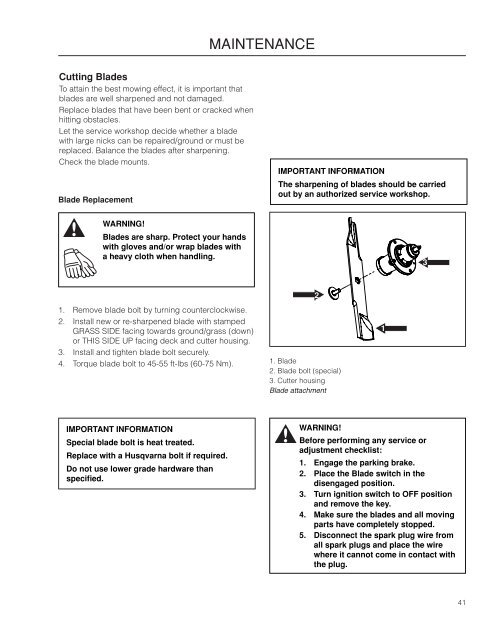
1. Remove blade bolt by <strong>turn</strong>ing counterclockwise.<br />
2. Install new or re-sharpened blade with stamped<br />
GRASS SIDE facing towards ground/grass (down)<br />
or THIS SIDE UP facing deck and cutter housing.<br />
3. Install and tighten blade bolt securely.<br />
4. Torque blade bolt to 45-55 ft-lbs (60-75 Nm). 1. Blade<br />
2. Blade bolt (special)<br />
3. Cutter housing<br />
Blade attachment<br />
2<br />
1<br />
IMPORTANT INFORMATION<br />
Special blade bolt is heat treated.<br />
Replace with a Husqvarna bolt if required.<br />
Do not use lower grade hardware than<br />
specified.<br />
WARNING!<br />
Before performing any service or<br />
adjustment checklist:<br />
1. Engage the parking brake.<br />
2. Place the Blade switch in the<br />
disengaged position.<br />
3. Turn ignition switch to OFF position<br />
and remove the key.<br />
4. Make sure the blades and all moving<br />
parts have c<strong>om</strong>pletely stopped.<br />
5. Disconnect the spark plug wire fr<strong>om</strong><br />
all spark plugs and place the wire<br />
where it cannot c<strong>om</strong>e in contact with<br />
the plug.<br />
41