Sinar Exposure 6.2 Read Me - image2output - Support
Sinar Exposure 6.2 Read Me - image2output - Support
Sinar Exposure 6.2 Read Me - image2output - Support
You also want an ePaper? Increase the reach of your titles
YUMPU automatically turns print PDFs into web optimized ePapers that Google loves.
<strong>image2output</strong> Limited: Unit 19, io Centre, Hearle Way, Hatfield Business Park, Hatfield, Herts, AL10 9EW<br />
7. Downloading Images from the CF-Card<br />
(<strong>Sinar</strong>back eSprit 65 LV and <strong>Sinar</strong> Hy6 65)<br />
If a CF-card with the data of a <strong>Sinar</strong>back eSprit 65 LV<br />
or <strong>Sinar</strong> Hy6 65 is inserted in a CF-card reader, an entry<br />
with the serial number of the respective <strong>Sinar</strong>back eSprit<br />
65 LV or <strong>Sinar</strong> Hy6 65 appears in the browser.<br />
To read out the content of the CF card, please doubleclick<br />
the serial number in the browser. Area 2 (Contact<br />
sheet) now displays the content of the CF card. In order<br />
to copy the images to the hard drive, simply drag-anddrop<br />
the images to the desired folder of the browser.<br />
After the images are copied to the hard disk, they can be<br />
viewed by selecting the respective folder with a doubleclick.<br />
Area 2 (Contact sheet) is now showing the<br />
content of the selected folder instead of the internal<br />
memory.<br />
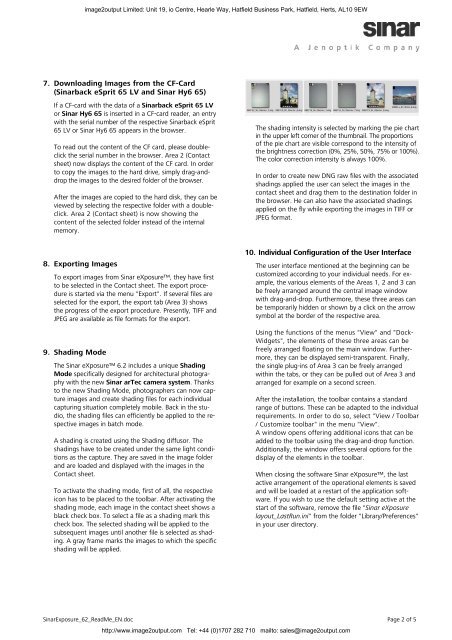
The shading intensity is selected by marking the pie chart<br />
in the upper left corner of the thumbnail. The proportions<br />
of the pie chart are visible correspond to the intensity of<br />
the brightness correction (0%, 25%, 50%, 75% or 100%).<br />
The color correction intensity is always 100%.<br />
In order to create new DNG raw files with the associated<br />
shadings applied the user can select the images in the<br />
contact sheet and drag them to the destination folder in<br />
the browser. He can also have the associated shadings<br />
applied on the fly while exporting the images in TIFF or<br />
JPEG format.<br />
8. Exporting Images<br />
To export images from <strong>Sinar</strong> eXposure, they have first<br />
to be selected in the Contact sheet. The export procedure<br />
is started via the menu "Export". If several files are<br />
selected for the export, the export tab (Area 3) shows<br />
the progress of the export procedure. Presently, TIFF and<br />
JPEG are available as file formats for the export.<br />
9. Shading Mode<br />
The <strong>Sinar</strong> eXposure <strong>6.2</strong> includes a unique Shading<br />
Mode specifically designed for architectural photography<br />
with the new <strong>Sinar</strong> arTec camera system. Thanks<br />
to the new Shading Mode, photographers can now capture<br />
images and create shading files for each individual<br />
capturing situation completely mobile. Back in the studio,<br />
the shading files can efficiently be applied to the respective<br />
images in batch mode.<br />
A shading is created using the Shading diffusor. The<br />
shadings have to be created under the same light conditions<br />
as the capture. They are saved in the image folder<br />
and are loaded and displayed with the images in the<br />
Contact sheet.<br />
To activate the shading mode, first of all, the respective<br />
icon has to be placed to the toolbar. After activating the<br />
shading mode, each image in the contact sheet shows a<br />
black check box. To select a file as a shading mark this<br />
check box. The selected shading will be applied to the<br />
subsequent images until another file is selected as shading.<br />
A gray frame marks the images to which the specific<br />
shading will be applied.<br />
10. Individual Configuration of the User Interface<br />
The user interface mentioned at the beginning can be<br />
customized according to your individual needs. For example,<br />
the various elements of the Areas 1, 2 and 3 can<br />
be freely arranged around the central image window<br />
with drag-and-drop. Furthermore, these three areas can<br />
be temporarily hidden or shown by a click on the arrow<br />
symbol at the border of the respective area.<br />
Using the functions of the menus "View" and "Dock-<br />
Widgets", the elements of these three areas can be<br />
freely arranged floating on the main window. Furthermore,<br />
they can be displayed semi-transparent. Finally,<br />
the single plug-ins of Area 3 can be freely arranged<br />
within the tabs, or they can be pulled out of Area 3 and<br />
arranged for example on a second screen.<br />
After the installation, the toolbar contains a standard<br />
range of buttons. These can be adapted to the individual<br />
requirements. In order to do so, select "View / Toolbar<br />
/ Customize toolbar" in the menu "View".<br />
A window opens offering additional icons that can be<br />
added to the toolbar using the drag-and-drop function.<br />
Additionally, the window offers several options for the<br />
display of the elements in the toolbar.<br />
When closing the software <strong>Sinar</strong> eXposure, the last<br />
active arrangement of the operational elements is saved<br />
and will be loaded at a restart of the application software.<br />
If you wish to use the default setting active at the<br />
start of the software, remove the file "<strong>Sinar</strong> eXposure<br />
layout_LastRun.ini" from the folder "Library/Preferences"<br />
in your user directory.<br />
<strong>Sinar</strong><strong>Exposure</strong>_62_<strong>Read</strong><strong>Me</strong>_EN.doc Page 2 of 5<br />
http://www.<strong>image2output</strong>.com Tel: +44 (0)1707 282 710 mailto: sales@<strong>image2output</strong>.com


