Certified Proof Manual - image2output - Support
Certified Proof Manual - image2output - Support
Certified Proof Manual - image2output - Support

You also want an ePaper? Increase the reach of your titles
YUMPU automatically turns print PDFs into web optimized ePapers that Google loves.
http://www.<strong>image2output</strong>.com<br />
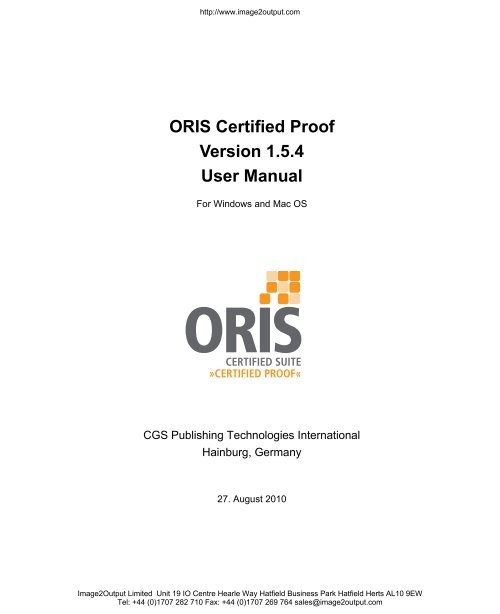
ORIS <strong>Certified</strong> <strong>Proof</strong><br />
Version 1.5.4<br />
User <strong>Manual</strong><br />
For Windows and Mac OS<br />
CGS Publishing Technologies International<br />
Hainburg, Germany<br />
27. August 2010<br />
Image2Output Limited Unit 19 IO Centre Hearle Way Hatfield Business Park Hatfield Herts AL10 9EW<br />
Tel: +44 (0)1707 282 710 Fax: +44 (0)1707 269 764 sales@<strong>image2output</strong>.com
http://www.<strong>image2output</strong>.com<br />
Image2Output Limited Unit 19 IO Centre Hearle Way Hatfield Business Park Hatfield Herts AL10 9EW<br />
Tel: +44 (0)1707 282 710 Fax: +44 (0)1707 269 764 sales@<strong>image2output</strong>.com
http://www.<strong>image2output</strong>.com<br />
Copyright<br />
© 2010 CGS Publishing Technologies International. All rights reserved.<br />
This document or any part of it may not be reproduced, published, translated or transmitted, in<br />
any form or by any means (electronic, mechanical, photocopying, recording or otherwise) without<br />
the prior consent of CGS Publishing Technologies International.<br />
Trademarks<br />
ORIS <strong>Certified</strong> <strong>Proof</strong>, ORIS <strong>Certified</strong> Press, ORIS <strong>Certified</strong> Monitor and ORIS Color Tuner⁄⁄Web<br />
are registered trademark of CGS Publishing Technologies International.<br />
Microsoft and Windows are trademarks of the Microsoft Corporation. Mac and the Mac logo are<br />
trademarks of Apple Computer, Inc., registered in the U.S. and other countries. PostScript is a<br />
trademark of Adobe Systems, Inc. HKS is a registered trademark of HKS-Warenzeichenverband<br />
e.V.<br />
SWOP is a registered trademark of SWOP Incorporated. GRACoL is a registered trademark of<br />
IDEAlliance.<br />
PANTONE® Colors displayed in the software application or in the user documentation may not<br />
match PANTONE-identified standards. Consult current PANTONE Color Publications for accurate<br />
color. PANTONE®, PANTONE® Goe and other Pantone, Inc. trademarks are the property<br />
of Pantone, Inc. © Pantone, Inc., 2003.<br />
Pantone, Inc. is the copyright owner of color data and/or software which are licensed to CGS<br />
Publishing Technologies International to distribute for use only in combination with ORIS <strong>Certified</strong><br />
<strong>Proof</strong>. PANTONE Color Data and/or Software shall not be copied onto another disk or into<br />
memory unless as part of the execution of ORIS <strong>Certified</strong> <strong>Proof</strong>.<br />
All other trademarks referenced in this manual are the property of the respective owners.<br />
Disclaimer of Warranty<br />
To the maximum extent permitted by applicable law, in no event shall CGS Publishing Technologies<br />
International or its suppliers be liable for any damages whatsoever (including without limitation,<br />
special, incidental, consequential, or indirect damages for personal injury, loss of business<br />
profits, business interruption, loss of business information, or any other pecuniary loss) in<br />
connection with or arising from the use or inability to use this product, the accompanying manuals,<br />
or any related product. In any case, the entire liability of CGS Publishing Technologies<br />
International and its suppliers under any provision of this agreement shall be limited to the<br />
amount actually paid for the software.<br />
The information contained in this document is subject to change without notice.<br />
Image2Output Limited Unit 19 IO Centre Hearle Way Hatfield Business Park Hatfield Herts AL10 9EW<br />
Tel: +44 (0)1707 282 710 Fax: +44 (0)1707 269 764 sales@<strong>image2output</strong>.com
http://www.<strong>image2output</strong>.com<br />
Contacting CGS<br />
www.cgs-oris.com<br />
North and South America, contact:<br />
Europe, Asia, Africa and Australia, contact:<br />
CGS Publishing Technologies<br />
International LLC<br />
Trevor Haworth, President<br />
100 North Sixth Street - Suite 308B<br />
Minneapolis, MN 55403 USA<br />
Tel.: +1 (612) 870 0061<br />
Fax: +1 (612) 870 0063<br />
info@cgsusa.com<br />
sales@cgsusa.com<br />
support@cgsusa.com<br />
CGS Publishing Technologies<br />
International GmbH<br />
Trevor Haworth, President<br />
Kettelerstr. 24<br />
D-63512 Hainburg, Germany<br />
Tel.: +49 6182 9626 0<br />
Fax: +49 6182 9626 99<br />
info@cgs-oris.com<br />
sales@cgs-oris.com<br />
support@cgs-oris.com<br />
Regional Office:<br />
CGS Canada<br />
445 Apple Creek Boulevard, Suite 120<br />
Markham, Ontario L3R 9X7 Canada<br />
Tel.: +1 (905) 475 3632<br />
Toll Free Tel.: +1 (866) CGS-ORIS<br />
Fax: +1 (905) 475 0114<br />
Toll Free Fax: +1 (866) CGS 7755<br />
info@cgscanada.com<br />
sales@cgscanada.com<br />
Regional Office:<br />
CGS Latinoamérica<br />
Alborada 124-PB3<br />
México DF 14010<br />
México<br />
Tel.: +52 (55) 5666-1950<br />
Fax.: +52 (55) 5666-2328<br />
informacion@cgsusa.com<br />
Regional Office:<br />
CGS France<br />
13-15 Rue Auguste Laurent<br />
75011 Paris, France<br />
Tel.: +33 1 4493 9751<br />
Mobile: +33 629 442 047<br />
Fax +33 1 4493 8768<br />
serge@cgs-oris.com<br />
Regional Office:<br />
CGS Japan<br />
Kudan Tsuruya Bld. 5th floor<br />
Kudan Minami 2-5-10<br />
Tokyo 102-0074, Japan<br />
Tel.: +81-3-3288-0311<br />
Fax: +81-3-3288-0312<br />
moto.nagai@cgsjapan.com<br />
Image2Output Limited Unit 19 IO Centre Hearle Way Hatfield Business Park Hatfield Herts AL10 9EW<br />
Tel: +44 (0)1707 282 710 Fax: +44 (0)1707 269 764 sales@<strong>image2output</strong>.com
http://www.<strong>image2output</strong>.com<br />
Table of Contents<br />
1 Introduction<br />
Features ............................................................................................................................... 1-1<br />
Benefits................................................................................................................................ 1-2<br />
System Requirements ........................................................................................................ 1-2<br />
<strong>Support</strong>ed Printing Standards........................................................................................... 1-2<br />
<strong>Support</strong>ed Measurement Devices ..................................................................................... 1-3<br />
Installation ........................................................................................................................ 1-4<br />
Connection ....................................................................................................................... 1-4<br />
<strong>Support</strong>ed Label Printers ................................................................................................... 1-4<br />
Starting ORIS <strong>Certified</strong> <strong>Proof</strong>............................................................................................. 1-4<br />
Entering Licenses ...............................................................................................................1-6<br />
2 Configuration<br />
Overview .............................................................................................................................. 2-1<br />
Remote Access to Color Tuner Database......................................................................... 2-2<br />
How to Set up Remote Database Access ........................................................................ 2-3<br />
3 Performing Measurements<br />
Step 1: Select ORIS Color Tuner⁄⁄Web Job ....................................................................... 3-1<br />
Step 2: Select Print Target ................................................................................................. 3-2<br />
Step 3: Create or Customize Print Target ......................................................................... 3-2<br />
Step 4: Enter Measurement Details................................................................................... 3-3<br />
Step 5: Start Measuring ...................................................................................................... 3-4<br />
ORIS <strong>Certified</strong> <strong>Proof</strong> Version 1.5.4 User <strong>Manual</strong><br />
i<br />
Image2Output Limited Unit 19 IO Centre Hearle Way Hatfield Business Park Hatfield Herts AL10 9EW<br />
Tel: +44 (0)1707 282 710 Fax: +44 (0)1707 269 764 sales@<strong>image2output</strong>.com
http://www.<strong>image2output</strong>.com<br />
Table of Contents<br />
Step 6: Evaluate Results .................................................................................................... 3-4<br />
Pass/Fail Indication .......................................................................................................... 3-5<br />
Deviation Values............................................................................................................... 3-5<br />
Color Bar .......................................................................................................................... 3-6<br />
Step 7: Print Label............................................................................................................... 3-6<br />
Step 8: Send Results to ORIS Color Tuner⁄⁄Web .............................................................. 3-7<br />
Step 9: View Report ............................................................................................................ 3-7<br />
Step 10: Continue Measuring............................................................................................. 3-7<br />
4 Reports<br />
Data Table............................................................................................................................ 4-1<br />
Color Space Diagram.......................................................................................................... 4-4<br />
Summary.............................................................................................................................. 4-4<br />
Printing Reports.................................................................................................................. 4-5<br />
5 Comparing Single Colors<br />
Step 1: Select Measurement Device.................................................................................. 5-1<br />
Step 2: Start Measurement Function................................................................................. 5-2<br />
Step 3: Add Reference Colors ........................................................................................... 5-2<br />
Measuring Colors ............................................................................................................. 5-2<br />
Entering Color Values....................................................................................................... 5-3<br />
Selecting From Spot Color Library ................................................................................... 5-3<br />
Step 4: Measure and Compare........................................................................................... 5-4<br />
Tips....................................................................................................................................... 5-5<br />
6 Long-Term Control and Trend Analysis<br />
‘Trend Analysis’ Dialog ...................................................................................................... 6-1<br />
Selecting Measurements .................................................................................................. 6-2<br />
Hiding and Displaying Curves .......................................................................................... 6-2<br />
Zooming In........................................................................................................................ 6-3<br />
Printing Trend Chart ......................................................................................................... 6-3<br />
ii CGS Publishing Technologies International Hainburg, Germany 08/27/2010<br />
Image2Output Limited Unit 19 IO Centre Hearle Way Hatfield Business Park Hatfield Herts AL10 9EW<br />
Tel: +44 (0)1707 282 710 Fax: +44 (0)1707 269 764 sales@<strong>image2output</strong>.com
http://www.<strong>image2output</strong>.com<br />
Table of Contents<br />
7 Miscellaneous<br />
About Measurement Files .................................................................................................. 7-1<br />
Measuring Tips.................................................................................................................... 7-1<br />
Loading Measurements .................................................................................................... 7-2<br />
Repeating or Canceling Measurements ........................................................................... 7-2<br />
Color Bar Geometry for Eye-One ..................................................................................... 7-3<br />
Strip Scanning with DTP41/45.......................................................................................... 7-3<br />
Strip Scanning with Eye-One............................................................................................ 7-3<br />
Strip Scanning with SpectroJet and RS 800..................................................................... 7-4<br />
Solid Density Measurement with Eye-One ....................................................................... 7-5<br />
Visualizing Acoustic Signals ............................................................................................. 7-5<br />
8 Dialog Reference<br />
‘Define Print Target’ Dialog................................................................................................ 8-1<br />
PREDEFINED PRINT TARGETS .............................................................................................. 8-2<br />
PRINT TARGETS.................................................................................................................. 8-3<br />
TARGET NAME .................................................................................................................... 8-3<br />
PROOF SUPPLIER................................................................................................................ 8-3<br />
MEASUREMENT VALUES ...................................................................................................... 8-4<br />
CMYK REFERENCE ............................................................................................................ 8-4<br />
TARGET VALUES ................................................................................................................. 8-4<br />
MEASURE OR AVERAGE TARGET VALUES ............................................................................ 8-5<br />
MEASURE TARGET VALUES.................................................................................................. 8-5<br />
DEFINE COLOR BAR ............................................................................................................ 8-6<br />
AVERAGE TARGET VALUES .................................................................................................. 8-7<br />
USE STANDARD TOLERANCES.............................................................................................. 8-7<br />
3DAP............................................................................................................................8-8<br />
FOGRA, SWOP ........................................................................................................... 8-8<br />
ISO 12647-3 NEWSPAPER ............................................................................................. 8-8<br />
ISO 12647-7 COLOR BAR............................................................................................... 8-8<br />
ISO 12647-7 TEST CHART ............................................................................................. 8-9<br />
ISO 12647-7 VALIDATION PRINT..................................................................................... 8-9<br />
SICOGIF ...................................................................................................................... 8-9<br />
DELTA E FORMULA ........................................................................................................... 8-10<br />
Delta E ....................................................................................................................... 8-10<br />
Delta E 94 .................................................................................................................. 8-10<br />
Delta E 2000 .............................................................................................................. 8-10<br />
Delta E CMC .............................................................................................................. 8-10<br />
Tolerance Input Boxes.................................................................................................... 8-11<br />
Tolerances for Lab Colors.......................................................................................... 8-11<br />
ORIS <strong>Certified</strong> <strong>Proof</strong> Version 1.5.4 User <strong>Manual</strong><br />
iii<br />
Image2Output Limited Unit 19 IO Centre Hearle Way Hatfield Business Park Hatfield Herts AL10 9EW<br />
Tel: +44 (0)1707 282 710 Fax: +44 (0)1707 269 764 sales@<strong>image2output</strong>.com
http://www.<strong>image2output</strong>.com<br />
Table of Contents<br />
Tolerances for Density ............................................................................................... 8-11<br />
SINGLE TOLERANCES........................................................................................................ 8-11<br />
‘Single Tolerances’ Dialog ......................................................................................... 8-12<br />
2-LEVEL TOLERANCES....................................................................................................... 8-13<br />
‘Settings’ Dialog................................................................................................................ 8-13<br />
DEFINE PROOF PRINTER.................................................................................................... 8-13<br />
DEFINE USER ................................................................................................................... 8-14<br />
SETUP LABEL PRINTER...................................................................................................... 8-15<br />
PRINTER ...................................................................................................................... 8-15<br />
PRINT AUTOMATICALLY................................................................................................. 8-16<br />
PRINT 2-LEVEL TOLERANCES ON LABEL ......................................................................... 8-16<br />
LOGO AND TITLE .......................................................................................................... 8-16<br />
PRINT TEST LABEL........................................................................................................ 8-17<br />
SETUP MEASUREMENT DEVICE ......................................................................................... 8-17<br />
MEASUREMENT DEVICE SETUP...................................................................................... 8-18<br />
INSTRUMENT PROPERTIES ............................................................................................ 8-19<br />
TEST ........................................................................................................................... 8-20<br />
MISCELLANEOUS............................................................................................................... 8-20<br />
COLOR MANAGEMENT .................................................................................................. 8-20<br />
DATABASE CONNECTION............................................................................................... 8-20<br />
‘Jobs to be certified’ Dialog ............................................................................................. 8-21<br />
9 File Reference<br />
Characterization Data for Printing Conditions................................................................. 9-1<br />
3DAP ................................................................................................................................ 9-1<br />
FOGRA............................................................................................................................. 9-1<br />
Offset Printing .............................................................................................................. 9-1<br />
Gravure Printing........................................................................................................... 9-3<br />
Screen Printing ............................................................................................................ 9-4<br />
IDEAlliance ....................................................................................................................... 9-4<br />
SWOP............................................................................................................................... 9-4<br />
Color Bars and Reference Files......................................................................................... 9-5<br />
3DAP ................................................................................................................................ 9-5<br />
CGS.................................................................................................................................. 9-5<br />
FOGRA............................................................................................................................. 9-6<br />
IDEAlliance ....................................................................................................................... 9-7<br />
SICOGIF........................................................................................................................... 9-7<br />
SWOP............................................................................................................................... 9-7<br />
Spot Color Libraries............................................................................................................9-8<br />
HKS® Library Files ........................................................................................................... 9-9<br />
PANTONE® Digital Color Library Files ............................................................................ 9-9<br />
iv CGS Publishing Technologies International Hainburg, Germany 08/27/2010<br />
Image2Output Limited Unit 19 IO Centre Hearle Way Hatfield Business Park Hatfield Herts AL10 9EW<br />
Tel: +44 (0)1707 282 710 Fax: +44 (0)1707 269 764 sales@<strong>image2output</strong>.com
http://www.<strong>image2output</strong>.com<br />
1 Introduction<br />
Features<br />
ORIS <strong>Certified</strong> <strong>Proof</strong> is an effective and easy-to-use quality control and<br />
certification system. It is a component of ORIS <strong>Certified</strong> Suite which also<br />
includes ORIS <strong>Certified</strong> Press and ORIS <strong>Certified</strong> Monitor. This is a suite<br />
of quality diagnostic tools designed to give printers ultimate quality control,<br />
from the prepress stage all the way to the pressroom.<br />
<strong>Proof</strong> and Press Sheet Verification<br />
A color bar on the proof is measured with a spectrophotometer. The software<br />
compares the Lab measurements against common industry standards<br />
such as SWOP, GRACoL or Fogra, or user-defined target values.<br />
You can use color bars of a printing standard or custom color bars.<br />
Press sheets can be measured and certified to the same industry or<br />
user-defined standards.<br />
Spot Colors<br />
Spot colors can be measured individually and compared to the stored<br />
library values of PANTONE® 1 , HKS or corporate colors. Spot color measurements<br />
can be saved and used as target values for proof verification.<br />
Reports and Trend Analysis<br />
The software gives you an instant pass/fail indication on the screen and<br />
also provides detailed reports and a trend analysis over time. The measurement<br />
results can also be output as a brief summary on a label.<br />
Integration with ORIS Color Tuner⁄⁄Web<br />
The software seamlessly integrates with ORIS Color Tuner⁄⁄Web, CGS’s<br />
contract proofing system.<br />
1. PANTONE® and other Pantone, Inc. trademarks are the property of Pantone, Inc.<br />
ORIS <strong>Certified</strong> <strong>Proof</strong> Version 1.5.4 User <strong>Manual</strong> 1-1<br />
Image2Output Limited Unit 19 IO Centre Hearle Way Hatfield Business Park Hatfield Herts AL10 9EW<br />
Tel: +44 (0)1707 282 710 Fax: +44 (0)1707 269 764 sales@<strong>image2output</strong>.com
Introduction<br />
Benefits<br />
http://www.<strong>image2output</strong>.com<br />
Benefits<br />
ORIS <strong>Certified</strong> <strong>Proof</strong> provides a list of proof jobs for which certification<br />
has been requested. You can select a job and measure it or, if this has<br />
been done already, load the measurement file. The certification results<br />
will be fed back into the ORIS Color Tuner⁄⁄Web database and can be<br />
viewed anywhere in the world using a web browser.<br />
ORIS <strong>Certified</strong> <strong>Proof</strong> eliminates subjective decisions and lengthy discussions<br />
about color issues. The benefits include:<br />
• Fast and accurate color verification<br />
• Quality control throughout the entire print production process<br />
• Reliable check for compliance with industry standards<br />
• Fast detection of color drifts<br />
• Detection of variations in ink or paper quality<br />
• Protection from misprints and customer complaints<br />
System Requirements<br />
The software is available as a Windows and Macintosh version. (All<br />
screen captures in this document are from the Windows version.)<br />
• Windows 7, Vista, XP (SP 3 or higher), 2008, 2003;<br />
Mac OS 10.2.8 or higher<br />
• Dongle and software license<br />
• Measurement device<br />
• Label printer<br />
The computer name should conform to the DoD Internet Host Table<br />
Specification (RFC 952). Note that underscores are invalid characters.<br />
<strong>Support</strong>ed Printing Standards<br />
Compliance with the following industry standards can be checked:<br />
• ISO 12647-7 (IDEAllicance, SWOP, GRACoL, FOGRA)<br />
• ISO 12647-7 Validation Print (FOGRA)<br />
• ISO 12647-3 Newspaper<br />
• 3DAP<br />
• SICOGIF<br />
1-2 CGS Publishing Technologies International Hainburg, Germany 08/27/2010<br />
Image2Output Limited Unit 19 IO Centre Hearle Way Hatfield Business Park Hatfield Herts AL10 9EW<br />
Tel: +44 (0)1707 282 710 Fax: +44 (0)1707 269 764 sales@<strong>image2output</strong>.com
http://www.<strong>image2output</strong>.com<br />
Introduction<br />
<strong>Support</strong>ed Measurement Devices<br />
The software includes target values, tolerances and reference files<br />
(color bar definitions) for these printing standards.<br />
The software also includes the ISO 12647-7 tolerance values defined by<br />
FOGRA for verifying proofing systems using IT8/7.4 test charts. Target<br />
values and reference files are not included, but will be in one of the next<br />
software versions. Currently target values can be specified with ICC profiles.<br />
» RELATED TOPICS:<br />
-PREDEFINED PRINT TARGETS (PAGE 8-2)<br />
-USE STANDARD TOLERANCES (PAGE 8-7)<br />
-CHARACTERIZATION DATA FOR PRINTING CONDITIONS (PAGE 9-1)<br />
-COLOR BARS AND REFERENCE FILES (PAGE 9-5)<br />
<strong>Support</strong>ed Measurement Devices<br />
The following spectrophotometers are supported:<br />
Device name Measure how? Measure what? Mac OS X?<br />
X-Rite Eye-One Strip, spot P, PS, SPM<br />
X-Rite Eye-One iO (Scanning table) P, PS<br />
X-Rite Eye-One iSis Test chart scan P, PS<br />
X-Rite DTP20 (Pulse) Strip, spot P, PS, SPM<br />
X-Rite DTP41 Strip P, PS<br />
X-Rite DTP45 Strip P, PS<br />
X-Rite DTP70 Test chart scan P, PS<br />
TECHKON RS 800 Strip, spot P, PS Not supported<br />
TECHKON SpectroJet Strip, spot P, PS<br />
in the Macintosh<br />
version of<br />
TECHKON SpectroDrive Strip, spot P, PS<br />
ORIS <strong>Certified</strong><br />
TECHKON SpectroDens Spot P, PS<br />
<strong>Proof</strong><br />
GretagMacbeth iCColor Test chart scan P, PS<br />
Abbreviations:<br />
P<br />
PS<br />
SPM<br />
<strong>Proof</strong>s<br />
Press sheets<br />
SINGLE PATCH MEASUREMENT function<br />
» RELATED TOPICS:<br />
-CONFIGURATION (PAGE 2-1)<br />
-SETUP MEASUREMENT DEVICE (PAGE 8-17)<br />
-MEASURING TIPS (PAGE 7-1)<br />
ORIS <strong>Certified</strong> <strong>Proof</strong> Version 1.5.4 User <strong>Manual</strong> 1-3<br />
Image2Output Limited Unit 19 IO Centre Hearle Way Hatfield Business Park Hatfield Herts AL10 9EW<br />
Tel: +44 (0)1707 282 710 Fax: +44 (0)1707 269 764 sales@<strong>image2output</strong>.com
Introduction<br />
<strong>Support</strong>ed Label Printers<br />
http://www.<strong>image2output</strong>.com<br />
Installation<br />
Install the measurement device according to the accompanying instructions<br />
provided by the manufacturer. The devices are shipped with a CD<br />
that includes software and drivers.<br />
The TECHKON devices SpectroJet, SpectroDrive and SpectroDens additionally<br />
require the TECHKON Device Service to be installed and running.<br />
This service is required for the communication with the computer.<br />
Install the TECHKON Device Service by double-clicking TDService.exe.<br />
This file is available on the TECHKON installation CD and can also be<br />
downloaded from http://www.cgs-oris.com. Then start this service. The<br />
service starts automatically when you reboot the computer.<br />
Connection<br />
We recommend to directly connect the measurement device to the USB<br />
port of your computer. The device may not work correctly if it is connected<br />
to a USB hub.<br />
TECHKON RS 800 and the serial DTP41 model have a serial interface<br />
only. Use a USB adapter to connect these devices to a USB port. We<br />
recommend the Keyspan USB Serial Adapter. You have to install a driver<br />
for this adapter.<br />
<strong>Support</strong>ed Label Printers<br />
ORIS <strong>Certified</strong> <strong>Proof</strong> supports any printer. We recommend to use DYMO<br />
LabelWriter 400 Turbo. Please install the label printer according to the<br />
accompanying instructions provided by the manufacturer. The printers<br />
are usually shipped with a CD that includes software and drivers.<br />
» RELATED TOPICS:<br />
-CONFIGURATION (PAGE 2-1)<br />
-SETUP LABEL PRINTER (PAGE 8-15)<br />
Starting ORIS <strong>Certified</strong> <strong>Proof</strong><br />
Windows • Select START | ALL PROGRAMS | CGS | ORIS CERTIFIED PROOF.<br />
Mac OS • Double-click …Applications:ORIS <strong>Certified</strong> <strong>Proof</strong>:ORIS <strong>Certified</strong><br />
<strong>Proof</strong>.<br />
The main window appears (see Fig. 1-1).<br />
1-4 CGS Publishing Technologies International Hainburg, Germany 08/27/2010<br />
Image2Output Limited Unit 19 IO Centre Hearle Way Hatfield Business Park Hatfield Herts AL10 9EW<br />
Tel: +44 (0)1707 282 710 Fax: +44 (0)1707 269 764 sales@<strong>image2output</strong>.com
http://www.<strong>image2output</strong>.com<br />
Introduction<br />
Starting ORIS <strong>Certified</strong> <strong>Proof</strong><br />
Note:<br />
Use the button to display a smaller version of the main window which<br />
provides frequently used functions only (see Fig. 1-2).<br />
Use<br />
to redisplay the large window.<br />
It is not possible to start more than one instance of ORIS <strong>Certified</strong> <strong>Proof</strong><br />
on the same computer.<br />
Fig. 1-1<br />
ORIS <strong>Certified</strong> <strong>Proof</strong> – Main Window<br />
ORIS <strong>Certified</strong> <strong>Proof</strong> Version 1.5.4 User <strong>Manual</strong> 1-5<br />
Image2Output Limited Unit 19 IO Centre Hearle Way Hatfield Business Park Hatfield Herts AL10 9EW<br />
Tel: +44 (0)1707 282 710 Fax: +44 (0)1707 269 764 sales@<strong>image2output</strong>.com
Introduction<br />
Entering Licenses<br />
http://www.<strong>image2output</strong>.com<br />
Fig. 1-2<br />
ORIS <strong>Certified</strong> <strong>Proof</strong> – Reduced Main Window<br />
Entering Licenses<br />
Do the following to enter licenses for activating ORIS <strong>Certified</strong> <strong>Proof</strong> or<br />
to update your licenses:<br />
1. Click on and then on LICENSE INFO.<br />
2. Click on the ADD LICENSE button.<br />
3. Select the license file you have received from CGS.<br />
4. Restart ORIS <strong>Certified</strong> <strong>Proof</strong>.<br />
If started without a valid software license, ORIS <strong>Certified</strong> <strong>Proof</strong> runs as<br />
a 30-day fully functional demo version.<br />
1-6 CGS Publishing Technologies International Hainburg, Germany 08/27/2010<br />
Image2Output Limited Unit 19 IO Centre Hearle Way Hatfield Business Park Hatfield Herts AL10 9EW<br />
Tel: +44 (0)1707 282 710 Fax: +44 (0)1707 269 764 sales@<strong>image2output</strong>.com
http://www.<strong>image2output</strong>.com<br />
2 Configuration<br />
Overview<br />
Before starting to work with ORIS <strong>Certified</strong> <strong>Proof</strong> you have to configure<br />
the program. Click on to open the SETTINGS dialog (see Fig. 2-1).<br />
Then click on one of the buttons displayed on the left:<br />
Create a list of your proof printers. The printer names can later be selected<br />
in the main window and are used for labels, reports and trend<br />
analyses.<br />
Create a list of the persons performing the measurements. These<br />
names can later be selected in the main window and are used for<br />
labels, reports and analyses.<br />
Select, configure and test your label printer. We recommend to use<br />
labels with a size of approximately 88 x 36 mm or larger. For DYMO<br />
printers you should set the paper size to 99012 LARGE ADDRESS.<br />
To include your company logo on labels and reports, select an image<br />
file with *.BMP format (Windows) or *.JPG format (Mac OS).<br />
Select, configure and test your measurement device. By default, the<br />
devices are set up for measuring according to the ISO standard.<br />
For Eye-One, specify whether strips or single patches are measured.<br />
If TECHKON devices are used, precisely specify the size of the<br />
color patches and the size of the gaps between them. We recommend<br />
a precision of two decimal places (see also page 8-19).<br />
Select a data source name (DSN) to establish the communication with<br />
an ORIS Color Tuner⁄⁄Web database running on a different computer<br />
on the local network. See below for more details. Leave the default<br />
DSN if ORIS Color Tuner⁄⁄Web runs on the same computer.<br />
Use the button to add entries to a list and to remove selected<br />
entries. Refer to page 8-13 for more details.<br />
ORIS <strong>Certified</strong> <strong>Proof</strong> Version 1.5.4 User <strong>Manual</strong> 2-1<br />
Image2Output Limited Unit 19 IO Centre Hearle Way Hatfield Business Park Hatfield Herts AL10 9EW<br />
Tel: +44 (0)1707 282 710 Fax: +44 (0)1707 269 764 sales@<strong>image2output</strong>.com
Configuration<br />
Remote Access to Color Tuner Database<br />
http://www.<strong>image2output</strong>.com<br />
Fig. 2-1<br />
‘Settings’ Dialog<br />
Remote Access to Color Tuner Database<br />
If ORIS <strong>Certified</strong> <strong>Proof</strong> has been installed together with ORIS Color Tuner⁄⁄Web,<br />
it is configured to access ORIS Color Tuner⁄⁄Web’s database.<br />
Thus users of ORIS Color Tuner⁄⁄Web are able to automatically certify<br />
their proof jobs. ORIS <strong>Certified</strong> <strong>Proof</strong> can display a list of proof jobs that<br />
need to be certified manually (see page 3-1).<br />
The same functionality is also available for stand-alone applications, i.e.<br />
if ORIS Color Tuner⁄⁄Web runs on a different computer. ORIS <strong>Certified</strong><br />
<strong>Proof</strong> is capable of accessing the database of ORIS Color Tuner⁄⁄Web<br />
installations running on any computer on the local network.<br />
If the ORIS Color Tuner⁄⁄Web database is accessed from multiple<br />
installations of ORIS <strong>Certified</strong> <strong>Proof</strong>, the print targets will overwrite<br />
each other in the database. Therefore make sure the print targets are<br />
defined identically in all installations of ORIS <strong>Certified</strong> <strong>Proof</strong>.<br />
2-2 CGS Publishing Technologies International Hainburg, Germany 08/27/2010<br />
Image2Output Limited Unit 19 IO Centre Hearle Way Hatfield Business Park Hatfield Herts AL10 9EW<br />
Tel: +44 (0)1707 282 710 Fax: +44 (0)1707 269 764 sales@<strong>image2output</strong>.com
http://www.<strong>image2output</strong>.com<br />
Configuration<br />
Remote Access to Color Tuner Database<br />
How to Set up Remote Database Access<br />
The following is required to establish the communication with an ORIS<br />
Color Tuner⁄⁄Web database via LAN:<br />
1. Select START | CONTROL PANEL | ADMINISTRATIVE TOOLS | DATA<br />
SOURCES (ODBC) | SYSTEM DSN. A dialog like this appears:<br />
2. Double-click the data source name ORIS COLOR TUNER. Or select the<br />
DSN and click on CONFIGURE. A dialog like this appears:<br />
3. Into the SERVER box, enter the name or IP address of the computer<br />
that runs ORIS Color Tuner⁄⁄Web. The name localhost is appropriate<br />
if this program runs on the same computer as ORIS <strong>Certified</strong> <strong>Proof</strong>.<br />
4. Click the TEST button to check if the database can be accessed.<br />
5. Close all dialogs using OK.<br />
6. In ORIS <strong>Certified</strong> <strong>Proof</strong>, click and then . The dialog provides<br />
an input box named DATABASE CONNECTION (see also page 8-20).<br />
7. Click on MODIFY and select the data source name (DSN) you have<br />
just configured. It is listed on the MACHINE DATA SOURCE tab.<br />
ORIS <strong>Certified</strong> <strong>Proof</strong> Version 1.5.4 User <strong>Manual</strong> 2-3<br />
Image2Output Limited Unit 19 IO Centre Hearle Way Hatfield Business Park Hatfield Herts AL10 9EW<br />
Tel: +44 (0)1707 282 710 Fax: +44 (0)1707 269 764 sales@<strong>image2output</strong>.com
Configuration<br />
Remote Access to Color Tuner Database<br />
http://www.<strong>image2output</strong>.com<br />
8. Click OK to close the dialog. The DSN appears in the input field.<br />
9. Click OK to close the dialog.<br />
2-4 CGS Publishing Technologies International Hainburg, Germany 08/27/2010<br />
Image2Output Limited Unit 19 IO Centre Hearle Way Hatfield Business Park Hatfield Herts AL10 9EW<br />
Tel: +44 (0)1707 282 710 Fax: +44 (0)1707 269 764 sales@<strong>image2output</strong>.com
http://www.<strong>image2output</strong>.com<br />
3 Performing Measurements<br />
This chapter explains how to measure with ORIS <strong>Certified</strong> <strong>Proof</strong> to verify<br />
the quality of proofs, proofing systems and press sheets.<br />
These measurements will provide answers to the following questions:<br />
• Is the proofer color space large enough to correctly simulate a given<br />
printing standard?<br />
• Are there any density variations across the press sheet? Are the ink<br />
zone settings correct?<br />
Before you begin, make sure the program is configured accordingly (see<br />
page 2-1). See also Comparing Single Colors (page 5-1).<br />
Step 1: Select ORIS Color Tuner⁄⁄Web Job<br />
Note:<br />
If ORIS Color Tuner⁄⁄Web is installed, you can easily certify proof jobs<br />
printed with this software. Click on the QUERY…DATABASE button.<br />
This opens the list of jobs that were printed with ORIS Color Tuner⁄⁄Web<br />
and set to require certification. Double-click a job. The dialog closes and<br />
the job name and print target to be used appear in the main window.<br />
Then proceed with Step 5 (page 3-4).<br />
Having completed the measurement, the job will be removed automatically<br />
from the list of jobs to be certified.<br />
Fig. 3-1<br />
List of Jobs to be <strong>Certified</strong><br />
ORIS <strong>Certified</strong> <strong>Proof</strong> Version 1.5.4 User <strong>Manual</strong> 3-1<br />
Image2Output Limited Unit 19 IO Centre Hearle Way Hatfield Business Park Hatfield Herts AL10 9EW<br />
Tel: +44 (0)1707 282 710 Fax: +44 (0)1707 269 764 sales@<strong>image2output</strong>.com
Performing Measurements<br />
Step 2: Select Print Target<br />
http://www.<strong>image2output</strong>.com<br />
Step 2: Select Print Target<br />
A print target defines the patches to be measured as well as the target<br />
values and tolerances. Select a print target in the main window (see Fig.<br />
3-2).<br />
ORIS <strong>Certified</strong> <strong>Proof</strong> provides predefined print targets for various standard<br />
printing conditions (see page 8-2).<br />
The selected print target is indicated on the title bar of the main window.<br />
Fig. 3-2<br />
Main Window – Print Target Selection<br />
Step 3: Create or Customize Print Target<br />
If your company has its own printing standard and color bar, you can customize<br />
the predefined print targets. If you need print targets for measuring<br />
press sheets (density), you have to create them. Proceed as follows:<br />
1. Click on to open the DEFINE PRINT TARGET dialog.<br />
2. Click on NEW in the list of PRINT TARGETS, or select the print target to<br />
be modified from this list (see Fig. 3-3).<br />
3. Enter a name into the TARGET NAME box, or overwrite the existing<br />
name if the original print target should be left unchanged.<br />
4. When creating print targets for press sheets, set the MEASUREMENT<br />
VALUES option to DENSITIES (see Fig. 3-3).<br />
5. Refer to page 8-1 for details on the other dialog options.<br />
6. Click OK to close the dialog.<br />
3-2 CGS Publishing Technologies International Hainburg, Germany 08/27/2010<br />
Image2Output Limited Unit 19 IO Centre Hearle Way Hatfield Business Park Hatfield Herts AL10 9EW<br />
Tel: +44 (0)1707 282 710 Fax: +44 (0)1707 269 764 sales@<strong>image2output</strong>.com
http://www.<strong>image2output</strong>.com<br />
Performing Measurements<br />
Step 4: Enter Measurement Details<br />
Tips<br />
• You can define color bars by measurement (see page 8-5) or by<br />
importing spot colors from a spot color library (see page 5-1).<br />
• For density measurements, use a color bar containing primary colors<br />
only. Non-primary colors will be skipped during measurement.<br />
• Density tolerances are relative values. If the maximum negative<br />
tolerance is 10% and the target density is 2.0, for example, density<br />
values ranging from 1.8 to 2.0 are within the tolerance limits.<br />
Fig. 3-3<br />
Customizing a Print Target<br />
Step 4: Enter Measurement Details<br />
Specify the details which clearly identify the measurement you are about<br />
to make (see Fig. 3-4).<br />
• PROOF PRINTER: Device on which the proof was output<br />
• USER: Your name<br />
• JOB: Publication, edition, page number, etc.<br />
• INFO TEXT: Any comment you like (optional)<br />
A unique measurement ID is created automatically.<br />
The details will be included in measurement files and reports and printed<br />
on labels. The details of proof measurements can also be used as filters<br />
in the trend analysis function (see page 6-1).<br />
ORIS <strong>Certified</strong> <strong>Proof</strong> Version 1.5.4 User <strong>Manual</strong> 3-3<br />
Image2Output Limited Unit 19 IO Centre Hearle Way Hatfield Business Park Hatfield Herts AL10 9EW<br />
Tel: +44 (0)1707 282 710 Fax: +44 (0)1707 269 764 sales@<strong>image2output</strong>.com
Performing Measurements<br />
Step 5: Start Measuring<br />
http://www.<strong>image2output</strong>.com<br />
Fig. 3-4<br />
Main Window – Measurement Details<br />
Step 5: Start Measuring<br />
Click this button in the main window to start the measurement<br />
process. Follow the instructions that appear at the bottom of the<br />
window. See also Measuring Tips (page 7-1).<br />
Spectrophotometers may request you to place the device on its<br />
base. A white calibration will then be performed. If density values<br />
are measured relative to the paper white, you also have to<br />
place the device on a white area of your substrate.<br />
Click this button in case of measurement mistakes or erroneous<br />
results. The last strip or patch measurement will be dismissed<br />
and you can repeat it.<br />
If this button is clicked at the end of the measurement process,<br />
the entire measurement will be dismissed and not added to the<br />
data collected for trend analysis (see page 6-1).<br />
Click this button if you want to cancel the measuring process. It<br />
is not necessary to press this button after completing the measurement<br />
process. The next job can be measured directly.<br />
Loading Measurement Files<br />
If the color bar has been measured already, click this button<br />
to load the measurement file.<br />
Step 6: Evaluate Results<br />
Having completed the measurement, the program displays the result<br />
and checks it against the target and tolerance values.<br />
3-4 CGS Publishing Technologies International Hainburg, Germany 08/27/2010<br />
Image2Output Limited Unit 19 IO Centre Hearle Way Hatfield Business Park Hatfield Herts AL10 9EW<br />
Tel: +44 (0)1707 282 710 Fax: +44 (0)1707 269 764 sales@<strong>image2output</strong>.com
http://www.<strong>image2output</strong>.com<br />
Performing Measurements<br />
Step 6: Evaluate Results<br />
Pass/Fail Indication<br />
The icon at the bottom of the main window indicates the overall result:<br />
OK – All values are within the tolerance limits<br />
Error – One or more values are out of tolerance<br />
If 2-level tolerances have been defined, there is an additional icon:<br />
OK – All measurements are within the strict tolerance limits<br />
Caution – All measurements are within the standard tolerance limits<br />
Error – One or more values are out of tolerance<br />
» RELATED TOPICS:<br />
-TOLERANCE INPUT BOXES (PAGE 8-11)<br />
-2-LEVEL TOLERANCES (PAGE 8-13)<br />
Deviation Values<br />
Note:<br />
Some characteristic deviation values are also indicated (see Fig. 3-5):<br />
• Delta E and delta H values (proofs)<br />
Indicate compliance with the selected printing standard.<br />
dH values can also be negative. This depends on the direction of the<br />
hue angle deviation in the LCh color space. The absolute value (without<br />
the sign) indicates the degree of this deviation.<br />
• Density deviations (press sheets)<br />
Relative deviations from the respective target values in percent.<br />
Deviations from 0 are indicated as absolute values.<br />
The names of color patches with maximum values are indicated in parentheses.<br />
The character after a parenthesis indicates the color name.<br />
Out-of-tolerance values are indicated in red. Further details about<br />
these values are available in the report (see page 4-1).<br />
Fig. 3-5<br />
Deviation Values (Lab and Density Measurement)<br />
ORIS <strong>Certified</strong> <strong>Proof</strong> Version 1.5.4 User <strong>Manual</strong> 3-5<br />
Image2Output Limited Unit 19 IO Centre Hearle Way Hatfield Business Park Hatfield Herts AL10 9EW<br />
Tel: +44 (0)1707 282 710 Fax: +44 (0)1707 269 764 sales@<strong>image2output</strong>.com
Performing Measurements<br />
Step 7: Print Label<br />
http://www.<strong>image2output</strong>.com<br />
Color Bar<br />
The color bar displays the target values and the actual values you have<br />
measured. The first strip appears as soon as you have finished measuring<br />
it. This allows you to recognize measurement errors immediately.<br />
The color with the largest deviation is underlined in red.<br />
If you place the cursor on a color patch, the Lab or density values, respectively,<br />
are displayed in a small yellow window. The target values appear<br />
at the top, the actual values at the bottom. The dE values are additionally<br />
indicated as soon as the measurement has been completed.<br />
Fig. 3-6<br />
Color Bar with Target and Actual Colors<br />
Step 7: Print Label<br />
Having completed the measurement, a label is printed automatically, if<br />
this has been specified. If it hasn’t, you can print it manually by clicking<br />
on the button.<br />
The label provides a summary of the measurement results. The icons<br />
and indicate whether all values are within the tolerance limits.<br />
The icon indicates that some of the values are outside the strict tolerances,<br />
but none outside the standard tolerances (2-level tolerances).<br />
The label should be signed by the operator and affixed to the proof or<br />
press sheet. Together with the color bar, the label clearly indicates the<br />
proof’s or press sheet’s quality and identity.<br />
» RELATED TOPICS:<br />
-SETUP LABEL PRINTER (PAGE 8-15)<br />
-2-LEVEL TOLERANCES (PAGE 8-13)<br />
3-6 CGS Publishing Technologies International Hainburg, Germany 08/27/2010<br />
Image2Output Limited Unit 19 IO Centre Hearle Way Hatfield Business Park Hatfield Herts AL10 9EW<br />
Tel: +44 (0)1707 282 710 Fax: +44 (0)1707 269 764 sales@<strong>image2output</strong>.com
http://www.<strong>image2output</strong>.com<br />
Performing Measurements<br />
Step 8: Send Results to ORIS Color Tuner⁄⁄Web<br />
Fig. 3-7<br />
Label for <strong>Proof</strong> Quality Certification<br />
Step 8: Send Results to ORIS Color Tuner⁄⁄Web<br />
Click if you have certified an ORIS Color Tuner⁄⁄Web job by loading<br />
a measurement file that was created automatically with the printer’s embedded<br />
spectrophotometer. This will feed the measurement results back<br />
into the ORIS Color Tuner⁄⁄Web database.<br />
If you have measured a color bar, ORIS <strong>Certified</strong> <strong>Proof</strong> will send the<br />
measurement results automatically. You don’t have to do anything.<br />
Step 9: View Report<br />
A report with various diagrams allows you to analyze the measurement<br />
results in detail. Refer to page 4-1 for more details.<br />
If you have measured a job printed with ORIS Color Tuner⁄⁄Web, the<br />
measurement results can also be viewed anywhere in the world using a<br />
web browser.<br />
» RELATED TOPICS:<br />
-ABOUT MEASUREMENT FILES (PAGE 7-1)<br />
-LONG-TERM CONTROL AND TREND ANALYSIS (PAGE 6-1)<br />
Step 10: Continue Measuring<br />
Select the next ORIS Color Tuner⁄⁄Web job (see Step 1) or enter the new<br />
job name and other measurement details (see Step 4). Then measure<br />
this job as explained in Step 5.<br />
ORIS <strong>Certified</strong> <strong>Proof</strong> Version 1.5.4 User <strong>Manual</strong> 3-7<br />
Image2Output Limited Unit 19 IO Centre Hearle Way Hatfield Business Park Hatfield Herts AL10 9EW<br />
Tel: +44 (0)1707 282 710 Fax: +44 (0)1707 269 764 sales@<strong>image2output</strong>.com
Performing Measurements<br />
Step 10: Continue Measuring<br />
http://www.<strong>image2output</strong>.com<br />
3-8 CGS Publishing Technologies International Hainburg, Germany 08/27/2010<br />
Image2Output Limited Unit 19 IO Centre Hearle Way Hatfield Business Park Hatfield Herts AL10 9EW<br />
Tel: +44 (0)1707 282 710 Fax: +44 (0)1707 269 764 sales@<strong>image2output</strong>.com
http://www.<strong>image2output</strong>.com<br />
4 Reports<br />
Data Table<br />
ORIS <strong>Certified</strong> <strong>Proof</strong> can create a detailed report for every measurement.<br />
It allows you to precisely inspect the measurement results.<br />
Click to open the REPORT dialog. It provides two tabs:<br />
• DATA – Data table (see below)<br />
• COLOR SPACES – Color space diagram (see page 4-4)<br />
Unavailable for density measurements (press sheets) and print<br />
targets defined without a CMYK reference file (see page 8-4).<br />
The data table allows you to precisely inspect the Lab values measured<br />
for every color patch and the calculated delta values. This table is provided<br />
online (REPORT dialog) and also included in the printed report.<br />
The following is displayed for every color patch:<br />
• Patch color and name<br />
• CMYK reference values (printed table only)<br />
• CIE Lab values (TGT = target, ACT = actual)<br />
• Lab differences (delta E, delta L, delta a, delta b)<br />
• Difference in hue (DH) and chromaticity (DC)<br />
• Tolerance values (printed table only)<br />
• Pass/fail indication in green or red (printed table only)<br />
The online table can be sorted by clicking on any of the column headers.<br />
The sorting order is maintained when the table is printed.<br />
ORIS <strong>Certified</strong> <strong>Proof</strong> Version 1.5.4 User <strong>Manual</strong> 4-1<br />
Image2Output Limited Unit 19 IO Centre Hearle Way Hatfield Business Park Hatfield Herts AL10 9EW<br />
Tel: +44 (0)1707 282 710 Fax: +44 (0)1707 269 764 sales@<strong>image2output</strong>.com
Reports<br />
Data Table<br />
http://www.<strong>image2output</strong>.com<br />
You can continue working with the main window while the REPORT<br />
dialog is open. When you click on the color bar in the main window<br />
(see page 3-6), the table row corresponding to the selected patch is<br />
highlighted. Likewise, when you click on a table row, the corresponding<br />
patch on the color bar is underlined in black.<br />
Fig. 4-1<br />
Online Data Table for Lab Measurement<br />
The color markup in the data table has the following meaning:<br />
• The values of solid primary and secondary colors are displayed in<br />
the respective colors.<br />
• A pink background is used for measurement values outside the tolerance<br />
limits (displayed for patch name, Lab values, and delta E).<br />
• Deviations in luminance (DL) are highlighted in gray if the color is too<br />
dark, or not highlighted if the color is too bright.<br />
• Deviations on the a axis are highlighted in red or green, respectively,<br />
depending on the color shift.<br />
• Deviations on the b axis are highlighted in blue or yellow.<br />
4-2 CGS Publishing Technologies International Hainburg, Germany 08/27/2010<br />
Image2Output Limited Unit 19 IO Centre Hearle Way Hatfield Business Park Hatfield Herts AL10 9EW<br />
Tel: +44 (0)1707 282 710 Fax: +44 (0)1707 269 764 sales@<strong>image2output</strong>.com
http://www.<strong>image2output</strong>.com<br />
Reports<br />
Data Table<br />
Fig. 4-2<br />
Online Data Table for Density Measurement<br />
This window lists all color patches along with the measured densities,<br />
target densities and density deviations in percent. Deviations from 0 are<br />
indicated as absolute values. The values of solid primary colors are<br />
displayed in the respective colors.<br />
Fig. 4-3<br />
Printed Data Table<br />
The colored bars in a printed report indicate the direction of the<br />
color shift:<br />
• Red/green for shifts on the a axis<br />
• Blue/yellow for shifts on the b axis<br />
• Black/gray for shifts on the L axis (darker/lighter)<br />
The dL indicators clearly show the overall shift in lightness<br />
(see figure on the right).<br />
ORIS <strong>Certified</strong> <strong>Proof</strong> Version 1.5.4 User <strong>Manual</strong> 4-3<br />
Image2Output Limited Unit 19 IO Centre Hearle Way Hatfield Business Park Hatfield Herts AL10 9EW<br />
Tel: +44 (0)1707 282 710 Fax: +44 (0)1707 269 764 sales@<strong>image2output</strong>.com
Reports<br />
Color Space Diagram<br />
http://www.<strong>image2output</strong>.com<br />
Color Space Diagram<br />
The color space diagram allows you to graphically compare the target<br />
and actual color space. It is only available if you have measured Lab<br />
colors (proofs).<br />
The color spaces are represented in a two-dimensional ab diagram. The<br />
borders of the target color space are represented by a green line. The<br />
primary and secondary colors as well as the white point are indicated.<br />
If a proof is perfect, the green line is completely inside the red line, or the<br />
two lines are on top of each other.<br />
Fig. 4-4<br />
Color Space Diagram<br />
Summary<br />
These are the details identifying the measurement and, in a gray box,<br />
the color deviations of characteristic values. Green and red pass/fail<br />
indicators, the related patch names and the tolerance values are also<br />
displayed. This information is provided in printed reports only.<br />
4-4 CGS Publishing Technologies International Hainburg, Germany 08/27/2010<br />
Image2Output Limited Unit 19 IO Centre Hearle Way Hatfield Business Park Hatfield Herts AL10 9EW<br />
Tel: +44 (0)1707 282 710 Fax: +44 (0)1707 269 764 sales@<strong>image2output</strong>.com
http://www.<strong>image2output</strong>.com<br />
Reports<br />
Printing Reports<br />
Printing Reports<br />
To print a report, click the PRINT button at the bottom of the dialog (see<br />
Fig. 4-5).<br />
Reports for Lab measurements include a summary of characteristic color<br />
deviations (see page 4-4) in addition to the data table (see page 4-3).<br />
We recommend to use A4-sized paper and PORTRAIT orientation.<br />
If the report is for density measurements (press sheets), the PRINT<br />
button will only output the contents of the measurement file.<br />
Using the SAVE button you can duplicate the measurement file to a<br />
directory of your choice (see also page 7-1).<br />
Fig. 4-5<br />
Buttons in ‘Report’ Window<br />
ORIS <strong>Certified</strong> <strong>Proof</strong> Version 1.5.4 User <strong>Manual</strong> 4-5<br />
Image2Output Limited Unit 19 IO Centre Hearle Way Hatfield Business Park Hatfield Herts AL10 9EW<br />
Tel: +44 (0)1707 282 710 Fax: +44 (0)1707 269 764 sales@<strong>image2output</strong>.com
Reports<br />
Printing Reports<br />
http://www.<strong>image2output</strong>.com<br />
4-6 CGS Publishing Technologies International Hainburg, Germany 08/27/2010<br />
Image2Output Limited Unit 19 IO Centre Hearle Way Hatfield Business Park Hatfield Herts AL10 9EW<br />
Tel: +44 (0)1707 282 710 Fax: +44 (0)1707 269 764 sales@<strong>image2output</strong>.com
http://www.<strong>image2output</strong>.com<br />
5 Comparing Single Colors<br />
ORIS <strong>Certified</strong> <strong>Proof</strong> is capable of verifying spot colors and other colors<br />
not available on standard color bars. You can create your own color set<br />
with Lab values imported from PANTONE® 1 and HKS spot color libraries<br />
or entered manually.<br />
ORIS <strong>Certified</strong> <strong>Proof</strong> can automatically identify the spot color that comes<br />
closest to your measurement. The color sets can be saved as target values<br />
and used for verifying proof quality, for example.<br />
See also Performing Measurements (page 3-1).<br />
Step 1: Select Measurement Device<br />
Click on and then on . Select a measurement device and configure<br />
it accordingly (see page 8-17). You can only use Eye-One or DTP20.<br />
Fig. 5-1<br />
‘Settings’ Dialog<br />
1. PANTONE® and other Pantone, Inc. trademarks are the property of Pantone, Inc.<br />
ORIS <strong>Certified</strong> <strong>Proof</strong> Version 1.5.4 User <strong>Manual</strong> 5-1<br />
Image2Output Limited Unit 19 IO Centre Hearle Way Hatfield Business Park Hatfield Herts AL10 9EW<br />
Tel: +44 (0)1707 282 710 Fax: +44 (0)1707 269 764 sales@<strong>image2output</strong>.com
Comparing Single Colors<br />
Step 2: Start Measurement Function<br />
http://www.<strong>image2output</strong>.com<br />
Step 2: Start Measurement Function<br />
Click the button on the left-hand side of the main window. This<br />
opens the SINGLE PATCH MEASUREMENT dialog (see Fig. 5-2).<br />
Fig. 5-2<br />
‘Single Patch Measurement’ Dialog<br />
Step 3: Add Reference Colors<br />
In the SINGLE PATCH MEASUREMENT dialog, add the reference colors.<br />
The colors you are about to measure will be compared against these<br />
colors. Use one of the methods described below. Five spot colors are<br />
loaded already by default (see Fig. 5-2).<br />
Using the button you can delete selected colors from the list.<br />
Measuring Colors<br />
1. Click on START MEASUREMENT. A white calibration may be required.<br />
2. Measure the color.<br />
3. Click on to open the ADD COLOR dialog (see Fig. 5-3).<br />
4. Enter a name for the new color, then click OK.<br />
5-2 CGS Publishing Technologies International Hainburg, Germany 08/27/2010<br />
Image2Output Limited Unit 19 IO Centre Hearle Way Hatfield Business Park Hatfield Herts AL10 9EW<br />
Tel: +44 (0)1707 282 710 Fax: +44 (0)1707 269 764 sales@<strong>image2output</strong>.com
http://www.<strong>image2output</strong>.com<br />
Comparing Single Colors<br />
Step 3: Add Reference Colors<br />
Entering Color Values<br />
1. Click on to open the ADD COLOR dialog (see Fig. 5-3).<br />
2. Enable the LAB INPUT option.<br />
3. Enter a COLOR NAME.<br />
4. Type the Lab values into the boxes.<br />
5. Click OK to close the dialog.<br />
The new color is added to the SINGLE PATCH MEASUREMENT dialog (see<br />
Fig. 5-2). The Lab values are displayed under TARGET VALUES.<br />
Selecting From Spot Color Library<br />
Windows<br />
Mac OS<br />
1. Click on to open the ADD COLOR dialog (see Fig. 5-3).<br />
2. Enable the SPOT COLOR option.<br />
3. Click on LOAD SPOT COLOR LIBRARY.<br />
4. Select a *.LAB file.<br />
The ADD SPOT COLOR dialog appears (see Fig. 5-3).<br />
Spot color libraries for PANTONE® 2 and HKS colors are available in<br />
the installation directory (see page 9-8) under<br />
…\Program Files\CGS\ORIS <strong>Certified</strong> <strong>Proof</strong>\Standards\Spot Color<br />
Libraries<br />
…Applications:ORIS <strong>Certified</strong> <strong>Proof</strong>:Standards:Spot Color<br />
Libraries<br />
5. Enable ADD SELECTED COLORS and CTRL-click on the colors to be<br />
added, or enable ADD WHOLE LIST to select all colors of the library file.<br />
6. Close the ADD SPOT COLORS and ADD COLOR dialogs using OK.<br />
2. PANTONE® and other Pantone, Inc. trademarks are the property of Pantone, Inc.<br />
ORIS <strong>Certified</strong> <strong>Proof</strong> Version 1.5.4 User <strong>Manual</strong> 5-3<br />
Image2Output Limited Unit 19 IO Centre Hearle Way Hatfield Business Park Hatfield Herts AL10 9EW<br />
Tel: +44 (0)1707 282 710 Fax: +44 (0)1707 269 764 sales@<strong>image2output</strong>.com
Comparing Single Colors<br />
Step 4: Measure and Compare<br />
http://www.<strong>image2output</strong>.com<br />
Fig. 5-3<br />
‘Add Color’ and ‘Add Spot Color’ Dialogs<br />
Step 4: Measure and Compare<br />
1. In the SINGLE PATCH MEASUREMENT dialog (see Fig. 5-4), select the<br />
color to which the measured color should be compared:<br />
• Click on one of the colors listed on the left. – or<br />
• Enable the option FIND BEST MATCHING COLOR to use the color<br />
which comes closest to the Lab values you are measuring.<br />
2. Click on the START MEASUREMENT button.<br />
3. If the spectrophotometer requires a white calibration, you are requested<br />
to place the instrument on its base. The white calibration is<br />
then performed automatically.<br />
4. Measure your color sample.<br />
The nearest color is selected automatically (if FIND BEST MATCHING<br />
COLOR is enabled) and the measured color is displayed both visually<br />
(color box on the right) and numerically (under ACTUAL VALUES).<br />
The deviations on the L, a and b axes are also indicated numerically.<br />
A color box to the right of the numeric value indicates the direction of<br />
the color shift.<br />
5. The overall color deviation is also displayed. Select the delta E formula<br />
to be used for calculating it.<br />
6. Click the button if you want to add the measured color to the list<br />
of reference colors (see Step 3).<br />
7. You can directly measure additional colors (see step 4).<br />
5-4 CGS Publishing Technologies International Hainburg, Germany 08/27/2010<br />
Image2Output Limited Unit 19 IO Centre Hearle Way Hatfield Business Park Hatfield Herts AL10 9EW<br />
Tel: +44 (0)1707 282 710 Fax: +44 (0)1707 269 764 sales@<strong>image2output</strong>.com
http://www.<strong>image2output</strong>.com<br />
Comparing Single Colors<br />
Tips<br />
Fig. 5-4<br />
‘Single Patch Measurement’ Dialog<br />
Tips<br />
Saving Measurements<br />
If the colors listed in the dialog (see Fig. 5-4) have to be measured frequently<br />
on a proof, you can save the measurements to a file. Click on the<br />
SAVE MEASUREMENTS AS button. You can then create a print target which<br />
uses this file as a target value file (see page 8-4).<br />
‘Stop Measurement’ Button<br />
It is not necessary to click on STOP MEASUREMENT and reclick START<br />
MEASUREMENT before measuring the next color. But you can do so if you<br />
want to repeat the white calibration. Some devices perform a white calibration<br />
whenever you click on START MEASUREMENT.<br />
ORIS <strong>Certified</strong> <strong>Proof</strong> Version 1.5.4 User <strong>Manual</strong> 5-5<br />
Image2Output Limited Unit 19 IO Centre Hearle Way Hatfield Business Park Hatfield Herts AL10 9EW<br />
Tel: +44 (0)1707 282 710 Fax: +44 (0)1707 269 764 sales@<strong>image2output</strong>.com
Comparing Single Colors<br />
Tips<br />
http://www.<strong>image2output</strong>.com<br />
5-6 CGS Publishing Technologies International Hainburg, Germany 08/27/2010<br />
Image2Output Limited Unit 19 IO Centre Hearle Way Hatfield Business Park Hatfield Herts AL10 9EW<br />
Tel: +44 (0)1707 282 710 Fax: +44 (0)1707 269 764 sales@<strong>image2output</strong>.com
http://www.<strong>image2output</strong>.com<br />
6 Long-Term Control and<br />
Trend Analysis<br />
It is not only important to analyze individual measurements, but also to<br />
monitor color over time. This can be done using the TREND ANALYSIS tool.<br />
This tool allows you to keep track of color drifts and to find out when<br />
recalibration is required, for example. It also shows you the tolerance<br />
values that can be met in practice by calibrating your system regularly.<br />
Click<br />
in the main window to open the TREND ANALYSIS dialog.<br />
Note:<br />
It is not possible to analyze density measurements with this tool.<br />
‘Trend Analysis’ Dialog<br />
Fig. 6-1<br />
‘Trend Analysis’ Dialog for Lab Measurements<br />
ORIS <strong>Certified</strong> <strong>Proof</strong> Version 1.5.4 User <strong>Manual</strong> 6-1<br />
Image2Output Limited Unit 19 IO Centre Hearle Way Hatfield Business Park Hatfield Herts AL10 9EW<br />
Tel: +44 (0)1707 282 710 Fax: +44 (0)1707 269 764 sales@<strong>image2output</strong>.com
Long-Term Control and Trend Analysis<br />
‘Trend Analysis’ Dialog<br />
http://www.<strong>image2output</strong>.com<br />
Selecting Measurements<br />
Use the options at the top right to select<br />
the measurements to be included in the<br />
trend analysis (see figure). The delta E<br />
curves will be updated automatically.<br />
Note that the input boxes are case sensitive.<br />
Only measurements which meet<br />
all of the specified criteria are displayed.<br />
In the diagram, the measurements are<br />
displayed on the x-axis (the IDs are listed<br />
if there is enough room) and the delta E values on the y-axis. The<br />
total number of selected measurements is displayed at the top. The<br />
measurement date and ID appear in a small yellow window when you<br />
place the cursor next to a measurement.<br />
Compressed Diagrams<br />
If you have selected more measurements than specified under COM-<br />
PRESS DIAGRAM FROM…, a certain number of measurements will be<br />
combined and displayed as one. In this case the heading of the diagram<br />
reads …MEASUREMENTS (COMPRESSED).<br />
To see all measurements individually, enter the number of measurements<br />
you have selected into the COMPRESS DIAGRAM FROM… box. However,<br />
this may cause the diagram to become extremely difficult to read.<br />
Hiding and Displaying Curves<br />
Use the options at the bottom right to select<br />
the delta E curves that should be displayed on<br />
the left.<br />
Every curve is displayed in a different color.<br />
The meaning of these colors is explained by<br />
abbreviations which appear to the right of the diagram.<br />
6-2 CGS Publishing Technologies International Hainburg, Germany 08/27/2010<br />
Image2Output Limited Unit 19 IO Centre Hearle Way Hatfield Business Park Hatfield Herts AL10 9EW<br />
Tel: +44 (0)1707 282 710 Fax: +44 (0)1707 269 764 sales@<strong>image2output</strong>.com
http://www.<strong>image2output</strong>.com<br />
Long-Term Control and Trend Analysis<br />
‘Trend Analysis’ Dialog<br />
C<br />
M<br />
Y<br />
K<br />
PW<br />
Max<br />
Ø<br />
dH Max<br />
dH Ø<br />
Gray<br />
Gray Ø<br />
Skin<br />
Skin Ø<br />
Delta E of cyan<br />
Delta E of magenta<br />
Delta E of yellow<br />
Delta E of black<br />
Delta E of paper white<br />
Maximum delta E<br />
Average delta E<br />
Maximum delta H of primary colors (absolute values)<br />
Average delta H of CMY gray (G10–G100)<br />
Maximum delta E of gray tones<br />
Average delta E of gray tones<br />
Maximum delta E of skin tones<br />
Average delta E of skin tones<br />
Use the TOLERANCES option to display the tolerance limits. They are represented<br />
as dashed lines in the color of the respective delta E curves.<br />
This option is only available if the same standard tolerances were used<br />
for all of the selected measurements.<br />
Delta H curves are only displayed if measurements with ‘ISO 12647-7<br />
color bar’ tolerances are selected (see page 8-7). Delta H values are<br />
always displayed as positive numbers, even if they are negative.<br />
Curves for gray and skin tones are only displayed if measurements<br />
with SICOGIF tolerances have been selected.<br />
Zooming In<br />
By default, the scale used for the y-axis is set such that all delta E curves<br />
are completely visible. To closely inspect lower delta E values, you can<br />
set the maximum delta E value displayed on the y-axis to a lower value.<br />
Select this value from the list titled MAX DE AXIS. The diagram becomes<br />
more detailed, since more intermediate delta E values are displayed.<br />
Printing Trend Chart<br />
Click the PRINT button to output the color trend chart on a printer.<br />
Fig. 6-2<br />
Printing a Trend Chart<br />
ORIS <strong>Certified</strong> <strong>Proof</strong> Version 1.5.4 User <strong>Manual</strong> 6-3<br />
Image2Output Limited Unit 19 IO Centre Hearle Way Hatfield Business Park Hatfield Herts AL10 9EW<br />
Tel: +44 (0)1707 282 710 Fax: +44 (0)1707 269 764 sales@<strong>image2output</strong>.com
Long-Term Control and Trend Analysis<br />
‘Trend Analysis’ Dialog<br />
http://www.<strong>image2output</strong>.com<br />
6-4 CGS Publishing Technologies International Hainburg, Germany 08/27/2010<br />
Image2Output Limited Unit 19 IO Centre Hearle Way Hatfield Business Park Hatfield Herts AL10 9EW<br />
Tel: +44 (0)1707 282 710 Fax: +44 (0)1707 269 764 sales@<strong>image2output</strong>.com
http://www.<strong>image2output</strong>.com<br />
7 Miscellaneous<br />
About Measurement Files<br />
Windows<br />
Mac OS<br />
Save Location<br />
All measurements are automatically saved to the following directory:<br />
…\Program Files\CGS\ORIS <strong>Certified</strong> <strong>Proof</strong>\Measurements\<br />
…Applications:ORIS <strong>Certified</strong> <strong>Proof</strong>:Measurements<br />
The names of measurement files are ID<br />
.TXT, where is the measurement ID (see page 3-3).<br />
Duplicating<br />
You can duplicate a measurement file to a directory of your choice by<br />
clicking on and then on SAVE.<br />
Measuring Tips<br />
Contents<br />
Measurement files store the actual and target values, CMYK reference<br />
values, tolerances and color deviations. They also include the measurement<br />
details entered by the user (see page 3-3).<br />
If Eye-One has been used, the density readings are also included.<br />
» RELATED TOPICS:<br />
-SUPPORTED MEASUREMENT DEVICES (PAGE 1-3)<br />
-PERFORMING MEASUREMENTS (PAGE 3-1)<br />
ORIS <strong>Certified</strong> <strong>Proof</strong> Version 1.5.4 User <strong>Manual</strong> 7-1<br />
Image2Output Limited Unit 19 IO Centre Hearle Way Hatfield Business Park Hatfield Herts AL10 9EW<br />
Tel: +44 (0)1707 282 710 Fax: +44 (0)1707 269 764 sales@<strong>image2output</strong>.com
Miscellaneous<br />
Measuring Tips<br />
http://www.<strong>image2output</strong>.com<br />
Loading Measurements<br />
Using the button you can load measurement files, e.g. those of<br />
previous measurements or measurements made with another program.<br />
These files must comply with the IT8.7 or CGATS.5 file format.<br />
Using the measurements you have loaded can be added to the<br />
data records collected for creating trend analyses (see page 6-1).<br />
Using the measurements you have added can be removed from<br />
the data stored for trend analysis.<br />
You can also load the measurements of large test charts (e.g.<br />
ECI2002 or IT8.3). The program automatically extracts the values of<br />
the relevant color patches, e.g. the patches of the FOGRA bar. This<br />
requires that all of these patches are available on the test chart.<br />
Repeating or Canceling Measurements<br />
When you click on , the button changes to . This button allows<br />
you to cancel the measuring process.<br />
It is not necessary to press the button when the measurement is<br />
completed. But you can do so if you want to repeat the white calibration.<br />
Some spectrophotometers perform a white calibration whenever you<br />
click on the button.<br />
Click in case of measurement mistakes. The last strip or patch<br />
measurement will be dismissed and you can repeat it.<br />
If this button is clicked at the end of the measurement process or after<br />
loading a measurement file, the entire measurement will be dismissed<br />
and not added to the data collected for trend analysis (see page 6-1).<br />
You can click repeatedly, e.g. to dismiss the measurements of<br />
several patches or of two color strips at the same time.<br />
7-2 CGS Publishing Technologies International Hainburg, Germany 08/27/2010<br />
Image2Output Limited Unit 19 IO Centre Hearle Way Hatfield Business Park Hatfield Herts AL10 9EW<br />
Tel: +44 (0)1707 282 710 Fax: +44 (0)1707 269 764 sales@<strong>image2output</strong>.com
http://www.<strong>image2output</strong>.com<br />
Miscellaneous<br />
Measuring Tips<br />
Color Bar Geometry for Eye-One<br />
Color bars can only be scanned automatically with Eye-One if they have<br />
a particular geometry:<br />
• There must be a white area to the left and right of every strip. The<br />
minimum width of this area must be the width of a color patch.<br />
• Color patches must have a minimum width of 8 mm. If neighboring<br />
patches are similar in color, there must be a gap between them.<br />
Strip Scanning with DTP41/45<br />
1. Center the color strip below the alignment mark and insert it into the<br />
strip entrance as far as it will go.<br />
2. Press the instrument button. The DTP41/45 pulls the strip through<br />
automatically and measures the color patches.<br />
The LED on the DTP41/45 flashes if an error occurs during measurement.<br />
In this case make sure the number of color patches and the<br />
measurement geometry has been set correctly in ORIS <strong>Certified</strong><br />
<strong>Proof</strong>, then repeat this process.<br />
3. Measure the second color strip (if any) in the same way.<br />
Strip Scanning with Eye-One<br />
1. Place the scanning ruler on the printed sample and align the guide<br />
slot on the upper row of color patches.<br />
2. Place the measuring head of the Eye-One on the white area to the<br />
left of the color bar.<br />
3. Press the instrument button and wait for a beep to signal that the<br />
device is ready. Instructions on how to perform the measurement are<br />
displayed at the bottom of the dialog.<br />
4. Hold the device button pressed down and move the measuring head<br />
slowly and steadily over the color patches (in about 6 seconds).<br />
5. Release the button when you have reached the end of the row. If the<br />
measurement was successful, the color patches you have measured<br />
are displayed in the dialog.<br />
6. If the color bar consists of multiple strips, measure the next strip in<br />
the same way.<br />
ORIS <strong>Certified</strong> <strong>Proof</strong> Version 1.5.4 User <strong>Manual</strong> 7-3<br />
Image2Output Limited Unit 19 IO Centre Hearle Way Hatfield Business Park Hatfield Herts AL10 9EW<br />
Tel: +44 (0)1707 282 710 Fax: +44 (0)1707 269 764 sales@<strong>image2output</strong>.com
Miscellaneous<br />
Measuring Tips<br />
http://www.<strong>image2output</strong>.com<br />
If a color bar has to be measured in the single-patch mode, make sure<br />
to do this in the correct order. Start with the strip at the top and measure<br />
the patches from left to right.<br />
Strip Scanning with SpectroJet and RS 800<br />
1. Make sure you have precisely specified the size of the color patches<br />
and the size of the gaps between them. You should use a precision<br />
of two decimal places (see page 8-19).<br />
2. Place the instrument’s measuring head on the white area to the left<br />
of the color bar, very close to the first patch. Precisely align the edge<br />
of the measurement device parallel to your color bar. Don’t leave any<br />
space between the device and color bar (see Fig. 7-1).<br />
3. Press the button on the device once (SpectroJet) or twice like a double<br />
click (RS 800), respectively.<br />
A beep indicates that the device is ready. Instructions on how to perform<br />
the measurement are displayed at the bottom of the dialog.<br />
4. Glide the device over the color bar until a beep indicates that the last<br />
patch has been measured. If the measurement was successful, the<br />
color patches you have measured are displayed in the dialog.<br />
5. If the color bar consists of multiple strips, measure the next strip in<br />
the same way.<br />
Fig. 7-1<br />
Positioning SpectroJet or RS 800 – Correct<br />
TECHKON Device<br />
Don’t leave any space here.<br />
Measuring<br />
head<br />
Don’t leave any space here.<br />
Fig. 7-2<br />
Positioning SpectroJet or RS 800 – Wrong<br />
Measuring<br />
head<br />
TECHKON Device<br />
Wrong!<br />
Wrong!<br />
7-4 CGS Publishing Technologies International Hainburg, Germany 08/27/2010<br />
Image2Output Limited Unit 19 IO Centre Hearle Way Hatfield Business Park Hatfield Herts AL10 9EW<br />
Tel: +44 (0)1707 282 710 Fax: +44 (0)1707 269 764 sales@<strong>image2output</strong>.com
http://www.<strong>image2output</strong>.com<br />
Miscellaneous<br />
Visualizing Acoustic Signals<br />
Solid Density Measurement with Eye-One<br />
Eye-One is capable of measuring density in addition to Lab values. To<br />
verify the density of solid primary colors (C100, M100, Y100, K100) you<br />
have to set up the measurement device as follows:<br />
1. Click on , then click on (see also page 8-17).<br />
2. Enable the option ADDITIONALLY MEASURE SOLID DENSITIES.<br />
3. Also enable RELATIVE TO PAPER if you want to measure the densities<br />
relative to the paper white. In this case the paper white value will be<br />
measured and subtracted from the density values you are measuring.<br />
Click on and then on DENSITIES to view the measured densities. The<br />
values are also written to the measurement file. Four density values are<br />
measured for every solid color (see also page 4-1).<br />
Fig. 7-3<br />
Solid Densities Measured with Eye-One<br />
Visualizing Acoustic Signals<br />
If there is a high noise level, it may be difficult to hear the beep signal<br />
produced by your measurement device. In this case it is advisable to<br />
have the system additionally create a visual signal. Proceed as follows:<br />
Windows Vista<br />
Select START | (SETTINGS) | CONTROL PANEL | EASE OF ACCESS | REPLACE<br />
SOUNDS WITH VISUAL CUES or USE TEXT OR VISUAL ALTERNATIVES FOR<br />
SOUNDS. Then enable TURN ON VISUAL NOTIFICATIONS FOR SOUNDS and<br />
select a visualization method, e.g. FLASH ACTIVE CAPTION BAR.<br />
Windows XP<br />
Select START | CONTROL PANEL | ACCESSIBILITY OPTIONS | (ACCESSIBILITY<br />
OPTIONS) | SOUND. Then enable USE SOUNDSENTRY and select a visualization<br />
method, e.g. FLASH ACTIVE CAPTION BAR.<br />
ORIS <strong>Certified</strong> <strong>Proof</strong> Version 1.5.4 User <strong>Manual</strong> 7-5<br />
Image2Output Limited Unit 19 IO Centre Hearle Way Hatfield Business Park Hatfield Herts AL10 9EW<br />
Tel: +44 (0)1707 282 710 Fax: +44 (0)1707 269 764 sales@<strong>image2output</strong>.com
Miscellaneous<br />
Visualizing Acoustic Signals<br />
http://www.<strong>image2output</strong>.com<br />
Mac OS X<br />
Select | SYSTEM PREFERENCES | SYSTEM | UNIVERSAL ACCESS<br />
|HEARING, then enable the option FLASH THE SCREEN WHENEVER AN<br />
ALERT SOUND OCCURS.<br />
7-6 CGS Publishing Technologies International Hainburg, Germany 08/27/2010<br />
Image2Output Limited Unit 19 IO Centre Hearle Way Hatfield Business Park Hatfield Herts AL10 9EW<br />
Tel: +44 (0)1707 282 710 Fax: +44 (0)1707 269 764 sales@<strong>image2output</strong>.com
http://www.<strong>image2output</strong>.com<br />
8 Dialog Reference<br />
‘Define Print Target’ Dialog<br />
This dialog can be opened by clicking the button in the main window.<br />
Use it to create or modify print targets. A print target defines the patches<br />
to be measured as well as the target values and tolerances.<br />
You have to select a print target in the main window before starting to<br />
measure (except when comparing single colors, see page 5-1).<br />
Fig. 8-1<br />
‘Define Print Target’ Dialog<br />
ORIS <strong>Certified</strong> <strong>Proof</strong> Version 1.5.4 User <strong>Manual</strong> 8-1<br />
Image2Output Limited Unit 19 IO Centre Hearle Way Hatfield Business Park Hatfield Herts AL10 9EW<br />
Tel: +44 (0)1707 282 710 Fax: +44 (0)1707 269 764 sales@<strong>image2output</strong>.com
Dialog Reference<br />
‘Define Print Target’ Dialog<br />
http://www.<strong>image2output</strong>.com<br />
PREDEFINED PRINT TARGETS<br />
This is the list of predefined print targets installed<br />
with ORIS <strong>Certified</strong> <strong>Proof</strong>. Predefined print targets<br />
cannot be modified or deleted.<br />
By default, the predefined print targets are also<br />
available in the list of print targets displayed below<br />
this list. If you have modified or deleted a predefined<br />
print target there, you can easily restore it.<br />
To do so, select the predefined print target and click on the button.<br />
This adds the print target to the other list (see Fig. 8-2). It can then be<br />
modified and is available in the main window.<br />
The following predefined print targets are available:<br />
Print Target Name Target Value File Reference File<br />
3DAP V3<br />
3DAPv3 LAB Target Values<br />
PT1-2.txt<br />
3DAPv3 CMYK<br />
Wedge.txt<br />
FOGRA V2 ISOCOATED V2 ECI ISOcoated v2 eci (FOGRA39).txt<br />
FOGRA V2 ISONEWSPAPER<br />
FOGRA V2 ISOUNCOATED<br />
FOGRA V2 ISOWEBCOATED<br />
FOGRA V2 SC PAPER ECI<br />
FOGRA V3 ISOCOATED V2 ECI<br />
FOGRA V3 ISOUNCOATED<br />
FOGRA V3 ISOWEBCOATED<br />
FOGRA V3 SC PAPER ECI<br />
IDEALLIANCE GRACOL<br />
COATED1 2009<br />
IDEALLIANCE SWOP COATED3<br />
2009<br />
IDEALLIANCE SWOP COATED5<br />
2009<br />
VALID. PRINT FOGRA V2<br />
ISOCOATED<br />
ISOnewspaper26v4 (IFRA26L).txt<br />
ISOuncoated (FOGRA29).txt<br />
ISOwebcoated (FOGRA28).txt<br />
SC paper eci (FOGRA40).txt<br />
FOGRA v3 ISOcoated v2 eci<br />
(FOGRA39).txt<br />
FOGRA v3 ISOuncoated<br />
(FOGRA29).txt<br />
FOGRA v3 ISOwebcoated<br />
(FOGRA28).txt<br />
FOGRA v3 SC paper eci<br />
(FOGRA40).txt<br />
GRACoLCoated1_ISO12647-<br />
7_ControlStrip2009.txt<br />
SWOPCoated3_ISO12647-<br />
7_ControlStrip2009.txt<br />
SWOPCoated5_ISO12647-<br />
7_ControlStrip2009.txt<br />
ISOcoated v2 eci (FOGRA39).txt<br />
FOGRA Reference.txt<br />
(two rows of patches)<br />
FOGRA v3<br />
Reference.txt<br />
(three rows of patches)<br />
IDEAlliance<br />
ISO12647-<br />
7_ControlStrip2009<br />
CMYK.txt<br />
FOGRA Reference.txt<br />
(two rows of patches)<br />
More details: See page 9-1 See page 9-5<br />
8-2 CGS Publishing Technologies International Hainburg, Germany 08/27/2010<br />
Image2Output Limited Unit 19 IO Centre Hearle Way Hatfield Business Park Hatfield Herts AL10 9EW<br />
Tel: +44 (0)1707 282 710 Fax: +44 (0)1707 269 764 sales@<strong>image2output</strong>.com
http://www.<strong>image2output</strong>.com<br />
Dialog Reference<br />
‘Define Print Target’ Dialog<br />
Fig. 8-2<br />
Adding a Predefined Print Target<br />
PRINT TARGETS<br />
This is the list of print targets that can be selected<br />
in the main window (see page 3-2).<br />
Click on a name in this list to select the print target<br />
to be modified or deleted. Click on NEW… to<br />
create a new print target.<br />
The following buttons appear underneath the list<br />
of print targets:<br />
– Saves a new or modified print target<br />
– Deletes the selected print target<br />
Changes are saved automatically when you close the dialog using OK.<br />
The CANCEL button discards all changes except for those saved with .<br />
TARGET NAME<br />
Having clicked on NEW…, enter a name for the new print target into this<br />
box. The names are not case sensitive.<br />
To duplicate and modify a print target, overtype the name in this box,<br />
then save your changes using the button.<br />
The name of the selected print target is displayed on the title bar of the<br />
main window.<br />
PROOF SUPPLIER<br />
Into this box, you can enter the name of the company which delivers the<br />
proofs, if the print target will be used for proof measurements.<br />
This information will be included in measurement files and reports and<br />
printed on the label. It can also be used for selecting the measurements<br />
to be included in a trend analysis (see page 6-1).<br />
ORIS <strong>Certified</strong> <strong>Proof</strong> Version 1.5.4 User <strong>Manual</strong> 8-3<br />
Image2Output Limited Unit 19 IO Centre Hearle Way Hatfield Business Park Hatfield Herts AL10 9EW<br />
Tel: +44 (0)1707 282 710 Fax: +44 (0)1707 269 764 sales@<strong>image2output</strong>.com
Dialog Reference<br />
‘Define Print Target’ Dialog<br />
http://www.<strong>image2output</strong>.com<br />
MEASUREMENT VALUES<br />
Click one of the following options to choose the type of measurement.<br />
• LAB<br />
Use this setting for measuring proofs (Lab values).<br />
• DENSITIES<br />
Use this setting for measuring press sheets (densities of primary colors).<br />
Enable the RELATIVE TO PAPER option if you want to measure the densities<br />
relative to the paper white. In this case the paper white value<br />
will be measured and subtracted from the density values measured<br />
on the color patches.<br />
You should use a color bar containing primary colors only. Color<br />
bars additionally containing other colors can also be used, but all of<br />
the non-primary colors will be skipped during density measurement.<br />
CMYK REFERENCE<br />
Use this option to select the file describing the layout and CMYK values<br />
of the color bar to be measured.<br />
Windows<br />
Mac OS<br />
Reference files for predefined print targets are available under<br />
…\Program Files\CGS\ORIS <strong>Certified</strong><br />
<strong>Proof</strong>\Standards\…\Reference\<br />
…Applications:ORIS <strong>Certified</strong> <strong>Proof</strong>:Standards:…:Reference<br />
Lab colors can also be measured without a reference file. In this case,<br />
however, it is not possible to calculate dE of paper white or primaries<br />
and to compare color spaces graphically (see page 4-4). A reference<br />
file is mandatory if the target values are specified with an ICC profile<br />
and when measuring with iCColor or Eye-One iSis.<br />
TARGET VALUES<br />
Click BROWSE to load the target values to which your measurements will<br />
be compared. To specify target values, you can use files of the following<br />
type:<br />
8-4 CGS Publishing Technologies International Hainburg, Germany 08/27/2010<br />
Image2Output Limited Unit 19 IO Centre Hearle Way Hatfield Business Park Hatfield Herts AL10 9EW<br />
Tel: +44 (0)1707 282 710 Fax: +44 (0)1707 269 764 sales@<strong>image2output</strong>.com
http://www.<strong>image2output</strong>.com<br />
Dialog Reference<br />
‘Define Print Target’ Dialog<br />
Windows<br />
Mac OS<br />
Windows<br />
Mac OS<br />
• The target value files available in the installation directory<br />
…\Program Files\CGS\ORIS <strong>Certified</strong> <strong>Proof</strong>\Standards\<br />
…Applications:ORIS <strong>Certified</strong> <strong>Proof</strong>:Standards<br />
These files characterize standard printing conditions (see page 9-1).<br />
• ICC profiles, e.g. CMYK profiles characterizing additional printing<br />
standards.<br />
We recommend to use the target value files in the installation directory.<br />
Only use ICC profiles if no measurement files are available.<br />
• Measurements made in the main window or with the MEASURE TAR-<br />
GET VALUES and DEFINE COLOR BAR functions.<br />
Measurements made in the main window are automatically saved to:<br />
…\Program Files\CGS\ORIS <strong>Certified</strong> <strong>Proof</strong>\Measurements\<br />
…Applications:ORIS <strong>Certified</strong> <strong>Proof</strong>:Measurements<br />
• Measurements of large test charts (e.g. ECI2002 or IT8.3).<br />
The program automatically extracts the values of the color patches<br />
defined in the reference file, e.g. the patches of the FOGRA bar. This<br />
requires that all of these patches are available on the test chart.<br />
• Measurement files created with other programs (e.g. ProfileMaker),<br />
provided that the file format complies with IT8.7 or CGATS.5.<br />
MEASURE OR AVERAGE TARGET VALUES<br />
Use this option to enable the buttons MEASURE TARGET VALUES, DEFINE<br />
COLOR BAR and AVERAGE TARGET VALUES.<br />
MEASURE TARGET VALUES<br />
Click this button if you want to use your corporate target values. You can<br />
then measure a color bar printed according to your company’s standard.<br />
1. If Eye-One is used, specify whether strips or single patches should<br />
be measured (see page 7-3).<br />
2. Click START MEASUREMENT and measure the color bar.<br />
3. Click SAVE TARGET VALUES to save the measurement file.<br />
By default, the file is saved to the installation directory Standards<br />
under the name of the print target and with the file extension TXT.<br />
The target value file you have saved will automatically be assigned to<br />
the current print target. The current target value file will be discarded.<br />
ORIS <strong>Certified</strong> <strong>Proof</strong> Version 1.5.4 User <strong>Manual</strong> 8-5<br />
Image2Output Limited Unit 19 IO Centre Hearle Way Hatfield Business Park Hatfield Herts AL10 9EW<br />
Tel: +44 (0)1707 282 710 Fax: +44 (0)1707 269 764 sales@<strong>image2output</strong>.com
Dialog Reference<br />
‘Define Print Target’ Dialog<br />
http://www.<strong>image2output</strong>.com<br />
Windows<br />
Mac OS<br />
This function is only available if MEASURE OR AVERAGE TARGET VALUES is<br />
enabled. It requires a CMYK REFERENCE file (see page 8-4).<br />
Various color bars and reference files are available in the installation<br />
directory (see page 9-5):<br />
…\Program Files\CGS\ORIS <strong>Certified</strong> <strong>Proof</strong>\Standards<br />
…Applications:ORIS <strong>Certified</strong> <strong>Proof</strong>:Standards<br />
Fig. 8-3<br />
‘Measure Target Values’ Dialog<br />
DEFINE COLOR BAR<br />
Click this button if you are using a color bar for which no CMYK reference<br />
file is available. You can define the color bar geometry and measure<br />
the target values of the individual color patches. The dialog for<br />
measuring target values appears (see Fig. 8-3).<br />
1. If Eye-One is used, select the number of strips and the number of<br />
patches per strip.<br />
2. Specify whether strips or single patches should be measured (see<br />
also page 7-3).<br />
3. Click START MEASUREMENT and measure the color bar.<br />
4. Click SAVE TARGET VALUES to save the measurement file.<br />
By default, the file is saved to the installation directory Standards<br />
under the name of the print target and with the file extension *.TXT.<br />
The target value file you have saved will be assigned automatically to<br />
the current print target. The current target value file and reference file<br />
will be discarded.<br />
8-6 CGS Publishing Technologies International Hainburg, Germany 08/27/2010<br />
Image2Output Limited Unit 19 IO Centre Hearle Way Hatfield Business Park Hatfield Herts AL10 9EW<br />
Tel: +44 (0)1707 282 710 Fax: +44 (0)1707 269 764 sales@<strong>image2output</strong>.com
http://www.<strong>image2output</strong>.com<br />
Dialog Reference<br />
‘Define Print Target’ Dialog<br />
This function is only available if the MEASURE OR AVERAGE TARGET VAL-<br />
UES option is enabled.<br />
AVERAGE TARGET VALUES<br />
This function averages the measurement values of several files and<br />
saves the result as a single file. It is only available if the MEASURE OR AV-<br />
ERAGE TARGET VALUES option is enabled.<br />
Using the MEASURE TARGET VALUES function, for example, you may have<br />
created several target value files for the same color bar. By averaging<br />
the target values you can minimize measurement errors and compensate<br />
for inaccuracies of the measurement device.<br />
Clicking on AVERAGE TARGET VALUES opens the dialog shown in Fig. 8-4.<br />
Use the and buttons to add or remove the files to be averaged.<br />
You can also select multiple files at the same time. Then click on AVER-<br />
AGE AND SAVE and specify the name and save location of the new file.<br />
The target value file you have saved will automatically be assigned to<br />
the current print target. The current target value file will be discarded.<br />
Fig. 8-4<br />
‘Average Target Values’ Dialog<br />
USE STANDARD TOLERANCES<br />
Enable this option to use the tolerances and DELTA E FORMULA of a particular<br />
printing standard. The available standards are listed below.<br />
Disable it if you want to enter your own tolerance values or to use another<br />
DELTA E FORMULA. Enter the tolerances into the input boxes further<br />
down below in the dialog. The selected DELTA E FORMULA determines<br />
whether color deviations are interpreted as delta E, dE94, or dE2000.<br />
The USE STANDARD TOLERANCES option is only available for Lab print targets.<br />
Some of the tolerance input boxes are unavailable if SINGLE TOL-<br />
ERANCES are enabled (see page 8-11).<br />
ORIS <strong>Certified</strong> <strong>Proof</strong> Version 1.5.4 User <strong>Manual</strong> 8-7<br />
Image2Output Limited Unit 19 IO Centre Hearle Way Hatfield Business Park Hatfield Herts AL10 9EW<br />
Tel: +44 (0)1707 282 710 Fax: +44 (0)1707 269 764 sales@<strong>image2output</strong>.com
Dialog Reference<br />
‘Define Print Target’ Dialog<br />
http://www.<strong>image2output</strong>.com<br />
3DAP<br />
This Australian standard defines the following tolerance values:<br />
dE average: 2<br />
dE maximum: 5<br />
dE formula: dE94<br />
FOGRA, SWOP<br />
These are the tolerances used by FOGRA (Germany) and SWOP (USA)<br />
until early 2007. They have been replaced by the ISO 12647-7 tolerances.<br />
dE paper: 3 (a)<br />
dE average: 4<br />
dE maximum: 10<br />
dE primaries: 5 (b)<br />
dE formula: dE<br />
Annotations:<br />
(a) Deviation from paper white<br />
(b) Maximum deviation for primary colors<br />
ISO 12647-3 NEWSPAPER<br />
Tolerances for offset newspaper printing according to ISO 12647-3:<br />
dL paper 3<br />
da paper: 2<br />
db paper: 2<br />
dE primary and secondary colors: 8 (a)<br />
Annotation:<br />
(a) IFRA recommends 4 dE<br />
ISO 12647-7 COLOR BAR<br />
These tolerances were introduced by FOGRA in early 2007. They have<br />
been adopted by SWOP and GRACoL. These values are used for verifying<br />
proofs according to ISO 12647-7 by measuring a color bar.<br />
dE paper: 3<br />
dE average: 3<br />
dE maximum: 6<br />
dE primaries: 5<br />
dH primaries: 2.5 (a)<br />
dH average CMY gray: 1.5 (b)<br />
dE formula:<br />
dE<br />
8-8 CGS Publishing Technologies International Hainburg, Germany 08/27/2010<br />
Image2Output Limited Unit 19 IO Centre Hearle Way Hatfield Business Park Hatfield Herts AL10 9EW<br />
Tel: +44 (0)1707 282 710 Fax: +44 (0)1707 269 764 sales@<strong>image2output</strong>.com
http://www.<strong>image2output</strong>.com<br />
Dialog Reference<br />
‘Define Print Target’ Dialog<br />
Annotations:<br />
(a) Maximum deviation in hue for primary colors<br />
dH values can be positive or negative. This depends on the<br />
direction of the deviation. The hue angle may deviate towards<br />
the red/green or yellow/blue axis in the LCh color space.<br />
(b) Average deviation in hue for CMY gray (G10–G100)<br />
ISO 12647-7 TEST CHART<br />
These tolerances were introduced by FOGRA in early 2007. They are<br />
used for verifying proofing systems according to ISO 12647-7 by measuring<br />
the IT8/7.3, IT8/7.4 or ECI2002 test chart. FOGRA recommends<br />
to use the random layout version of the IT8/7.4 test chart.<br />
dE 95% quantile: 6 (a)<br />
dE average: 4<br />
dE Ø outer gamut: 4 (b)<br />
dE formula: dE<br />
Annotations:<br />
(a) 95% of all dE values, arranged in ascending order, must be<br />
less than or equal to the specified tolerance value.<br />
(b) Average dE of all color patches located on the surface of the<br />
CMYK color space. These are colors with one or more 100%<br />
values such as C10M100Y34K20 or C15M100Y100K40.<br />
ISO 12647-7 VALIDATION PRINT<br />
Tolerance values for FOGRA Validation Print. This is an ISO 12647-7<br />
based certification standard for the creative design phase with a less<br />
stringent set of tolerance values.<br />
The tolerance values are identical to those of ISO 12647-7 COLOR BAR.<br />
There is only one exception: The tolerance for maximum dE is 8 (not 6).<br />
SICOGIF<br />
This French standard defines two-level tolerances, i.e. a set of standard<br />
and strict (lower) tolerance values (see also page 8-13).<br />
Strict Standard<br />
dE paper: 3 3<br />
dE average: 4 5<br />
dE maximum: 10 12<br />
dE primaries: 4 5.5<br />
dE gray tones max.: 5 6<br />
ORIS <strong>Certified</strong> <strong>Proof</strong> Version 1.5.4 User <strong>Manual</strong> 8-9<br />
Image2Output Limited Unit 19 IO Centre Hearle Way Hatfield Business Park Hatfield Herts AL10 9EW<br />
Tel: +44 (0)1707 282 710 Fax: +44 (0)1707 269 764 sales@<strong>image2output</strong>.com
Dialog Reference<br />
‘Define Print Target’ Dialog<br />
http://www.<strong>image2output</strong>.com<br />
Strict Standard<br />
dE gray tones Ø: 3 4<br />
dE skin tones max.: 5 6<br />
dE skin tones Ø: 3 4<br />
dE formula:<br />
dE94<br />
DELTA E FORMULA<br />
The DELTA E FORMULA defines the calculation method for color deviations.<br />
This option is only available if you have selected an Lab print<br />
target and disabled the USE STANDARD TOLERANCES option.<br />
Delta E<br />
Numerical value that represents the ‘distance’ between two colors in the<br />
CIE Lab color space. This formula was introduced in 1976 and is therefore<br />
also known as ‘Delta E 1976’.<br />
Delta E 94<br />
A variant of the Delta E color distance formula published in 1994. It gives<br />
more weight to chroma, which comes closer to what the human eye perceives.<br />
Delta E 2000<br />
Revision of the Delta E 94 formula, released in 2000.<br />
Unlike Delta E 94, which assumes that L* correctly reflects the perceived<br />
differences in lightness, delta E 2000 varies the weighting of L* depending<br />
on where in the lightness range the color falls.<br />
Delta E CMC<br />
Color difference formula adopted by the Colour Measurement Committee<br />
of the Society of Dyers and Colourists of Great Britain in 1984. It describes<br />
color differences in the CIE LCh color space.<br />
The human eye is more sensitive to chroma. Therefore, this formula<br />
uses an equation which allows the setting of lightness and chroma factors.<br />
CMC 2:1 means that lightness has twice the weighting of chroma.<br />
8-10 CGS Publishing Technologies International Hainburg, Germany 08/27/2010<br />
Image2Output Limited Unit 19 IO Centre Hearle Way Hatfield Business Park Hatfield Herts AL10 9EW<br />
Tel: +44 (0)1707 282 710 Fax: +44 (0)1707 269 764 sales@<strong>image2output</strong>.com
http://www.<strong>image2output</strong>.com<br />
Dialog Reference<br />
‘Define Print Target’ Dialog<br />
Tolerance Input Boxes<br />
Enter the tolerance values here (see Fig. 8-5). A tolerance is the maximum<br />
deviation from the target value that is still acceptable.<br />
» RELATED TOPICS:<br />
-USE STANDARD TOLERANCES (PAGE 8-7)<br />
-SINGLE TOLERANCES (PAGE 8-11)<br />
-2-LEVEL TOLERANCES (PAGE 8-13)<br />
Tolerances for Lab Colors<br />
If the USE STANDARD TOLERANCES option is enabled, the tolerance values<br />
defined by the respective printing standard are used automatically. Refer<br />
to page 8-7 for more details.<br />
If you disable this option, you can adjust the tolerance values according<br />
to your requirements.<br />
Tolerances for Density<br />
You can specify the following tolerances:<br />
• Average of negative deviations<br />
• Average of positive deviations<br />
• Maximum of negative deviations<br />
• Maximum of positive deviations<br />
These tolerances are relative values. If the maximum negative tolerance<br />
is 10% and the target density is 2.0, for example, density values ranging<br />
from 1.8 to 2.0 are within the tolerance limits.<br />
Fig. 8-5<br />
Tolerance Input Boxes for Lab (left) and Density (right)<br />
SINGLE TOLERANCES<br />
Enable this option and click the EDIT button to open the SINGLE TOLER-<br />
ANCES dialog (see Fig. 8-6). It allows you to enter a separate tolerance<br />
value for every patch. In the case of Lab print targets, this applies to<br />
delta E tolerances.<br />
ORIS <strong>Certified</strong> <strong>Proof</strong> Version 1.5.4 User <strong>Manual</strong> 8-11<br />
Image2Output Limited Unit 19 IO Centre Hearle Way Hatfield Business Park Hatfield Herts AL10 9EW<br />
Tel: +44 (0)1707 282 710 Fax: +44 (0)1707 269 764 sales@<strong>image2output</strong>.com
Dialog Reference<br />
‘Define Print Target’ Dialog<br />
http://www.<strong>image2output</strong>.com<br />
This option is only available if USE STANDARD TOLERANCES is disabled.<br />
Some of the tolerance input boxes, such as dE paper or primaries,<br />
become unavailable if single tolerances are defined.<br />
‘Single Tolerances’ Dialog<br />
1. Click on a table row (see Fig. 8-6). This will automatically open an input<br />
box. If a table row is selected already, you have to double-click it.<br />
You can also use the and keys to select the next or previous<br />
color patch.<br />
2. Enter a tolerance value for the selected color patch.<br />
If the 2-LEVEL TOLERANCES option is enabled, you can enter two different<br />
tolerance values (see page 8-13).<br />
Fig. 8-6<br />
‘Single Tolerances’ Dialog<br />
8-12 CGS Publishing Technologies International Hainburg, Germany 08/27/2010<br />
Image2Output Limited Unit 19 IO Centre Hearle Way Hatfield Business Park Hatfield Herts AL10 9EW<br />
Tel: +44 (0)1707 282 710 Fax: +44 (0)1707 269 764 sales@<strong>image2output</strong>.com
http://www.<strong>image2output</strong>.com<br />
Dialog Reference<br />
‘Settings’ Dialog<br />
2-LEVEL TOLERANCES<br />
This option is only available for Lab print targets. Enable it to define two<br />
sets of tolerance values (see Fig. 8-7):<br />
Low value, strict tolerance limit<br />
High value, standard tolerance limit<br />
If you have defined two-level tolerances, one of the following icons<br />
appears after you have completed a measurement:<br />
All measurements are within the strict tolerance limits<br />
All measurements are within the standard tolerance limits<br />
One or more values are outside the standard tolerance limits<br />
Note:<br />
Two-level tolerances are used automatically for the SICOGIF standard.<br />
Fig. 8-7<br />
Two-Level Tolerances<br />
‘Settings’ Dialog<br />
This configuration dialog can be opened by clicking the button in the<br />
main window. Select a category using the buttons on the left-hand side.<br />
DEFINE PROOF PRINTER<br />
This dialog (Fig. 8-8) opens when you click the button on the left.<br />
Use it to create a list of proof printer names which users have to select<br />
from before starting to measure in the main window. See also page 3-3.<br />
To add a name, enter it into the NEW PROOF PRINTER box and click on .<br />
To remove a name, select it and click on .<br />
Changes are saved automatically when you close the dialog using OK.<br />
The CANCEL button discards all changes except for those saved with .<br />
The printer name will be printed on the label and included in reports. It<br />
can also be used for selecting the measurements to be included in a<br />
trend analysis (see page 6-1).<br />
ORIS <strong>Certified</strong> <strong>Proof</strong> Version 1.5.4 User <strong>Manual</strong> 8-13<br />
Image2Output Limited Unit 19 IO Centre Hearle Way Hatfield Business Park Hatfield Herts AL10 9EW<br />
Tel: +44 (0)1707 282 710 Fax: +44 (0)1707 269 764 sales@<strong>image2output</strong>.com
Dialog Reference<br />
‘Settings’ Dialog<br />
http://www.<strong>image2output</strong>.com<br />
Fig. 8-8<br />
‘Settings’ Dialog – <strong>Proof</strong> Printer<br />
DEFINE USER<br />
This dialog (Fig. 8-9) opens when you click the<br />
button on the left.<br />
Use it to create a list of the persons performing the measurements.<br />
These name can then be easily selected in the main window.<br />
To add a name, enter it into the NEW USER box and click on . To<br />
remove a name, select it and click on .<br />
Changes are saved automatically when you close the dialog using OK.<br />
The user’s name will be printed on the label, included in reports and can<br />
be used for selecting the measurements to be included in a trend analysis.<br />
Fig. 8-9<br />
‘Settings’ Dialog – User<br />
8-14 CGS Publishing Technologies International Hainburg, Germany 08/27/2010<br />
Image2Output Limited Unit 19 IO Centre Hearle Way Hatfield Business Park Hatfield Herts AL10 9EW<br />
Tel: +44 (0)1707 282 710 Fax: +44 (0)1707 269 764 sales@<strong>image2output</strong>.com
http://www.<strong>image2output</strong>.com<br />
Dialog Reference<br />
‘Settings’ Dialog<br />
SETUP LABEL PRINTER<br />
This dialog (Fig. 8-10) opens when you click the<br />
button on the left.<br />
Use it to make settings for the label printer and to specify the logo and<br />
header text to be used when printing labels, reports or trend analysis<br />
charts.<br />
Fig. 8-10<br />
‘Settings’ Dialog – Label Printer<br />
PRINTER<br />
Windows<br />
Mac OS<br />
Select your label printer from this list. You can also use other printers if<br />
you want. All printers installed on your system are listed here.<br />
Then click the SETUP button and define the label format. We recommend<br />
to use labels with a size of approximately 88 x 36 mm or larger.<br />
Make the following settings for DYMO printers:<br />
PAPER – SIZE:<br />
ORIENTATION:<br />
99012 LARGE ADDRESS<br />
PORTRAIT<br />
SETTINGS: PAGE ATTRIBUTES<br />
FORMAT FOR:<br />
PAPER SIZE: 99012 LARGE ADDRESS<br />
ORIENTATION:<br />
SCALE: 100%<br />
Select your label printer here<br />
normal (button on the left)<br />
ORIS <strong>Certified</strong> <strong>Proof</strong> Version 1.5.4 User <strong>Manual</strong> 8-15<br />
Image2Output Limited Unit 19 IO Centre Hearle Way Hatfield Business Park Hatfield Herts AL10 9EW<br />
Tel: +44 (0)1707 282 710 Fax: +44 (0)1707 269 764 sales@<strong>image2output</strong>.com
Dialog Reference<br />
‘Settings’ Dialog<br />
http://www.<strong>image2output</strong>.com<br />
In some rare cases the paper size setting may not persist and always<br />
revert to the default size. Should this occur, do the following:<br />
1. Delete the file Default.opd in the ORIS <strong>Certified</strong> <strong>Proof</strong> installation<br />
directory.<br />
2. Select the paper size 99012 LARGE ADDRESS using the options of<br />
the printer driver (SETUP | PROPERTIES | ADVANCED).<br />
3. Restart ORIS <strong>Certified</strong> <strong>Proof</strong>.<br />
PRINT AUTOMATICALLY<br />
Enable this option if a label should be printed automatically when the<br />
measurement is completed. You can choose whether this should be<br />
done always, if the colors are OK, or if they are out of tolerance.<br />
If this option is disabled, labels can only be printed manually by clicking<br />
the button in the main window (see also page 3-6).<br />
PRINT 2-LEVEL TOLERANCES ON LABEL<br />
This option is only relevant for print targets with 2-level tolerances.<br />
The icon on a label may mislead users in thinking that the measurements<br />
are out of tolerance, although this icon means that the values are<br />
outside the strict tolerance limits only. Such users may feel reassured if<br />
they see the icon instead.<br />
If you disable this option, the will be printed on the label if the measurements<br />
are outside the strict, but within the standard tolerance limits.<br />
In addition, the strict tolerances values are suppressed on the label.<br />
This option has no effect on the tolerance values and icons displayed in<br />
the main window.<br />
» RELATED TOPICS:<br />
-2-LEVEL TOLERANCES (PAGE 8-13)<br />
-PRINT LABEL (PAGE 3-6)<br />
-PASS/FAIL INDICATION (PAGE 3-5)<br />
LOGO AND TITLE<br />
Windows<br />
Use these options to specify the header text and logo to be added when<br />
printing labels, reports and trend analysis charts. Enter the header text<br />
into the TITLE box. Use the BROWSE button to select a logo file.<br />
You can only use logos with bitmap format (*.BMP).<br />
8-16 CGS Publishing Technologies International Hainburg, Germany 08/27/2010<br />
Image2Output Limited Unit 19 IO Centre Hearle Way Hatfield Business Park Hatfield Herts AL10 9EW<br />
Tel: +44 (0)1707 282 710 Fax: +44 (0)1707 269 764 sales@<strong>image2output</strong>.com
http://www.<strong>image2output</strong>.com<br />
Dialog Reference<br />
‘Settings’ Dialog<br />
Mac OS<br />
JPEG images deliver the best quality.<br />
Click the DEFAULT LOGO button to revert to the default logo.<br />
PRINT TEST LABEL<br />
Click this button to test the label printer. It will print an empty label with<br />
just the logo, header text and date.<br />
SETUP MEASUREMENT DEVICE<br />
This dialog (Fig. 8-11) opens when you click the button on the left.<br />
Use this dialog to configure the measurement device connected to your<br />
computer and to test whether the device is capable of communicating<br />
with your computer.<br />
» RELATED TOPICS:<br />
-SUPPORTED MEASUREMENT DEVICES (PAGE 1-3)<br />
-MEASURING TIPS (PAGE 7-1)<br />
Fig. 8-11<br />
‘Settings’ Dialog – Measurement Device<br />
ORIS <strong>Certified</strong> <strong>Proof</strong> Version 1.5.4 User <strong>Manual</strong> 8-17<br />
Image2Output Limited Unit 19 IO Centre Hearle Way Hatfield Business Park Hatfield Herts AL10 9EW<br />
Tel: +44 (0)1707 282 710 Fax: +44 (0)1707 269 764 sales@<strong>image2output</strong>.com
Dialog Reference<br />
‘Settings’ Dialog<br />
http://www.<strong>image2output</strong>.com<br />
MEASUREMENT DEVICE SETUP<br />
• INSTRUMENT<br />
Use this list to select the measurement device connected to your<br />
computer (see also page 1-3).<br />
• PORT<br />
This list displays the USB port to which the device is connected. Selecting<br />
a port is only required if the device is connected to a serial port<br />
(COMx:).<br />
• DATA RATE<br />
Having selected a measurement device, the baud rate usually defaults<br />
to the correct value. Should this value be incorrect, select the<br />
correct value here.<br />
• MEASURE STRIPS/SINGLE PATCHES<br />
Use this option to select the measurement mode for Eye-One. You<br />
can choose between scanning color strips or measuring individual<br />
color patches. See also Measuring Tips (page 7-1).<br />
• ADDITIONALLY MEASURE SOLID DENSITIES<br />
This option is only available for Eye-One. If enabled, the density values<br />
of solid colors (C100, M100, Y100, K100) will be measured in addition<br />
to the Lab values.<br />
Enable the RELATIVE TO PAPER option if you want to measure the densities<br />
relative to the paper white. In this case the paper white value<br />
will be measured and subtracted from the density values you are<br />
measuring.<br />
Click on and then on DENSITIES to view the measured densities.<br />
The values are also written to the measurement file. Four density values<br />
are measured for every solid color (see also page 4-1).<br />
Fig. 8-12 Density Measurements for Solid Colors<br />
8-18 CGS Publishing Technologies International Hainburg, Germany 08/27/2010<br />
Image2Output Limited Unit 19 IO Centre Hearle Way Hatfield Business Park Hatfield Herts AL10 9EW<br />
Tel: +44 (0)1707 282 710 Fax: +44 (0)1707 269 764 sales@<strong>image2output</strong>.com
http://www.<strong>image2output</strong>.com<br />
Dialog Reference<br />
‘Settings’ Dialog<br />
INSTRUMENT PROPERTIES<br />
By default, these parameters are set according to the ISO standard.<br />
• RESPONSE STATUS<br />
Standard to be used for measuring color density, e.g.<br />
• ANSI (ISO) T used in the USA<br />
• ANSI E, DIN 16536 used in Europe<br />
• FILTER<br />
Eye-One iSis:<br />
DTP70:<br />
Eye-One (iO):<br />
Select the filter setting to be used for measuring.<br />
Make sure the filter setting matches the filter selected<br />
on the device.<br />
The filter built into the device is displayed here.<br />
Note:<br />
We do not recommend to use any filters.<br />
• ILLUMINANT<br />
Color temperature (default is D50)<br />
• STANDARD OBSERVER<br />
Observation angle (default is 2°)<br />
• DEVICE SIGNAL ON<br />
If you disable this option, the device will not send any ‘beep’ signals.<br />
This option is only available for certain measurement devices. See<br />
also Visualizing Acoustic Signals (page 7-5).<br />
• PATCH SIZE/GAP SIZE<br />
Specify the color bar geometry, i.e. the size of the color patches and<br />
the size of the gaps between them. For SpectroJet and RS 800 we<br />
recommend a precision of two decimal places.<br />
This option is only available for measurement devices that do no use<br />
color bars with a fixed geometry (see page 7-3).<br />
» RELATED TOPICS:<br />
-COLOR BAR GEOMETRY FOR EYE-ONE (PAGE 7-3)<br />
-STRIP SCANNING WITH DTP41/45 (PAGE 7-3)<br />
-STRIP SCANNING WITH SPECTROJET AND RS 800 (PAGE 7-4)<br />
-COLOR BARS AND REFERENCE FILES (PAGE 9-5)<br />
ORIS <strong>Certified</strong> <strong>Proof</strong> Version 1.5.4 User <strong>Manual</strong> 8-19<br />
Image2Output Limited Unit 19 IO Centre Hearle Way Hatfield Business Park Hatfield Herts AL10 9EW<br />
Tel: +44 (0)1707 282 710 Fax: +44 (0)1707 269 764 sales@<strong>image2output</strong>.com
Dialog Reference<br />
‘Settings’ Dialog<br />
http://www.<strong>image2output</strong>.com<br />
TEST<br />
Having completed the setup, click this button to check whether ORIS<br />
<strong>Certified</strong> <strong>Proof</strong> and the measurement device are capable of communicating<br />
with each other. If so, information about the device such as the<br />
version and serial number appears in the dialog.<br />
MISCELLANEOUS<br />
This dialog (Fig. 8-13) opens when you click the button on the left. It<br />
is only available in the Windows version of ORIS <strong>Certified</strong> <strong>Proof</strong>.<br />
Fig. 8-13<br />
‘Settings’ Dialog – Miscellaneous<br />
COLOR MANAGEMENT<br />
Use this option to select the color matching module (CMM) to be used<br />
after restarting the program.<br />
DATABASE CONNECTION<br />
This option defines the communication between ORIS <strong>Certified</strong> <strong>Proof</strong><br />
and the database of an ORIS Color Tuner⁄⁄Web installation running on<br />
the same computer or on a different computer on the local network.<br />
With this database connection, users of ORIS Color Tuner⁄⁄Web are able<br />
to automatically certify their proof jobs. ORIS <strong>Certified</strong> <strong>Proof</strong> can display<br />
a list of proof jobs that need to be certified manually (see page 3-1). The<br />
certification results are fed back into the database.<br />
If ORIS <strong>Certified</strong> <strong>Proof</strong> and ORIS Color Tuner⁄⁄Web run on the same<br />
computer (both programs installed together):<br />
The database connection is configured already. The input box displays<br />
the data source name (DSN) of the ORIS Color Tuner⁄⁄Web database.<br />
Do not modify this DSN.<br />
8-20 CGS Publishing Technologies International Hainburg, Germany 08/27/2010<br />
Image2Output Limited Unit 19 IO Centre Hearle Way Hatfield Business Park Hatfield Herts AL10 9EW<br />
Tel: +44 (0)1707 282 710 Fax: +44 (0)1707 269 764 sales@<strong>image2output</strong>.com
http://www.<strong>image2output</strong>.com<br />
Dialog Reference<br />
‘Jobs to be certified’ Dialog<br />
If ORIS <strong>Certified</strong> <strong>Proof</strong> should access a database running on a different<br />
computer on the LAN (stand-alone installation):<br />
1. Using the Windows Control Panel, modify the data source name<br />
(DSN). Specify the name or IP address of the computer that runs<br />
ORIS Color Tuner⁄⁄Web. Refer to page 2-2 for more details.<br />
2. In ORIS <strong>Certified</strong> <strong>Proof</strong>’s SETTINGS dialog, click MODIFY and select<br />
this DSN. It is usually listed on the MACHINE DATA SOURCE tab.<br />
‘Jobs to be certified’ Dialog<br />
This dialog appears when you click on the QUERY…DATABASE button in<br />
the main window. It displays the list of jobs that were printed with ORIS<br />
Color Tuner⁄⁄Web and set to require certification.<br />
Select a job by double-clicking it, or click on it and then on OK. The dialog<br />
closes and the job name and print target to be used appear in the<br />
main window (see also page 3-1).<br />
Having completed the measurement, the job will be removed automatically<br />
from the list of jobs to be certified.<br />
Fig. 8-14<br />
List of Jobs to be <strong>Certified</strong><br />
ORIS <strong>Certified</strong> <strong>Proof</strong> Version 1.5.4 User <strong>Manual</strong> 8-21<br />
Image2Output Limited Unit 19 IO Centre Hearle Way Hatfield Business Park Hatfield Herts AL10 9EW<br />
Tel: +44 (0)1707 282 710 Fax: +44 (0)1707 269 764 sales@<strong>image2output</strong>.com
Dialog Reference<br />
‘Jobs to be certified’ Dialog<br />
http://www.<strong>image2output</strong>.com<br />
8-22 CGS Publishing Technologies International Hainburg, Germany 08/27/2010<br />
Image2Output Limited Unit 19 IO Centre Hearle Way Hatfield Business Park Hatfield Herts AL10 9EW<br />
Tel: +44 (0)1707 282 710 Fax: +44 (0)1707 269 764 sales@<strong>image2output</strong>.com
http://www.<strong>image2output</strong>.com<br />
9 File Reference<br />
Characterization Data for Printing Conditions<br />
Windows<br />
Mac OS<br />
The following characterization files for standard printing conditions are<br />
available in the ORIS <strong>Certified</strong> <strong>Proof</strong> installation directory<br />
…\Program Files\CGS\ORIS <strong>Certified</strong> <strong>Proof</strong>\Standards\<br />
…Applications:ORIS <strong>Certified</strong> <strong>Proof</strong>:Standards<br />
These files can be loaded as target value files when defining a print target<br />
(see page 8-1). There is a subdirectory for every printing standard.<br />
3DAP<br />
Australian printing standard<br />
3DAPv2 LAB Target Values.txt<br />
Target values for 3DAP Version 2<br />
3DAPv3 LAB Target Values PT1-2.txt<br />
Target values for 3DAP Version 3<br />
FOGRA<br />
German printing standard. There are two variants of most characterization<br />
files. The files beginning with FOGRA v3 are for three-row color bars,<br />
the other files for color bars with two rows.<br />
Offset Printing<br />
ISOcoated v2 eci (FOGRA39).txt<br />
FOGRA v3 ISOcoated v2 eci (FOGRA39).txt<br />
Commercial printing, paper type 1 or 2, i.e. gloss or matt coated, 115<br />
g/m 2 , positive-acting plates, periodic screen 60/cm, solids and TVI<br />
according to ISO 12647-2:2004/Amd 1<br />
ORIS <strong>Certified</strong> <strong>Proof</strong> Version 1.5.4 User <strong>Manual</strong> 9-1<br />
Image2Output Limited Unit 19 IO Centre Hearle Way Hatfield Business Park Hatfield Herts AL10 9EW<br />
Tel: +44 (0)1707 282 710 Fax: +44 (0)1707 269 764 sales@<strong>image2output</strong>.com
File Reference<br />
Characterization Data for Printing Conditions<br />
http://www.<strong>image2output</strong>.com<br />
ISOcoated (FOGRA27).txt<br />
FOGRA v3 ISOcoated (FOGRA27).txt<br />
Commercial printing, paper type 1 or 2, i.e. gloss or matt coated, 115<br />
g/m 2 , positive-acting plates, periodic screen 60/cm, solids and TVI<br />
according to ISO 12647-2:2004<br />
ISOcofcoated (FOGRA31).txt<br />
FOGRA v3 ISOcofcoated (FOGRA31).txt<br />
Continuous forms printing, paper type 2, i.e. matt coated offset, 115<br />
g/m 2 , positive-acting plates, periodic screen 60/cm, solids and TVI<br />
according to ISO 12647-2:2004<br />
ISOcofuncoated (FOGRA32).txt<br />
FOGRA v3 ISOcofuncoated (FOGRA32).txt<br />
Continuous forms printing, paper type 4, i.e. white uncoated offset,<br />
80 g/m 2 , positive-acting plates, periodic screen 60/cm, solids and TVI<br />
according to ISO 12647-2:2004<br />
ISOnewspaper26v4 (IFRA26L).txt<br />
Newspaper coldset offset printing according to ISO 12647-3:2004,<br />
standard newsprint, screen ruling 40 l/cm ± 2 l/cm<br />
ISOuncoated (FOGRA29).txt<br />
FOGRA v3 ISOuncoated (FOGRA29).txt<br />
Commercial printing, paper type 4, i.e. uncoated white offset, 120 g/<br />
m 2 , positive-acting plates, periodic screen 60/cm, solids and TVI according<br />
to ISO 12647-2:2004<br />
ISOuncoated_yw (FOGRA30).txt<br />
FOGRA v3 ISOuncoated_yw (FOGRA30).txt<br />
Commercial printing, paper type 5, i.e. uncoated slightly yellowish offset,<br />
120 g/m 2 , positive-acting plates, periodic screen 60/cm, solids<br />
and TVI according to ISO 12647-2:2004<br />
ISOwebcoated (FOGRA28).txt<br />
FOGRA v3 ISOwebcoated (FOGRA28).txt<br />
Commercial printing, paper type 3, i.e. glossy coated web, 60 g/m 2 ,<br />
positive-acting plates, periodic screen 60/cm, solids and TVI according<br />
to ISO 12647-2:2004<br />
FOGRA v3 PSO_MFC (FOGRA41).txt<br />
Heat-set web offset printing, MFC paper<br />
FOGRA v3 PSO_SNP (FOGRA42).txt<br />
Heat-set web offset printing, standard newsprint paper<br />
FOGRA v3 PSO_Coated_NP (FOGRA43).txt<br />
Commercial printing, paper type 1 or 2, i.e. gloss or matt coated<br />
paper, non-periodic screening<br />
9-2 CGS Publishing Technologies International Hainburg, Germany 08/27/2010<br />
Image2Output Limited Unit 19 IO Centre Hearle Way Hatfield Business Park Hatfield Herts AL10 9EW<br />
Tel: +44 (0)1707 282 710 Fax: +44 (0)1707 269 764 sales@<strong>image2output</strong>.com
http://www.<strong>image2output</strong>.com<br />
File Reference<br />
Characterization Data for Printing Conditions<br />
FOGRA v3 PSO_Uncoated_NP (FOGRA44).txt<br />
Commercial printing, paper type 4, i.e. uncoated white paper, nonperiodic<br />
screening<br />
FOGRA v3 PSO_LWC_improved (FOGRA45).txt<br />
Heatset web offset printing on improved LWC paper (paper type 3),<br />
characterization data FOGRA45L<br />
FOGRA v3 PSO_LWC_standard (FOGRA46).txt<br />
Heatset web offset printing on standard LWC paper (paper type 3),<br />
characterization data FOGRA46L<br />
FOGRA v3 PSO_uncoated (FOGRA47).txt<br />
Offset printing on uncoated white paper (paper type 4), characterization<br />
data FOGRA47L<br />
SC paper eci (FOGRA40).txt<br />
FOGRA v3 SC paper eci (FOGRA40).txt<br />
Commercial printing, SC paper, i.e. glossy coated web, 60 g/m 2 , positive-acting<br />
plates, periodic screen 60/cm, solids and TVI according<br />
to ISO 12647-2:2004<br />
Gravure Printing<br />
FOGRA v3 ECI_PSR_LWC_PLUS_V2.txt<br />
Web-fed gravure, paper type LWC Plus (improved LWC paper) gloss<br />
coated, 70 g/m 2 , according to ISO 12647-4<br />
FOGRA v3 ECI_PSR_LWC_STD_V2.txt<br />
Web-fed gravure, paper type LWC (light-weight coated), 51 g/m 2 ,<br />
according to ISO 12647-4<br />
FOGRA v3 ECI_PSR_SC_STD_V2.txt<br />
Web-fed gravure, paper type SC (super calendered), 56 g/m 2 ,<br />
according to ISO 12647-4<br />
FOGRA v3 ECI_PSR_SC_PLUS_V2.txt<br />
Web-fed gravure, paper type SC Plus (whiter super calendered),<br />
52 g/m 2 , according to ISO 12647-4<br />
PSRgravureHWC.txt<br />
FOGRA v3 PSRgravureHWC.txt<br />
Gravure printing, paper type HWC, 70 g/m 2 , according to PSR of ECI,<br />
target values from PSRgravureHWC_ECI2002.txt<br />
PSRgravureLWC_sb.txt<br />
FOGRA v3 PSRgravureLWC_sb.txt<br />
Gravure printing, paper type LWC, according to PSR of ECI, target<br />
values from PSRgravureLWC_ECI2002.txt<br />
ORIS <strong>Certified</strong> <strong>Proof</strong> Version 1.5.4 User <strong>Manual</strong> 9-3<br />
Image2Output Limited Unit 19 IO Centre Hearle Way Hatfield Business Park Hatfield Herts AL10 9EW<br />
Tel: +44 (0)1707 282 710 Fax: +44 (0)1707 269 764 sales@<strong>image2output</strong>.com
File Reference<br />
Characterization Data for Printing Conditions<br />
http://www.<strong>image2output</strong>.com<br />
PSRgravureMF_sb.txt<br />
FOGRA v3 PSRgravureMF_sb.txt<br />
Publication gravure, machine finished paper, according to process<br />
standard gravure of ECI<br />
PSRgravureSC_sb.txt<br />
FOGRA v3 PSRgravureSC_sb.txt<br />
Gravure printing, paper grade SC, according to PSR of ECI, target<br />
values from PSRgravureSC_IS12642.txt<br />
Screen Printing<br />
SilkScreenPrint (FOGRA9).txt<br />
Screen printing, gamut class 2, similar to offset paper grade 1,<br />
according to ISO 12647-5<br />
IDEAlliance<br />
‘International Digital Enterprise Alliance’<br />
GRACoLCoated1_ISO12647-7_ControlStrip2009.txt<br />
Sheet-fed commercial printing, paper grade 1, coated, ISO 12647-7<br />
SWOPCoated3_ISO12647-7_ControlStrip2009.txt<br />
Web offset publication printing, paper grade 3, coated, ISO 12647-7<br />
SWOPCoated5_ISO12647-7_ControlStrip2009.txt<br />
Web offset publication printing, paper grade 5, coated, ISO 12647-7<br />
SWOP<br />
SWOP and GRACoL are US printing standards.<br />
ORIS_GRACoL2006_Coated1.icc<br />
Sheet-fed commercial printing, paper grade 1, coated. Profile created<br />
using color characterization data GRACoL2006_Coated1 from IDEAlliance®.<br />
ORIS_SWOP2006_Coated3.icc<br />
Web offset publication printing, paper grade 3, coated. Profile created<br />
using color characterization data SWOP2006_Coated3 from IDEAlliance®.<br />
9-4 CGS Publishing Technologies International Hainburg, Germany 08/27/2010<br />
Image2Output Limited Unit 19 IO Centre Hearle Way Hatfield Business Park Hatfield Herts AL10 9EW<br />
Tel: +44 (0)1707 282 710 Fax: +44 (0)1707 269 764 sales@<strong>image2output</strong>.com
http://www.<strong>image2output</strong>.com<br />
File Reference<br />
Color Bars and Reference Files<br />
ORIS_SWOP2006_Coated5.icc<br />
Web offset publication printing, paper grade 5, coated. Profile created<br />
using color characterization data SWOP2006_Coated5 from IDEAlliance®.<br />
Color Bars and Reference Files<br />
Windows<br />
Mac OS<br />
Color bars (*.tif) are available in the subdirectories of the respective<br />
printing standards, i.e. under<br />
…\Program Files\CGS\ORIS <strong>Certified</strong> <strong>Proof</strong>\Standards\…\<strong>Proof</strong>ing<br />
Bars\<br />
…Applications:ORIS <strong>Certified</strong> <strong>Proof</strong>:Standards:…:<strong>Proof</strong>ing Bars<br />
The file names indicate the measurement device to be used. When using<br />
DTP20, you first have to measure a TID strip. The names of theses<br />
files are similar to those of the corresponding color bars (…TID.tif).<br />
Reference files (*.txt) are available under …\Standards\…\Reference\.<br />
These files define the number of patches to be measured and their<br />
CMYK color values. They can be loaded when creating a print target.<br />
» RELATED TOPICS:<br />
-SUPPORTED MEASUREMENT DEVICES (PAGE 1-3)<br />
-CREATE OR CUSTOMIZE PRINT TARGET (PAGE 3-2)<br />
- CMYK REFERENCE (PAGE 8-4)<br />
3DAP<br />
Australian printing standard<br />
The software includes two reference files for color bars, but not the color<br />
bars themselves.<br />
3DAPv2 CMYK Wedge.txt<br />
Defines a color bar with two rows for 3DAP Version 2<br />
3DAPv3 CMYK Wedge.txt<br />
Defines a color bar with three rows for 3DAP Version 3<br />
CGS<br />
ORIS (DTP41-45).tif<br />
ORIS <strong>Certified</strong> <strong>Proof</strong> Version 1.5.4 User <strong>Manual</strong> 9-5<br />
Image2Output Limited Unit 19 IO Centre Hearle Way Hatfield Business Park Hatfield Herts AL10 9EW<br />
Tel: +44 (0)1707 282 710 Fax: +44 (0)1707 269 764 sales@<strong>image2output</strong>.com
File Reference<br />
Color Bars and Reference Files<br />
http://www.<strong>image2output</strong>.com<br />
ORIS (i1).tif<br />
ORIS (iCColor).tif<br />
ORIS (PULSE).tif<br />
ORIS (PULSE) TID.tif<br />
ORIS Reference.txt<br />
Reference file defining these color bars.<br />
FOGRA<br />
German printing standard<br />
FOGRA Reference.txt<br />
For color bars with two rows of patches<br />
FOGRA v3 Reference.txt<br />
For color bars with three rows of patches<br />
FOGRA <strong>Proof</strong>ing Bar<br />
Internet shortcut to the FOGRA web site http://www.fogra.org.<br />
FOGRA color bars are license-protected and must be purchased.<br />
9-6 CGS Publishing Technologies International Hainburg, Germany 08/27/2010<br />
Image2Output Limited Unit 19 IO Centre Hearle Way Hatfield Business Park Hatfield Herts AL10 9EW<br />
Tel: +44 (0)1707 282 710 Fax: +44 (0)1707 269 764 sales@<strong>image2output</strong>.com
http://www.<strong>image2output</strong>.com<br />
File Reference<br />
Color Bars and Reference Files<br />
IDEAlliance<br />
‘International Digital Enterprise Alliance’<br />
IDEAlliance ISO 12647-7_Control Strip 2009.pdf<br />
IDEAlliance ISO12647-7_ControlStrip2009 CMYK.txt<br />
Reference file defining this color bar.<br />
SICOGIF<br />
French printing standard.<br />
SICOGIF Reference.txt<br />
SWOP<br />
US printing standard<br />
TR001 - 1 row (DTP41-45).tif<br />
TR001 - 1 row (i1).tif<br />
TR001 - 1 row (PULSE).tif<br />
TR001 - 1 row (PULSE) TID.tif<br />
TR001 - 2 rows (DTP41-45).tif<br />
ORIS <strong>Certified</strong> <strong>Proof</strong> Version 1.5.4 User <strong>Manual</strong> 9-7<br />
Image2Output Limited Unit 19 IO Centre Hearle Way Hatfield Business Park Hatfield Herts AL10 9EW<br />
Tel: +44 (0)1707 282 710 Fax: +44 (0)1707 269 764 sales@<strong>image2output</strong>.com
File Reference<br />
Spot Color Libraries<br />
http://www.<strong>image2output</strong>.com<br />
TR001 - 2 rows (i1).tif<br />
TR001 - 2 rows (iCColor).tif<br />
TR001 - 2 rows (PULSE).tif<br />
TR001 - 2 rows (PULSE) TID.tif<br />
TR001 Reference - 1 row(i1).txt<br />
TR001 Reference - 1 row.txt<br />
TR001 Reference - 2 rows.txt<br />
Reference files defining these color bars.<br />
Spot Color Libraries<br />
Windows<br />
Mac OS<br />
The following files are available in the ORIS <strong>Certified</strong> <strong>Proof</strong> installation<br />
directory<br />
…\Program Files\CGS\ORIS <strong>Certified</strong> <strong>Proof</strong>\Standards\Spot Color<br />
Libraries\<br />
…Applications:ORIS <strong>Certified</strong> <strong>Proof</strong>:Standards:Spot Color<br />
Libraries<br />
These files can be loaded when comparing single colors (see page 5-3).<br />
9-8 CGS Publishing Technologies International Hainburg, Germany 08/27/2010<br />
Image2Output Limited Unit 19 IO Centre Hearle Way Hatfield Business Park Hatfield Herts AL10 9EW<br />
Tel: +44 (0)1707 282 710 Fax: +44 (0)1707 269 764 sales@<strong>image2output</strong>.com
http://www.<strong>image2output</strong>.com<br />
File Reference<br />
Spot Color Libraries<br />
HKS® Library Files<br />
HKS_E.lab (Continuous paper)<br />
HKS_K.lab (Art paper)<br />
HKS_N.lab (Natural paper)<br />
HKS_Z.lab (Newsprint paper)<br />
PANTONE® 1 Digital Color Library Files<br />
PANTONE Coated.Lab<br />
PANTONE color bridge CMYK UP.lab<br />
PANTONE Goe coated.lab<br />
PANTONE Goe uncoated.lab<br />
PANTONE metallic coated.lab<br />
PANTONE pastel coated.lab<br />
PANTONE pastel uncoated.lab<br />
PANTONE Process Coated EURO.lab<br />
PANTONE process coated.lab<br />
PANTONE process uncoated.lab<br />
PANTONE Process.Lab<br />
PANTONE solid coated.lab<br />
PANTONE solid matte.lab<br />
PANTONE solid uncoated.lab<br />
PANTONE SolidToProc C EURO.lab<br />
PANTONE SolidToProc coated.lab<br />
PANTONE Uncoated.Lab<br />
1. PANTONE® and other Pantone, Inc. trademarks are the property of Pantone, Inc.<br />
ORIS <strong>Certified</strong> <strong>Proof</strong> Version 1.5.4 User <strong>Manual</strong> 9-9<br />
Image2Output Limited Unit 19 IO Centre Hearle Way Hatfield Business Park Hatfield Herts AL10 9EW<br />
Tel: +44 (0)1707 282 710 Fax: +44 (0)1707 269 764 sales@<strong>image2output</strong>.com
File Reference<br />
Spot Color Libraries<br />
http://www.<strong>image2output</strong>.com<br />
9-10 CGS Publishing Technologies International Hainburg, Germany 08/27/2010<br />
Image2Output Limited Unit 19 IO Centre Hearle Way Hatfield Business Park Hatfield Herts AL10 9EW<br />
Tel: +44 (0)1707 282 710 Fax: +44 (0)1707 269 764 sales@<strong>image2output</strong>.com
http://www.<strong>image2output</strong>.com<br />
Image2Output Limited Unit 19 IO Centre Hearle Way Hatfield Business Park Hatfield Herts AL10 9EW<br />
Tel: +44 (0)1707 282 710 Fax: +44 (0)1707 269 764 sales@<strong>image2output</strong>.com
http://www.<strong>image2output</strong>.com<br />
Image2Output Limited Unit 19 IO Centre Hearle Way Hatfield Business Park Hatfield Herts AL10 9EW<br />
Tel: +44 (0)1707 282 710 Fax: +44 (0)1707 269 764 sales@<strong>image2output</strong>.com