Flatlocked Patchwork Fleece Blanket - Bernina
Flatlocked Patchwork Fleece Blanket - Bernina
Flatlocked Patchwork Fleece Blanket - Bernina

Create successful ePaper yourself
Turn your PDF publications into a flip-book with our unique Google optimized e-Paper software.
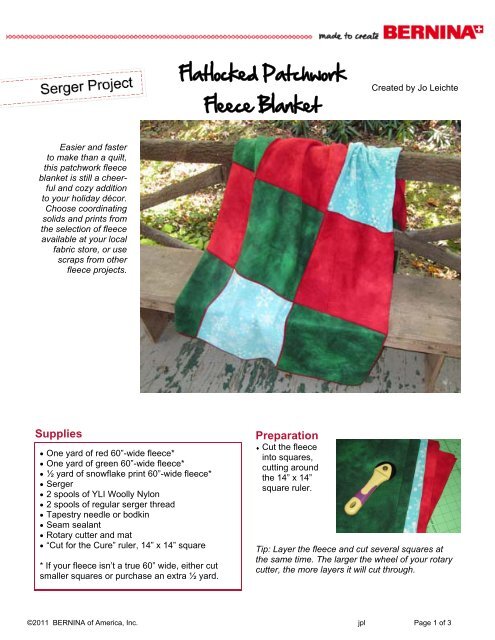
<strong>Flatlocked</strong> <strong>Patchwork</strong><br />
<strong>Fleece</strong> <strong>Blanket</strong><br />
Created by Jo Leichte<br />
Easier and faster<br />
to make than a quilt,<br />
this patchwork fleece<br />
blanket is still a cheerful<br />
and cozy addition<br />
to your holiday décor.<br />
Choose coordinating<br />
solids and prints from<br />
the selection of fleece<br />
available at your local<br />
fabric store, or use<br />
scraps from other<br />
fleece projects.<br />
Supplies<br />
One yard of red 60”-wide fleece*<br />
One yard of green 60”-wide fleece*<br />
½ yard of snowflake print 60”-wide fleece*<br />
Serger<br />
2 spools of YLI Woolly Nylon<br />
2 spools of regular serger thread<br />
Tapestry needle or bodkin<br />
Seam sealant<br />
Rotary cutter and mat<br />
“Cut for the Cure” ruler, 14” x 14” square<br />
* If your fleece isn’t a true 60” wide, either cut<br />
smaller squares or purchase an extra ½ yard.<br />
Preparation<br />
Cut the fleece<br />
into squares,<br />
cutting around<br />
the 14” x 14”<br />
square ruler.<br />
Tip: Layer the fleece and cut several squares at<br />
the same time. The larger the wheel of your rotary<br />
cutter, the more layers it will cut through.<br />
©2011 BERNINA of America, Inc. jpl Page 1 of 3
Set the serger for a wide 3-thread flatlock<br />
with Woolly Nylon in the upper looper, following<br />
the instructions in your owner’s manual. For<br />
BERNINA sergers, use the settings below as a<br />
starting point, then sew a text swatch and adjust<br />
the settings as needed:<br />
Upper Looper (Woolly Nylon) = 4.0<br />
Lower Looper = 8.5<br />
Right Needle = removed<br />
Left Needle = 1.2<br />
Stitch Length = 1<br />
Differential Feed = N<br />
Cutting Width = 2<br />
Rolled hem lever = pushed in<br />
Join the Squares<br />
Flatlock the<br />
squares together,<br />
being sure to<br />
shave a little off<br />
the edge as they<br />
are joined. Construct<br />
four strips<br />
as shown below.<br />
Make a test swatch:<br />
Place two pieces of fleece together, then<br />
serge along one side. The upper and lower<br />
looper and needle threads should meet at the<br />
edge, where the lower looper thread weaves<br />
them securely together. Woolly Nylon is very<br />
stretchy, so it may be necessary to loosen the<br />
upper looper tension.<br />
Alternative: 2-Thread Flatlock<br />
If you serger has 2-thread capability, you may<br />
choose to set it for a wide 2-thread flatlock,<br />
following the instructions in your owner’s manual.<br />
For BERNINA sergers, use the settings<br />
below as a starting point, then sew a text<br />
swatch and adjust the settings as needed:<br />
Upper Looper = converter installed<br />
Lower Looper = 4.0<br />
Right Needle = removed<br />
Left Needle = 2.0<br />
Stitch Length = 1<br />
Differential Feed = N<br />
Cutting Width = 1 to 1.5<br />
Tip: If squares stretch as they are serged together,<br />
adjust the differential feed toward 1.5.<br />
Flatlock the rows together to create one large<br />
piece of patchwork:<br />
Gently pull the<br />
squares away<br />
unopened<br />
from each<br />
other—like<br />
pulled flat<br />
pulling on the<br />
covers of a<br />
book—until<br />
the seam<br />
opens flat.<br />
The upper<br />
looper side of the stitch looks like “loops,” the<br />
needle thread stitches on the back look like<br />
“ladders.” Adjust tensions as needed.<br />
©2011 BERNINA of America, Inc. jpl Page 2 of 3
Finish the Edges<br />
Set the serger for a wide 3-thread overlock with<br />
Woolly Nylon in both loopers, following the<br />
instructions in the owner’s manual. For BERNINA<br />
sergers, use the settings below as a starting<br />
point, then sew a text swatch and adjust the<br />
settings as needed:<br />
Upper Looper Woolly Nylon) = 4.0<br />
Lower Looper (Woolly Nylon) = 4.0<br />
Right Needle = removed<br />
Left Needle = 4.0<br />
Stitch Length = 1<br />
Differential Feed = N<br />
Cutting Width = 2<br />
Rolled hem lever = pushed in<br />
Simple Serger-Edged <strong>Blanket</strong><br />
Serge around all<br />
four sides of the<br />
blanket, leaving<br />
thread tails at the<br />
corners.<br />
upper<br />
looper<br />
lower<br />
looper<br />
Supplies<br />
1 yard of 45”-wide fabric (36” x 44” blanket) or<br />
2 yards of 45”-wide fabric (44” x 60” blanket)<br />
2 spools of YLI Woolly Nylon<br />
1 spool of regular serger thread<br />
Weave thread<br />
tails back under<br />
stitching. Dab<br />
with seam sealant;<br />
let dry, then<br />
cut tails.<br />
There’s no need<br />
to trim away the<br />
unprinted edges<br />
before making the<br />
blanket; they’ll be<br />
cut away as the<br />
sides are serged.<br />
Visit www.berninausa.com<br />
Projects ● Webinars ● Promotions<br />
Follow the “Finish<br />
the Edges” steps<br />
above, cutting off<br />
any unprinted<br />
borders while<br />
serging the edges<br />
of the blanket.<br />
©2011 BERNINA of America, Inc. jpl Page 3 of 3