TB100MW9 DTV Digital to Analog Converter (Set Top Box) - Funai
TB100MW9 DTV Digital to Analog Converter (Set Top Box) - Funai
TB100MW9 DTV Digital to Analog Converter (Set Top Box) - Funai

Create successful ePaper yourself
Turn your PDF publications into a flip-book with our unique Google optimized e-Paper software.
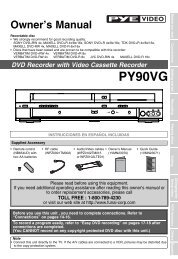
Owner's Manual<br />
<strong>TB100MW9</strong><br />
<strong>DTV</strong> <strong>Digital</strong> <strong>to</strong> <strong>Analog</strong> <strong>Converter</strong><br />
(<strong>Set</strong> <strong>Top</strong> <strong>Box</strong>)<br />
THANK YOU FOR CHOOSING MAGNAVOX.<br />
NEED HELP FAST?<br />
READ YOUR OWNER'S MANUAL FIRST FOR QUICK TIPS<br />
THAT MAKE USING YOUR MAGNAVOX PRODUCT MORE ENJOYABLE.<br />
IF YOU HAVE READ YOUR INSTRUCTIONS AND STILL NEED ASSISTANCE,<br />
YOU MAY ACCESS OUR ONLINE HELP AT HTTP://WWW.FUNAI-CORP.COM<br />
OR CALL 1-800-605-8610 WHILE WITH YOUR PRODUCT.<br />
INSTRUCCIONES EN ESPAÑOL INCLUIDAS.<br />
Products that have earned ENERGY STAR® are<br />
designed <strong>to</strong> protect the environment through<br />
superior energy efficiency.<br />
© 2008 <strong>Funai</strong> Electric Co., Ltd.
Before Using<br />
WARNING: TO REDUCE THE RISK OF FIRE OR ELECTRIC SHOCK, DO NOT EXPOSE THIS<br />
APPLIANCE TO RAIN OR MOISTURE.<br />
CAUTION<br />
RISK OF ELECTRIC SHOCK<br />
DO NOT OPEN<br />
CAUTION:<br />
TO REDUCE THE RISK OF ELECTRIC SHOCK, DO NOT<br />
REMOVE COVER (OR BACK). NO USER SERVICEABLE<br />
PARTS INSIDE. REFER SERVICING TO QUALIFIED<br />
SERVICE PERSONNEL.<br />
The caution marking is located on the bot<strong>to</strong>m of the cabinet.<br />
Important Safeguards<br />
1. Read instructions - All the safety and operating instructions<br />
should be read before the appliance is operated.<br />
2. Retain Instructions - The safety and operating<br />
instructions should be retained for future reference.<br />
3. Heed Warnings - All warnings on the appliance and in<br />
the operating instructions should be adhered <strong>to</strong>.<br />
4. Follow Instructions - All operating and use<br />
instructions should be followed.<br />
5. Cleaning - Unplug this product from the wall outlet<br />
before cleaning. Do not use liquid cleaners or aerosol<br />
cleaners. Use a damp cloth for cleaning.<br />
EXCEPTION: A product that is meant for uninterrupted<br />
service and, that for some specific reason, such as<br />
the possibility of the loss of an authorization code for<br />
a CATV converter, is not intended <strong>to</strong> be unplugged<br />
by the user for cleaning or any other purpose, may<br />
exclude the reference <strong>to</strong> unplugging the appliance in<br />
the cleaning description otherwise required in item 5.<br />
6. Attachments - Do not use attachments not<br />
recommended by this product manufacturer as they<br />
may cause hazards.<br />
7. Water and Moisture - Do not use this product near<br />
water-for example, near a bath tub, wash bowl, kitchen<br />
sink, or laundry tub, in a wet basement, or near a<br />
swimming pool, and the like.<br />
8. Accessories - Do not place this product on an<br />
unstable cart, stand, tripod, bracket, or table.<br />
This product may fall, causing serious injury<br />
<strong>to</strong> someone, and serious damage <strong>to</strong> the<br />
appliance. Use only with a cart, stand,<br />
tripod, bracket, or table recommended<br />
by the manufacturer, or sold with this<br />
product. Any mounting of the appliance<br />
should follow the manufacturer’s instructions and<br />
should use a mounting accessory recommended by<br />
the manufacturer. An appliance and cart combination<br />
should be moved with care.<br />
Quick s<strong>to</strong>ps, excessive force, and uneven surfaces may<br />
cause the appliance and cart combination <strong>to</strong><br />
overturn.<br />
AMEUBLES - Cet appareil ne doit être<br />
placé que sur un meuble (avec ou sans<br />
roulettes) recommandé par le fabricant. Si<br />
vous l’installez sur un meuble à roulettes,<br />
2<br />
EN<br />
THIS SYMBOL INDICATES THAT<br />
DANGEROUS VOLTAGE CONSTITUTING<br />
A RISK OF ELECTRIC SHOCK IS PRESENT<br />
WITHIN THIS UNIT.<br />
THIS SYMBOL INDICATES THAT THERE<br />
ARE IMPORTANT OPERATING AND<br />
MAINTENANCE INSTRUCTIONS IN THE<br />
LITERATURE ACCOMPANYING THE<br />
APPLIANCE.<br />
déplacez les deux ensembles avec précaution. Un<br />
arrêt brusque, l’utilisation d’une force excessive et des<br />
surfaces irrégulières risquent de déstabiliser l’ensemble<br />
et de le renverser.<br />
9. Ventilation - Slots and openings in the cabinet and the<br />
back or bot<strong>to</strong>m are provided for ventilation and <strong>to</strong> ensure<br />
reliable operation of this product and <strong>to</strong> protect it from<br />
overheating, and these openings must not be blocked<br />
or covered. The openings should never be blocked by<br />
placing this product on a bed, sofa, rug, or other similar<br />
surface. This product should never be placed near or<br />
over a radia<strong>to</strong>r or heat register. This product should not<br />
be placed in a built-in installation such as a bookcase<br />
or rack unless proper ventilation is provided or the<br />
manufacturer’s instructions have been adhered <strong>to</strong>.<br />
10. Power Sources - This product should be operated<br />
only from the type of power source indicated on the<br />
marking label. If you are not sure of the type of power<br />
supply <strong>to</strong> your home, consult your appliance dealer or<br />
local power company. For this products intended <strong>to</strong><br />
operate from battery power, or other sources, refer <strong>to</strong><br />
the operating instructions.<br />
11. Grounding or Polarization - This product is equipped<br />
with a polarized alternating-current line plug(a plug<br />
having one blade wider than the other). This plug will<br />
fit in<strong>to</strong> the power outlet only one way. This is a safety<br />
feature. If you are unable <strong>to</strong> insert the plug fully in<strong>to</strong><br />
the outlet, try reversing the plug. If the plug should<br />
still fail <strong>to</strong> fit, contact your electrician <strong>to</strong> replace your<br />
obsolete outlet. Do not defeat the safety purpose of<br />
the polarized plug.<br />
12. Power-Cord Protection - Power-supply cords should be<br />
routed so that they are not likely <strong>to</strong> be walked on or pinched<br />
by items placed upon or against them, paying particular<br />
attention <strong>to</strong> cords at plugs, convenience receptacles, and<br />
the point where they exit from the appliance.<br />
13. Outdoor Antenna grounding - If an outside antenna<br />
or cable system is connected <strong>to</strong> this product, be<br />
sure the antenna or cable system is grounded so<br />
as <strong>to</strong> provide some protection against voltage<br />
surges and built-up static charges. Article 810 of the<br />
National Electrical Code, ANSI/NFPA No. 70, provides<br />
information with respect <strong>to</strong> proper grounding of the<br />
mast and supporting structure, grounding of the leadin<br />
wire <strong>to</strong> an antenna discharge unit, size of grounding
FIGURE A<br />
EXAMPLE OF ANTENNA GROUNDING AS PER<br />
NATIONAL ELECTRICAL CODE<br />
GROUND CLAMP<br />
ANTENNA LEAD<br />
IN WIRE<br />
ANTENNA<br />
DISCHARGE UNIT<br />
(NEC SECTION 810-20)<br />
Before Using<br />
ELECTRIC SERVICE<br />
EQUIPMENT<br />
NEC - NATIONAL<br />
ELECTRICAL CODE<br />
POWER SERVICE GROUNDING ELECTRODE<br />
SYSTEM (NEC ART 250, PART H)<br />
GROUNDING<br />
CONDUCTORS<br />
(NEC SECTION 810-21)<br />
GROUND CLAMPS<br />
conduc<strong>to</strong>rs, location of antenna-discharge unit,<br />
connection <strong>to</strong> grounding electrodes, and requirements<br />
for the grounding electrode. (Fig. A)<br />
14. Lightning - For added protection for this product<br />
receiver during a lightning s<strong>to</strong>rm, or when it is left<br />
unattended and unused for long periods of time,<br />
unplug it from the wall outlet and disconnect the<br />
antenna or cable system. This will prevent damage <strong>to</strong><br />
this product due <strong>to</strong> lightning and power-line surges.<br />
15. Power Lines - An outside antenna system should not<br />
be located in the vicinity of overhead power lines or<br />
other electric light or power circuits, or where it can<br />
fall in<strong>to</strong> such power lines or circuits. When installing an<br />
outside antenna system, extreme care should be taken<br />
<strong>to</strong> keep from <strong>to</strong>uching such power lines or circuits as<br />
contact with them might be fatal.<br />
16. Overloading - Do not overload wall outlets and extension<br />
cords as this can result in a risk of fire or electric shock.<br />
17. Object and Liquid Entry - Never push objects of any<br />
kind in<strong>to</strong> this product through openings as they may<br />
<strong>to</strong>uch dangerous voltage points or short out parts that<br />
could result in a fire or electric shock. Never spill liquid<br />
of any kind on this product.<br />
18. Servicing - Do not attempt <strong>to</strong> service this product<br />
yourself as opening or removing covers may expose<br />
you <strong>to</strong> dangerous voltage or other hazards. Refer all<br />
servicing <strong>to</strong> qualified service personnel.<br />
19. Damage Requiring Service - Unplug this product from<br />
the wall outlet and refer servicing <strong>to</strong> qualified service<br />
personnel under the following conditions:<br />
a. When the power-supply cord or plug is damaged<br />
or frayed.<br />
b. If liquid has been spilled, or objects have fallen in<strong>to</strong><br />
this product.<br />
c. If this product has been exposed <strong>to</strong> rain or water.<br />
d. If this product does not operate normally by<br />
following the operating instructions. Adjust only<br />
those controls that are covered by the operating<br />
instructions, as improper adjustment of other<br />
controls may result in damage and will often<br />
require extensive work by a qualified technician <strong>to</strong><br />
res<strong>to</strong>re this product <strong>to</strong> its normal operation.<br />
e. If this product has been dropped or damaged in<br />
any way.<br />
f. When this product exhibits a distinct change in<br />
performance-this indicates a need for service.<br />
20. Replacement Parts - When replacement parts are<br />
required, be sure the service technician has used<br />
replacement parts specified by the manufacturer that<br />
have the same characteristics as the original part.<br />
Unauthorized substitutions may result in fire, electric<br />
shock, injury <strong>to</strong> persons or other hazards.<br />
21. Safety Check - Upon completion of any service or<br />
repairs <strong>to</strong> this product, ask the service technician <strong>to</strong><br />
perform routine safety checks <strong>to</strong> determine that this<br />
product is in proper operating condition.<br />
22. Heat - This product should be situated away from heat<br />
sources such as radia<strong>to</strong>rs, heat registers, s<strong>to</strong>ves, or other<br />
products (including amplifiers) that produce heat.<br />
The serial number of this product may be found on the bot<strong>to</strong>m of the unit. You should record the number and<br />
other vital information here and retain this book as a permanent record. Serial numbers are not kept on file.<br />
Date of Purchase<br />
Dealer Purchase from<br />
Dealer Address<br />
Dealer Phone No.<br />
Model No.<br />
Serial No.<br />
CAUTION:<br />
ATTENTION:<br />
TO PREVENT ELECTRIC SHOCK, MATCH WIDE BLADE OF PLUG TO WIDE SLOT, FULLY<br />
INSERT.<br />
POUR ÉVITER LES CHOCS ÉLECTRIQUES, INTRODUIRE LA LAME LA PLUS LARGE DE<br />
LA FICHE DANS LA BORNE CORRESPONDANTE DE LA PRISE ET POUSSER JUSQU’AU<br />
FOND.<br />
Do not place the unit on the furniture that is capable of being tilted by a child and an adult leaning, pulling,<br />
standing or climbing on it. A falling unit can cause serious injury or even death.<br />
3<br />
EN
Before Using<br />
Precautions<br />
Location<br />
For safe operation and satisfac<strong>to</strong>ry performance<br />
of this product, keep the following in mind when<br />
selecting a place for its installation:<br />
•<br />
•<br />
•<br />
•<br />
•<br />
•<br />
•<br />
Shield it from direct sunlight and keep it away<br />
from sources of intense heat.<br />
Avoid dusty or humid places.<br />
Avoid places with insufficient ventilation for<br />
proper heat dissipation. Do not block the<br />
ventilation holes at the <strong>to</strong>p and bot<strong>to</strong>m of the<br />
product. Do not place the product on a carpet<br />
because this will block the ventilation holes.<br />
Install the product in a horizontal position.<br />
Avoid locations subject <strong>to</strong> strong vibration.<br />
Do not place this product near strong magnetic<br />
fields.<br />
Avoid moving this product <strong>to</strong> locations where<br />
temperature differences are extreme.<br />
Important Copyright Information<br />
Unauthorized recording or use of broadcast<br />
television programming, video tape, film or other<br />
copyrighted material may violate applicable<br />
copyright laws. We assume no responsibility for the<br />
unauthorized duplication, use or other acts which<br />
infringe upon the rights of copyright owners.<br />
FCC WARNING- This equipment may generate<br />
or use radio frequency energy. Changes or<br />
modifications <strong>to</strong> this equipment may cause<br />
harmful interference unless the modifications<br />
are expressly approved in the instruction<br />
manual. The user could lose the authority <strong>to</strong><br />
operate this equipment if an unauthorized<br />
change or modification is made.<br />
Avoid the Hazards of Electrical<br />
Shock and Fire<br />
•<br />
•<br />
•<br />
•<br />
Do not handle the power cord with wet hands.<br />
Do not pull on the power cord when<br />
disconnecting it from an AC wall outlet. Grasp it<br />
by the plug.<br />
If by accident, water is spilled on your the<br />
product, unplug the power cord immediately<br />
and take the product <strong>to</strong> our Authorized Service<br />
Center for servicing.<br />
Do not place anything directly on <strong>to</strong>p of the<br />
product.<br />
A Note about Recycling<br />
This product’s packaging materials are recyclable<br />
and can be reused. Please dispose of any materials in<br />
accordance with your local recycling regulations.<br />
Batteries should never be thrown away or<br />
incinerated but disposed of in accordance with your<br />
local regulations concerning chemical wastes.<br />
4<br />
EN
Table of Contents<br />
Before Using<br />
Important Safeguards . . . . . . . . . . . . . . . . . . . . . . . . . . . . . 2<br />
Precautions . . . . . . . . . . . . . . . . . . . . . . . . . . . . . . . . . . . . . . . 4<br />
Overview . . . . . . . . . . . . . . . . . . . . . . . . . . . . . . . . . . . . . . . . . 6<br />
Information on <strong>Digital</strong> Broadcasting . . . . . . . . . . . . . . . 7<br />
Accessories . . . . . . . . . . . . . . . . . . . . . . . . . . . . . . . . . . . . . . . 7<br />
Installing Batteries . . . . . . . . . . . . . . . . . . . . . . . . . . . . . . . . 7<br />
Location of Controls . . . . . . . . . . . . . . . . . . . . . . . . . . . . . . . 8<br />
Connections<br />
Connecting <strong>to</strong> a TV without A/V Jacks . . . . . . . . . . . . 10<br />
Connecting <strong>to</strong> a TV with A/V Jacks . . . . . . . . . . . . . . . . 10<br />
Connecting <strong>to</strong> a Cable <strong>Box</strong> (Optional) . . . . . . . . . . . . . 11<br />
Connecting <strong>to</strong> Other Devices . . . . . . . . . . . . . . . . . . . . . 12<br />
Advanced Operation<br />
Au<strong>to</strong>scan (Receiving Channels) . . . . . . . . . . . . . . . . . . . 18<br />
Adding/Deleting Channels . . . . . . . . . . . . . . . . . . . . . . . 18<br />
Adjusting Antenna . . . . . . . . . . . . . . . . . . . . . . . . . . . . . . . 20<br />
Selecting Display Mode . . . . . . . . . . . . . . . . . . . . . . . . . . 20<br />
<strong>Set</strong>ting the Time Zone and D.S.T<br />
(Daylight Saving Time) . . . . . . . . . . . . . . . . . . . . . . . . . . . 21<br />
V-chip Options . . . . . . . . . . . . . . . . . . . . . . . . . . . . . . . . . . . 22<br />
Closed Caption Options . . . . . . . . . . . . . . . . . . . . . . . . . . 25<br />
Au<strong>to</strong> Power Down . . . . . . . . . . . . . . . . . . . . . . . . . . . . . . . 26<br />
Others<br />
Specifications . . . . . . . . . . . . . . . . . . . . . . . . . . . . . . . . . . . . 26<br />
Troubleshooting . . . . . . . . . . . . . . . . . . . . . . . . . . . . . . . . . 27<br />
Before Using<br />
Initial <strong>Set</strong>up (<strong>Set</strong>up Wizard)<br />
Initial <strong>Set</strong>up . . . . . . . . . . . . . . . . . . . . . . . . . . . . . . . . . . . . . . 13<br />
Basic Operation<br />
Selecting Channels on the STB . . . . . . . . . . . . . . . . . . . 15<br />
Warranty . . . . . . . . . . . . . . . . . . . . . . . . . . . . . . . Back Cover<br />
© 2008 <strong>Funai</strong> Electric Co., Ltd.<br />
All rights reserved. No part of this manual may be reproduced, copied, transmitted, disseminated, transcribed,<br />
downloaded or s<strong>to</strong>red in any s<strong>to</strong>rage medium, in any form or for any purpose without the express prior written<br />
consent of <strong>Funai</strong>. Furthermore, any unauthorized commercial distribution of this manual or any revision here<strong>to</strong><br />
is strictly prohibited.<br />
Information in this document is subject <strong>to</strong> change without notice. <strong>Funai</strong> reserves the right <strong>to</strong> change the<br />
content herein without the obligation <strong>to</strong> notify any person or organization of such changes.<br />
with the design is a registered trademark of <strong>Funai</strong> Electric Co., Ltd and may not be used in any way<br />
without the express written consent of <strong>Funai</strong>. All other trademarks used herein remain the exclusive property<br />
of their respective owners. Nothing contained in this manual should be construed as granting, by implication<br />
or otherwise, any license or right <strong>to</strong> use any of the trademarks displayed herein. Misuse of any trademarks or<br />
any other content in this manual is strictly prohibited. <strong>Funai</strong> shall aggressively enforce its intellectual property<br />
rights <strong>to</strong> the fullest extent of the law.<br />
Manufactured under license from Dolby Labora<strong>to</strong>ries. Dolby and the double-D symbol are trademarks of Dolby<br />
Labora<strong>to</strong>ries.<br />
5<br />
EN
Before Using<br />
Overview<br />
CONNECTION<br />
A Connecting <strong>to</strong><br />
a TV without A/V jacks<br />
Conexión a un TV sin <strong>to</strong>mas de A/V<br />
TV without<br />
A/V jacks<br />
SET TOP BOX<br />
P10<br />
B Connecting <strong>to</strong><br />
a TV with A/V jacks<br />
Conexión a un TV con <strong>to</strong>mas de A/V<br />
TV with<br />
A/V jacks<br />
SET TOP BOX<br />
P10<br />
C<br />
Connecting <strong>to</strong><br />
a Cable <strong>Box</strong><br />
Conexión a una caja de<br />
cable<br />
TV with<br />
A/V jacks<br />
Cable <strong>Box</strong><br />
SET TOP BOX<br />
P11<br />
D Connecting <strong>to</strong><br />
Other Devices<br />
Conexión a otros<br />
dispositivos<br />
TV with<br />
A/V jacks<br />
DVD or VCR<br />
SET TOP BOX<br />
P12<br />
SETUP WIZARD<br />
1. Language for TV screen<br />
Idioma para la pantalla<br />
2. Connection for audio output<br />
Conexión para salida de audio<br />
3. Time zone<br />
Husos horarios<br />
4. Daylight savings time (D.S.T)<br />
Hora de verano (D.S.T)<br />
5. Display mode<br />
modo de indicaciones<br />
P14<br />
6. Channel scanning<br />
Búsqueda de canales<br />
6<br />
EN
Information on <strong>Digital</strong> Broadcasting<br />
Before Using<br />
Receives<br />
ATSC<br />
<strong>Digital</strong> terrestrial<br />
antenna<br />
ATSC<br />
<strong>Digital</strong><br />
terrestrial signals<br />
This STB makes it possible <strong>to</strong> view the digital TV<br />
programs on your analog TV by converting the<br />
digital signal <strong>to</strong> the analog signal. You can use<br />
most features provided by the digital broadcast,<br />
except that the resolution of the image is always<br />
output in 480i (standard resolution).<br />
STB (<strong>Set</strong> <strong>Top</strong> <strong>Box</strong>)<br />
converts the ATSC signal<br />
<strong>to</strong> analog signal<br />
TV<br />
Accessories<br />
Check the following accessories when unpacking the STB:<br />
Remote control:<br />
NA386UD (x1)<br />
Owner’s manual:<br />
1VMN25976 (x1)<br />
AA battery (x2)<br />
RF cable:<br />
WPZ0901TM002 /<br />
WPZ0901TM005 (x1)<br />
Installing Batteries<br />
Instalación de pilas<br />
1 Unsnap the battery cover from the<br />
back of the remote control.<br />
Abra la cubierta de pilas de la parte<br />
trasera del mando a distancia.<br />
2 Install two AA batteries making<br />
sure the polarity (+ / - ) is correct.<br />
Instale dos pilas AA asegurándose que<br />
la polaridad (+ / - ) sea la correcta.<br />
3 Snap the battery<br />
cover back.<br />
Cierre la cubierta de<br />
pilas.<br />
NOTE:<br />
• When replacing batteries,<br />
replace them in pairs.<br />
Cuando cambie las pilas,<br />
hágalo por pares.<br />
CAUTION:<br />
•<br />
•<br />
•<br />
Do not mix battery types (alkaline and manganese, or old ones and<br />
new ones).<br />
No mezcle tipos de baterías (baterías alcalinas y de manganeso, ni pilas viejas<br />
con pilas nuevas).<br />
Do not recharge, short-circuit, heat, burn or disassemble batteries.<br />
No recargue, caliente, queme o desarme baterías ni provoque un cor<strong>to</strong> circui<strong>to</strong><br />
con ellas.<br />
Remove batteries from battery compartment that is not going <strong>to</strong> be<br />
used for a month or more.<br />
Quite las pilas del compartimen<strong>to</strong> de pilas si no se va a utilizar durante un mes o más.<br />
7<br />
EN
Before Using<br />
Location of Controls<br />
Ubicación del control<br />
Remote Control<br />
Mando a distancia<br />
1<br />
2<br />
3<br />
4<br />
5<br />
6<br />
7<br />
8<br />
9<br />
10<br />
11<br />
12<br />
13<br />
1 STANDBY-ON but<strong>to</strong>n: Turns STB on and off.<br />
Conecta y desconecta el STB.<br />
2 Number but<strong>to</strong>ns<br />
3 OK but<strong>to</strong>n<br />
4 SETUP but<strong>to</strong>n: Displays “SETUP” menu.<br />
Switches between ch3 / ch4 by holding this<br />
but<strong>to</strong>n down over 3 seconds.<br />
Despliega el menú “AJUSTE”.<br />
Puede alternar entre el canal 3 y 4 si mantiene<br />
presionado [SETUP] durante 3 segundos.<br />
5 ALT. CH: Returns <strong>to</strong> the last selected channel.<br />
Regresa al último canal seleccionado.<br />
6 AUDIO but<strong>to</strong>n: Selects alternative audio<br />
languages (if available).<br />
Selecciona idiomas de audio alternativos (si existen).<br />
7 . (Confirm) but<strong>to</strong>n: Press <strong>to</strong> confirm the channel<br />
selection made by [the Number but<strong>to</strong>ns].<br />
Presione para confirmar la selección del canal, hecha<br />
con [los bo<strong>to</strong>nes de Números].<br />
8 DISPLAY but<strong>to</strong>n: Displays the channel banner.<br />
Despliega el banner del canal.<br />
9 RETURN but<strong>to</strong>n: Returns <strong>to</strong> the previous menu<br />
screen.<br />
Regresa a la pantalla de menú anterior.<br />
10 Navigation but<strong>to</strong>ns K / L / s / B<br />
11 EPG but<strong>to</strong>n: Displays the Electronic Program<br />
Guide.<br />
Despliega la Guía Electrónica de Programas.<br />
12 CH K / Lbut<strong>to</strong>ns<br />
13 STILL but<strong>to</strong>n: Freezes the image on the TV<br />
screen.<br />
Congela la imagen de la pantalla del TV.<br />
• To operate this STB with a universal remote, check the instruction manual for remote and find<br />
Magnavox brand STB code. If you do not find the code or the code does not work, try <strong>to</strong> use Sylvania<br />
brand STB code instead.<br />
8<br />
EN
Front Panel<br />
Panel frontal<br />
Before Using<br />
1 2 3<br />
1 Remote control sensor<br />
2 POWER indica<strong>to</strong>r:<br />
Turns green when the STB is in operation. Turns<br />
yellow on standby.<br />
Se vuelve verde cuando el STB está en operación. Se<br />
vuelve amarilla en el modo en espera.<br />
3 Main Power:<br />
Turns STB’s main power on and off.<br />
Conecta y desconecta la fuente de alimentación<br />
principal del STB.<br />
When you use this but<strong>to</strong>n <strong>to</strong> turn off<br />
the main power, make sure the Power<br />
indica<strong>to</strong>r is yellow.<br />
Cuando utilice este botón para desconectar la<br />
fuente de alimentación principal, asegúrese de<br />
que el indicador de potencia esté amarillo.<br />
Rear Panel<br />
Panel trasero<br />
1 2 3 4 5<br />
1 AC power cord<br />
2 AUDIO OUT jacks (Right-red / Left-white):<br />
Connect your TV, stereo system or VCR etc. with<br />
standard audio cables.<br />
Conecte su TV, sistema estéreo o VCR, etc., con cables<br />
de audio estándares.<br />
3 VIDEO OUT jack (yellow):<br />
Connect your TV or VCR etc. with a standard<br />
video cable.<br />
Conecte su TV o VCR, etc., con un cable estándar de<br />
video.<br />
4 ANT. IN jack:<br />
Connect an antenna.<br />
Conecte una antena.<br />
5 ANT. OUT jack:<br />
Connect <strong>to</strong> the ANT. IN jack on your TV.<br />
Conecte a la <strong>to</strong>ma ANT. IN de su TV.<br />
9<br />
EN
Connections<br />
1 Disconnect the AC power cords of the devices from the AC outlet.<br />
Desconecte los cables de alimentación de los apara<strong>to</strong>s del <strong>to</strong>macorriente CA.<br />
2 Disconnect RF coaxial cable from antenna input jack of your TV.<br />
Desconecte el cable coaxial de RF del conec<strong>to</strong>r hembra de entrada de antena de su televisor.<br />
3 Make the connections as illustrated below.<br />
Efectúe las conexiones tal como se ilustra a continuación.<br />
4 Plug all AC power cords in<strong>to</strong> AC outlets, then turn all devices on.<br />
Enchufe <strong>to</strong>dos los cables eléctricos de CA en los <strong>to</strong>macorrientes de CA y conecte la alimentación de <strong>to</strong>dos los equipos.<br />
A Connecting <strong>to</strong> a TV without A/V Jacks<br />
Conexión a un TV sin <strong>to</strong>mas de A/V<br />
TV<br />
TV antenna<br />
Antena de TV<br />
STB<br />
Does not send<br />
the analog TV signal.<br />
No envía la señal analógica<br />
RF cable<br />
(supplied)<br />
cable de RF<br />
(se incluye)<br />
B Connecting <strong>to</strong> a TV with A/V Jacks<br />
Conexión a un TV con <strong>to</strong>mas de A/V<br />
TV<br />
TV antenna<br />
Antena de TV<br />
STB<br />
white<br />
red<br />
yellow<br />
yellow<br />
white<br />
red<br />
Audio cable<br />
cable de audio<br />
Video cable<br />
cable de<br />
video<br />
NOTE:<br />
• If your TV has only one audio jack, connect the AUDIO OUT jack (L) (white) on the STB <strong>to</strong> the audio input<br />
jack on the TV.<br />
Si su TV sólo tiene una <strong>to</strong>ma de audio, conecte la <strong>to</strong>ma AUDIO OUT (L) (blanco) del STB, a la <strong>to</strong>ma de entrada de audio<br />
del TV.<br />
10<br />
EN
C Connecting <strong>to</strong> a Cable <strong>Box</strong> (Optional)<br />
Conexión a una caja de cable (opcional)<br />
TV<br />
STB<br />
TV antenna<br />
Antena de TV<br />
Connections<br />
yellow<br />
white<br />
red<br />
Cable TV<br />
company<br />
empresa de<br />
TV por cable<br />
white<br />
red<br />
Audio cable<br />
cable de audio<br />
yellow<br />
Video cable<br />
cable de video<br />
Cable box (optional)<br />
caja de cable (opcional)<br />
RF cable (supplied)<br />
cable de RF (se incluye)<br />
Incoming<br />
cable signals<br />
Señales del cable<br />
de entrada<br />
Note <strong>to</strong> the Cable TV System Installer:<br />
This reminder is provided <strong>to</strong> call the Cable TV system installer’s attention <strong>to</strong> Article 820-40 of the National<br />
Electrical Code, which provides guidelines for proper grounding - in particular, specifying that the cable<br />
ground shall be connected <strong>to</strong> the grounding system of the building, as close <strong>to</strong> the point of cable entry as<br />
possible.<br />
Observación para el instalador del sistema de cable de TV:<br />
Este recorda<strong>to</strong>rio se provee para alertar al instalador del sistema de cable de TV sobre el Artículo 820-40 del Código<br />
Eléctrico Nacional, el cual proporciona pautas para una puesta a tierra adecuada, y en particular especifica que la puesta<br />
a tierra del cable debe estar conectada al sistema de puesta a tierra del edificio, lo más cerca posible del pun<strong>to</strong> de entrada<br />
del cable.<br />
11<br />
EN
Connections<br />
D Connecting <strong>to</strong> Other Devices<br />
Conexión a otros dispositivos<br />
TV antenna<br />
Antena de TV<br />
Splitter<br />
Divisor<br />
TV<br />
STB<br />
white<br />
yellow<br />
white<br />
red<br />
Audio cable<br />
cable de audio<br />
DVD Recorder or VCR<br />
Grabador de DVD o videograbador<br />
RF cable<br />
cable de RF<br />
red<br />
yellow<br />
Does not send<br />
the analog TV signal.<br />
No envía la señal analógica<br />
Audio cable<br />
cable de audio<br />
white<br />
red<br />
yellow<br />
Video cable<br />
cable de video<br />
RF cable<br />
(supplied)<br />
cable de RF<br />
(se incluye)<br />
NOTE:<br />
• If your DVD recorder or VCR has only one audio jack, connect the AUDIO OUT jack (L) (white)<br />
on the STB <strong>to</strong> the audio input jack on the DVD.<br />
Si su grabador de DVD o videograbador sólo tiene una <strong>to</strong>ma de audio, conecte la <strong>to</strong>ma AUDIO OUT (L)<br />
(blanco) del STB, a la <strong>to</strong>ma de entrada de audio del DVD.<br />
12<br />
EN
1<br />
CH.<br />
CH.<br />
Initial <strong>Set</strong>up (<strong>Set</strong>up Wizard)<br />
1 Switch the STB’s mains power on.<br />
Encienda la alimentación principal del STB.<br />
Initial <strong>Set</strong>up<br />
Ajùste inicial<br />
ON OFF<br />
lights up in yellow<br />
se vuelve amarilla<br />
2 Press [STANDBY-ON] on the remote control <strong>to</strong> activate the STB.<br />
Presione [STANDBY-ON] en el mando a distancia para activar el STB.<br />
Initial <strong>Set</strong>up<br />
(<strong>Set</strong>up Wizard)<br />
lights up in green<br />
se vuelve verde<br />
3 Turn on the TV, and select the viewing channel (ch3 or external input channel) on<br />
your TV. (Refer <strong>to</strong> your TV’s manual.)<br />
Encienda el TV, y seleccione el canal que quiera ver (canal 3 o uno de entrada externo) en su TV. (Véase el<br />
manual del TV.)<br />
1<br />
2<br />
2 3<br />
4 5 6<br />
7 8 9<br />
0<br />
Appropriate Viewing Channel<br />
Configuración apropiada de el Canal de Visión<br />
Viewing<br />
Connection<br />
STB Cable <strong>Box</strong> DVD or VCR<br />
A (p.10) “CH3” - -<br />
B (p.10)<br />
External input channel<br />
Canal de entrada externo<br />
- -<br />
C (p.11)<br />
External input channel<br />
Canal de entrada externo<br />
Ch3 -<br />
D (p.12) “CH3” - External input channel<br />
Canal de entrada externo<br />
• If your TV’s ch3 is already occupied, select ch4, and set the STB’s output channel <strong>to</strong> ch4. You can<br />
switch ch3 / ch4 by holding [SETUP] down over 3 seconds.<br />
Si el c3 de su TV ya está ocupado, seleccione el c4 y luego ajuste el canal de salida del STB a c4. Puede alternar<br />
entre el c3 y 4 manteniendo presionado [SETUP] durante 3 segundos.<br />
”SETUP WIZARD” screen au<strong>to</strong>matically appears.<br />
Follow the directions shown on the TV screen <strong>to</strong> set the each setting.<br />
13<br />
EN
Initial <strong>Set</strong>up (<strong>Set</strong>up Wizard)<br />
4 Select “CONTINUE” using [ s / B ],<br />
then press [OK].<br />
Seleccione “CONTINÚE” utilizando [s / B] y presione<br />
[OK].<br />
This SETUP WIZARD will help you with the initial<br />
setup on your own.<br />
“CONTINUE”: To continue setup<br />
“CANCEL ”: To cancel <strong>to</strong> leave pre-arranged<br />
setup<br />
CANCEL<br />
CONTINUE<br />
5 Select the language using [ K / L ],<br />
then press [OK].<br />
Seleccione el idioma utilizando [K / L] y presione [OK].<br />
ENGLISH<br />
Select the language for setup display.<br />
ESPAÑOL Elija idioma de preparación.<br />
FRANÇAIS Sélectionner langue écran config.<br />
6 Select the connection for audio<br />
output using [ s / B ], then press [OK].<br />
Seleccione la conexión para salida de audio mediante<br />
[s / B] y luego presione [OK].<br />
8 Select “ON” or “OFF” for Daylight<br />
Saving Time (D.S.T) using [ s / B ],<br />
then press [OK].<br />
Seleccione “ON” u “OFF” para la hora de verano. (D.S.T)<br />
utilizando [s / B] y presione [OK].<br />
Select Daylight Saving Time.<br />
NOTE:<br />
2:00AM of the second Sunday in<br />
March until 2:00AM of the first<br />
Sunday in November.<br />
ON<br />
OFF<br />
9 Select the desired display mode<br />
using [ K / L ], then press [OK] (refer<br />
<strong>to</strong> page 20).<br />
Seleccione el modo de indicación deseado utilizando<br />
[K / L] y presione [OK].<br />
Select display mode.<br />
LETTERBOX<br />
ZOOM<br />
FULL<br />
Select the connection for Audio output.<br />
AUDIO OUT : Connecting STB and TV via AUDIO<br />
Cable<br />
RF OUT : Connecting STB and TV via RF<br />
Cable<br />
AUDIO OUT RF OUT<br />
Select “AUDIO OUT” if...<br />
- you are using the standard audio cable <strong>to</strong><br />
connect the STB <strong>to</strong> your TV. (Connection B or<br />
C on pages 10 and 11.)<br />
Seleccione “AUDIO FUERA” si...<br />
- está utilizando el cable de audio normal para<br />
conectar el STB a su TV. (conexión B o C en las<br />
páginas 10 y 11.)<br />
Select “RF OUT” if...<br />
- you are using the RF cable <strong>to</strong> connect the STB<br />
<strong>to</strong> your TV. (Connection A or D on pages 10<br />
and 12.)<br />
Seleccione “RF FUERA” si...<br />
- está utilizando el cable RF para conectar el STB a su<br />
TV. (conexión A o D en las páginas 10 y 12.)<br />
7 Select your time zone using [ K / L ],<br />
then press [OK].<br />
Seleccione su huso horario con [K / L] y presione [OK].<br />
Select Time Zone.<br />
ATLANTIC<br />
EASTERN<br />
CENTRAL<br />
MOUNTAIN<br />
PACIFIC<br />
ALASKA<br />
HAWAII<br />
14<br />
EN<br />
10 Select “AUTOSCAN” using [ K / L ],<br />
then press [OK].<br />
Seleccione “AUTOEXPLO.” mediante [K / L] y luego<br />
presione [OK].<br />
AUTOSCAN will rescan all channels.<br />
This may take a while <strong>to</strong> complete.<br />
EXIT<br />
AUTOSCAN<br />
The system is now scanning.<br />
12% Channel Found<br />
EXIT<br />
• STB starts receiving available digital channels<br />
and s<strong>to</strong>res them in the channel map.<br />
• When the scanning is complete,<br />
“AUTOSCAN COMPLETED” will be indicated.<br />
• After au<strong>to</strong>scan is complete, use [CH K / L]<br />
<strong>to</strong> verify whether STB is receiving channels<br />
properly.<br />
The “SETUP WIZARD” is now complete.<br />
El “ASISTENTE DE PREP.” ahora ha finalizado.<br />
To cancel during scanning:<br />
Press [SETUP] or [OK].<br />
Para cancelar durante la exploración: Presione [SETUP] o [OK].<br />
•<br />
If au<strong>to</strong>scan is canceled, some channels not yet<br />
scanned may not be received. We recommend<br />
completing au<strong>to</strong>scan.<br />
You can do au<strong>to</strong>scan and adding / deleting<br />
channel later. Refer <strong>to</strong> page 18.<br />
•
Basic Operation<br />
About Sub-channel Broadcasting<br />
<strong>Digital</strong> broadcasting offers a service that enables<br />
multiple signals, called “sub-channels”, <strong>to</strong> be sent<br />
simultaneously on one main channel by using its<br />
high compression technology.<br />
ATSC<br />
18:00<br />
18:30<br />
CH4-1 (Soccer)<br />
CH4-1 (Soccer) CH4-2 (News)<br />
CH4-3 (Tennis)<br />
Selecting Channels on the STB<br />
1 Enter the main channel number.<br />
If the main channel number is 1 digit, press [.]<br />
when finish entering.<br />
2 Enter the sub-channel number.<br />
If the sub-channel number is 1 digit, press [OK]<br />
when finish entering.<br />
E.g., selecting 6.1<br />
19:00<br />
19:30<br />
20:00<br />
CH4-1 (Soccer)<br />
CH4-1 (Soccer)<br />
CH4-2 (News)<br />
E.g., selecting 26.12<br />
Basic Operation<br />
: Can be changed by<br />
using [CH K/ L ].<br />
NOTE:<br />
• If you do not have a particular sub-channel<br />
number you want <strong>to</strong> select, enter the main<br />
channel number and then press [OK]. (If the<br />
main channel number is 1 digit, you should<br />
press [OK] twice.) The STB au<strong>to</strong>matically tunes<br />
in<strong>to</strong> the lowest sub-channel for the selected<br />
main channel.<br />
• Press [ALT. CH] <strong>to</strong> return <strong>to</strong> the previously<br />
viewed channel.<br />
• “NO SIGNAL” appears after the sub-channel<br />
broadcast is over.<br />
15<br />
EN
Basic Operation<br />
Choosing Audio Language<br />
You can change languages when the channel<br />
provides alternate languages.<br />
Press [AUDIO] repeatedly.<br />
ENGLISH 1/4<br />
SPANISH 2/4<br />
FRENCH 3/4<br />
OTHER 4/4<br />
• Audio language changes as follows.<br />
•<br />
NOTE:<br />
•<br />
“OTHER” is indicated when the<br />
language is not English, Spanish<br />
nor French.<br />
For international stations audio<br />
language will still be displayed as<br />
English.<br />
Picture Still<br />
You can freeze the image on the TV screen.<br />
Press [STILL].<br />
The image on the TV screen will be paused.<br />
To cancel still mode:<br />
Press any but<strong>to</strong>n except [STANDBY-ON].<br />
NOTE:<br />
• The sound output will not be<br />
paused.<br />
• If “no signal” is detected or protected<br />
signal is received during still mode,<br />
the image remains paused and the<br />
sound output will be muted.<br />
• If the TV is left on STILL for a long<br />
period of time, the still image may<br />
cause a burn-in effect damaging the<br />
TV screen.<br />
16<br />
EN
Channel Banner<br />
The channel banner provides you with the information on the selected channel.<br />
Press [DISPLAY].<br />
Station name<br />
Program title SMILE<br />
ABC-XXX<br />
Channel number :<br />
3.1<br />
Information Icons<br />
CC ENGLISH 1/2<br />
Audio language<br />
CC (Closed Caption):<br />
Indicates that the program being<br />
broadcast is available with closed<br />
captioning.<br />
LOCK:<br />
Indicates that the current program<br />
is blocked according <strong>to</strong> your V-chip<br />
setting.<br />
To remove the channel banner:<br />
Press [DISPLAY].<br />
TV-Y7 FV<br />
SIGNAL<br />
50<br />
RESTRICTED PROGRAM<br />
Signal strength :<br />
Indicates the signal strength of<br />
the current channel.<br />
Program ratings :<br />
Displays all the available ratings.<br />
Active ratings are highlighted in<br />
red.<br />
Basic Operation<br />
Electronic Program Guide (EPG)<br />
Electronic Program Guide (EPG) is the electronic equivalent of a printed TV program guide.<br />
You can view a list of programs scheduled for the next few hours up <strong>to</strong> the next seven days.<br />
To display the correct information on “EPG”, “TIME ZONE” and ”D.S.T” must be set correctly.<br />
1 Press [EPG] while watching TV.<br />
Closed Caption :<br />
EPG<br />
CC<br />
Indicates that the program being<br />
Program title<br />
3.1<br />
SMILE Prog 2<br />
ABC-XXX<br />
broadcast is available with closed<br />
captioning.<br />
Time segment for the program.<br />
“NOW” icon will be displayed on<br />
the right for the current program.<br />
Program description<br />
12:00PM-1:00PM<br />
SMILE 2-1<br />
SMILE 2-2<br />
SMILE 2-3<br />
PREV<br />
2 Select the desired program using [ s / B ].<br />
To remove the EPG:<br />
Press [EPG].<br />
NOTE:<br />
•<br />
•<br />
NEXT<br />
Channel number<br />
Indicates that there is a program<br />
information available for next or<br />
previous program.<br />
“EPG” will be cleared after 5 minutes.<br />
For channel numbers with blank description, the broadcasting station may not<br />
provide signals for “EPG”.<br />
When the program description consists of more than 4 lines, use [ K / L ] <strong>to</strong> scroll<br />
up / down in the list.<br />
•<br />
17<br />
EN
Advanced Operation<br />
Au<strong>to</strong>scan<br />
(Receiving Channels)<br />
Au<strong>to</strong>scan receives available digital channels and<br />
s<strong>to</strong>res them in a channel map.<br />
CAUTION:<br />
• If au<strong>to</strong>scan is skipped, digital channels may not<br />
be received correctly.<br />
1 Press [SETUP].<br />
2 Select “CHANNEL” using [ K / L ],<br />
then press [OK].<br />
3 Select “AUTOSCAN” using [ K / L ],<br />
then press [OK].<br />
To cancel during scanning:<br />
Press [SETUP] or [OK].<br />
NOTE:<br />
• If canceled, some channels not yet scanned may<br />
not be received. We recommend completing<br />
au<strong>to</strong>scan.<br />
• When you want <strong>to</strong> completely refresh the<br />
channel map, delete all the channels, then do<br />
the au<strong>to</strong>scan again. See “Adding/Deleting<br />
Channels” on this page for details.<br />
When “NO SIGNAL” appears on the TV screen:<br />
Verify the antenna connection, then scan again.<br />
The STB tunes in channel 2-1 and “NO SIGNAL”<br />
appears if the STB could not receive any channels.<br />
CHANNEL<br />
EXIT<br />
Adding/Deleting Channels<br />
CHANNEL<br />
TIME<br />
DETAIL<br />
ADD/DELETE<br />
ANTENNA<br />
AUTOSCAN<br />
Add or delete desired channels in the channel map.<br />
INITIAL<br />
4 Select “AUTOSCAN” using [ K / L ],<br />
then press [OK].<br />
CAUTION:<br />
• You cannot recover the deleted channels once<br />
they are deleted unless you perform the<br />
au<strong>to</strong>scan again.<br />
AUTOSCAN<br />
EXIT<br />
AUTOSCAN will rescan all channels.<br />
This may take a while <strong>to</strong> complete.<br />
CHANNEL<br />
TIME BACK<br />
1 Press [SETUP].<br />
2 Select “CHANNEL” using [ K / L ],<br />
then press [OK].<br />
DETAIL<br />
AUTOSCAN<br />
SETUP<br />
INITIAL<br />
EXIT<br />
CHANNEL<br />
TIME<br />
ADD/DELETE<br />
ANTENNA<br />
AUTOSCAN<br />
AUTOSCAN<br />
DETAIL<br />
The system is now scanning.<br />
INITIAL<br />
12% Channel Found<br />
EXIT<br />
3 Select “ADD/ DELETE” using [ K / L ],<br />
then press [OK].<br />
• STB starts receiving available digital<br />
channels and s<strong>to</strong>res them in the channel<br />
map.<br />
• When the scanning is complete,<br />
“AUTOSCAN COMPLETED” will be indicated.<br />
• After au<strong>to</strong>scan is complete, use [CH K / L]<br />
<strong>to</strong> verify whether STB is receiving channels<br />
properly.<br />
18<br />
EN<br />
CHANNEL<br />
EXIT<br />
CHANNEL<br />
TIME<br />
DETAIL<br />
INITIAL<br />
ADD/DELETE<br />
ANTENNA<br />
AUTOSCAN
Add<br />
4 With “ADD” selected, enter the main<br />
channel number you want <strong>to</strong> add,<br />
then press [OK] or wait for a few<br />
seconds <strong>to</strong> fix the number.<br />
If the main channel number is 1 digit, press [0]<br />
first.<br />
NOTE:<br />
• Entering sub-channel number is not required.<br />
5 Press [OK] again <strong>to</strong> add the channel<br />
<strong>to</strong> the channel map.<br />
Delete<br />
4 Select “DELETE” using [ K / L ], then<br />
press [OK].<br />
ADD/DELETE<br />
EXIT<br />
CHANNEL<br />
TIME<br />
DETAIL<br />
INITIAL<br />
ADD<br />
DELETE<br />
10.1<br />
5 Select the channel number you want<br />
<strong>to</strong> delete from the channel list on the<br />
right using [ K / L ], then press [OK].<br />
E.g., deleting channel 26.<br />
10<br />
20<br />
26<br />
56<br />
E.g., adding channel 6<br />
ADD/DELETE<br />
26.1<br />
(or leave for<br />
a few seconds)<br />
EXIT<br />
CHANNEL<br />
TIME<br />
ADD<br />
DELETE<br />
10<br />
20<br />
26<br />
DETAIL<br />
58<br />
INITIAL<br />
ADD/DELETE<br />
EXIT<br />
CHANNEL<br />
TIME<br />
DETAIL<br />
INITIAL<br />
ADD<br />
DELETE<br />
E.g., adding channel 26.<br />
6.X<br />
6<br />
10<br />
20<br />
58<br />
(or leave for<br />
a few seconds)<br />
ADD/DELETE<br />
EXIT<br />
CHANNEL<br />
TIME<br />
DETAIL<br />
INITIAL<br />
58.1<br />
ADD<br />
10<br />
DELETE<br />
20<br />
58<br />
60<br />
• The selected channel is now deleted.<br />
To continue deleting:<br />
Repeat step 5.<br />
6 Press [SETUP] <strong>to</strong> exit.<br />
Advanced<br />
Operation<br />
ADD/DELETE<br />
26.X<br />
EXIT<br />
CHANNEL<br />
TIME<br />
DETAIL<br />
INITIAL<br />
ADD<br />
DELETE<br />
6<br />
10<br />
20<br />
26<br />
• The selected channel is now added.<br />
To continue adding:<br />
Repeat steps 4 and 5.<br />
6 Press [SETUP] <strong>to</strong> exit.<br />
19<br />
EN
Advanced Operation<br />
Adjusting Antenna<br />
You can verify the signal strength of each channel.<br />
1 Select a channel <strong>to</strong> adjust using [the<br />
Number but<strong>to</strong>ns] or [CH K / L].<br />
2 Press [SETUP].<br />
3 Select “CHANNEL” using [ K / L ],<br />
then press [OK].<br />
4 Select “ANTENNA” using [ K / L ],<br />
then press [OK].<br />
CHANNEL<br />
EXIT<br />
CHANNEL<br />
TIME<br />
DETAIL<br />
INITIAL<br />
ADD/DELETE<br />
ANTENNA<br />
AUTOSCAN<br />
• STB starts receiving the signal for the<br />
channel.<br />
5 By referring <strong>to</strong> the on-screen<br />
indication, adjust the antenna’s<br />
direction <strong>to</strong> get the best reception.<br />
Status bar:<br />
Stretches <strong>to</strong> the right as the signal<br />
strength gets stronger.<br />
ANTENNA<br />
EXIT<br />
CHANNEL<br />
TIME<br />
DETAIL<br />
INITIAL<br />
WEAK<br />
NOW<br />
10<br />
BACK<br />
10.1<br />
STRONG<br />
50<br />
PEAK<br />
Peak indica<strong>to</strong>r:<br />
Indicates the highest strength ever<br />
reached.<br />
Selecting Display Mode<br />
You can adjust the aspect ratio of the digital TV<br />
program <strong>to</strong> fit your 4:3 TV moni<strong>to</strong>r.<br />
Display Mode<br />
1 Press [SETUP].<br />
2 Select “DETAIL” using [ K / L ], then<br />
press [OK].<br />
SETUP<br />
EXIT<br />
CHANNEL<br />
TIME<br />
DETAIL<br />
INITIAL<br />
V-CHIP<br />
CLOSED CAPTION<br />
DISPLAY MODE LETTERBOX<br />
AUTO POWER DOWN 4 HOURS<br />
3 Select “DISPLAY MODE” using [ K / L ],<br />
then press [OK].<br />
DETAIL<br />
EXIT<br />
CHANNEL<br />
TIME<br />
DETAIL<br />
INITIAL<br />
V-CHIP<br />
CLOSED CAPTION<br />
DISPLAY MODE LETTERBOX<br />
AUTO POWER DOWN 4 HOURS<br />
4 Select the desired display mode<br />
using [ K / L ], then press [OK].<br />
*<br />
Descriptions of each settings are explained<br />
in the “Information on Display Mode” on the<br />
next page.<br />
Select display mode.<br />
LETTERBOX<br />
ZOOM<br />
FULL<br />
5 Press [SETUP] <strong>to</strong> exit.<br />
To adjust other channels:<br />
Select the channel using [CH K / L], then adjust<br />
it.<br />
6 Press [SETUP] <strong>to</strong> exit.<br />
20<br />
EN
Information on Display Mode<br />
LETTERBOX<br />
ZOOM<br />
FULL<br />
16:9 picture is scaled down<br />
until the both sides of the<br />
picture fits the 4:3 TV. Black<br />
bars appear on <strong>to</strong>p and<br />
bot<strong>to</strong>m of the TV screen.<br />
Displays the 16:9 image with<br />
the <strong>to</strong>p and the bot<strong>to</strong>m of<br />
the picture fit <strong>to</strong> the 4:3 TV<br />
screen. Both sides of the<br />
picture are cut off.<br />
16:9 image is squeezed in<strong>to</strong><br />
the 4:3 TV screen. No parts<br />
are cropped, but the picture<br />
gets dis<strong>to</strong>rted.<br />
<strong>Set</strong>ting the Time Zone and<br />
D.S.T (Daylight Saving Time)<br />
You need <strong>to</strong> select the time zone of your area and<br />
set D.S.T correctly <strong>to</strong> make use of the EPG and the<br />
Channel banner function.<br />
1 Press [SETUP].<br />
2 Select “TIME” using [ K / L ], then<br />
press [OK].<br />
Time Zone<br />
3 Select “TIME ZONE” using [ K / L ],<br />
then press [OK].<br />
TIME<br />
CAUTION:<br />
EXIT<br />
CHANNEL<br />
TIME<br />
TIME ZONE<br />
D.S.T<br />
EASTERN<br />
OFF<br />
If the TV is left in LETTER BOX mode for a long period<br />
of time, the black bars may cause a permanent burnin<br />
effect.<br />
DETAIL<br />
INITIAL<br />
4 Select your time zone using [ K / L ],<br />
then press [OK].<br />
Select Time Zone.<br />
ATLANTIC<br />
EASTERN<br />
CENTRAL<br />
MOUNTAIN<br />
PACIFIC<br />
ALASKA<br />
HAWAII<br />
Advanced<br />
Operation<br />
5 Press [SETUP] <strong>to</strong> exit.<br />
21<br />
EN
Advanced Operation<br />
D.S.T (Daylight Saving Time)<br />
3 Select “D.S.T” using [ K / L ], then<br />
press [OK].<br />
TIME<br />
4-a Enter 4-digit numbers except 4737<br />
as your password using [the Number<br />
but<strong>to</strong>ns].<br />
• Enter exactly the same password again in<br />
“Confirm password.” entry field.<br />
EXIT<br />
CHANNEL<br />
TIME ZONE<br />
D.S.T<br />
EASTERN<br />
ON<br />
V-CHIP<br />
TIME<br />
EXIT<br />
Enter password.<br />
DETAIL<br />
CHANNEL<br />
INITIAL<br />
TIME<br />
Confirm password.<br />
4 Select “ON” or “OFF” using [ s / B ],<br />
then press [OK].<br />
D.S.T<br />
EXIT<br />
CHANNEL<br />
TIME<br />
DETAIL<br />
INITIAL<br />
Select Daylight Saving Time.<br />
NOTE:<br />
2:00AM of the second Sunday in<br />
March until 2:00AM of the first<br />
Sunday in November.<br />
ON<br />
5 Press [SETUP] <strong>to</strong> exit.<br />
OFF<br />
V-chip Options<br />
V-chip reads the ratings for programs, then denies<br />
access <strong>to</strong> the programs which exceed the rating level<br />
you set. With this function, you can block certain<br />
programming inappropriate for children.<br />
1 Press [SETUP].<br />
2 Select “DETAIL” using [ K / L ], then<br />
press [OK].<br />
3 Select “V-CHIP” using [ K / L ], then<br />
press [OK].<br />
DETAIL<br />
INITIAL<br />
CAUTION:<br />
• Do not forget the password. It will be used as<br />
your V-chip access password from the next time<br />
onward.<br />
4-b Enter the password using [the<br />
Number but<strong>to</strong>ns].<br />
• Asterisk(*) will substitute for your password.<br />
NOTE:<br />
****<br />
• If you forget the password, enter “4737” then<br />
proceed <strong>to</strong> “New Password” on page 24.<br />
DETAIL<br />
EXIT<br />
CHANNEL<br />
TIME<br />
DETAIL<br />
V-CHIP<br />
CLOSED CAPTION<br />
DISPLAY MODE LETTERBOX<br />
AUTO POWER DOWN 4 HOURS<br />
INITIAL<br />
• Password entry field will appear.<br />
If you have not created a password yet...<br />
- proceed <strong>to</strong> step 4-a.<br />
If you have already set a password...<br />
- proceed <strong>to</strong> 4-b.<br />
If you want <strong>to</strong> change the password...<br />
- proceed <strong>to</strong> “New Password” on page 24.<br />
22<br />
EN
5 Select the desired rating type using<br />
[ K / L ], then press [OK].<br />
E.g., “TV RATING”<br />
NOTE:<br />
V-CHIP<br />
EXIT<br />
CHANNEL<br />
TIME<br />
DETAIL<br />
INITIAL<br />
MPAA RATING<br />
TV RATING<br />
CANADIAN ENGLISH RATING<br />
CANADIAN FRENCH RATING<br />
DOWNLOADABLE RATING<br />
CLEAR DOWNLOADABLE RATING<br />
NEW PASSWORD<br />
MPAA Rating<br />
Rating<br />
Description<br />
X Mature audience only higher<br />
NC-17 No one under 17 admitted<br />
R<br />
Restricted; under 17 requires<br />
accompanying parent or adult<br />
guardian<br />
PG-13 Unsuitable for children under 13<br />
PG Parental guidance suggested<br />
G General audience lower<br />
NR No rating<br />
• “DOWNLOADABLE RATING” will be available<br />
when the STB receives a digital broadcast which<br />
contains V-chip 2.0 signal.<br />
• If the broadcasting signal does not have the<br />
downloadable rating information, “Downloadable<br />
Rating is currently not available.” will appear.<br />
This message will also appear when you try <strong>to</strong><br />
access “DOWNLOADABLE RATING” after you<br />
have cleared the downloadable rating<br />
information, and the new information has not<br />
been downloaded since.<br />
• To clear the downloadable rating information<br />
and its setting, select “CLEAR DOWNLOADABLE<br />
RATING”.<br />
6 Select the desired rating using<br />
[ K / L ], then press [OK] repeatedly<br />
<strong>to</strong> switch between view and block.<br />
• When the rating is blocked, will appear.<br />
E.g.,<br />
“MPAA rating”<br />
“TV rating”<br />
TV Rating<br />
Rating<br />
Description<br />
TV-MA Mature audience only higher<br />
TV-14<br />
Unsuitable for children under<br />
14<br />
TV-PG Parental guidance suggested<br />
TV-G General audience<br />
TV-Y7<br />
Appropriate for all children 7<br />
and older<br />
TV-Y Appropriate for all children lower<br />
None No rating<br />
Advanced<br />
Operation<br />
V-CHIP<br />
V-CHIP<br />
EXIT<br />
CHANNEL<br />
TIME<br />
DETAIL<br />
INITIAL<br />
Select MPAA rating.<br />
X<br />
NC-17<br />
R<br />
PG-13<br />
PG<br />
G<br />
NR<br />
EXIT<br />
CHANNEL<br />
TIME<br />
DETAIL<br />
INITIAL<br />
<strong>Set</strong> TV rating.<br />
TV-MA<br />
TV-14<br />
TV-PG<br />
TV-G<br />
TV-Y7<br />
TV-Y<br />
None<br />
FV V S L D<br />
“Canadian English rating”<br />
“Canadian French rating”<br />
V-CHIP<br />
V-CHIP<br />
EXIT<br />
CHANNEL<br />
TIME<br />
DETAIL<br />
INITIAL<br />
<strong>Set</strong> Canadian English rating.<br />
18+<br />
14+<br />
PG<br />
G<br />
C8+<br />
C<br />
E<br />
EXIT<br />
CHANNEL<br />
TIME<br />
DETAIL<br />
INITIAL<br />
<strong>Set</strong> Canadian French rating.<br />
18ans+<br />
16ans+<br />
13ans+<br />
8ans+<br />
G<br />
E<br />
23<br />
EN
Advanced Operation<br />
To <strong>Set</strong> the Sub Ratings for “TV RATING”.<br />
As for TV-MA, TV-14, TV-PG, or TV-Y7, you can further<br />
set the sub ratings <strong>to</strong> block specific elements of<br />
programming. To set the sub ratings, follow the step<br />
below.<br />
Use [ K / L / s / B ] <strong>to</strong> select the desired rating<br />
or sub rating, then press [OK] repeatedly <strong>to</strong> switch<br />
between view and block. Sub rating status will<br />
appear beside the main rating.<br />
V-CHIP<br />
7 Press [SETUP] <strong>to</strong> exit.<br />
NOTE:<br />
• When you select a rating and set it <strong>to</strong> block, the<br />
higher ratings will be blocked au<strong>to</strong>matically.<br />
The lower ratings will be available for viewing.<br />
• When you set the highest rating <strong>to</strong> view, all<br />
ratings will turn <strong>to</strong> view au<strong>to</strong>matically.<br />
EXIT<br />
CHANNEL<br />
TIME<br />
DETAIL<br />
INITIAL<br />
<strong>Set</strong> TV rating.<br />
TV-MA<br />
TV-14<br />
TV-PG<br />
TV-G<br />
TV-Y7<br />
TV-Y<br />
None<br />
FV V S L D<br />
Sub Rating<br />
Description<br />
FV<br />
Fantasy Violence<br />
V<br />
Violence<br />
S<br />
Sexual Situation<br />
L<br />
Coarse Language<br />
D<br />
Suggestive Dialogue<br />
• Changing the main rating <strong>to</strong> block or view<br />
au<strong>to</strong>matically changes all its sub ratings <strong>to</strong> the<br />
same (block or view).<br />
New Password<br />
When you forget the password or when you want<br />
<strong>to</strong> change your password, follow the instructions<br />
below.<br />
1 Press [SETUP].<br />
2 Select “DETAIL” using [ K / L ], then<br />
press [OK].<br />
3 Select “V-CHIP” using [ K / L ], then<br />
press [OK].<br />
4 Enter 4737 in the password entry<br />
field.<br />
5 Select “NEW PASSWORD” using<br />
[ K / L ], then press [OK].<br />
Canadian English Rating<br />
Rating<br />
Description<br />
18+ Adult audience only higher<br />
14+ Unsuitable for ages under 14<br />
PG Parental guidance suggested<br />
G General audience<br />
C8+ For children over 8<br />
C For all children lower<br />
E Exempt program<br />
V-CHIP<br />
EXIT<br />
CHANNEL<br />
TIME<br />
DETAIL<br />
INITIAL<br />
MPAA RATING<br />
TV RATING<br />
CANADIAN ENGLISH RATING<br />
CANADIAN FRENCH RATING<br />
DOWNLOADABLE RATING<br />
CLEAR DOWNLOADABLE RATING<br />
NEW PASSWORD<br />
6 Enter the new 4-digit password<br />
using [the Number but<strong>to</strong>ns].<br />
• Enter exactly the same password again in<br />
“Confirm password.” entry field.<br />
V-CHIP<br />
Canadian French Rating<br />
Rating<br />
Description<br />
18 ans+ Adult audience only higher<br />
16 ans + Unsuitable for ages under 16<br />
13 ans + Unsuitable for ages under 13<br />
8 ans + Unsuitable for ages under 8<br />
G General audience lower<br />
E Exempt program<br />
EXIT<br />
Enter password.<br />
CHANNEL<br />
TIME Confirm password.<br />
DETAIL<br />
INITIAL<br />
7 Press [SETUP] <strong>to</strong> exit.<br />
24<br />
EN
Closed Caption Options<br />
<strong>DTV</strong> has its own closed caption called <strong>DTV</strong> CC. Use<br />
this menu <strong>to</strong> change the settings for <strong>DTV</strong> CC.<br />
1 Press [SETUP].<br />
2 Select “DETAIL” using [ K / L ], then<br />
press [OK].<br />
3 Select “CLOSED CAPTION” using<br />
[ K / L ], then press [OK].<br />
CC Style<br />
You need <strong>to</strong> set “CC STYLE” <strong>to</strong> “MANUAL” <strong>to</strong> cus<strong>to</strong>mize<br />
your CC style.<br />
5 Select “MANUAL” using [ K / L ],<br />
then press [OK].<br />
CC STYLE<br />
EXIT<br />
CHANNEL<br />
TIME<br />
DETAIL<br />
INITIAL<br />
CC STYLE will be displayed using<br />
your manual setting.<br />
AUTO<br />
MANUAL<br />
DETAIL<br />
EXIT<br />
CHANNEL<br />
TIME<br />
DETAIL<br />
INITIAL<br />
V-CHIP<br />
CLOSED CAPTION<br />
DISPLAY MODE LETTERBOX<br />
AUTO POWER DOWN<br />
4 HOURS<br />
4 Select the desired closed caption<br />
item using [ K / L ], then press [OK].<br />
<strong>DTV</strong> CC<br />
CLOSED CAPTION<br />
EXIT<br />
CHANNEL<br />
TIME<br />
DETAIL<br />
INITIAL<br />
<strong>DTV</strong> CC<br />
CC STYLE<br />
CC STYLE EDIT<br />
OFF<br />
AUTO<br />
<strong>Digital</strong> TV has its own closed captions called <strong>DTV</strong> CC.<br />
Use this menu <strong>to</strong> change the settings for <strong>DTV</strong> CC.<br />
5 Select the desired <strong>DTV</strong> closed caption<br />
using [ K / L ], then press [OK].<br />
Select service.<br />
OFF<br />
SERVICE1<br />
SERVICE2<br />
SERVICE3<br />
SERVICE4<br />
SERVICE5<br />
SERVICE6<br />
If you select “AUTO”...<br />
- the original CC style set by the broadcast<br />
station will be applied.<br />
If you select “MANUAL”...<br />
- you can cus<strong>to</strong>mize the CC style as you like.<br />
CC Style Edit<br />
You can edit the style of CC such as font, color or size,<br />
etc. This feature is available only when “CC STYLE” is<br />
set <strong>to</strong> “MANUAL”.<br />
5 Select an item using [ K / L ], then<br />
press [OK]. Then use [ K / L ] <strong>to</strong> select<br />
the desired setting and press [OK].<br />
Picture display<br />
FONT STYLE FONT0<br />
SERVICE1<br />
FONT SIZE MIDDLE<br />
FONT COLOR WHITE ON<br />
FONT OPACITY SOLID<br />
BACK COLOR BLACK<br />
BACK OPACITY SOLID<br />
EDGE COLOR BLACK<br />
EDGE TYPE NONE<br />
Back<br />
(Back Color and Back Opacity)<br />
Advanced<br />
Operation<br />
Select if you do not want<br />
Off<br />
<strong>DTV</strong> CC. This is the default.<br />
Select one of these before<br />
<strong>DTV</strong> CC<br />
changing any other item in<br />
Service 1~6 “CLOSED CAPTION” menu.<br />
Choose “SERVICE1” under<br />
normal circumstances.<br />
“<strong>DTV</strong> CC” differs depending on the broadcast.<br />
HI. EVERYONE<br />
Edge<br />
(Edge Color and Edge Type)<br />
Font<br />
(Font Style, Font Size, Font Color and Font Opacity)<br />
6 Press [SETUP] <strong>to</strong> exit.<br />
25<br />
EN
Advanced Operation / Others<br />
Au<strong>to</strong> Power Down<br />
“Au<strong>to</strong> power down” shuts down the STB<br />
au<strong>to</strong>matically after a certain period of time you set.<br />
(The EPA (U.S. Environmental Protection Agency)<br />
recommends using this setting <strong>to</strong> conserve energy.)<br />
1 Press [SETUP].<br />
2 Select “DETAIL” using [ K / L ], then<br />
press [OK].<br />
3 Select “AUTO POWER DOWN” using<br />
[ K / L ], then press [OK].<br />
DETAIL<br />
EXIT<br />
CHANNEL<br />
TIME<br />
DETAIL<br />
INITIAL<br />
V-CHIP<br />
CLOSED CAPTION<br />
DISPLAY MODE LETTERBOX<br />
AUTO POWER DOWN<br />
4 HOURS<br />
4 Select desired amount of time using<br />
[ K / L ], then press [OK].<br />
Select AUTO POWER DOWN time.<br />
OFF<br />
4 HOURS<br />
2 HOURS<br />
1 HOUR<br />
• Select “OFF” <strong>to</strong> cancel the au<strong>to</strong> power down.<br />
5 Press [SETUP] <strong>to</strong> exit .<br />
Specifications<br />
Product<br />
<strong>DTV</strong> <strong>Digital</strong> <strong>to</strong> <strong>Analog</strong> <strong>Converter</strong><br />
Tuner<br />
Receivable channels 2-69ch<br />
Connecting Jacks<br />
ANT. IN/OUT<br />
RF connec<strong>to</strong>r x2 (75ohm)<br />
Video Output<br />
RCA jack x1, 1Vpp (75ohm)<br />
<strong>Analog</strong> Audio Output<br />
RCA jack (L / R) x2<br />
2V rms (100k ohm)<br />
Power Source<br />
120V AC+/-10%, 60Hz+/-0.5%<br />
Power Consumption<br />
8W (Power on), Less than 1 W (Power off)<br />
ENERGY STAR adopted.<br />
Closed Caption System<br />
§15.122/FCC (digital CC)<br />
Operating Condition<br />
41°F (5°C) - 104°F (40°C)<br />
Dimensions (W x H x D)<br />
9.7" x 1.7" x 6"<br />
(244mm x 43mm x 150mm)<br />
Weight<br />
1.4lbs. (0.6Kg)<br />
Designs and Specifications are subject <strong>to</strong> change<br />
without notice.<br />
26<br />
EN
Others<br />
Troubleshooting<br />
Before requesting service, check the table below for a possible cause of the problem.<br />
No power<br />
Symp<strong>to</strong>m<br />
The STB is not responding<br />
<strong>to</strong> the remote control.<br />
No audio / picture<br />
•<br />
•<br />
•<br />
•<br />
•<br />
•<br />
•<br />
•<br />
•<br />
•<br />
Remedy<br />
Make sure that the AC power cord is securely plugged in<strong>to</strong> the power<br />
outlet.<br />
Make sure that the STB’s main power is on.<br />
Make sure <strong>to</strong> point the remote control at the remote control sensor.<br />
You may be <strong>to</strong>o far from STB. Try moving closer.<br />
Remove any obstacles between the remote control and the remote<br />
control sensor.<br />
Make sure that the batteries are installed in the correct direction<br />
(+ and –). ( Page 7.)<br />
The batteries may be depleted. Replace them with new ones.<br />
Make sure that the audio / video cables are correctly connected.<br />
Make sure that the TV is turned on.<br />
Make sure that the correct viewing channel (ch3 or external input<br />
channel) is selected on your TV. (<br />
for further information.<br />
Make sure the cables are not damaged.<br />
Page 13.) Refer <strong>to</strong> your TV’s manual<br />
•<br />
Blocked noise on picture • Make sure that the RF cable is connected correctly. ( Pages 10 - 12.)<br />
• Make sure that “D.S.T” and “TIME ZONE” is set correctly. ( Page 21.)<br />
No EPG or the provided<br />
information is wrong<br />
Low volume<br />
No reception<br />
When you forget the<br />
password for V-chip<br />
Closed captioning display<br />
(TEXT mode) does not go<br />
off even after changing<br />
channels through STB.<br />
The TV screen goes blank<br />
just after turning the STB<br />
on.<br />
• Sound volume differs depending on the audio out setting. Select “RF<br />
OUT” at step 6 in the “Initial <strong>Set</strong>up (<strong>Set</strong>up Wizard)”. ( Page 14.)<br />
•<br />
•<br />
•<br />
Make sure <strong>to</strong> complete au<strong>to</strong>scan in “SETUP WIZARD” or in “SETUP”<br />
menu. When au<strong>to</strong>scan is not completed, some channels will not be<br />
received.<br />
The selected channel does not exist at that time. There are not always<br />
sub-channels being broadcast.<br />
Some channels with weak signal may not be received properly.<br />
This is not a malfunction.<br />
• If you forget the password, refer <strong>to</strong> “New Password”. ( Page 24.)<br />
•<br />
•<br />
Change the channel on your TV.<br />
Turn the TV off, and then on.<br />
• This is a normal part of the start-up process and is not a malfunction.<br />
Others<br />
Fin<br />
27<br />
EN
LIMITED WARRANTY<br />
FUNAI CORP. will repair this product, free of charge in the USA in the event of defect in materials or workmanship<br />
as follows:<br />
DURATION:<br />
PARTS: FUNAI CORP. will provide parts <strong>to</strong> replace defective parts without charge for one (1) year from the date<br />
of original retail purchase. Certain parts are excluded from this warranty.<br />
LABOR: FUNAI CORP. will provide the labor without charge for a period of ninety (90) days from the date of<br />
original retail purchase.<br />
LIMITS AND EXCLUSIONS:<br />
THIS WARRANTY IS EXTENDED ONLY TO THE ORIGINAL RETAIL PURCHASER. A PURCHASE RECEIPT OR OTHER<br />
PROOF OF ORIGINAL RETAIL PURCHASE WILL BE REQUIRED TOGETHER WITH THE PRODUCT TO OBTAIN SERVICE<br />
UNDER THIS WARRANTY.<br />
This warranty shall not be extended <strong>to</strong> any other person or transferee.<br />
This warranty is void and of no effect if any serial numbers on the product are altered, replaced, defaced, missing<br />
or if service was attempted by an unauthorized service center. This limited warranty does not apply <strong>to</strong> any<br />
product not purchased and used in the United States.<br />
This warranty only covers failures due <strong>to</strong> defects in material or workmanship which occur during normal use. It<br />
does not cover damage which occurs in shipment, or failures which are caused by repairs, alterations or products<br />
not supplied by FUNAI CORP., or damage, which results from accident, misuse, abuse, mishandling,<br />
misapplication, alteration, faulty installation, improper maintenance, commercial use such as hotel, rental or<br />
office use of this product, or damage which results from fire, flood, lightning or other acts of God.<br />
THIS WARRANTY DOES NOT COVER PACKING MATERIALS, ANY ACCESSORIES (EXCEPT REMOTE CONTROL), ANY<br />
COSMETIC PARTS, COMPLETE ASSEMBLY PARTS, DEMO OR FLOOR MODELS.<br />
FUNAI CORP. AND ITS REPRESENTATIVES OR AGENTS SHALL IN NO EVENT BE LIABLE FOR ANY GENERAL, INDIRECT<br />
OR CONSEQUENTIAL DAMAGES ARISING OUT OF OR OCCASIONED BY THE USE OF OR THE INABILITY TO USE THIS<br />
PRODUCT. THIS WARRANTY IS MADE IN LIEU OF ALL OTHER WARRANTIES, EXPRESS OR IMPLIED, AND OF ALL<br />
OTHER LIABILITIES ON THE PART OF FUNAI, ALL OTHER WARRANTIES INCLUDING THE WARRANTY OF<br />
MERCHANTABILITY AND FITNESS FOR A PARTICULAR PURPOSE, ARE HEREBY DISCLAIMED BY FUNAI AND ITS<br />
REPRESENTATIVES IN THE UNITED STATES.<br />
ALL WARRANTY INSPECTIONS AND REPAIRS MUST BE PERFORMED BY AN AUTHORIZED SERVICE CENTER.<br />
THIS WARRANTY IS ONLY VALID WHEN THE UNIT IS CARRIED-IN TO AN AUTHORIZED SERVICE CENTER.<br />
THE PRODUCT MUST BE ACCOMPANIED BY A COPY OF THE ORIGINAL RETAIL PURCHASE RECEIPT. IF NO PROOF<br />
OF PURCHASE IS ATTACHED, THE WARRANTY WILL NOT BE HONORED AND REPAIR COSTS WILL BE CHARGED.<br />
IMPORTANT:<br />
THIS LIMITED WARRANTY GIVES YOU SPECIFIC LEGAL RIGHTS. YOU MAY HAVE OTHER RIGHTS THAT VARY FROM<br />
STATE TO STATE. IF, AT ANY TIME DURING THE WARRANTY PERIOD, YOU ARE UNABLE TO OBTAIN SATISFACTION<br />
WITH THE REPAIR OF THIS PRODUCT, PLEASE CONTACT FUNAI CORP.<br />
ATTENTION:<br />
FUNAI CORP. RESERVES THE RIGHT TO MODIFY ANY DESIGN OF THIS PRODUCT WITHOUT<br />
PRIOR NOTICE.<br />
WARRANTY STATEMENT REGARDING NON AUTHORIZED REPAIRS:<br />
To obtain warranty service, you must take the product, or deliver the product freight prepaid, in either its original<br />
packaging or packaging affording an equal degree of protection, <strong>to</strong> any AUTHORIZED SERVICE CENTER. FUNAI<br />
CORP. will not reimburse you for any service done by unauthorized service providers without prior written<br />
approval.<br />
To locate your nearest AUTHORIZED SERVICE CENTER or for general service inquiries, please<br />
contact us at:<br />
FUNAI SERVICE CORPORATION<br />
Cus<strong>to</strong>mer Service<br />
Tel: 1-800-605-8610<br />
http://www.funai-corp.com<br />
5653 Creekside Parkway, Suite A, Lockbourne, OH 43137<br />
Printed in China<br />
X6042UD<br />
1VMN25976 ★★★★★