

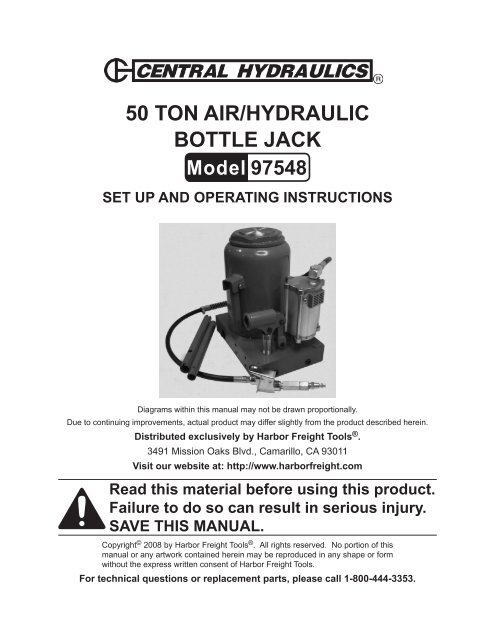
50 TON AIR/HYDRAULIC BOTTLE JACK - Harbor Freight Tools
50 TON AIR/HYDRAULIC BOTTLE JACK - Harbor Freight Tools
50 TON AIR/HYDRAULIC BOTTLE JACK - Harbor Freight Tools

You also want an ePaper? Increase the reach of your titles
YUMPU automatically turns print PDFs into web optimized ePapers that Google loves.
<strong>50</strong> <strong>TON</strong> <strong>AIR</strong>/<strong>HYDRAULIC</strong><br />
<strong>BOTTLE</strong> <strong>JACK</strong><br />
Model 97548<br />
Set up And Operating Instructions<br />
Diagrams within this manual may not be drawn proportionally.<br />
Due to continuing improvements, actual product may differ slightly from the product described herein.<br />
Distributed exclusively by <strong>Harbor</strong> <strong>Freight</strong> <strong>Tools</strong> ® .<br />
3491 Mission Oaks Blvd., Camarillo, CA 93011<br />
Visit our website at: http://www.harborfreight.com<br />
Read this material before using this product.<br />
Failure to do so can result in serious injury.<br />
Save this manual.<br />
Copyright © 2008 by <strong>Harbor</strong> <strong>Freight</strong> <strong>Tools</strong> ® . All rights reserved. No portion of this<br />
manual or any artwork contained herein may be reproduced in any shape or form<br />
without the express written consent of <strong>Harbor</strong> <strong>Freight</strong> <strong>Tools</strong>.<br />
For technical questions or replacement parts, please call 1-800-444-3353.
Save This Manual<br />
Keep this manual for the safety warnings<br />
and precautions, assembly, operating,<br />
inspection, maintenance and cleaning<br />
procedures. Write the product’s serial number<br />
in the back of the manual near the assembly<br />
diagram (or month and year of purchase if<br />
product has no number). Keep this manual<br />
and the receipt in a safe and dry place for<br />
future reference.<br />
Important SAFETY<br />
Information<br />
In this manual, on the labeling,<br />
and all other information<br />
provided with this product:<br />
This is the safety alert<br />
symbol. It is used to alert<br />
you to potential personal<br />
injury hazards. Obey all<br />
safety messages that<br />
follow this symbol to avoid<br />
possible injury or death.<br />
DANGER indicates<br />
a hazardous<br />
situation which, if<br />
not avoided, will result in death<br />
or serious injury.<br />
Danger<br />
WARNING indicates<br />
a hazardous<br />
situation which, if<br />
not avoided, could result in<br />
death or serious injury.<br />
WARNING<br />
CAUTION, used<br />
with the safety alert<br />
symbol, indicates a<br />
hazardous situation which, if<br />
not avoided, could result in<br />
minor or moderate injury.<br />
Caution<br />
NOTICE is used to<br />
address practices<br />
not related to<br />
personal injury.<br />
Notice<br />
CAUTION, without<br />
the safety alert<br />
symbol, is used to<br />
address practices not related<br />
to personal injury.<br />
Caution<br />
General Safety Rules<br />
WARNING! Read all instructions.<br />
Failure to follow all instructions<br />
listed below may result in<br />
serious injury. The term “tool”<br />
in all of the warnings listed below<br />
refers to your Bottle Jack.<br />
SAVE THESE INSTRUCTIONS<br />
1. Work area safety<br />
a. Keep work area clean and well<br />
lit. Cluttered or dark areas invite<br />
accidents.<br />
b. Do not operate tools in explosive<br />
atmospheres, such as in the presence<br />
of flammable liquids, gases or dust.<br />
Air and hydraulic tools create sparks<br />
which may ignite the dust or fumes.<br />
c. Keep children and bystanders away<br />
while operating this tool. Distractions<br />
can cause you to lose control.<br />
3. Personal safety<br />
a. Stay alert, watch what you are<br />
doing and use common sense when<br />
operating this tool. Do not use this<br />
tool while you are tired or under<br />
the influence of drugs, alcohol or<br />
medication. A moment of inattention<br />
while operating this tool may result in<br />
serious personal injury.<br />
b. Use safety equipment. Always<br />
wear ANSI-approved safety impact<br />
SKU 97548 For technical questions, please call 1-800-444-3353.<br />
Page 2
goggles. Safety equipment such<br />
as non-skid safety shoes, hard<br />
hat, or hearing protection used for<br />
appropriate conditions will reduce<br />
personal injuries.<br />
c. Avoid accidental starting. Ensure the<br />
Air Valve (32) is in the off-position<br />
before connecting to an air supply.<br />
Connecting this tool with the Air Valve<br />
on invites accidents.<br />
d. Remove any adjusting key or wrench<br />
before turning the tool on. A wrench<br />
or a key left attached to a moving<br />
part of the tool may result in personal<br />
injury.<br />
e. Do not overreach. Keep proper<br />
footing and balance at all times. This<br />
enables better control of the tool in<br />
unexpected situations.<br />
f. Dress properly. Do not wear loose<br />
clothing or jewelry. Keep your hair,<br />
clothing and gloves away from moving<br />
parts. Loose clothes, jewelry or long<br />
hair can be caught in moving parts.<br />
4. Tool use and care<br />
a. Do not force the tool. Use the correct<br />
tool for your application. The correct<br />
tool will do the job better and safer at<br />
the rate for which it was designed.<br />
b. Do not use the tool if the Air Valve<br />
does not turn it on and off. Any tool<br />
that cannot be controlled with its<br />
Air Valve is dangerous and must be<br />
repaired.<br />
c. Disconnect the air hose from the<br />
tool and release any remaining<br />
air pressure before making any<br />
adjustments, changing accessories,<br />
or storing the tool. Such preventive<br />
safety measures reduce the risk of<br />
starting the tool accidentally.<br />
d. Store idle tools out of the reach of<br />
children and do not allow people<br />
unfamiliar with the tool or these<br />
instructions to operate this tool.<br />
<strong>Tools</strong> are dangerous in the hands of<br />
untrained users.<br />
e. Maintain this tool. Check for<br />
misalignment or binding of moving<br />
parts, breakage of parts and any other<br />
condition that may affect the tool’s<br />
operation. If damaged, have the tool<br />
repaired before use. Many accidents<br />
are caused by poorly maintained<br />
tools.<br />
f. Use the tool and its accessories in<br />
accordance with these instructions<br />
and in the manner intended for this<br />
particular type of tool, taking into<br />
account the working conditions and<br />
the work to be performed. Use of this<br />
tool for operations different from those<br />
intended could result in a hazardous<br />
situation.<br />
5. Service<br />
a. Have the tool serviced by a qualified<br />
repair person using only identical<br />
replacement parts. This will ensure<br />
the safety of the tool is maintained.<br />
Specific Safety Rules<br />
1. Maintain labels and nameplates on<br />
the Bottle Jack. These carry important<br />
safety information. If unreadable or<br />
missing, contact <strong>Harbor</strong> <strong>Freight</strong> <strong>Tools</strong><br />
for a replacement.<br />
2. Use clean, dry, regulated, compressed<br />
air at 110-120 PSI. Do not exceed the<br />
recommended. Do not use oxygen,<br />
carbon dioxide, combustible gases,<br />
or any other bottled gas as a power<br />
source for this tool.<br />
3. Do not exceed the <strong>50</strong> ton (100,000<br />
pound) capacity of the Bottle Jack.<br />
Doing so may cause damage to the<br />
tool and/or serious personal injury.<br />
SKU 97548 For technical questions, please call 1-800-444-3353.<br />
Page 3
4. Bleed the hydraulic system of the<br />
Bottle Jack before its initial use.<br />
5. Always place the Bottle Jack on a dry,<br />
oil/grease free, solid, level floor surface<br />
capable of supporting the weight of the<br />
Jack and all other additional tools and<br />
accessories.<br />
6. Apply the vehicle’s parking brake<br />
and chock the tires before lifting the<br />
vehicle.<br />
7. Lift the vehicle only by the<br />
manufacturer-recommended lifting<br />
points.<br />
8. Stay out from under the load while it is<br />
being lifted or supported.<br />
9. Avoid rapid load descent. Turn the<br />
Release Screw slowly.<br />
10. Do not use for aircraft purposes.<br />
11. Do not leave the tool unattended when<br />
it is connected to a compressed air<br />
supply. Release the tool’s load, and<br />
disconnect it from its compressed air<br />
supply before leaving.<br />
12. This product is not a toy. Keep it out of<br />
reach of children.<br />
13. When lifting only one wheel, make<br />
sure to support the load immediately<br />
with one jack stand (not included)<br />
placed under the side of the vehicle<br />
being lifted. Align the saddle of the<br />
jack stand directly under the vehicle’s<br />
seam or recommended lifting point.<br />
14. When lifting the entire front end or<br />
rear end of a vehicle, make sure to<br />
support the load immediately with two<br />
jack stands. Align the saddles of the<br />
jack stands directly under the vehicle’s<br />
frame or recommended lifting points.<br />
Also, make sure the jack stands are<br />
adjusted at the same height.<br />
15. Use the Bottle Jack only on vehicles<br />
whose frames have lifting points (on<br />
its seam or frame) capable of aligning<br />
with the Bottle Jack.<br />
16. Do not use the Bottle Jack with the<br />
vehicle’s engine running. When<br />
running, the vehicle’s engine produces<br />
carbon monoxide, a colorless,<br />
odorless, toxic fume that, when<br />
inhaled, can cause serious personal<br />
injury or death.<br />
17. Always keep hands, fingers, and feet<br />
away from all moving parts of the<br />
Bottle Jack when applying or releasing<br />
a load. Remain clear of the vehicle<br />
being raised or lowered. People and<br />
animals should be kept at a safe<br />
distance when using the Bottle Jack.<br />
18. Do not allow anyone in the vehicle<br />
when using the Bottle Jack. Keep all<br />
bystanders a safe distance away from<br />
the vehicle.<br />
19. Never support both ends of the vehicle<br />
at the same time.<br />
20. Before lowering the Bottle Jack,<br />
make sure tool trays, jack stands,<br />
and all other tools and equipment are<br />
removed from under the vehicle<br />
21. The warnings, precautions, and<br />
instructions discussed in this<br />
instruction manual cannot cover all<br />
possible conditions and situations that<br />
may occur. It must be understood<br />
by the operator that common sense<br />
and caution are factors which cannot<br />
be built into this product, but must be<br />
supplied by the operator.<br />
Save these<br />
instructions.<br />
SKU 97548 For technical questions, please call 1-800-444-3353.<br />
Page 4
Maximum<br />
Lifting<br />
Capacity<br />
Required Air Pressure<br />
Air Inlet<br />
Fitting<br />
Minimum<br />
Height<br />
Specifications<br />
<strong>50</strong> Tons (100,000 pounds)<br />
110-120 PSI<br />
1/4" - 18 NPT<br />
12"<br />
Maximum Height 19"<br />
Ram Travel 7"<br />
Net Weight<br />
Air Hose Length 46"<br />
Jack Handle<br />
89.70 lbs<br />
20"L (2 pcs, upper & lower)<br />
Unpacking<br />
When unpacking, check to make sure<br />
that the item is intact and undamaged. If<br />
any parts are missing or broken, please call<br />
<strong>Harbor</strong> <strong>Freight</strong> <strong>Tools</strong> at the number shown<br />
on the cover of this manual as soon as<br />
possible.<br />
Note: For additional information regarding<br />
the parts listed in the following pages,<br />
refer to the Assembly Diagram near<br />
the end of this manual.<br />
Operating Instructions<br />
Read the entire Important<br />
Safety Information section<br />
at the beginning of this manual<br />
including all text under<br />
subheadings therein before set<br />
up or use of this product.<br />
To prevent<br />
serious injury<br />
from accidental<br />
operation:<br />
Disconnect the Bottle Jack<br />
from its compressed air supply<br />
source, and release any<br />
compressed air from the tool<br />
before performing any set up<br />
and operating procedures.<br />
WARNING<br />
Tool Set Up<br />
1. IMPORTANT: Prior to use, make sure<br />
to check for presence of air and proper<br />
hydraulic oil level in the Bottle Jack.<br />
Then thoroughly test the Jack for<br />
proper operation prior to its actual use.<br />
If the Jack appears not to be working<br />
properly, it may be necessary to purge<br />
its hydraulic system of excessive air.<br />
To do so:<br />
a. Insert the Lower Handle (41) onto the<br />
Release Valve Screw (4); first turn<br />
handle clockwise until snug. Then<br />
turn the Release Valve Screw 1-1/2<br />
turns counterclockwise.<br />
(See Assy. Diagram.)<br />
b. Wipe Filler Plug area with a clean and<br />
lint free rag. Remove the Filler Plug<br />
(15), and fill the Reservoir (14) with<br />
hydraulic oil (not included).<br />
(See Assy. Diagram.)<br />
c. Insert the Handle (41, 41b) into the<br />
Handle Bracket (38). Then rapidly<br />
pump the Handle several times to<br />
purge air from the system.<br />
(See Assy. Diagram.)<br />
d. Insert the Lower Handle (41) onto the<br />
Release Valve Screw (4). Then turn<br />
the Release Valve Screw clockwise<br />
until snug.<br />
(See Assy. Diagram.)<br />
e. Top off the Reservoir (14) with<br />
hydraulic oil. Then replace the Filler<br />
SKU 97548 For technical questions, please call 1-800-444-3353.<br />
Page 5
Plug (15); and wipe the jack’s exterior.<br />
(See Assy. Diagram.)<br />
f. IMPORTANT: After bleeding the<br />
Bottle Jack, make sure to test the<br />
unit to ensure it operates properly.<br />
g. NOTE: To prevent damage to the<br />
Bottle Jack, check for excessive air<br />
and/or low hydraulic oil regularly.<br />
Note: There are threaded holes on<br />
sides of Jack base, which are predrilled<br />
for the mounting of an optional<br />
wheel and handle kit (not included).<br />
Contact <strong>Harbor</strong> <strong>Freight</strong> <strong>Tools</strong> for<br />
details on this optional kit. (See below<br />
photo).<br />
OPERATING INSTRUCTIONS<br />
1. Make sure the vehicle is parked on a<br />
flat, level, solid, ground surface.<br />
2. Turn off the vehicle’s engine. Place<br />
the vehicle’s transmission in “PARK”<br />
(if automatic) or in it lowest gear (if<br />
manual). Set the emergency brake.<br />
Then chock the wheels that are not<br />
being lifted.<br />
3. Check to make sure the Bottle Jack<br />
is fully lowered. If not, assemble the<br />
Handle (41) assembly. Insert the lower<br />
portion of the Handle assembly onto<br />
the Release Valve Screw (4), and turn<br />
the Screw counterclockwise to lower<br />
the Jack. Once the Jack’s ram is fully<br />
lowered, turn the Screw clockwise to<br />
close the Release Valve (4).<br />
(See Assy. Diagram.)<br />
4. Carefully position the ram (9) of<br />
the Bottle Jack under the vehicle<br />
manufacturer’s recommended lifting<br />
point. (See vehicle manufacturer’s<br />
manual for location of seam lifting point<br />
when lifting only one wheel and frame<br />
lifting points when lifting the entire front<br />
or rear end of the vehicle.) (See Assy.<br />
Diagram.)<br />
To raise the vehicle manually:<br />
a. Pump the Handle (41) assembly until<br />
the top of the Bottle Jack’s ram (9)<br />
has nearly reached the vehicle lifting<br />
point. The Jack should be positioned<br />
at 90° to the vehicle’s lifting point to<br />
ensure the Bottle Jack’s Ram and<br />
vehicle lifting point are in alignment.<br />
If not, remove and reposition the Jack<br />
before lifting.<br />
b. To lift the vehicle, pump the Handle<br />
assembly using smooth, full strokes.<br />
(See Assy. Diagram.)<br />
To raise the vehicle, using compressed<br />
air:<br />
a. Check to make sure the Lock Lever<br />
of the Air Valve (32) assembly is in its<br />
unlocked position. Then connect an<br />
air hose (not included) to the Air Valve<br />
assembly.<br />
(See Assy. Diagrams.)<br />
b. Turn on your air compressor, and set<br />
its regulator to 110-120 PSI. Do not<br />
exceed 120 PSI.<br />
c. Depress the Lever of the Air Valve<br />
assembly until the top of the Bottle<br />
Jack has nearly reached the vehicle<br />
lifting point. The Jack should be<br />
positioned at 90° to the vehicle’s<br />
lifting point to ensure the Bottle<br />
Jack’s Ram and vehicle lifting point<br />
are in alignment. If not, remove and<br />
reposition the Bottle Jack before<br />
SKU 97548 For technical questions, please call 1-800-444-3353.<br />
Page 6
lifting.<br />
(See Assy. Diagrams.)<br />
d. To lift the vehicle, continue to depress<br />
the Lever on the Air Valve assembly<br />
(32). Once the vehicle is lifted,<br />
make sure to place the Lock Lever<br />
in its locked position. (See Assy.<br />
Diagrams.)<br />
5. Once the vehicle is raised, slide a<br />
jack stand (not included) to the proper<br />
lifting point referred to in the vehicle<br />
manufacturer’s manual. If using two<br />
jack stands, make sure they are on the<br />
same point on each side of the vehicle.<br />
And if using two jack stands, make<br />
sure they are at the same height.<br />
6. Slightly lower the Jack to ease the<br />
vehicle onto the jack stands.<br />
7. While standing safely aside, gently<br />
rock the vehicle to determine if it is<br />
stable on the jack stand(s). If it is<br />
not, raise the vehicle, and reposition<br />
the jack stand(s). WARNING! When<br />
performing this procedure, be prepared<br />
to stand clear of the vehicle as the<br />
vehicle can fall off the jack stand(s)<br />
causing personal injury and/or property<br />
damage.<br />
8. When the repair work to the vehicle is<br />
completed, make sure to remove all<br />
tools, old vehicle parts, etc. from under<br />
the vehicle.<br />
To lower the vehicle manually:<br />
a. Make sure the Handle (41, 41b)<br />
assembly is turned completely<br />
clockwise to close the Release<br />
Valve Screw (4). Pump the Handle<br />
assembly to raise the vehicle slightly<br />
above the saddle(s) of the jack<br />
stand(s). Then remove the jack<br />
stand(s) from under the vehicle.<br />
b. Slowly turn the Handle (41, 41b)<br />
assembly counterclockwise (never<br />
more than two full turns) to lower the<br />
vehicle onto the ground.<br />
(See Assy. Diagram.)<br />
To lower the vehicle, using<br />
compressed air:<br />
a. Make sure the Handle (41, 41b)<br />
assembly is turned completely<br />
clockwise closing the Release Valve<br />
Screw (4). Release the Lock Lever<br />
on the Air Valve (32) assembly.<br />
Depress the Lever on the Air Valve<br />
assembly (32) to raise the vehicle<br />
slightly above the saddle(s) of the<br />
jack stand(s). Place the Lock Lever in<br />
its locked position. Then remove the<br />
jack stand(s) from under the vehicle.<br />
(See Assy. Diagrams.)<br />
b. Turn off the air compressor, and<br />
disconnect the air hose from the Air<br />
Valve (32) assembly of the Jack.<br />
(See Assy. Diagram.)<br />
c. Release the Lock Lever on the Air<br />
Valve (32) assembly. Then insert the<br />
Handle (41, 41b) assembly onto the<br />
Release Valve (4) of the Jack.<br />
d. Slowly turn the Handle (41, 41b)<br />
assembly counterclockwise (never<br />
more than two full turns) to lower the<br />
vehicle onto the ground. (See Assy.<br />
Diagram.)<br />
8. Lower the Bottle Jack completely (Be<br />
aware that it will take a good amount of<br />
effort to lower the ram back down level<br />
with the reservoir). Store the Jack in<br />
a clean, dry, safe location out of reach<br />
of children and other unauthorized<br />
people.<br />
SKU 97548 For technical questions, please call 1-800-444-3353.<br />
Page 7
Maintenance And<br />
Servicing<br />
Procedures not specifically<br />
explained in this manual must<br />
be performed only by a qualified<br />
technician.<br />
To prevent serious<br />
injury from accidental<br />
operation:<br />
Disconnect the Bottle Jack from<br />
its compressed air supply source<br />
and use the Handle (41, 41b)<br />
assembly to loosen the Release<br />
Valve Screw (counterclockwise)<br />
before performing any inspection,<br />
maintenance, or cleaning<br />
procedures.<br />
1. BEFORE EACH USE, inspect the<br />
general condition of the Bottle Jack.<br />
Check for loose screws, misalignment<br />
or binding of moving parts, cracked or<br />
broken parts, damaged Air Hose, and<br />
any other condition that may affect its<br />
safe operation.<br />
2. After Use, clean external surfaces<br />
of the Bottle Jack with a clean, moist<br />
cloth and a mild detergent. Do not use<br />
solvents.<br />
3. BLEEDING INSTRUCTIONS: Before<br />
each use or when the Bottle Jack<br />
lacks in performance, make sure to<br />
check for excessive air and proper<br />
hydraulic oil level in the Bottle Jack.<br />
If the Jack appears not to be working<br />
properly, it may be necessary to purge<br />
its hydraulic system of excessive air.<br />
To do so:<br />
a. Insert the Lower Handle (41) onto the<br />
Release Valve Screw (4). Then turn<br />
the Release Valve Screw 1-1/2 turns<br />
counterclockwise releasing pressure.<br />
(See Assy. Diagram.)<br />
b. Remove the Filler Plug (15), and fill<br />
the Reservoir (14) with hydraulic oil<br />
(not included).<br />
(See Assy. Diagram.)<br />
c. Insert the Handle (41, 41b) into the<br />
Handle Bracket (38). Then rapidly<br />
pump the Handle several times to<br />
purge air from the system.<br />
(See Assy. Diagram.)<br />
d. Insert the Lower Handle (41) onto the<br />
Release Valve Screw (4). Then turn<br />
the Release Valve Screw clockwise<br />
until snug to hold pressure.<br />
(See Assy. Diagram.)<br />
e. Top off the Reservoir (14) with<br />
hydraulic oil. Then replace the Filler<br />
Plug (15). (See Assy. Diagram.)<br />
f. IMPORTANT: After bleeding the<br />
Bottle Jack, test the Jack for<br />
proper operation prior to its actual<br />
use.NOTE: To prevent damage to<br />
the Bottle Jack, check for excessive<br />
air and/or low hydraulic oil regularly.<br />
4. WHEN STORING, always store the<br />
Bottle Jack and its accessories in a<br />
clean, dry, safe location out of reach<br />
of children and other unauthorized<br />
people.<br />
SKU 97548 For technical questions, please call 1-800-444-3353.<br />
Page 8
PLEASE READ THE FOLLOWING CAREFULLY<br />
The manufacturer and/or distributor has provided the parts list and assembly<br />
diagram in this manual as a reference tool only. Neither the manufacturer or<br />
distributor makes any representation or warranty of any kind to the buyer that<br />
he or she is qualified to make any repairs to the product, or that he or she is<br />
qualified to replace any parts of the product. In fact, the manufacturer and/or<br />
distributor expressly states that all repairs and parts replacements should be<br />
undertaken by certified and licensed technicians, and not by the buyer. The buyer<br />
assumes all risk and liability arising out of his or her repairs to the original<br />
product or replacement parts thereto, or arising out of his or her installation<br />
of replacement parts thereto.<br />
TROUBLESHOOTING<br />
Bottle Jack will not raise the Bottle Jack ram<br />
when pumping the Handle manually.<br />
Bottle Jack will not raise the Bottle Jack ram<br />
when using the pneumatic function.<br />
Bottle Jack ram does not lower.<br />
1.<br />
2.<br />
1.<br />
2.<br />
3.<br />
4.<br />
1.<br />
Use the slotted end of the Handle to tighten<br />
(clockwise) the Release Valve Screw on the<br />
Bottle Jack.<br />
Bleed the Air Bottle Jack of excess air.<br />
Use the slotted end of the Handle to tighten<br />
(clockwise) the Release Valve Screw on the<br />
Bottle Jack.<br />
Check to make sure the regulator of the air<br />
compressor is set at 110-120 PSI.<br />
Check for loose air connections and damaged<br />
air hoses.<br />
Bleed the Bottle Jack of excess air.<br />
Use the slotted end of the Handle to loosen<br />
(counterclockwise) the Release Valve Screw<br />
on the Bottle Jack.<br />
SKU 97548 For technical questions, please call 1-800-444-3353.<br />
Page 9
ASSEMBLY DIAGRAM - Entire Unit<br />
SKU 97548 For technical questions, please call 1-800-444-3353.<br />
Page 10
PARTS LIST - Entire Unit<br />
Part No Description Qty<br />
1 Base 1<br />
2 Ball 1<br />
3 Seal 1<br />
4 Release Valve 1<br />
5 O-Ring 1<br />
6 Cylinder 1<br />
7 O-Ring 2<br />
8 Cup Seal 1<br />
9 Ram 1<br />
10 Packing 1<br />
11 Handle 2<br />
12 Pin 1<br />
13 R-Pin 5<br />
14 Reservoir 1<br />
15 Filler Plug 1<br />
16 Nylon Ring 1<br />
17 Top Nut 1<br />
18 Ball Cup 1<br />
19 Ball 5<br />
20 Oil Filter 2<br />
21 Ball 1<br />
22 Ball Cup 1<br />
Part No Description Qty<br />
23 Spring 1<br />
24 Screw 1<br />
25 O-Ring 1<br />
26 Screw 1<br />
27 Spring 2<br />
28 Screw 2<br />
29 Washer 2<br />
30 Air Motor 1<br />
31 Air Hose 1<br />
32 Air Valve 1<br />
33 Pump Cylinder 1<br />
34 O-Ring 1<br />
35 Nylon Ring 1<br />
36 Back Up Ring 1<br />
37 Piston 1<br />
38 Handle Bracket 1<br />
39 Pin 3<br />
40 Connector 1<br />
41 Lower Handle 1<br />
41b Upper Handle 1<br />
42 Washer 1<br />
43 Washer 2<br />
SKU 97548 For technical questions, please call 1-800-444-3353.<br />
Page 11
diagram - air motor<br />
SKU 97548 For technical questions, please call 1-800-444-3353.<br />
Page 12
PARTS LIST - air motor<br />
Part No Description Qty<br />
A01 Air Pump Cylinder 1<br />
A02 Nut 1<br />
A03 Sealing Ring 1<br />
A04 Nylon Ring 1<br />
A05 Copper Ring 1<br />
A06 Air Cylinder Seat 1<br />
A07 Nut 1<br />
A08 Spring 1<br />
A09 Air Pump Piston 1<br />
A10 O-Ring 2<br />
A11 Big Piston 1<br />
A12 Air Cylinder 1<br />
A13 Screw 2<br />
A14 Lock Washer 2<br />
A15 Safety Cover 1<br />
A16 Filter 1<br />
A17 Silencing Pad 1<br />
A18 Small Piston 1<br />
A19 O-Ring 1<br />
A20 O-Ring 1<br />
A21 Sealing Ring 1<br />
A22 Bolt 3<br />
A23 Nylon Ring 1<br />
A24 O-Ring 2<br />
Part No Description Qty<br />
A25 O-Ring 1<br />
A26 Air Cylinder Cap 1<br />
A27 Bolt 4<br />
A28 Coupler Seat 1<br />
A29 Retaining Ring 1<br />
A30 O-Ring 2<br />
A31 Coupler 1<br />
A32 Air Hose 1<br />
A33 Lock Lever 1<br />
A34 Lever 1<br />
A35 Nut 1<br />
A36 O-Ring 1<br />
A37 O-Ring 1<br />
A38 Packing 1<br />
A39 Throttle 1<br />
A40 Spring 1<br />
A41 Lock Nut 1<br />
A42 Bolt 1<br />
A43 Valve Body 1<br />
A44 Screw 1<br />
A45 Screen 1<br />
A46 O-Ring 1<br />
A47 Quick Coupler-male 1<br />
A48 Coupler Seat 1<br />
SKU 97548 For technical questions, please call 1-800-444-3353.<br />
Page 13
LIMITED 90 DAY WARRANTY<br />
<strong>Harbor</strong> <strong>Freight</strong> <strong>Tools</strong> Co. makes every effort to assure that its products meet high quality<br />
and durability standards, and warrants to the original purchaser that this product is free from<br />
defects in materials and workmanship for the period of 90 days from the date of purchase. This<br />
warranty does not apply to damage due directly or indirectly, to misuse, abuse, negligence or<br />
accidents, repairs or alterations outside our facilities, criminal activity, improper installation,<br />
normal wear and tear, or to lack of maintenance. We shall in no event be liable for death,<br />
injuries to persons or property, or for incidental, contingent, special or consequential damages<br />
arising from the use of our product. Some states do not allow the exclusion or limitation of<br />
incidental or consequential damages, so the above limitation of exclusion may not apply to<br />
you. This warranty is expressly in lieu of all other warranties, express<br />
or implied, including the warranties of merchantability and fitness.<br />
To take advantage of this warranty, the product or part must be returned to us with<br />
transportation charges prepaid. Proof of purchase date and an explanation of the complaint<br />
must accompany the merchandise. If our inspection verifies the defect, we will either repair or<br />
replace the product at our election or we may elect to refund the purchase price if we cannot<br />
readily and quickly provide you with a replacement. We will return repaired products at our<br />
expense, but if we determine there is no defect, or that the defect resulted from causes not<br />
within the scope of our warranty, then you must bear the cost of returning the product.<br />
This warranty gives you specific legal rights and you may also have other rights which<br />
vary from state to state.<br />
3491 Mission Oaks Blvd. • PO Box 6009 • Camarillo, CA 93011 • (800) 444-3353<br />
Record Product’s Serial Number Here:<br />
Note: If product has no serial number, record month and year of purchase instead.<br />
Note: Some parts are listed and shown for illustration purposes only, and are not available<br />
individually as replacement parts.<br />
SKU 97548 For technical questions, please call 1-800-444-3353.<br />
Page 14


