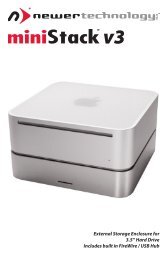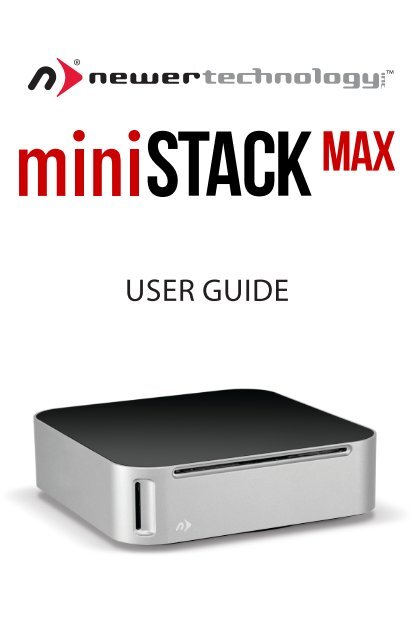
miniStack MAX Owner's Guide (4MB PDF) - Newer Technology
miniStack MAX Owner's Guide (4MB PDF) - Newer Technology
miniStack MAX Owner's Guide (4MB PDF) - Newer Technology

Create successful ePaper yourself
Turn your PDF publications into a flip-book with our unique Google optimized e-Paper software.
®<br />
<br />
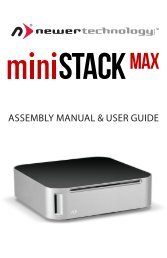
USER GUIDE
TABLE OF CONTENTS<br />
1. INTRODUCTION............................................................................................................. 1<br />
1.1 MINIMUM SYSTEM REQUIREMENTS<br />
1.1.1 Mac® Requirements<br />
1.1.2 PC Requirements<br />
1.1.3 Supported Hard Drives<br />
1.2 PACKAGE CONTENTS<br />
1.3 ABOUT THIS MANUAL<br />
1.4 FRONT VIEW<br />
1.4.1 Front Features<br />
1.5 REAR VIEW<br />
1.5.1 Rear Features<br />
1.5.2 Connectivity Notes<br />
1.6 PRECONFIGURED<br />
2. APPENDIX.......................................................................................................................... 4<br />
2.1 FORMATTING<br />
2.2 UNMOUNTING DRIVES<br />
2.3 TROUBLESHOOTING<br />
2.4 ABOUT DATA BACKUP<br />
2.5 ONLINE RESOURCES<br />
2.6 TECHNICAL SUPPORT HOURS AND CONTACT INFORMATION<br />
NEWERTECH MINISTACK <strong>MAX</strong><br />
TABLE OF CONTENTS
INTRODUCTION<br />
1.1 MINIMUM SYSTEM REQUIREMENTS<br />
1.1.1 Mac Requirements<br />
• PowerPC G4 CPU, 128MB RAM<br />
• eSATA: Mac OS X 10.3 or later<br />
• FireWire: Mac OS X 10.2 or later<br />
• USB 3.0 (backwards compatible to<br />
USB 2.0): Mac OS X 10.2 or later<br />
1.1.2 PC Requirements<br />
• 500MHz Intel Pentium 3 CPU, 128MB RAM<br />
• eSATA: Windows XP or later<br />
• FireWire: Windows 2000/XP or later<br />
• USB 3.0 (backwards compatible to USB<br />
2.0): Windows 2000/XP or later<br />
1.1.3 Supported Drives<br />
• Any 2.5” or 3.5” SATA hard drive or solid state drive (SSD).<br />
• Any 9.5mm or 12.7mm slot-loading SATA optical drive.<br />
1.2 PACKAGE CONTENTS<br />
<strong>miniStack</strong>® <strong>MAX</strong> Power supply Power cable<br />
FireWire 800<br />
(1394b) cable<br />
USB 3.0<br />
(A to Standard-B) cable<br />
NOTE: eSATA cable not included.<br />
1.3 ABOUT THIS MANUAL<br />
Firmware, images, and descriptions may vary slightly between this manual and the unit<br />
shipped. Functions and features may change depending on the firmware version. Please<br />
visit the product webpage for the most recent specifications.<br />
NEWERTECH MINISTACK <strong>MAX</strong><br />
1<br />
INTRODUCTION
1.4 FRONT VIEW<br />
SD card reader Optical drive Power LED<br />
1.4.1 Front Features<br />
• SD card reader — Insert any standard SD card into the slot, with the card’s label facing<br />
to the right.<br />
• Optical drive — Insert optical discs into the slot-loading optical drive on the front<br />
of the <strong>miniStack</strong> <strong>MAX</strong>. Supported optical media and read/write functionality will vary<br />
based on the specific model purchased.<br />
• Power LED — The <strong>Newer</strong>Tech <strong>miniStack</strong> <strong>MAX</strong> has a single LED at the front, located<br />
directly below the aluminum face. The LED will illuminate when the <strong>miniStack</strong> <strong>MAX</strong> is<br />
powered on.<br />
1.5 REAR VIEW<br />
1 2 3 4 5 6 7 8<br />
NEWERTECH MINISTACK <strong>MAX</strong><br />
2<br />
INTRODUCTION
1.5.1 Rear Features<br />
1. USB charging port — Connect any device that charges over USB. This port has no<br />
connectivity; it is used only for charging.<br />
2. USB 3.0 hub ports — Connect up to two additional USB devices here.<br />
3. USB 3.0 uplink port — Connect this port to your computer using the included USB<br />
3.0 (A to Standard-B) cable to enable the USB 3.0 hub ports, the SD card reader, and the<br />
optical drive. If the eSATA or FireWire ports are not connected to your computer, the<br />
hard drive in the <strong>miniStack</strong> <strong>MAX</strong> will connect using this USB 3.0 port.<br />
4. eSATA port — If you want to use the hard drive in the <strong>miniStack</strong> <strong>MAX</strong> over eSATA, connect<br />
this port to your computer using an eSATA cable (not included). This eSATA port<br />
operates at SATA 2.0 (3.0Gb/sec.) speeds.<br />
5. FireWire 800 (1394b) ports — Connect one FireWire 800 port to your computer<br />
with the included FireWire 800 cable to use the hard drive in the <strong>miniStack</strong> <strong>MAX</strong> over<br />
FireWire 800. Use the other FireWire 800 port to connect additional devices.<br />
6. Power input — Connect the included power supply here.<br />
7. On/off switch — Turn the <strong>miniStack</strong> <strong>MAX</strong> on and off using this switch.<br />
8. Security slot — Attach a security tether here.<br />
1.5.2 Connectivity Notes<br />
• The hard drive in the <strong>miniStack</strong> <strong>MAX</strong> can connect using any of the three interface types<br />
(USB 3.0, eSATA, FireWire 800). The hard drive will always use the eSATA interface if it is<br />
connected. If eSATA is not connected, the hard drive will use FireWire 800. If FireWire<br />
800 is not connected, the hard drive will use USB 3.0.<br />
• In order for the USB 3.0 hub ports, the SD card reader, and the optical drive to function,<br />
the USB 3.0 uplink port must be connected to the computer.<br />
• To connect additional FireWire devices through the <strong>miniStack</strong> <strong>MAX</strong>, you must connect<br />
one FireWire 800 port to the computer.<br />
• For the safe removal of your drive and to assure that no data is lost, always eject or unmount<br />
the drive from your operating system before powering off.<br />
• In order for the computer to access volumes larger than 2TB, the operating system<br />
needs to support large volumes (e.g., Windows Vista or Mac OS X 10.4 and above).<br />
1.6 PRECONFIGURED<br />
To help get things up and running quickly, the hard drive in your <strong>Newer</strong>Tech <strong>miniStack</strong> <strong>MAX</strong><br />
has already been formatted. For formatting information, including how to format your mini-<br />
Stack <strong>MAX</strong> for Mac or Windows, go to: http://www.macsales.com/format<br />
NEWERTECH MINISTACK <strong>MAX</strong><br />
3<br />
INTRODUCTION
2.1 FORMATTING<br />
For formatting information, including instructions on how to format your <strong>miniStack</strong> <strong>MAX</strong> for<br />
Mac or Windows, go to: http://www.macsales.com/format<br />
2.2 UNMOUNTING DRIVES<br />
To properly unmount any connected drives from your computer, you need to follow a few<br />
simple steps.<br />
For Mac OS X systems:<br />
APPENDIX<br />
There are two main methods to umount disks with Mac OS X systems. Either drag the<br />
icon for the disk you wish to unmount to the trash can, or right-click the disk icon on the<br />
desktop, then click “Eject”.<br />
For Windows systems:<br />
1. Go to the System Tray (located in the lower right corner of your screen). Click on the<br />
“Eject” icon (a small green arrow over a hardware image).<br />
2. A message will appear, detailing the devices that the “Eject” icon controls, i.e., “Safely<br />
remove...” Click on this prompt.<br />
3. You will then be given the following message. “Safe to Remove Hardware”. It is now<br />
safe to disconnect the <strong>Newer</strong>Tech <strong>miniStack</strong> <strong>MAX</strong> from the computer.<br />
2.3 TROUBLESHOOTING<br />
Begin your troubleshooting by verifying that the power cable is connected to the <strong>Newer</strong>-<br />
Tech <strong>miniStack</strong> <strong>MAX</strong> and to a power source. If the power cable is connected to a power strip,<br />
make sure that the power switch on the strip is turned on.<br />
Then, simply verify that both ends of your cables are properly plugged into the computer<br />
and the <strong>miniStack</strong> <strong>MAX</strong>. If the <strong>miniStack</strong> <strong>MAX</strong> is still not working properly, try connecting to<br />
another interface such as the USB connection and see if the device works properly. You can<br />
also connect the <strong>miniStack</strong> <strong>MAX</strong> to a different computer.<br />
If problems persist, consult our online collection of frequently asked questions (http://<br />
www.macsales.com/FAQ) or see section 2.6 for information on contacting technical<br />
support.<br />
NEWERTECH MINISTACK <strong>MAX</strong><br />
4<br />
APPENDIX
2.4 ABOUT DATA BACKUP<br />
To ensure that your files are protected and to prevent data loss, we strongly suggest that you<br />
keep two copies of your data: one copy on your <strong>Newer</strong>Tech <strong>miniStack</strong> <strong>MAX</strong> and a second<br />
copy on either your internal drive or another storage medium, such as an optical backup, or<br />
on a second external storage unit. Any data loss or corruption while using the <strong>Newer</strong>Tech<br />
<strong>miniStack</strong> <strong>MAX</strong> is the sole responsibility of the user, and under no circumstances will <strong>Newer</strong><br />
<strong>Technology</strong> be held liable for compensation or the recovery of any lost data.<br />
2.5 ONLINE RESOURCES<br />
Formatting:<br />
For formatting information, including instructions on how to format your <strong>Newer</strong>Tech<br />
<strong>miniStack</strong> <strong>MAX</strong> for Mac or Windows, go to: http://www.macsales.com/format<br />
Data Migration:<br />
For a step-by-step walkthrough of our recommended method for migrating your data<br />
from an old drive to a new one, go to: http://www.macsales.com/migration<br />
FAQs:<br />
Access our online collection of frequently asked questions for this and other products at:<br />
http://www.macsales.com/FAQ<br />
2.6 TECHNICAL SUPPORT HOURS AND CONTACT INFORMATION<br />
8AM - 8PM (CT) Monday - Friday<br />
9AM - 4PM (CT) Saturday<br />
By telephone: (800) 275-4576 (North America only)<br />
International customers please call: (815) 338-8685<br />
Live chat is available during normal business hours as well.<br />
For more information, visit: http://www.newertech.com/support<br />
Or you can email us. Submit your email at:<br />
http://www.newertech.com/support<br />
NEWERTECH MINISTACK <strong>MAX</strong><br />
5<br />
APPENDIX
Copyrights:<br />
Copyright ©2009-13 <strong>Newer</strong> <strong>Technology</strong>, Inc. All rights reserved. No part of this publication may be reproduced, stored<br />
in a retrieval system, or transmitted in any form or by any means, electronic, mechanical, photocopying, recording or<br />
otherwise, without the prior written consent of Other World Computing.<br />
Changes:<br />
The material in this document is for information only and subject to change without notice. While reasonable efforts<br />
have been made in the preparation of this document to assure its accuracy, Other World Computing assumes no<br />
liability resulting from errors or omissions in this document, or from the use of the information contained herein.<br />
Other World Computing reserves the right to make changes or revisions in the product design or the product manual<br />
without reservation and without obligation to notify any person of such revisions and changes.<br />
FCC Statement:<br />
Warning! Modifications not authorized by the manufacturer may void the user’s authority to operate this device.<br />
NOTE: This equipment has been tested and found to comply with the limits for a Class A digital device, pursuant to<br />
Part 15 of the FCC Rules. These limits are designed to provide reasonable protection against harmful interference<br />
when the equipment is operated in a commercial environment. This equipment generates, uses, and can radiate<br />
radio frequency energy and, if not installed and used in accordance with the instruction manual, may cause harmful<br />
interference with radio communications. Operation of this equipment in a residential area is likely to cause harmful<br />
interference, in which case the user will be required to correct the interference at his own expense.<br />
NOTE: This equipment has been tested and found to comply with the limits for a Class B digital device, pursuant to<br />
Part 15 of the FCC Rules. These limits are designed to provide reasonable protection against harmful interference in<br />
a residential installation. This equipment generates, uses and can radiate radio frequency energy and, if not installed<br />
and used in accordance with the instructions, may cause harmful interference to radio communications. However,<br />
there is no guarantee that interference will not occur in a particular installation. If this equipment does cause harmful<br />
interference with radio or television reception, which can be determined by turning the equipment off and on, the<br />
user is encouraged to try to correct the interference by one or more of the following measures:<br />
• Reorient or relocate the receiving antenna.<br />
• Increase the separation between the equipment and receiver.<br />
• Connect the equipment to an outlet on a circuit different from that to which the receiver is connected.<br />
Health And Safety Precautions:<br />
• Use proper anti-static precautions while performing the installation of your hard drives into this drive enclosure.<br />
Failure to do so can cause damage to your drive mechanisms and/or the hard drive enclosure.<br />
• Read this user guide carefully and follow the correct procedures when setting up the device.<br />
• Do not attempt to disassemble or modify the device. To avoid any risk of electrical shock, fire, short-circuiting or<br />
dangerous emissions, never insert any metallic object into the device. If it appears to be malfunctioning, contact<br />
Other World Computing technical support.<br />
• Never expose your device to rain, or use it near water or in damp or wet conditions. Never place objects containing<br />
liquids on the drive, as they may spill into its openings. Doing so increases the risk of electrical shock, short-circuiting,<br />
fire or personal injury.<br />
General Use Precautions:<br />
• To avoid damage, do not expose the device to temperatures outside the range of 5° C to 40° C (41° F to 104° F).<br />
• Always unplug the device from the electrical outlet if there is a risk of lightning or if it will be unused for an extended<br />
period of time. Otherwise, there is an increased risk of electrical shock, short-circuiting or fire.<br />
• Do not use the device near other electrical appliances such as televisions, radios or speakers. Doing so may cause<br />
interference which will adversely affect the operation of the other products.<br />
• Do not place the device near sources of magnetic interference, such as computer displays, televisions or speakers.<br />
Magnetic interference can affect the operation and stability of hard drives.<br />
• Do not place heavy objects on top of the device.<br />
• Protect your device from excessive exposure to dust during use or storage. Dust can build up inside the device,<br />
increasing the risk of damage or malfunction.<br />
• Do not block any ventilation openings on the device. These help to keep the device cool during operation. Blocking<br />
the ventilation openings may cause damage to the device and cause an increased risk of short-circuiting or fire.<br />
R3 05/03/13 SL<br />
Copyright ©2009-13 <strong>Newer</strong> <strong>Technology</strong> All Rights Reserved. <strong>Newer</strong>Tech’s<br />
Limited Warranty is not transferable and subject to limitations.<br />
®<br />
NWTMANMSTKMXOM