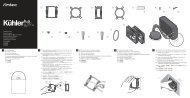
Minuet 350 - Antec
Minuet 350 - Antec
Minuet 350 - Antec

You also want an ePaper? Increase the reach of your titles
YUMPU automatically turns print PDFs into web optimized ePapers that Google loves.
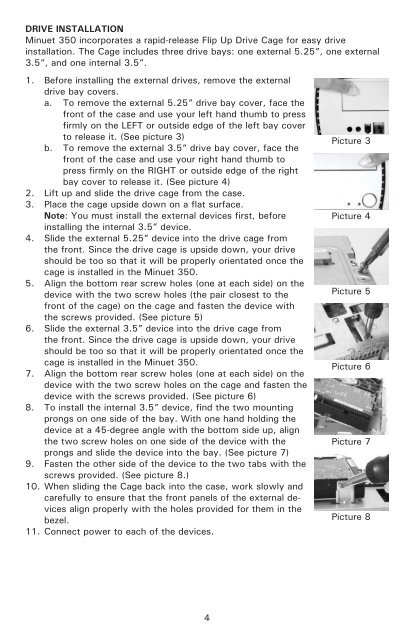
DRIVE INSTALLATION<br />
<strong>Minuet</strong> <strong>350</strong> incorporates a rapid-release Flip Up Drive Cage for easy drive<br />
installation. The Cage includes three drive bays: one external 5.25”, one external<br />
3.5”, and one internal 3.5”.<br />
1. Before installing the external drives, remove the external<br />
drive bay covers.<br />
a. To remove the external 5.25” drive bay cover, face the<br />
front of the case and use your left hand thumb to press<br />
firmly on the LEFT or outside edge of the left bay cover<br />
to release it. (See picture 3)<br />
b. To remove the external 3.5” drive bay cover, face the<br />
front of the case and use your right hand thumb to<br />
press firmly on the RIGHT or outside edge of the right<br />
bay cover to release it. (See picture 4)<br />
2. Lift up and slide the drive cage from the case.<br />
3. Place the cage upside down on a flat surface.<br />
Note: You must install the external devices first, before<br />
installing the internal 3.5” device.<br />
4. Slide the external 5.25” device into the drive cage from<br />
the front. Since the drive cage is upside down, your drive<br />
should be too so that it will be properly orientated once the<br />
cage is installed in the <strong>Minuet</strong> <strong>350</strong>.<br />
5. Align the bottom rear screw holes (one at each side) on the<br />
device with the two screw holes (the pair closest to the<br />
front of the cage) on the cage and fasten the device with<br />
the screws provided. (See picture 5)<br />
6. Slide the external 3.5” device into the drive cage from<br />
the front. Since the drive cage is upside down, your drive<br />
should be too so that it will be properly orientated once the<br />
cage is installed in the <strong>Minuet</strong> <strong>350</strong>.<br />
7. Align the bottom rear screw holes (one at each side) on the<br />
device with the two screw holes on the cage and fasten the<br />
device with the screws provided. (See picture 6)<br />
8. To install the internal 3.5” device, find the two mounting<br />
prongs on one side of the bay. With one hand holding the<br />
device at a 45-degree angle with the bottom side up, align<br />
the two screw holes on one side of the device with the<br />
prongs and slide the device into the bay. (See picture 7)<br />
9. Fasten the other side of the device to the two tabs with the<br />
screws provided. (See picture 8.)<br />
10. When sliding the Cage back into the case, work slowly and<br />
carefully to ensure that the front panels of the external devices<br />
align properly with the holes provided for them in the<br />
bezel.<br />
11. Connect power to each of the devices.<br />
Picture 3<br />
Picture 4<br />
Picture 5<br />
Picture 6<br />
Picture 7<br />
Picture 8<br />
4