
Create successful ePaper yourself
Turn your PDF publications into a flip-book with our unique Google optimized e-Paper software.
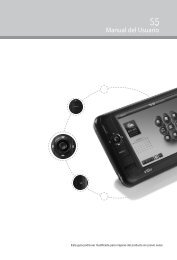
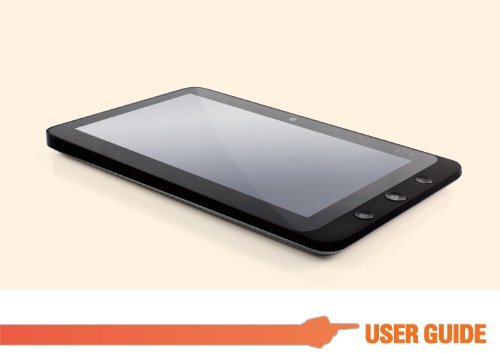
USER GUIDE<br />
USER GUIDE
Ⅱ<br />
Brief introduction<br />
Safety Instructions<br />
Use the following safety guidelines to help protect yourself and Tablet PC.<br />
• Do not attempt to service the Tablet PC yourself. Always follow installation instructions<br />
closely.<br />
• Be sure that nothing rests on the AC adapter's power cable and that the cable is not located<br />
where it can be tripped over or stepped on.<br />
• Do not cover the AC adaptor with papers or other items that will reduce cooling; also, do not use<br />
use the AC adapter while it is inside a carrying case.<br />
• Use only the AC adapter, power cord, and batteries that are approved for use with this Tablet<br />
PC. Use of another type of battery or AC adapter may cause risk of fire or explosion.<br />
• If you use an extension cable with the AC adapter, ensure that the total ampere rating of the<br />
products plugged in to the extension cable does not exceed the ampere rating of the extension cable.<br />
• When you move the Tablet PC between environments with very different temperature and/ore<br />
humidity ranges, condensation may form on or within the Tablet PC. To avoid damaging the<br />
Tablet PC, allow sufficient time for the moisture to evaporate before using the Tablet PC.<br />
• When you . disconnect a cable, pull on its connector or on its strain relief loop, not on the cable<br />
itself. As you pull out the connector, keep it evenly aligned to avoid bending any connector pins.<br />
Also, before you connect a cable make sure both connectors are correctly oriented and aligned.<br />
This guide shown may vary from Actual products,please follow the actual products.
Package contents<br />
After opening the package, carefully inspect the contents. If any of the items is missing or appear damaged,<br />
contact your dealer. The shipping carton should contain the following:<br />
STANDARD<br />
• A Tablet PC<br />
• An AC adapter with power cord<br />
• User's guide<br />
• Driver CD (Installed on SSD)<br />
WARNING<br />
This Tablet PC driver put on SSD last partition,be careful do not delete or formate the files.<br />
OPTIONAL<br />
The following items are normally optional, but some vendors may include them in the standard package.Some<br />
items may not be available in some countries, or some vendors may choose not to carry all the items. not to<br />
carry all the items.<br />
• Pouch<br />
• Mini VGA Cable<br />
• Cleaning cloth<br />
• Earphone<br />
Ⅲ
Windows 7 system application<br />
Start use your Tablet PC<br />
Connect the Tablet PC to the external power source via the AC adapter, press and hold the power button for 2~3<br />
seconds , then start on your Tablet PC.Release the press when the power indicator is light up in blue.<br />
And then follow the on-screen instructions to <strong>com</strong>plete the initial Operating system setup.<br />
The system home(destop) screen will appear as follows(The device’s built-in G-sensor movement and changes<br />
its angle/orientation).<br />
Landscape view<br />
Portrait view<br />
10
Work area<br />
The onscreen area where users can perform their work, as well as store programs, documents, and their shortcuts.<br />
]ou can add Gadgets for give users fast access to personally relevant information and simple tasks—without getting<br />
in the way.<br />
Gadgets(samples)<br />
12
Connect to a wireless networks<br />
1. Make sure you are located within the wireless network service area. Press the Wi-Fi button to turn on Wi-Fi, and the Wi-Fi<br />
indicator light up in blue.(If insert a 3G SIM card,and turn on 3G, you also can conncect to a 3G networks)<br />
2. Click the network icon in the notification area, a list of available wireless networks will be displayed.<br />
Note: WPS(Wi-Fi Protected Setup)<br />
(Wi-Fi hotspots and 3G networks will show up together in the same list.<br />
Windows 7 also virtualises the Wi-Fi card so you can use it twice, for<br />
example to connect WPS devices to a non-WPS access point.)<br />
(To connect to some networks that require security authentication, you<br />
may have to undergo another authorization process and enter username<br />
and password. For details, please consult your network administrator.)<br />
(For data security, it is strongly re<strong>com</strong>mended to connect to<br />
security-enabled wireless networks whenever possible.)<br />
(When travelling by air, please be sure to turn off wireless networking to<br />
avoid any possible risks to flight safety.)<br />
3. Choose a network and then click Connect. If security authentication is not required by the network you are using, there<br />
will be a successful message showing that you have connected to the network.<br />
14
Touch Panel Input<br />
Tablet PC input panel<br />
The Tablet PC input panel is the main input panel used to enter textual content.<br />
Writing Board<br />
There is also a Writing Board that captures handwriting and converts it to printed text. There are two methods for<br />
capturing hand writing: Free writing or Write to Grid.<br />
1. Free writing<br />
20
21<br />
2. Write to Grid<br />
Tablet PC Settings<br />
In order to fully exploit all the Touch features of this system, you should go to "Start" > "Control Panel" and then select<br />
“Tablet PC Settings".
Tablet PC Settings Introduction<br />
Display<br />
1. Configuration<br />
To configure the pen and touch screen, click the Setup button. Then touch the screen with your finger to <strong>com</strong>plete the<br />
touch-screen identification settings.<br />
22
23<br />
2. Display Options<br />
Display: Select the output display device<br />
Calibration: Do not use windows system build-in screen calibration, if you wanted to Calibrate a Touch screen, please<br />
refer to the additional page: “Calibration of the touch screen”.<br />
Reset: If you did wrong that with build-in screen calibration, you can click the Reset button to restore the default .<br />
Go to Orientation<br />
This device’s built-in G-sensor ,you don’t need to do this settings.
Others<br />
1. Handedness<br />
Select the preferred position of menus based on whether you’re right or left handed. If you select the left-handed<br />
setting, menus appears on the right; if you select the right-handed setting, menus appears on the left.<br />
2. Pen and Touch<br />
Click the “Go to Pen and Touch” link in the Pen and Touch box.<br />
3. Tablet PC Input Panel Options<br />
Click the “Go to Input Panel Settings” link in the Tablet PC Input Panel options.<br />
24
25<br />
Pen and Touch Settings<br />
Enable Touch<br />
1. Select the checkbox “Use your finger as an input device” to enable the touch interface.<br />
2. Select the checkbox “Enable multi-touch gestures and inking” to enable multi-touch gestures such as 2 finger<br />
zooming.<br />
Settings<br />
Click the "Settings" button to adjust double tap speed and spatial tolerance, and to test your settings.
Touch Pointer<br />
Select the “Touch pointer” check box to show the touch pointer when fingers interact with items on the screen.<br />
In the Advanced Option, you can set the "Touch Pointer Location Option" and "Touch Pointer Appearance and<br />
Behavior".<br />
Panning<br />
In the “Panning” tab, select the “Turn on Single Finger Panning” checkbox to enable single finger panning.<br />
Select both checkboxes in the “Gestures” box and select the desired Inertia settings.<br />
26
27<br />
Using the Camera<br />
The built-in camera allows to participate in video calls and to take pictures.<br />
Using the Multi-Touch Screen<br />
Multi touch technology allows you to control your <strong>com</strong>puter with one or two fingers simultaneously. A double click is<br />
equivalent to tapping a finger twice. Scrolling web pages is as intuitive as moving your finger up and down a page. Use two<br />
fingers to zoom in and out of pictures – pinch to zoom out, separate to zoom in. To right�click a file, touch it with one finger<br />
and tap the screen with a second(you can use one finger to touch the screen for 2~3 seconds too).
General hardware problems / possible causes and solutions<br />
Some <strong>com</strong>mon hardware problems and re<strong>com</strong>mended solutions are in the below:<br />
1. System Ceased Operation during the Execution of the Program.<br />
Cause: error by using the current procedure. Solution: Click , and keys. Windows operating system<br />
causes error; restart the system by using the power supply.<br />
2. Operating System cannot be Restored to the Using State.<br />
If the operating system can not resume operation after a pause, please check the following possible causes:The battery<br />
may have a malfunction, or the current power level may be very low. To solve this problem, please connect an external<br />
power supply such as the AC adapter.<br />
3. The System cannot Shutdown Normally.<br />
Hold down the power button 4-6 seconds, until the system shuts down.<br />
4. After Shutdown, if the System cannot reboot:<br />
Connect the AC power adapter immediately; as it means that the battery did not have sufficient power to reboot.<br />
5. Measures to Extend Battery Life?<br />
Adjust the screen brightness to the minimum possible level.<br />
Adjust the <strong>com</strong>puter screen to the normal standard.<br />
Remove the Tablet PC card if not often used.<br />
Turn off the Tablet PC Bluetooth function.<br />
Turn off the Tablet PC wireless network function.<br />
Ensure that the power configuration setting is in the "Save power" mode.<br />
28
29<br />
6. Wireless Network Breaks after 2 to 3 Minutes on line, and cannot resume on-line.<br />
This may be due to interference caused by channel, please change the AP's channel and re-line.<br />
7. Tablet PC cannot connect to the Internet Network.<br />
Internet service providers (ISP) account is not setup; please contact your network service <strong>com</strong>pany for assistance.<br />
8. The Tablet PC has been online via a Wireless Network, but still cannot connect to<br />
another Computer.<br />
Please check the device driver is installed correctly. If the driver is not installed correctly, press the [Start] -> [Control<br />
Panel] -> [System] -> [Device Manager] -> [Network Adapters], you will find a yellow exclamation mark on the network<br />
tag. If a yellow exclamation mark occurs, please use the driver CD to reinstall the device driver.<br />
9. Good Signal Strength, but cannot connect to the Network.<br />
Please check the TCP / IP address settings are correct or not.<br />
10. If water accidentally penetrates the Tablet PC, how to solve this problem?<br />
At this point, do not connect the Tablet PC's power supply, or it will cause more serious damage to the Tablet PC.<br />
Unplug the power supply and power cord, remove any attached external devices (such as: drive). Dry any liquid that<br />
was spilled on the Tablet PC; wipe stains with a soft cloth to reduce potential damage to the unit. Dry the body and<br />
other equipment with fans, and then send it to the nearest Tablet PC repair center to diagnose and repair the Tablet PC<br />
by qualified engineers, in order to reduce the damage to the Tablet PC.<br />
11. The <strong>com</strong>puter cannot continue running.<br />
An external or internal storage device could be the cause of this problem as it is not operating properly when storing the<br />
content.
External peripheral devices may not <strong>com</strong>patible with the Tablet PC - such as external USB devices,<br />
Micro SD cards that are belong to precision devices; if incorrectly used, they can easily cause the<br />
Tablet PC to move to a standby situation when connected to the Tablet PC.In<strong>com</strong>patible software<br />
or drivers - the driver which is not <strong>com</strong>patible will cause .dll, .sys and .exe extension files and will<br />
put the Tablet PC into standby or hibernation mode.<br />
30
VER.1.0