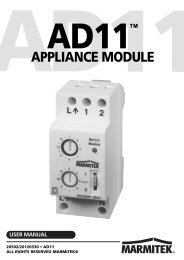
Manual - Insteon
Manual - Insteon
Manual - Insteon

You also want an ePaper? Increase the reach of your titles
YUMPU automatically turns print PDFs into web optimized ePapers that Google loves.
Dual Momentary Wall Switch<br />
Connected load/responders<br />
Dual momentary switch Tap Press and hold Double-tap LED<br />
Top<br />
Up/On<br />
(ramped)<br />
Up<br />
Brighten<br />
until release or 100%<br />
(dimmable responders only)<br />
Up/On<br />
(instant)<br />
Green<br />
Bottom<br />
Down/Off<br />
(ramped)<br />
Down<br />
Dim<br />
until release or off<br />
(dimmable responders only)<br />
Down/Off<br />
(instant)<br />
Red<br />
Adjust Local Settings<br />
Change LED Brightness (or turn it off)<br />
Default = 50% brightness level<br />
1) Press and hold Set button until it beeps<br />
LED will start blinking green<br />
2) Press and hold Set button until it beeps again<br />
LED will start blinking red<br />
3) Press and hold Set button until it beeps a third time<br />
LED will start blinking green<br />
4) Tap Set button once<br />
LED will start double-blinking green<br />
5) Press and hold Set button until it beeps<br />
LED will turn green (at brightness of connected load)<br />
6) Press and hold Micro module on/off buttons to brighten or dim LED to desired brightness<br />
7) Tap Set button<br />
Micro On/Off will double-beep and return to ready mode<br />
Error Blink<br />
Default = enabled<br />
This setting is only adjustable via software or a central controller. Micro module LED will blink red once if one or more<br />
responders do not acknowledge a message and will blink green once if all responders are successful.<br />
Blink on Traffic<br />
Default = disabled<br />
This setting is only adjustable via software or a central controller. Micro module LED will blink red if it detects noise<br />
that could disrupt communication.<br />
Beep on Button Press<br />
Default = disabled<br />
Page 10 of 21<br />
2444-222/2444-422/2444-522 - Rev: 1/8/2013 7:54 PM