Submitting Printing Requests via Eprint Instruction Sheet.pdf
Submitting Printing Requests via Eprint Instruction Sheet.pdf
Submitting Printing Requests via Eprint Instruction Sheet.pdf

Create successful ePaper yourself
Turn your PDF publications into a flip-book with our unique Google optimized e-Paper software.
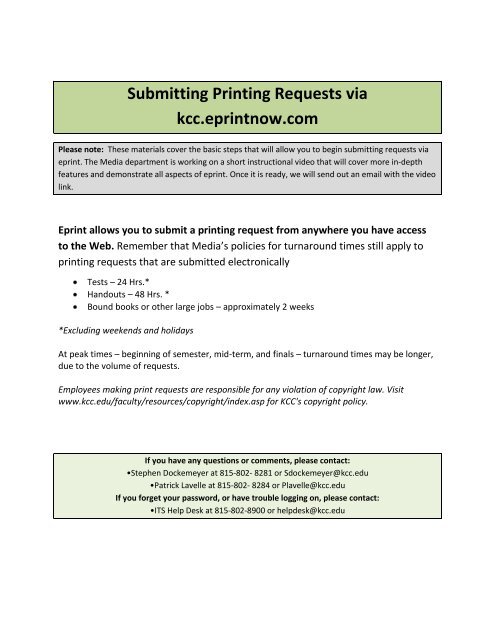
<strong>Submitting</strong> <strong>Printing</strong> <strong>Requests</strong> <strong>via</strong><br />
kcc.eprintnow.com<br />
Please note: These materials cover the basic steps that will allow you to begin submitting requests <strong>via</strong><br />
eprint. The Media department is working on a short instructional video that will cover more in-depth<br />
features and demonstrate all aspects of eprint. Once it is ready, we will send out an email with the video<br />
link.<br />
<strong>Eprint</strong> allows you to submit a printing request from anywhere you have access<br />
to the Web. Remember that Media’s policies for turnaround times still apply to<br />
printing requests that are submitted electronically<br />
Tests – 24 Hrs.*<br />
Handouts – 48 Hrs. *<br />
Bound books or other large jobs – approximately 2 weeks<br />
*Excluding weekends and holidays<br />
At peak times – beginning of semester, mid-term, and finals – turnaround times may be longer,<br />
due to the volume of requests.<br />
Employees making print requests are responsible for any violation of copyright law. Visit<br />
www.kcc.edu/faculty/resources/copyright/index.asp for KCC's copyright policy.<br />
If you have any questions or comments, please contact:<br />
•Stephen Dockemeyer at 815-802- 8281 or Sdockemeyer@kcc.edu<br />
•Patrick Lavelle at 815-802- 8284 or Plavelle@kcc.edu<br />
If you forget your password, or have trouble logging on, please contact:<br />
•ITS Help Desk at 815-802-8900 or helpdesk@kcc.edu
Some things to keep in mind when using eprint:<br />
You can change your password at any time. Simply select the “Preferences” tab in<br />
the upper right corner of the home page. Click “Change Password”. Then you will<br />
need to type in your current password, your new password, and then confirm<br />
your new password by typing it in again.<br />
If you are uploading a PowerPoint document to be printed electronically, please<br />
reference the last two sheets of this document for instructions. There are a few<br />
steps you will need to take before “uploading” your document to allow eprint to<br />
correctly convert a PowerPoint document.<br />
Once a document is “uploaded”, you cannot make any changes to that<br />
document. All changes must be made to the original document on your<br />
computer. The uploaded document is only a copy.<br />
Also, Media cannot edit a document once we receive it. Please do not submit<br />
blank pages or any pages you do not want printed (i.e. answer keys for tests,<br />
homework, etc...).<br />
Once you send a file you cannot retract the request. You will need to contact the<br />
Media department and ask them to delete a request by referencing the order ID<br />
number assigned to that request.
Begin by logging in:<br />
How to use eprint for copy requests:<br />
Go to http://kcc.eprintnow.com<br />
Type in user name: same as your network login name, for example, sdockemeyer.<br />
Type in password: All 7 digits of your Colleague ID# (include all 0’s).<br />
Check the “Remember me next time” box to skip this step in the future if you are using a nonshared<br />
computer, i.e. home computer. DO NOT check this box if this computer is used by<br />
multiple people.<br />
You are now logged into KCC’s eprint home page (as shown below). To submit a printing request you<br />
must first upload a document or select one from your eprint library. Click on the “Upload” tab on the<br />
blue menu bar to begin the uploading process.
Next:<br />
Click on the “Select” button to access documents stored on the computer you are working from.<br />
Double click the document you wish to upload. You are able to select and upload multiple<br />
documents at a time.<br />
Once you have selected the document(s) you wish to have printed, hit the “upload” button and<br />
the process will begin.<br />
STEP 1: You are now on the “Library” page where you actually begin to submit a printing request.<br />
1: Check the box of<br />
the document you<br />
wish to print.<br />
2: Click on the shopping basket to<br />
begin the ordering process.
STEP 2: On this page you will select the “Document Type”. You have six to choose from. The two most<br />
common types of documents will be “Test or Quiz” and ”Standard (White Paper)”.<br />
Each “Document Type” has its own specific list of options.<br />
Choose the “Document Type” that<br />
fits your printing needs and click<br />
on “proceed”.<br />
STEP 3: You are now in the “Product Options” page. All fields are defaulted to the most common<br />
options for this “Document Type”. If you need to change any settings, click on the dropdown arrows and<br />
select available options.<br />
Feel free to include any additional printing or<br />
finishing instructions that will help media complete<br />
your request to match your needs.<br />
Once you have selected all the<br />
appropriate options, click the<br />
“next” button found below the<br />
“notes” box.<br />
(Not shown here)
STEP 4: On the “Basket” page, you will enter the number of copies you want printed. PLEASE NOTE<br />
after you enter a number in the quantity box, click anywhere on the page and you will see a spinning<br />
icon. This means the computer is changing the field from 0 to the number you entered. You will then<br />
have to hit the “next” button to continue.<br />
STEP 5: On the “Address” page, you will enter your contact information. All fields highlighted in red<br />
are mandatory and require data. The “Account #” field only pertains to departments funded<br />
by grant programs.<br />
Hit “Next” to continue.<br />
Checking this box will save the<br />
entered contact information for all<br />
future orders.
STEP 6: On the “Shipping” page you need to enter the “Date Needed”. Click on the calendar icon,<br />
then click on the date you need the printed materials.<br />
Click on the drop down arrow in the “Deliver To” field and select the location you would<br />
like Media to deliver the completed materials for you to pick up. Feel free to enter<br />
any additional instructions in the “Notes” field.<br />
Hit “Next” to continue.<br />
Please reference Media’s policy on<br />
“turnaround” times posted on the Home<br />
page of this site.<br />
STEP 7: The “Confirm” page will show you a brief summary of the order you are placing. Review the<br />
information and verify if it is correct. If so, hit “confirm order”. If you find an error or want to make<br />
changes, hit the “Cancel Order” button and start over.
If you successfully submitted your printing request, you will see this page appear. This page confirms<br />
that your printing request was properly sent to Media. You will see a message which states “Your order<br />
was successful”. Your request will also be assigned an “Order Number” at this point. Please reference<br />
this number if you need to contact the Media department for any reason regarding this request.<br />
You can access this information at any time from the “Orders” tab located on the main blue menu bar.<br />
Once Media prints and sends out your materials according to your request, we will delete this job from<br />
the system, and it will no longer show up on your orders list.
<strong>Submitting</strong> Power Point Slides <strong>via</strong><br />
kcc.eprintnow.com<br />
1). Open the PowerPoint file that you are submitting.<br />
2). Select the “Design” tab and click on the “office theme” (Black and White) theme box to convert slides<br />
to a printable black and white version as pictured below. (You will still have your full color Slide<br />
Presentation by selecting “Save As” in step three.)<br />
This step allows us to print out more legible documents and use less toner.<br />
The Office Theme box<br />
looks like this<br />
3). Go to “File” “Save As”, rename the document, and then click the “Save as type:” drop down arrow<br />
and select PDF.
Rename your document i.e. add “print<br />
version” to the existing file name.<br />
Select PDF from “Save as<br />
type:” drop down<br />
Once PDF is selected, additional boxes will appear. Click on the options button.<br />
4). In the options window, under the Publish options section, select “Handouts” in the Publish what:<br />
drop down box. If you would like to have “notes” next to each slide, select 3 Slides per page or less in<br />
the Slides per page: drop down box. If you do not require notes, then select however many slides per<br />
page you desire and click the OK button.<br />
6). Click “Save” and submit your print version <strong>via</strong> kcc.eprintnow.com