Using Sounds Tutorial - Kurzweil Educational Systems
Using Sounds Tutorial - Kurzweil Educational Systems
Using Sounds Tutorial - Kurzweil Educational Systems

Create successful ePaper yourself
Turn your PDF publications into a flip-book with our unique Google optimized e-Paper software.
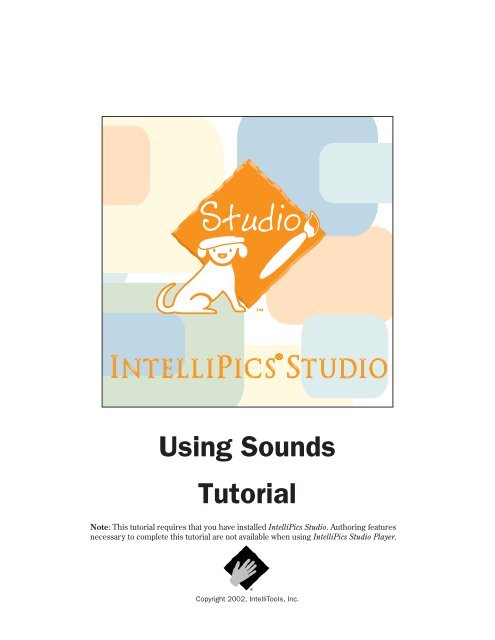
<strong>Using</strong> <strong>Sounds</strong><br />
<strong>Tutorial</strong><br />
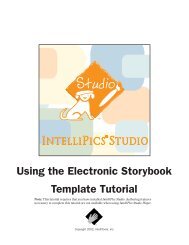
Note: This tutorial requires that you have installed IntelliPics Studio. Authoring features<br />
necessary to complete this tutorial are not available when using IntelliPics Studio Player.<br />
Copyright 2002, IntelliTools, Inc.
Copyright Notice<br />
© 2002 IntelliTools, Inc. All rights reserved. The distribution and sale of this software and manual are authorized for<br />
the original purchaser only. Unauthorized duplication is a violation of federal copyright law.<br />
Images that appear in IntelliPics Studio may not be used in any commercial application without the prior consent of<br />
IntelliTools, Inc.<br />
Trademarks and Acknowledgments<br />
IntelliTools, IntelliPics, IntelliKeys, IntelliTalk II, and Overlay Maker, and their respective logos are registered<br />
trademarks of IntelliTools, Inc. IntelliMathics, IntelliCritters, IntelliMation, IntelliQuiz, Overlay Printer, and Overlay<br />
Sender are trademarks of IntelliTools, Inc.<br />
Adobe and Acrobat Reader are registered trademarks or trademarks of Adobe <strong>Systems</strong> Incorporated, registered in<br />
the United States and/or other countries. Macintosh, QuickTime, and QuickTime logo are registered trademarks or<br />
trademarks of Apple Computer, Inc., registered in the U.S.A. and other countries. Windows 95, Windows 98,<br />
Windows 2000, and Windows ME are registered trademarks or trademarks of Microsoft Corporation, registered in<br />
the U.S.A. and other countries. Other brand and product names mentioned herein are trademarks, registered<br />
trademarks, or trade names of their respective holders and are hereby acknowledged.<br />
Some photographic images included with this program are from the CD-ROM, “Picture This... Professional Edition”<br />
and are the copyright of Silver Lining Multimedia, Inc. If you would like to obtain more images that can be imported<br />
into IntelliTools products, please visit the Silver Lining Multimedia Web site: http://www.silverliningmm.com.<br />
Over 90 of the images supplied with IntelliPics Studio are Picture Communication Symbols from the Boardmaker<br />
software, ©1981–2001 Mayer-Johnson, Inc. and are used with permission. Boardmaker has 3,000+ additional images<br />
that can be imported into IntelliTools products. For additional information about Boardmaker images, please visit the<br />
Mayer-Johnson Web site: http://www.mayer-johnson.com.<br />
Credits<br />
IntelliPics Studio was produced through the collaborative efforts of many staff members at IntelliTools. Design: Arjan<br />
Khalsa, Scott Schafer; Project Management: David Robertshaw; Content Development: Suzanne Feit, Arjan Khalsa,<br />
Lucinda Ray, Patty Kilroy; Software Engineering: Scott Schafer, Paul Archibald, Fred Ross-Perry; User’s Guide: Alan<br />
Rhody; Teacher’s Guide: Lucinda Ray; <strong>Tutorial</strong>: Suzanne Feit; Additional Development: Philip Nittenberg, Jeremy<br />
Bolan, Linda Finley, Meida Pang, Steve Gensler; Testing: Dale Goetsch, Lisa Carr, Mike Burns, Meida Pang, Chris<br />
Finley; Artwork: Patty Kilroy, Chris Santeramo, Michelle Graham, Mary Ann Zapalac, Jeremy Bolan; Support<br />
Services: Linda Finley; Packaging: Patty Kilroy; <strong>Using</strong> <strong>Sounds</strong> <strong>Tutorial</strong>: Alan Rhody.<br />
Technical Support<br />
Hours:<br />
8 a.m.– 5 p.m. Pacific Time, Monday through Friday<br />
Phone:<br />
(800) 899-6687 (U.S. and Canada)<br />
(707) 773-2000 (local and international)<br />
Fax: (707) 773-2001<br />
Email:<br />
tech@intellitools.com (for technical information)<br />
info@intellitools.com (for general information)<br />
World Wide Web: http://www.intellitools.com<br />
Important note: To insure that returns are handled correctly and without delays, please call us for a Return<br />
Merchandise Authorization (RMA) before returning any item.<br />
MNL-IPS-T&T <strong>Sounds</strong> Printed in U.S.A. 10/02
Table of Contents<br />
Introduction...........................................................................................................................2<br />
Beginning the <strong>Tutorial</strong> .............................................................................................................2<br />
Part 1: Adding Sound to a Text Box<br />
Creating a Read-Aloud Text Box .............................................................................................3<br />
Part 2: Adding Sound to a Page<br />
Adding Synthesized Speech to a Page ....................................................................................4<br />
Adding Recorded Sound to a Page..........................................................................................5<br />
Part 3: Adding Sound to a Picture<br />
Adding Synthesized Speech to a Picture ................................................................................6<br />
Adding Recorded Sound to a Picture......................................................................................7<br />
Importing a Sound File From Your Computer..................................................................7<br />
Recording a New Sound File...............................................................................................8<br />
Adding a Sound to an Inserted Item .......................................................................................9<br />
Part 4: Adding Sound to a Button<br />
Adding Recorded Sound to a Button ....................................................................................10<br />
Importing a Sound File From Your Computer................................................................11<br />
Importing a Sound File From a CD..................................................................................11<br />
Recording a New Sound File.............................................................................................12<br />
Adding Synthesized Speech to a Button...............................................................................12<br />
Playing Button <strong>Sounds</strong> ...........................................................................................................12<br />
Part 5: Adding Two <strong>Sounds</strong> to a Page<br />
Adding One Page Sound ........................................................................................................14<br />
Adding a Second Page Sound ................................................................................................14<br />
Playing Two Page <strong>Sounds</strong>......................................................................................................16<br />
Note<br />
The illustrations in this tutorial are<br />
intended to be similar to what you see<br />
on-screen. Some may differ depending<br />
on the computer system you are using.<br />
<strong>Using</strong> <strong>Sounds</strong> 1
Introduction<br />
<strong>Sounds</strong> can easily be added to various parts of an IntelliPics Studio document by:<br />
• <strong>Using</strong> the program’s Read-Aloud feature.<br />
• <strong>Using</strong> the program’s Synthesized Speech feature.<br />
• Importing a sound from your hard drive, from a CD, or from elsewhere on your network.<br />
• Recording a voice or a sound into a microphone. (If the computer you are using does not have a built in<br />
microphone, you will need to connect one to it. Consult your computer’s operations manual, if needed.)<br />
Adding a Sound to a... Result Sound Options Use / Examples<br />
Text Box<br />
Contents read aloud when text Synthesized Speech Verbal feedback for instructions<br />
box is clicked<br />
or help<br />
Page<br />
Picture<br />
Palette Item<br />
Button<br />
Sound plays when page is first<br />
displayed<br />
Sound plays when picture is<br />
clicked (i.e., selected)<br />
Sound plays when selected item<br />
is inserted<br />
Sound plays when button is<br />
clicked<br />
Synthesized Speech<br />
Prerecorded Sound<br />
New Recording<br />
Synthesized Speech<br />
Prerecorded Sound<br />
New Recording<br />
Synthesized Speech<br />
Recorded Sound<br />
New Recording<br />
Synthesized Speech<br />
Recorded <strong>Sounds</strong><br />
New Recording<br />
Message or sound effects<br />
Interactive activity<br />
Interactive activity<br />
Interactive activity<br />
Beginning the <strong>Tutorial</strong><br />
1. If it is not open, launch IntelliPics Studio. When<br />
the program launches, the Home page is<br />
displayed.<br />
2. From the Home page, click the Paint and Design<br />
button.<br />
3. Click the Basic Design button. An untitled<br />
document displays.<br />
4. (Optional) Choose the program’s voice for<br />
synthesized speech:<br />
An untitled Basic Design document<br />
a. From the Speech menu, select Change Voice.<br />
b. In the Change Voice dialog box, select the<br />
program’s voice and the speed at which<br />
words are spoken. Click Test to hear an<br />
example of the test sentence.<br />
c. Click OK.<br />
You can also change the way words are<br />
pronounced by selecting Edit Pronunciation from<br />
the Speech menu.<br />
Change Voice dialog box<br />
2<br />
IntelliPics Studio <strong>Tutorial</strong>
Part 1: Adding Sound to a Text Box<br />
Creating a Read-Aloud Text Box<br />
It is often useful to hear the contents of a text box<br />
read aloud. For instance, a text box might contain<br />
important instructions for students or questions about<br />
an activity. An IntelliPics Studio text box can be set to<br />
respond to a student’s mouse click by reading the text<br />
within it.<br />
1. Select Text Tool from the Design menu or click<br />
the Text tool (on the left side of the palette above<br />
the page). A check mark next to this menu option<br />
indicates this tool is active.<br />
When this menu option is active, the cursor<br />
becomes a text insertion point when it is within<br />
the page.<br />
2. With the cursor on the page, drag your mouse<br />
horizontally to set the width of the text box. The<br />
text box is marked by a solid border. Release the<br />
mouse button when you are satisfied with the<br />
initial width of the text box. A resizing frame<br />
appears. A flashing cursor displays in the text box<br />
for text entry.<br />
3. Type: Click this box to hear the text read<br />
aloud (non-bold). The text box expands<br />
downward to accommodate your entry.<br />
4. Press [Ctrl] and click directly on the text box. A<br />
Properties of Text Box dialog box displays.<br />
5. Click the Text Settings tab. This portion of the<br />
dialog box can be used to modify the appearance<br />
of the text and of the text box.<br />
6. Check these options so a check mark appears in<br />
the check box:<br />
• Read-Only Text<br />
• Lock<br />
• Respond to Mouse Clicks<br />
7. Click OK to close this dialog box.<br />
8. Click the Select tool (on the left side of the palette<br />
above the page) to deactivate the Text tool.<br />
9. Click the text box to hear the contents read aloud.<br />
10. (Optional) Change the program’s voice and/or<br />
pronunciation by selecting different Speech menu<br />
options (see previous page).<br />
11. Save your work and, if you are continuing with<br />
this tutorial, click Next Page to explore another<br />
sound feature.<br />
Next Page<br />
Text Tool<br />
<strong>Using</strong> <strong>Sounds</strong> 3
Part 2: Adding Sound to a Page<br />
Adding Synthesized Speech to a<br />
Page<br />
It can be useful for a user to hear a message each time<br />
a page is displayed. For the purposes of this tutorial,<br />
you will create a message using the IntelliPics Studio<br />
synthesized speech feature. (Note: It is also possible<br />
to record a spoken message using a microphone.)<br />
1. Select Page Properties from the Pages menu or<br />
press [Ctrl] while clicking the page’s<br />
background. The Page Properties dialog box<br />
displays.<br />
2. Click the Page <strong>Sounds</strong> tab to display the Page<br />
<strong>Sounds</strong> section of the Page Properties dialog box.<br />
Notice that the Page <strong>Sounds</strong> section includes:<br />
• Play button – click to hear selected sound or text<br />
read aloud.<br />
• Synthesized Speech radio button – click to use<br />
synthesized speech feature.<br />
• Synthesized Speech text box – enter text to be<br />
read aloud.<br />
(Note: There are other options available that are<br />
not relevant for this procedure.)<br />
3. Select the Synthesized Speech option.<br />
4. Type the desired message into the text entry box.<br />
Type the sentence: You hear synthesized<br />
speech when this page displays (non-bold)<br />
5. Click Play. The words you typed will be read<br />
aloud according to the voice and pronunciation<br />
options that are selected in the Speech menu.<br />
6. Click OK to close this dialog box.<br />
7. To hear a page sound, this page (page #2) must<br />
be reactivated, as page sounds play when the<br />
page is first displayed. Click Next Page and then<br />
Previous Page to return to Page #2. The text<br />
message you entered is read aloud.<br />
8. Save your work and, if you are continuing with<br />
this tutorial, click Next Page to explore another<br />
sound feature.<br />
4<br />
IntelliPics Studio <strong>Tutorial</strong>
Part 2: Adding Sound to a Page<br />
Adding Recorded Sound to a Page<br />
1. Click the Sky palette item (the bottom item on the<br />
palette to the right of the page) to add a<br />
background picture to Page #3.<br />
2. Select Page Properties from the Pages menu or<br />
press [Ctrl] while clicking the page’s<br />
background. The Page Properties dialog box<br />
displays.<br />
3. Click the Page <strong>Sounds</strong> tab to display the Page<br />
<strong>Sounds</strong> section of the Page Properties dialog box.<br />
Notice that this section includes:<br />
• Recorded Sound radio button – click to use<br />
recorded sound feature.<br />
• Recorded Sound list box – displays the names of<br />
all recorded sounds in the current document.<br />
• Import button – click to open a navigation dialog<br />
box so you can select a sound file stored on your<br />
computer, on a CD, or elsewhere. You can import<br />
WAV, .AIF, MP3, and .SND sound file formats.<br />
(Note: There are other options available that are<br />
not relevant for this procedure.)<br />
4. Select the Recorded Sound option.*<br />
5. Click Import. A navigation dialog box displays.<br />
6. Navigate to a sound file stored on your computer<br />
and select it. For this tutorial, navigate to the<br />
IntelliPics Studio program folder on your hard<br />
drive, open the <strong>Tutorial</strong> Files sub-folder, open the<br />
<strong>Sounds</strong> sub-folder, and select swamp.wav.<br />
7. Click Open. The navigation dialog box closes and<br />
the selected sound is added to the Recorded<br />
Sound list box.<br />
8. Select the sound in the list box (e.g., swamp) that<br />
you want to hear when Page #3 displays.<br />
9. Click Play. The selected sound previews.<br />
10. Click OK to close this dialog box.<br />
11. Click Next Page and then Previous Page to return<br />
to Page #3. The swamp sound plays.<br />
12. Save your work and click Next Page to explore<br />
another sound feature.<br />
* To record your own voice or a sound effect using<br />
a microphone, refer to the procedures for<br />
recording a new sound file on page 8 (steps 5–8)<br />
and page 12 (steps 4–9) of this tutorial.<br />
<strong>Using</strong> <strong>Sounds</strong> 5
Part 3: Adding Sound to a Picture<br />
Adding Synthesized Speech to a<br />
Picture<br />
Once a picture item has been inserted on the page,<br />
you can add a sound to it. This sound will play when<br />
the user clicks the picture. The sound can be<br />
synthesized speech.<br />
1. Click the Backyard palette item (the top item on<br />
the palette to the right of the page) to add a<br />
background picture to Page #4. Notice that when<br />
the background picture displays, a palette of<br />
related items also appears below the page.<br />
2. Click the boy 1 palette item (below the page) to<br />
insert a picture of a boy on the page. Position the<br />
picture on the left side of the page.<br />
3. Insert three other kid characters and position<br />
them in a group on the right side of the page.<br />
4. Press [Ctrl] and click the boy 1 picture you’ve<br />
placed on the page. The Properties of Picture<br />
dialog box displays.<br />
5. Click Edit Item.<br />
6. Click the Sound icon.<br />
7. Select the Synthesized Speech option.<br />
8. Type text into the text entry box. Enter the<br />
sentence: Use synthesized speech to add a<br />
message to a picture (non-bold).<br />
9. Click Play. The words you typed will be read<br />
aloud according to the voice and pronunciation<br />
options that are selected in the Speech menu.<br />
Notice that all recorded sound files that you<br />
previously added to this document (i.e., swamp)<br />
are listed in the Recorded Sound list box.<br />
10. Click OK to close the Edit Item dialog box.<br />
11. Check that the Respond to Mouse Clicks option<br />
in the Properties dialog box is selected<br />
(checked).<br />
12. Click OK to close this dialog box.<br />
13. Click the boy 1 picture to hear the message play.<br />
6<br />
IntelliPics Studio <strong>Tutorial</strong>
Part 3: Adding Sound to a Picture<br />
Adding Recorded Sound to a Picture<br />
1. Press [Ctrl] and click a picture of a child that you<br />
previously inserted and grouped on the right side<br />
of the page. The Properties of Picture dialog box<br />
associated with the selected picture displays.<br />
2. Click Edit Item. The Edit Item dialog box shows.<br />
3. Click the Sound icon (on the left side of the box).<br />
4. Select the Recorded Sound option.<br />
Importing a Sound File From Your<br />
Computer<br />
1. Click Import. A navigation dialog box displays.<br />
2. Navigate to a sound file stored on your computer<br />
and select it. For this tutorial, navigate to the<br />
IntelliPics Studio program folder on your hard<br />
drive, open the <strong>Tutorial</strong> Files sub-folder, open the<br />
<strong>Sounds</strong> sub-folder, and select kids_laugh.wav.<br />
3. Click Open. The navigation dialog box closes and<br />
the selected sound is added to the Recorded<br />
Sound list box.<br />
4. Select the sound in the list box (e.g.,kids_laugh)<br />
that you want to hear when the picture is clicked.<br />
5. Click Play. The selected sound previews.<br />
6. Click OK to close the Edit Item dialog box.<br />
7. Check that the Respond to Mouse Clicks option<br />
in the Properties dialog box is selected<br />
(checked).<br />
8. Click OK to close this dialog box.<br />
9. Click the picture you just added a sound to to<br />
hear the sound play.<br />
<strong>Using</strong> <strong>Sounds</strong> 7
Part 3: Adding Sound to a Picture<br />
Recording a New Sound File<br />
You can record a new sound for an inserted picture<br />
item using a microphone. Connect a microphone to<br />
your computer if one isn’t built in. Consult your<br />
computer’s operations manual for specific<br />
instructions, if needed.<br />
1. Press [Ctrl] and click a picture of a second child<br />
that you previously inserted and grouped on the<br />
right side of the page. The Properties of Picture<br />
dialog box associated with the selected picture<br />
displays.<br />
2. Click Edit Item. The Edit Item dialog box shows.<br />
3. Click the Sound icon (on the left side of the box).<br />
It highlights and the Sound portion of the Edit<br />
Item dialog box displays.<br />
4. Select the Recorded Sound option.<br />
5. Click Record. The Record Sound dialog box<br />
displays.<br />
6. Enter a name in the Save As text box if you want<br />
to change the default name. The default name is<br />
the same as the item name.<br />
7. Click Record. Record your voice using the<br />
microphone. Say “I recorded this myself.” Click<br />
Stop.<br />
8. Click Play to hear what you have just recorded. If<br />
you are not satisfied with your recording, repeat<br />
step 7. If you are satisfied, click OK. The Record<br />
dialog box closes and the name of your recording<br />
is listed in the Recorded Sound list box.<br />
9. Select the newly recorded sound to associate it<br />
with the picture item.<br />
10. Check that the Respond to Mouse Clicks option<br />
in the Properties dialog box is selected<br />
(checked).<br />
11. Click OK to close this dialog box.<br />
12. Click the picture you just added a sound to to<br />
hear the sound play.<br />
8<br />
IntelliPics Studio <strong>Tutorial</strong>
Part 3: Adding Sound to a Picture<br />
Adding a Sound to an Inserted Item<br />
You can also add a sound to a palette item when it<br />
inserts a picture on a page using the item’s Actions<br />
properties. The sound might identify the item to the<br />
user, provide a message to the user, or be a sound<br />
effect. After clicking the palette item, the user will<br />
hear the sound as the picture is inserted on the page.<br />
Note: The following procedures can also be used to<br />
add a sound to a palette item that does not insert a<br />
picture on the page.<br />
1. Press [Ctrl] and click a palette item (e.g., the<br />
football item located in the palette that is<br />
displayed below the page). The Edit Item dialog<br />
box displays.<br />
2. Click the Actions icon to display the Actions<br />
dialog box.<br />
3. Select Speech from the list of Action categories<br />
(on the left side of the Available Actions section of<br />
the dialog box).<br />
4. Select Speak Text from the list of Speech actions<br />
(on the right side of the Available Actions section<br />
of the dialog box).<br />
5. Click Add Speak Text to add this action to the<br />
item you are working with. A Speak Text dialog<br />
box displays.<br />
6. Enter the desired message (e.g., Play Ball) in the<br />
Speak Text text box.<br />
7. Click OK to close the Speak Text text box.<br />
8. A palette item’s actions occur in the order in<br />
which they are listed in the Item Actions list box.<br />
Note that the football item has five Make Smaller<br />
actions listed—this is because the picture needs<br />
to be resized to a smaller image when it inserts<br />
on the page. Use the Up and Down buttons to<br />
move this sound action to the end of the Item<br />
Actions list.<br />
9. Click OK twice to close all open dialog boxes.<br />
10. Now click the football palette item. The message<br />
plays as the item is inserted on the page.<br />
11. Save your work and click Next Page to explore<br />
another sound feature.<br />
<strong>Using</strong> <strong>Sounds</strong> 9
Part 4: Adding Sound to a Button<br />
Adding Recorded Sound to a Button<br />
1. Navigate to the next page or any page where you<br />
want to insert a button.<br />
2. Select Button Tool from the Design menu (or<br />
click the Button Tool if it is displayed).<br />
3. Place your cursor on the page where you want a<br />
corner of the button to be and drag your cursor in<br />
any direction to define the borders of the button.<br />
A rectangular button appears on the page. Release<br />
the cursor when the button is the desired size and<br />
shape. A resizing frame surrounds the button.<br />
At the same time the resizing frame appears, a<br />
Properties of Button dialog box that is associated<br />
with the new button also appears on the page. Use<br />
this dialog box to set button properties.<br />
4. Name the button WOW.<br />
5. Click the Sound tab to display the Sound section<br />
of the Properties of Button “WOW” dialog box.<br />
Notice that the Sound section of the Properties of<br />
Button dialog box includes:<br />
• None radio button – click for no button sound.<br />
• Play button – click to hear selected sound or text<br />
read aloud.<br />
• Synthesized Speech radio button – click to use<br />
synthesized speech feature.<br />
• Synthesized Speech text box – enter text to be<br />
read aloud.<br />
• Recorded Sound radio button – click to use<br />
recorded sound feature.<br />
• Recorded Sound list box – displays names of<br />
sounds in current document.<br />
• Record button – click to open Record Sound<br />
dialog box.<br />
• Import button – click to open a navigation dialog<br />
box so you can select a sound file stored<br />
elsewhere. You can import WAV, .AIF, MP3, and<br />
.SND sound file formats.<br />
• Rename button – click to open the Rename Sound<br />
dialog box.<br />
• Delete button – click to remove selected listing<br />
6. Select the Recorded Sound option.<br />
10<br />
IntelliPics Studio <strong>Tutorial</strong>
Part 4: Adding Sound to a Button<br />
Importing a Sound File from Your Computer<br />
1. Click Import. A navigation dialog box displays.<br />
2. Navigate to a sound file stored on your computer<br />
and select it. You can import WAV, .AIF, MP3, and<br />
.SND sound file formats.<br />
For this tutorial, navigate to the IntelliPics Studio<br />
program folder on your main hard drive<br />
(Windows: usually named the C drive, Macintosh:<br />
usually named Macintosh HD), open the <strong>Tutorial</strong><br />
Files sub-folder, open the <strong>Sounds</strong> sub-folder, and<br />
select kids_wow.wav.<br />
A navigation dialog box (Macintosh)<br />
3. Click Open. The navigation dialog box closes and<br />
the selected sound is added to the Recorded<br />
Sound list box.<br />
4. Select a sound in the list box that you want to<br />
hear when the WOW button is clicked. The<br />
selection is highlighted. Choose kids_wow.<br />
5. Click Play. The selected sound previews.<br />
6. Click the Actions tab. Note that the button action<br />
for the WOW button is Play Sound.... Play Sound<br />
is the program’s default button action. If this<br />
action is not listed in the Button Action list box,<br />
you will need to add it so the sound plays.<br />
7. Check the Lock option and the Respond to Mouse<br />
Clicks option in the Properties dialog box.<br />
8. Click OK to close this dialog box.<br />
Importing a Sound File from a CD<br />
1. Create a new button and name it Drum.<br />
2. Click the Sound tab to display the Sound section<br />
of the Properties of Button dialog box.<br />
3. Select the Recorded Sound option.<br />
4. Click Import. A navigation dialog box displays.<br />
5. Insert a CD that contains sound files. You can<br />
import WAV, .AIF, MP3, and .SND sound file<br />
formats.<br />
For this tutorial, insert the IntelliPics Studio CD,<br />
as it includes hundreds of useful sound files.<br />
6. Open the CD and navigate to the <strong>Sounds</strong> folder.<br />
Open the Musical Instruments sub-folder and<br />
select drum.wav.<br />
A navigation dialog box (Macintosh)<br />
<strong>Using</strong> <strong>Sounds</strong> 11
Part 4: Adding Sound to a Button<br />
7. Click Open. The navigation dialog box closes and<br />
the selected sound is added to the Recorded<br />
Sound list box.<br />
8. Select a sound in the list box that you want to<br />
hear when the Drum button is clicked. The<br />
selection is highlighted. Choose drum.wav.<br />
9. Click Play. The selected sound previews.<br />
10. Click the Actions tab. Note that the default button<br />
action for the Drum button is Play Sound. If this<br />
action is not listed in the Button Action list box,<br />
you will need to add it so the button sound plays.<br />
11. Check the Lock option and the Respond to Mouse<br />
Clicks option in the Properties dialog box.<br />
12. Click OK to close this dialog box.<br />
Recording a New Sound File<br />
You need a microphone to record sounds.<br />
1. Create a new button and name it My Voice.<br />
2. Click the Sound tab to display the Sound section<br />
of the Properties of Button dialog box.<br />
3. Select the Recorded Sound option.<br />
4. Connect a microphone to your computer if one<br />
isn’t built in. Consult your computer’s operations<br />
manual for specific instructions, if needed.<br />
5. Click Record. The Record Sound dialog box<br />
displays.<br />
6. Name your recording by entering a name in the<br />
Save As text box.<br />
7. Click Record. Record your voice using the<br />
microphone. Say “This is my voice.” Click Stop.<br />
8. Click Play to hear what you have just recorded. If<br />
you are not satisfied with your recording, repeat<br />
step 7.<br />
9. Click OK. The Record dialog box closes and the<br />
name of your recording is listed in the Recorded<br />
Sound list box.<br />
10. Select the newly recorded sound to associate it<br />
with the My Voice button.<br />
11. Click the Actions tab. Note that the default button<br />
action for the My Voice button is Play Sound. If<br />
this action is not listed in the Button Action list<br />
box, you will need to add it so the button sound<br />
will play.<br />
12<br />
IntelliPics Studio <strong>Tutorial</strong>
Part 4: Adding Sound to a Button<br />
12. Check the Lock option and the Respond to Mouse<br />
Clicks option in the Properties dialog box.<br />
13. Click OK to close this dialog box.<br />
Adding Synthesized Speech to a<br />
Button<br />
1. Create a new button and name it Hear Words.<br />
2. Click the Sound tab to display the Sound section<br />
of the Properties of Button dialog box.<br />
3. Select the Synthesized Speech option.<br />
4. Type text into the text entry box. Enter the<br />
sentence: Click this button to hear some<br />
words (non-bold).<br />
5. Click Play. The words you typed will be read<br />
aloud according to the voice and pronunciation<br />
options that are selected in the Speech menu.<br />
6. Check the Lock option and the Respond to Mouse<br />
Clicks option in the Properties dialog box.<br />
7. Click OK to close this dialog box.<br />
Upper portion of dialog box<br />
Playing Button <strong>Sounds</strong><br />
With the page containing the four newly created<br />
buttons displayed:<br />
1. Click the Wow button. Click it again.<br />
2. Click the Drum button. Click it again.<br />
3. Click the Hear Words button. Click it again.<br />
4. Click the My Voice button. Click it again.<br />
You should hear a sound each time you click a button.<br />
If not:<br />
1. Press [Ctrl] and click the button to display the<br />
Properties of Button dialog box.<br />
2. Notice the button sounds and the button actions<br />
listed. Repeat the appropriate steps in this tutorial,<br />
if needed. Consult the IntelliPics Studio User’s<br />
Guide for additional information.<br />
<strong>Using</strong> <strong>Sounds</strong><br />
13
Part 5: Adding Two <strong>Sounds</strong> to a Page<br />
In some instances, it is useful to have two sounds on a<br />
page. For instance, you might want a student to hear a<br />
message read aloud (that you recorded or text you<br />
entered into synthesized speech) followed by a sound<br />
effect or another message.<br />
Adding One Page Sound<br />
If you have followed the procedures listed on page 4<br />
of this tutorial, Adding Synthesized Speech to a Page,<br />
you have already added one sound to Page #2 of the<br />
current document. (If you have not, display a new<br />
page in the current document and follow steps 1–7 on<br />
page 4.)<br />
1. Navigate to Page #2 in the current document (or<br />
to a new page that you have already added a<br />
sound to using the options available in the Sound<br />
portion of the Page Properties dialog box).<br />
Notice that when the page displays, the sound<br />
you added—synthesized speech, a recording, or a<br />
imported sound file—plays automatically. This is<br />
because the page has a default page action<br />
assigned to it. The page action, Play IntelliMation,<br />
plays any existing page sounds and page<br />
animations each time that page displays.<br />
Adding a Second Page Sound<br />
2. By assigning another page action to Page #2, you<br />
can have a second page sound play after the first<br />
page sound plays. The page action you need to<br />
add is Select Item. This will direct the program to<br />
find a certain palette item in the document. If the<br />
designated palette item has been designed to play<br />
a sound when selected, that action will occur.<br />
Before adding the Select Item page action to Page<br />
#2, you will need to create a new palette item:<br />
Create a New Palette Item<br />
a. Create a palette and name it Sound Only:<br />
(From the Create menu, select Edit Palettes.<br />
The Palettes dialog box displays. Click the<br />
New Palette button. Name the palette and<br />
click OK. The Edit Palette Contents dialog<br />
box displays. Click the New Item button.)<br />
b. The Edit Item dialog box displays. Name the<br />
new item: Second Sound. This will be the<br />
palette item the program will go to when it<br />
follows the Select Item page action.<br />
14<br />
IntelliPics Studio <strong>Tutorial</strong>
Part 5: Adding Two <strong>Sounds</strong> to a Page<br />
c. <strong>Using</strong> the Actions portion of the Edit Items<br />
dialog box, delete the default action, Insert<br />
Item and add the action Play Sound. (See the<br />
illustration on the bottom of the previous<br />
page.)<br />
d. <strong>Using</strong> the <strong>Sounds</strong> portion of the Edit Items<br />
dialog box, add a synthesized speech<br />
message (using steps 3–6 listed on page 4),<br />
record your own voice (using steps 3–7 on<br />
page 12), or import a sound file to use as a<br />
sound effect (using pertinent steps on page<br />
11). Close all open dialog boxes.<br />
Hide the Sound Only Palette<br />
e. From the Create menu, select Layout<br />
Palettes. The Layout Palettes dialog box<br />
displays.<br />
f. Select the Sound Only palette. Check the<br />
Hide palette check box. Click OK.<br />
This step hides the palette containing the<br />
Second Sound item from view, as it is not<br />
necessary to have this palette item available<br />
for students to click—this item is being used<br />
only to “store” a sound.<br />
Add the Select Item Page Action<br />
g. Select Page Properties from the Pages menu.<br />
The Page Properties dialog box for Page #2<br />
displays.<br />
h. Click the Page Actions tab. The Page Actions<br />
portion of the Page Properties dialog box<br />
displays.<br />
i. From the list of available page actions, select<br />
Items and then Select Item.<br />
j. Click the Add: Select Item button. A Select<br />
Item dialog box appears.<br />
<strong>Using</strong> <strong>Sounds</strong> 15
Part 5: Adding Two <strong>Sounds</strong> to a Page<br />
Designate Which Item to Select<br />
k. Enter the name of the newly created item,<br />
Second Sound. This will be the palette item<br />
the program will go to and select as the page<br />
performs page actions. Click OK.<br />
l. Notice that the Page Actions assigned to Page<br />
#2 are: Play IntelliMation (pre-existing) and<br />
Select Item (newly added).<br />
These Page Actions occur sequentially. (The<br />
order can be modified using the Up and<br />
Down buttons, if desired). Click OK.<br />
Playing Two Page <strong>Sounds</strong><br />
3. To hear multiple page sounds, this page (Page #2)<br />
must be reactivated, as page sounds play when<br />
the page is first displayed. Click Next Page and<br />
then Previous Page to return to Page #2. The text<br />
message you previously entered is read aloud.<br />
Then the Second Sound item will play.<br />
Congratulations<br />
Congratulations! You have explored some of the<br />
sound features of IntelliPics Studio.<br />
The Teacher’s Guide that comes with IntelliPics<br />
Studio contains 17 lesson plans to help you use the<br />
Sample Activities and Activity Templates in the<br />
context of your curriculum. The User’s Guide<br />
provides more detailed instructions about the many<br />
tools and features of the program.<br />
Be sure to check the IntelliTools Web site,<br />
www.intellitools.com, for more ideas and activities<br />
related to using IntelliPics Studio.<br />
16<br />
IntelliPics Studio <strong>Tutorial</strong>