Role-Based Security User Checklist - OfficeMate Software Solutions
Role-Based Security User Checklist - OfficeMate Software Solutions
Role-Based Security User Checklist - OfficeMate Software Solutions

Create successful ePaper yourself
Turn your PDF publications into a flip-book with our unique Google optimized e-Paper software.
<strong>Role</strong>-<strong>Based</strong> <strong>Security</strong> <strong>User</strong> <strong>Checklist</strong><br />
<strong>Security</strong> is an important component in safeguarding patient data and complying with HIPAA rules and regulations.<br />
<strong>OfficeMate</strong> requires that you set up security so that each user must log in to view or maintain patient information. <strong>OfficeMate</strong><br />
leverages a role-based security system, which allows you to control how loosely or how tightly security is implemented in<br />
your practice.<br />
Use the checklist below as helpful reminder tool for staff members in your practice to help you successfully setup up<br />
role-based security.<br />
For more detailed information on how to set up role-based security, see the <strong>OfficeMate</strong> Home Office <strong>User</strong>’s Guide, view the<br />
Home Office recorded video tutorials, and schedule additional training in the New-01 course with OMU.<br />
In this document:<br />
• <strong>Role</strong>s, 1<br />
• <strong>User</strong>s, 2<br />
• Preferences, 3<br />
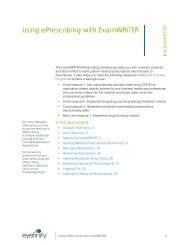
<strong>Role</strong>s<br />
A role is a job or a function within your practice. For example, front desk is a function within your practice that generally<br />
requires entering patient demographic data, scheduling appointments, receiving copayments, etc. You can easily think of<br />
a list of tasks within your own practice that the front desk role would need to perform as well as those of biller, office<br />
manager, and optician. <strong>OfficeMate</strong> allows you to establish which sections of the software each role can access.<br />
®<br />
<strong>Role</strong>-<strong>Based</strong> <strong>Security</strong> <strong>User</strong> <strong>Checklist</strong> 1
<strong>Role</strong>-<strong>Based</strong> <strong>Security</strong> <strong>User</strong> <strong>Checklist</strong><br />
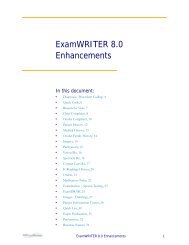
<strong>User</strong>s<br />
It is not uncommon for one person in your practice to fill multiple roles. For example, a single person in your practice may<br />
work in the capacity of front desk, biller, and optician. <strong>OfficeMate</strong> allows you to assign multiple roles to each individual in<br />
your practice, thereby enabling users to access the various portions of the software that they need to perform their various<br />
job functions. <strong>OfficeMate</strong> makes setting up roles easy by including several sample roles that you can customize to your<br />
practice’s needs.<br />
Completed<br />
Task<br />
<strong>OfficeMate</strong> comes preloaded with example roles. Eyefinity highly recommends that you modify or copy these roles<br />
according to the needs of your practice. You are not required to use the sample roles, but rather they are there to help<br />
you get started with role-based security.<br />
If you need to create new roles, either edit existing roles or create new ones. To edit existing roles, copy the existing role<br />
that most closely suits the staff member’s needs and either add more security tasks to or remove security tasks from the<br />
role as necessary.<br />
<strong>User</strong>s<br />
Completed<br />
You can assign as many roles as desired to users.<br />
Task<br />
All users are initially assigned to a default administrator role, which allows them access to all products, modules, and<br />
tasks in all locations, until you modify their role assignments. Modify role assignments as soon as possible for optimal<br />
security! If your practice is not concerned with security, you do not need to modify role assignments, although Eyefinity<br />
does not recommend this course of action.<br />
If your practice requires minimal security, assign all users to Administration <strong>Role</strong>. The Administration <strong>Role</strong> requires users<br />
to log in with a username and password and allows them to access all areas of the software.<br />
2 <strong>Role</strong>-<strong>Based</strong> <strong>Security</strong> <strong>User</strong> <strong>Checklist</strong>
<strong>Role</strong>-<strong>Based</strong> <strong>Security</strong> <strong>User</strong> <strong>Checklist</strong><br />
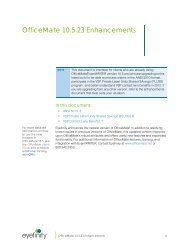
Preferences<br />
Preferences<br />
Completed<br />
<strong>Security</strong> preferences allow you to control, globally or by location, the amount of time a user may be inactive before being<br />
logged out of the software and establish which reports are secure.<br />
Task<br />
Set up the number of minutes the <strong>OfficeMate</strong> Suite can be idle before requiring the user to log back in. You can set up<br />
session inactivity by location.<br />
Click the Secure Reports button and select the check box in the Secure column next to each report that you want to<br />
restrict access.Selected reports can only be accessed by users who are assigned roles with the Secured Report task.<br />
Any reports not selected can be accessed by any user.<br />
<strong>Role</strong>-<strong>Based</strong> <strong>Security</strong> <strong>User</strong> <strong>Checklist</strong> 3