ExamWRITER 8.0 Enhancements - OfficeMate Software Solutions
ExamWRITER 8.0 Enhancements - OfficeMate Software Solutions
ExamWRITER 8.0 Enhancements - OfficeMate Software Solutions
Create successful ePaper yourself
Turn your PDF publications into a flip-book with our unique Google optimized e-Paper software.
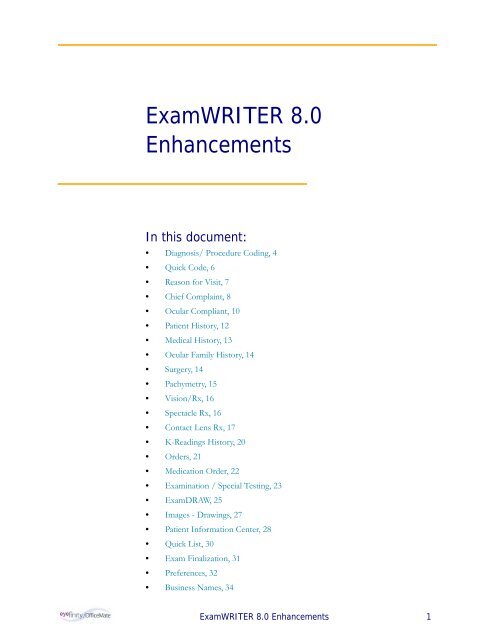
<strong>ExamWRITER</strong> <strong>8.0</strong><br />
<strong>Enhancements</strong><br />
In this document:<br />
• Diagnosis/ Procedure Coding, 4<br />
• Quick Code, 6<br />
• Reason for Visit, 7<br />
• Chief Complaint, 8<br />
• Ocular Compliant, 10<br />
• Patient History, 12<br />
• Medical History, 13<br />
• Ocular Family History, 14<br />
• Surgery, 14<br />
• Pachymetry, 15<br />
• Vision/Rx, 16<br />
• Spectacle Rx, 16<br />
• Contact Lens Rx, 17<br />
• K-Readings History, 20<br />
• Orders, 21<br />
• Medication Order, 22<br />
• Examination / Special Testing, 23<br />
• ExamDRAW, 25<br />
• Images - Drawings, 27<br />
• Patient Information Center, 28<br />
• Quick List, 30<br />
• Exam Finalization, 31<br />
• Preferences, 32<br />
• Business Names, 34<br />
<strong>ExamWRITER</strong> <strong>8.0</strong> <strong>Enhancements</strong> 1
<strong>ExamWRITER</strong> <strong>8.0</strong> <strong>Enhancements</strong><br />
• Medications Maintenance, 35<br />
• Patient Systemic Medications, 35<br />
• Templates, 36<br />
• Auto Letter, 37<br />
• Function Keys, 37<br />
• ePrescribing, 37<br />
• Equipment Interfaces, 37<br />
• Other, 38<br />
<strong>OfficeMate</strong> <strong>Software</strong> <strong>Solutions</strong> announces the newest version of <strong>ExamWRITER</strong>! In<br />
addition to resolving several known issues in previous versions of <strong>ExamWRITER</strong>,<br />
this updated version improves upon <strong>ExamWRITER</strong>’s current robust attributes and<br />
offers useful new features and expanded functionality. For additional information on<br />
<strong>ExamWRITER</strong> features, training, and integration with <strong>OfficeMate</strong>, contact<br />
<strong>OfficeMate</strong> <strong>Software</strong> <strong>Solutions</strong> at www.officemate.net or 800.942.5353.<br />
<strong>ExamWRITER</strong> <strong>8.0</strong> <strong>Enhancements</strong> 2
<strong>ExamWRITER</strong> <strong>8.0</strong> <strong>Enhancements</strong><br />
Notes<br />
• If you are upgrading to <strong>ExamWRITER</strong> <strong>8.0</strong>, the templates that you<br />
previously created will need to be reprocessed due to changes that<br />
were made to the Quick Code functionality. Also, the information<br />
already recorded in exams that you copy forward to <strong>ExamWRITER</strong><br />
<strong>8.0</strong> will need to be reprocessed. After you upgrade to <strong>ExamWRITER</strong><br />
<strong>8.0</strong> you must open the exams that you copy forward and the templates<br />
that you created using previous <strong>ExamWRITER</strong> versions and reselect<br />
and reprocess all of the information in those exams. For more<br />
information on creating templates and recording information in<br />
exams, see the <strong>ExamWRITER</strong> Getting Started Guide.<br />
• For the new auto code feature to work properly with unilateral<br />
procedure codes (92226, 92135, 76519, 92225, and 92235), you must<br />
ensure that separate unilateral procedure codes for each eye are set up<br />
in the Customization window (Procedure Codes tab) in <strong>OfficeMate</strong><br />
or <strong>ExamWRITER</strong> (for example, 92226 RT and 92226 LT) prior to<br />
coding exams. Then, you must open the services in the Products<br />
window and select the appropriate right or left eye modifier for the<br />
procedure code.<br />
• <strong>ExamWRITER</strong> <strong>8.0</strong> requires the following system specifications:<br />
− Windows ® Vista SP1 or higher, Windows ® XP Professional,<br />
Windows ® 2000 Professional for workstations<br />
− 1024 x 768 monitor and video adapter screen resolution<br />
For a complete list of system specifications, go to<br />
http://www.officemate.net/PDFs/System Specifications.pdf.<br />
• If you are upgrading from <strong>ExamWRITER</strong> 5.x to <strong>8.0</strong>, ensure that you<br />
have read the <strong>ExamWRITER</strong> 5.1, 6.4, and 7.1–7.4 Enhancement<br />
documents located at<br />
www.officemate.net/support_ex_resources.aspx. In order for you to<br />
understand and use all of the new features that were implemented in<br />
each <strong>ExamWRITER</strong> version, you must read each version’s<br />
enhancement list.<br />
<strong>ExamWRITER</strong> <strong>8.0</strong> <strong>Enhancements</strong> 3
<strong>ExamWRITER</strong> <strong>8.0</strong> <strong>Enhancements</strong><br />
Diagnosis/ Procedure Coding<br />
Diagnosis/<br />
Procedure<br />
Coding<br />
The new Auto<br />
Code feature<br />
means that you no<br />
longer have to<br />
remember coding<br />
rules and you can<br />
focus more on<br />
patient care.<br />
The improved Diagnosis/Procedure Coding window contains the following new<br />
features:<br />
• Ability to select and add modifiers to procedure codes.<br />
• Ability to view only the PQRI procedure codes by selecting the PQRI radio<br />
button.<br />
• Ability to automatically populate procedure codes in the Selected Procedures<br />
table. Based on your exam selections, <strong>ExamWRITER</strong> will automatically<br />
populate the Selected Procedures table. If the procedure codes are cleared, click<br />
Auto Code to repopulate the Selected Procedures table.<br />
Notes<br />
• Only the first 20 procedure codes selected in a new exam and<br />
listed in the Patient Open Charges window will transfer to a<br />
patient’s fee slip. If you do not want to post these charges, select<br />
them and click Close out.<br />
• For the auto code feature to work properly with unilateral<br />
procedure codes (92226, 92135, 76519, 92225, and 92235), you<br />
must ensure that separate unilateral procedure codes for each<br />
eye are set up in the Customization window (Procedure Codes<br />
tab) in <strong>OfficeMate</strong> or <strong>ExamWRITER</strong> (for example, 92226 RT<br />
and 92226 LT) prior to coding exams. Then, you must open the<br />
services in the Products window and select the appropriate right<br />
or left eye modifier for the procedure code.<br />
• For the new auto code feature to work properly with surgical<br />
procedure codes (67850, 68200, 68810, 67515, and 65860), you<br />
must ensure that the procedure codes are set up in the<br />
Customization window (Procedure Codes tab) and Products<br />
window in <strong>OfficeMate</strong> or <strong>ExamWRITER</strong> prior to coding<br />
exams.<br />
• If you select a 992xx procedure code and click Save/Exit, the<br />
E & M Quick Code Check window automatically opens so that<br />
you can reference quick code information. For information on<br />
the E & M Quick Code Check window, go to Quick Code on<br />
page 6.<br />
<strong>ExamWRITER</strong> <strong>8.0</strong> <strong>Enhancements</strong> 4
<strong>ExamWRITER</strong> <strong>8.0</strong> <strong>Enhancements</strong><br />
Diagnosis/ Procedure Coding<br />
• Ability to click the Quick Code button and open the E & M Quick Code Check<br />
window and reference quick code information. For information on the E & M<br />
Quick Code Check window, go to Quick Code on page 6.<br />
<strong>ExamWRITER</strong> <strong>8.0</strong> <strong>Enhancements</strong> 5
<strong>ExamWRITER</strong> <strong>8.0</strong> <strong>Enhancements</strong><br />
Quick Code<br />
Quick Code<br />
The improved E&M Quick Code Check window contains the following new features:<br />
• Ability to accurately and automatically determine the level of medical code<br />
documentation (based on the Evaluation and Management Services Guide by the<br />
Centers for Medicare & Medicaid Services (CMS)) needed for billing purposes<br />
on new exams. The check box selections that you record in a patient’s exam<br />
record that relate to 99xxx procedure codes are tallied and recorded in the<br />
Documented Elements row on the E&M Quick Code Check window.<br />
Now that you are<br />
able to increment<br />
and decrement<br />
coding levels in<br />
real time, you will<br />
be able to<br />
accurately select<br />
procedure codes<br />
for your exams. • Ability to quickly visually note what elements you have documented, what<br />
elements you have not documented, what E&M code you have already selected<br />
in the Diagnosis/Procedure Coding window (if applicable), and what alternate<br />
E&M code you can bill based on the elements that you have already documented<br />
(if applicable). The following color-coding is used in the E&M Quick Code<br />
Check window:<br />
−<br />
−<br />
−<br />
Note<br />
Due to the extensive changes that were made to the Quick Code<br />
functionality, the E&M Quick Code Check window will not<br />
accurately determine the level of medical code documentation for<br />
exams copied forward from <strong>ExamWRITER</strong> 7.4 and below to<br />
<strong>ExamWRITER</strong> <strong>8.0</strong> unless you open the exams that you copied<br />
forward and reselect and reprocess all of the information in those<br />
exams.<br />
Grey boxes denote elements that you have not documented or coding<br />
levels that you have not reached.<br />
Purple boxes denote coding levels that you have reached.<br />
Green rows denote the coding level that you have already selected in the<br />
Diagnosis/Procedure Coding window (if applicable).<br />
− A red E&M Code box denotes an alternate E&M code that you can bill<br />
based on elements that you have already documented (if applicable).<br />
The lowest level of code that you have selected (as denoted by purple boxes) is<br />
what you are able to bill a patient. To meet CMS guidelines, you cannot bill a<br />
level 5 E&M code unless all of the boxes in the level 5 row are purple. For<br />
example, if there is a purple HPI box in the level 2 row and purple ROS, PFSH,<br />
Phys Exam, Diag/Mgmt, and Risk boxes in the level 5 row, you must bill the<br />
level 2 E&M code unless you document additional HPI elements to create a<br />
purple HPI box in the level 5 row.<br />
<strong>ExamWRITER</strong> <strong>8.0</strong> <strong>Enhancements</strong> 6
<strong>ExamWRITER</strong> <strong>8.0</strong> <strong>Enhancements</strong><br />
Reason for Visit<br />
To meet CMS guidelines, you must document two out of three areas (History,<br />
Exam, and/or Medical Decision) for established patients.<br />
To meet CMS guidelines, you must document all three areas (History, Exam, and<br />
Medical Decision) for new patients; new patients are patients who have not been<br />
seen in your practice in at least three years.<br />
• Ability to click on the HPI heading and open the History of Present Illness<br />
window and record additional history information.<br />
• Ability to click on the PFSH heading and open the Ocular Family History<br />
window and record additional history information.<br />
• Ability to click the Diag/Mgmt heading and open the<br />
Impressions/Assessment window and record additional exam impressions.<br />
• Ability to click Coding and open the Diagnosis/Procedure Coding window and<br />
record and modify coding information.<br />
Reason for<br />
Visit<br />
The redesigned Reason for Visit window contains the following new feature:<br />
Streamlined content more accurately documents patients’ reasons for visiting.<br />
The following new fields have been added to the Reason for Visit window:<br />
The redesigned<br />
Reason for Visit<br />
window allows you<br />
to instantly access<br />
previous exam<br />
information and<br />
helps you to more<br />
completely<br />
document a<br />
patient’s reason<br />
for visit.<br />
−<br />
−<br />
−<br />
Patient Insurance (imported from the Insurance tab on the Demographic<br />
window in <strong>OfficeMate</strong>)<br />
Last Eye Exam (elsewhere)<br />
Referred by<br />
To record a patient’s referring doctor in the exam record, select a primary<br />
care physician or other physician and then select the appropriate PCP,<br />
Other Physician, or None radio button.<br />
<strong>ExamWRITER</strong> <strong>8.0</strong> <strong>Enhancements</strong> 7
<strong>ExamWRITER</strong> <strong>8.0</strong> <strong>Enhancements</strong><br />
Chief Complaint<br />
−<br />
−<br />
Notes (previously entitled Special needs)<br />
To record notes in the Notes text box, left-click in the Notes text box,<br />
left-click on appropriate selections that appear (press F12 to add notes to<br />
your selection items), and then right-click to save your selections in the<br />
Notes text box.<br />
Lab Orders<br />
The most recent spectacle, soft contact lens, and rigid contact lens lab<br />
orders are displayed.<br />
Chief<br />
Complaint<br />
Note<br />
Due to extensive improvements and changes made to the Chief<br />
Complaint window in <strong>ExamWRITER</strong> <strong>8.0</strong>, chief complaint information<br />
recorded in <strong>ExamWRITER</strong> 7.4.1 and below exams will not copy<br />
forward to new <strong>ExamWRITER</strong> <strong>8.0</strong> exams, even if you have selected to<br />
copy forward chief complaint information in the Preferences window.<br />
The redesigned Chief Complaint window contains the following new features:<br />
The redesigned<br />
Chief Complaint<br />
window is now<br />
completely<br />
customizeable.<br />
• Ability to select Chief Complaint as your default exam view. For more<br />
information on the new feature that allows you to set up a preference so that<br />
Chief Complaint is your default exam view, go to Preferences on page 32.<br />
<strong>ExamWRITER</strong> <strong>8.0</strong> <strong>Enhancements</strong> 8
<strong>ExamWRITER</strong> <strong>8.0</strong> <strong>Enhancements</strong><br />
Chief Complaint<br />
• Ability to record custom complaints and timeline information. HPI information<br />
is no longer included on the Chief Complaint window; instead, there is a<br />
separate HPI category bar and window for documenting a patient’s history. For<br />
more information on documenting a patient’s HPI in <strong>ExamWRITER</strong> <strong>8.0</strong>, go to<br />
Ocular Compliant on page 10.<br />
<strong>ExamWRITER</strong> <strong>8.0</strong> <strong>Enhancements</strong> 9
<strong>ExamWRITER</strong> <strong>8.0</strong> <strong>Enhancements</strong><br />
Ocular Compliant<br />
Ocular<br />
Compliant<br />
Now the least<br />
experienced<br />
technican can<br />
easily and<br />
effortlessly<br />
document clear<br />
and accurate HPI<br />
information. Every<br />
element is specific<br />
to the chief<br />
complaint and<br />
nothing is<br />
generalized.<br />
The new Ocular Complaint window improves the accuracy and quality of ocular<br />
complaint documentation and makes the technician’s job of documenting complaints<br />
worry-free with the new HPI Wizard.<br />
To document an exam using this new window, select the new Use HPI wizard<br />
general preference. You can also select a preference to document HPI information on<br />
an exam record in a vertical, multiline format or in a horizontal, narrative format. For<br />
more information on this new preference, go to Preferences on page 32.<br />
To document a patient’s common ocular complaints, click the Chief Complaint tab,<br />
click the History Present Illness (HPI) category bar, select the Common<br />
Ocular Complaints check box, and click Process.<br />
<strong>ExamWRITER</strong> <strong>8.0</strong> <strong>Enhancements</strong> 10
<strong>ExamWRITER</strong> <strong>8.0</strong> <strong>Enhancements</strong><br />
Ocular Compliant<br />
Search for and select a complaint in the box on the left side of the window (press the<br />
F12 key to add a complaint to the box) and then select an eye from the Eye<br />
drop-down menu. In the Keyword and Long Description text boxes, left-click to<br />
select the appropriate items from the drop-down menu list and then right-click to save<br />
your selections. To modify or add keywords and long descriptions, left-click in a<br />
Keyword text box and press the F12 key. If you prefer to add custom text instead of<br />
using the HPI Wizard, click the Custom Text button. After you have finished<br />
documenting an ocular complaint, click Save Item to add the complaint to the<br />
Ocular Complaint table at the bottom of the window. After you have finished<br />
documenting all ocular complaints, click Process.<br />
<strong>ExamWRITER</strong> <strong>8.0</strong> <strong>Enhancements</strong> 11
<strong>ExamWRITER</strong> <strong>8.0</strong> <strong>Enhancements</strong><br />
Patient History<br />
Patient<br />
History<br />
The improved Patient History window contains the following new feature:<br />
When selected on the Patient History window, disposition and orientation<br />
information is recorded under the Examination category bar, per Medicare<br />
requirements.<br />
<strong>ExamWRITER</strong> <strong>8.0</strong> <strong>Enhancements</strong> 12
<strong>ExamWRITER</strong> <strong>8.0</strong> <strong>Enhancements</strong><br />
Medical History<br />
Medical<br />
History<br />
The redesigned Medical History window contains the following new feature:<br />
Ability to easily document a patient’s Medical History, Ocular History,<br />
Systemic Surgery, and Ocular Surgery history from within one window by<br />
clicking the appropriate radio buttons in the top right corner of the window and<br />
opening appropriate history selections.<br />
You no longer<br />
have to fully<br />
complete one<br />
history subject<br />
before<br />
documenting<br />
another history<br />
subject. You can<br />
now fluidly<br />
document a<br />
patient’s history<br />
and follow a<br />
patient’s<br />
conversation in<br />
<strong>ExamWRITER</strong>.<br />
<strong>ExamWRITER</strong> <strong>8.0</strong> <strong>Enhancements</strong> 13
<strong>ExamWRITER</strong> <strong>8.0</strong> <strong>Enhancements</strong><br />
Ocular Family History<br />
Ocular Family<br />
History<br />
The redesigned Ocular Family History window contains the following new feature:<br />
Ability to easily document a patient’s Ocular and Systemic family history from<br />
within one window by clicking the appropriate radio buttons in the top right<br />
corner of the window and opening appropriate family history selections.<br />
You no longer<br />
have to fully<br />
complete one<br />
history subject<br />
before<br />
documenting<br />
another history<br />
subject. You can<br />
now fluidly<br />
document a<br />
patient’s history<br />
and follow a<br />
patient’s<br />
conversation in<br />
<strong>ExamWRITER</strong>.<br />
Surgery<br />
The Surgery<br />
window is now<br />
exclusively<br />
devoted to<br />
operative reports.<br />
The new Surgery window displays the following new feature:<br />
Ability to document operative reports.<br />
To document operative reports, click the Surgery - Plan - Mgmt tab, click the<br />
Surgery category bar, select the operative reports that you want to document,<br />
and click Process.<br />
<strong>ExamWRITER</strong> <strong>8.0</strong> <strong>Enhancements</strong> 14
<strong>ExamWRITER</strong> <strong>8.0</strong> <strong>Enhancements</strong><br />
Pachymetry<br />
Pachymetry<br />
Because<br />
pachymetry has its<br />
own CPT code<br />
(76514),<br />
observations must<br />
be recorded as<br />
interpretations<br />
and reports. You<br />
are now able to<br />
document these<br />
interpretations<br />
and reports from<br />
within the Special<br />
Testing category<br />
bar.<br />
The pachymetry impressions have been moved from the Pachymetry recording<br />
window to a new Pachymetry window under the Special Testing category bar.<br />
To record pachymetry impressions, click the Exam - Special Tests tab, click the<br />
Special Testing category bar, select Pachymetry, select appropriate check boxes,<br />
and click Process.<br />
<strong>ExamWRITER</strong> <strong>8.0</strong> <strong>Enhancements</strong> 15
<strong>ExamWRITER</strong> <strong>8.0</strong> <strong>Enhancements</strong><br />
Vision/Rx<br />
Vision/Rx<br />
The improved Vision/Rx tab contains the following new features:<br />
• Ability to click on the blue Rx Notes flags and open the Rx window and view<br />
the contact lens trial and final Rx notes and spectacle final and alternate Rx<br />
notes.<br />
• New selection options in the Vision/Rx window.<br />
Spectacle Rx<br />
The improved Spectacle Rx window contains the following new features:<br />
• Ability to automatically populate procedure codes in the Diagnosis/Procedure<br />
Coding window based on your manifest prescription (and not your final<br />
prescription). For more information on the new feature that automatically codes<br />
exams, go to Diagnosis/ Procedure Coding on page 4.<br />
The manifest prescription is now displayed under the Impressions/Assessment<br />
category bar on the Surgery - Plan - Mgmt tab.<br />
<strong>ExamWRITER</strong> <strong>8.0</strong> <strong>Enhancements</strong> 16
<strong>ExamWRITER</strong> <strong>8.0</strong> <strong>Enhancements</strong><br />
Contact Lens Rx<br />
• Ability to view the most recent lab order on all tabs in the Spectacle Rx window.<br />
• Ability to print the final spectacle Rx from the Final tab.<br />
To print the final Rx from the Final tab, click Print Rx.<br />
• Ability to easily record a 180 axis measurement.<br />
To record a 180 axis measurement, select the 180 radio button above the axis<br />
blue slider bar.<br />
• Ability to clear all visual acuities that have been previously recorded for an Rx.<br />
To clear all visual acuities previously recorded for an Rx, click Clear VAs.<br />
Contact Lens<br />
Rx<br />
The improved Contact Lens Rx window contains the following new features:<br />
• Ability to view the most recent lab order on all tabs in the Spectacle Rx window.<br />
• Ability to select a disinfecting regimen from the Disinfecting drop-down<br />
menu on the Final tab, which will print on the final and trial Rx.<br />
Notes<br />
• The Disinfection information that is recorded on the Contacts<br />
(Care Regimen) window will print on the first final Rx.<br />
Selections from the Disinfecting drop-down menu on the<br />
Contact Lens Rx - Final window will print on the second and<br />
any subsequent final prescriptions.<br />
• Only the disinfecting information that is recorded for the most<br />
recently saved final Rx is displayed under the Plan category bar<br />
on the Surgery - Plan - Mgmt tab.<br />
<strong>ExamWRITER</strong> <strong>8.0</strong> <strong>Enhancements</strong> 17
<strong>ExamWRITER</strong> <strong>8.0</strong> <strong>Enhancements</strong><br />
Contact Lens Rx<br />
• Ability to print the final contact lens Rx from the Final tab.<br />
To print the final Rx from the Final tab, click Print Rx.<br />
• Ability to clear all visual acuities that have been previously recorded for an Rx.<br />
To clear all visual acuities previously recorded for an Rx, click Clear VAs.<br />
• Ability to record multiple final contact lens prescriptions on the Final tab.<br />
Many doctors have<br />
desired the ability<br />
to record multiple<br />
final contact lens<br />
prescriptions. This<br />
option is now<br />
available!<br />
To record multiple final contact lens prescriptions, click New Rx after<br />
recording a prescription. Click the arrows under #/of to view other final<br />
contact lens prescriptions.<br />
• Ability to view the most recent final spectacle Rx from a prior exam (if one does<br />
not exist in the current exam) and copy it to the trial Rx on the Trial tab.<br />
<strong>ExamWRITER</strong> <strong>8.0</strong> <strong>Enhancements</strong> 18
<strong>ExamWRITER</strong> <strong>8.0</strong> <strong>Enhancements</strong><br />
Contact Lens Rx<br />
• Ability to easily record a 180 axis measurement.<br />
To record a 180 axis measurement, select the 180 radio button above the axis<br />
blue slider bar.<br />
<strong>ExamWRITER</strong> <strong>8.0</strong> <strong>Enhancements</strong> 19
<strong>ExamWRITER</strong> <strong>8.0</strong> <strong>Enhancements</strong><br />
K-Readings History<br />
K-Readings<br />
History<br />
The new<br />
K-Readings<br />
History window<br />
allows you to<br />
precisely track<br />
irregular corneal<br />
conditions.<br />
The new K-Readings History window contains the following new feature:<br />
Ability to view a graphical historical display of a patient’s keratometry readings.<br />
To open the K-Readings History window and view a graphical historical display<br />
of a patient’s keratometry readings, click the yellow Hx button in the<br />
K-Readings box on the exam chart window. Select the Flat, Steep, or Both radio<br />
button to change the display of the graph. You can copy the graph to a clipboard<br />
or print the graph using the icons in the upper left corner of the window.<br />
<strong>ExamWRITER</strong> <strong>8.0</strong> <strong>Enhancements</strong> 20
<strong>ExamWRITER</strong> <strong>8.0</strong> <strong>Enhancements</strong><br />
Orders<br />
Orders<br />
The redesigned<br />
Orders window is<br />
now completely<br />
customizeable. It<br />
also contains a<br />
complete<br />
database of every<br />
ophthalmic<br />
surgical procedure<br />
and lab test.<br />
The redesigned Orders window (previously entitled Follow-Up Orders) contains the<br />
new features:<br />
• Ability to record Examination, Surgery, Test, Consult, and Laboratory<br />
orders within the same window by selecting the appropriate radio button.<br />
• Ability to customize orders by pressing the F12 key and adding, editing, and<br />
deleting orders on the Code Maintenance window.<br />
• Ability to select an eye for an order from the Eye drop-down menu.<br />
• Ability to easily record an order for today by selecting the Today check box.<br />
• Ability to save orders without timelines or action information by selecting the<br />
Save WITHOUT Timeline and Action Date check box.<br />
• Ability to open the Orders window anytime during an exam by pressing the F3<br />
key.<br />
<strong>ExamWRITER</strong> <strong>8.0</strong> <strong>Enhancements</strong> 21
<strong>ExamWRITER</strong> <strong>8.0</strong> <strong>Enhancements</strong><br />
Medication Order<br />
Medication<br />
Order<br />
You can save up to<br />
15 clicks per Rx by<br />
selecting default<br />
medication values<br />
on the Medications<br />
Maintenance<br />
window and<br />
selecting the<br />
medication on the<br />
Medication Order.<br />
The updated Medication Order window contains the following new features:<br />
• Ability to open the Medication Order window anytime during an exam by<br />
pressing the F6 key.<br />
• Ability to record a medication’s expiration date in the Expiration Date field.<br />
The expiration date automatically populates to one year from the date of the<br />
order for all refill medication orders.<br />
Note<br />
You can only record a medication’s expiration date in<br />
<strong>ExamWRITER</strong> <strong>8.0</strong> exams and higher. You cannot record a<br />
medication’s expiration date when you refill a medication order<br />
that was recorded in an exam created with <strong>ExamWRITER</strong> 7.4.1 or<br />
below.<br />
• Ability to print prescriptions with or without a provider’s signature. For more<br />
information on the new feature that allows you to record a provider or staff<br />
member’s signature in <strong>ExamWRITER</strong>, go to Business Names on page 34.<br />
Note<br />
Some states require an original signature on medical prescriptions.<br />
Check with your state regulatory agency to find out if printing a<br />
signature on prescriptions is legal in your state.<br />
Printing your<br />
signature on<br />
prescriptions will<br />
save you time!<br />
To print a prescription with a signature, click the Surgery - Plan - Mgmt tab,<br />
click the Plan category bar, select the Medication Rx check box, click<br />
Process, record the prescription, and click Print Rx w/Sig.<br />
• Ability to view discontinue information, discontinue dates, and allergy<br />
information in the Medication Hx table.<br />
<strong>ExamWRITER</strong> <strong>8.0</strong> <strong>Enhancements</strong> 22
<strong>ExamWRITER</strong> <strong>8.0</strong> <strong>Enhancements</strong><br />
Examination / Special Testing<br />
Examination /<br />
Special<br />
Testing<br />
Because<br />
compliance<br />
guidelines dictate<br />
that special testing<br />
documentation<br />
must be kept<br />
separate and<br />
distinct from other<br />
exam<br />
documentation,<br />
we have created<br />
the new Special<br />
Testing category<br />
bar.<br />
The new Exam - Special Tests tab contains the following new features:<br />
• Separation of the Examination and Special Testing category bars on the<br />
renamed Exam - Special Tests tab.<br />
• Ability to automatically populate procedure codes in the Diagnosis/Procedure<br />
Coding window based on your examination and special test selections. For more<br />
information on the new feature that automatically codes exams, go to<br />
Diagnosis/ Procedure Coding on page 4.<br />
• Ability to document ophthalmic tests.<br />
To document ophthalmic tests, click the Exam - Special Tests tab, click the<br />
Special Testing category bar, select appropriate ophthalmic tests, and click<br />
Process.<br />
<strong>ExamWRITER</strong> <strong>8.0</strong> <strong>Enhancements</strong> 23
<strong>ExamWRITER</strong> <strong>8.0</strong> <strong>Enhancements</strong><br />
Examination / Special Testing<br />
• Ability to accurately document refractive surgery.<br />
To document refractive surgery, click the Exam - Special Tests tab, click the<br />
Examination category bar, select the Refractive Surgery check box, select<br />
appropriate check boxes, and click Process.<br />
<strong>ExamWRITER</strong> <strong>8.0</strong> <strong>Enhancements</strong> 24
<strong>ExamWRITER</strong> <strong>8.0</strong> <strong>Enhancements</strong><br />
ExamDRAW<br />
ExamDRAW<br />
The redesigned ExamDRAW window contains the following new features:<br />
• New Cataracts, Gonioscopy, and Optic Nerve Cupping ExamDRAW<br />
template options.<br />
• New interface that allows you to more easily and accurately create a wide variety<br />
of drawings.<br />
You can now easily<br />
navigate through<br />
multiple drawings<br />
in ExamDRAW.<br />
To use the new interface, click a tab at the top of the window to open a drawing<br />
template; choose appropriate options (inverted or default view), diseases, tools,<br />
sizes, opacity, and colors; and click on the eyes.<br />
Notes<br />
• After you have recorded a drawing using a template and saved<br />
it, the tab denoting that template turns green. If you have<br />
recorded a drawing using a template but have not saved it, the<br />
tab denoting that template turns pink.<br />
• To undo, redo, or clear changes that you have made to a<br />
drawing, click Edit from the main menu toolbar and select<br />
Clear Changes, Undo, or Redo.<br />
• To delete diseases or text that you have placed on the eyes,<br />
left-click on the disease or text and select Delete.<br />
• To add auto text to the drawing when you add a disease, click<br />
File and select Configure to open the draw text box. Ensure<br />
that the Disease state text check box is selected to insert auto<br />
text on the drawing. You can modify the font type, size, and<br />
style in the draw window also. The auto text is documented on<br />
the drawing and the Autotext tab.<br />
<strong>ExamWRITER</strong> <strong>8.0</strong> <strong>Enhancements</strong> 25
<strong>ExamWRITER</strong> <strong>8.0</strong> <strong>Enhancements</strong><br />
ExamDRAW<br />
You can now easily<br />
access multiple<br />
drawings from<br />
within ExamDRAW<br />
simply by clicking<br />
on the tabs at the<br />
top of the window.<br />
• Ability to view text automatically generated based on the diseases added to the<br />
drawing on the Autotext tab.<br />
Auto text is automatically added to the Autotext tab when you add a disease to<br />
a drawing. The retina location is documented in Disc Diameters and clock<br />
position on the Autotext tab for central retina and entire fundus drawings. If you<br />
do not want to use the auto text, deselect the check box next to the auto text on<br />
the Autotext tab. You can use the text tool (the T icon) to add your own text to<br />
the drawing.<br />
• Ability to add comments to drawings.<br />
The redesigned<br />
ExamDRAW<br />
program<br />
automatically adds<br />
documentation to<br />
exam drawings.<br />
You can now view<br />
historical patient<br />
drawings without<br />
opening previous<br />
exams.<br />
To add general comments to the drawing, click the Comments tab and type<br />
your comments.<br />
To add comments to the auto text that appears when you draw on the eye, click<br />
the Autotext tab, double-click in the Comments column next to the auto text,<br />
and type your comments.<br />
• Ability to view a historical record of a patient’s drawings by moving the white<br />
slider bar to the desired date on the timeline or pressing your keyboard’s left and<br />
right arrow keys.<br />
• Ability to copy drawings from a previous date forward to the current date to<br />
modify and record them on the current date.<br />
To copy drawings forward, open a drawing from a previous date and click Copy<br />
Forward.<br />
• Ability to delete drawings.<br />
To delete drawings, click Delete.<br />
<strong>ExamWRITER</strong> <strong>8.0</strong> <strong>Enhancements</strong> 26
<strong>ExamWRITER</strong> <strong>8.0</strong> <strong>Enhancements</strong><br />
Images - Drawings<br />
Images -<br />
Drawings<br />
The new Images - Drawings tab contains a category bar that, when clicked, opens the<br />
eDocuments window and allows you to view, add, edit, and delete electronic<br />
documents attached to the exam record. All images and drawings from ExamDRAW<br />
and diagnostic equipment will be displayed under this tab.<br />
<strong>ExamWRITER</strong> <strong>8.0</strong> <strong>Enhancements</strong> 27
<strong>ExamWRITER</strong> <strong>8.0</strong> <strong>Enhancements</strong><br />
Patient Information Center<br />
Patient<br />
Information<br />
Center<br />
The improved Patient Information Center window contains the following new<br />
features:<br />
• Ability to view patient’s diagnosis codes (or, problem list) and procedure codes<br />
from previous exams on the Exam Hx tab.<br />
It is now very easy<br />
for you to view a<br />
patient’s complete<br />
exam history and<br />
problem list from<br />
within the Patient<br />
Information<br />
Center.<br />
For insurance<br />
billing purposes, it<br />
is now easy for<br />
you to view when<br />
tests were<br />
completed on a<br />
patient.<br />
Notes<br />
• If you have diagnosis codes recorded in previous exams that are<br />
outdated and no longer appear on the Diagnosis Codes tab on<br />
the Customization window, they will not appear in the<br />
Diagnosis/Problem List on the Patient Information Center<br />
window.<br />
• To display PQRI procedure codes in the Procedures Performed<br />
table and keep track of PQRI reporting, select the Show PQRI<br />
check box.<br />
<strong>ExamWRITER</strong> <strong>8.0</strong> <strong>Enhancements</strong> 28
<strong>ExamWRITER</strong> <strong>8.0</strong> <strong>Enhancements</strong><br />
Patient Information Center<br />
• Ability to add a discontinued date to a medication on the Med/Surgical Hx<br />
tab.<br />
To add a discontinued date to a medication, right-click on the medication in the<br />
Medication History table and select DISCONTINUE. Select a date from the<br />
Date Discontinued calendar and click Save. The discontinued date appears<br />
in the Date column in the Medication History window.<br />
<strong>ExamWRITER</strong> <strong>8.0</strong> <strong>Enhancements</strong> 29
<strong>ExamWRITER</strong> <strong>8.0</strong> <strong>Enhancements</strong><br />
Quick List<br />
Quick List<br />
Now, with a simple<br />
glace at the<br />
Patient Quick List,<br />
you can view<br />
which provider in<br />
your practice is<br />
seeing which<br />
patients.<br />
The improved Patient Quick List window contains the following new features:<br />
• Ability to view when a patient’s exam has been closed or finalized in the Room<br />
column. When a patient’s exam has been closed or finalized, the Room column<br />
automatically displays the text “CLOSED.”<br />
• New Provider (Prov) and Service columns. The Prov column displays the<br />
provider’s initials and provider ID (which is also displayed in the ID # box next<br />
to the provider’s name on the Provider/Staff tab on the Business Names<br />
window).<br />
• Ability to view patients in the Quick List who are assigned to all providers or<br />
view patients in the Quick List who are assigned only to the provider logged into<br />
<strong>ExamWRITER</strong>.<br />
To view patients in the Quick List who are assigned only to the provider logged<br />
into <strong>ExamWRITER</strong>, deselect the All Providers check box. The All Providers<br />
check box is only active when a provider is logged into <strong>ExamWRITER</strong>. Staff<br />
members logged into <strong>ExamWRITER</strong> will see all providers listed in the Quick<br />
List.<br />
<strong>ExamWRITER</strong> <strong>8.0</strong> <strong>Enhancements</strong> 30
<strong>ExamWRITER</strong> <strong>8.0</strong> <strong>Enhancements</strong><br />
Exam Finalization<br />
Exam<br />
Finalization<br />
The improved Exam Finalization window contains the following new features:<br />
• Ability to Print Alternate Spectacle Rx.<br />
• Ability to Print Trial Contact Rx.<br />
• Ability to Print Patient Report.<br />
Note<br />
You must click the Coding icon in <strong>ExamWRITER</strong>, verify or add<br />
diagnosis and procedure codes on the Diagnosis/Procedure Coding<br />
window, and click Save/Exit before <strong>ExamWRITER</strong> will allow you to<br />
finalize an exam. If you have automatically recorded procedure codes in<br />
the exam, but the “Coding is Incomplete, Click Continue to Code<br />
Exam.” message appears, then you have not saved the codes in the<br />
Diagnosis/Procedure Coding window and you must do so before<br />
finalizing the exam.<br />
<strong>ExamWRITER</strong> <strong>8.0</strong> <strong>Enhancements</strong> 31
<strong>ExamWRITER</strong> <strong>8.0</strong> <strong>Enhancements</strong><br />
Preferences<br />
Preferences<br />
The improved System Preferences window contains the following new features:<br />
• New General preferences that include<br />
− Ability to select Chief Complaint as your default exam view.<br />
− Ability to select a preference to use the new “HPI Wizard” to more easily<br />
and accurately document HPI information. If you choose to use the new<br />
HPI Wizard, you can also select a preference to document HPI<br />
information on an exam record in a vertical, multiline format or in a<br />
horizontal, narrative format. For more information on the new HPI<br />
Wizard feature in the Ocular Complaint window, go to Ocular Compliant<br />
on page 10.<br />
− Ability to select Slate grey as an exam background color.<br />
−<br />
Note<br />
You can no longer select yellow as an exam background color.<br />
Ability to select exam finalization defaults that will automatically print<br />
alternate spectacle and trial contact lens prescriptions and patient letters.<br />
<strong>ExamWRITER</strong> <strong>8.0</strong> <strong>Enhancements</strong> 32
<strong>ExamWRITER</strong> <strong>8.0</strong> <strong>Enhancements</strong><br />
Preferences<br />
• New Defaults preference allows you to choose whether or not you want<br />
<strong>ExamWRITER</strong> to automatically select the “Unless otherwise noted below:”<br />
check box on the Patient History, Review of Systems, External Exam, Slit-Lamp<br />
Exam, and Routine Ophthalmoscopy windows.<br />
<strong>ExamWRITER</strong> <strong>8.0</strong> <strong>Enhancements</strong> 33
<strong>ExamWRITER</strong> <strong>8.0</strong> <strong>Enhancements</strong><br />
Business Names<br />
Business<br />
Names<br />
The improved Business Names window contains the following new feature:<br />
Ability to save default provider and staff members’ signatures on the<br />
Provider/Staff tab that will print on medical prescriptions. For information on<br />
the new feature that allows you to print signatures on medical prescriptions, go<br />
to Medication Order on page 22.<br />
To save a default signature that will print on medical prescriptions, click<br />
Browse, navigate to the signature, and click Open.<br />
Notes<br />
• <strong>OfficeMate</strong> <strong>Software</strong> <strong>Solutions</strong> recommends saving all<br />
signatures in the eDocuments folder.<br />
• All signatures must be saved using the JPEG graphic format.<br />
• Some states require an original signature on medical<br />
prescriptions. Check with your state regulatory agency to find<br />
out if printing a signature on prescriptions is legal in your state.<br />
<strong>ExamWRITER</strong> <strong>8.0</strong> <strong>Enhancements</strong> 34
<strong>ExamWRITER</strong> <strong>8.0</strong> <strong>Enhancements</strong><br />
Medications Maintenance<br />
Medications<br />
Maintenance<br />
The improved Medications Maintenance window contains the following new feature:<br />
New default values including substitutions, refills, application, frequency, and<br />
duration.<br />
You can save up to<br />
15 clicks per Rx by<br />
selecting default<br />
medication values<br />
and selecting the<br />
medication on the<br />
Medication Order.<br />
Patient<br />
Systemic<br />
Medications<br />
The redesigned Patient Systemic Medications window contains the following new<br />
features:<br />
• Medications are now listed at the top of the window and selections that you have<br />
made are now listed at the bottom of the window.<br />
<strong>ExamWRITER</strong> <strong>8.0</strong> <strong>Enhancements</strong> 35
<strong>ExamWRITER</strong> <strong>8.0</strong> <strong>Enhancements</strong><br />
Templates<br />
• Ability to add a discontinued date to a medication in the Patient SYSTEMIC<br />
Medications table.<br />
To add a discontinued date to a medication, click on the medication in the<br />
Patient SYSTEMIC Medications table and then click Discontinue. Select a<br />
date from the Discontinue Date calendar and click Save. The discontinued<br />
date appears in the Date column in the Medication History window.<br />
Tablet PC users<br />
will find that it is<br />
much easier to<br />
view medications<br />
on this window<br />
now that they are<br />
listed at the top of<br />
the window.<br />
Templates<br />
The improved Template Maintenance window contains the following new feature:<br />
The new<br />
templates are<br />
available in line<br />
item and narrative<br />
formats. Some<br />
templates also<br />
have CPT codes<br />
pre-recorded in<br />
them.<br />
<br />
Availability of forty-seven new exam templates.<br />
Note<br />
Existing users must run the Update Template utility to add the new<br />
exam templates to <strong>ExamWRITER</strong>. This utility is available on our<br />
Knowledge Base at www.officemate.net.<br />
<strong>ExamWRITER</strong> <strong>8.0</strong> <strong>Enhancements</strong> 36
<strong>ExamWRITER</strong> <strong>8.0</strong> <strong>Enhancements</strong><br />
Auto Letter<br />
Auto Letter<br />
The updated auto letter contains the following new note at the bottom of the letter:<br />
Note: The information contained in this report is confidential. Unauthorized disclosure may result in<br />
civil/criminal action as provided by HIPAA (1996) regulations.<br />
Function Keys<br />
You can now<br />
document orders<br />
and medications<br />
and view a list of a<br />
patient’s reported<br />
diagnoses anytime<br />
during an exam.<br />
The following function keys are now available to use in <strong>ExamWRITER</strong>:<br />
• F3 – Use this function key anytime during an exam to open the Orders window<br />
and record a patient’s examination, surgery, test, consultation, and laboratory<br />
orders.<br />
• F4 – Use this function key anytime during an exam to open a compilation of a<br />
patient’s reported diagnoses.<br />
• F6 – Use this function key anytime during an exam to open the Medication<br />
Order window and record a patient’s prescription medication.<br />
ePrescribing<br />
The new <strong>ExamWRITER</strong> ePrescribing interface allows you to quickly and easily send<br />
medical prescriptions electronically to pharmacies nationwide. Prescriptions that are<br />
electronically sent to pharmacies through the interface are recorded in the patient’s<br />
exam record in <strong>ExamWRITER</strong>.<br />
Note<br />
In order to use the new features in the <strong>ExamWRITER</strong> ePrescribing<br />
interface, you must have already purchased and activated the interface.<br />
For information on purchasing this interface, contact Sales at<br />
1.800.269.3666 or sales@officemate.net.<br />
Equipment<br />
Interfaces<br />
The improved equipment interface contains the following new features:<br />
Note<br />
In order to use the equipment interface, you must have already<br />
purchased and activated the interface. For information on purchasing<br />
the equipment interface, contact Sales at 1.800.269.3666 or<br />
sales@officemate.net.<br />
• New interfaces available with <strong>ExamWRITER</strong> <strong>8.0</strong>.21, including<br />
− Woodlyn Medmont<br />
− Comsquared Systems<br />
− Marco capture software<br />
<strong>ExamWRITER</strong> <strong>8.0</strong> <strong>Enhancements</strong> 37
<strong>ExamWRITER</strong> <strong>8.0</strong> <strong>Enhancements</strong><br />
Other<br />
• Ability to specify the start and end characters of data source files on the Setup<br />
<strong>ExamWRITER</strong> Equipment Interfaces window. These characters identify<br />
specific files from which the interface is importing data.<br />
To specify the start and end characters of data source files, click Tools on the<br />
<strong>ExamWRITER</strong> main window, select Equipment Integration Setup, select a<br />
device from the Available Equipment Interfaces box, select File from the<br />
Data Source drop-down menu, type the data file’s beginning characters in the<br />
Data File Start Chars text box, select the data file’s ending characters<br />
(extension) from the Data File End Char drop-down menu, and click Save.<br />
Other<br />
You no longer<br />
have to scroll<br />
through previous<br />
exams to open a<br />
specific exam;<br />
now you can easily<br />
select and view a<br />
specific previous<br />
exam.<br />
Other enhancements include the following new features:<br />
• Ability to more easily open a previous exam from within a currently opened<br />
exam.<br />
To open a previous exam from within a currently opened exam, select a date and<br />
primary procedure code from the Exam History drop-down menu on the<br />
exam chart window.<br />
<strong>ExamWRITER</strong> <strong>8.0</strong> <strong>Enhancements</strong> 38
<strong>ExamWRITER</strong> <strong>8.0</strong> <strong>Enhancements</strong><br />
Other<br />
• Ability to quickly notice if there are contact lens and spectacle lab orders from<br />
the <strong>ExamWRITER</strong> chart window.<br />
• Ability to quickly view the most recent final spectacle and contact lens<br />
information under the Patient Management category bar on the Full View tab.<br />
• Business name address (or store name address for <strong>OfficeMate</strong> Enterprise users)<br />
is printed on examination records.<br />
• Patients’ DOB (date of birth) is printed on medical prescriptions.<br />
• Renamed Surgery - Plan - Mgmt tab.<br />
• Ability to use a scrollbar on the Notes and Addendum windows.<br />
• Ability to add a “Recorded By” user on the Notes and Addendum windows.<br />
• Ability to add information to addendums that have already been recorded.<br />
Note<br />
You can no longer edit information in addendums that have<br />
already been recorded; you can only add new information to the<br />
addendums.<br />
• Ability to view a patient’s name suffix when conducting a chart search on the<br />
<strong>ExamWRITER</strong> Control Center window, printing medical prescriptions, and on<br />
the blue title bar in <strong>ExamWRITER</strong>.<br />
• Ability to view a patient’s nickname in parentheses on the blue title bar in<br />
<strong>ExamWRITER</strong>.<br />
• The white box in the upper right corner of exams displays addendum<br />
information only.<br />
<strong>ExamWRITER</strong> <strong>8.0</strong> <strong>Enhancements</strong> 39
<strong>ExamWRITER</strong> <strong>8.0</strong> <strong>Enhancements</strong><br />
Other<br />
• Updated diagnosis codes in the Customization window.<br />
Note<br />
If you are upgrading to <strong>ExamWRITER</strong> <strong>8.0</strong> and the program is<br />
unable to find an identical match for a CPT code in your<br />
Customization window that it needs to update, it adds the new<br />
CPT code and modifies the old CPT code by adding a “z” to the<br />
front of its name (for example, “z_Trachoma, Unspecified”).<br />
<strong>ExamWRITER</strong> <strong>8.0</strong> <strong>Enhancements</strong> 40


