Using ePrescribing with ExamWRITER
Using ePrescribing with ExamWRITER
Using ePrescribing with ExamWRITER

Create successful ePaper yourself
Turn your PDF publications into a flip-book with our unique Google optimized e-Paper software.
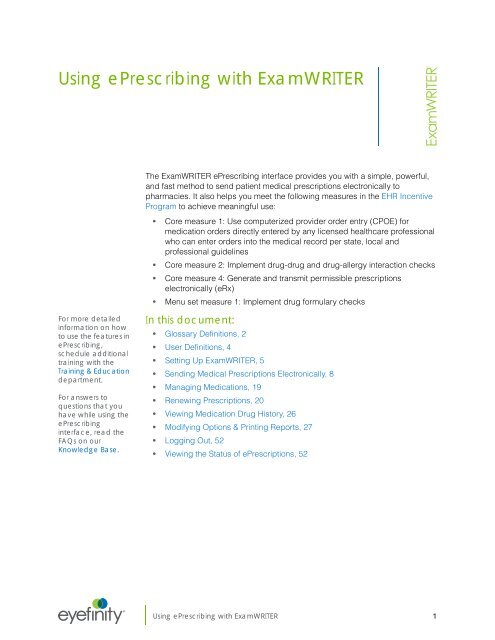
<strong>Using</strong> <strong>ePrescribing</strong> <strong>with</strong> <strong>ExamWRITER</strong><br />
The <strong>ExamWRITER</strong> <strong>ePrescribing</strong> interface provides you <strong>with</strong> a simple, powerful,<br />
and fast method to send patient medical prescriptions electronically to<br />
pharmacies. It also helps you meet the following measures in the EHR Incentive<br />
Program to achieve meaningful use:<br />
• Core measure 1: Use computerized provider order entry (CPOE) for<br />
medication orders directly entered by any licensed healthcare professional<br />
who can enter orders into the medical record per state, local and<br />
professional guidelines<br />
• Core measure 2: Implement drug-drug and drug-allergy interaction checks<br />
• Core measure 4: Generate and transmit permissible prescriptions<br />
electronically (eRx)<br />
• Menu set measure 1: Implement drug formulary checks<br />
For more detailed<br />
information on how<br />
to use the features in<br />
<strong>ePrescribing</strong>,<br />
schedule additional<br />
training <strong>with</strong> the<br />
Training & Education<br />
department.<br />
For answers to<br />
questions that you<br />
have while using the<br />
<strong>ePrescribing</strong><br />
interface, read the<br />
FAQs on our<br />
Knowledge Base.<br />
In this document:<br />
• Glossary Definitions, 2<br />
• User Definitions, 4<br />
• Setting Up <strong>ExamWRITER</strong>, 5<br />
• Sending Medical Prescriptions Electronically, 8<br />
• Managing Medications, 19<br />
• Renewing Prescriptions, 20<br />
• Viewing Medication Drug History, 26<br />
• Modifying Options & Printing Reports, 27<br />
• Logging Out, 52<br />
• Viewing the Status of ePrescriptions, 52<br />
®<br />
<strong>Using</strong> <strong>ePrescribing</strong> <strong>with</strong> <strong>ExamWRITER</strong> 1
<strong>Using</strong> <strong>ePrescribing</strong> <strong>with</strong> <strong>ExamWRITER</strong><br />
Glossary Definitions<br />
NOTES • Before you begin using the <strong>ExamWRITER</strong> <strong>ePrescribing</strong> interface,<br />
ensure that you have activated your practice and providers using<br />
the EW-DrFirstDB.mdb file provided to you as the<br />
EW-DrFirstDB.txt file by the Eyefinity Sales team. For information<br />
about installing this file, contact the Customer Care team at<br />
1.800.942.5353 or officematesupport@eyefinity.com.<br />
• In order to properly upload data to, download data from, and<br />
navigate the <strong>ExamWRITER</strong> <strong>ePrescribing</strong> interface, add the<br />
following URLs to your Web browser's trusted site’s list:<br />
rx-blue.drfirst.com<br />
drfirst.com<br />
https://rx7.drfirst.com<br />
http://www.msn.com (OfficeMate/<strong>ExamWRITER</strong> v10.0 and<br />
below only! This website is used as an alternate logout site<br />
when navigating to the DrFirst website to prevent an error.)<br />
After you add the URLs to your Web browser’s trusted sites list,<br />
deselect the Require server verification (https:) for all sites<br />
in this zone check box.<br />
• You must have the .NET Framework installed on the computer<br />
system running <strong>ExamWRITER</strong> to use the <strong>ExamWRITER</strong><br />
<strong>ePrescribing</strong> interface. You can download the .NET Framework at<br />
http://www.microsoft.com/download/en/details.aspx?displaylang<br />
=en&id=22. The .NET Framework requires Windows Installer<br />
version 3 or above. You can download this Windows Installer<br />
version at<br />
http://www.microsoft.com/download/en/details.aspx?displaylang<br />
=en&id=8483.<br />
• You must protect your practice and BACK UP YOUR DATA when<br />
using the <strong>ExamWRITER</strong> <strong>ePrescribing</strong> interface! For more<br />
information about backing up your data, see the “Backing Up &<br />
Restoring Data” document at www.officemate.net.<br />
Glossary Definitions<br />
Category search<br />
This search allows you to use therapeutic categories to find the list of drugs.<br />
Electronic<br />
prescription<br />
A prescription sent directly from the provider to a pharmacy through Surescripts.<br />
Favorite<br />
prescription<br />
A medication that you routinely prescribe for your patients. Favorite prescriptions<br />
include the Sig and strength information. For more information on adding and<br />
modifying favorite prescriptions, go to “Adding & Modifying Favorite<br />
Prescriptions” on page 29.<br />
Fax prescription<br />
A prescription sent directly to the pharmacy’s fax machine.<br />
2 <strong>Using</strong> <strong>ePrescribing</strong> <strong>with</strong> <strong>ExamWRITER</strong>
<strong>Using</strong> <strong>ePrescribing</strong> <strong>with</strong> <strong>ExamWRITER</strong><br />
Glossary Definitions<br />
Formulary<br />
A list of drugs that provides information on coverage and copays from the<br />
patient’s insurance or health plan. Formulary information is obtained from<br />
Surescripts; however, Surescripts may not provide information for all<br />
government-funded formularies and some small regional payers. If a patient has<br />
more than one insurance carrier, you can select formulary information for the<br />
appropriate insurance carrier when you are prescribing a medication. For more<br />
information on configuring formularies, go to “Configuring Formularies” on page<br />
28.<br />
Formulary<br />
coverage codes<br />
These codes determine the prescription drug benefit coverage for a particular<br />
medication, such as step therapy (ST) or prior authorization (PA). For a list of<br />
codes and definitions, go to www.officemate.net/omkb/Article.aspx?id=28501.<br />
Formulary status<br />
This status is determined by the health plan. Drugs can have a formulary or<br />
non-formulary status or a preferred status such as P1, P2, etc. For a list of statuses<br />
and definitions, go to www.officemate.net/omkb/Article.aspx?id=28501.<br />
Medication<br />
A drug that the patient is already taking.<br />
Medication history<br />
A list of medications that the patient has taken in the past. This information may<br />
be obtained from <strong>ExamWRITER</strong> and the medication drug history. The medication<br />
drug history contains pharmacy history of up to two years for all patients whose<br />
insurance companies and pharmacies provide this information to Surescripts.<br />
Prescription<br />
Oral, written, faxed, or electronic order of medication.<br />
Prescription status<br />
This status provides transmission information on the prescription you sent and<br />
whether it has been received by the pharmacy.<br />
Provider<br />
Health care professional such as MD, DO, NP, or PA.<br />
Refills<br />
The number of times a prescription can be refilled at the pharmacy <strong>with</strong>out<br />
requiring a new prescription.<br />
Renewals<br />
A request from the pharmacy to obtain additional refills on a prescription or<br />
receive an updated prescription, if it has expired.<br />
<strong>Using</strong> <strong>ePrescribing</strong> <strong>with</strong> <strong>ExamWRITER</strong> 3
<strong>Using</strong> <strong>ePrescribing</strong> <strong>with</strong> <strong>ExamWRITER</strong><br />
User Definitions<br />
User Definitions<br />
This section includes definitions for the users that you set up when you activated<br />
the <strong>ExamWRITER</strong> <strong>ePrescribing</strong> interface <strong>with</strong> the Eyefinity Sales team. The<br />
features available to you in the <strong>ExamWRITER</strong> <strong>ePrescribing</strong> interface are<br />
dependent on your user status.<br />
Create Sign Send Print Favorites User<br />
Preferences<br />
Periodic<br />
Report<br />
Pharmacy<br />
Report<br />
Physician 1 X X X X X X X X<br />
Agent 2 X X X X X X X<br />
Clinical Staff 3 X X X X X X<br />
Non-Clinical<br />
X X X X X<br />
Staff 4<br />
Administrator 5 X X X<br />
(1) Physicians (including physician assistants and nurse practitioners) are able to<br />
create, sign, send, and print prescriptions. They can also change the signature<br />
password; add and modify favorite prescriptions, pharmacy information, and user<br />
preferences; and create and print the Periodic Report and Pharmacy Report.<br />
(2) Agents are able to create, send, and print prescriptions, but they cannot sign<br />
prescriptions. They can also add and modify favorite prescriptions, pharmacy<br />
information, and user preferences, and print the Periodic Report and Pharmacy<br />
Report.<br />
(3) Clinical staff members are able to create, print, and archive prescriptions, but<br />
they cannot sign or send prescriptions. They can also add and modify favorite<br />
prescriptions, pharmacy information, and user preferences, and print the Periodic<br />
Report and Pharmacy Report.<br />
(4) Non-clinical staff members are able to open the <strong>ExamWRITER</strong> <strong>ePrescribing</strong><br />
interface, select pharmacies for patients, and print and archive pending<br />
prescriptions, but they cannot create, sign, or send prescriptions. They can also<br />
add and modify favorite prescriptions, pharmacy information, and user<br />
preferences, and print the Periodic Report and Pharmacy Report.<br />
(5) Administrators are able to add and modify user and practice preferences and<br />
create and print the Activity Report, Drug Report, Decision Report, Periodic<br />
Report, and Pharmacy Report. Every office will have at least one administrator<br />
and the administrator(s) will also be set up as a physician, agent, clinical staff<br />
member, or non-clinical staff member.<br />
4 <strong>Using</strong> <strong>ePrescribing</strong> <strong>with</strong> <strong>ExamWRITER</strong>
<strong>Using</strong> <strong>ePrescribing</strong> <strong>with</strong> <strong>ExamWRITER</strong><br />
Setting Up <strong>ExamWRITER</strong><br />
Setting Up<br />
<strong>ExamWRITER</strong><br />
Before you begin using the <strong>ExamWRITER</strong> <strong>ePrescribing</strong> interface, complete the<br />
following set up tasks in <strong>ExamWRITER</strong> so that you are able to successfully send<br />
prescriptions electronically through the <strong>ExamWRITER</strong> <strong>ePrescribing</strong> interface.<br />
• Open the demographic record for each patient for whom you plan to send<br />
prescriptions electronically and ensure that the following information is<br />
recorded: Last Name, First Name, Zip Code, Sex, Date of Birth, and<br />
Provider.<br />
<strong>Using</strong> <strong>ePrescribing</strong> <strong>with</strong> <strong>ExamWRITER</strong> 5
<strong>Using</strong> <strong>ePrescribing</strong> <strong>with</strong> <strong>ExamWRITER</strong><br />
Setting Up <strong>ExamWRITER</strong><br />
• Click Tools (in <strong>ExamWRITER</strong>) or Setup and then <strong>ExamWRITER</strong> (in<br />
Administration/Home Office), select Preferences, and ensure that the<br />
following system preferences are set up properly in the Preferences window:<br />
<br />
<br />
If you selected the SINGLE line per heading Exam Default View on the<br />
General tab, ensure that you select the Yes radio button next to the<br />
Insert “No ~ exists except:” in Patient Hx preference on the Defaults<br />
tab.<br />
If you selected the MULTIPLE lines Exam Default View on the General<br />
tab, ensure that you select the No radio button next to the Insert “No ~<br />
exists except:” in Patient Hx preference on the Defaults tab.<br />
6 <strong>Using</strong> <strong>ePrescribing</strong> <strong>with</strong> <strong>ExamWRITER</strong>
<strong>Using</strong> <strong>ePrescribing</strong> <strong>with</strong> <strong>ExamWRITER</strong><br />
Setting Up <strong>ExamWRITER</strong><br />
• If you are using <strong>ExamWRITER</strong> 9.0 or below, select the Security Active?<br />
check box on the User Security window to activate security in <strong>ExamWRITER</strong><br />
for each <strong>ExamWRITER</strong> <strong>ePrescribing</strong> interface user. If you are using<br />
<strong>ExamWRITER</strong> 9.5 or above, security will already be activated.<br />
For more information<br />
about security<br />
settings in<br />
<strong>ExamWRITER</strong>, see<br />
the <strong>ExamWRITER</strong><br />
User’s Guide and<br />
Security recorded<br />
video tutorials.<br />
<strong>Using</strong> <strong>ePrescribing</strong> <strong>with</strong> <strong>ExamWRITER</strong> 7
<strong>Using</strong> <strong>ePrescribing</strong> <strong>with</strong> <strong>ExamWRITER</strong><br />
Sending Medical Prescriptions Electronically<br />
Sending<br />
Medical<br />
Prescriptions<br />
Electronically<br />
Prescribing<br />
medications<br />
electronically meets<br />
the CPOE and eRx<br />
requirements for<br />
meaningful use<br />
(core measures 1<br />
and 4).<br />
This section includes instructions that will help you send medical prescriptions<br />
electronically. This section includes the following topics:<br />
• Opening the <strong>ExamWRITER</strong> <strong>ePrescribing</strong> Interface, 8<br />
• Selecting a Practice, 10<br />
• Selecting a Pharmacy, 10<br />
• Prescribing a Medication, 12<br />
Opening the <strong>ExamWRITER</strong> <strong>ePrescribing</strong> Interface<br />
1. Open a patient’s exam record in <strong>ExamWRITER</strong>.<br />
2. Follow the instructions below to ensure that the patient’s medication allergy<br />
and medication history information is recorded in the exam record:<br />
a. Click the Patient Hx - ROS tab on the <strong>ExamWRITER</strong> chart window<br />
b. Click the Patient History bar.<br />
c. Select Medications - Systemic/Ocular/Allergies [MU].<br />
d. Click Process.<br />
e. Double-click the medication name in the table at the top of the window<br />
to add it to the table at the bottom of the bottom of the window, if needed.<br />
f. To record a medication as discontinued, select the medication in the<br />
table at the bottom of the window, click Discontinue medication, select<br />
a date from the Discontinue Date calendar, and click Save.<br />
g. To denote if the patient is allergic to a medication, select the Allergy<br />
check box next to the medication in the table at the bottom of the<br />
window, click in the blank text box in the Reaction window, select as<br />
many reactions as necessary, right-click in the Reaction window, select<br />
an onset date from the Onset calendar, and click Save.<br />
h. Click Save/Exit.<br />
8 <strong>Using</strong> <strong>ePrescribing</strong> <strong>with</strong> <strong>ExamWRITER</strong>
<strong>Using</strong> <strong>ePrescribing</strong> <strong>with</strong> <strong>ExamWRITER</strong><br />
Sending Medical Prescriptions Electronically<br />
The <strong>ExamWRITER</strong><br />
<strong>ePrescribing</strong><br />
interface<br />
automatically<br />
checks for<br />
drug-drug and<br />
drug-allergy<br />
interactions to help<br />
meet the<br />
requirements for<br />
meaningful use<br />
(core measure 2).<br />
3. Complete one of the actions below to open the Medication Order window:<br />
Click the Surgery - Plan - Mgmt tab on the <strong>ExamWRITER</strong> chart window,<br />
click the Plan bar, select the Medication Rx check box, and click<br />
Process.<br />
Press the F6 key anytime during an exam to record a patient’s<br />
prescription medication.<br />
NOTE<br />
Do not record the medication order in the <strong>ExamWRITER</strong><br />
Medication Order window. You must record the medication<br />
order in the <strong>ExamWRITER</strong> <strong>ePrescribing</strong> interface to<br />
electronically submit the medical prescription.<br />
4. Click the MU eRX icon to open the <strong>ExamWRITER</strong> <strong>ePrescribing</strong> interface.<br />
NOTE<br />
If you are not logged into <strong>ExamWRITER</strong> as a physician, ensure<br />
that the correct user is selected from the User ID drop-down<br />
menu, and, if necessary, type the password associated <strong>with</strong> the<br />
user ID in the Password text box and click Login. You must be<br />
a registered <strong>ExamWRITER</strong> <strong>ePrescribing</strong> interface user to log in<br />
to the interface.<br />
The practice, provider, patient demographic, medication allergy, and<br />
medication history information is sent from <strong>ExamWRITER</strong> and populated in<br />
the <strong>ExamWRITER</strong> <strong>ePrescribing</strong> interface.<br />
NOTE<br />
Modifications that you make to patient demographic,<br />
medication allergy, and medication history information in the<br />
<strong>ExamWRITER</strong> <strong>ePrescribing</strong> interface are only saved in the<br />
interface; the modifications are not transferred back to<br />
<strong>ExamWRITER</strong>.<br />
<strong>Using</strong> <strong>ePrescribing</strong> <strong>with</strong> <strong>ExamWRITER</strong> 9
<strong>Using</strong> <strong>ePrescribing</strong> <strong>with</strong> <strong>ExamWRITER</strong><br />
Sending Medical Prescriptions Electronically<br />
Selecting a Practice<br />
If you are using <strong>ExamWRITER</strong> in a multilocation environment, click the Practice<br />
link and select the practice from which you are prescribing the medication.<br />
Selecting a Pharmacy<br />
1. Open the <strong>ExamWRITER</strong> <strong>ePrescribing</strong> interface. For more information on<br />
opening the interface, go to “Opening the <strong>ExamWRITER</strong> <strong>ePrescribing</strong><br />
Interface” on page 8.<br />
2. Click the Pharmacy link to select the pharmacy where you want to send the<br />
patient’s medical prescription.<br />
10 <strong>Using</strong> <strong>ePrescribing</strong> <strong>with</strong> <strong>ExamWRITER</strong>
<strong>Using</strong> <strong>ePrescribing</strong> <strong>with</strong> <strong>ExamWRITER</strong><br />
Sending Medical Prescriptions Electronically<br />
3. Type appropriate search information in the Patient Pharmacy Information<br />
section and click Find to search for and select a pharmacy.<br />
NOTES • Click the Favorite List radio button to search for pharmacies<br />
in your Favorite List.<br />
• Click the Practice List radio button to search for local<br />
pharmacies in your geographic area. For more information<br />
on setting up the Practice List, go to “Adding & Modifying<br />
Pharmacy Data” on page 33.<br />
• Click the All lists radio button to search for all of the<br />
pharmacies available in the <strong>ExamWRITER</strong> <strong>ePrescribing</strong><br />
interface.<br />
• Click the Add a new pharmacy to the practice list link to<br />
add a local pharmacy to the Practice List, and, if desired, to<br />
your Favorite List.<br />
<strong>Using</strong> <strong>ePrescribing</strong> <strong>with</strong> <strong>ExamWRITER</strong> 11
<strong>Using</strong> <strong>ePrescribing</strong> <strong>with</strong> <strong>ExamWRITER</strong><br />
Sending Medical Prescriptions Electronically<br />
4. Click on a pharmacy name to select that pharmacy for the patient’s medical<br />
prescription.<br />
NOTES • Click the Edit link to edit the pharmacy’s information.<br />
• Click the Delete link to delete the pharmacy from the search<br />
results.<br />
• Click the Favor link to add the pharmacy to your Favorite<br />
List, or, click the UnFavor link to remove the pharmacy from<br />
your Favorite List.<br />
• Select the check boxes next to the pharmacies and click the<br />
Add link below the pharmacy list to add the selected<br />
pharmacies to your Favorite List or Practice List.<br />
• You cannot add a mail order pharmacy to a patient’s record,<br />
but you can select to send the prescription to a mail order<br />
pharmacy at the time that you prescribe it.<br />
Prescribing a Medication<br />
1. Open the <strong>ExamWRITER</strong> <strong>ePrescribing</strong> interface. For more information on<br />
opening the interface, go to “Opening the <strong>ExamWRITER</strong> <strong>ePrescribing</strong><br />
Interface” on page 8.<br />
2. Ensure that you have selected a pharmacy where you want to send the<br />
medical prescription. If desired, complete the actions below:<br />
<br />
<br />
Click the View link to view the pharmacy’s address, phone, and fax<br />
information.<br />
Click the Change link to select a different pharmacy; for more<br />
information on selecting a pharmacy, go to “Selecting a Pharmacy” on<br />
page 10.<br />
12 <strong>Using</strong> <strong>ePrescribing</strong> <strong>with</strong> <strong>ExamWRITER</strong>
<strong>Using</strong> <strong>ePrescribing</strong> <strong>with</strong> <strong>ExamWRITER</strong><br />
Sending Medical Prescriptions Electronically<br />
3. Click Prescribe in the main navigation bar at the top of the <strong>ExamWRITER</strong><br />
<strong>ePrescribing</strong> interface.<br />
4. If you want to record the patient’s last office visit on the prescription as<br />
today’s date, click Visit Today.<br />
NOTE<br />
To view, modify, and delete previous patient office visits, click<br />
Show Patient Visits.<br />
5. If the patient is pregnant or breastfeeding, select the Pregnant or<br />
Breastfeeding check box.<br />
6. If the patient transitioned from one point of care to your practice and you<br />
have enabled the Display Transition of Care Link practice preference, click<br />
TOC Today to record the patient’s transition of care date as today’s date.<br />
7. If you have enabled the When I select a patient, I want to see the Rendering<br />
Provider’s in the Patient’s Demographic Information section practice<br />
preference, select the provider who rendered services for the patient from<br />
the Rendering Provider drop-down menu and click Update.<br />
8. If you signed up to use the new Akario messaging system, click Send<br />
Patient Info. to securely send HIPAA-compliant patient referrals and<br />
protected health information to other medical providers or click Akario<br />
Messages to view messages sent to you by other medical providers.<br />
9. Complete one of the following actions in the Prescribe a Medication section<br />
to search for and select a medication:<br />
Click Category Search to search for medications by therapeutic class.<br />
<br />
<br />
NOTES • You can send and receive up to 20 MBs of data<br />
(attachments, etc.) in each message.<br />
• To learn more about Akario, go to<br />
https://getakiro.com/learnmore.<br />
• For Akario training information, go to<br />
www.getakario.com/trainingvideo.<br />
Type the full or partial name of a medication in the Name text box and<br />
click Find.<br />
Select a medication in your Favorite List from the Favorites drop-down<br />
menu and click Use. For more information on setting up your Favorite<br />
<strong>Using</strong> <strong>ePrescribing</strong> <strong>with</strong> <strong>ExamWRITER</strong> 13
<strong>Using</strong> <strong>ePrescribing</strong> <strong>with</strong> <strong>ExamWRITER</strong><br />
Sending Medical Prescriptions Electronically<br />
List, go to “Adding & Modifying Favorite Prescriptions” on page 29.<br />
NOTES • If you type the name of a medication in the Name text box<br />
and click Find and the medication is not recognized, you<br />
can click the Use free text link, record the drug schedule<br />
details, and then send the medication to the pharmacy<br />
through the <strong>ExamWRITER</strong> <strong>ePrescribing</strong> interface. Note that<br />
drug-drug interaction and drug-allergy warnings may not<br />
appear if you use the free text link.<br />
• If, after you have selected a medication in your Favorite List<br />
from the Favorites drop-down menu, you want to view or edit<br />
the medication, click View/Edit.<br />
If you did not select a pharmacy, but you did select formulary information,<br />
green and red alpha-numeric codes may appear next to medications,<br />
indicating formulary restrictions and preferences; note the codes and select<br />
a medication. If the medication that you searched for and selected interacts<br />
negatively <strong>with</strong> another medication’s formulary information, a blue warning<br />
message may appear.<br />
The <strong>ExamWRITER</strong><br />
<strong>ePrescribing</strong><br />
interface<br />
automatically<br />
checks for formulary<br />
information to help<br />
meet the<br />
requirements for<br />
meaningful use<br />
(menu set measure<br />
1).<br />
10. If the medication that you searched for and selected in step 9 interacts<br />
negatively <strong>with</strong> another medication or patient medication allergy, a warning<br />
message may appear; click Prescribe Anyway to prescribe the drug or<br />
Cancel to cancel the prescription.<br />
14 <strong>Using</strong> <strong>ePrescribing</strong> <strong>with</strong> <strong>ExamWRITER</strong>
<strong>Using</strong> <strong>ePrescribing</strong> <strong>with</strong> <strong>ExamWRITER</strong><br />
Sending Medical Prescriptions Electronically<br />
The <strong>ExamWRITER</strong><br />
<strong>ePrescribing</strong><br />
interface<br />
automatically<br />
checks for<br />
drug-drug and<br />
drug-allergy<br />
interactions to help<br />
meet the<br />
requirements for<br />
meaningful use<br />
(core measure 2).<br />
NOTES • Drug-drug interaction and drug-allergy warnings may not<br />
appear if the medication has a red triangle to the left of its<br />
name; these triangles indicate that the medication was<br />
entered by hand, rather than selected from a list, or was<br />
transferred <strong>with</strong> a code that the <strong>ExamWRITER</strong> <strong>ePrescribing</strong><br />
interface did not recognize. To receive more conclusive<br />
warning messages, click Manage Medications and reselect<br />
the patient’s other medications or medication allergies from<br />
the medication list.<br />
• Clinical prescription warnings are displayed in red text.<br />
Non-clinical prescription warnings are displayed in blue text.<br />
• If you want to provide a justification for prescribing the<br />
medication not<strong>with</strong>standing the warning, type text into the<br />
text box.<br />
<strong>Using</strong> <strong>ePrescribing</strong> <strong>with</strong> <strong>ExamWRITER</strong> 15
<strong>Using</strong> <strong>ePrescribing</strong> <strong>with</strong> <strong>ExamWRITER</strong><br />
Sending Medical Prescriptions Electronically<br />
11. If required information is missing from the prescription, you must record the<br />
prescription details in the appropriate fields and click Continue; otherwise,<br />
skip to step 12.<br />
NOTES • Ensure that all directions, including the Sig, are accurate. To<br />
taper a Sig, type the instructions in the Directions to Patient<br />
text box. If your tapering instructions are more than 140<br />
characters, the prescription will be faxed and not sent<br />
electronically.<br />
• If no provider is selected, select a provider from the Provider<br />
drop-down menu. If no provider is selected, the prescription<br />
will remain <strong>with</strong> a pending status until a provider is selected.<br />
• Click the Change link next to the selected pharmacy to<br />
search for and select a different pharmacy. For more<br />
information on selecting a pharmacy, go to “Selecting a<br />
Pharmacy” on page 10.<br />
• Click the Remove link to remove the selected pharmacy<br />
from the patient’s list. Patients can have up to five<br />
pharmacies assigned to them.<br />
• Click Split Prescription to select a second pharmacy to<br />
which you want to send part of the prescription. This feature<br />
is helpful if you want to send part of the prescription to a mail<br />
order pharmacy and part of it to a retail pharmacy.<br />
• Click Drug Reference to open the RxList website and<br />
search for information about a specific medication.<br />
• Type the patient’s weight in the Patient Weight text box and<br />
click Show Dose Calculator to calculate the correct dose<br />
for the patient and apply it to the Rx.<br />
• Click Change Drug to search for and select a different drug.<br />
16 <strong>Using</strong> <strong>ePrescribing</strong> <strong>with</strong> <strong>ExamWRITER</strong>
<strong>Using</strong> <strong>ePrescribing</strong> <strong>with</strong> <strong>ExamWRITER</strong><br />
Sending Medical Prescriptions Electronically<br />
12. Complete one of the following actions to sign, send, and print the<br />
prescription:<br />
<br />
<br />
<br />
<br />
If you are a physician, type your signature password in the Signature<br />
Password text box and click Send, Send and Print, Print w/o sending,<br />
or Sign w/o sending.<br />
If you are an agent, click Send, Signature for follow, Send and Print,<br />
Print w/o sending, or Archive w/o sending; you cannot sign<br />
prescriptions.<br />
If you are a clinical staff member, click Print w/o sending or Archive<br />
w/o sending; you cannot sign or send prescriptions.<br />
If you are a non-clinical staff member, do nothing; you cannot sign, send,<br />
or print prescriptions.<br />
NOTES • If you are writing a prescription for a controlled substance,<br />
click Print w/o sending. You cannot send prescriptions for<br />
controlled substances electronically.<br />
• If you are writing a prescription for sample medication, click<br />
Sign w/o sending.<br />
• If you want to stop the medication on a specific date, select<br />
the Stop medication on check box and select a date from<br />
the drop-down menus (if available).<br />
• Click OK to save the prescription <strong>with</strong>out signing, sending,<br />
or printing it (if available).<br />
• Click Add to Favorites or the Favor link to add the<br />
medication to your Favorite List. For more information on<br />
setting up your Favorite List, go to “Adding & Modifying<br />
Favorite Prescriptions” on page 29.<br />
• Click Modify to modify the prescription details.<br />
• Click Delete to delete the prescription for the patient and<br />
document the deletion in the Correspondence Hx tab in the<br />
Patient Information Center window in <strong>ExamWRITER</strong>.<br />
• Click the Print Pharmacy link to print the pharmacy on the<br />
prescription.<br />
<strong>Using</strong> <strong>ePrescribing</strong> <strong>with</strong> <strong>ExamWRITER</strong> 17
<strong>Using</strong> <strong>ePrescribing</strong> <strong>with</strong> <strong>ExamWRITER</strong><br />
Sending Medical Prescriptions Electronically<br />
All prescribed prescriptions appear in the Medications section in the<br />
<strong>ExamWRITER</strong> <strong>ePrescribing</strong> interface. If you signed and sent, printed, or<br />
archived the prescription, the prescription and its strength appears <strong>with</strong><br />
“eRX” after it in the Current Therapeutic Rx table and the pharmacy name<br />
appears in the Special Instructions text box and Medication Hx Notes<br />
column in the <strong>ExamWRITER</strong> Medication Order window.<br />
18 <strong>Using</strong> <strong>ePrescribing</strong> <strong>with</strong> <strong>ExamWRITER</strong>
<strong>Using</strong> <strong>ePrescribing</strong> <strong>with</strong> <strong>ExamWRITER</strong><br />
Managing Medications<br />
Managing<br />
Medications<br />
This section includes instructions that will help you manage the patient’s<br />
prescription medications, including deleting, modifying, and stopping them.<br />
NOTE<br />
Modifications that you make to medication information in the Manage<br />
Meds section in the <strong>ExamWRITER</strong> <strong>ePrescribing</strong> interface are only<br />
saved in the interface; the modifications are not transferred back to<br />
<strong>ExamWRITER</strong>.<br />
1. Open the <strong>ExamWRITER</strong> <strong>ePrescribing</strong> interface. For more information on<br />
opening the interface, go to “Opening the <strong>ExamWRITER</strong> <strong>ePrescribing</strong><br />
Interface” on page 8.<br />
2. Click Manage Meds in the main navigation bar at the top of the<br />
<strong>ExamWRITER</strong> <strong>ePrescribing</strong> interface.<br />
The Medication List for the patient is displayed.<br />
3. Complete one or more of the following actions:<br />
<br />
<br />
<br />
<br />
<br />
<br />
<br />
If you want to add a medication to the patient’s Medication List, type a<br />
medication’s name in the Add a medication text box and click Find or<br />
select a favorite medication from the Favorites drop-down menu and<br />
click Add. If, after you have selected a medication in your Favorite List<br />
from the Favorites drop-down menu, you want to view or update the<br />
medication, click View/Update.<br />
If you want to delete a medication from the list, click the Delete link. If<br />
you delete the medication, it is documented in the Correspondence Hx<br />
tab in the Patient Information Center window in <strong>ExamWRITER</strong>.<br />
If you want to modify a medication in the list, click the Modify link.<br />
If you want to stop a medication in the list, click the Stop link.<br />
If you want to start a medication in the list that has been previously<br />
stopped, click the Unstop link.<br />
If you want to display and print a detailed medication report for the<br />
patient, click the Display Detailed Medication Report link.<br />
If you want to view and print a mini medication report for the patient, click<br />
the Mini Report link.<br />
<strong>Using</strong> <strong>ePrescribing</strong> <strong>with</strong> <strong>ExamWRITER</strong> 19
<strong>Using</strong> <strong>ePrescribing</strong> <strong>with</strong> <strong>ExamWRITER</strong><br />
Renewing Prescriptions<br />
<br />
If you want to display the patient’s medication history, click the Show<br />
Medication History link; alternatively, if you want to hide the patient’s<br />
medication history, click the Hide Medication History link.<br />
NOTES • Click the Delete, Restart, Prescribe, and Renew links<br />
under the patient’s Medication History to delete, restart,<br />
prescribe, or renew the medication. If you delete the<br />
medication, it is documented in the Correspondence Hx tab<br />
in the Patient Information Center window in <strong>ExamWRITER</strong>.<br />
• Clicking the Medications Reviewed link will not satisfy menu<br />
set measure 7 in the EHR Incentive Program and help you<br />
meet the requirements for meaningful use. You must review<br />
medications in <strong>ExamWRITER</strong> to satisfy menu set measure 7<br />
in the EHR Incentive Program.<br />
Renewing<br />
Prescriptions<br />
This section includes instructions that will help you renew prescriptions. To refill<br />
prescriptions requests submitted electronically by pharmacies, go to “Viewing the<br />
Status of Refills” on page 53.<br />
1. Open the <strong>ExamWRITER</strong> <strong>ePrescribing</strong> interface. For more information on<br />
opening the interface, go to “Opening the <strong>ExamWRITER</strong> <strong>ePrescribing</strong><br />
Interface” on page 8.<br />
2. Ensure that you have selected a pharmacy where you want to send the<br />
medical prescription. For more information on selecting a pharmacy, go to<br />
“Selecting a Pharmacy” on page 10.<br />
3. Click Prescribe in the main navigation bar at the top of the <strong>ExamWRITER</strong><br />
<strong>ePrescribing</strong> interface.<br />
4. If you want to record the patient’s last office visit on the prescription as<br />
today’s date, click Visit Today.<br />
NOTE<br />
To view, modify, and delete previous patient office visits, click<br />
Show Patient Visits.<br />
5. If the patient is pregnant or breastfeeding, select the Pregnant or<br />
Breastfeeding check box.<br />
20 <strong>Using</strong> <strong>ePrescribing</strong> <strong>with</strong> <strong>ExamWRITER</strong>
<strong>Using</strong> <strong>ePrescribing</strong> <strong>with</strong> <strong>ExamWRITER</strong><br />
Renewing Prescriptions<br />
6. If the patient transitioned from one point of care to your practice and you<br />
have enabled the Display Transition of Care Link practice preference, click<br />
TOC Today to record the patient’s transition of care date as today’s date.<br />
7. If you have enabled the When I select a patient, I want to see the Rendering<br />
Provider’s in the Patient’s Demographic Information section practice<br />
preference, select the provider who rendered services for the patient from<br />
the Rendering Provider drop-down menu and click Update.<br />
8. If you signed up to use the new Akario messaging system, click Send<br />
Patient Info. to securely send HIPAA-compliant patient referrals and<br />
protected health information to other medical providers or click Akario<br />
Messages to view messages sent to you by other medical providers.<br />
NOTES • You can send and receive up to 20 MBs of data<br />
(attachments, etc.) in each message.<br />
• To learn more about Akario, go to<br />
https://getakiro.com/learnmore.<br />
• For Akario training information, go to<br />
www.getakario.com/trainingvideo.<br />
9. Click the Renew link next to the prescription you want to renew.<br />
NOTE<br />
To renew multiple prescriptions at the same time, select the<br />
check box next to the prescriptions (or, click the Select All link)<br />
and click the Renew Selected link.<br />
If you did not select a pharmacy, but you did select formulary information,<br />
green and red alpha-numeric codes may appear next to medications,<br />
indicating formulary restrictions and preferences; note the codes and select<br />
a medication. If the medication that you searched for and selected interacts<br />
negatively <strong>with</strong> another medication’s formulary information, a blue warning<br />
message may appear.<br />
<strong>Using</strong> <strong>ePrescribing</strong> <strong>with</strong> <strong>ExamWRITER</strong> 21
<strong>Using</strong> <strong>ePrescribing</strong> <strong>with</strong> <strong>ExamWRITER</strong><br />
Renewing Prescriptions<br />
The <strong>ExamWRITER</strong><br />
<strong>ePrescribing</strong><br />
interface<br />
automatically<br />
checks for formulary<br />
information to help<br />
meet the<br />
requirements for<br />
meaningful use<br />
(menu set measure<br />
1).<br />
22 <strong>Using</strong> <strong>ePrescribing</strong> <strong>with</strong> <strong>ExamWRITER</strong>
<strong>Using</strong> <strong>ePrescribing</strong> <strong>with</strong> <strong>ExamWRITER</strong><br />
Renewing Prescriptions<br />
10. If the medication(s) that you are renewing interacts negatively <strong>with</strong> another<br />
medication or patient medication allergy, a warning message may appear;<br />
click Prescribe Anyway to renew the drug or Cancel to cancel the<br />
prescription.<br />
The <strong>ExamWRITER</strong><br />
<strong>ePrescribing</strong><br />
interface<br />
automatically<br />
checks for<br />
drug-drug and<br />
drug-allergy<br />
interactions to help<br />
meet the<br />
requirements for<br />
meaningful use<br />
(core measure 2).<br />
NOTES • Drug-drug interaction and drug-allergy warnings may not<br />
appear if the medication has a red triangle to the left of its<br />
name; these triangles indicate that the medication was<br />
entered by hand, rather than selected from a list, or was<br />
transferred <strong>with</strong> a code that the <strong>ExamWRITER</strong> <strong>ePrescribing</strong><br />
interface did not recognize. To receive more conclusive<br />
warning messages, click Manage Medications and reselect<br />
the patient’s other medications or medication allergies from<br />
the medication list.<br />
• Clinical prescription warnings are displayed in red text.<br />
Non-clinical prescription warnings are displayed in blue text.<br />
• If you want to provide a justification for prescribing the<br />
medication not<strong>with</strong>standing the warning, type text into the<br />
text box.<br />
<strong>Using</strong> <strong>ePrescribing</strong> <strong>with</strong> <strong>ExamWRITER</strong> 23
<strong>Using</strong> <strong>ePrescribing</strong> <strong>with</strong> <strong>ExamWRITER</strong><br />
Renewing Prescriptions<br />
11. Complete one of the following actions to sign, send, and print the<br />
prescription:<br />
<br />
<br />
<br />
<br />
If you are a physician, type your signature password in the Signature<br />
Password text box and click Send, Send and Print, Print w/o sending,<br />
or Sign w/o sending.<br />
If you are an agent, click Send, Signature for follow, Send and Print,<br />
Print w/o sending, or Archive w/o sending; you cannot sign<br />
prescriptions.<br />
If you are a clinical staff member, click Print w/o sending or Archive<br />
w/o sending; you cannot sign or send prescriptions.<br />
If you are a non-clinical staff member, do nothing; you cannot sign, send,<br />
or print prescriptions.<br />
NOTES • If you are writing a prescription for a controlled substance,<br />
click Print w/o sending. You cannot send prescriptions for<br />
controlled substances electronically.<br />
• If you are writing a prescription for sample medication, click<br />
Sign w/o sending.<br />
• Click the Favor link to add the medication to your Favorite<br />
List. For more information on setting up your Favorite List, go<br />
to “Adding & Modifying Favorite Prescriptions” on page 29.<br />
• Click the Modify link to modify the prescription details.<br />
• Click the Delete link to delete the prescription for the patient<br />
and document the deletion in the Correspondence Hx tab in<br />
the Patient Information Center window in <strong>ExamWRITER</strong>.<br />
• Click the Print Pharmacy link to print the pharmacy on the<br />
prescription.<br />
24 <strong>Using</strong> <strong>ePrescribing</strong> <strong>with</strong> <strong>ExamWRITER</strong>
<strong>Using</strong> <strong>ePrescribing</strong> <strong>with</strong> <strong>ExamWRITER</strong><br />
Renewing Prescriptions<br />
All prescribed prescriptions appear in the Medications section in the<br />
<strong>ExamWRITER</strong> <strong>ePrescribing</strong> interface. If you signed and sent, printed, or<br />
archived the prescription, the prescription and its strength appears <strong>with</strong><br />
“eRX” after it in the Current Therapeutic Rx table and the pharmacy name<br />
appears in the Special Instructions text box and Medication Hx Notes<br />
column in the <strong>ExamWRITER</strong> Medication Order window.<br />
<strong>Using</strong> <strong>ePrescribing</strong> <strong>with</strong> <strong>ExamWRITER</strong> 25
<strong>Using</strong> <strong>ePrescribing</strong> <strong>with</strong> <strong>ExamWRITER</strong><br />
Viewing Medication Drug History<br />
Viewing<br />
Medication<br />
Drug History<br />
This section includes instructions about viewing a patient’s medication drug<br />
history. Medication drug history of up to two years will be displayed for all patients<br />
whose insurance companies and pharmacies provide this information to<br />
Surescripts.<br />
1. Open the <strong>ExamWRITER</strong> <strong>ePrescribing</strong> interface. For more information on<br />
opening the interface, go to “Opening the <strong>ExamWRITER</strong> <strong>ePrescribing</strong><br />
Interface” on page 8.<br />
2. Click Med Hx in the main navigation bar at the top of the <strong>ExamWRITER</strong><br />
<strong>ePrescribing</strong> interface.<br />
3. Select a time frame from the drop-down menu and click Obtain New Data.<br />
External medication and drug interaction information from insurance<br />
companies and pharmacies is displayed based on your current Medication<br />
List. To add medications to the current Medication List, go to “Managing<br />
Medications” on page 19.<br />
26 <strong>Using</strong> <strong>ePrescribing</strong> <strong>with</strong> <strong>ExamWRITER</strong>
<strong>Using</strong> <strong>ePrescribing</strong> <strong>with</strong> <strong>ExamWRITER</strong><br />
Modifying Options & Printing Reports<br />
Modifying<br />
Options &<br />
Printing<br />
Reports<br />
You can modify options and set up preferences in the <strong>ExamWRITER</strong> <strong>ePrescribing</strong><br />
interface. You can also print a variety of reports. This section includes the<br />
following topics:<br />
• Changing the Signature Password, 27<br />
• Configuring Formularies, 28<br />
• Adding & Modifying Favorite Prescriptions, 29<br />
• Managing Provider Agents, 32<br />
• Setting Up Patient Advisor Preferences, 33<br />
• Adding & Modifying Pharmacy Data, 33<br />
• Setting Up User Preferences, 35<br />
• Setting Up Practice Preferences, 38<br />
• Printing the Activity Report, 44<br />
• Printing the Drug Report, 45<br />
• Printing the Decision Report, 46<br />
• Printing the Periodic Report, 47<br />
• Printing the Pharmacy Report, 49<br />
• Printing the Prescription Report, 49<br />
• Printing the Provider Agent Report, 51<br />
Changing the Signature Password<br />
If you are a physician, you can change the signature password that is needed to<br />
send prescriptions electronically to pharmacies. Only physicians can change the<br />
signature password.<br />
1. Open the <strong>ExamWRITER</strong> <strong>ePrescribing</strong> interface. For more information on<br />
opening the interface, go to “Opening the <strong>ExamWRITER</strong> <strong>ePrescribing</strong><br />
Interface” on page 8.<br />
2. Click Options in the main navigation bar at the top of the <strong>ExamWRITER</strong><br />
<strong>ePrescribing</strong> interface.<br />
3. Click the Change Password link.<br />
4. Type the old password in the Old Signature Password text box.<br />
5. Type the new password in the New Signature Password text box.<br />
<strong>Using</strong> <strong>ePrescribing</strong> <strong>with</strong> <strong>ExamWRITER</strong> 27
<strong>Using</strong> <strong>ePrescribing</strong> <strong>with</strong> <strong>ExamWRITER</strong><br />
Modifying Options & Printing Reports<br />
6. Click Change.<br />
Configuring Formularies<br />
Follow the instructions below to add or modify insurance formularies for the<br />
practice.<br />
1. Open the <strong>ExamWRITER</strong> <strong>ePrescribing</strong> interface. For more information on<br />
opening the interface, go to “Opening the <strong>ExamWRITER</strong> <strong>ePrescribing</strong><br />
Interface” on page 8.<br />
2. Click Options in the main navigation bar at the top of the <strong>ExamWRITER</strong><br />
<strong>ePrescribing</strong> interface.<br />
3. Click the Configure Formularies link.<br />
4. If you want to enable formulary exclusion warnings that display formulary<br />
restrictions and preferences while prescribing medications, select the<br />
Enable Formulary Exclusion Warnings check box.<br />
5. Select how you want to use each formulary (Web Only or Web and Palm)<br />
from the Use drop-down menus.<br />
28 <strong>Using</strong> <strong>ePrescribing</strong> <strong>with</strong> <strong>ExamWRITER</strong>
<strong>Using</strong> <strong>ePrescribing</strong> <strong>with</strong> <strong>ExamWRITER</strong><br />
Modifying Options & Printing Reports<br />
6. Click Configure.<br />
Adding & Modifying Favorite Prescriptions<br />
You can create favorite prescriptions – medications that you routinely prescribe<br />
for your patients. These prescriptions can include the Sig and strength<br />
information. Physicians, agents, clinical staff members, and non-clinical staff<br />
members can add and modify favorite prescriptions; administrators cannot add<br />
or modify favorite prescriptions.<br />
1. Open the <strong>ExamWRITER</strong> <strong>ePrescribing</strong> interface. For more information on<br />
opening the interface, go to “Opening the <strong>ExamWRITER</strong> <strong>ePrescribing</strong><br />
Interface” on page 8.<br />
2. Click Options in the main navigation bar at the top of the <strong>ExamWRITER</strong><br />
<strong>ePrescribing</strong> interface.<br />
3. Click the Favorite Prescription link.<br />
<strong>Using</strong> <strong>ePrescribing</strong> <strong>with</strong> <strong>ExamWRITER</strong> 29
<strong>Using</strong> <strong>ePrescribing</strong> <strong>with</strong> <strong>ExamWRITER</strong><br />
Modifying Options & Printing Reports<br />
4. To modify an existing favorite prescription, follow the instructions below;<br />
otherwise, go to step 5 to add a new favorite prescription.<br />
a. Select the favorite prescription from the Favorites drop-down menu.<br />
b. Click View/Update.<br />
c. Click the Change link.<br />
d. Modify the prescription, as desired, and click Continue.<br />
e. Click Update to save the changes.<br />
30 <strong>Using</strong> <strong>ePrescribing</strong> <strong>with</strong> <strong>ExamWRITER</strong>
<strong>Using</strong> <strong>ePrescribing</strong> <strong>with</strong> <strong>ExamWRITER</strong><br />
Modifying Options & Printing Reports<br />
5. To add a new favorite prescription, follow the instructions below:<br />
a. Type the drug name in the Drug Name text box and click Find.<br />
b. Select the prescription from the list of available drugs.<br />
c. Modify the prescription, as desired, and click Continue.<br />
d. Click Create to save the prescription.<br />
<strong>Using</strong> <strong>ePrescribing</strong> <strong>with</strong> <strong>ExamWRITER</strong> 31
<strong>Using</strong> <strong>ePrescribing</strong> <strong>with</strong> <strong>ExamWRITER</strong><br />
Modifying Options & Printing Reports<br />
Managing Provider Agents<br />
You can view a list of your provider agents and authorize and revoke the privileges<br />
of your provider agents. Agents are able to create, send, and print prescriptions,<br />
but they cannot sign prescriptions. They can also add and modify favorite<br />
prescriptions, pharmacy information, and user preferences, and print the Periodic<br />
Report and Pharmacy Report. To print the Provider Agent Report, which allows<br />
you to view all provider agents <strong>with</strong>in the practice, the date the agents’ privileges<br />
were authorized and revoked, and the individual who last acted upon the status<br />
of the agent, go to “Printing the Provider Agent Report” on page 51.<br />
1. Open the <strong>ExamWRITER</strong> <strong>ePrescribing</strong> interface. For more information on<br />
opening the interface, go to “Opening the <strong>ExamWRITER</strong> <strong>ePrescribing</strong><br />
Interface” on page 8.<br />
2. Click Options in the main navigation bar at the top of the <strong>ExamWRITER</strong><br />
<strong>ePrescribing</strong> interface.<br />
3. Click the Manage My Agents link.<br />
4. Type and select user search criteria and click Search to find users for whom<br />
you want to authorize or revoke provider agent privileges.<br />
5. Select users for whom you want to authorize or revoke provider agent<br />
privileges.<br />
6. Type your signature password in the Signature Password text box above or<br />
below the list of users.<br />
7. Click Authorize Agent to authorize provider agent privileges for the users<br />
that you selected in step 5 or click Revoke Agent to revoke provider agent<br />
privileges for the users that you selected in step 5.<br />
32 <strong>Using</strong> <strong>ePrescribing</strong> <strong>with</strong> <strong>ExamWRITER</strong>
<strong>Using</strong> <strong>ePrescribing</strong> <strong>with</strong> <strong>ExamWRITER</strong><br />
Modifying Options & Printing Reports<br />
Setting Up Patient Advisor Preferences<br />
You can set up a preference to offer prescription savings, such as coupons,<br />
vouchers, and co-pays, to patients. These offerings are amended to prescriptions<br />
in the pharmacy notes field.<br />
NOTE<br />
After you set up Patient Advisor preferences, you can modify them at<br />
any time in the Practice-Wide Preferences. For more information<br />
about modifying Patient Advisor preferences, go to “Setting Up<br />
Practice Preferences” on page 38.<br />
1. Open the <strong>ExamWRITER</strong> <strong>ePrescribing</strong> interface. For more information on<br />
opening the interface, go to “Opening the <strong>ExamWRITER</strong> <strong>ePrescribing</strong><br />
Interface” on page 8.<br />
2. Click Options in the main navigation bar at the top of the <strong>ExamWRITER</strong><br />
<strong>ePrescribing</strong> interface.<br />
3. Click the Patient Advisor Preferences link.<br />
4. Select the Prescription Savings (Co-pay Cards, Vouchers) check box.<br />
5. Click Save.<br />
Adding & Modifying Pharmacy Data<br />
You can add or modify the pharmacy Practice List to make selecting a pharmacy<br />
while prescribing a medication quicker and easier.<br />
1. Open the <strong>ExamWRITER</strong> <strong>ePrescribing</strong> interface. For more information on<br />
opening the interface, go to “Opening the <strong>ExamWRITER</strong> <strong>ePrescribing</strong><br />
Interface” on page 8.<br />
2. Click Options in the main navigation bar at the top of the <strong>ExamWRITER</strong><br />
<strong>ePrescribing</strong> interface.<br />
3. Click the Pharmacy Data link.<br />
<strong>Using</strong> <strong>ePrescribing</strong> <strong>with</strong> <strong>ExamWRITER</strong> 33
<strong>Using</strong> <strong>ePrescribing</strong> <strong>with</strong> <strong>ExamWRITER</strong><br />
Modifying Options & Printing Reports<br />
4. To modify an existing pharmacy’s information, follow the instructions below;<br />
otherwise, go to step 5 to add a new pharmacy to the Practice List.<br />
a. Select and type pharmacy search criteria in the Patient Pharmacy<br />
Information section and then click Find.<br />
b. Click Edit next to the pharmacy that you want to modify.<br />
c. Modify the alias in the Practice List Alias text box.<br />
d. Click Change Pharmacy Data.<br />
5. To add an new pharmacy to the practice list, follow the instructions below:<br />
a. Click Add a new pharmacy to the practice list.<br />
b. Record pharmacy information in the required fields and click Register<br />
this Pharmacy.<br />
34 <strong>Using</strong> <strong>ePrescribing</strong> <strong>with</strong> <strong>ExamWRITER</strong>
<strong>Using</strong> <strong>ePrescribing</strong> <strong>with</strong> <strong>ExamWRITER</strong><br />
Modifying Options & Printing Reports<br />
Setting Up User Preferences<br />
You can modify <strong>ExamWRITER</strong> <strong>ePrescribing</strong> interface user preferences, including<br />
custom prescription notes.<br />
1. Open the <strong>ExamWRITER</strong> <strong>ePrescribing</strong> interface. For more information on<br />
opening the interface, go to “Opening the <strong>ExamWRITER</strong> <strong>ePrescribing</strong><br />
Interface” on page 8.<br />
2. Click Options in the main navigation bar at the top of the <strong>ExamWRITER</strong><br />
<strong>ePrescribing</strong> interface.<br />
3. Click the Preferences -- user link.<br />
<strong>Using</strong> <strong>ePrescribing</strong> <strong>with</strong> <strong>ExamWRITER</strong> 35
<strong>Using</strong> <strong>ePrescribing</strong> <strong>with</strong> <strong>ExamWRITER</strong><br />
Modifying Options & Printing Reports<br />
4. Select user preferences from the drop-down menus and then click Make<br />
these Changes.<br />
User Preference<br />
When starting, go to:<br />
When searching for<br />
pharmacies, start <strong>with</strong>:<br />
When reporting, warn if<br />
a patient has had no<br />
office visit in the last:<br />
When reporting, use as<br />
default:<br />
When reporting, show<br />
by default:<br />
When reporting,<br />
retrieve by default<br />
prescriptions for:<br />
When reporting,<br />
retrieve up to:<br />
When displaying<br />
medication history,<br />
show medications for<br />
last:<br />
Show cancelled<br />
prescriptions in reports:<br />
Use Practice or<br />
Provider address on<br />
prescriptions and<br />
medication reports.<br />
Show the prescriber’s<br />
Medical License<br />
Number on retail<br />
prescriptions:<br />
Options<br />
Select which screen you want to appear when<br />
opening the <strong>ExamWRITER</strong> <strong>ePrescribing</strong><br />
interface. We recommend that you select<br />
Patient Selection.<br />
Select the default pharmacy list to use during<br />
searches. We recommend that you select All<br />
Lists.<br />
Select the number of days since a patient’s last<br />
appointment that you want a patient office visit<br />
warning to appear. We recommend that you<br />
select year.<br />
Select the default provider that you want to use<br />
for reporting options.<br />
Select the default prescription report display<br />
option that you want to use.<br />
Select the default prescription report filtering<br />
option that you want to use.<br />
Select the maximum number of records a report<br />
will display at one time. We recommend that you<br />
select 50 reports.<br />
Select the default time limit for medications to<br />
display when generating a patient’s medical<br />
history report.<br />
Select if you want to display cancelled<br />
prescriptions when generating prescription<br />
reports.<br />
Select the default address that you want to use<br />
on all prescription and medication reports. We<br />
recommend that you select Practice.<br />
Select if you want to automatically display the<br />
provider’s medical license number on<br />
prescriptions. Note that mail order prescriptions<br />
will always display the license number.<br />
Additionally, some states require a license<br />
number on retail prescriptions.<br />
36 <strong>Using</strong> <strong>ePrescribing</strong> <strong>with</strong> <strong>ExamWRITER</strong>
<strong>Using</strong> <strong>ePrescribing</strong> <strong>with</strong> <strong>ExamWRITER</strong><br />
Modifying Options & Printing Reports<br />
User Preference<br />
Show the prescriber’s<br />
email address on retail<br />
prescriptions:<br />
Print at most X<br />
prescriptions on a<br />
single page.<br />
Display patient allergies<br />
on printed/faxed<br />
prescriptions:<br />
Display patient problem<br />
on printed/faxed<br />
prescriptions:<br />
Notify me of All<br />
messages or Only<br />
messages sent to me.<br />
Ignore previously seen<br />
warnings on refills from<br />
patient medication list:<br />
When encountering an<br />
insurance warning,<br />
show confirmation<br />
screen for:<br />
Allow two or more<br />
medications for a single<br />
patient that differ only in<br />
quantity:<br />
Show patient weight on<br />
details screen:<br />
Custom prescription<br />
notes (one per line):<br />
Options<br />
Select if you want to print the prescriber’s e-mail<br />
address on prescriptions.<br />
Select the number of prescriptions that you want<br />
to print on a single page. We recommend that<br />
you select 1.<br />
Select if you want to display patient allergies on<br />
printed and faxed prescriptions.<br />
Select if you want to display patient problems on<br />
printed and faxed prescriptions.<br />
Select if you want to be notified of all practice<br />
renewal messages or only renewal messages<br />
sent to the current user.<br />
Select if you want to continue to receive<br />
warnings to which you have already been<br />
alerted.<br />
Select which type of warning to display on the<br />
confirmation window.<br />
Select if you want prescribe the same<br />
medication more than once to a single patient,<br />
as long as the quantity is different for each<br />
written prescription.<br />
Select if you want to display patients’ weight on<br />
the details window.<br />
Type custom prescription notes that will be<br />
available to select while prescribing<br />
medications. The note can be as long as<br />
desired. Do not press the Enter key while typing<br />
an individual note; let the text wrap. Press the<br />
Enter key to delineate between individual<br />
prescription notes.<br />
<strong>Using</strong> <strong>ePrescribing</strong> <strong>with</strong> <strong>ExamWRITER</strong> 37
<strong>Using</strong> <strong>ePrescribing</strong> <strong>with</strong> <strong>ExamWRITER</strong><br />
Modifying Options & Printing Reports<br />
Setting Up Practice Preferences<br />
Administrators can modify <strong>ExamWRITER</strong> <strong>ePrescribing</strong> interface practice<br />
preferences, including Patient Advisor preferences. Modifications that you make<br />
to these preferences affect all users, regardless of their own user preferences.<br />
1. Open the <strong>ExamWRITER</strong> <strong>ePrescribing</strong> interface. For more information on<br />
opening the interface, go to “Opening the <strong>ExamWRITER</strong> <strong>ePrescribing</strong><br />
Interface” on page 8.<br />
2. Click Options in the main navigation bar at the top of the <strong>ExamWRITER</strong><br />
<strong>ePrescribing</strong> interface.<br />
3. Click the Preferences -- practice link.<br />
38 <strong>Using</strong> <strong>ePrescribing</strong> <strong>with</strong> <strong>ExamWRITER</strong>
<strong>Using</strong> <strong>ePrescribing</strong> <strong>with</strong> <strong>ExamWRITER</strong><br />
Modifying Options & Printing Reports<br />
4. Select practice preferences from the drop-down menus and then click Make<br />
these Changes.<br />
Practice Preference<br />
Allow prescribers to see<br />
prescription savings<br />
(Co-pay Cards,<br />
Vouchers) when<br />
available:<br />
Warn users when they<br />
prescribe a drug that<br />
may not be covered by<br />
insurance:<br />
When an insurance<br />
warning is displayed<br />
and the user desires to<br />
prescribe the<br />
medication<br />
not<strong>with</strong>standing the<br />
warning:<br />
When renewing or<br />
prescribing an active<br />
medication, retain the<br />
Office Commends and<br />
Directions to<br />
Pharmacist from the<br />
previous prescription<br />
by default:<br />
When selecting a drug,<br />
show users formulary<br />
statuses for:<br />
Show the prescriber’s<br />
DEA Number<br />
By default, check the<br />
“print pharmacy name”<br />
checkbox:<br />
Allow prescription<br />
“print” button to instead<br />
fax to the following fax<br />
numbers (separate by<br />
commas):<br />
Options<br />
Select if you want to use the Patient Advisor to<br />
allow prescribers to see prescription savings<br />
when available. These savings can help reduce<br />
first fill prescription abandonment, improve<br />
medication adherence rates <strong>with</strong> sustainable<br />
results, and allow providers to gain insight into<br />
patient behaviors.<br />
Select if you want to display an insurance drug<br />
coverage warning when the prescribed<br />
medication is not covered.<br />
Select the action that you want to require if an<br />
insurance warning is displayed and the user<br />
prescribes the medication not<strong>with</strong>standing the<br />
warning.<br />
Select if you want to retain previous notes to the<br />
pharmacist and staff on renewals.<br />
Select to display formulary statuses for restricted<br />
drugs only or all drugs. We recommend that you<br />
select All Drugs.<br />
Select to display the prescriber’s DEA number<br />
on prescriptions for scheduled drugs, on all<br />
prescriptions, or never. We recommend that you<br />
select On prescriptions for scheduled drugs.<br />
Select if you want to automatically print the<br />
pharmacy name on printed prescriptions.<br />
Type fax numbers to which you want to<br />
automatically fax prescriptions. We do not<br />
recommend using this feature.<br />
<strong>Using</strong> <strong>ePrescribing</strong> <strong>with</strong> <strong>ExamWRITER</strong> 39
<strong>Using</strong> <strong>ePrescribing</strong> <strong>with</strong> <strong>ExamWRITER</strong><br />
Modifying Options & Printing Reports<br />
Practice Preference<br />
Allow users to send a<br />
prescription directly<br />
from the Review<br />
Prescriptions screen:<br />
Require staff to specify<br />
a provider before<br />
saving a prescription:<br />
Require provider signoff<br />
for prescriptions printed<br />
by staff:<br />
Allow creation of<br />
prescriptions missing<br />
sig or quantity data:<br />
When reporting, start<br />
<strong>with</strong> pending<br />
prescriptions checked:<br />
When reporting, display<br />
patient Primary care<br />
provider, if any:<br />
When reporting, show<br />
date of last patient visit:<br />
When reporting, show<br />
date of next patient<br />
visit, if any:<br />
When reporting, show<br />
office comments in full:<br />
When reporting, show<br />
pharmacy name:<br />
Automatically set the<br />
medication stop date<br />
when the prescription<br />
has a set duration:<br />
Options<br />
Select if you want to add the “Action” buttons to<br />
the Review Prescription window.<br />
Select if you want to automatically prevent<br />
prescriptions from being created <strong>with</strong>out<br />
selecting a provider. We recommend that you<br />
select Yes.<br />
Select if you want to require the provider’s<br />
signature on printed prescriptions.<br />
Select if you want to allow prescriptions to be<br />
generated and saved <strong>with</strong>out including Sig or<br />
quantity data. This feature is helpful for staff<br />
members because sometimes they do not know<br />
the Sig and when this feature is turned on, they<br />
can still create and send prescriptions to the<br />
physician's queue for approval. We recommend<br />
that you select Yes.<br />
Select if you want to check all pending<br />
prescriptions on the pending prescriptions<br />
report. We recommend that you select No so<br />
that physicians have to choose the prescriptions<br />
that they desire to approve and do not<br />
accidently approve another physician's<br />
prescriptions.<br />
Select if you want to automatically display the<br />
primary care provider, if available, on all reports.<br />
Select if you want to automatically display the<br />
last patient visit date on all reports.<br />
Select if you want to automatically display the<br />
next scheduled patient visit date, if available, on<br />
all reports.<br />
Select if you want to display office comments on<br />
all reports.<br />
Select if you want to display the pharmacy name<br />
on all reports.<br />
Select if you want to automatically discontinue<br />
an active medication when the duration expires.<br />
If you select Yes, medications will automatically<br />
be moved to the patient’s history.<br />
40 <strong>Using</strong> <strong>ePrescribing</strong> <strong>with</strong> <strong>ExamWRITER</strong>
<strong>Using</strong> <strong>ePrescribing</strong> <strong>with</strong> <strong>ExamWRITER</strong><br />
Modifying Options & Printing Reports<br />
Practice Preference<br />
Use practice name on<br />
prescription and<br />
medication reports:<br />
Show prescriber name<br />
on medication reports:<br />
Display drug<br />
interaction, allergy, and<br />
exclusion warnings on<br />
the printed/faxed<br />
prescription:<br />
Show a link to a free<br />
drug information<br />
reference site.<br />
External ID system<br />
name to require for<br />
each patient, if any:<br />
External ID system<br />
name to display on<br />
prescriptions and<br />
reports, if any:<br />
Label to use for above<br />
external ID, if any:<br />
Signature Password<br />
Duration:<br />
Warn provider for<br />
renewal requests more<br />
than X day(s) old.<br />
Warn provider for<br />
pending prescriptions<br />
more than X day(s) old.<br />
When checking for<br />
drug-drug interactions,<br />
show:<br />
Options<br />
Select if you want to automatically display the<br />
practice name on prescription and medication<br />
reports.<br />
Select if you want to automatically display the<br />
prescriber name on medication reports.<br />
Select if you want to automatically include any<br />
drug and allergy interaction and exclusion<br />
warnings on all printed and faxed prescriptions.<br />
Select if you want to see links to ePocrates. Note<br />
that you must have a license to access this<br />
website.<br />
Type the identifier used to link Rcopia to<br />
<strong>ExamWRITER</strong>. This identifier is necessary if you<br />
add new patients directly in the <strong>ExamWRITER</strong><br />
<strong>ePrescribing</strong> interface.<br />
Type the patient or external ID that you want to<br />
display on all prescriptions and reports. This<br />
feature is typically not used by smaller practices.<br />
If you typed a patient or external ID that you want<br />
to display on all prescriptions and reports in the<br />
preference above, type the label that you want to<br />
use for the ID.<br />
Select the duration, in minutes, that the signature<br />
password should remain active. We recommend<br />
that you select None so that a signature<br />
password is required at all times and proper<br />
credentials are always used.<br />
Select the number of days after a renewal<br />
request was created that you want to warn the<br />
provider. We recommend that you select 1 so<br />
that providers are cognizant of their pending<br />
renewal requests.<br />
Select the number of days after a prescription<br />
was created that you want to warn the provider.<br />
We recommend that you select 1 so that<br />
providers are cognizant of their pending<br />
prescriptions that need signatures.<br />
Select the drug-drug interactions that you want<br />
to display.<br />
<strong>Using</strong> <strong>ePrescribing</strong> <strong>with</strong> <strong>ExamWRITER</strong> 41
<strong>Using</strong> <strong>ePrescribing</strong> <strong>with</strong> <strong>ExamWRITER</strong><br />
Modifying Options & Printing Reports<br />
Practice Preference<br />
When checking for<br />
drug-drug interactions,<br />
check against patient’s<br />
PBM drug history if<br />
available:<br />
When checking for<br />
drug-allergy<br />
interactions, show:<br />
When checking for<br />
drug-disease<br />
interactions, show:<br />
Allow drug interaction<br />
checking against<br />
medication list:<br />
When showing geriatric<br />
precautions, limit to:<br />
When showing<br />
pediatric precautions,<br />
limit to:<br />
When checking for<br />
duplicate therapy,<br />
check against patient’s<br />
PBM drug history if<br />
available:<br />
Automatically search<br />
for patient PBM drug<br />
history:<br />
In the patient<br />
medication list, display<br />
the initials of the<br />
provider who last<br />
renewed the<br />
medication.<br />
Allow incomplete drugs<br />
in medications<br />
Allow partial start dates<br />
in medication and<br />
allergy records<br />
Use Medication History<br />
Source?<br />
Options<br />
Select if you want to use a patient’s medication<br />
drug history to check for drug-drug interactions.<br />
The medication drug history includes<br />
prescription refills <strong>with</strong>in the past 120 days, if<br />
available. We recommend that you select Yes.<br />
Select the drug-allergy interactions that you<br />
want to display.<br />
Select the drug-disease interactions that you<br />
want to display.<br />
Select if you want to check drug interactions<br />
against the medication list.<br />
Select the geriatric precaution warnings that you<br />
want to be displayed.<br />
Select the pediatric precaution warnings that<br />
you want to be displayed.<br />
Select if you want to use a patient’s medication<br />
drug history to check for duplicate therapy. The<br />
medication drug history includes prescription<br />
refills <strong>with</strong>in the past 120 days, if available. We<br />
recommend that you select Yes.<br />
Select the number of days that you want to use in<br />
your medication drug history searches. We<br />
recommend that you select over last 90 days.<br />
Select if you want to display the initials of the<br />
provider who last renewed medications.<br />
Select if you want to include incomplete drugs in<br />
medications.<br />
Select if you want to allow partial start dates in<br />
medication and allergy records.<br />
Select if you want to use the medication history<br />
source.<br />
42 <strong>Using</strong> <strong>ePrescribing</strong> <strong>with</strong> <strong>ExamWRITER</strong>
<strong>Using</strong> <strong>ePrescribing</strong> <strong>with</strong> <strong>ExamWRITER</strong><br />
Modifying Options & Printing Reports<br />
Practice Preference<br />
Medication history<br />
source options<br />
Display Transition of<br />
Care Link<br />
I have an interface from<br />
Rcopia to my<br />
PMS/EMR. When<br />
making changes to<br />
Office Visit data and/or<br />
Transition of Care data,<br />
please send this<br />
information back to my<br />
PMS/EMR.<br />
When I select a patient,<br />
I want to see the<br />
Rendering Provider’s in<br />
the Patient’s<br />
Demographic<br />
Information section.<br />
Description of any<br />
additional security<br />
features to include on<br />
printed prescriptions:<br />
Allow users to send<br />
patient referrals using<br />
Akiro<br />
Allow users to receive<br />
Akario message<br />
notifications<br />
Options<br />
If you are using medication history sources, type<br />
them in this text box. Type only one source per<br />
line and let the text on each line wrap, if<br />
necessary (do not press Enter to wrap the line).<br />
Press Enter to type a new source on a new line.<br />
Select if you want to display the TOC Today link<br />
to record a patient’s transition of care date.<br />
Select if you want to send updated office visit<br />
and transition of care information to<br />
OfficeMate/<strong>ExamWRITER</strong>.<br />
Select if you want to select and display a<br />
patient’s rendering provider.<br />
Type any additional security features that you<br />
want to include on printed prescriptions.<br />
Select if you want the ability to send patient<br />
records through Akario’s secure messaging<br />
system.<br />
Select if you want the ability to receive messages<br />
through Akario’s secure messaging system.<br />
<strong>Using</strong> <strong>ePrescribing</strong> <strong>with</strong> <strong>ExamWRITER</strong> 43
<strong>Using</strong> <strong>ePrescribing</strong> <strong>with</strong> <strong>ExamWRITER</strong><br />
Modifying Options & Printing Reports<br />
Printing the Activity Report<br />
The Activity Report lists of all of your practice’s recent prescription activity. Only<br />
administrators can print the Activity Report.<br />
1. Open the <strong>ExamWRITER</strong> <strong>ePrescribing</strong> interface. For more information on<br />
opening the interface, go to “Opening the <strong>ExamWRITER</strong> <strong>ePrescribing</strong><br />
Interface” on page 8.<br />
2. Click Options in the main navigation bar at the top of the <strong>ExamWRITER</strong><br />
<strong>ePrescribing</strong> interface.<br />
3. Click the Activity Report link.<br />
44 <strong>Using</strong> <strong>ePrescribing</strong> <strong>with</strong> <strong>ExamWRITER</strong>
<strong>Using</strong> <strong>ePrescribing</strong> <strong>with</strong> <strong>ExamWRITER</strong><br />
Modifying Options & Printing Reports<br />
4. Select report criteria in the Practice Activity Report section.<br />
5. Click Create Report.<br />
The Activity Report is displayed.<br />
Printing the Drug Report<br />
The Drug Report lists patients who are taking a specific drug. Only administrators<br />
can print the Drug Report.<br />
1. Open the <strong>ExamWRITER</strong> <strong>ePrescribing</strong> interface. For more information on<br />
opening the interface, go to “Opening the <strong>ExamWRITER</strong> <strong>ePrescribing</strong><br />
Interface” on page 8.<br />
2. Click Options in the main navigation bar at the top of the <strong>ExamWRITER</strong><br />
<strong>ePrescribing</strong> interface.<br />
3. Click the Drug Report link.<br />
4. Type the name of a drug in the Drug Name text box and click Find.<br />
5. Select the drug name from the search results.<br />
6. Select other search criteria.<br />
<strong>Using</strong> <strong>ePrescribing</strong> <strong>with</strong> <strong>ExamWRITER</strong> 45
<strong>Using</strong> <strong>ePrescribing</strong> <strong>with</strong> <strong>ExamWRITER</strong><br />
Modifying Options & Printing Reports<br />
7. Click Create Report.<br />
Printing the Decision Report<br />
The Decision Report lists the safety and formulary information for your practice.<br />
Only administrators can print the Decision Report.<br />
1. Open the <strong>ExamWRITER</strong> <strong>ePrescribing</strong> interface. For more information on<br />
opening the interface, go to “Opening the <strong>ExamWRITER</strong> <strong>ePrescribing</strong><br />
Interface” on page 8.<br />
2. Click Options in the main navigation bar at the top of the <strong>ExamWRITER</strong><br />
<strong>ePrescribing</strong> interface.<br />
3. Click the Decision Report link.<br />
46 <strong>Using</strong> <strong>ePrescribing</strong> <strong>with</strong> <strong>ExamWRITER</strong>
<strong>Using</strong> <strong>ePrescribing</strong> <strong>with</strong> <strong>ExamWRITER</strong><br />
Modifying Options & Printing Reports<br />
4. Select report criteria in the Decision Report section.<br />
5. Click Create Report.<br />
The Decision Report is displayed.<br />
Printing the Periodic Report<br />
The Periodic Report lists recent prescription activity for the provider.<br />
1. Open the <strong>ExamWRITER</strong> <strong>ePrescribing</strong> interface. For more information on<br />
opening the interface, go to “Opening the <strong>ExamWRITER</strong> <strong>ePrescribing</strong><br />
Interface” on page 8.<br />
2. Click Options in the main navigation bar at the top of the <strong>ExamWRITER</strong><br />
<strong>ePrescribing</strong> interface.<br />
3. Click the Periodic Report link.<br />
<strong>Using</strong> <strong>ePrescribing</strong> <strong>with</strong> <strong>ExamWRITER</strong> 47
<strong>Using</strong> <strong>ePrescribing</strong> <strong>with</strong> <strong>ExamWRITER</strong><br />
Modifying Options & Printing Reports<br />
4. Click Periodic Report to print the report for the current user or select report<br />
criteria and click Interval Report to print the report for another provider or<br />
all providers.<br />
The Periodic Report is displayed.<br />
5. Use the Adobe Reader tools at the top of the window to print or save the<br />
report.<br />
48 <strong>Using</strong> <strong>ePrescribing</strong> <strong>with</strong> <strong>ExamWRITER</strong>
<strong>Using</strong> <strong>ePrescribing</strong> <strong>with</strong> <strong>ExamWRITER</strong><br />
Modifying Options & Printing Reports<br />
Printing the Pharmacy Report<br />
The Pharmacy Report lists the pharmacy Practice List.<br />
1. Open the <strong>ExamWRITER</strong> <strong>ePrescribing</strong> interface. For more information on<br />
opening the interface, go to “Opening the <strong>ExamWRITER</strong> <strong>ePrescribing</strong><br />
Interface” on page 8.<br />
2. Click Options in the main navigation bar at the top of the <strong>ExamWRITER</strong><br />
<strong>ePrescribing</strong> interface.<br />
3. Click the Pharmacy Report link.<br />
The Pharmacy Report is displayed.<br />
Printing the Prescription Report<br />
The Prescription Report allows you to view prescription activity.<br />
1. Open the <strong>ExamWRITER</strong> <strong>ePrescribing</strong> interface. For more information on<br />
opening the interface, go to “Opening the <strong>ExamWRITER</strong> <strong>ePrescribing</strong><br />
Interface” on page 8.<br />
2. Click Rx Report in the main navigation bar at the top of the <strong>ExamWRITER</strong><br />
<strong>ePrescribing</strong> interface.<br />
3. Select appropriate report criteria in the Prescription Report section.<br />
<strong>Using</strong> <strong>ePrescribing</strong> <strong>with</strong> <strong>ExamWRITER</strong> 49
<strong>Using</strong> <strong>ePrescribing</strong> <strong>with</strong> <strong>ExamWRITER</strong><br />
Modifying Options & Printing Reports<br />
4. Click Display Report or Print Report.<br />
If you selected to display the report, the prescriptions that meet your search<br />
criteria are displayed at the bottom of the window. If you selected to print the<br />
report, a printer-friendly version of the report displays.<br />
5. If you selected to display the report in step 4, select one of the following<br />
options to perform an action:<br />
<br />
<br />
If you want to modify the comments on a pending prescription or a<br />
prescription that has already been signed and sent, click pending or<br />
signed, sent.<br />
If you want to view a formulary, drug, or allergy warning, click Warning.<br />
50 <strong>Using</strong> <strong>ePrescribing</strong> <strong>with</strong> <strong>ExamWRITER</strong>
<strong>Using</strong> <strong>ePrescribing</strong> <strong>with</strong> <strong>ExamWRITER</strong><br />
Modifying Options & Printing Reports<br />
Printing the Provider Agent Report<br />
The Provider Agent Report allows you to view all provider agents <strong>with</strong>in the<br />
practice, the date the agents’ privileges were authorized and revoked (if<br />
applicable), and the individual who last acted upon the status of the agent. To<br />
authorize and revoke provider agent privileges, go to “Managing Provider<br />
Agents” on page 32.<br />
1. Open the <strong>ExamWRITER</strong> <strong>ePrescribing</strong> interface. For more information on<br />
opening the interface, go to “Opening the <strong>ExamWRITER</strong> <strong>ePrescribing</strong><br />
Interface” on page 8.<br />
2. Click Options in the main navigation bar at the top of the <strong>ExamWRITER</strong><br />
<strong>ePrescribing</strong> interface.<br />
3. Click the Provider Agent Report link.<br />
4. Record search criteria and then click Search.<br />
Provider agents meeting your search criteria are displayed.<br />
<strong>Using</strong> <strong>ePrescribing</strong> <strong>with</strong> <strong>ExamWRITER</strong> 51
<strong>Using</strong> <strong>ePrescribing</strong> <strong>with</strong> <strong>ExamWRITER</strong><br />
Logging Out<br />
Logging Out<br />
Click the X in the top right corner of the <strong>ExamWRITER</strong> <strong>ePrescribing</strong> interface to<br />
log out of the <strong>ExamWRITER</strong> <strong>ePrescribing</strong> interface.<br />
The <strong>ExamWRITER</strong> <strong>ePrescribing</strong> interface closes and you are returned to<br />
<strong>ExamWRITER</strong>. If you signed and sent, printed, or archived the prescription, the<br />
prescription and its strength appears <strong>with</strong> “eRX” after it in the Current Therapeutic<br />
Rx table and the pharmacy name appears in the Special Instructions text box and<br />
Medication Hx Notes column in the <strong>ExamWRITER</strong> Medication Order window. The<br />
number of prescriptions downloaded to <strong>ExamWRITER</strong> after you closed the<br />
<strong>ExamWRITER</strong> <strong>ePrescribing</strong> interface is displayed under the MU eRX icon in the<br />
Medication Order window.<br />
Viewing the<br />
Status of<br />
ePrescriptions<br />
This section includes instructions that will help you view the status of prescriptions<br />
in the <strong>ExamWRITER</strong> <strong>ePrescribing</strong> interface. This section includes the following<br />
topics:<br />
• Viewing the Status of Refills, 53<br />
• Viewing Pending Prescriptions, 55<br />
• Viewing Prescriptions that Need to be Signed, 58<br />
52 <strong>Using</strong> <strong>ePrescribing</strong> <strong>with</strong> <strong>ExamWRITER</strong>
<strong>Using</strong> <strong>ePrescribing</strong> <strong>with</strong> <strong>ExamWRITER</strong><br />
Viewing the Status of ePrescriptions<br />
Viewing the Status of Refills<br />
1. Click eRX Status on the <strong>ExamWRITER</strong> main window toolbar.<br />
NOTE<br />
If you are not logged into <strong>ExamWRITER</strong> as a physician, ensure<br />
that the correct user is selected from the User ID drop-down<br />
menu, and, if necessary, type the password associated <strong>with</strong> the<br />
user ID in the Password text box and click Login. You must be<br />
a registered <strong>ExamWRITER</strong> <strong>ePrescribing</strong> interface user to log in<br />
to the interface.<br />
The ePrescribe Status window opens. If pharmacies have submitted refill<br />
requests electronically, the number of refill requests is noted.<br />
2. Click Refills.<br />
The Renewal Requests window opens in the <strong>ExamWRITER</strong> <strong>ePrescribing</strong><br />
interface and displays all of the refill requests submitted electronically from<br />
pharmacies.<br />
NOTES • Click the View link next to a patient’s name to view the<br />
patient’s demographic information.<br />
• Click the Re link next to the prescription name to view the<br />
prescription’s notification information.<br />
• Click the Next link to view other prescription refills listed on<br />
subsequent pages.<br />
3. To view renewal requests for another provider or all providers, select All<br />
Providers or the provider’s name from the View messages for drop-down<br />
menu.<br />
<strong>Using</strong> <strong>ePrescribing</strong> <strong>with</strong> <strong>ExamWRITER</strong> 53
<strong>Using</strong> <strong>ePrescribing</strong> <strong>with</strong> <strong>ExamWRITER</strong><br />
Viewing the Status of ePrescriptions<br />
4. Select an action from the Action drop-down menu for each prescription that<br />
you want to refill.<br />
NOTES • Select Deny if you do not want to refill the prescription.<br />
• Select Change to modify the prescription before refilling it.<br />
• Select Renew to renew the prescription.<br />
• Select Forward to send a message to the provider <strong>with</strong> the<br />
renewal information.<br />
• Select Remove to remove the prescription from the refill<br />
Messages list.<br />
5. If desired, select notes for the pharmacy from the Pharm Notes drop-down<br />
menu and type comments for the office in the Comments text box.<br />
54 <strong>Using</strong> <strong>ePrescribing</strong> <strong>with</strong> <strong>ExamWRITER</strong>
<strong>Using</strong> <strong>ePrescribing</strong> <strong>with</strong> <strong>ExamWRITER</strong><br />
Viewing the Status of ePrescriptions<br />
6. If you are a physician, type your signature password in the Signature<br />
Password text box and click Perform.<br />
The prescription refill is sent to the pharmacy and the number of renewal<br />
requests is decreased.<br />
Viewing Pending Prescriptions<br />
Pending<br />
prescriptions still<br />
meet the CPOE<br />
requirements for<br />
meaningful use<br />
(core measure 1).<br />
1. Click eRX Status on the <strong>ExamWRITER</strong> main window toolbar.<br />
NOTE<br />
If you are not logged into <strong>ExamWRITER</strong> as a physician, ensure<br />
that the correct user is selected from the User ID drop-down<br />
menu, and, if necessary, type the password associated <strong>with</strong> the<br />
user ID in the Password text box and click Login. You must be<br />
a registered <strong>ExamWRITER</strong> <strong>ePrescribing</strong> interface user to log in<br />
to the interface.<br />
The ePrescribe Status window opens. If patient prescriptions were signed in<br />
the <strong>ExamWRITER</strong> <strong>ePrescribing</strong> interface, but not sent electronically, the<br />
number of prescriptions not sent is noted.<br />
<strong>Using</strong> <strong>ePrescribing</strong> <strong>with</strong> <strong>ExamWRITER</strong> 55
<strong>Using</strong> <strong>ePrescribing</strong> <strong>with</strong> <strong>ExamWRITER</strong><br />
Viewing the Status of ePrescriptions<br />
2. Click Pending RXs.<br />
The <strong>ExamWRITER</strong> <strong>ePrescribing</strong> interface opens and displays all of the<br />
pending prescriptions for patients assigned to the provider logged into<br />
<strong>ExamWRITER</strong>.<br />
NOTE<br />
If you are using <strong>ExamWRITER</strong> in a multilocation environment,<br />
click the Practice link and select the practice for which you<br />
want to view pending prescriptions.<br />
3. To view prescriptions for another provider or all providers, select All<br />
Providers or the provider’s name from the View pending prescriptions for<br />
drop-down menu.<br />
56 <strong>Using</strong> <strong>ePrescribing</strong> <strong>with</strong> <strong>ExamWRITER</strong>
<strong>Using</strong> <strong>ePrescribing</strong> <strong>with</strong> <strong>ExamWRITER</strong><br />
Viewing the Status of ePrescriptions<br />
4. Complete one of the following actions to sign, send, and print the<br />
prescription:<br />
<br />
<br />
<br />
<br />
If you are a physician, type your signature password in the Signature<br />
Password text box and click Send, Send and Print, Print w/o sending,<br />
or Sign w/o sending.<br />
If you are an agent, click Send, Signature for follow, Send and Print,<br />
Print w/o sending, or Archive w/o sending; you cannot sign<br />
prescriptions.<br />
If you are a clinical staff member, click Print w/o sending or Archive<br />
w/o sending; you cannot sign or send prescriptions.<br />
If you are a non-clinical staff member, click Print w/o sending or<br />
Archive w/o sending; you cannot sign or send prescriptions.<br />
NOTES • If you are writing a prescription for a controlled substance,<br />
click Print w/o sending. You cannot send prescriptions for<br />
controlled substances electronically.<br />
• If you are writing a prescription for sample medication, click<br />
Sign w/o sending.<br />
• Click the Void, Reprint, Resend, Renew, Modify, Delete, or<br />
Favor links in the Action column to void, reprint, resend,<br />
renew, modify, delete, or favor the medication. For more<br />
information on setting up your Favorite List, go to “Adding &<br />
Modifying Favorite Prescriptions” on page 29. Although<br />
pharmacies receive notices of all voided medications, we<br />
suggest that you call the pharmacies where voided<br />
medications were sent and ensure that they have not yet<br />
filled the prescriptions. If you delete the medication, it is<br />
documented in the Correspondence Hx tab in the Patient<br />
Information Center window in <strong>ExamWRITER</strong>.<br />
• Click the Print Pharmacy link to print the pharmacy on the<br />
prescription.<br />
<strong>Using</strong> <strong>ePrescribing</strong> <strong>with</strong> <strong>ExamWRITER</strong> 57
<strong>Using</strong> <strong>ePrescribing</strong> <strong>with</strong> <strong>ExamWRITER</strong><br />
Viewing the Status of ePrescriptions<br />
Viewing Prescriptions that Need to be Signed<br />
1. Click eRX Status on the <strong>ExamWRITER</strong> main window toolbar.<br />
NOTE<br />
If you are not logged into <strong>ExamWRITER</strong> as a physician, ensure<br />
that the correct user is selected from the User ID drop-down<br />
menu, and, if necessary, type the password associated <strong>with</strong> the<br />
user ID in the Password text box and click Login. You must be<br />
a registered <strong>ExamWRITER</strong> <strong>ePrescribing</strong> interface user to log in<br />
to the interface.<br />
The ePrescribe Status window opens. If patient prescriptions were sent, but<br />
not signed in the <strong>ExamWRITER</strong> <strong>ePrescribing</strong> interface, the number of<br />
prescriptions not signed is noted.<br />
2. Click RXs need signing.<br />
The <strong>ExamWRITER</strong> <strong>ePrescribing</strong> interface opens and displays all of the<br />
unsigned prescriptions for patients assigned to the provider logged into<br />
<strong>ExamWRITER</strong>.<br />
3. To view prescriptions for another provider or all providers, select All<br />
Providers or the provider’s name from the View pending prescriptions for<br />
drop-down menu.<br />
58 <strong>Using</strong> <strong>ePrescribing</strong> <strong>with</strong> <strong>ExamWRITER</strong>
<strong>Using</strong> <strong>ePrescribing</strong> <strong>with</strong> <strong>ExamWRITER</strong><br />
Viewing the Status of ePrescriptions<br />
4. Complete one of the following actions to sign, send, and print the<br />
prescription:<br />
<br />
<br />
<br />
<br />
If you are a physician, type your signature password in the Signature<br />
Password text box and click Send, Send and Print, Print w/o sending,<br />
or Sign w/o sending.<br />
If you are an agent, click Send, Signature for follow, Send and Print,<br />
Print w/o sending, or Archive w/o sending; you cannot sign<br />
prescriptions.<br />
If you are a clinical staff member, click Print w/o sending or Archive<br />
w/o sending; you cannot sign or send prescriptions.<br />
If you are a non-clinical staff member, do nothing; you cannot sign, send,<br />
or print prescriptions.<br />
NOTES • If you are writing a prescription for a controlled substance,<br />
click Print w/o sending. You cannot send prescriptions for<br />
controlled substances electronically.<br />
• If you are writing a prescription for sample medication, click<br />
Sign w/o sending.<br />
• Click the Void, Reprint, Resend, Renew, Modify, Delete, or<br />
Favor links in the Action column to void, reprint, resend,<br />
renew, modify, delete, or favor the medication. For more<br />
information on setting up your Favorite List, go to “Adding &<br />
Modifying Favorite Prescriptions” on page 29. Although<br />
pharmacies receive notices of all voided medications, we<br />
suggest that you call the pharmacies where voided<br />
medications were sent and ensure that they have not yet<br />
filled the prescriptions. If you delete the medication, it is<br />
documented in the Correspondence Hx tab in the Patient<br />
Information Center window in <strong>ExamWRITER</strong>.<br />
• Click the Print Pharmacy link to print the pharmacy on the<br />
prescription.<br />
<strong>Using</strong> <strong>ePrescribing</strong> <strong>with</strong> <strong>ExamWRITER</strong> 59