1 PSI-DATA/BASIC-MODEM/RS232 Industrial Modem
1 PSI-DATA/BASIC-MODEM/RS232 Industrial Modem
1 PSI-DATA/BASIC-MODEM/RS232 Industrial Modem

Create successful ePaper yourself
Turn your PDF publications into a flip-book with our unique Google optimized e-Paper software.
INTERFACE<br />
User Manual<br />
UM EN <strong>PSI</strong>-<strong>DATA</strong>/<strong>BASIC</strong>-<strong>MODEM</strong>/<strong>RS232</strong><br />
Order No.:<br />
2888699<br />
<strong>Industrial</strong> Analog <strong>Modem</strong><br />
onlinecomponents.com
onlinecomponents.com
INTERFACE<br />
User Manual<br />
<strong>Industrial</strong> Analog <strong>Modem</strong><br />
Designation:<br />
Revision:<br />
Order No.:<br />
UM EN <strong>PSI</strong>-<strong>DATA</strong>/<strong>BASIC</strong>-<strong>MODEM</strong>/<strong>RS232</strong><br />
01<br />
2888699<br />
This user manual is valid for:<br />
Designation<br />
Order No.<br />
<strong>PSI</strong>-<strong>DATA</strong>/<strong>BASIC</strong>-<strong>MODEM</strong>/<strong>RS232</strong> 2313067<br />
onlinecomponents.com<br />
08/2006<br />
102906_01_en<br />
PHOENIX CONTACT
<strong>PSI</strong>-<strong>DATA</strong>/<strong>BASIC</strong>-<strong>MODEM</strong>/<strong>RS232</strong><br />
Please Observe the Following Notes<br />
In order to ensure the safe use of the product described, we recommend that you read this<br />
manual carefully. The following notes provide information on how to use this manual.<br />
User Group of This Manual<br />
The use of products described in this manual is oriented exclusively to<br />
– qualified electricians or persons instructed by them, who are familiar with applicable<br />
standards and other regulations regarding electrical engineering and, in particular, the<br />
relevant safety concepts.<br />
– qualified application programmers and software engineers, who are familiar with the<br />
safety concepts of automation technology and applicable standards.<br />
Phoenix Contact accepts no liability for erroneous handling or damage to products from<br />
Phoenix Contact or third-party products resulting from disregard of information contained<br />
in this manual.<br />
Explanation of Symbols Used<br />
The attention symbol refers to an operating procedure which, if not carefully followed, could<br />
result in damage to hardware and software or personal injury.<br />
The note symbol informs you of conditions that must strictly be observed to achieve<br />
error-free operation. It also gives you tips and advice on the efficient use of hardware<br />
and on software optimization to save you extra work.<br />
The text symbol refers to detailed sources of information (manuals, data sheets, literature,<br />
etc.) on the subject matter, product, etc. This text also provides helpful information for the<br />
orientation in the manual.<br />
We Are Interested in Your Opinion<br />
We are constantly striving to improve the quality of our manuals.<br />
Should you have any suggestions or recommendations for improvement of the contents<br />
and layout of our manuals, please send us your comments.<br />
PHOENIX CONTACT GmbH & Co. KG<br />
Documentation Services<br />
32823 Blomberg<br />
Germany<br />
onlinecomponents.com<br />
Phone +49 - 52 35 - 30 0<br />
Fax +49 - 52 35 - 34 20 21<br />
E-mail tecdoc@phoenixcontact.com<br />
PHOENIX CONTACT<br />
102906_01_en
<strong>PSI</strong>-<strong>DATA</strong>/<strong>BASIC</strong>-<strong>MODEM</strong>/<strong>RS232</strong><br />
General Terms and Conditions of Use for Technical Documentation<br />
Phoenix Contact GmbH & Co. KG reserves the right to alter, correct, and/or improve the<br />
technical documentation and the products described in the technical documentation at its<br />
own discretion and without giving any notice.<br />
The provision of technical documentation (in particular data sheets, installation<br />
instructions, manuals, etc.) does not constitute any further duty on the part of<br />
Phoenix Contact GmbH & Co. KG to furnish information on alterations to products and/or<br />
technical documentation. Any other agreement shall only apply if expressly confirmed in<br />
writing by Phoenix Contact GmbH & Co. KG. Please note that the supplied documentation<br />
is product-specific documentation only.<br />
Although Phoenix Contact GmbH & Co. KG makes every effort to ensure that the<br />
information content is accurate, up-to-date, and state-of-the-art, technical inaccuracies<br />
and/or printing errors in the information cannot be ruled out.<br />
Phoenix Contact GmbH & Co. KG does not offer any guarantees as to the reliability,<br />
accuracy or completeness of the information provided. Phoenix Contact GmbH & Co. KG<br />
accepts no liability or responsibility for errors or omissions in the content of the technical<br />
documentation (in particular data sheets, installation instructions, manuals, etc.).<br />
As far as is permissible by applicable jurisdiction, no guarantee or claim for liability for<br />
defects whatsoever shall be granted in conjunction with the information available in the<br />
technical documentation, whether expressly mentioned or implied. This information does<br />
not include any guarantees on quality, does not describe any fair marketable quality and<br />
does not make any claims as to quality guarantees or guarantees on the suitability for a<br />
special purpose.<br />
Phoenix Contact GmbH & Co. KG reserves the right to alter, correct, and/or improve the<br />
information and the products described in the information at its own discretion and without<br />
giving any notice.<br />
onlinecomponents.com<br />
102906_01_en<br />
PHOENIX CONTACT
<strong>PSI</strong>-<strong>DATA</strong>/<strong>BASIC</strong>-<strong>MODEM</strong>/<strong>RS232</strong><br />
Statement of Legal Authority<br />
This manual, including all illustrations contained herein, is copyright protected. Use of this<br />
manual by any third party is forbidden. Reproduction, translation, or electronic and<br />
photographic archiving or alteration requires the express written consent<br />
of Phoenix Contact. Violators are liable for damages.<br />
Phoenix Contact reserves the right to make any technical changes that serve the purpose<br />
of technical progress.<br />
Phoenix Contact reserves all rights in the case of patent award or listing of a registered<br />
design. Third-party products are always named without reference to patent rights. The<br />
existence of such rights shall not be excluded.<br />
Windows 3.x, Windows 95, Windows 98, Windows NT, Windows 2000, Windows XP, and<br />
MS DOS are trademarks of the Microsoft Corporation.<br />
All other product names used are trademarks of the respective organizations.<br />
Internet<br />
Up-to-date information on Phoenix Contact products can be found on the Internet at:<br />
www.phoenixcontact.com<br />
Make sure you always use the latest documentation.<br />
It can be downloaded at:<br />
www.download.phoenixcontact.com<br />
A conversion table is available on the Internet at:<br />
www.download.phoenixcontact.com/general/7000_en_00.pdf<br />
<strong>PSI</strong> Hotline<br />
Should problems occur that cannot be solved with the help of this documentation, please<br />
contact our hotline:<br />
+ 49 - (0) 52 35 - 3-19 89 0<br />
+ 49 - (0) 52 35 - 3-19 89 9<br />
interface-service@phoenixcontact.com<br />
onlinecomponents.com<br />
PHOENIX CONTACT<br />
102906_01_en
Table of Contents<br />
1 <strong>PSI</strong>-<strong>DATA</strong>/<strong>BASIC</strong>-<strong>MODEM</strong>/<strong>RS232</strong> <strong>Industrial</strong> <strong>Modem</strong>.............................................................1-1<br />
1.1 Short Description................................................................................................1-1<br />
1.2 Application..........................................................................................................1-2<br />
1.3 Ordering Data.....................................................................................................1-3<br />
1.4 Technical Data ...................................................................................................1-3<br />
2 Quick Startup of a Dial-Up Line Connection............................................................................2-1<br />
2.1 Hardware Installation .........................................................................................2-1<br />
2.1.1 Default Configuration ..........................................................................2-1<br />
2.1.2 Mounting .............................................................................................2-1<br />
2.1.3 V.24 (RS-232) Interface ......................................................................2-2<br />
2.1.4 Connecting the Telecommunications Cable .......................................2-3<br />
2.1.5 Supply Voltage ...................................................................................2-3<br />
2.2 Software Installation...........................................................................................2-4<br />
2.2.1 System Requirements ........................................................................2-4<br />
2.2.2 Driver Installation ................................................................................2-4<br />
3 Hardware Installation...............................................................................................................3-1<br />
3.1 Structure.............................................................................................................3-1<br />
3.2 Operating Elements ...........................................................................................3-2<br />
3.2.1 Connection Terminal Blocks ...............................................................3-2<br />
3.2.2 Connectors .........................................................................................3-2<br />
3.2.3 LEDs ...................................................................................................3-3<br />
3.3 Electrical Connections........................................................................................3-3<br />
3.3.1 Block Diagram ....................................................................................3-4<br />
3.3.2 V.24 (RS-232) Interface ......................................................................3-5<br />
3.3.3 Telecommunications Cable ................................................................3-6<br />
3.3.4 Supply Voltage ...................................................................................3-7<br />
4 Software Installation ................................................................................................................4-1<br />
4.1 System Requirements........................................................................................4-1<br />
4.2 Driver Installation ...............................................................................................4-1<br />
4.3 Configuration Software.......................................................................................4-5<br />
4.3.1 Installation ..........................................................................................4-5<br />
4.3.2 Operation ............................................................................................4-9<br />
onlinecomponents.com<br />
5 Password Protection................................................................................................................5-1<br />
5.1 Selecting a Password.........................................................................................5-1<br />
5.2 Deactivating Password Protection .....................................................................5-1<br />
5.3 Password-Protected Callback ............................................................................5-2<br />
5.4 Dial In With Password Protection.......................................................................5-2<br />
102906_01_en PHOENIX CONTACT i
<strong>PSI</strong>-<strong>DATA</strong>/<strong>BASIC</strong>-<strong>MODEM</strong>/<strong>RS232</strong><br />
6 AT Commands.........................................................................................................................6-1<br />
6.1 Command Descriptions......................................................................................6-2<br />
6.2 AT Commands for MNP and LAPM (V.42bis)....................................................6-9<br />
6.3 S Registers.......................................................................................................6-11<br />
6.4 Modulation Commands ....................................................................................6-17<br />
6.5 <strong>Modem</strong> Confirmations ......................................................................................6-18<br />
6.6 Processing the Break Character ......................................................................6-20<br />
7 Configuration Help...................................................................................................................7-1<br />
7.1 Programming Connection for Phoenix Contact Controllers................................7-1<br />
7.2 Programming Connection for Siemens S7 300/400...........................................7-3<br />
onlinecomponents.com<br />
ii PHOENIX CONTACT 102906_01_en
<strong>PSI</strong>-<strong>DATA</strong>/<strong>BASIC</strong>-<strong>MODEM</strong>/<strong>RS232</strong> <strong>Industrial</strong> <strong>Modem</strong><br />
1 <strong>PSI</strong>-<strong>DATA</strong>/<strong>BASIC</strong>-<strong>MODEM</strong>/<strong>RS232</strong> <strong>Industrial</strong> <strong>Modem</strong><br />
1.1 Short Description<br />
The DIN rail-mountable <strong>PSI</strong>-<strong>DATA</strong>/<strong>BASIC</strong>-<strong>MODEM</strong>/<strong>RS232</strong> V.24 (RS-232) modem is<br />
specifically designed to meet industrial requirements for remote monitoring. It provides<br />
access to machines and systems anywhere in the world via dial-up line connections<br />
according to the V.34 standard. A wide range of security functions, such as connection<br />
establishment with password protection and callback function, protect the system against<br />
unauthorized access.<br />
To ensure error-free operation even in harsh EMC conditions, the device has high-quality<br />
3-way isolation and integrated surge protection. The modem also features an integrated<br />
automatic "Sleep" function to increase battery life and a wide supply voltage range of 10 V<br />
to 30 V, making it suitable for universal use.<br />
<strong>Modem</strong> startup is very easy using plug and play and user-friendly configuration software.<br />
The modem is approved for use in public telephone networks in Europe, the USA, and<br />
Canada. Additional approvals can be provided on request.<br />
Features<br />
– For universal use<br />
– Password-protected access/callback function<br />
– Wide supply voltage range of 10 V to 30 V DC<br />
– Power-saving sleep mode<br />
– High-quality three-way isolation (VCC // V.24 (RS-232) // PTSN)<br />
– Slim design width of 22.5 mm<br />
– Easy startup using plug and play and user-friendly configuration software<br />
– 3964R-compatible<br />
onlinecomponents.com<br />
102906_01_en PHOENIX CONTACT 1-1
<strong>PSI</strong>-<strong>DATA</strong>/<strong>BASIC</strong>/<br />
<strong>MODEM</strong>/<strong>RS232</strong><br />
Ord.-No. 23 13 067<br />
<strong>PSI</strong>-<strong>DATA</strong>/<strong>BASIC</strong>/<br />
<strong>MODEM</strong>/<strong>RS232</strong><br />
Ord.-No. 23 13 067<br />
<strong>PSI</strong>-<strong>DATA</strong>/<strong>BASIC</strong>/<br />
<strong>MODEM</strong>/<strong>RS232</strong><br />
Ord.-No. 23 13 067<br />
<strong>PSI</strong>-<strong>DATA</strong>/<strong>BASIC</strong>-<strong>MODEM</strong>/<strong>RS232</strong><br />
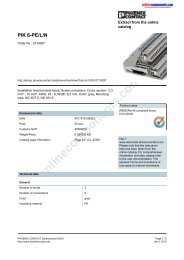
1.2 Application<br />
The <strong>PSI</strong>-<strong>DATA</strong>/<strong>BASIC</strong>-<strong>MODEM</strong>/<strong>RS232</strong> modem is suitable for universal and international<br />
use as an analog dial-up modem.<br />
LINE<br />
OH<br />
DTR<br />
DCD<br />
AA<br />
Figure 1-1<br />
LINE<br />
OH<br />
DTR<br />
DCD<br />
AA<br />
RS 232<br />
RS 232<br />
Telephone<br />
network<br />
Dial-up operation<br />
The following modem applications can be implemented:<br />
– Remote monitoring of systems and machines<br />
– Remote control<br />
– Remote system diagnostics<br />
– Production data acquisition<br />
This device is approved for operation in the following public telephone networks:<br />
– Austria<br />
– Belgium<br />
– Canada<br />
– Denmark<br />
– Finland<br />
– France<br />
– Germany<br />
– Great Britain<br />
– Greece<br />
– Ireland<br />
– Italy<br />
– Luxembourg<br />
– Norway<br />
– Portugal<br />
– Spain<br />
– Sweden<br />
– Switzerland<br />
– The Netherlands<br />
– USA<br />
Approvals for other countries are available on request.<br />
onlinecomponents.com<br />
LINE<br />
OH<br />
DTR<br />
DCD<br />
AA<br />
RS 232<br />
102906A001<br />
1-2 PHOENIX CONTACT 102906_01_en
<strong>PSI</strong>-<strong>DATA</strong>/<strong>BASIC</strong>-<strong>MODEM</strong>/<strong>RS232</strong> <strong>Industrial</strong> <strong>Modem</strong><br />
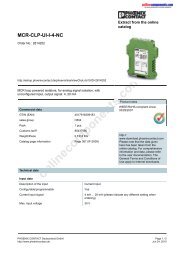
1.3 Ordering Data<br />
<strong>Modem</strong><br />
Description Type Order No. Pcs./Pck.<br />
<strong>Industrial</strong> analog modem for mounting on EN DIN rails<br />
Scope of supply: <strong>Modem</strong>, CD with configuration software, manual, and<br />
RJ12/RJ12 cable<br />
<strong>PSI</strong>-<strong>DATA</strong>/<strong>BASIC</strong>-<strong>MODEM</strong>/<strong>RS232</strong> 2313067 1<br />
Accessories<br />
Description Type Order No. Pcs./Pck.<br />
System power supply unit,<br />
primary-switched<br />
Input voltage range<br />
Nominal output voltage<br />
Nominal output current<br />
45 Hz ... 65 Hz<br />
85 V AC ... 264 V AC<br />
24 V DC ±1%<br />
1.5 A<br />
1.4 Technical Data<br />
MINI-SYS-PS-100-240AC/24DC/1.5 2866983 1<br />
DIN rail connector, to supply power to the modem via the DIN rail bus ME 22,5 TBUS 1,5/ 5-ST-3,81 GN 2707437 50<br />
V.24 (RS-232) cable, 2 m, to connect the modem to 9-pos. D-SUB/ PSM-KA9SUB9/BB/2METER 2799474 1<br />
a 9-pos. device interface<br />
9-pos. D-SUB<br />
(female/female)<br />
V.24 (RS-232) cable, 0.5 m, to connect the modem<br />
to a 9-pos. device interface<br />
9-pos. D-SUB/<br />
9-pos. D-SUB<br />
(female/female)<br />
PSM-KA9SUB9/BB/0,5METER 2708520 1<br />
Power Supply<br />
Supply voltage<br />
Frequency<br />
Current consumption<br />
Nominal operation<br />
Sleep mode (can be configured via software)<br />
Display<br />
V.24 (RS-232) Interface<br />
Connection<br />
Device type<br />
Data format/encoding<br />
10 V DC ... 30 V DC via COMBICON plug-in screw terminal<br />
DC<br />
< 100 mA (at 24 V)<br />
< 40 mA (at 24 V)<br />
Green LED (VCC), steady light during operation<br />
9-pos. D-SUB pin strip<br />
Data Communication Equipment (DCE)<br />
Serial asynchronous UART/NRZ, 7/8 data,<br />
1/2 stop, 1 parity, 10/11 bits character length<br />
onlinecomponents.com<br />
Data flow control/protocols<br />
Software handshake Xon/Xoff,<br />
hardware handshake RTS/CTS<br />
or 3964R<br />
Serial transmission speed Automatic transmission speed detection for 300, 1200, 2400, 4800, 9600,<br />
19200, 38400, 57600, 115200 bps<br />
Data indicator<br />
Control signal indicator<br />
Green LED (TD), data to modem (dynamic)<br />
Yellow LED (RD), data from modem (dynamic)<br />
Yellow DTR LED, Data Terminal Ready<br />
Yellow DCD LED, Data Carrier Detect<br />
102906_01_en PHOENIX CONTACT 1-3
<strong>PSI</strong>-<strong>DATA</strong>/<strong>BASIC</strong>-<strong>MODEM</strong>/<strong>RS232</strong><br />
PSTN Port (a/b Line)<br />
Connection<br />
Shield<br />
Operating modes<br />
Dialing procedure<br />
Transmission speed<br />
DCE/DCE<br />
Fax<br />
6-pos. RJ12<br />
Via metal foot on EN DIN rail<br />
Dial-up modem, 2-wire half/full duplex<br />
Multiple frequency/pulse dialing, configuration via software<br />
Automatic adjustment according to V.8<br />
300 baud ... 56 kbaud<br />
2400 baud ... 14.4 kbaud<br />
Compatibility<br />
Command set compatibility<br />
ITU V.42bis, V.42, V.92, V.90, V.34 extended, ITU V.32bis, V.32, V.21,<br />
V.22bis, V.22, V.23, ITU V.17<br />
AT standard command set and extended<br />
V.250 basic command set<br />
Error correction V.42 (LAPM or MNP 2 to 4)<br />
Data compression V.42bis (throughput 4:1), MNP 5 (throughput 2:1)<br />
Data indicator<br />
Green LED (OH), off the hook<br />
Yellow LED (AA), automatic answer, flashes during selective call acceptance<br />
Acoustic signal<br />
Integrated piezo<br />
Startup diagnostics<br />
Selftest, visualization via LEDs (controller, RAM, EEPROM, DSP)<br />
Telecommunications approvals<br />
TBR21, TIA-968-A, CS-03 for Europe, USA, and Canada<br />
Telephone Number Memory<br />
Telephone number memory<br />
Tests/Approvals<br />
UL<br />
Telecommunications<br />
General Data<br />
Ambient temperature range (operation)<br />
Housing<br />
Material<br />
Dimensions (H x W x D)<br />
Weight<br />
Functional earth ground<br />
Vibration resistance<br />
Shock test according to IEC 60068-2-27<br />
Operation<br />
Storage<br />
4 telephone numbers with a maximum of 36 digits<br />
In preparation<br />
TBR21, TIA-968-A, CS-03 for Europe, USA, and Canada<br />
0°C ... +55°C<br />
ME 22,5 with T-BUS and ground contact<br />
ABS-V0, green<br />
99 mm x 22.5 mm x 114.5 mm<br />
165 g<br />
To EN DIN rail in the housing<br />
5g according to DIN EN 60068-2-6, 1.5 h each in x, y, and z direction<br />
onlinecomponents.com<br />
15g, 11 ms, half-sine shock pulse<br />
30g, 11 ms, half-sine shock pulse<br />
Free fall according to IEC 60068-2-32<br />
Degree of protection<br />
3-way electrical isolation<br />
Test voltage<br />
1 m<br />
IP20<br />
Supply // PSTN // V.24 (RS-232)<br />
1.5 kV AC, 50 Hz, 1 min. between all ground levels according to<br />
EN 61010-1/VDE 0411-1 and EN 60950<br />
1-4 PHOENIX CONTACT 102906_01_en
<strong>PSI</strong>-<strong>DATA</strong>/<strong>BASIC</strong>-<strong>MODEM</strong>/<strong>RS232</strong> <strong>Industrial</strong> <strong>Modem</strong><br />
Conformance With EMC Directive 89/336/EEC<br />
Noise Immunity Test According to EN 61000-6-2 1<br />
Electrostatic discharge (ESD) EN 61000-4-2 Criterion B 2 8 kV air discharge<br />
6 kV contact discharge<br />
Electromagnetic HF field<br />
EN 61000-4-3 Criterion A 3 10 V/m<br />
10 V/m<br />
Amplitude modulation<br />
Pulse modulation<br />
Fast transients (burst)<br />
Signal<br />
Supply<br />
Surge current load<br />
Signal<br />
Supply<br />
EN 61000-4-4<br />
Criterion B 2<br />
Criterion A 3<br />
EN 61000-4-5 Criterion B 2 1 kV<br />
2 kV<br />
Conducted interference EN 61000-4-6 Criterion A 3 10 V<br />
Noise Emission Test According to EN 61000-6-4<br />
2 kV/5 kHz<br />
1 kV/5 kHz<br />
2 kV/5 kHz<br />
Noise emission of housing EN 55022 Limiting curve B<br />
1 EN 61000 corresponds to IEC 61000<br />
2 Criterion B: Temporary adverse effects on the operating behavior, which the device corrects automatically.<br />
3 Criterion A: Normal operating behavior within the specified limits.<br />
onlinecomponents.com<br />
102906_01_en PHOENIX CONTACT 1-5
<strong>PSI</strong>-<strong>DATA</strong>/<strong>BASIC</strong>-<strong>MODEM</strong>/<strong>RS232</strong><br />
onlinecomponents.com<br />
1-6 PHOENIX CONTACT 102906_01_en
2 Quick Startup of a Dial-Up Line Connection<br />
Quick Startup of a Dial-Up Line Connection<br />
Quick startup refers only to a standard dial-up connection.<br />
2.1 Hardware Installation<br />
2.1.1 Default Configuration<br />
The modem is preconfigured to dial-up line operation with automatic data rate detection<br />
and automatic call acceptance by default upon delivery.<br />
2.1.2 Mounting<br />
Only mount devices when the power supply is disconnected.<br />
• Mount the modem on a 35 mm EN DIN rail (see Figure 2-1).<br />
The DIN rail must be connected to PE to ensure safe operation.<br />
onlinecomponents.com<br />
102906A002<br />
Figure 2-1<br />
Mounting<br />
102906_01_en PHOENIX CONTACT 2-1
<strong>PSI</strong>-<strong>DATA</strong>/<strong>BASIC</strong>-<strong>MODEM</strong>/<strong>RS232</strong><br />
Electrical connection<br />
Only qualified personnel may connect the power, start up, and operate this device.<br />
According to the safety instructions in this text, qualified personnel are persons who are<br />
authorized to start up, to ground, and to mark devices, systems, and equipment<br />
according to the standards of safety technology. In addition, these persons must be<br />
familiar with all warning instructions and maintenance measures in this text.<br />
Disregarding this warning may result in damage to equipment and/or serious personal<br />
injury.<br />
2.1.3 V.24 (RS-232) Interface<br />
The modem and the computer or another device are connected via the<br />
PSM-KA-9SUB9/BB/... V.24 (RS-232) cable (see Section 1.3, "Ordering Data").<br />
The cable is an interface cable with 1:1 connected contacts.<br />
The modem may only be connected to devices, which meet the requirements of<br />
EN 60950 ("Safety of Information Technology Devices").<br />
• Use this interface cable to connect the modem to a free COM interface on the PC.<br />
onlinecomponents.com<br />
Figure 2-2<br />
2 + 2 + @ A <br />
5 7 * ,<br />
# '<br />
= N # <br />
" ' BJ<br />
, + , & <br />
, + ,<br />
6 N ,<br />
! ! 6 N ,<br />
4 N ,<br />
4 6 5<br />
!<br />
" %<br />
%<br />
4 N ,<br />
4 6 5<br />
+ 6 5 # &<br />
& + 6 5<br />
, 6 4 "<br />
" , 6 4<br />
, 5 4 $ $<br />
$ , 5 4<br />
4 1 '<br />
' 4 1<br />
/ , % #<br />
# / ,<br />
V.24 (RS-232) interface<br />
5 7 * , '<br />
$ ' ! ) ! #<br />
2-2 PHOENIX CONTACT 102906_01_en
Quick Startup of a Dial-Up Line Connection<br />
2.1.4 Connecting the Telecommunications Cable<br />
RJ12/RJ11 connector<br />
Connect the telecommunications cable to an RJ12/RJ11 connector on the front of the<br />
device. Signals "a" and "b" are assigned to the middle pins, 3 and 4.<br />
? <br />
? ? <br />
> 6 , <br />
> ? <br />
= ? <br />
= 6 , <br />
4 ? , <br />
4 , <br />
Figure 2-3<br />
2 E &<br />
2 E % $<br />
2 E $ #<br />
2 E # "<br />
2 E " !<br />
2 E ! <br />
2 E <br />
2 E <br />
Connection using an RJ12/RJ11 connector<br />
2.1.5 Supply Voltage<br />
4 4 " # <br />
The <strong>PSI</strong>-<strong>DATA</strong>/<strong>BASIC</strong>-<strong>MODEM</strong>/<strong>RS232</strong> is designed exclusively for SELV operation<br />
according to IEC 60950/EN 60950/VDE 0805.<br />
Connect the 24 V supply voltage to the "24V" and "0V" terminal points on the plug-in screw<br />
terminal block.<br />
24 V 0V<br />
24V 0V NC NC<br />
$ ' ! ) ! $<br />
onlinecomponents.com<br />
102906A003<br />
Figure 2-4<br />
Connecting the supply voltage<br />
As soon as the "VCC" LED lights up, the modem is ready for dial-up line operation.<br />
102906_01_en PHOENIX CONTACT 2-3
<strong>PSI</strong>-<strong>DATA</strong>/<strong>BASIC</strong>-<strong>MODEM</strong>/<strong>RS232</strong><br />
2.2 Software Installation<br />
2.2.1 System Requirements<br />
In principle, any device can be connected to the modem via a free V.24 (RS-232) interface.<br />
A terminal program, for example, can be used for configuration. More detailed information<br />
can be found in later sections.<br />
A PC with one of the following operating systems is required for the <strong>PSI</strong>-<strong>MODEM</strong>-CONF<br />
configuration software and the plug and play function:<br />
Windows 95, Windows 98, Windows 2000, Windows NT, Windows ME or Windows XP.<br />
The installation procedure for the driver varies depending on the operating system. In the<br />
following, driver installation under Windows XP is described as an example. During<br />
installation, please always follow the on-screen instructions.<br />
2.2.2 Driver Installation<br />
• Connect the modem to the PC as described above and switch on the supply voltage.<br />
After the PC has been started, the modem is detected automatically and the driver can<br />
be installed:<br />
onlinecomponents.com<br />
• Select "No, not this time" and click "Next".<br />
2-4 PHOENIX CONTACT 102906_01_en
Quick Startup of a Dial-Up Line Connection<br />
• Insert the "<strong>PSI</strong>-<strong>MODEM</strong>-CONF" CD provided in the drive.<br />
• Select "Install the software automatically (Recommended)" and click "Next".<br />
onlinecomponents.com<br />
• Click on "Continue Anyway". Contrary to the message displayed, this will in no way<br />
affect the operation of the software or your computer.<br />
102906_01_en PHOENIX CONTACT 2-5
<strong>PSI</strong>-<strong>DATA</strong>/<strong>BASIC</strong>-<strong>MODEM</strong>/<strong>RS232</strong><br />
• Insert the "<strong>PSI</strong>-<strong>MODEM</strong>-CONF" CD in the corresponding drive and confirm with "OK".<br />
• Select "Browse".<br />
onlinecomponents.com<br />
• Click on "acfva.sys" and confirm your selection with "Open".<br />
2-6 PHOENIX CONTACT 102906_01_en
Quick Startup of a Dial-Up Line Connection<br />
• Confirm with "OK".<br />
• Click "Finish" to complete the installation.<br />
onlinecomponents.com<br />
The driver has now been installed and the modem is available to application programs,<br />
e.g., the dial-up network.<br />
102906_01_en PHOENIX CONTACT 2-7
<strong>PSI</strong>-<strong>DATA</strong>/<strong>BASIC</strong>-<strong>MODEM</strong>/<strong>RS232</strong><br />
onlinecomponents.com<br />
2-8 PHOENIX CONTACT 102906_01_en
Hardware Installation<br />
3 Hardware Installation<br />
3.1 Structure<br />
Dimensions<br />
114.5 22.5<br />
Figure 3-1<br />
Dimensions (in mm)<br />
<strong>PSI</strong>-<strong>DATA</strong>/<strong>BASIC</strong>/<br />
<strong>MODEM</strong>/<strong>RS232</strong><br />
Ord.-No. 23 13 067<br />
Only mount devices when the power supply is disconnected.<br />
• Mount the modem on a 35 mm EN DIN rail (see Figure 3-2).<br />
The DIN rail must be connected to PE to ensure safe operation.<br />
onlinecomponents.com<br />
100<br />
LINE<br />
OH<br />
DTR<br />
DCD<br />
AA<br />
RS 232<br />
102906A004<br />
102906A002<br />
Figure 3-2<br />
Mounting<br />
102906_01_en PHOENIX CONTACT 3-1
<strong>PSI</strong>-<strong>DATA</strong>/<strong>BASIC</strong>-<strong>MODEM</strong>/<strong>RS232</strong><br />
3.2 Operating Elements<br />
1 2 3 4<br />
13<br />
12<br />
11<br />
10<br />
9<br />
8<br />
7<br />
Figure 3-3<br />
Operating elements<br />
3.2.1 Connection Terminal Blocks<br />
1 24 V supply (10 V DC ... 30 V DC)<br />
2 0 V supply (0 V)<br />
3 Not used<br />
4 Not used<br />
<strong>PSI</strong>-<strong>DATA</strong>/<strong>BASIC</strong>/<br />
<strong>MODEM</strong>/<strong>RS232</strong><br />
Ord.-No. 23 13 067<br />
LINE<br />
OH<br />
DTR<br />
DCD<br />
AA<br />
RS 232<br />
onlinecomponents.com<br />
3.2.2 Connectors<br />
6<br />
5<br />
102906A005<br />
5 Line, RJ12 (telecommunications connection)<br />
6 V.24 (RS-232) data interface, 9-pos. D-SUB<br />
3-2 PHOENIX CONTACT 102906_01_en
Hardware Installation<br />
3.2.3 LEDs<br />
7 AA (Yellow) Automatic answer (automatic call acceptance), flashes during<br />
selective call acceptance<br />
8 DCD (Yellow) Data carrier detected, connection established with partner<br />
9 DTR (Yellow) Connected device is ready (e.g., PC or PLC)<br />
10 OH (Green) Off the hook<br />
11 TD (Green) Transmit data with reference to the PSTN (telecommunications)<br />
connection<br />
12 RD (Yellow) Receive data with reference to the PSTN (telecommunications)<br />
connection<br />
13 VCC (Green) Supply voltage is present<br />
3.3 Electrical Connections<br />
Electrical connection<br />
Only qualified personnel may connect the power, start up, and operate this device.<br />
According to the safety instructions in this text, qualified personnel are persons who are<br />
authorized to start up, to ground, and to mark devices, systems, and equipment<br />
according to the standards of safety technology. In addition, these persons must be<br />
familiar with all warning instructions and maintenance measures in this text.<br />
Disregarding this warning may result in damage to equipment and/or serious personal<br />
injury.<br />
onlinecomponents.com<br />
102906_01_en PHOENIX CONTACT 3-3
<strong>PSI</strong>-<strong>DATA</strong>/<strong>BASIC</strong>-<strong>MODEM</strong>/<strong>RS232</strong><br />
3.3.1 Block Diagram<br />
COMBICON<br />
0V<br />
24 V<br />
24 V<br />
5V<br />
- +<br />
Backplane<br />
Phone Line<br />
Pin 2<br />
Pin 3<br />
Pin 4<br />
Pin 5<br />
RJ12<br />
a2<br />
a<br />
b<br />
b2<br />
onlinecomponents.com<br />
Figure 3-4<br />
Block diagram<br />
µC<br />
EEPROM<br />
Backplane<br />
D9-SUB<br />
1 DCD<br />
3<br />
2<br />
7<br />
8<br />
6<br />
4<br />
9<br />
5<br />
TxD<br />
RxD<br />
RTS<br />
CTS<br />
DSR<br />
DTR<br />
RI<br />
GND<br />
RS-232<br />
102906A006<br />
3-4 PHOENIX CONTACT 102906_01_en
Hardware Installation<br />
3.3.2 V.24 (RS-232) Interface<br />
Minimum configuration<br />
The modem and the computer or another device are connected via the<br />
PSM-KA-9SUB9/BB/... V.24 (RS-232) cable (see Section 1.3, "Ordering Data").<br />
The cable is an interface cable with 1:1 connected contacts.<br />
• Use the interface cable to connect the modem to a free COM interface on the PC.<br />
In rare cases, when connecting a PLC or control system, DCE (Data Communication<br />
Equipment) may be used instead of DTE (Data Terminal Equipment), which is typical for a<br />
PC. If so, the following cables must be crossed (null modem cable):<br />
– TxD and RxD<br />
– RTS and CTS<br />
– DSR and DTR<br />
If you do not know which type of interface is connected, you can determine the correct<br />
configuration by testing (crossing cables).<br />
The minimum configuration only requires one connection for TxD, RxD, and GND<br />
(software handshake).<br />
This does not apply to the 3964R protocol for Phoenix Contact controller boards. Only TxD,<br />
RxD, and GND are connected here, but no handshake protocol is selected.<br />
The modem may only be connected to devices, which meet the requirements of<br />
EN 60950 ("Safety of Information Technology Devices").<br />
2 + 2 + @ A <br />
5 7 * ,<br />
# '<br />
= N # <br />
" ' BJ<br />
5 7 * , '<br />
, + , & <br />
, + ,<br />
6 N ,<br />
! ! 6 N ,<br />
4 N ,<br />
4 6 5<br />
!<br />
" %<br />
%<br />
4 N ,<br />
4 6 5<br />
+ 6 5 # &<br />
& + 6 5<br />
, 6 4 "<br />
" , 6 4<br />
, 5 4 $ $<br />
$ , 5 4<br />
4 1 '<br />
' 4 1<br />
/ , % #<br />
# / ,<br />
onlinecomponents.com<br />
Figure 3-5<br />
V.24 (RS-232) interface<br />
$ ' ! ) ! #<br />
102906_01_en PHOENIX CONTACT 3-5
<strong>PSI</strong>-<strong>DATA</strong>/<strong>BASIC</strong>-<strong>MODEM</strong>/<strong>RS232</strong><br />
Table 3-1<br />
Meaning of the terminal designations<br />
RJ12/RJ11 connector<br />
Designation<br />
DCD (Data Carrier Detect)<br />
TxD (Transmit Data)<br />
RxD (Receive Data)<br />
RTS (Request To Send)<br />
CTS (Clear To Send)<br />
DTR (Data Terminal Ready)<br />
DSR (Data Set Ready)<br />
RI (Ring Indicator)<br />
GND (Signal Ground)<br />
3.3.3 Telecommunications Cable<br />
Connect the telecommunications cable to an RJ12/RJ11 connector on the front of the<br />
device. Signals "a" and "b" are assigned to the middle pins, 3 and 4.<br />
? <br />
? ? <br />
> 6 , <br />
> ? <br />
= ? <br />
= 6 , <br />
4 ? , <br />
4 , <br />
Figure 3-6<br />
2 E &<br />
2 E % $<br />
2 E $ #<br />
2 E # "<br />
2 E " !<br />
2 E ! <br />
2 E <br />
2 E <br />
4 4 " # <br />
Connection using an RJ12/RJ11 connector<br />
Meaning<br />
Data carrier detected, connection established<br />
Transmit data (refers to PC, PLC, etc.)<br />
Receive data (refers to PC, PLC, etc.)<br />
Request to send<br />
Clear to send<br />
Ready (PC, PLC, etc.)<br />
Ready (modem)<br />
Incoming call<br />
Signal ground<br />
$ ' ! ) ! $<br />
onlinecomponents.com<br />
3-6 PHOENIX CONTACT 102906_01_en
Hardware Installation<br />
3.3.4 Supply Voltage<br />
The <strong>PSI</strong>-<strong>DATA</strong>/<strong>BASIC</strong>-<strong>MODEM</strong>/<strong>RS232</strong> is designed exclusively for SELV operation<br />
according to IEC 60950/EN 60950/VDE 0805.<br />
The supply voltage must be between 10 V and 30 V DC.<br />
Connect the 24 V supply voltage to the "24V" and "0V" terminal points on the plug-in screw<br />
terminal block.<br />
24 V 0V<br />
24V 0V NC NC<br />
Figure 3-7<br />
Connections<br />
As soon as the "VCC" LED lights up, the modem is ready.<br />
102906A003<br />
onlinecomponents.com<br />
102906_01_en PHOENIX CONTACT 3-7
<strong>PSI</strong>-<strong>DATA</strong>/<strong>BASIC</strong>-<strong>MODEM</strong>/<strong>RS232</strong><br />
onlinecomponents.com<br />
3-8 PHOENIX CONTACT 102906_01_en
Software Installation<br />
4 Software Installation<br />
4.1 System Requirements<br />
In principle, any device can be connected to the modem via a free V.24 (RS-232) interface.<br />
A terminal program, for example, can be used for configuration. More detailed information<br />
can be found in later sections.<br />
A PC with one of the following operating systems is required for the <strong>PSI</strong>-<strong>MODEM</strong>-CONF<br />
configuration software and the plug and play function:<br />
Windows 95, Windows 98, Windows 2000, Windows NT, Windows ME or Windows XP.<br />
The installation procedure for the driver varies depending on the operating system. In the<br />
following, driver installation under Windows XP is described as an example. During<br />
installation, please always follow the on-screen instructions.<br />
4.2 Driver Installation<br />
• Connect the modem to the PC as described above and switch on the supply voltage.<br />
After the PC has been started, the modem is detected automatically and the driver can<br />
be installed:<br />
onlinecomponents.com<br />
• Select "No, not this time" and click "Next".<br />
102906_01_en PHOENIX CONTACT 4-1
<strong>PSI</strong>-<strong>DATA</strong>/<strong>BASIC</strong>-<strong>MODEM</strong>/<strong>RS232</strong><br />
• Insert the "<strong>PSI</strong>-<strong>MODEM</strong>-CONF" CD provided in the drive.<br />
• Select "Install the software automatically (Recommended)" and click "Next".<br />
onlinecomponents.com<br />
• Click on "Continue Anyway". Contrary to the message displayed, this will in no way<br />
affect the operation of the software or your computer.<br />
4-2 PHOENIX CONTACT 102906_01_en
Software Installation<br />
• Insert the "<strong>PSI</strong>-<strong>MODEM</strong>-CONF" CD in the corresponding drive and confirm with "OK".<br />
• Select "Browse".<br />
onlinecomponents.com<br />
• Click on "acfva.sys" and confirm your selection with "Open".<br />
102906_01_en PHOENIX CONTACT 4-3
<strong>PSI</strong>-<strong>DATA</strong>/<strong>BASIC</strong>-<strong>MODEM</strong>/<strong>RS232</strong><br />
• Confirm with "OK".<br />
• Click "Finish" to complete the installation.<br />
onlinecomponents.com<br />
The driver has now been installed and the modem is available to application programs,<br />
e.g., the dial-up network.<br />
4-4 PHOENIX CONTACT 102906_01_en
Software Installation<br />
4.3 Configuration Software<br />
The <strong>PSI</strong>-<strong>MODEM</strong>-CONF software is used to configure the <strong>PSI</strong>-<strong>DATA</strong>/<strong>BASIC</strong>-<strong>MODEM</strong>/<br />
<strong>RS232</strong>. Your modem has more functions than can be mapped in the configuration<br />
software. To use these functions, enter additional AT commands in the "Additional<br />
Settings" field (see page 4-15). The AT commands and their meanings are described in<br />
"Command Descriptions" on page 6-2.<br />
Starting installation<br />
4.3.1 Installation<br />
• Insert the CD labeled "<strong>PSI</strong>-<strong>MODEM</strong>-CONF" in the CD-ROM drive on your computer.<br />
• Use Windows Explorer to start the "Setup_Vx.x.xxx.exe" file located in the<br />
"...:\<strong>PSI</strong>-CONF" directory.<br />
• Close all other applications and click "Next".<br />
onlinecomponents.com<br />
102906_01_en PHOENIX CONTACT 4-5
<strong>PSI</strong>-<strong>DATA</strong>/<strong>BASIC</strong>-<strong>MODEM</strong>/<strong>RS232</strong><br />
Accepting the terms of the<br />
license agreement<br />
Selecting an installation<br />
folder<br />
• Read the terms of the software license agreement thoroughly and click "Yes" to accept<br />
them.<br />
You may now select a specific installation folder.<br />
The default setting is "C:\Program Files\<strong>PSI</strong>-<strong>MODEM</strong>-CONF".<br />
onlinecomponents.com<br />
• If necessary, select a different folder and click "Next".<br />
4-6 PHOENIX CONTACT 102906_01_en
Software Installation<br />
Selecting<br />
shortcuts<br />
Start copying<br />
• For full installation, select "Yes" for both options.<br />
• Experienced users can select "No" so that no shortcuts are created on the desktop or<br />
in the Start menu.<br />
onlinecomponents.com<br />
• Click "Next" to start copying the files. This may take a few seconds depending on the<br />
system.<br />
102906_01_en PHOENIX CONTACT 4-7
<strong>PSI</strong>-<strong>DATA</strong>/<strong>BASIC</strong>-<strong>MODEM</strong>/<strong>RS232</strong><br />
Finishing installation<br />
• Exit setup by clicking "Finish".<br />
onlinecomponents.com<br />
4-8 PHOENIX CONTACT 102906_01_en
Software Installation<br />
4.3.2 Operation<br />
After installation the following shortcut will appear on your desktop:<br />
Starting the software<br />
Double-click on this icon to start the <strong>PSI</strong>-<strong>MODEM</strong>-CONF configuration software.<br />
Figure 4-1<br />
<strong>PSI</strong>-<strong>MODEM</strong>-CONF configuration software<br />
onlinecomponents.com<br />
102906_01_en PHOENIX CONTACT 4-9
<strong>PSI</strong>-<strong>DATA</strong>/<strong>BASIC</strong>-<strong>MODEM</strong>/<strong>RS232</strong><br />
Select language<br />
You can set the language to English or German in the "Options" menu item.<br />
Figure 4-2<br />
Select language<br />
onlinecomponents.com<br />
4-10 PHOENIX CONTACT 102906_01_en
Software Installation<br />
Configuring the interface<br />
First, you must configure the interface.<br />
• Select the "<strong>RS232</strong>" function in the "Options" menu.<br />
• Select the interface to which your modem is connected.<br />
• Adjust the parameters according to your application requirements.<br />
• Apply the settings by confirming with "OK".<br />
• Click on the "Write" button to write the settings to the modem.<br />
onlinecomponents.com<br />
102906_01_en PHOENIX CONTACT 4-11
<strong>PSI</strong>-<strong>DATA</strong>/<strong>BASIC</strong>-<strong>MODEM</strong>/<strong>RS232</strong><br />
• Click on the "Read" button to read data from the connected modem.<br />
The software displays the modem type and firmware version.<br />
onlinecomponents.com<br />
4-12 PHOENIX CONTACT 102906_01_en
Software Installation<br />
File Functions<br />
Creates a new project file with the default settings.<br />
Opens a saved project file.<br />
Configuration Profile<br />
Click on the "Settings" button .<br />
Saves the current settings.<br />
This opens the "Basic <strong>Modem</strong> Configuration" window.<br />
onlinecomponents.com<br />
Figure 4-3<br />
"Basic <strong>Modem</strong> Configuration" window<br />
102906_01_en PHOENIX CONTACT 4-13
<strong>PSI</strong>-<strong>DATA</strong>/<strong>BASIC</strong>-<strong>MODEM</strong>/<strong>RS232</strong><br />
Echo<br />
DCD Signal<br />
DSR Signal<br />
If the echo is on, all characters sent by the computer in command mode are sent back by<br />
the modem. The characters can thus be displayed on screen on the computer.<br />
When the partner carrier detect signal is detected, the V.24 (RS-232) interface activates<br />
the DCD signal (Data Carrier Detect). Alternatively, this signal can also be permanently<br />
switched on.<br />
The DSR signal (Data Set Ready) of the V.24 (RS-232) interface can be permanently<br />
switched on or switched off in command mode.<br />
DTR Signal<br />
Flow Control<br />
Error Correction<br />
Compression<br />
Your modem can process the DTR signal (Data Terminal Ready) as follows:<br />
– The modem returns to command mode if there is no DTR signal at the V.24 (RS-232)<br />
interface.<br />
– The modem hangs up and returns to command mode if there is no DTR signal at the<br />
V.24 (RS-232) interface.<br />
– The modem hangs up, is reset, and returns to command mode if there is no DTR signal<br />
at the V.24 (RS-232) interface.<br />
– The modem ignores the DTR signal. This may be necessary when using a PLC, as the<br />
V.24 (RS-232) interface of a PLC is often unable to provide a DTR signal.<br />
The data flow control of the V.24 (RS-232) interface can be set for various operating<br />
modes:<br />
– For the "Hardware" setting, the CTS and RTS signals are used for bidirectional data<br />
flow control.<br />
– For the "Software" setting, the data flow control is bidirectional using XON and XOFF<br />
characters.<br />
– In "XON/XOFF Unidirect" mode, the XON character is sent to the computer (DTE) to<br />
start data transmission and the XOFF character is sent to stop data transmission. The<br />
<strong>PSI</strong>-<strong>DATA</strong>/FAX-<strong>MODEM</strong>/<strong>RS232</strong> ignores XON and XOFF characters sent by the<br />
computer.<br />
– Data flow control can also be switched off completely. This may be necessary when<br />
protocols such as 3964R are transmitted, which control the flow independently.<br />
When error correction is switched on, any transmission errors are corrected automatically<br />
by the modem. For this, error correction must be activated on the transmitting and<br />
receiving modem. Some protocols, such as 3964R, must not be transmitted with error<br />
correction.<br />
Data compression on the telecommunications cable results in increased data throughput.<br />
For this, data compression must be activated on the transmitting and receiving modem.<br />
Some protocols, such as 3964R, must not be transmitted with data compression.<br />
onlinecomponents.com<br />
Modulation Method<br />
You can specify the transmission method of your modem (default: CCITT).<br />
Table 6-1 on page 6-17 shows how the various settings work.<br />
4-14 PHOENIX CONTACT 102906_01_en
Software Installation<br />
Result Codes<br />
Auto Answer<br />
Your modem is configured so that it outputs alphanumeric responses on the screen. The<br />
"Numeric" option can be used if your software package or PLC only supports numeric<br />
confirmations. The relevant settings can be found in Table 6-2 on page 6-18.<br />
Automatic call acceptance enables you to specify the number of rings after which your<br />
modem can automatically respond to incoming calls. Automatic call acceptance is<br />
switched off by default upon delivery. Active automatic call acceptance is indicated by the<br />
yellow "AA" (Automatic Answer) LED.<br />
Dialtone Detection<br />
Country Code<br />
Speaker<br />
Additional Settings (AT)<br />
Telephone Book<br />
This LED flashes in the event of an incoming call, regardless of the automatic call<br />
acceptance setting.<br />
When dial tone detection is switched on the modem waits for the dial tone before dialing.<br />
Dial tone detection should be switched off in a private branch exchange.<br />
Select the country where you wish to use your <strong>PSI</strong>-<strong>DATA</strong>/FAX-<strong>MODEM</strong>/<strong>RS232</strong>. If your<br />
country is not listed, select Europe (CTR21) or the USA.<br />
The internal speaker can be switched off, always on or only switched on when establishing<br />
a connection.<br />
Your modem has more functions than can be mapped in the configuration software. To use<br />
these functions, enter additional AT commands in the "Additional Settings" field.<br />
The AT commands and their meanings are described in "Command Descriptions" on<br />
page 6-2.<br />
Example: Entering L3 increases the speaker volume.<br />
Additional settings can be saved in the project file via the "Save" button. However, they<br />
are not read from the modem by the configuration software.<br />
You can store three telephone numbers in Store Numbers 1 through 3, which can be used<br />
as a speed dial memory. The use of stored telephone numbers with the DS=n command<br />
is described on page 6-4.<br />
onlinecomponents.com<br />
102906_01_en PHOENIX CONTACT 4-15
<strong>PSI</strong>-<strong>DATA</strong>/<strong>BASIC</strong>-<strong>MODEM</strong>/<strong>RS232</strong><br />
Remote Login<br />
Password Mode<br />
When password mode is active, the caller must enter a password after the incoming call<br />
has been accepted. If the password is invalid or the time allocated for password entry has<br />
been exceeded, the caller has two more attempts to enter the correct password. When the<br />
correct password is entered, the modem continues to operate as usual, otherwise the<br />
connection is aborted.<br />
When password mode is active with callback the caller is requested to enter a password.<br />
If the password is invalid or the time allocated for password entry has been exceeded, the<br />
caller has two more attempts to enter the correct password.<br />
When the correct password is entered, the modem aborts the existing connection to dial<br />
the number that is stored in the memory under Callback No. The modem has three<br />
attempts to establish a connection with the callback number.<br />
Automatic call acceptance must be activated for all password-protected functions.<br />
Password<br />
Enter your password here.<br />
The password can contain up to seven characters from the ASCII character set (1 to<br />
127), excluding question marks. The password is not case-sensitive.<br />
• Click on the "Write" button to write the settings to the modem once they have<br />
all been entered.<br />
onlinecomponents.com<br />
4-16 PHOENIX CONTACT 102906_01_en
Password Protection<br />
5 Password Protection<br />
This section describes password protection using AT commands. For information about<br />
password protection using the <strong>PSI</strong>-<strong>MODEM</strong>-CONF configuration software, refer to<br />
page 4-16.<br />
Example<br />
5.1 Selecting a Password<br />
The password can contain up to seven characters from the ASCII character set (1 to<br />
127), excluding question marks. The password is not case-sensitive.<br />
If no password is stored, the modem continues to request the stored telephone details.<br />
The password and telephone number can be stored using the *P=x and &Zn=x<br />
commands (see below).<br />
AT&F<br />
AT*P=ASDFG1<br />
AT&Z0=012345<br />
AT%S1<br />
ATS0=1<br />
Load default setting<br />
Enter the password "ASDFG1"<br />
Enter the callback number<br />
Activate password protection with callback<br />
Enable automatic call acceptance<br />
– *P=x command<br />
Store a password in the permanent memory<br />
The *P=x command stores the password x (maximum of seven characters from the ASCII<br />
character set, excluding question marks) in the permanent memory on the modem. No<br />
password is stored on the modem by default. If no password is stored and the %S1 or %S2<br />
command is activated, the modem skips the password request stage.<br />
– *P? command<br />
Display stored password<br />
The *P? command displays the stored password.<br />
Your modem has a built-in security function, which can be activated when your modem is<br />
in auto answer mode (see page 6-12).<br />
onlinecomponents.com<br />
5.2 Deactivating Password Protection<br />
The %S0 command deactivates password-protected callback (see "Password-Protected<br />
Callback" on page 5-2). By default upon delivery, password protection is deactivated.<br />
102906_01_en PHOENIX CONTACT 5-1
<strong>PSI</strong>-<strong>DATA</strong>/<strong>BASIC</strong>-<strong>MODEM</strong>/<strong>RS232</strong><br />
5.3 Password-Protected Callback<br />
The %S1 command activates password-protected callback. If you wish to activate this<br />
function, switch your modem to auto answer mode (automatic call acceptance; ATS0 > 0).<br />
Your modem now accepts calls and executes the usual handshake. The caller is then<br />
requested to enter a password. If the password is invalid or the time allocated for password<br />
entry has been exceeded, the caller has two more attempts to enter the correct password.<br />
When the correct password is entered, the modem aborts the existing connection to dial<br />
the number that is stored in the memory under &Z0. The modem has three attempts to<br />
establish a connection with the callback number.<br />
5.4 Dial In With Password Protection<br />
The %S2 command enables password validation when an incoming called is accepted. In<br />
this case, the caller must enter a password after the incoming call has been accepted. If<br />
the password is invalid or the time allocated for password entry has been exceeded, the<br />
caller has two more attempts to enter the correct password. When the correct password is<br />
entered, the modem continues to operate as usual, otherwise the connection is aborted.<br />
Automatic call acceptance must be activated for all password-protected functions (see<br />
"S Registers" on page 6-11).<br />
onlinecomponents.com<br />
5-2 PHOENIX CONTACT 102906_01_en
AT Commands<br />
6 AT Commands<br />
Your modem stores its operating characteristics in a non-volatile memory (EEPROM). You<br />
can overwrite these characteristics using commands and can thus modify the method of<br />
operation of the device. The modem executes commands as long as it is in command<br />
mode. Your modem is automatically in command mode until you dial a number and<br />
establish a connection. You can enter commands for your modem using appropriate<br />
communication software (e.g., HyperTerminal). The device supports data transmission<br />
speeds of 300, 1200, 2400, 4800, 9600, 19,200, 38,400, 57,600, and 115,200 bps.<br />
Make sure that the baud rate setting for your COM port in your communication software<br />
corresponds to one of these speeds.<br />
Modes<br />
The modem can be operated in two modes:<br />
– Command mode: The modem can be configured and controlled via AT commands.<br />
As soon as a connection is established, the modem automatically switches to data<br />
mode.<br />
– Data mode: In this mode, the modem transmits data to the partner.<br />
Command Structure<br />
All commands transmitted to the modem must start with AT and must be confirmed by<br />
pressing ENTER. The commands can be entered in either upper or lowercase, but not a<br />
mixture of the two. Spaces may be inserted between the commands so that the command<br />
lines are easier to read.<br />
AT deletes the last command line executed by your modem (if present) and prepares<br />
your modem for the new command line. In addition, AT informs your modem of the<br />
transmission speed, parity, and character length.<br />
For commands that must be specified by a parameter, a missing parameter corresponds<br />
to parameter 0, e.g., ATM = ATM0.<br />
Correct a Typing Error<br />
If you make a mistake when entering a command, you can correct it using the backspace<br />
key. Pressing the backspace key deletes the last character entered. The AT at the start of<br />
the command line is not deleted.<br />
onlinecomponents.com<br />
Repeat the Previous Command<br />
You can instruct your modem to repeat the previous command by entering A/ in command<br />
mode. AT is not entered for this command and it does not have to be confirmed by pressing<br />
ENTER, i.e., the command is repeated as soon as A/ is entered.<br />
102906_01_en PHOENIX CONTACT 6-1
<strong>PSI</strong>-<strong>DATA</strong>/<strong>BASIC</strong>-<strong>MODEM</strong>/<strong>RS232</strong><br />
6.1 Command Descriptions<br />
AT<br />
Attention String<br />
AT is the prefix of a command line and must be entered at the start of each command line<br />
(except for the A/ command or the +++ Escape string). The Attention characters transmit<br />
the transmission speed, character format, and parity of your computer or terminal to your<br />
modem.<br />
A<br />
Manual Answering<br />
Use the A command to manually answer a call. The A command can also be used to<br />
convert voice communication into data communication: Once you have completed the<br />
spoken part of the call, the caller enters the ATD command and ENTER to enable data<br />
transmission. The partner responds with the ATA command and ENTER. Your modem<br />
does not execute any commands that appear after the A in the command line. You must<br />
therefore enter all settings before the A command.<br />
A/ Repeat the Previous Command<br />
The A/ command instructs the modem to repeat the previous command line (i.e., the last<br />
command that it stored in its memory). You can use the A/ command to redial a number if<br />
the line was busy on the first attempt or it could not connect.<br />
B<br />
If you attempt to execute a command line that does not start with AT, an error message<br />
is generated (except when repeating a command with A/ or using the +++ Escape string).<br />
The A/ command does not have to be preceded by AT or confirmed by pressing ENTER.<br />
You can use the A/ command to repeat the last command line as many times as you wish<br />
until the command is deleted from the modem memory by either resetting the modem or<br />
entering a new command line.<br />
Set the CCITT or Bell Transmission Method<br />
The B command can be used to operate your modem in Bell and/or CCITT mode. This<br />
command is only relevant for transmission speeds from 300 to 1200 bps. For all other<br />
speeds, only CCITT modulation is used.<br />
B0<br />
B1<br />
Use CCITT modulation<br />
Use Bell modulation<br />
onlinecomponents.com<br />
6-2 PHOENIX CONTACT 102906_01_en
AT Commands<br />
D<br />
Dial<br />
The D command instructs your modem to dial a number. Enter the number that you wish<br />
to dial after the D command. You can modify the D command with the following additional<br />
commands:<br />
P Pulse Dialing<br />
The P modifier generates the call using pulse dialing, which is standard in<br />
Germany. Enter the modifier after the command, followed by the desired<br />
telephone number.<br />
T Tone Dialing<br />
The T modifier instructs the modem to use tone dialing. Enter the modifier after<br />
the command, followed by the desired telephone number.<br />
W Wait for a Dial Tone<br />
The W modifier instructs the modem to wait for a second dial tone. Use this<br />
command in private branch exchanges to wait for a dial tone after calling an<br />
outside line.<br />
Example: ATDP0W555-1111<br />
This command dials 0 for an outside line, waits for a second dial tone and then<br />
dials the number 555-1111.<br />
, Pause<br />
This modifier inserts a 2-second pause before dialing. If, for example, your<br />
modem is located in a private branch exchange (e.g., in offices), where a number<br />
(usually 0) must be dialed for an outside line, insert a comma between the 0 and<br />
the actual telephone number you wish to dial. Your modem dials 0, waits for two<br />
seconds and then dials the telephone number. If a longer pause is required, you<br />
can either insert another comma in the command line or change the value of the<br />
S8 register (see page 6-13).<br />
@ Wait for Five Seconds of Silence<br />
This modifier instructs the modem to wait until no tone has been detected on the<br />
line for five seconds before dialing the specified number.<br />
> Dial an Outside Line via a Ground Button<br />
; Return to Command Mode<br />
If your modem is to call another modem and then return to command mode<br />
without disconnecting, enter the ; modifier as the last character in your dial<br />
command line.<br />
L Redial<br />
The last dialed telephone number is redialed.<br />
onlinecomponents.com<br />
102906_01_en PHOENIX CONTACT 6-3
<strong>PSI</strong>-<strong>DATA</strong>/<strong>BASIC</strong>-<strong>MODEM</strong>/<strong>RS232</strong><br />
DS=n<br />
Dial One of the Stored Telephone Numbers<br />
The DS=n command instructs the modem to dial one of four telephone numbers, where n<br />
is a value between 0 and 3. Use the &Z command to store telephone numbers (see<br />
page 6-8).<br />
Example: ATDS=1<br />
The modem dials the telephone number in store number 1.<br />
E<br />
Echo<br />
Your modem is set by default to display commands on the computer screen in command<br />
mode (echo). This feature can only be used if your computer is configured for full duplex<br />
mode.<br />
+++ Escape String<br />
The Escape string can be used to switch your modem from data mode to command mode<br />
without losing the connection with the partner. When you enter the Escape string, your<br />
modem outputs an OK message to inform you that it is in command mode.<br />
Enter ATO to return to data mode and confirm by pressing ENTER. Enter ATH to hang up<br />
and confirm by pressing ENTER.<br />
H<br />
I<br />
Most systems operate in full duplex mode. In this case, you can enable the echo function<br />
with the E1 command.<br />
If you are working in half duplex mode, you must disable the echo function with the E0<br />
command.<br />
Hook (Hang Up)<br />
H0<br />
H1<br />
Identification<br />
The modem hangs up.<br />
The line is occupied by the modem (only required for test purposes).<br />
I0 Display the ID number for your modem (e.g., 56000).<br />
I1 Display the ROM checksum for your modem (e.g., 255).<br />
I2 Output an OK message.<br />
I3 Display the fixed ID code.<br />
I4 Display the variable ID code.<br />
I5 Display the country code (see +GCI).<br />
I6 Display the data pump version.<br />
I7 Output an OK message.<br />
onlinecomponents.com<br />
L<br />
Volume Control<br />
L0<br />
L1<br />
L2<br />
L3<br />
Low volume<br />
Low volume<br />
Medium volume<br />
High volume<br />
6-4 PHOENIX CONTACT 102906_01_en
AT Commands<br />
M<br />
Speaker<br />
M0<br />
M1<br />
M2<br />
Speaker off<br />
Speaker on during the connection phase<br />
Speaker always on<br />
O<br />
Data Mode/Fall Forward/Fall Backward<br />
P<br />
Q<br />
Sr?<br />
Sr=n<br />
T<br />
O0<br />
O1<br />
O2<br />
O3<br />
O4<br />
O5<br />
Return to data mode if you switched to command mode using the Escape string.<br />
Completely new adjustment with speed modification after returning to data mode.<br />
This function is useful if errors emerge, e.g., due to modifying the telephone line attributes.<br />
The Fall Forward/Fall Backward options enable you to set the required transmission<br />
speed.<br />
Pulse Dialing<br />
This command sets pulse dialing by default for your modem (see D command).<br />
<strong>Modem</strong> Messages<br />
Q0<br />
Q1<br />
Quick adjustment without speed modification after returning to data mode.<br />
Adjustment without speed modification after returning to data mode.<br />
Adjustment by decreasing the speed (Fall Backward) after returning to data<br />
mode.<br />
Adjustment by increasing the speed (Fall Forward) after returning to data mode.<br />
Information from the modem about its status and display of confirmations on your<br />
screen.<br />
Disable confirmations. This may be necessary, e.g., if a PLC is connected to your<br />
modem and responses would interfere.<br />
Read the <strong>Modem</strong> Register<br />
Your modem has 29 registers (0 through 28), which are used to set the operating<br />
parameters. Sr? can be used to read the values set in the registers.<br />
Set Register Values<br />
Sr=n can be used to modify the register values for your modem (see Section "S Registers"<br />
on page 6-11).<br />
onlinecomponents.com<br />
Tone Frequency Dialing<br />
Tone frequency dialing is stored by default.<br />
102906_01_en PHOENIX CONTACT 6-5
<strong>PSI</strong>-<strong>DATA</strong>/<strong>BASIC</strong>-<strong>MODEM</strong>/<strong>RS232</strong><br />
V<br />
Alpha or Numeric Responses<br />
Your modem displays responses on screen.<br />
V0<br />
V1<br />
Display numeric confirmations. This option can be used if your software package<br />
or PLC only supports numeric confirmations.<br />
Display alpha confirmations (default).<br />
W<br />
X<br />
Z<br />
Additional Confirmations<br />
The W command enables or disables the MNP/V.42, CONNECT, and CARRIER additional<br />
confirmations and determines whether the modem is specifying the DCE speed (modem<br />
speed) or the DTE speed (computer speed).<br />
W0<br />
W1<br />
W2<br />
Disable additional confirmations and display the DTE speed<br />
(e.g., CONNECT 115200).<br />
Enable additional confirmations and display the DCE speed.<br />
E.g.,<br />
+MCR: V34<br />
+MRR: 33600<br />
+ER: LAPM<br />
CONNECT 115200<br />
Disable additional confirmations and display the DCE speed<br />
(e.g., CONNECT 33600).<br />
Confirmation Settings<br />
The X command can be used to control the way in which your modem responds to specific<br />
events. There are five different command sets for answering:<br />
X0<br />
X1<br />
X2<br />
X3<br />
X4<br />
Hayes Smart <strong>Modem</strong> 300-compatible answering/dummy dialing (private branch<br />
exchange)<br />
As X0 plus all CONNECT answering/dummy dialing (private branch exchange)<br />
As X1 plus detection of dial tone/proceed-to-dial tone (outside line)<br />
As X1 plus detection of engaged tone/dummy dialing (private branch exchange)<br />
All answering and detection of dial tone and engaged tone<br />
Reset<br />
Use the Z command to reset your modem. Your modem then hangs up and loads<br />
configuration profile 0 or 1. This command must be the last one in the command line.<br />
onlinecomponents.com<br />
Z0 Reset and activate stored configuration profile 0.<br />
Z1 Reset and activate stored configuration profile 1.<br />
&C<br />
Carrier Detect Signal<br />
&C0<br />
&C1<br />
Continuous activation of the carrier detect signal for your modem.<br />
Set the V.24 (RS-232-C) carrier detect signal for your modem (DCD) when the<br />
modem detects a carrier detect signal from the partner (default).<br />
6-6 PHOENIX CONTACT 102906_01_en
AT Commands<br />
&D<br />
Data Terminal (PC) Ready Signal (DTR)<br />
&D0<br />
&D1<br />
&D2<br />
&D3<br />
Ignore the status of the DTR signal. The DTR signal is always activated, even<br />
when your PC is switched off.<br />
Return to command mode if the modem detects a falling edge on the DTR line.<br />
Hang up and return to command mode if the modem detects a falling edge on the<br />
DTR line.<br />
Hang up, reset, and return to command mode if the modem detects a falling edge<br />
on the DTR line.<br />
&F<br />
&K<br />
&Q<br />
&S<br />
The &Q command influences the function of the &D command.<br />
Factory Configuration<br />
The &F command (default) restores the factory settings with enabled hardware flow<br />
control.<br />
Set DTE Flow Control<br />
The &K command specifies the type of data flow control that is set between the modem<br />
and the local computer to prevent data loss. Your modem supports two types of data flow<br />
control. The selected function depends on the requirements of your computer.<br />
&K0<br />
&K3<br />
&K4<br />
&K5<br />
Connection Mode<br />
The &Q command is preset automatically, and should not be modified.<br />
Otherwise, the &Q command can affect the function of the &D command.<br />
onlinecomponents.com<br />
DSR Options<br />
&S0<br />
&S1<br />
Disable data flow control.<br />
Use CTS/RTS signals for bidirectional data flow control. The CTS signal starts or<br />
finishes data transmission from the computer or terminal. The RTS signal controls<br />
data transmission to the computer.<br />
If the RTS is disabled, data transmission is finished. If it is enabled, the modem<br />
sends data to the computer.<br />
Select data flow control in both directions (XON/XOFF).<br />
Select transparent data flow control (XON/XOFF).<br />
Enable the DSR signal (default).<br />
Enable the DSR signal during the handshake and in data mode and disable it in<br />
test or silent mode.<br />
The DSR is deactivated when the carrier detect signal is lost.<br />
102906_01_en PHOENIX CONTACT 6-7
<strong>PSI</strong>-<strong>DATA</strong>/<strong>BASIC</strong>-<strong>MODEM</strong>/<strong>RS232</strong><br />
&V<br />
Display Configuration Profiles<br />
The &V command can be used to view the active and stored configuration profiles and the<br />
four telephone numbers that are stored on your modem. Any commands or registers that<br />
appear in the active or stored profiles, but are not described in this user manual, can be<br />
ignored.<br />
This command cannot be activated when the modem is online.<br />
&W<br />
&Y<br />
&Zn=x<br />
%S Callback Security<br />
*P=x<br />
*P?<br />
Save Active Configuration<br />
This command saves the active configuration in the permanent memory.<br />
&W0 Save the active settings as configuration profile 0.<br />
&W1 Save the active settings as configuration profile 1.<br />
Select Active Profile<br />
The &Y command specifies which saved profile is loaded when the modem is switched on<br />
or reset.<br />
&Y0 Use configuration profile 0 (default).<br />
&Y1 Use configuration profile 1.<br />
Store a Telephone Number in the Permanent Memory<br />
The &Zn=x command stores a telephone number (x) (31 digits, maximum) in the<br />
permanent memory of the modem. Your modem can store up to four telephone numbers<br />
(n = 0 through 3).<br />
%S0 Disable callback security.<br />
%S1 Enable callback security with password validation.<br />
%S2 Enable password validation.<br />
Store a Password in the Permanent Memory<br />
The *P=x command stores the password x (maximum of seven characters from the ASCII<br />
character set, excluding question marks) in the permanent memory on the modem. No<br />
password is stored on the modem by default. If no password is stored and the %S1 or %S2<br />
command is activated, the modem skips the password request stage.<br />
onlinecomponents.com<br />
Display Stored Password<br />
The *P? command displays the stored password.<br />
6-8 PHOENIX CONTACT 102906_01_en
6.2 AT Commands for MNP and LAPM (V.42bis)<br />
AT Commands<br />
The modem can establish a data connection via LAPM (Link Access Procedure for<br />
<strong>Modem</strong>s) (V.42bis) or MNP (Microcom Networking Protocol).<br />
%C Data Compression (V.42bis/MNP 5)<br />
%C0 Disable data compression.<br />
%C1 Use MNP-5 compression.<br />
%C2 Use V.42bis compression.<br />
%C3 Enable data compression (default).<br />
The compression algorithm enabled is determined by the error correction protocol<br />
used: If a V.42 connection is present, V.42bis compression is used. If an<br />
MNP-2-4 connection is present, MNP-5 compression is used.<br />
\B Send BREAK<br />
The \B commands sends a break character to the modem that is calling so that the<br />
connection is aborted. If you have established a standard connection (i.e., not an MNP<br />
connection), enter a number after this command to specify how long your modem should<br />
send the break character. This number is multiplied by 100 ms.<br />
If you are using a reliable connection (MNP), you do not have to enter a number after this<br />
command. The pause is always 300 ms for these connections (default: 3).<br />
\K Process Break Character<br />
The \K command specifies one of three options for processing the break character:<br />
– Immediate disconnection with data loss<br />
The buffer memory is deleted and the break character is transmitted immediately.<br />
– Immediate disconnection<br />
The break character is transmitted before any data is stored in the buffer memory.<br />
– Delayed disconnection<br />
The break character is transmitted once the data in the buffer memory has been sent.<br />
"Processing the Break Character" on page 6-20 describes the various ways in which your<br />
modem can process break characters.<br />
onlinecomponents.com<br />
102906_01_en PHOENIX CONTACT 6-9
<strong>PSI</strong>-<strong>DATA</strong>/<strong>BASIC</strong>-<strong>MODEM</strong>/<strong>RS232</strong><br />
\N V.42/MNP Data Connection<br />
The \N command specifies what type of data connection your modem can establish (MNP<br />
or LAPM (V.42bis)).<br />
+DR<br />
+GCI<br />
\N0 Establish a standard data connection (i.e., a connection that does not use MNP<br />
or V.42).<br />
\N1 Establish a direct data connection (i.e., a connection that bypasses error<br />
correction and speed buffering).<br />
\N2 Establish only V.42 or MNP data connections. If the partner modem does not use<br />
V.42 or MNP, your modem aborts the connection and returns to command mode.<br />
\N3 Establish standard, V.42 or MNP data connections depending on whether the<br />
calling modem uses MNP or V.42. If the partner modem does not use MNP or<br />
V.42, a standard data connection is established. If the partner modem uses MNP<br />
or V.42, one of these connections is established.<br />
\N4 Establish only V.42 data connections. If the partner modem does not use V.42,<br />
your modem aborts the connection and returns to command mode.<br />
\N5 Establish only MNP data connections. If the partner modem does not use MNP,<br />
your modem aborts the connection and returns to command mode.<br />
Data flow control (&K) should be enabled during \N0, \N2 ,\N3, \N4, and \N5 operations.<br />
Confirmation for Data Compression<br />
The +DR command enables extended confirmation for data compression.<br />
+DR=1<br />
+DR=0<br />
+DR?<br />
Enable confirmation.<br />
Disable confirmation.<br />
Request setting.<br />
The confirmations are described in Table 6-2 on page 6-18.<br />
Country ID<br />
The +GCI command sets the country ID for the modem. If your country is not listed, use<br />
"+GCIB5" (default).<br />
+GCI09<br />
+GCI16<br />
+GCI20<br />
+GCI42<br />
+GCIB5<br />
Australia<br />
Brazil<br />
onlinecomponents.com<br />
Canada<br />
Europe<br />
USA<br />
+GCI?<br />
Request Country ID<br />
Indicates the set country ID.<br />
6-10 PHOENIX CONTACT 102906_01_en
AT Commands<br />
+MS<br />
Modulation Method<br />
The +MS command sets the modulation method for the modem.<br />
+MS=Modu, Auto, MinSend, MaxSend, MinRec, MaxRec<br />
Modu= Modulation method (for possible values, see Table 6-1 on page 6-17).<br />
Auto=0<br />
Auto=1<br />
Example:<br />
AT+MS=V34,1,9600,33600,9600,33600<br />
Preferably, V.34 modulation should be used here. If V.34 is not possible, another<br />
modulation type is used (automatic adjustment of the modulation type). To send and<br />
receive, a minimum of 9600 bps and a maximum of 33600 bps should be used.<br />
6.3 S Registers<br />
Only use specified modulation type.<br />
Automatic adjustment of the modulation type.<br />
MinSend= Lowest baud rate for sending data (see Table 6-1).<br />
MaxSend= Highest baud rate for sending data (see Table 6-1).<br />
MinRec= Lowest baud rate for receiving data (see Table 6-1).<br />
MaxRec= Highest baud rate for receiving data (see Table 6-1).<br />
Your modem has 211 registers (S0 through S210). These registers influence the operating<br />
characteristics of the modem, send you information via your modem, and enable you to<br />
test your modem. The values of certain registers can be modified using specific<br />
commands. If you use a command to modify a register value, this command remains active<br />
until you switch off or reset your modem. Your modem then reverts back to the operating<br />
characteristics stored in its permanent memory.<br />
Reading a Register Value<br />
Use the Sr? command to read the current value of a register:<br />
r = Register number (0 through 210)<br />
Your modem displays a three-digit decimal value for the register.<br />
Modifying a Register Value<br />
Use the Sr=n command to modify the current value of a register:<br />
r = Register number (0 through 210)<br />
n = New value<br />
onlinecomponents.com<br />
102906_01_en PHOENIX CONTACT 6-11
<strong>PSI</strong>-<strong>DATA</strong>/<strong>BASIC</strong>-<strong>MODEM</strong>/<strong>RS232</strong><br />
Description of the S Registers<br />
S0<br />
Number of Rings Before Automatically Answering (Auto Answer)<br />
Register S0 specifies the number of rings after which your modem can automatically<br />
respond to incoming calls.<br />
Default: 0 (this value disables automatic call acceptance).<br />
S1<br />
S2<br />
S3<br />
S4<br />
Count the Received Ring Signals<br />
Register S1 counts the ring signals when you are called. If the value in this register is<br />
greater than or equal to 1 and corresponds to the value in register S0, your modem<br />
answers the call.<br />
Escape Character<br />
Register S2 specifies the ASCII value of the Escape character.<br />
Default: 43<br />
(This value corresponds to the ASCII character "+". This can be changed to any value<br />
between 0 and 255. Values greater than 127 disable the Escape function and prevent<br />
return to command mode.)<br />
Carriage Return<br />
Register S3 defines the ASCII value of the carriage return character. This character is used<br />
to terminate a command line and enables your modem to execute this line. In addition, this<br />
character appears after the response that your modem sends to you.<br />
Default: 13<br />
(Any ASCII value between 0 and 127 can be used. This may be required if you have a nonstandard<br />
device.)<br />
Line Feed<br />
Register S4 specifies the ASCII value of the line feed character. Your modem sends the<br />
character for the line feed after a carriage return character. If you wish to prevent a line<br />
feed, set the value in this register to zero. It is not possible, however, to disable a line feed<br />
character.<br />
Default: 10<br />
(Any ASCII value between 0 and 127 can be used.)<br />
onlinecomponents.com<br />
6-12 PHOENIX CONTACT 102906_01_en
AT Commands<br />
S5<br />
Backspace<br />
Register S5 specifies the ASCII value of the backspace character. This character is<br />
generated when the backspace key is pressed and when the cursor is moved to the left.<br />
Default: 8<br />
(Any ASCII value between 0 and 32 can be used.)<br />
S6<br />
S7<br />
Wait When Dialing Without Dial Tone<br />
Register S6 informs your modem how long it should wait after being activated before it dials<br />
the first digit in a dialing instruction when dial tone detection is disabled, i.e., the X0, X1 or<br />
X3 confirmations are enabled.<br />
Default: 2 seconds<br />
Wait for the Carrier Detect Signal from the Dialed <strong>Modem</strong><br />
Register S7 defines how many seconds your modem should wait for the carrier detect<br />
signal from the dialed modem before it hangs up.<br />
Default: 45 seconds<br />
(You can set this value to another value between 1 and 100 seconds if your modem does<br />
not receive a carrier detect signal within the specified time.)<br />
If your modem detects the carrier detect signal within the specified time, it outputs the<br />
message CONNECT and switches to data mode. If no carrier detect signal is detected<br />
within this time, the modem sends back the message NO CARRIER, hangs up, and returns<br />
to command mode.<br />
S8 Pause Character Duration (,)<br />
Register S8 informs your modem how long the pause for each comma in a dial command<br />
line should last in seconds. The pause character , is normally used in private branch<br />
exchanges or other special telephone networks where it is necessary to wait for an outside<br />
line.<br />
Default: 2 seconds<br />
(You can select any value between 0 and 255 seconds.)<br />
We recommend that you insert several commas in your command line rather than modify<br />
this register.<br />
onlinecomponents.com<br />
102906_01_en PHOENIX CONTACT 6-13
<strong>PSI</strong>-<strong>DATA</strong>/<strong>BASIC</strong>-<strong>MODEM</strong>/<strong>RS232</strong><br />
S9<br />
S10<br />
S11<br />
Waiting Time for Detecting the Carrier Detect Signal<br />
Register S9 specifies how long the carrier detect signal from the dialed modem must be<br />
present so that your modem can detect it. This function ensures that your modem does not<br />
incorrectly interpret other signals such as the engaged tone, telephone ringing or voice<br />
paging as a carrier detect signal.<br />
This register value is specified in units of one tenth of a second.<br />
Default: 600 ms<br />
(Any value between 1 and 255 can be used. If, for example, you specify the value 13, your<br />
modem must receive the carrier detect signal from the dialed modem for 1.3 seconds<br />
before responding.)<br />
The higher the value, the less likely the modem is to incorrectly identify carrier detect<br />
signals.<br />
Waiting Time for Losing the Carrier Detect Signal<br />
Register S10 specifies how long your modem should wait after losing the carrier detect<br />
signal from the dialed modem before it aborts the connection. This function can be used to<br />
prevent your modem from aborting the connection if the selected carrier detect signal only<br />
briefly disappears from the line.<br />
This register is set in units of one tenth of a second.<br />
Default: 1400 ms<br />
(The entire valid range is between 1 and 200.)<br />
Select a higher value if the connection is poor and the dialed carrier detect signal is<br />
disturbed by other noises.<br />
Set the value to 255 if your modem should ignore the carrier detect status and assume that<br />
the carrier detect signal from the dialed modem is continuously present (not possible in<br />
certain countries).<br />
If the value of this register is less than the value of register S9, your modem interrupts<br />
the connection as soon as the carrier detect signal briefly disappears.<br />
In this case register S10 elapses before the waiting time allocated for detecting the<br />
carrier detect signal elapses.<br />
Dialing Speed (Dial Tone Duration) for Tone Dialing<br />
Register S11 controls the speed of tone frequency dialing (DTMF).<br />
Default: 85 ms<br />
onlinecomponents.com<br />
Register S11 has no effect on pulse dialing.<br />
6-14 PHOENIX CONTACT 102906_01_en
AT Commands<br />
S12<br />
Waiting Time for Detecting the Escape Character<br />
Register S12 specifies how long your modem should wait once the Escape string has been<br />
entered before identifying the Escape character and displaying an OK message.<br />
This value is specified in units of 20 ms (1/50 s).<br />
Default: 50 (1 s)<br />
(A smaller value may not leave enough time to type in three Escape characters before the<br />
waiting time elapses.)<br />
S13<br />
S14<br />
S15<br />
S16<br />
S17 - 20<br />
S21<br />
S22<br />
S23<br />
S24<br />
Not Used<br />
<strong>Modem</strong> Control Register (Bit-Mapped)<br />
Register S14 can be used to control specific modem features, such as confirmations, echo,<br />
and dialing methods.<br />
In addition, you can specify whether your modem should act as a caller or callee.<br />
Not Used<br />
RDL Options, Line Enable, Retraining, Reply Codes for the <strong>Modem</strong><br />
(Bit-Mapped)<br />
Register S16 controls the options for requesting a digital remote test (remote digital<br />
loopback), the use of enable signals, retraining, and the reply codes that your modem<br />
outputs.<br />
Reserved<br />
<strong>Modem</strong> Control Register (Bit-Mapped)<br />
Register S21 controls the caller mode (originate) and control signals for data transmission.<br />
<strong>Modem</strong> Control Register (Bit-Mapped)<br />
Register S22 controls the internal modem speaker.<br />
<strong>Modem</strong> Control Register (Bit-Mapped)<br />
Register S23 indicates the status of the monitoring tone.<br />
Energy-Saving Mode (Sleep Timer)<br />
This register indicates the time in seconds after which the modem switches to energysaving<br />
mode. As soon as an activity is detected on the telephone line or on the serial<br />
interface, the modem exits energy-saving mode.<br />
onlinecomponents.com<br />
S25<br />
Delay Time for Data Terminal Ready Status<br />
This register specifies how long your modem needs to detect a change in the DTR signal.<br />
The values are between 0 and 255 in units of 0.01 seconds.<br />
Default: 0.05 s<br />
102906_01_en PHOENIX CONTACT 6-15
<strong>PSI</strong>-<strong>DATA</strong>/<strong>BASIC</strong>-<strong>MODEM</strong>/<strong>RS232</strong><br />
S26<br />
S27<br />
Delay Interval Between Request To Send (RTS) and Clear To Send (CTS)<br />
This register specifies how long your modem should wait when the RTS signal switches<br />
from off to on, before a CTS signal is output. The values for this register are between 0 and<br />
2.55 s in 10 ms intervals.<br />
Default: 10 ms<br />
<strong>Modem</strong> Control Register (Bit-Mapped)<br />
This register defines asynchronous/synchronous operations, pulse generators for<br />
synchronous pulses, and the DCE rate.<br />
S28<br />
S29<br />
S30<br />
S31 to S90<br />
S91<br />
S92<br />
S93 to S210<br />
<strong>Modem</strong> Control Register (Bit-Mapped)<br />
This register controls the activation of automatic dialing, the password-protected call back<br />
function, automatic baud rate detection, and the DCE protocol options.<br />
Reserved<br />
Inactive Timer<br />
This register controls the inactive timer (\T). The values for this register are between 0 and<br />
255 in 10-minute intervals.<br />
Default: 0 min<br />
(I.e., the inactive timer is disabled.)<br />
Reserved<br />
Transmit Level for Fax Mode<br />
This register controls the transmit level for permanent line operation. The values for this<br />
register are between 0 and 15 in negative dBm intervals.<br />
Default: -10 dBm<br />
Transmit Level for <strong>Modem</strong> Mode<br />
This register controls the transmit level for permanent line operation. The values for this<br />
register are between 0 and 15 in negative dBm intervals.<br />
Default: -10 dBm<br />
Reserved<br />
onlinecomponents.com<br />
6-16 PHOENIX CONTACT 102906_01_en
AT Commands<br />
6.4 Modulation Commands<br />
The +MS command can be used to set the transmission method (see page 6-2).<br />
Table 6-1<br />
Modulation commands<br />
AT Command Modulation Possible Transmission Speeds in bps<br />
+MS=B103 Bell 103 300<br />
+MS=B212 Bell 212 1200 Rx/75 Tx or 75 Rx/1200 Tx<br />
+MS=V21 V.21 300<br />
+MS=V22 V.22 1200<br />
+MS=V22B V.22bis 2400 or 1200<br />
+MS=V23 V.23 1200<br />
+MS=V32 V.32 9600 or 4800<br />
+MS=V32B V.32bis 14400, 12000, 9600, 7200 or 4800<br />
+MS=V34 V.34 33600, 31200, 28800, 26400, 24000, 21600,<br />
19200, 16800, 14400, 12000, 9600, 7200, 4800 or<br />
2400<br />
+MS=V90 V.90 56000, 54667, 53333, 52000, 50667, 49333,<br />
48000, 46667, 45333, 44000, 42667, 41333,<br />
40000, 38667, 37333, 36000, 34667, 33333,<br />
32000, 30667, 29333, 2800<br />
+MS=V92 V.92 downstream 56000, 54667, 53333, 52000, 50667, 49333,<br />
48000, 46667, 45333, 44000, 42667, 41333,<br />
40000, 38667, 37333, 36000, 34667, 33333,<br />
32000, 30667, 29333, 2800<br />
+MS=V92 V.92 upstream 48000, 46667, 45333, 44000, 42667, 41333,<br />
40000, 38667, 37333, 36000, 34667, 33333,<br />
32000, 30667, 29333, 2800<br />
onlinecomponents.com<br />
102906_01_en PHOENIX CONTACT 6-17
<strong>PSI</strong>-<strong>DATA</strong>/<strong>BASIC</strong>-<strong>MODEM</strong>/<strong>RS232</strong><br />
6.5 <strong>Modem</strong> Confirmations<br />
The X command can be used to control the way in which your modem responds to specific<br />
events (see page 6-6).<br />
Table 6-2<br />
<strong>Modem</strong> confirmations<br />
Word X Number Meaning<br />
OK 0,1,2,3,4 0 <strong>Modem</strong> has executed a command<br />
CONNECT 0,1,2,3,4 1 Data connection has been established<br />
RING 0,1,2,3,4 2 <strong>Modem</strong> has detected a ring<br />
NO CARRIER 0,1,2,3,4 3 Carrier detect signal from the dialed modem was lost or was not<br />
detected within the time specified by register S7<br />
ERROR 0,1,2,3,4 4 Error detected in your command line<br />
NO DIALTONE 2,4 6 No dial tone detected<br />
BUSY 3,4 7 Engaged tone received<br />
NO ANSWER 1,2,3,4 8 Partner not answering<br />
CONNECT 600 1,2,3,4 9 600 bps connection established<br />
CONNECT 1200 1,2,3,4 5 1200 bps connection established<br />
CONNECT 2400 1,2,3,4 10 2400 bps connection established<br />
CONNECT 4800 1,2,3,4 11 4800 bps connection established<br />
CONNECT 7200 1,2,3,4 13 7200 bps connection established<br />
CONNECT 9600 1,2,3,4 12 9600 bps connection established<br />
CONNECT 12000 1,2,3,4 14 12000 bps connection established<br />
CONNECT 14400 1,2,3,4 15 14400 bps connection established<br />
CONNECT 16800 1,2,3,4 59 16800 bps connection established<br />
CONNECT 19200 1,2,3,4 16 19200 bps connection established<br />
CONNECT 21600 1,2,3,4 61 21600 bps connection established<br />
CONNECT 24000 1,2,3,4 62 24000 bps connection established<br />
CONNECT 26400 1,2,3,4 63 26400 bps connection established<br />
CONNECT 28800 1,2,3,4 64 28800 bps connection established<br />
CONNECT 31200 1,2,3,4 91 31200 bps connection established<br />
CONNECT 33600 1,2,3,4 84 33600 bps connection established<br />
CONNECT 38400 1,2,3,4 17 38400 bps connection established<br />
CONNECT 57600 1,2,3,4 18 57600 bps connection established<br />
CONNECT 115200 1,2,3,4 19 115200 bps connection established<br />
CONNECT 1200TX/75RX 1,2,3,4 23 1200/75 bps connection established<br />
CONNECT 75TX/1200RX 1,2,3,4 22 75/1200 bps connection established<br />
+MRR: 300 1,2,3,4 40 Connection with 300 bps carrier<br />
+MRR: 1200/75 1,2,3,4 44 Connection with 1200/75 bps carrier<br />
+MRR: 75/1200 1,2,3,4 45 Connection with 75/1200 bps carrier<br />
+MRR: 1200 1,2,3,4 46 Connection with 1200 bps carrier<br />
onlinecomponents.com<br />
6-18 PHOENIX CONTACT 102906_01_en
AT Commands<br />
Table 6-2<br />
<strong>Modem</strong> confirmations (Continued)<br />
Word X Number Meaning<br />
+MRR: 2400 1,2,3,4 47 Connection with 2400 bps carrier<br />
+MRR: 4800 1,2,3,4 48 Connection with 4800 bps carrier<br />
+MRR: 7200 1,2,3,4 49 Connection with 7200 bps carrier<br />
+MRR: 9600 1,2,3,4 50 Connection with 9600 bps carrier<br />
+MRR: 12000 1,2,3,4 51 Connection with 12000 bps carrier<br />
+MRR: 14400 1,2,3,4 52 Connection with 14400 bps carrier<br />
+MRR: 16800 1,2,3,4 53 Connection with 16800 bps carrier<br />
+MRR: 19200 1,2,3,4 54 Connection with 19200 bps carrier<br />
+MRR: 21600 1,2,3,4 55 Connection with 21600 bps carrier<br />
+MRR: 24000 1,2,3,4 56 Connection with 24000 bps carrier<br />
+MRR: 26400 1,2,3,4 57 Connection with 26400 bps carrier<br />
+MRR: 28800 1,2,3,4 58 Connection with 28800 bps carrier<br />
+MRR: 31200 1,2,3,4 78 Connection with 31200 bps carrier<br />
+MRR: 33600 1,2,3,4 79 Connection with 33600 bps carrier<br />
+DR: ALT 1,2,3,4 66 Data compression: MNP CLASS 5<br />
+DR: V.42B 1,2,3,4 67 Data compression: V.42bis<br />
+DR: NONE 1,2,3,4 69 No data compression<br />
+ER: NONE 1,2,3,4 76 No error correction<br />
+ER: LAPM 1,2,3,4 77 Error correction: V.42 LAPM<br />
+ER: ALT 1,2,3,4 80 Error correction: MNP<br />
LINE IN USE 1,2,3,4 83 Line in use<br />
+MCR: B103 1,2,3,4 134 Connection with Bell 103 modulation<br />
+MCR: B212 1,2,3,4 135 Connection with Bell 212 modulation<br />
+MCR: V21 1,2,3,4 136 Connection with ITU-T V.21 modulation<br />
+MCR: V22 1,2,3,4 137 Connection with ITU-T V.22 modulation<br />
+MCR: V22B 1,2,3,4 138 Connection with ITU-T V.22bis modulation<br />
+MCR: V23 1,2,3,4 139 Connection with ITU-T V.23 modulation<br />
onlinecomponents.com<br />
+MCR: V32 1,2,3,4 140 Connection with ITU-T V.32 modulation<br />
+MCR: V32B 1,2,3,4 141 Connection with ITU-T V.32bis modulation<br />
+MCR: V34 1,2,3,4 142 Connection with ITU-T V.34 modulation<br />
+MCR: K56 1,2,3,4 144 Connection with K56flex modulation<br />
+MCR: V90 1,2,3,4 145 Connection with ITU-T V.90 modulation<br />
102906_01_en PHOENIX CONTACT 6-19
<strong>PSI</strong>-<strong>DATA</strong>/<strong>BASIC</strong>-<strong>MODEM</strong>/<strong>RS232</strong><br />
6.6 Processing the Break Character<br />
The \K command specifies one of three options for processing the break character (see<br />
page 6-9):<br />
Table 6-3<br />
Break character received from the computer with an MNP or standard<br />
connection<br />
AT\Kn<br />
n = 0, 2, 4<br />
n = 1<br />
n = 3<br />
n = 5<br />
Table 6-4<br />
AT\Kn<br />
n = 0, 1<br />
n = 2, 3<br />
n = 4, 5<br />
Table 6-5<br />
AT\Kn<br />
n = 0, 1<br />
n = 2, 3<br />
n = 4, 5<br />
Effect<br />
Do not send a break character to the partner system. Set the modem to<br />
command mode.<br />
Delete buffer memory and immediately send a break character to the<br />
partner modem.<br />
Immediately send a break character to the partner modem.<br />
Send all data from the buffer memory and then send a break character<br />
to the partner modem.<br />
Break character received by the computer while the modem is connected<br />
via an MNP or standard connection in command mode<br />
Effect<br />
Delete buffer memory and send a break character to the partner modem.<br />
Immediately send a break character to the other modem.<br />
Send all data from the buffer memory, followed by a break character to<br />
the other modem.<br />
Break character received by the partner modem while the modem is<br />
connected via a standard connection in data mode<br />
Effect<br />
Delete buffer memory and immediately send a break character to the<br />
serial output.<br />
Immediately send a break character to the serial output.<br />
Send all stored data followed by a break character to the serial output.<br />
onlinecomponents.com<br />
6-20 PHOENIX CONTACT 102906_01_en
Configuration Help<br />
7 Configuration Help<br />
7.1 Programming Connection for Phoenix Contact<br />
Controllers<br />
If you wish to use the modem in conjunction with Phoenix Contact controllers, you will need<br />
a three-wire null modem cable. The pin assignment is as follows:<br />
<strong>Modem</strong><br />
Controller<br />
Pin 2 Pin 3<br />
Pin 3 Pin 2<br />
Pin 5 Pin 5<br />
A modem cable (1:1) is required to connect the modem to the PC. The pin assignment is<br />
as follows:<br />
<strong>Modem</strong><br />
PC<br />
Pin 1 Pin 1<br />
Pin 2 Pin 2<br />
Pin 3 Pin 3<br />
Pin 4 Pin 4<br />
Pin 5 Pin 5<br />
Pin 6 Pin 6<br />
Pin 7 Pin 7<br />
Pin 8 Pin 8<br />
Pin 9 Pin 9<br />
The interface on the PC must be set as follows:<br />
– 9600 bps<br />
– 8 data bits<br />
– Even parity<br />
– 1 stop bit<br />
onlinecomponents.com<br />
102906_01_en PHOENIX CONTACT 7-1
<strong>PSI</strong>-<strong>DATA</strong>/<strong>BASIC</strong>-<strong>MODEM</strong>/<strong>RS232</strong><br />
Configuration of the <strong>Modem</strong><br />
The modem must be configured as follows when connecting to Phoenix Contact<br />
controllers:<br />
AT Command Function<br />
AT*F<br />
Default setting<br />
ATS0=1<br />
Automatic call acceptance<br />
AT&D0<br />
Ignore DTR signal<br />
AT&K0<br />
No data flow control<br />
ATW0<br />
ATX3<br />
AT\N0<br />
ATE0<br />
AT&W0<br />
Only CONNECT message<br />
Dummy dialing<br />
No error correction<br />
Echo off<br />
Save<br />
The interface on the PC must be set as follows:<br />
– 9600 bps<br />
– 8 data bits<br />
– Even parity<br />
– 1 stop bit<br />
onlinecomponents.com<br />
7-2 PHOENIX CONTACT 102906_01_en
Configuration Help<br />
7.2 Programming Connection for Siemens S7 300/400<br />
A TS adapter (Siemens Order No. 6ES7 972 - 0CA34-0XA0) is required to connect the<br />
<strong>PSI</strong>-<strong>DATA</strong>/<strong>BASIC</strong>-<strong>MODEM</strong>/<strong>RS232</strong> to the Siemens MPI interface. The programming<br />
connection is established using Siemens TeleService software.<br />
A modem cable (1:1) is required to connect the modem to the TS adapter. The pin<br />
assignment is as follows:<br />
<strong>Modem</strong><br />
TS Adapter<br />
Pin 1 Pin 1<br />
Pin 2 Pin 2<br />
Pin 3 Pin 3<br />
Pin 4 Pin 4<br />
Pin 5 Pin 5<br />
Pin 6 Pin 6<br />
Pin 7 Pin 7<br />
Pin 8 Pin 8<br />
Pin 9 Pin 9<br />
A modem cable (1:1) is required to connect the modem to the PG/PC. The pin assignment<br />
is as follows:<br />
<strong>Modem</strong><br />
PG/PC<br />
Pin 1 Pin 1<br />
Pin 2 Pin 2<br />
Pin 3 Pin 3<br />
Pin 4 Pin 4<br />
Pin 5 Pin 5<br />
Pin 6 Pin 6<br />
Pin 7 Pin 7<br />
Pin 8 Pin 8<br />
Pin 9 Pin 9<br />
onlinecomponents.com<br />
The interface on the PC must be set as follows:<br />
– 9600 bps (or 38400 bps)<br />
– 8 data bits<br />
– No parity<br />
– 1 stop bit<br />
The "19200 bps default modem" can also be used by Windows as a modem driver.<br />
102906_01_en PHOENIX CONTACT 7-3
<strong>PSI</strong>-<strong>DATA</strong>/<strong>BASIC</strong>-<strong>MODEM</strong>/<strong>RS232</strong><br />
Configuration of the <strong>Modem</strong> on the PG/PC<br />
The modem must be configured as follows when connected to the PG/PC:<br />
AT Command<br />
AT*F<br />
ATX3<br />
AT&W0<br />
Function<br />
Default setting<br />
Dummy dialing<br />
Save<br />
Configuration of the <strong>Modem</strong> on the TS Adapter<br />
The initialization string that is already stored in the TS adapter can be initialized without<br />
modification. The following entries are preconfigured by Siemens:<br />
AT Command Function<br />
AT*F<br />
Default setting<br />
E1<br />
Echo on<br />
L1<br />
Low volume<br />
M1<br />
Speaker is on when establishing a connection<br />
Q0<br />
Confirmations on<br />
V1<br />
Word confirmations<br />
&C1<br />
DCD, if carrier detected<br />
S0=1 Automatic call acceptance after one ring<br />
The +++ATH command is used to disconnect (default for modem and TS adapter). The<br />
default transmission speed is 19200 bps.<br />
onlinecomponents.com<br />
7-4 PHOENIX CONTACT 102906_01_en