EPIPHANY/ION POWER BUTTON - PaintballTech
EPIPHANY/ION POWER BUTTON - PaintballTech
EPIPHANY/ION POWER BUTTON - PaintballTech

Create successful ePaper yourself
Turn your PDF publications into a flip-book with our unique Google optimized e-Paper software.
<strong>EPIPHANY</strong>/<strong>ION</strong> <strong>POWER</strong> <strong>BUTTON</strong><br />
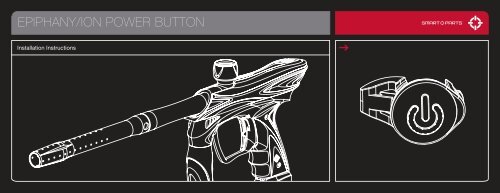
Installation Instructions
<strong>EPIPHANY</strong>/<strong>ION</strong> <strong>POWER</strong> <strong>BUTTON</strong><br />
PLEASE READ CAREFULLY<br />
INSTALLING IN AN <strong>ION</strong><br />
<strong>POWER</strong> <strong>BUTTON</strong> INSTALLAT<strong>ION</strong><br />
Begin by unloading and degassing the Ion following the Ion manual. Remove the power button dome sticker from the grip frame. Use<br />
of a hair dryer to warm the sticker can soften its adhesive – take care not to overheat the Ion body. Install the Epiphany power button by<br />
pressing the arrow shaped retention tabs in first, facing toward the front of the marker then working the back into place. If the button fits<br />
too snug, you may need to disassemble the Ion, remove the circuit board (see the Ion manual) and very slightly enlarge the power button<br />
hole with a fine file.<br />
INSTALLING IN AN <strong>EPIPHANY</strong><br />
Degas and unload the Epiphany, following the Epiphany manual. Install the Epiphany power button by pressing the arrow shaped retention<br />
tabs in first, facing toward the front of the marker then working the back into place.<br />
800.922.2147 www.smartparts.com