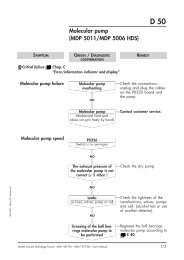
Leybold WS151 Roots Blower Manual - REMRSEC Facilities
Leybold WS151 Roots Blower Manual - REMRSEC Facilities
Leybold WS151 Roots Blower Manual - REMRSEC Facilities

Create successful ePaper yourself
Turn your PDF publications into a flip-book with our unique Google optimized e-Paper software.
Installation and connection<br />
The contact amplifier is identical for all pressure switches.<br />
Pressure switches and contact amplifiers with explosion<br />
hazard protection are available upon request.<br />
After removing a screw plug, the pressure switch (8/8)<br />
together with an adapter (8/11) and a right-angle bend<br />
(8/10) can be mounted on the bore (8/6).<br />
When doing so, ensure proper sealing and air-tight<br />
installation.<br />
It is advisable to mount the switch vertically to reduce the<br />
entry of contaminants.<br />
3.4 Connection of the<br />
Flanges<br />
Caution<br />
Warning<br />
Already small quantities of liquids (from the<br />
vacuum chamber or the piping) can lead to<br />
liquid damages within the pump. These may<br />
lead to a deformation of the impellers and<br />
may entirely destroy the pump. Suitable protective<br />
measures should be provided as<br />
required in the piping on the suction side<br />
(separator, T-piece).<br />
The RUVAC WS/WSU pumps have not<br />
been designed to pump ignitable or explosive<br />
mixtures without additional protection.<br />
If the pumps are none-the-less to be used<br />
under such conditions, the customer himself<br />
must ensure that proper measures for<br />
the purpose of protection against explosions<br />
(pressure monitor, flame arresters etc.)<br />
are introduced in line with the requirements<br />
of the applicable laws.<br />
Explosion protected canned motors (temperature<br />
class T 3 or T 4) are not available.<br />
Consult us for advice.<br />
Caution<br />
The RUVAC WS PFPE is vented with nitrogen.<br />
Only remove the packing flanges before<br />
immediate connection.<br />
If not already done, remove the protective shipping<br />
covers, cardboard pieces, foil or packing flanges from the<br />
flanges (8/5) and (8/1).<br />
We recommend that you retain the transport flanges of<br />
the WS PFPE in case you want to store the pump at a<br />
later date.<br />
Clean the flanges and check that the sealing surfaces<br />
are in perfect condition.<br />
Flange the pump to the vacuum system.<br />
Caution<br />
Don’t place any stress on the pump casing<br />
when installing the intake and exhaust lines.<br />
Fit compensation elements in order to avoid<br />
such stresses.<br />
When attaching the pump directly (without<br />
bolting down the feet) to the forevacuum<br />
pump, you must always use on the pressure<br />
side the full number of screws defined by<br />
the flange standard (ISO-K, DIN or ASA)<br />
whereby these must comply with the<br />
demanded property class rating.<br />
You must also check whether the backing<br />
pump is rigid and stable enough to support<br />
the load of the RUVAC pump in each case.<br />
The dirt-trap which is supplied with the pump should<br />
always be fitted into the intake flange when there is the<br />
possibility of contaminants entering the pump coming<br />
from the vacuum chamber or the piping. Even with clean<br />
vacuum processes, contaminants from the system may<br />
enter upon initial start-up. Depending on the operating<br />
conditions, the dirt trap may reduce the pumping speed<br />
of the pump.<br />
Observe the maintenance information provided in Section<br />
5.1.<br />
16 GA 03.108/7.02 - 11/96