3.5â Portable TV - Radio Shack
3.5â Portable TV - Radio Shack
3.5â Portable TV - Radio Shack
You also want an ePaper? Increase the reach of your titles
YUMPU automatically turns print PDFs into web optimized ePapers that Google loves.
TM<br />
THE PERFORMANCE YOU NEED<br />
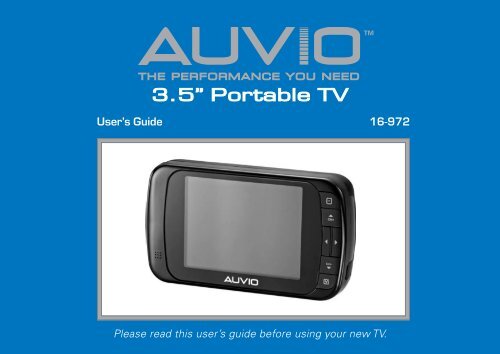
3.5” <strong>Portable</strong> <strong>TV</strong><br />
User’s Guide 16-972<br />
Please read<br />
this User’s<br />
XX-XXX<br />
User’s Guide<br />
Please read this user’s guide before using your new <strong>TV</strong>.
Contents<br />
Important Safety Instructions............................................................................... 4<br />
Precautions............................................................................................................ 6<br />
Package Contents.................................................................................................. 8<br />
Product Features................................................................................................... 8<br />
Powering Your <strong>TV</strong>................................................................................................. 10<br />
Install Batteries............................................................................................... 10<br />
Using a DC or Car Power Adapter (optional)................................................11<br />
Using the Antenna......................................................................................... 12<br />
Menu Operation.................................................................................................. 13<br />
Auto Search............................................................................................... 13<br />
Quick Search.............................................................................................. 14<br />
Channel Hop.............................................................................................. 14<br />
EPG (Electronic Program Guide).............................................................. 15<br />
Channel Edit.............................................................................................. 15<br />
Functions................................................................................................... 16
Manually Editing Menus................................................................................ 20<br />
Viewing Current Channel Information............................................................... 21<br />
Channel Information for Analog Mode................................................... 21<br />
Channel Information for Digital Mode.................................................... 22<br />
Specifications...................................................................................................... 23<br />
Troubleshooting.................................................................................................. 24<br />
FCC Information.................................................................................................. 25<br />
Limited Warranty............................................................................................ 25
Safety<br />
Important Safety Instructions<br />
Always be careful when using your product. To reduce the risk of fire, electrical<br />
shock and other injuries, keep these safety precautions in mind when installing,<br />
using and maintaining your <strong>TV</strong>.<br />
1) Read these instructions<br />
2) Keep these instructions.<br />
3) Heed all warnings.<br />
4) Follow all instructions.<br />
5) Do not use this product near water.<br />
6) To clean, unplug and separate from all power sources and use a dry cloth only.<br />
7) Do not block any ventilation openings.<br />
8) Do not install or use near any heat sources such as radiators, heat registers,<br />
stoves, or other products (including amplifiers) that produce heat.<br />
9) Protect the power cord of your adapter from being walked on or pinched<br />
particularly at plugs, convenience receptacles, and the point where they exit<br />
from the product.<br />
10) Only use the attachments / accessories specified by the manufacturer.<br />
11) Unplug this product during lightning storms or when unused for long periods of time.
12) Refer all servicing to qualified service personnel. Servicing is required when<br />
the product has been damaged in any way, such as power supply cord or plug<br />
is damaged, liquid has been spilled or objects have fallen into the product, the<br />
apparatus has been exposed to rain or moisture, does not operate normally, or<br />
has been dropped.<br />
13) Lightning – For added protection for this product during a lightning storm, or<br />
when it is left unattended and unused for long periods of time, unplug it from<br />
the wall outlet, separate batteries from the apparatus and store the antenna.<br />
This will prevent damage to the product due to lightning and power-line surges.<br />
Safety
Safety<br />
14) Overloading – Do not overload wall outlets, extension cords, or integral<br />
convenience receptacles as this can result in a risk of fire or electrical shock.<br />
15) Object and Liquid Entry – Never push objects of any kind into this product<br />
through openings as they may touch dangerous voltage points or short-out<br />
parts that could result in a fire or electric shock. Never spill liquid of any kind on<br />
the product.<br />
16) Servicing – Do not attempt to service this product yourself as openings or<br />
disassembling the cabinet may expose you to dangerous voltage or other<br />
hazards. Refer all servicing to qualified service personnel.<br />
Precautions<br />
1) Do not use this product in temperatures higher than 40°C (104°F) and lower<br />
than 32°F (0°C).<br />
2) Do not store this product and batteries in temperature higher than 140°F (60°C)<br />
and lower than 14°F (-10°C).<br />
3) Remove the batteries from the <strong>TV</strong> when you are not using it for extended<br />
periods.<br />
4) Keep the unit away from direct sunlight.<br />
5) To prevent overheating, do not place the product inside any bag or case while<br />
powered on.
6) Handle carefully. Do not place anything heavy, sharp, wet, or hot on the unit.<br />
7) To protect your hearing, set the volume to the lowest before using earphones.<br />
Do not listen at extremely high volume levels as extended high volume<br />
listening can cause hearing loss.<br />
8) To prevent breakage or damage to the antenna, pull the antenna to the very<br />
end before adjusting.<br />
9) Be careful that the extended built-in antenna does not poke any part of body or<br />
other people.<br />
10) Parents should supervise usage of this product by children.<br />
Safety<br />
Complies with the European Union’s “Restriction of Hazardous<br />
Substances Directive,” which protects the environment by restricting<br />
specific hazardous materials and products.
Package Contents<br />
• <strong>Portable</strong> 3.5” <strong>TV</strong> • Quick Start • User’s Guide<br />
Product Features<br />
• The <strong>TV</strong>’s 3.5” high-resolution screen delivers a bright, crisp picture<br />
• Handheld design for easy portability<br />
• Runs on four AA batteries (not included) for cord-free convenience<br />
Battery compartment<br />
Antenna<br />
Extend and adjust for<br />
best reception.<br />
POWER ON/ OFF<br />
Flip-out stand<br />
Headphone jack
Menu<br />
Access/exit the<br />
settings menu.<br />
CH+/CH–<br />
• Navigate menus<br />
and EPG.<br />
• Skip to the next<br />
or previous<br />
channel.<br />
Setup<br />
DC5V<br />
Insert power adapter<br />
plug (optional)<br />
<br />
• Navigate menus and Electronic<br />
Program Guide (EPG).<br />
• Change the volume.<br />
<br />
• Confirm<br />
selections.<br />
• Display channel<br />
information.
Setup<br />
Powering Your <strong>TV</strong><br />
Install Batteries<br />
1. Slide open the battery compartment door.<br />
2. Insert four alkaline batteries (not included) into the battery<br />
compartment with correct polarity (+ and –) as marked<br />
inside the compartment<br />
3. Close the battery compartment door.<br />
b Battery Notes:<br />
•<br />
•<br />
•<br />
Use only fresh batteries of the required size and type. Do<br />
not mix battery types.<br />
Do not burn or bury batteries. Do not puncture or crush. Do<br />
not disassemble.<br />
Remove batteries if you do not intend to use your <strong>TV</strong> for an extended<br />
time.<br />
Activate Max Battery function to maximize the duration of your<br />
battery life. See page 18.<br />
•<br />
10
Using an AC or Car Power Adapter (optional)<br />
To power your <strong>TV</strong> with an AC or car power adapter (neither<br />
included), make sure your adapter has the following specifications:<br />
• Tip Size: 2.8mm<br />
• Tip Polarity: Positive (+)<br />
• Output Voltage: 5V, Current Rating: 1A<br />
1. Remove batteries if installed in the <strong>TV</strong>.<br />
2. Connect the adapter (not included) to the DC5V jack on the<br />
right hand side panel.<br />
3. Connect your adapter to a standard household outlet.<br />
– OR –<br />
To use a car power adapter, start your car first before<br />
connecting to your car lighter socket.<br />
w Caution<br />
•<br />
•<br />
DC5V adapter<br />
port<br />
Using an adapter that does not meet the above specifications could damage the <strong>TV</strong> and<br />
your adapter.<br />
Always disconnect your adapter from your power source and <strong>TV</strong> when not in use.<br />
Setup<br />
11
Setup<br />
Using the Antenna<br />
Fully extend the built-in antenna for best signal reception.<br />
There might be no signal or a weak signal if:<br />
• Buildings or trees are blocking the transmitting tower.<br />
• It is snowing or raining heavily.<br />
• You are walking, running, or moving with the <strong>TV</strong>.<br />
• You are operating the <strong>TV</strong> inside a moving vehicle.<br />
• The <strong>TV</strong> is surrounded by other electronics.<br />
If the picture is not clear with the built-in antenna extended, try placing your <strong>TV</strong><br />
near a window.<br />
n Notes:<br />
• Digital Mode requires the <strong>TV</strong> to be stationary. You cannot watch digital channels in a<br />
moving vehicle.<br />
• Keep the built-in antenna stored folded and away from any object which can conduct<br />
electric current.<br />
12
Menu Operation<br />
1. Slide the POWER switch on the back of the <strong>TV</strong> to ON.<br />
2. Press to access the main menu.<br />
3. Use the navigation buttons CH+,CH–, , to<br />
select one of six submenus: Auto Search, Quick Search,<br />
Channel Hop, EPG, Channel Edit, Functions (explained<br />
on page 16).<br />
4. Press to confirm.<br />
Auto Search<br />
1. Select Auto Search from the main menu.<br />
2. Highlight one of the following and press to select:<br />
• Rescan to scan for channels and erase previously<br />
saved channel information.<br />
• Update to scan for channels but keep previously<br />
saved channel information.<br />
3. Press to start channel searching. Press again to stop.<br />
n Note: RF Ch. No. may differ from the actual channel number. For example, for RF Ch.<br />
No 19, the actual channel may be 32-1 or 32-2.<br />
Operation<br />
13
Quick Search<br />
If you know the RF channel number, you can access it<br />
quickly. Visit AntennaWeb.org and follow the “Choose an<br />
antenna” instructions to find a list of RF channel numbers<br />
in your area.<br />
1. Select Quick Search from the main menu.<br />
2. Use the buttons CH+,CH–,, to select your desired Channel number<br />
and press to input.<br />
Operation<br />
Channel Edit<br />
1. Select Channel Edit from the main menu.<br />
2. Use CH+,CH– to move to the next/ previous channel.<br />
3. Use , to move to the next channel list.<br />
4. Press on a channel’s corresponding check box to<br />
activate or deactivate the channel.<br />
14
Channel Hop<br />
Once channels are activated in the “Channel Edit” menu, they<br />
appear in the “Channel Hop” menu.<br />
1. Select Channel Hop from the main menu.<br />
2. Use the buttons CH+,CH– to move up/ down and , to<br />
turn pages, then press to select the desired channel.<br />
EPG (Electronic Program Guide)<br />
For Digital <strong>TV</strong> mode only. The EPG gives an overview<br />
of the available programs and shows program names,<br />
starting times, ending times, and detailed information. The<br />
availability and amount of program details depends upon<br />
the broadcaster.<br />
1. Tune to a specific channel to receive the broadcaster’s<br />
PSIP (Program and System Information Protocol) for<br />
EPG update, if available.<br />
2. Select EPG from the main menu.<br />
3. Use CH+,CH– to navigate through the EPG menu.<br />
Press to view detailed program information.<br />
n Note: Time Zone must be correctly set to enable EPG times.<br />
See “Time Zone” on page 18.<br />
Operation<br />
15
Functions<br />
You can customize many <strong>TV</strong> functions, as indicated in the Functions<br />
table below.<br />
1. Select Functions from the main menu.<br />
2. Use CH+,CH– to scroll through the submenus.<br />
3. Press to enter specific settings in each submenu.<br />
4. Use CH+,CH– ,, to change settings, and press to save.<br />
5. Press once to return to the functions list, or press twice to exit.<br />
n Note: Some functions work in digital mode only.<br />
Operation<br />
Functions<br />
Mode Selection<br />
Brightness<br />
Select Analog or Digital.<br />
Select desired brightness from 20%, 40%, 60%, 80% or<br />
100%.<br />
n Note: Brightness affects battery consumption. Dimmer settings<br />
extend battery life.<br />
16
Aspect Ratio<br />
Preferred Audio<br />
Digital mode only<br />
Audio<br />
Sound<br />
Digital mode only<br />
Audio Enhance<br />
Select Auto, 16:9, 4:3, Zoom1, or Zoom2.<br />
• Auto defaults to original broadcast format in Digital mode.<br />
• 16:9 stretches the picture to fill the screen, sometimes<br />
resulting in distortion.<br />
• 4:3 shrinks the picture and adds black bars on the sides<br />
• Zoom1, Zoom2 offers two levels of zoom to enlarge<br />
details for viewing.<br />
Select the default for programs broadcast in multiple languages<br />
(shown in channel information): English, Spanish, or French.<br />
Digital mode: Options are based on the MTS (Multichannel<br />
Television Sound) information.<br />
Analog mode: Options include Mono, Stereo, SAP (Second<br />
Audio Program).<br />
Select Stereo, Left Mono, or Right Mono. When two<br />
different sounds and/or languages come from the <strong>TV</strong>, select<br />
Left Mono or Right Mono.<br />
Select On or Off to optimize sound.<br />
Operation<br />
17
Operation<br />
Closed Caption<br />
Max Battery<br />
Menú Idioma<br />
Menu Opacity<br />
Time Zone<br />
Digital mode only<br />
Key Option<br />
Select a caption option: CS 1-6, CC 1-4, TEXT 1-4, or Off.<br />
n Note: CS 1-6 available only in Digital mode.<br />
When operating the <strong>TV</strong> on battery power, you can turn the<br />
Max Battery function on/off. When activated, appears<br />
highlighted in the channel information display, and the unit<br />
will maximize battery life by changing the brightness settings.<br />
Select English or Español to change menu language. Default<br />
is English.<br />
Select 60%, 80%, or 100% to see through menus (60-80%) or<br />
keep them opaque (100%).<br />
Select your time zone: Atlantic, Eastern, Central, Mountain,<br />
Pacific, Alaska, or Hawaii.<br />
n Note: If you don’t set the correct Time Zone, the EPG, channel<br />
information, and automatic time will be incorrect, and will either<br />
display the wrong time or not display at all.<br />
Program your most frequently used functions for analog and<br />
digital modes. After, you can access a programmed function<br />
by pressing for 2 seconds.<br />
n Note: Default key option setting for both Digital mode and<br />
Analog mode is Aspect Ratio.<br />
18
Menu Edit<br />
Factory Reset<br />
Set the order of the Functions list:<br />
Normal – default menu order.<br />
Auto – the list memorizes and automatically modifies<br />
the order according to how frequently you use selected<br />
functions.<br />
Manual – This allows you to customise by rerranging the<br />
order and removing functions. See “Manually Edit Menus”<br />
on page 20 for details.<br />
Restore the default factory settings.<br />
n Note: Channel data will not be reset. To reset channel data, use<br />
Auto Search menu (page 13). After Factory Reset is complete, your<br />
<strong>TV</strong> will automatically restart.<br />
Operation<br />
19
Operation<br />
Manually Editing Menus<br />
Menu Edit allows you to customize the Functions list by<br />
rerranging the order and removing unwanted functions.<br />
1. Select Menu Edit from the Functions menu.<br />
2. Press to enter the submenu, and use CH+,CH–<br />
to select Manual.<br />
3. Press to confirm. Check boxes appear for each menu<br />
option in the Functions menu.<br />
4. To remove a function from the original list, use<br />
CH+,CH– to scroll up / down the function list. Then<br />
press to deselect a check box. (Press again if you<br />
change your mind.)<br />
5. To change the list order, press to highlight a function,<br />
then use CH+,CH– to scroll through the Menu name<br />
list and press to highlight the menu you want to move.<br />
Use CH+,CH– again to move the function to the up<br />
or down in the list, and press to confirm.<br />
6. When finished, press to exit.<br />
20
Viewing Current Channel Information<br />
1. To view the information window, press while viewing a program.<br />
2. Press again to hide the information window, or wait 5 minutes.<br />
Channel Information for Analog Mode<br />
Current channel number<br />
Broadcast audio format<br />
Battery power<br />
When the Max Battery<br />
function is activated,<br />
the icon appears<br />
highlighted.<br />
Operation<br />
21
Channel Information for Digital Mode<br />
Channel # and<br />
Station Name<br />
(Broadcaster)<br />
Program Start<br />
and End Time<br />
Program Title<br />
Time and Date<br />
n Note: Time Zone<br />
must be set. See<br />
page 18.<br />
Operation<br />
Signal strength<br />
Current<br />
broadcast resolution.<br />
<strong>TV</strong> converts to<br />
appropriate resolution<br />
for the <strong>TV</strong>.<br />
appears<br />
when Closed<br />
Caption service is<br />
available.<br />
appears<br />
when multilingual<br />
audio tracks are<br />
available.<br />
Battery Power<br />
When the Max<br />
Battery function<br />
is activated, the<br />
icon appears<br />
highlighted.<br />
appears when<br />
a show is broadcast in multi<br />
channel Dolby Digital surround<br />
sound, which the <strong>TV</strong> converts<br />
to stereo.<br />
22
Specifications<br />
RF Reception........................................................... Terrestrial ATSC 8VSB: 54 - 860 Mhz (Ch2 - Ch69)<br />
..................................................................................................................................... Terrestrial NTSC<br />
...........................................................................................................Built-in Antenna (Monopole Type)<br />
Audio Processing.....................................................................................................Dolby Digital Audio<br />
.................................................................................................................................Digital Multi-lingual<br />
Audio Input......................................................................................................................LR Audio Input<br />
Audio Output......................................................... Built-in Speaker Max. 1 x 0.9 W, 3.5mm earphones<br />
Video Processing..............................................................................................MPEG-2 video decoding<br />
.......................................................................................................Decoding format: ATSC 18 Formats<br />
Display...................................................................................................................3.5” LCD: 320 × 240<br />
.......................................................................................................................................4:3 aspect ratio<br />
.......................................................................................................................................Contrast: 400:1<br />
.........................................................................................................................Brightness (cd/m2): 250<br />
Power............................................................................4 × AA batteries for approx. 2 hours view time<br />
................................................................................................................................DC Adapter (5V, 1A)<br />
.................................................................................................................... Smart power management<br />
Specifications are typical; individual units might vary. Specifications are subject to change and<br />
improvement without notice. Actual product may vary from the product images in this document.<br />
23<br />
Additional Info
Additional Info<br />
Troubleshooting<br />
Problem<br />
<strong>TV</strong> does not<br />
turn on<br />
Intermittent or<br />
no <strong>TV</strong> signal<br />
Poor or no<br />
sound<br />
Picture is<br />
distorted<br />
Possible Solutions<br />
• The batteries may be dead. Try replacing the batteries.<br />
• If using AC Adapter, check to make sure the power cord is plugged in to<br />
the wall outlet securely.<br />
• Plug in another appliance to make sure that the outlet works.<br />
• Make sure your antenna is connected and undamaged.<br />
• Adjust your antenna. The signal strength may be low.<br />
• Move your <strong>TV</strong> near a window if you are indoors.<br />
• Move your <strong>TV</strong> away from other appliances that could cause<br />
interference (such as a microwave).<br />
• Try another audio language. Some programs do not have multiple<br />
audio tracks.<br />
• Adjust the volume level.<br />
• If using earphones, make sure they are working properly and are<br />
plugged in all the way.<br />
• Make sure the correct display mode is selected.<br />
• Check if Aspect Ratio is set properly. See page 17.<br />
24
FCC Information<br />
This equipment has been tested and found to comply with the limits for a Class B digital device, pursuant to Part 15 of the FCC<br />
Rules. These limits are designed to provide reasonable protection against harmful interference in a residential installation. This equipment<br />
generates, uses and can radiate radio frequency energy and, if not installed and used in accordance with the instructions, may<br />
cause harmful interference to radio communications. However, there is no guarantee that interference will not occur in a particular<br />
installation. If this equipment does cause harmful interference to radio or television reception, which can be determined by turning<br />
the equipment off and on, the user is encouraged to try to correct the interference by one or more of the following measures:<br />
• Reorient or relocate the receiving antenna.<br />
• Increase the separation between the equipment and receiver.<br />
• Connect the equipment into an outlet on a circuit different from that to which the receiver is connected.<br />
• Consult the dealer or an experienced radio/<strong>TV</strong> technician for help.<br />
Changes or modifications not expressly approved by Ignition L.P. may cause interference and void the user’s authority to operate<br />
the equipment.<br />
This device complies with Part 15 of the FCC Rules. Operation is subject to the following two conditions: (1) This device may not cause<br />
harmful interference, and (2) this device must accept any interference received, including interference that may cause undesired operation.<br />
Limited Warranty<br />
This brand product is warranted by Innovative D<strong>TV</strong> Solutions, Inc. to the original purchaser against manufacturing defects in<br />
materials and workmanship encountered in the normal noncommercial use of this product for a limited warranty period of:<br />
Twelve (12) Months Labor and Parts<br />
This limited warranty begins on the original date of purchase, and is valid only on products purchased and used in the United<br />
States.<br />
1-LABOR: During the twelve months labor limited warranty period: Innovative D<strong>TV</strong> Solutions, Inc. will, at its option, repair the<br />
defective product at no cost to you, or replace the defective product with a new or remanufactured functionally equivalent<br />
product of equal value.<br />
2-PARTS: During the twelve months parts limited warranty period, Innovative D<strong>TV</strong> Solutions, Inc. will supply new or rebuilt<br />
replacements for defective parts as may be deemed.<br />
3-This Warranty DOES NOT APPLY to products that have been damaged due to abuse, misuse, accident, alteration, modification,<br />
negligence, line power surges, connection to improper voltage supply or settings, accident, acts of God and tampering or<br />
products that have been serviced by any unauthorized service center or third party. This Warranty DOES NOT APPLY to LCD and<br />
other accessories packaged with the unit.<br />
4-In order to have your merchandise repaired or replaced by warranty, you must contact our Customer Service representatives<br />
by phone or email, and get RMA number. Once you have obtained a RMA number, send the unit pre-paid to our authorized<br />
25<br />
Additional Info
service center in the original packaging or reasonable substitute to prevent damage. You must include your full name, shipping<br />
address and telephone number for our reference with Proof of purchase. No return will be shipped back to a PO BOX. Innovative<br />
D<strong>TV</strong> Solutions, Inc. will not be responsible for delays or unprocessed claims resulting from a purchaser’s failure to provide<br />
any or all of the necessary information. It will take approximately 3 to 4 weeks to process, from the date of receipt.<br />
All of the accessories that came with the product package must be sent along with the main unit. The RMA number issued by<br />
our customer service rep. must be written on the mail package, along with return address. Contact the number and email for<br />
service:<br />
1-877-400-1230<br />
support@idtvsolutions.com<br />
EXCEPT TO THE EXTEND PROHIBITED BY APPLICABLE LAW, ALL IMPLIED WARRANTIES IN CONNECTION WITH THE<br />
PRODUCT, INCLUDING WARRANTY OF MERCHANTABILITY, ARE LIMITED TO THE DURATION OF THE EXPRESS WARRANTY<br />
HEREIN, AND NO WARRANTIES EXPRESS OR IMPLIED INCLUDING SAID WARRANTY OF MERCHANTABILITY, SHALL<br />
APPLY TO THIS PRODUCT AFTER SAID PERIOD. SHOULD THIS PRODUCT PROVE TO BE DEFECTIVE IN WORKMANSHIP<br />
OR MATERIAL, THE CONSUMER’S SOLE REMEDY SHALL BE SUCH REPAIR OR REPLACEMENT AS IN HEREIN ABOVE<br />
EXPRESSLY PROVIDED, AND UNDER NO CIRCUMSTANCES SHALL BE LIABLE FOR ANY LOSS OR DAMAGE, DIRECT<br />
OR CONSEQUENTIAL ARISING OUT OF THE USE, MISUSE, OR IN ABILITY TO USE THIS PRODUCT. THIS WARRANTY IS<br />
NONTRANSFERABLE.<br />
Some states do not allow the exclusion and limitation of incidental or consequential damage, or allow limitations on how long<br />
an implied warrant lasts, so the above limitations or exclusions or inclusions may not apply to you. This warranty gives you<br />
specific legal right and you may also have other rights, which vary from state to state.<br />
Additional Info<br />
License Notice: Manufactured under license from Dolby Laboratories.<br />
Trademark Acknowledgment :“Dolby” and the double-D symbol are trademarks of Dolby Laboratories.<br />
26
27<br />
Additional Info
Protect the environment by recycling used electronics. Go to<br />
E-CyclingCentral.com to find an electronic recycling center near you.<br />
©2009. SCK,<br />
Inc. All rights<br />
Get more from your audio and video equipment. See what you’ve<br />
been missing. With Auvio, you control the experience.<br />
Auvio was established by a group of technophiles to provide<br />
high quality audio and video products without the high sticker<br />
price. The Auvio philosophy is for you to experience audio and<br />
video as it was intended to be: pure and distortion free.<br />
We know electronics can be intimidating. Auvio simplifies your<br />
experience by providing the right products, with the right specs,<br />
to work with your equipment.<br />
Be confident about your purchase: your new Auvio product<br />
incorporates the latest technology, is built to the highest quality<br />
standards, and reduces environmental impact by complying<br />
with RoHS environmental restrictions.<br />
© 2009. Ignition L.P. All rights reserved. Auvio is a trademark used by Ignition L.P.<br />
Package and user’s guide are recyclable. User’s guide contains recycled material.<br />
Printed<br />
Printed<br />
in China<br />
in China<br />
mmAyy<br />
09A09<br />
16-972


