
Create successful ePaper yourself
Turn your PDF publications into a flip-book with our unique Google optimized e-Paper software.
®<br />
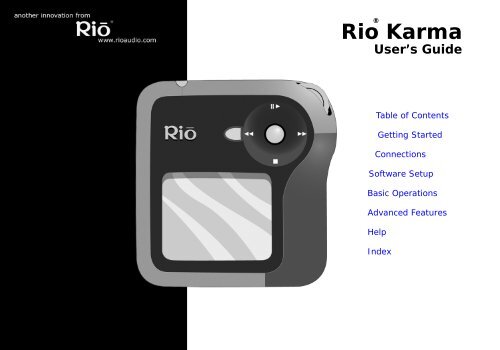
<strong>Rio</strong> <strong>Karma</strong><br />
User’s Guide<br />
Table of Contents<br />
Getting Started<br />
Connections<br />
Software Setup<br />
Basic Operations<br />
Advanced Features<br />
Help<br />
Index
Package Contents<br />
Table of Contents Index<br />
• AC Adapter<br />
• Docking Station<br />
• Earphones<br />
• Ethernet Cables<br />
• Installation CD<br />
• Quick Start Poster<br />
• RCA Cable<br />
• <strong>Rio</strong> <strong>Karma</strong><br />
• USB Cable<br />
Copyright/Trademarks<br />
© 2003, 2004 Digital Networks North America, Inc. All rights reserved.<br />
Digital Networks North America, Inc. shall not be liable for any errors contained herein or for<br />
any damages arising out of or related to this document or the information contained herein,<br />
even if Digital Networks North America has been advised of the possibility of such damages.<br />
This document is intended for informational and instructional purposes only. Digital Networks<br />
North America, Inc. reserves the right to make changes in the specifications and other information<br />
contained in this document without prior notification. Digital Networks North America,<br />
Inc. disclaims any obligation to update the information contained herein.<br />
<strong>Rio</strong> ® is a registered trademark of Digital Networks North America, Inc.<br />
<strong>Rio</strong> <strong>Karma</strong><br />
Microsoft, Windows Media and the Windows Logo are trademarks or registered trademarks of<br />
Microsoft Corporation in the United States and/or other countries.<br />
All other product names may be trademarks of the companies with which they are associated.<br />
P/N 75510429-003<br />
ii
<strong>Rio</strong> <strong>Karma</strong><br />
• Package Contents.......................................... ii<br />
• Copyright/Trademarks.................................. ii<br />
1 - Getting Started<br />
Welcome.........................................................1<br />
• Learning More.................................................1<br />
Tour of the <strong>Rio</strong> <strong>Karma</strong> ..............................2<br />
Tour of the <strong>Rio</strong> <strong>Karma</strong><br />
Docking Station...........................................4<br />
LCD Overview...............................................5<br />
• About Track View ...........................................5<br />
• Menu Mode .....................................................5<br />
• Running Order View.......................................5<br />
• Play Screen Views ..........................................6<br />
• Playback Modes..............................................6<br />
2 - Connections<br />
Basic Connections ......................................7<br />
• AC Adapter......................................................7<br />
• Battery ............................................................7<br />
• Docking Station..............................................8<br />
• Earphones.......................................................8<br />
• Ethernet ..........................................................8<br />
• RCA Out ..........................................................8<br />
• USB .................................................................8<br />
• Additional Accessories ...................................9<br />
3 - Software Setup<br />
Software Installation..............................10<br />
• <strong>Rio</strong> Music Manager .......................................11<br />
Table of Contents Index<br />
Table of Contents<br />
4 - Basic Operations<br />
Basic Operations.......................................12<br />
Copy ...............................................................13<br />
• Copying Tracks with <strong>Rio</strong> Music Manager ....13<br />
Transfer ........................................................14<br />
• <strong>Rio</strong> Music Manager .......................................14<br />
Control ..........................................................15<br />
Play.................................................................16<br />
Artist..............................................................17<br />
Album ............................................................17<br />
Track ..............................................................18<br />
Playlist ..........................................................18<br />
<strong>Rio</strong> DJ ............................................................19<br />
Genre .............................................................22<br />
Year ................................................................22<br />
5 - Advanced Features<br />
Advanced Features ..................................23<br />
Equalizer ......................................................24<br />
• Bass & Treble ...............................................25<br />
• EQ Off............................................................26<br />
• Rock ..............................................................26<br />
• Pop ................................................................26<br />
• Jazz ...............................................................27<br />
• Classical ........................................................27<br />
• Trance ...........................................................27<br />
• EQ Mode........................................................28<br />
• 5-Band Equalizer..........................................28<br />
• Custom Equalizer Settings ..........................28<br />
iii
<strong>Rio</strong> <strong>Karma</strong><br />
iv<br />
• Custom 1, Custom 2, and Custom 3 ..........28<br />
• EQ Setup.......................................................29<br />
• Special...........................................................30<br />
Organize .......................................................31<br />
Bookmarks ..................................................32<br />
Settings.........................................................33<br />
• Playback........................................................34<br />
• Play Screen...................................................35<br />
• Power ............................................................36<br />
• Display ..........................................................37<br />
• Resume .........................................................38<br />
• Time & Date..................................................39<br />
• Language ......................................................40<br />
• Network.........................................................41<br />
• Orientation....................................................43<br />
• Audible Prompts ...........................................44<br />
• Menu Button .................................................45<br />
Features........................................................46<br />
• <strong>Rio</strong> Taxi .........................................................46<br />
• Stopwatch.....................................................47<br />
• Web Interface...............................................48<br />
About Track.................................................49<br />
About <strong>Rio</strong> <strong>Karma</strong>.......................................50<br />
6 - Help<br />
Troubleshooting........................................51<br />
• Customer Service Information....................51<br />
• Frequently Asked Questions........................52<br />
Glossary of Digital Audio Terms.........59<br />
• Bass...............................................................59<br />
• Bitrate ...........................................................59<br />
• Center ...........................................................59<br />
• Codec ............................................................59<br />
• Firmware.......................................................60<br />
Table of Contents Index<br />
• FLAC ..............................................................60<br />
• Gain...............................................................60<br />
• ID3 Tag .........................................................60<br />
• IntroScan ......................................................60<br />
• MP3 ...............................................................60<br />
• Octave...........................................................61<br />
• Ogg Vorbis ....................................................61<br />
• Rip and Encode.............................................61<br />
• Synchronize ..................................................61<br />
• Treble............................................................61<br />
• VBR................................................................61<br />
• Width.............................................................62<br />
• WMA ..............................................................62<br />
Limited Warranty and Software<br />
License ..........................................................63<br />
• Warranty.......................................................63<br />
• Warranty Service .........................................63<br />
• Scope of and Limitation on Warranty.........64<br />
FCC and Industry Canada<br />
Compliance..................................................65<br />
• Federal Communications Commission<br />
(FCC) ............................................................65<br />
• Industry Canada...........................................65<br />
Safety ............................................................66<br />
• Warning.........................................................66<br />
• CAUTION.......................................................66
Chapter 1<br />
Table of Contents Index<br />
Getting Started<br />
:: Welcome<br />
Thank you for purchasing the <strong>Rio</strong> <strong>Karma</strong>. Small and powerful, the <strong>Rio</strong> <strong>Karma</strong> can store thousands of tracks on its<br />
20GB hard drive. The <strong>Rio</strong> <strong>Karma</strong> includes an AC adapter, earphones, a backlit LCD, a long lasting built-in battery,<br />
and a docking station that enables RCA, Ethernet, and USB 2.0 connectivity.<br />
Learning More<br />
• Refer to the Quick Start Poster for the basics on how to set up and start using your <strong>Rio</strong> <strong>Karma</strong>.<br />
• Visit the <strong>Rio</strong> website at www.rioaudio.com.<br />
<strong>Rio</strong> <strong>Karma</strong><br />
* Actual formatted capacity less. 1GB = 1,000,000,000 bytes.<br />
1
:: Tour of the <strong>Rio</strong> <strong>Karma</strong><br />
Table of Contents Index<br />
POWER<br />
Press to turn the player on.<br />
Press and hold to turn the<br />
player off.<br />
VOLUME + and -<br />
Press to adjust the volume<br />
level.<br />
MENU<br />
Press to enter Menu Mode.<br />
Press and hold to enter the<br />
Play Music menu.<br />
When in Menu mode, press<br />
to return to Playback mode.<br />
PLAY/PAUSE<br />
Select with the <strong>Rio</strong>Stick to<br />
play or pause playback.<br />
ROTARY WHEEL<br />
Press or rotate to control menu<br />
navigation.<br />
RIOSTICK<br />
Press to select menu options.<br />
Move to control menu navigation.<br />
In Player mode, press and hold<br />
to access About Track.<br />
Move to control PLAY/PAUSE,<br />
STOP, FORWARD, and REVERSE<br />
playback functions.<br />
<strong>Rio</strong> <strong>Karma</strong><br />
STOP<br />
Select with the <strong>Rio</strong>Stick to stop<br />
playback.<br />
FORWARD and<br />
REVERSE<br />
Select with the <strong>Rio</strong>Stick to skip to<br />
the next or previous track.<br />
Select and hold to scan forward<br />
or reverse.<br />
2
Table of Contents Index<br />
invisible text<br />
VOLUME + and -<br />
Press to adjust the volume<br />
level.<br />
LOCK/UNLOCK<br />
Slide into the LOCK position to<br />
disable buttons and prevent<br />
accidental operation.<br />
DC IN<br />
Connects to AC<br />
adapter.<br />
RESET HOLE<br />
Insert pin to reset the<br />
player.<br />
USB<br />
Connects to supplied USB<br />
cable.<br />
EARPHONES<br />
Connects to earphones<br />
and optional remote<br />
control.<br />
DOCK<br />
CONNECTOR<br />
Connects to the <strong>Rio</strong><br />
<strong>Karma</strong> Docking<br />
Station.<br />
<strong>Rio</strong> <strong>Karma</strong><br />
POWER<br />
Press to turn the player on.<br />
Press and hold to turn the player off.<br />
3
:: Tour of the <strong>Rio</strong> <strong>Karma</strong> Docking Station<br />
Table of Contents Index<br />
RCA OUT<br />
Right and Left<br />
Connects to external audio system.<br />
ETHERNET LEDs<br />
Light and blink when an<br />
Ethernet connection is present.<br />
DC IN<br />
Connects to AC adapter.<br />
ETHERNET<br />
Connects to Ethernet cable.<br />
<strong>Rio</strong> <strong>Karma</strong><br />
USB<br />
Connects to USB cable.<br />
4
:: LCD Overview<br />
Menu Mode<br />
Press MENU to access the Main Menu.<br />
Press and hold the <strong>Rio</strong>Stick to access<br />
the About Track View.<br />
Press the <strong>Rio</strong>Stick to access the<br />
Running order View.<br />
Table of Contents Index<br />
Menu Title<br />
Selected Option<br />
Options<br />
About Track View<br />
Track Information<br />
Scroll Bar<br />
Running Order View<br />
Power Indicator<br />
Currently Playing Track<br />
Scroll Bar<br />
Selected Track<br />
<strong>Rio</strong> <strong>Karma</strong><br />
The first track in the running order is<br />
located at the top; the last track in the<br />
running order is located at the bottom.<br />
Volume Indicator<br />
Current Track/ Total<br />
Tracks<br />
5
clear text<br />
Table of Contents Index<br />
Playback Modes<br />
A/B Loop<br />
Indicator<br />
Shuffle Indicator<br />
IntroScan<br />
Indicator<br />
Repeat All Indicator<br />
Repeat Track Indicator<br />
Ethernet Indicator<br />
Play Screen Views<br />
Use Menu mode<br />
to set Playback and Play Screen<br />
options.<br />
<strong>Rio</strong> <strong>Karma</strong><br />
Progress View Profile View VU View<br />
6
Chapter 2<br />
Table of Contents Index<br />
Connections<br />
:: Basic Connections<br />
This chapter describes how to connect the <strong>Rio</strong> <strong>Karma</strong> and the <strong>Rio</strong> <strong>Karma</strong> docking station to<br />
power adapters, USB cables, and additional accessories. Basic connections include:<br />
AC Adapter<br />
Connect the AC power adapter to the DC IN port on the bottom of the player or the back of<br />
the docking station. The power adapter recharges the battery from 0% capacity to 60-70%<br />
capacity within two hours.<br />
1 Plug the AC adapter into an electrical outlet.<br />
2 Connect the AC adapter to the docking station.<br />
3 Place the <strong>Rio</strong> <strong>Karma</strong> in the docking station.<br />
Battery<br />
The <strong>Rio</strong> <strong>Karma</strong> uses a built-in lithium-ion rechargable battery that lasts many<br />
hours per charge. Lithium-ion batteries drain at a very slow rate even when they<br />
are not being used. If you have not used your <strong>Rio</strong> <strong>Karma</strong> in a long period of time<br />
you will need to recharge the battery.<br />
The battery should be charged for at least five hours during its initial charge. The<br />
player will recharge anytime the AC adapter is plugged into the player or the <strong>Rio</strong><br />
<strong>Karma</strong> is placed in the docking station and the docking station is connected to the<br />
AC adapter. The <strong>Rio</strong> <strong>Karma</strong> may be left in the docking station for extended periods<br />
of time without fear that the <strong>Rio</strong> <strong>Karma</strong>’s lithium-ion battery will be overcharged.<br />
Power Indicator<br />
Full<br />
Half<br />
Low<br />
Full<br />
(AC adapter<br />
connected)<br />
<strong>Rio</strong> <strong>Karma</strong><br />
Charging<br />
Empty<br />
(indicator flashes)<br />
7
Docking Station<br />
The docking station provides RCA Out and additional DC In, Ethernet, and USB ports<br />
to the player. When <strong>Rio</strong> Music Manager is active, the docking station also can be<br />
used to automatically Synchronize audio content on your computer with content on<br />
the <strong>Rio</strong> <strong>Karma</strong>.<br />
Table of Contents Index<br />
Earphones<br />
Connect earphones to the EARPHONES port on the top of the player.<br />
Ethernet<br />
If you have a home network, you can connect the <strong>Rio</strong> <strong>Karma</strong> to it. The ETHERNET<br />
port on the docking station gives the player the capability to transfer files with your<br />
computer. Plug one end of the Ethernet cable into the Ethernet port on the dock and<br />
the other end of the cable into an available jack on network (on a wall, hub, switch,<br />
or router). The link lights on docking station’s Ethernet port will light and blink when<br />
an Ethernet connection is present.<br />
RCA Out<br />
The RCA OUT ports can be used to connect the player to almost any audio device<br />
that uses standard RCA jacks.<br />
• You can use the RCA OUT ports to connect the <strong>Rio</strong> <strong>Karma</strong> to powered<br />
speakers and home stereo systems.<br />
<strong>Rio</strong> <strong>Karma</strong><br />
USB<br />
The USB ports on the player and the docking station give the player the capability to<br />
transfer files with a computer. Plug one end of the USB cable into the player or docking<br />
station and the other end of the cable into a computer’s USB port.<br />
When connected to a USB cable, the battery on the <strong>Rio</strong> <strong>Karma</strong> will drain faster than<br />
usual. To prevent battery drain, the AC adapter should be connected to the <strong>Rio</strong><br />
<strong>Karma</strong> anytime it is connected to a USB cable for an extended amount of time.<br />
8
Additional Accessories<br />
Get the most out of the <strong>Rio</strong> <strong>Karma</strong> with additional accessories available online at<br />
the <strong>Rio</strong> website. Some of the most popular accessories include:<br />
Table of Contents Index<br />
• <strong>Rio</strong> Car Stereo Adapter<br />
Upgrade your car stereo for hundreds of dollars less than buying a new MP3 CD<br />
player. The <strong>Rio</strong> car stereo adapter lets you play your favorite audio tracks in<br />
any vehicle equipped with a standard cassette deck.<br />
<strong>Rio</strong> <strong>Karma</strong><br />
9
Chapter 3<br />
Table of Contents Index<br />
Software Setup<br />
:: Software Installation<br />
Follow these instructions to load software that enables a computer to recognize the <strong>Rio</strong> <strong>Karma</strong>. The installation<br />
also loads <strong>Rio</strong> Music Manager.<br />
1 Place the installation CD label-side up into the computer’s CD-ROM drive.<br />
The <strong>Rio</strong> installation software launches automatically.<br />
2 Click <strong>Rio</strong> Music Manager INSTALL NOW (required) and follow the on-screen instructions.<br />
3 Reboot the computer when the installation is complete.<br />
• If <strong>Rio</strong> installation software does not display automatically, follow these steps to begin the installation<br />
manually:<br />
4 Double-click the My Computer icon on the Windows desktop.<br />
5 Double-click the CD-ROM icon.<br />
6 Double-click the Install icon.<br />
7 Go to Step 2.<br />
<strong>Rio</strong> <strong>Karma</strong><br />
10
<strong>Rio</strong> Music Manager<br />
Table of Contents Index<br />
<strong>Rio</strong> Music Manager is an all-in-one solution that can save and manage entire collections of digital audio tracks. <strong>Rio</strong><br />
Music Manager provides the following capabilities:<br />
• Save (Rip and Encode) Audio CDs into compressed digital<br />
audio files. <strong>Rio</strong> Music Manager encodes FLAC, OGG, and<br />
WMA tracks by default, and MP3 via an optional upgrade<br />
pack.<br />
• Automatically Synchronize the music collection on your<br />
computer with your <strong>Rio</strong> <strong>Karma</strong>.<br />
• Edit ID3 Tag information on digital audio tracks.<br />
• Organize and manage digital audio tracks on your<br />
computer and <strong>Rio</strong> <strong>Karma</strong>.<br />
• Search for tracks on your computer and <strong>Rio</strong> <strong>Karma</strong>.<br />
• Create custom playlists.<br />
• Transfer tracks from your computer to <strong>Rio</strong> <strong>Karma</strong>.<br />
<strong>Rio</strong> <strong>Karma</strong><br />
11
Chapter 4<br />
Table of Contents Index<br />
Basic Operations<br />
:: Basic Operations<br />
Enjoying audio tracks on the <strong>Rio</strong> <strong>Karma</strong> is easy. Basic operations of the <strong>Rio</strong> <strong>Karma</strong> include:<br />
Copy<br />
Transfer<br />
Control<br />
Play<br />
<strong>Rio</strong> <strong>Karma</strong><br />
12
:: Copy<br />
Table of Contents Index<br />
Copying Tracks with <strong>Rio</strong> Music Manager<br />
Copying tracks from Audio CDs involves two steps commonly known as ripping and encoding. Ripping and encoding<br />
refers to the process of ripping (copying) audio from a CD and encoding (saving) the audio content into a compressed<br />
digital audio format like FLAC, MP3, OGG, or WMA.<br />
1 Launch the <strong>Rio</strong> Music Manager.<br />
2 Insert an Audio CD into your CD-ROM drive.<br />
3 Click the CD-ROM icon on the <strong>Rio</strong> Music Manager Device List.<br />
4 Use any of the following techniques to select tracks:<br />
Track Type<br />
Single track.<br />
Multiple tracks.<br />
All tracks.<br />
No tracks.<br />
Every track except for the currently selected<br />
tracks.<br />
Technique<br />
• Left-click the track.<br />
• Press SHIFT+Click or CTRL+Click.<br />
• Press CTRL+A.<br />
• Press CTRL+N.<br />
• Select Edit, Invert Selection.<br />
5 Click to begin copying tracks to your computer.<br />
<strong>Rio</strong> <strong>Karma</strong><br />
13
:: Transfer<br />
Table of Contents Index<br />
<strong>Rio</strong> Music Manager<br />
Transferring tracks from the PC to the <strong>Rio</strong> <strong>Karma</strong> with the <strong>Rio</strong> Music Manager involves selecting tracks and transferring<br />
them to the player.<br />
1 Launch the <strong>Rio</strong> Music Manager.<br />
2 Click My Music in the left frame to access tracks. <strong>Rio</strong> Music Manager will scan the computer’s hard drives for<br />
digital audio tracks that are compatible with the <strong>Rio</strong> <strong>Karma</strong>. Tracks are automatically categorized by album title<br />
and displayed in the Track List.<br />
3 Select tracks within a category. Categories include Albums, Artists, Genres, Songs, and Playlists.<br />
For example, if you wish to transfer all tracks from a favorite artist to the player, click the Artists tab and then<br />
use any of the techniques in Step 4 to select the desired tracks.<br />
4 Use any of the following techniques to select tracks:<br />
Track Type<br />
Single track, album, or artist.<br />
Multiple tracks, albums, and/or artists.<br />
All tracks, albums, and artists.<br />
No tracks, albums, or artists.<br />
Every track except for the currently selected<br />
tracks.<br />
Technique<br />
• Left-click the track, album, or artist.<br />
• Press SHIFT+Click or CTRL+Click.<br />
• Press CTRL+A.<br />
• Press CTRL+N.<br />
• Select Edit, Invert Selection.<br />
5 After the tracks have been selected they can be transferred to the <strong>Rio</strong> <strong>Karma</strong> by clicking .<br />
<strong>Rio</strong> <strong>Karma</strong><br />
14
:: Control<br />
Table of Contents Index<br />
• Power<br />
Press to turn the player on. Press and hold to turn the player off.<br />
• Menu<br />
Press to enter Menu mode. In Menu mode, press to return to Player mode.<br />
• Rotary wheel (Rotate)<br />
Rotate to scan forward or reverse through a track. In Menu mode, rotate to control<br />
menu navigation.<br />
• Rotary wheel (Press)<br />
Press to set A/B Loop points if available. In Menu mode, press to select menu<br />
options.<br />
• RIOSTICK (Press)<br />
Press to cycle through Play Screens. In Menu mode, press to select menu options.<br />
• RIOSTICK (Movement)<br />
Move to control menu navigation. In Player mode, move to control PLAY/PAUSE,<br />
STOP, FORWARD, and REVERSE playback functions. Move and hold in the up<br />
(PLAY/PAUSE) position to turn IntroScan mode on.<br />
Controls<br />
Locations of all controls can<br />
be found on page 2 and 3.<br />
• Play/Pause<br />
Select with the <strong>Rio</strong>Stick to play or pause playback.<br />
<strong>Rio</strong> <strong>Karma</strong><br />
• Stop<br />
Select with the <strong>Rio</strong>Stick to stop playback.<br />
• Forward and Reverse<br />
Select with the <strong>Rio</strong>Stick to skip to the next or previous track. Select and hold to<br />
scan forward or reverse through a track.<br />
15
:: Play<br />
Table of Contents Index<br />
The <strong>Rio</strong> <strong>Karma</strong> player can play audio tracks using a variety of playback formats. Any format can be used within a<br />
matter of seconds so you can spend more time enjoying tracks and less time arranging them.<br />
Artist<br />
Album<br />
Track<br />
Playlist<br />
<strong>Rio</strong> DJ<br />
Genre<br />
Year<br />
<strong>Rio</strong> <strong>Karma</strong><br />
• If the <strong>Rio</strong> <strong>Karma</strong> does not power on after POWER has been pressed, check the LOCK/UNLOCK switch<br />
and confirm it is in the UNLOCK position.<br />
16
:: Artist<br />
Table of Contents Index<br />
To play tracks from a specific artist please follow these steps:<br />
1 Press MENU.<br />
2 Select Play Music.<br />
3 Select Artist.<br />
4 Select the first letter of the artist name.<br />
5 Select an artist.<br />
6 If present, select a single album or Play All Albums.<br />
7 Select a single track or Play All Tracks to begin playback.<br />
:: Album<br />
To play tracks from a specific album please follow these steps:<br />
1 Press MENU.<br />
2 Select Play Music.<br />
3 Select Album.<br />
4 Select the first letter of the album name.<br />
5 Select an album.<br />
6 Select a single track or Play All Tracks to begin playback.<br />
<strong>Rio</strong> <strong>Karma</strong><br />
17
:: Track<br />
Table of Contents Index<br />
To play a specific track please follow these steps:<br />
1 Press MENU.<br />
2 Select Play Music.<br />
3 Select Track.<br />
4 Select the first letter of the track name.<br />
5 Select a track or Play All Tracks to begin playback.<br />
:: Playlist<br />
To play tracks from playlists created on the <strong>Rio</strong> <strong>Karma</strong> or using <strong>Rio</strong> Music Manager please follow these steps:<br />
1 Press MENU.<br />
2 Select Play Music.<br />
3 Select Playlist.<br />
4 Select a playlist or Play All Playlists to begin playback.<br />
Please refer to <strong>Rio</strong> Music Manager Help Topics for instructions on creating playlists using <strong>Rio</strong> Music Manager.<br />
<strong>Rio</strong> <strong>Karma</strong><br />
18
:: <strong>Rio</strong> DJ<br />
Table of Contents Index<br />
Use <strong>Rio</strong> DJ to create innovative track running orders based on ID3 Tag information. To access <strong>Rio</strong> DJ:<br />
1 Press MENU.<br />
2 Select Play Music.<br />
3 Select <strong>Rio</strong> DJ.<br />
4 Select a <strong>Rio</strong> DJ mode.<br />
5 Select <strong>Rio</strong> DJ mode settings.<br />
6 Select Done to apply settings or Cancel to return to the <strong>Rio</strong> DJ menu.<br />
<strong>Rio</strong> DJ offers the following running order generators:<br />
Entertain Me!<br />
Play All<br />
Top Tunes<br />
New Music<br />
Memory Lane<br />
Sounds Of...<br />
Forgotten Gems<br />
Déjà Vu<br />
Random Mix<br />
<strong>Rio</strong> <strong>Karma</strong><br />
19
Table of Contents Index<br />
• Entertain Me!<br />
Select to create a running order composed of the most frequently played tracks. The track running order plays<br />
for a selectable amount of time. Settings include 15 minutes (the default setting), 30 minutes, 1 hour, 2<br />
hours, 3 hours, 4 hours, 8 hours, and Everything.<br />
• Play All<br />
Select to create a running order that sorts all of the tracks on the player into basic categories. Settings include<br />
Album (the default setting), Artist, Genre, and Year. The track running order generated is ordered<br />
alphabetically or chronologically, based on the selected Play All setting.<br />
• Top Tunes<br />
Select to create a running order composed of a set number of the most frequently played tracks. The most<br />
frequently played tracks are played first. Settings include 10 (the default setting), 20, 30, 40, 50, 100, and<br />
250.<br />
• New Music<br />
Select to create a running order composed of the most recently loaded tracks during a set amount of time. The<br />
most recently played tracks are played first. Settings include 1 day (the default setting), 3 days, 1 week, 2<br />
weeks, 1 month, 6 months, and 1 year.<br />
• Memory Lane<br />
Select to create a running order composed of the least frequently played tracks during a set amount of time.<br />
The least recently played tracks are played first. Settings include 1 day (the default setting), 3 days, 1 week,<br />
2 weeks, 1 month, 6 months, and 1 year.<br />
<strong>Rio</strong> <strong>Karma</strong><br />
20
Table of Contents Index<br />
• Sounds Of...<br />
Select to create a running order composed of tracks from a specific decade. Settings include 1940’s (the<br />
default setting), 1950’s, 1960’s, 1970’s, 1980’s, 1990’s, and the 2000’s.<br />
• Forgotten Gems<br />
Select to create a running order composed of the most popular, but least recently played, tracks during a set<br />
amount of time. The most recently played tracks are played first. Settings include 1 day (the default setting),<br />
3 days, 1 week, 2 weeks, 1 month, 6 months, and 1 year.<br />
• Déjà Vu<br />
Select to create a running order composed of the most popular and most recently played tracks during a set<br />
amount of time. The most frequently played tracks are played first. Settings include 1 day (the default<br />
setting), 3 days, 1 week, 2 weeks, 1 month, 6 months, and 1 year.<br />
• Random Mix<br />
Select to create a running order composed of all tracks, in random order, on the player. The track running order<br />
will play for a set amount of time. Settings include 15 minutes (the default setting), 30 minutes, 1 hour, 2<br />
hours, 3 hours, 4 hours, 8 hours, and Everything.<br />
<strong>Rio</strong> <strong>Karma</strong><br />
21
:: Genre<br />
Table of Contents Index<br />
To play tracks from a specific genre (e.g. Alternative, Brit Pop, Classical, etc.) please follow these steps:<br />
1 Press MENU.<br />
2 Select Play Music.<br />
3 Select Genre.<br />
4 Select the first letter of the genre name.<br />
5 Select a genre.<br />
6 Select a single track or Play All Tracks to begin playback.<br />
:: Year<br />
To play tracks from a specific year please follow these steps:<br />
1 Press MENU.<br />
2 Select Play Music.<br />
3 Select Year.<br />
4 Select a year or Play All Years.<br />
5 Select a single track or Play All Tracks to begin playback.<br />
<strong>Rio</strong> <strong>Karma</strong><br />
22
Chapter 5<br />
Table of Contents Index<br />
Advanced Features<br />
:: Advanced Features<br />
Advanced features of the <strong>Rio</strong> <strong>Karma</strong> include:<br />
Equalizer<br />
Organize<br />
Bookmarks<br />
Settings<br />
Features<br />
About Track<br />
About <strong>Rio</strong> <strong>Karma</strong><br />
<strong>Rio</strong> <strong>Karma</strong><br />
23
:: Equalizer<br />
Table of Contents Index<br />
The sound of tracks played on the <strong>Rio</strong> can be adjusted using various preset and fully customizable equalizer<br />
settings.<br />
Bass & Treble<br />
EQ Off<br />
Rock<br />
Pop<br />
Jazz<br />
Classical<br />
Trance<br />
EQ Mode<br />
Custom Equalizer Settings<br />
EQ Setup<br />
Special<br />
<strong>Rio</strong> <strong>Karma</strong><br />
24
Bass & Treble<br />
Table of Contents Index<br />
The Bass & Treble feature can be used to adjust Bass and Treble a total of 12 decibels (dB), from -6dB to +6dB.<br />
The Bass & Treble option is only available when the EQ Mode has been set to Bass & Treble.<br />
1 Press MENU.<br />
2 Select Equalizer.<br />
3 Select Bass & Treble.<br />
4 Select an option by scrolling ROTARY WHEEL. Use RIOSTICK to adjust<br />
options.<br />
5 Select Done to apply settings or Cancel to return to the Equalizer menu.<br />
Bass & Treble options include:<br />
• Bass<br />
Adjusts the low end of the sound spectrum from -6dB to +6dB.<br />
• Treble<br />
Adjusts the high end of the sound spectrum from -6dB to +6dB.<br />
<strong>Rio</strong> <strong>Karma</strong><br />
25
EQ Off<br />
Table of Contents Index<br />
Select the EQ Off equalizer option to apply no equalizer adjustments to audio content on the <strong>Rio</strong> <strong>Karma</strong>.<br />
1 Press MENU.<br />
2 Select Equalizer.<br />
3 Select EQ Off to set no equalizer option and return to Player mode.<br />
Rock<br />
Select the Rock equalizer option to change the sound of tracks according to the Rock preset settings.<br />
1 Press MENU.<br />
2 Select Equalizer.<br />
3 Select Rock to set the Rock equalizer option and return to Player mode.<br />
Pop<br />
Select the Pop equalizer option to change the sound of tracks according to the Pop preset settings.<br />
1 Press MENU.<br />
2 Select Equalizer.<br />
3 Select Pop to set the Pop equalizer option and return to Player mode.<br />
<strong>Rio</strong> <strong>Karma</strong><br />
26
Jazz<br />
Table of Contents Index<br />
Select the Jazz equalizer option to change the sound of tracks according to the Jazz preset settings.<br />
1 Press MENU.<br />
2 Select Equalizer.<br />
3 Select Jazz to set the Jazz equalizer option and return to Player mode.<br />
Classical<br />
Select the Classical equalizer option to change the sound of tracks according to the Classical preset settings.<br />
1 Press MENU.<br />
2 Select Equalizer.<br />
3 Select Classical to set the Classical equalizer option and return to Player mode.<br />
Trance<br />
Select the Trance equalizer option to change the sound of tracks according to the Trance preset settings.<br />
1 Press MENU.<br />
2 Select Equalizer.<br />
3 Select Trance to set the Trance equalizer option and return to Player mode.<br />
<strong>Rio</strong> <strong>Karma</strong><br />
27
EQ Mode<br />
Table of Contents Index<br />
5-Band Equalizer<br />
EQ Mode allows the player to switch between the standard Bass & Treble audio<br />
settings and advanced 5-Band Parametric audio settings.<br />
• Custom 1, Custom 2, Custom 3, and EQ Setup options are only<br />
available when the 5-Band Parametric mode has been selected.<br />
Custom Equalizer Settings<br />
Custom 1, Custom 2, and Custom 3<br />
Custom equalizer options function the same way as preset equalizer settings but<br />
are set according to personal preferences. Custom equalizer options are only<br />
available when the EQ Mode has been set to 5-Band Parametric.<br />
1 Press MENU.<br />
2 Select Equalizer.<br />
3 Select Custom 1, Custom 2, or Custom 3.<br />
4 Adjust 5-Band Equalizer settings.<br />
Scroll ROTARY WHEEL to change frequencies. Move RIOSTICK left or right to<br />
adjust decibel levels.<br />
5 Select Done to apply settings or Cancel to return to the Equalizer menu.<br />
Options include 10k, 2.5k, 600, 150, and 40 hertz frequencies.<br />
<strong>Rio</strong> <strong>Karma</strong><br />
28
EQ Setup<br />
Table of Contents Index<br />
Custom equalizer settings function the same way as preset equalizer settings but are set according to personal<br />
preferences and offer a greater range of customization based on Center and Width adjustments. EQ Setup options<br />
are only available when the EQ Mode has been set to 5-Band Parametric.<br />
1 Press MENU.<br />
2 Select Equalizer.<br />
3 Select EQ Setup.<br />
4 Scroll ROTARY WHEEL to adjust center and width settings<br />
5 Select Done to apply settings or Cancel to return to the Equalizer menu.<br />
EQ Setup options include:<br />
• Center<br />
Ranges include 40 Hz through 20kHz. 12 kHz, 4 kHz, 1 kHz, 250 Hz, and 80 Hz are the default frequency<br />
settings.<br />
• Width<br />
Editable ranges include .2 through 4.0 Octaves.<br />
• EQ Setup adjustments will dramatically alter audio settings. Only users confident about the changes<br />
they will make should alter EQ Setup settings.<br />
<strong>Rio</strong> <strong>Karma</strong><br />
29
Special<br />
Additional audio filters are available in the Special menu.<br />
Table of Contents Index<br />
1 Press MENU.<br />
2 Select Equalizer.<br />
3 Select Special.<br />
4 Select an option by scrolling ROTARY WHEEL. Use RIOSTICK to adjust<br />
options.<br />
5 Select Done to apply settings or Cancel to return to the Equalizer menu.<br />
Special options include:<br />
• Auto Gain Control<br />
Gain settings affect the overall Gain of the audio to make the audio sound more consistent by automatically<br />
adjusting the volume. Auto Gain Control is great for keeping sounds clear, without being too strong, even in<br />
noisy external environments. Settings include Off (the default setting), Low, Medium, and High.<br />
• Stereo Separation<br />
Many albums recorded in stereo during the early days of studio production separated all instruments to one<br />
side and all vocals to another. This type of extreme stereo separation is found on many Beatles and Buddy<br />
Holly albums. The Stereo Separation option merges the left and right stereo channels together to<br />
compensate for stereo effects that may sound strange when played on headphones. Specific tracks can be<br />
marked using <strong>Rio</strong> Music Manager to use Stereo Separation compensation. Settings include Off (the default<br />
setting) and All tracks.<br />
<strong>Rio</strong> <strong>Karma</strong><br />
30
:: Organize<br />
Table of Contents Index<br />
Use the Organize menu to create custom playlists or delete tracks without using <strong>Rio</strong> Music Manager.<br />
1 Press MENU.<br />
2 Select Organize.<br />
3 Select My Playlists or Delete Content.<br />
Organize options include:<br />
• My Playlists<br />
Options include Create, Edit, Delete, and Rename.<br />
To create a playlist:<br />
1 Select Create.<br />
2 Name the playlist.<br />
3 Select DONE using the index list or press RIOSTICK.<br />
4 Select tracks using Artist, Album, Genre, Year or Track methods. Press MENU to navigate up to change<br />
track selection methods if desired.<br />
5 When done, press MENU to navigate out of the Create menu and confirm that you want to save the newly<br />
created playlist.<br />
<strong>Rio</strong> <strong>Karma</strong><br />
• Delete Content<br />
Select Delete Content to select an Album, an Artist, a Track, or Everything! to delete from the player and<br />
create room for new content.<br />
31
:: Bookmarks<br />
Table of Contents Index<br />
Bookmarks store specific player settings, including the current running order, the current track, the current time<br />
position of the track, the Repeat Mode setting, and the Shuffle Mode setting. Users can save these settings in a<br />
bookmark and restore them whenever they use the player. Bookmarks are great for:<br />
• Placing digital bookmarks in digital audio books or other extended length tracks.<br />
• Maintaining positions in long term running orders.<br />
• Sharing your player with others without losing personal settings.<br />
1 Press MENU.<br />
2 Select Bookmarks.<br />
3 Select a Bookmark option.<br />
Bookmark options include:<br />
• Set<br />
Name and set a new bookmark.<br />
• Select<br />
Select a bookmark. Press the ROTARY WHEEL to restore the selected bookmark.<br />
• Update<br />
Select a bookmark. Press the ROTARY WHEEL to replace the bookmark with the current player settings.<br />
<strong>Rio</strong> <strong>Karma</strong><br />
• Delete<br />
Select a bookmark. Press the ROTARY WHEEL to delete the selected bookmark.<br />
• The <strong>Rio</strong> <strong>Karma</strong> automatically saves user settings when it is turned off. These settings are automatically<br />
restored when the <strong>Rio</strong> <strong>Karma</strong> is turned on. Settings saved automatically are not saved as a bookmark.<br />
32
:: Settings<br />
Table of Contents Index<br />
Playback<br />
Play Screen<br />
Power<br />
Display<br />
Resume<br />
Time & Date<br />
Language<br />
Network<br />
Orientation<br />
Audible Prompts<br />
Menu Button<br />
<strong>Rio</strong> <strong>Karma</strong><br />
33
Playback<br />
Table of Contents Index<br />
Various playback settings can be used to modify the way the <strong>Rio</strong> <strong>Karma</strong> plays tracks. Tracks can be shuffled at<br />
random, repeated continuously, or blended together to create seamless playback.<br />
1 Press MENU.<br />
2 Select Settings.<br />
3 Select Playback.<br />
4 Adjust Shuffle Mode, Repeat Mode, and/or Cross Fade settings.<br />
5 Select Done to apply settings or Cancel to return to the Settings menu.<br />
Plackback options include:<br />
• Shuffle Mode<br />
Set track running orders to play in standard or random order. Settings include Off (the default setting) and On.<br />
Previously played tracks are always placed behind the current position in the running order.<br />
• Repeat Mode<br />
Set the <strong>Rio</strong> <strong>Karma</strong> to repeat the playback of the entire running order, the current track, or a select portion of<br />
the current track. Settings include Off (the default setting), All, Track, and A/B Loop. Set A/B loop points<br />
using ROTARY PRESS.<br />
• Cross Fade<br />
Set Cross Fade settings that can seamlessly merge the playback of tracks during the end of one track and the<br />
beginning of another. Settings include Off (the default setting), 1 Second, 2 Seconds, and 3 Seconds.<br />
<strong>Rio</strong> <strong>Karma</strong><br />
34
Play Screen<br />
Table of Contents Index<br />
When the <strong>Rio</strong> <strong>Karma</strong> is in playback mode, pressing RIOSTICK will cycle the display through various Play Screen<br />
Views. Visualization and timer options can be set using the Play Screen menu.<br />
1 Press MENU.<br />
2 Select Settings.<br />
3 Select Play Screen.<br />
4 Adjust Current Track View, Timer Direction, and/or Timer Mode settings.<br />
5 Select Done to apply settings or Cancel to return to the Settings menu.<br />
Play Screen settings include:<br />
• Current Track View<br />
Set the <strong>Rio</strong> <strong>Karma</strong>’s visualization mode to one of three settings. Settings include Progress View (the default<br />
setting), Profile View, and VU View.<br />
• Timer Direction<br />
Settings include Count Up (the default setting) and Count Down.<br />
• Timer Mode<br />
Settings include Single Track (the default setting) and All Tracks.<br />
<strong>Rio</strong> <strong>Karma</strong><br />
35
Power<br />
By adjusting standby mode times the player can conserve energy when not in use.<br />
Table of Contents Index<br />
1 Press MENU.<br />
2 Select Settings.<br />
3 Select Power.<br />
4 Adjust Auto Standby settings.<br />
5 Select Done to apply settings or Cancel to return to the Settings menu.<br />
Power options include:<br />
• Auto Standby after set time of no activity<br />
Set the player to enter standby mode, after a specific amount of time. When in standby mode, the player<br />
conserves energy and behaves as if it is shutdown, but maintains the ability to power on immediately. Settings<br />
include Never (the default setting), 2 Minutes, 5 Minutes, 15 Minutes, and 30 Minutes.<br />
<strong>Rio</strong> <strong>Karma</strong><br />
36
Display<br />
Table of Contents Index<br />
By adjusting Display settings, the player can conserve energy used to power the LCD and extend the amount of<br />
playback time during each battery charge.<br />
1 Press MENU.<br />
2 Select Settings.<br />
3 Select Display.<br />
4 Adjust Screen Backlight and/or Contrast settings.<br />
5 Select Done to apply settings or Cancel to return to the Settings menu.<br />
Display options include:<br />
• Screen Backlight<br />
Set the backlight on the player to shut itself off after a specific amount of time. Settings include Always Off<br />
(the default setting), 1 second, 2 Seconds, 5 Seconds, 10 Seconds, and Always On.<br />
• To conserve battery life, the Always On setting should only be used when the <strong>Rio</strong> <strong>Karma</strong> is connected<br />
to an AC adapter.<br />
• Contrast<br />
Use the contrast slider to set how light or dark the images on the LCD will appear. Setting the contrast too light<br />
will result in washed out images. Setting the contrast too dark will result in images too dark to read.<br />
<strong>Rio</strong> <strong>Karma</strong><br />
37
Resume<br />
Table of Contents Index<br />
Use the options in the Resume menu to set the track that the player will play whenever the player restarts.<br />
1 Press MENU.<br />
2 Select Settings.<br />
3 Select Resume.<br />
4 Adjust Track to Resume and/or Position Within Track settings.<br />
5 Select Done to apply settings or Cancel to return to the Settings menu.<br />
Resume options include:<br />
• Track to Resume<br />
Set the player to begin playback of the last track played before shutdown, or the first track in the running order<br />
when the player restarts. Settings include Current (the default setting) and First.<br />
• Position Within Track<br />
Set the player to begin playback of the last track played at the point the track was at during shutdown or at the<br />
start of the track. Settings include Current (the default setting) and Start.<br />
<strong>Rio</strong> <strong>Karma</strong><br />
38
Time & Date<br />
Table of Contents Index<br />
Use the options in the Time & Date menu to set the player’s internal clock. Establishing a connection between the<br />
<strong>Rio</strong> <strong>Karma</strong> and <strong>Rio</strong> Music Manager will (re)set Time & Date settings according to the Date/Time Properties<br />
currently running on the host computer.<br />
1 Press MENU.<br />
2 Select Settings.<br />
3 Select Time & Date.<br />
4 Select Set Time, Set Date, and/or Time & Date Format.<br />
5 Adjust settings.<br />
6 Select Done to apply settings or Cancel to return to the Time & Date menu.<br />
Time & Date settings include:<br />
• Set Time<br />
Options include Hour, Minute, and AM / PM.<br />
(The AM / PM option is only available if the Time & Date Form at setting is set to the 12 hour format.)<br />
• Set Date<br />
Options include Month, Day, and Year.<br />
• Time & Date Format<br />
Options include 12 hour (the default setting) and 24 hour time formats and USA (the default setting),<br />
Europe, and Japan date formats.<br />
<strong>Rio</strong> <strong>Karma</strong><br />
39
Language<br />
Table of Contents Index<br />
The <strong>Rio</strong> <strong>Karma</strong>’s menus can be set to display one of five languages in addition to two spelling formats (US and UK<br />
English).<br />
1 Press MENU.<br />
2 Select Settings.<br />
3 Select Language.<br />
4 Select a Language setting.<br />
Language settings include:<br />
• English (US) (the default setting)<br />
Set the player display language to English (US).<br />
• English (UK)<br />
Set the player display language to English (UK).<br />
• Deutsch<br />
Set the player display language to German.<br />
• Français<br />
Set the player display language to French.<br />
<strong>Rio</strong> <strong>Karma</strong><br />
• Español<br />
Set the player display language to Spanish.<br />
•<br />
Set the player display language to Japanese.<br />
40
Network<br />
Table of Contents Index<br />
The Network menu contains options that configure the player’s Ethernet settings. Automatic or Manual settings<br />
can be accessed via the DHCP menu.<br />
1 Press MENU.<br />
2 Select Settings.<br />
3 Select Network.<br />
4 Select Network settings.<br />
5 Select Done to apply settings or Cancel to return to the Network menu.<br />
Network settings include:<br />
• DHCP<br />
Automatic is the default setting. The player should have no problem<br />
connecting to networks that use DHCP servers or UPnP (Autonet). Players<br />
connected to non-DHCP or -UPnP networks may need to use the Manual<br />
setting.<br />
• Current Lease<br />
Available in Automatic mode, Current Lease indicates the current network<br />
settings including IP, Mask, and Gateway addresses.<br />
<strong>Rio</strong> <strong>Karma</strong><br />
41
Table of Contents Index<br />
• Password<br />
Available in Automatic and Manual modes, the Password menu lets users<br />
assign a network password to the player. A password must be set before the<br />
<strong>Rio</strong> <strong>Karma</strong> can be accessed over a network. Assigning a non-blank password to<br />
the player is highly recommended if the player will be connected to a public<br />
network.<br />
• IP Address<br />
Available in Manual mode, IP Address enables IP address to be set manually.<br />
• Net Mask<br />
Available in Manual mode, Net Mask enables the net mask number to be set<br />
manually.<br />
• Default Gateway<br />
Available in Manual mode, Default Gateway enables the gateway point to be<br />
set manually.<br />
<strong>Rio</strong> <strong>Karma</strong><br />
42
Orientation<br />
Table of Contents Index<br />
The <strong>Rio</strong> <strong>Karma</strong> can be made more ergonomic for left handed users. When in Left handed mode, the LCD and<br />
controls are reversed and the player can be used upside down with the <strong>Rio</strong>Stick on the left rather than the right.<br />
1 Press MENU.<br />
2 Select Settings.<br />
3 Select Orientation.<br />
4 Select an Orientation setting.<br />
5 Select Done to apply settings or Cancel to return to the Settings menu.<br />
Orientation settings include:<br />
• Right handed (the default setting)<br />
Restores the player controls to their default settings.<br />
• Left handed<br />
Sets the player controls to be more comfortable for left handed users.<br />
When Orientation is set to Left handed, the player controls work in the following manner:<br />
• RIOSTICK<br />
Up becomes Down, Left becomes Right, and vice versa.<br />
• ROTARY WHEEL<br />
Rotation directions are reversed.<br />
<strong>Rio</strong> <strong>Karma</strong><br />
• VOLUME + and -<br />
VOLUME + becomes VOLUME - and vice versa.<br />
43
Audible Prompts<br />
The player can be set to confirm button presses with an audible prompt.<br />
Table of Contents Index<br />
1 Press MENU.<br />
2 Select Settings.<br />
3 Select Audible Prompts.<br />
4 Select On or Off and a Prompt volume setting. (Moving the slider right<br />
increases the volume. Moving the slider left decreases the volume.)<br />
5 Select Done to apply settings or Cancel to return to the Settings menu.<br />
<strong>Rio</strong> <strong>Karma</strong><br />
44
Menu Button<br />
Table of Contents Index<br />
Use the options in the Menu Button menu to configure how MENU will respond when pressed. One option must<br />
always be set to Main Menu.<br />
1 Press MENU.<br />
2 Select Settings.<br />
3 Select Menu Button.<br />
4 Adjust Pressing Menu button and/or Press and hold Menu button settings.<br />
5 Select Done to apply settings or Cancel to return to the Settings menu.<br />
Menu Button options include:<br />
• Pressing Menu button<br />
Settings include Main Menu (the default setting), Play Music, <strong>Rio</strong> DJ, Select Artist, Select Album, Select<br />
Track, and Select Playlist.<br />
• Press and hold Menu button<br />
Settings include Play Music (the default setting), <strong>Rio</strong> DJ, Select Artist, Select Album, Select Track,<br />
Select Playlist, and Main Menu.<br />
<strong>Rio</strong> <strong>Karma</strong><br />
45
:: Features<br />
Table of Contents Index<br />
<strong>Rio</strong> Taxi<br />
Stopwatch<br />
Web Interface<br />
<strong>Rio</strong> Taxi<br />
<strong>Rio</strong> Taxi is a stand-alone program that allows files to be transferred from one device to another using a <strong>Rio</strong> player.<br />
Using <strong>Rio</strong> Taxi you can copy files to your <strong>Rio</strong> player, store them on the player as long as you want, and transfer<br />
them to any computer on which <strong>Rio</strong> Taxi has been installed. Any file type can be copied using <strong>Rio</strong> Taxi--the only<br />
limitation is the amount of free space available on your <strong>Rio</strong> player.<br />
Although a computer is required to perform all <strong>Rio</strong> Taxi functions, the <strong>Rio</strong> Taxi feature on the player can be used<br />
to display basic information about the number of files currently stored on the player and the space they occupy.<br />
1 Press MENU.<br />
2 Select Features.<br />
3 Select <strong>Rio</strong> Taxi.<br />
4 Select Files On Board or Delete Files.<br />
<strong>Rio</strong> Taxi options include:<br />
<strong>Rio</strong> <strong>Karma</strong><br />
• Files On Board<br />
View the number and total space used by Taxi files on the player.<br />
• Delete Files<br />
Displays all files stored on the player, sorted alphabetically. All files can be deleted or files can be deleted one<br />
at a time.<br />
46
Stopwatch<br />
Use the stopwatch to keep track of time sensitive events while listening to digital audio.<br />
1 Press MENU.<br />
2 Select Features.<br />
3 Select Stopwatch.<br />
Table of Contents Index<br />
Lap statistics are displayed at the bottom of the Stopwatch screen. When a new lap is set, the difference, either<br />
faster (-) or slower (+) between new lap times and the average laptime is displayed for a few moments. Lap times<br />
are displayed from left to right based on their time. The longer the lap time, the farther to the right the time will be<br />
displayed.<br />
When in Stopwatch mode, the controls work in the following ways:<br />
• MENU<br />
Press to return to the Main Menu.<br />
• RIOSTICK (Press)<br />
Press to set a lap time. Press and hold to return to single lap display. Multiple laps and lap averages will be lost.<br />
• RIOSTICK (Up)<br />
Press to start and stop the timer.<br />
<strong>Rio</strong> <strong>Karma</strong><br />
• RIOSTICK (Down0<br />
Press to reset timer.<br />
47
Web Interface<br />
Table of Contents Index<br />
The Web Interface menu displays the URL that must be typed in the address bar of a Web browser to connect the<br />
<strong>Rio</strong> <strong>Karma</strong> to Java-enabled Web-based versions of <strong>Rio</strong> Music Manager and <strong>Rio</strong> Taxi.<br />
If the Ethernet connection is down or the Ethernet cables are not connected to either the <strong>Rio</strong> <strong>Karma</strong> or the host<br />
computer, the Web Interface menu will read No Connection.<br />
1 Press MENU.<br />
2 Select Features.<br />
3 Select Web Interface.<br />
<strong>Rio</strong> <strong>Karma</strong><br />
48
:: About Track<br />
Table of Contents Index<br />
The About Track screen displays Title, Artist, Album, Genre, year, Track #, Duration, Comment, Codec, Bitrate,<br />
PCM Format, File Size, Date Loaded, Times Played, Last Played, and Autosynced information.<br />
1 Press MENU.<br />
2 Select About Track.<br />
3 Use the Rotary Wheel to scroll up or down through About Track information.<br />
<strong>Rio</strong> <strong>Karma</strong><br />
49
:: About <strong>Rio</strong> <strong>Karma</strong><br />
Table of Contents Index<br />
The About <strong>Rio</strong> <strong>Karma</strong> screen displays information about the <strong>Rio</strong> <strong>Karma</strong>. Information displayed on the About<br />
screen includes the total amount of space on the disk, the amount of free space, the number of tracks on the<br />
player, and the Firmware version.<br />
1 Press MENU.<br />
2 Select About <strong>Rio</strong> <strong>Karma</strong>.<br />
<strong>Rio</strong> <strong>Karma</strong><br />
50
Chapter 6<br />
Table of Contents Index<br />
Help<br />
:: Troubleshooting<br />
Customer Service Information<br />
The FAQs below will help you solve common issues with your player. If you do not find the answers you need here,<br />
you can contact our Customer Service Department via any of the following methods:<br />
Web:www.rioaudio.com/support<br />
Technical Support Telephone:(206) 515-1400<br />
Customer Support Telephone:(800) 468-5846<br />
With every <strong>Rio</strong> product you receive the following support services:<br />
• Unlimited access to the <strong>Rio</strong> web-based technical information resources, available 24 hours a day every day at<br />
www.rioaudio.com/support. Here you will find FAQ files, product updates, and other useful information.<br />
• Unlimited e-mail support for the duration of your <strong>Rio</strong> product hardware warranty period.<br />
• Access to the latest software updates and enhancements for <strong>Rio</strong> products via our website.<br />
<strong>Rio</strong> <strong>Karma</strong><br />
51
Frequently Asked Questions<br />
Table of Contents Index<br />
Question<br />
Why will my <strong>Rio</strong> <strong>Karma</strong><br />
not power on?<br />
Answer<br />
• Confirm the LOCK/UNLOCK switch on the player is set to UNLOCK. The player<br />
will not power on if LOCK/UNLOCK is in the LOCK position. Switch LOCK/<br />
UNLOCK to the UNLOCK position and press POWER to turn the <strong>Rio</strong> <strong>Karma</strong> on. If<br />
the <strong>Karma</strong> still does not power on, the battery may be completely dead.<br />
What type of files can I<br />
play with the <strong>Rio</strong> <strong>Karma</strong>?<br />
Can I add FLAC, MP3, Ogg<br />
Vorbis, and WMA files to<br />
the player at the same<br />
time?<br />
• You can play FLAC, MP3, Ogg Vorbis, and WMA audio files on the <strong>Rio</strong> <strong>Karma</strong>.<br />
• Yes. You can play FLAC, MP3, Ogg Vorbis, and WMA audio content. They can be<br />
mixed together.<br />
What are the differences<br />
between FLAC, MP3, Ogg<br />
Vorbis, and WMA files?<br />
• Ogg Vorbis and WMA files are generally half as large as comparable sounding MP3<br />
files. Because Ogg Vorbis and WMA uses smaller file sizes, you can store more<br />
sound in less space on CDs or hard drives. The WMA format is exclusive to<br />
Windows-based computers. Unlike MP3, OGG, and WMA formats, the FLAC<br />
format is lossless and creates perfect duplicates when ripping and encoding CD<br />
audio. Perfect sound requires a great deal of space and FLAC files are typically<br />
four to eight times larger than 128kbps MP3, OGG, or WMA files.<br />
<strong>Rio</strong> Music manager can encode audio tracks in FLAC, OGG and WMA formats by<br />
default and MP3 with an upgrade.<br />
<strong>Rio</strong> <strong>Karma</strong><br />
52
Table of Contents Index<br />
What is the maximum<br />
number of tracks I can<br />
put on the <strong>Rio</strong> player?<br />
• The number of tracks you can store on the player depends on the size of the<br />
tracks and the amount of available space on the player. The About <strong>Rio</strong> <strong>Karma</strong><br />
menu lists the total amount of space, the amount of free space, and the number<br />
of tracks on the <strong>Rio</strong> player.<br />
Bitrate<br />
Approximate amount of space required per<br />
minute of audio content<br />
64 kbps<br />
96 kbps<br />
128 kbps<br />
160 kbps<br />
192 kbps<br />
FLAC Lossless<br />
0.5 MB<br />
0.75 MB<br />
1 MB<br />
1.25 MB<br />
1.75 MB<br />
5.5 MB<br />
What kind of batteries can<br />
I use with the <strong>Rio</strong> <strong>Karma</strong>?<br />
• The <strong>Rio</strong> <strong>Karma</strong> uses non-removable rechargeable lithium-ion batteries.<br />
Will the <strong>Rio</strong> <strong>Karma</strong> play<br />
Variable Bitrate (VBR)<br />
files?<br />
• Yes. Because there are many standards for VBR files, it cannot be guaranteed<br />
that every encoding software package will properly function with the <strong>Rio</strong> <strong>Karma</strong>.<br />
VBR files that do not comply to standards may lack track time, fast forward, and/<br />
or rewind capabilities.<br />
Where is the battery<br />
indicator on the <strong>Rio</strong><br />
<strong>Karma</strong>?<br />
• The battery indicator on the <strong>Rio</strong> <strong>Karma</strong> is located in the top-right corner of the<br />
display. The segments in the battery icon show the remaining battery power. The<br />
illumination of all segments indicates a fully charged battery. Non-illuminated<br />
segments indicate a run down battery. The battery indicator blinks when less<br />
than 20% of the charge on the battery remains.<br />
Can I replace the battery<br />
in my <strong>Rio</strong> <strong>Karma</strong>?<br />
• No.<br />
<strong>Rio</strong> <strong>Karma</strong><br />
The drive stops spinning<br />
during playback. Is this<br />
normal?<br />
• Yes. It is normal for the drive to stop spinning during playback. Stopping the<br />
drive is part of the player’s battery life management system. When the drive is<br />
stopped, the <strong>Rio</strong> <strong>Karma</strong> conserves power and plays tracks from a memory buffer.<br />
53
Table of Contents Index<br />
Can I charge the <strong>Rio</strong><br />
<strong>Karma</strong> using the USB<br />
cable?<br />
• No. The AC adapter must be used to charge the <strong>Rio</strong> <strong>Karma</strong>.<br />
What should I do if the<br />
display permanently locks<br />
up or will not display?<br />
• If you cannot read the display, or the display has become locked onto a particular<br />
screen, the player firmware may be corrupted. Corrupted firmware may be<br />
caused by a failed firmware update. If the player’s firmware becomes corrupted<br />
for any reason, follow these steps to start the player in Recovery Mode and<br />
proceed with the firmware update.<br />
1 Reset the player by inserting a pin or needle into the RESET HOLE next to the<br />
DC IN port.<br />
2 Press POWER. The player should power on as normal.<br />
If the player continues to lock up or does not display properly:<br />
1 Reset the player by inserting a pin or needle into the RESET HOLE next to the<br />
DC IN port.<br />
2 Press and hold MENU + POWER until UPGRADER is displayed on the screen.<br />
3 Connect the <strong>Rio</strong> <strong>Karma</strong> player to the computer using the USB cable.<br />
Proceed with the firmware upgrade.<br />
Why won’t the <strong>Rio</strong> <strong>Karma</strong><br />
play secure, dated, or<br />
other DRM (digital rights<br />
management) encoded<br />
files?<br />
• DRM files may not work properly if the <strong>Rio</strong> <strong>Karma</strong>’s internal clock is no longer<br />
accurate. This can happen if the rechargeable battery becomes completely<br />
drained for any period of time. Make sure the batteries are fully charged, then<br />
follow these steps:<br />
1 Connect the <strong>Rio</strong> <strong>Karma</strong> to the computer using the USB cable.<br />
2 Connect to the secure service where the DRM encoded files came from.<br />
The <strong>Rio</strong> <strong>Karma</strong>’s clock should reset.<br />
DRM files should now play correctly.<br />
<strong>Rio</strong> <strong>Karma</strong><br />
54
Table of Contents Index<br />
Can I upgrade the<br />
firmware on the <strong>Rio</strong><br />
<strong>Karma</strong>?<br />
• Yes. If available, firmware for your <strong>Rio</strong> can be downloaded and installed<br />
automatically using <strong>Rio</strong> Music Manager or downloaded and installed manually<br />
from the <strong>Rio</strong> Audio website.<br />
Note: Quit all applications before running the firmware update. While running the<br />
firmware update, do not close the program, turn off the player, or unplug the USB<br />
cable.<br />
Downloading the update manually<br />
1 Click the following link: www.rioaudio.com/support<br />
2 Click the link to the <strong>Rio</strong> <strong>Karma</strong>.<br />
3 Click Firmware.<br />
Select and download the latest software. Download the software that is specific<br />
to the operating system you use on your PC:<br />
*.exe (Windows)<br />
*.hqx (Mac)<br />
*.zip (Windows; must use WinZip to open)<br />
*.txt (All operating systems—a text file including update information and<br />
instructions.)<br />
Installing the update (PC)<br />
1 Connect the player to your computer with the USB cable.<br />
2 Turn the player on.<br />
3 Double-click the file that you downloaded from the <strong>Rio</strong> website.<br />
The update should take approximately 30 seconds to load.<br />
<strong>Rio</strong> <strong>Karma</strong><br />
55
Table of Contents Index<br />
How do I assign an IP<br />
address to my <strong>Rio</strong> <strong>Karma</strong><br />
if it does not receive one<br />
automatically?<br />
• If your home network does not have a DHCP server (a router for example) it may<br />
be necessary to manually set a new IP address before it will work with the <strong>Rio</strong><br />
<strong>Karma</strong>. To manually set an IP address, please follow the instructions applicable to<br />
your operating system:<br />
Windows 98 and ME<br />
Windows 2000<br />
Windows XP<br />
Windows 98 and ME<br />
1 Click Start on the Windows desktop.<br />
2 Click Settings.<br />
3 Click Control Panel.<br />
4 Double-click the Network icon.<br />
5 Click the TCP/IP component installed for your Ethernet card.<br />
6 Click Properties.<br />
7 Click Specify an IP address on the IP Address tab.<br />
8 Type 192.168.0.x (where x is a number between 2 and 254) in the IP Address<br />
field.<br />
The new IP address should not be used by any other computers on your<br />
network. If you are using Windows Me, uncheck the Detach connection to<br />
network media box.<br />
9 Type 255.255.255.0 in the Subnet Mask field.<br />
10 Click OK.<br />
11 Click OK.<br />
12 Click Yes when prompted to restart your computer.<br />
<strong>Rio</strong> <strong>Karma</strong><br />
56
Table of Contents Index<br />
Windows 2000<br />
1 Click Start on the Windows desktop.<br />
2 Click Settings.<br />
3 Click Control Panel.<br />
4 Click the Network Connections Control Panel icon.<br />
5 Double-click Local Area Connection.<br />
6 Click Properties.<br />
7 Double-click Internet Protocol (TCP/IP).<br />
8 Click Use the following IP address:.<br />
9 Type 192.168.0.x (where x is a number between 2 and 254) in the IP Address<br />
field.<br />
The new IP address should not be used by any other computers on your<br />
network.<br />
10 Type 255.255.255.0 in the Subnet Mask field.<br />
11 Click OK.<br />
12 Click OK.<br />
13 Click Yes if prompted to restart your computer.<br />
<strong>Rio</strong> <strong>Karma</strong><br />
57
Table of Contents Index<br />
Windows XP<br />
1 Click Start on the Windows desktop.<br />
2 Click Control Panel.<br />
3 Click Network and Internet Connections.<br />
4 Click the Network Connections Control Panel icon.<br />
5 Double-click Local Area Connection.<br />
6 Click Properties.<br />
7 Double-click Internet Protocol (TCP/IP).<br />
8 Click Use the following IP address:.<br />
9 Type 192.168.0.x (where x is a number between 2 and 254) in the IP Address<br />
field.<br />
The new IP address should not be used by any other computers on your<br />
network.<br />
10 Type 255.255.255.0 in the Subnet Mask field.<br />
11 Click OK.<br />
12 Click OK.<br />
13 Click Yes if prompted to restart your computer.<br />
My <strong>Rio</strong> <strong>Karma</strong> is<br />
connected to a USB hub<br />
but is not being detected<br />
by my computer. Why<br />
isn’t it being detected?<br />
• The <strong>Rio</strong> <strong>Karma</strong> will only be detected by self-powered USB hubs. Connect the <strong>Rio</strong><br />
<strong>Karma</strong> directly to a USB port on your computer if the USB hub you are using<br />
cannot be self powered.<br />
<strong>Rio</strong> <strong>Karma</strong><br />
58
:: Glossary of Digital Audio Terms<br />
Table of Contents Index<br />
Bass<br />
Bass is the particular low-range area of the sound spectrum where low musical notes and sounds are located.<br />
Increasing the bass value will make the low vocals and drums more prominent in your audio tracks. You can select<br />
the amount of bass in your audio tracks by selecting various Equalizer options or setting your own Bass menu<br />
option.<br />
Bitrate<br />
Bitrate denotes the number of bits per second used by a digital music file. The size and quality of a compressed<br />
digital audio file is determined by the bitrate used when encoding the file. Generally, the higher the bitrate used<br />
the higher the sound quality and the larger the file size. For example, a bitrate of 96kbps (96,000 bits per second)<br />
is generally thought of as “CD quality” for WMA audio files, and takes up about 0.75 megabytes (MB) per minute of<br />
music. At a 64kbps bitrate, the sound quality of WMA is similar to that of an FM radio signal, but approximately<br />
two minutes of music will fit in 1MB of space.<br />
Center<br />
Each of the five bands in the 5-band Parametric EQ has a center frequency control that lets you specify a<br />
frequency in Hertz. When the gain of the frequency band is increased of decreased, the effect will be strongest at<br />
the specified center frequency.<br />
Codec<br />
Depending on the context and kind of technology involved, codec can be defined as a compressed digital audio file<br />
format (like MP3, WMA, etc.), a “coding/decoding” chip used to translate between digital and analog transmissions<br />
(used in modems), or a compression/decompression algorithm. Codecs compress audio data into a file, often for<br />
efficient transmission over a network, and then decode it for playback. While all the codecs perform similar<br />
compression of digital audio, there are differences in the technology.<br />
The <strong>Rio</strong> <strong>Karma</strong> supports the following digital audio codecs:<br />
<strong>Rio</strong> <strong>Karma</strong><br />
• Free Lossless Audio Codec; FLAC<br />
• MPEG Layer 3; MP3<br />
• Ogg Vorbis; OGG<br />
• Windows Media; WMA<br />
59
Firmware<br />
Table of Contents Index<br />
Firmware is the permanent read-only software that is installed on the player. Like software it can be updated, but<br />
unlike software it can never be deleted from the player.<br />
FLAC<br />
FLAC stands for Free Lossless Audio Codec. FLAC is a lossless digital audio format, referring to the fact that none<br />
of the audio signal is discarded or “lost”. FLAC files decode exactly the same as the digital source material from<br />
which the FLAC file was encoded. (MP3, Ogg Vorbis, and WMA all discard inaudible parts of the signal.) Lossless<br />
compression comes at a price: FLAC gets much poorer compression ratios than the other codecs. In practical<br />
terms, FLAC files are usually four to eight times larger than typical MP3, Ogg Vorbis, or WMA files.<br />
Gain<br />
Gain is the extent to which an audio signal, or a limited frequency range of an audio signal, is made louder or<br />
quieter by a filter such as an equalizer. Gain adjustments boost or reduce sounds to produce a more desirable<br />
audio output.<br />
ID3 Tag<br />
The ID3 tag is the part of the encoded MP3 or WMA file that contains information about the digital audio file such<br />
as song title, artist, album title, encoding bitrate, track time duration, and so on. ID3 tag information is displayed<br />
on the Album/Track title line on the player’s LCD.<br />
IntroScan<br />
When in Introscan mode, the <strong>Rio</strong> <strong>Karma</strong> will play the first ten seconds of a track and then skip to the next track in<br />
the running order and repeat, playing ten seconds, then skipping to the next track. The IntroScan playback mode<br />
can only be accessed by moving and holding the <strong>Rio</strong>Stick in the up (PLAY/PAUSE) position.<br />
<strong>Rio</strong> <strong>Karma</strong><br />
MP3<br />
MP3 is short for Moving Pictures Experts Group Audio Layer 3. MP3 is the most well known compressed digital<br />
audio file format. This format allows for near “CD quality” sound, but at a fraction of the size of normal audio files.<br />
MP3 conversion of an audio track from CD-ROM reduces the file size by approximately a 12:1 ratio with virtually no<br />
perceptible loss in quality. MP3 compression removes the redundant and irrelevant parts of a sound signal that the<br />
human ear doesn't hear. This digital sound encoding and compression process was developed by the Fraunhofer<br />
Institute for Integrated Circuits and Thomson Multimedia. The MP3 encoding process is well suited for the transfer<br />
of high quality audio files with small file size over the Internet.<br />
60
Octave<br />
Table of Contents Index<br />
An octave is a set space between two frequencies that has a ratio of two to one. (e.g., one octave higher than<br />
500Hz is 1000Hz and one octave lower than 500Hz is 250Hz.) The human range of hearing covers roughly ten<br />
octaves (20-20000Hz). To cover this range, each band of the 5-Band Equalizer covers two octaves and is<br />
positioned approximately two octaves apart from the next band.<br />
Ogg Vorbis<br />
Ogg Vorbis is a free, open, and unpatented digital audio compression format that many users use as an alternative<br />
to MP3 or WMA. Like the WMA codec, the Ogg Vorbis codec offers greater file compression than the MP3 codec,<br />
enabling storage of more digital audio tracks in the same amount of space when compared to MP3s.<br />
Rip and Encode<br />
Rip and encode refers to the process of extracting audio from an audio CD (ripping), and encoding it into a<br />
compressed digital audio format like FLAC, MP3, Ogg Vorbis, or WMA.<br />
Synchronize<br />
<strong>Rio</strong> Music Manager can automatically (or manually) delete old content, transfer new audio content, or keep the<br />
content on your <strong>Rio</strong> <strong>Karma</strong> fresh and dynamic. <strong>Rio</strong> Music Manager must be open for synchronization to occur.<br />
Treble<br />
Treble notes occupy the higher portion of the sound spectrum. Increasing the treble value will raise the levels of<br />
the high sounds in your audio files. You can select the amount of treble in your tracks by selecting various<br />
Equalizer options or setting your own Treble menu option.<br />
VBR<br />
Variable Bitrate (VBR) encoding converts tracks at a variable rate, using higher bitrate encoding for complex<br />
portions and lower bitrate encoding for pauses and simpler portions of tracks.<br />
<strong>Rio</strong> <strong>Karma</strong><br />
61
Width<br />
Table of Contents Index<br />
Each of the five bands in the 5-Band Parametric EQ has a width control that can alter the width of the frequency<br />
band in Octaves. The Width equalizer control adjusts the bandwidth of individual octaves and changes the range<br />
(higher or lower) that the frequency will be heard at. The width is the approximate range of frequencies that will<br />
be affected when the gain of that band is boosted or reduced. (e.g., if a band has a Center of 1000Hz, a width of<br />
two octaves and a Gain of +6dB, than a boost will be applied to the frequencies between 500Hz and 2000Hz and<br />
will peak at 6dB at 1000Hz.)<br />
WMA<br />
Windows Media Audio (WMA) is a compressed audio format created by Microsoft as an alternative to MP3. The<br />
WMA codec offers greater file compression than the MP3 codec, enabling storage of more digital audio tracks in the<br />
same amount of space when compared to MP3s.<br />
<strong>Rio</strong> <strong>Karma</strong><br />
62
:: Limited Warranty and Software License<br />
Warranty<br />
Table of Contents Index<br />
Digital Networks North America, Inc. warrants that your product will be free from defects in materials and<br />
workmanship for a period of ninety (90) days from the date of original retail purchase. Digital Networks North<br />
America, Inc. warrants refurbished products, marked and sold as such, for thirty (30) days from the original<br />
purchase date. This warranty is extended to the original end user purchaser only and is not assignable or<br />
transferable to any other party.<br />
If you discover a defect covered by this warranty, Digital Networks North America, Inc. will repair or replace the<br />
product at our sole discretion using new or remanufactured product or components. Digital Networks North<br />
America, Inc.'s liability is limited solely to the repair or replacement of the defective product. If Digital Networks<br />
North America, Inc. cannot reasonably repair or replace the defective product then Digital Networks North<br />
America, Inc. may, at its sole discretion, refund the current suggested retail price for the product. Digital Networks<br />
North America, Inc. warrants any replaced or repaired product for a period of thirty (30) days from shipment, or<br />
through the end of the original warranty period, whichever is longer.<br />
Warranty Service<br />
To obtain service under this warranty, you must contact a Digital Networks North America, Inc. Customer Care<br />
Center within the applicable warranty period to receive a warranty service authorization. You will be required to<br />
provide a dated original proof of purchase. Products shipped to Digital Networks North America, Inc. must be<br />
shipped postage-paid and packaged appropriately for safe shipment. Digital Networks North America, Inc. is not<br />
responsible for products received without a warranty service authorization and may be rejected. Repaired or<br />
replacement products will be shipped to you at Digital Networks North America, Inc.'s expense. All products or<br />
parts that are replaced become the property of Digital Networks North America, Inc.<br />
<strong>Rio</strong> <strong>Karma</strong><br />
63
Scope of and Limitation on Warranty<br />
Table of Contents Index<br />
This warranty does not cover damage caused by abuse, misuse, unauthorized attempts to open, modify, or repair<br />
the product, moisture, extreme heat or cold, corrosive environments, shipping, or high voltage surges from<br />
external sources such as power line, telephone line, or connected equipment. This warranty does not cover wear<br />
and tear on covers, housing or wiring. This warranty also does not apply to any product with an altered or defaced<br />
serial number. Digital Networks North America, Inc.'s liability is limited to the repair or replacement of this<br />
product. In no event will Digital Networks North America, Inc. be liable for any amount greater than the currently<br />
suggested retail price of this product. We will not be liable to you or anyone else for any damages that result from<br />
the failure of this product or from the breach of any express or implied warranties. These include damage to other<br />
equipment, lost data, lost profits, or any consequential, incidental, or punitive damages. This written warranty<br />
represents the entire warranty agreement between Digital Networks North America, Inc. and you. This warranty is<br />
given in lieu of all other warranties, express or implied, including without limitation implied warranties of<br />
merchantability and fitness for a particular purpose. This warranty is limited to the term specified above. No<br />
warranties, either express or implied, will apply after this period. This warranty may not be altered in any way<br />
other than in writing by an officer of Digital Networks North America, Inc. This warranty gives you specific legal<br />
rights and you may also have other rights, which vary, from state to state. Some states limit what warranties may<br />
be excluded as well as how long an implied warranty lasts, so the above limitation may not apply to you.<br />
<strong>Rio</strong> <strong>Karma</strong><br />
64
:: FCC and Industry Canada Compliance<br />
Federal Communications Commission (FCC)<br />
Table of Contents Index<br />
This device complies with Part 15 of the FCC Rules. Operation is subject to the following two conditions:<br />
1 This device may not cause harmful interference, and<br />
2 This device must accept any interference received, including interference that may cause undesired operation.<br />
This equipment has been tested and found to comply with the limits for a Class B digital device, pursuant to Part<br />
15 of the FCC Rules. These limits are designed to provide reasonable protection against harmful interference in a<br />
residential installation. This equipment generates, uses and can radiate radio frequency energy and, if not installed<br />
and used in accordance with the instructions, may cause harmful interference to radio communications. However,<br />
there is no guarantee that interference will not occur in a particular installation. If this equipment does cause<br />
harmful interference to radio or television reception, which can be determined by turning the equipment off and<br />
on, the user is encouraged to try to correct the interference by one or more of the following measures:<br />
• Reorient or relocate the receiving antenna.<br />
• Increase the separation between the equipment and receiver.<br />
• Connect the equipment into an outlet on a circuit different from that to which the receiver is connected.<br />
• Consult the dealer or an experienced radio/TV technician for help.<br />
Industry Canada<br />
This Class B digital apparatus complies with Canadian ICES-003.<br />
Cet appareil numérique de la classe B est conforme à la norme NMB-003 du Canada.<br />
<strong>Rio</strong> <strong>Karma</strong><br />
65
:: Safety<br />
Table of Contents Index<br />
Warning<br />
TO REDUCE THE CHANCE OF SHOCK OR INJURY, DO NOT USE or OPERATE THIS DEVICE IN OR NEAR WATER OR<br />
WET LOCATIONS.<br />
CAUTION<br />
RISK OF EXPLOSION, DAMAGE OR BATTERY LEAKAGE IS POSSIBLE IF BATTERY IS REPLACED INCORRECTLY OR<br />
BY AN INCORRECT TYPE. NEVER ATTEMPT TO CHARGE A NON-RECHARGEABLE ALKALINE BATTERY. DISPOSE OF<br />
USED BATTERIES ACCORDING TO INSTRUCTIONS OR LOCAL LAWS. Use of headphones while operating a vehicle<br />
is not recommended and is unlawful in some states and areas. Be careful and attentive while driving. Stop<br />
operation of the player if you find it disruptive or distracting while operating any type of equipment.<br />
Listening to audio at full power over extended periods of time can be damaging to the hearing of the user.<br />
<strong>Rio</strong> <strong>Karma</strong><br />
66
Table of Contents Index<br />
Index<br />
<strong>Rio</strong> <strong>Karma</strong><br />
Symbols<br />
+/- 2<br />
5-Band Equalizer 28<br />
A<br />
About <strong>Rio</strong> <strong>Karma</strong> 50<br />
About Track 49<br />
AC Adapter 7<br />
Accessories 9<br />
Advanced Features 23<br />
Album 17<br />
Artist 17<br />
Audible Prompts 44<br />
B<br />
Backlight 37<br />
Basic operations 12<br />
Bass 59<br />
definition 59<br />
Menu option 25<br />
Battery<br />
Indicator 7<br />
Installation 53<br />
Bitrate<br />
definition 59<br />
Bookmarks 32<br />
Buttons and Controls 2<br />
C<br />
Classical 27<br />
Codec<br />
definition 59<br />
FLAC 60<br />
MP3 60<br />
Ogg Vorbis 61<br />
WMA 61, 62<br />
Contrast 37<br />
Controls 15<br />
Copying Tracks 13<br />
Custom equalizer 28<br />
Customer Service<br />
Information 51<br />
D<br />
DC in 3<br />
Display 37<br />
Docking Station 8<br />
E<br />
Earphones 8<br />
Encoding 13<br />
EQ Mode 28<br />
EQ Off 26<br />
EQ Setup 29<br />
Equalizer 24<br />
Ethernet 8<br />
F<br />
Features 46<br />
Federal Communications<br />
Commission (FCC) 65<br />
Firmware 60<br />
FLAC 60<br />
Forward 2, 15<br />
Frequently Asked<br />
Questions 52<br />
G<br />
Genre 22<br />
Getting Started 1<br />
Glossary 59<br />
H<br />
Help 51<br />
I<br />
ID3 Tag 60<br />
IntroScan 60<br />
J<br />
Jazz 27<br />
L<br />
Language 40<br />
Limited Warranty 63<br />
Liquid Crystal Display<br />
LCD 5<br />
M<br />
Menu Mode 5<br />
MP3 60<br />
N<br />
Network 41<br />
O<br />
Ogg Vorbis 61<br />
Organize 31<br />
Orientation 43<br />
P<br />
Package contents ii<br />
Play Screen 35<br />
Play/Pause 2, 15<br />
Playback 34<br />
Playlist 18<br />
Pop 26<br />
Power button 2<br />
Power settings 36<br />
Profile View 35<br />
Progress View 35<br />
R<br />
RCA 8<br />
regulatory information<br />
65<br />
Resume 38<br />
Reverse 2, 15<br />
<strong>Rio</strong> DJ 19<br />
<strong>Rio</strong> Music Manager 11<br />
<strong>Rio</strong> Taxi 46<br />
Ripping and Encoding 61<br />
Rock 26<br />
Running Order View 5<br />
S<br />
Safety Information 66<br />
Settings 33<br />
67
Special 30<br />
Stop 2, 15<br />
Stopwatch 47<br />
T<br />
Technical Support 51<br />
Time & Date 39<br />
Track 18<br />
Track Details 5<br />
Track Format 5<br />
Trance 27<br />
Transferring tracks<br />
<strong>Rio</strong> Music Manager<br />
14<br />
Treble<br />
definition 61<br />
Menu option 25<br />
Troubleshooting 51<br />
U<br />
Upgrading Firmware 55<br />
USB 8<br />
V<br />
variable bitrate (VBR) 61<br />
Volume +/- 2<br />
VU View 35<br />
Table of Contents Index<br />
W<br />
Warranty 63<br />
Web Interface 48<br />
WMA 61, 62<br />
Y<br />
Year 22<br />
<strong>Rio</strong> <strong>Karma</strong><br />
68
2600 San Tomas Expy.<br />
Santa Clara, CA 95051-0953<br />
USA