2 - Radio Shack
2 - Radio Shack
2 - Radio Shack

You also want an ePaper? Increase the reach of your titles
YUMPU automatically turns print PDFs into web optimized ePapers that Google loves.
TM<br />
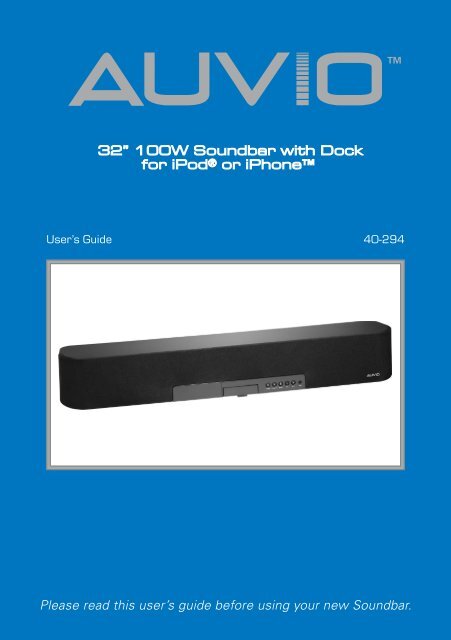
32” 100W Soundbar with Dock<br />
for iPod® or iPhone<br />
User’s Guide 40-294<br />
Please read this user’s guide before using your new Soundbar.
Contents<br />
Important Safety Instructions..............................................................................................3<br />
Warnings and Precautions...................................................................................................3<br />
Overview...............................................................................................................................4<br />
Features...........................................................................................................................4<br />
Package Contents...........................................................................................................4<br />
Front View........................................................................................................................5<br />
Back View.........................................................................................................................6<br />
Remote Control...............................................................................................................7<br />
Setup.....................................................................................................................................8<br />
Connect the FM Antenna...............................................................................................8<br />
Connect External Devices (Optional)............................................................................8<br />
Install Back-up Battery....................................................................................................9<br />
Connect Power..............................................................................................................10<br />
Install Remote Control Batteries..................................................................................10<br />
Setting the Clock...........................................................................................................10<br />
Basic Operation.................................................................................................................. 11<br />
FM <strong>Radio</strong>....................................................................................................................... 11<br />
Storing Stations...................................................................................................... 11<br />
Recalling Station..................................................................................................... 11<br />
Playing an iPod / iPhone.............................................................................................. 11<br />
Dock and Charge your iPod / iPhone..................................................................... 11<br />
Playing an iPod / iPhone.........................................................................................12<br />
Audio Settings..............................................................................................................12<br />
3D Sound.................................................................................................................12<br />
Adjusting Bass and Treble......................................................................................12<br />
Display Brightness..................................................................................................12<br />
Select Source................................................................................................................13<br />
Additional Information.......................................................................................................13<br />
Troubleshooting............................................................................................................13<br />
Specifications................................................................................................................13<br />
FCC Information............................................................................................................14<br />
Limited Warranty..........................................................................................................14<br />
2
Important Safety Instructions<br />
1. Read these instructions.<br />
2. Keep these instructions.<br />
3. Heed all warnings.<br />
4. Follow all instructions.<br />
5. Do not use this apparatus near water.<br />
6. Clean only with dry cloth.<br />
7. Do not block any ventilation openings.Install in accordance with the manufacturer’s<br />
instructions.<br />
8. Do not install near any heat sources such as radiators,heat registers,stoves,or other<br />
apparatus (including amplifiers) that produce heat.<br />
9. Do not defeat the safety purpose of the polarized or grounding-type plug. A polarized<br />
plug has two blades with one wider than the other. A grounding type plug has two<br />
blades and a third grounding prong. The wide blade or the third prong are provided for<br />
your safety. If the provided plug does not fit into your outlet, consult an electrician for<br />
replacement of the obsolete outlet.<br />
10. Protect the power cord from being walked on or pinched particularly at plugs,<br />
convenience receptacles, and the point where they exit from the apparatus.<br />
11. Only use attachments/accessories specified by the manufacturer.<br />
12. Use only with the cart,stand, tripod, bracket,or table specified by the<br />
manufacturer,or sold with the apparatus.When a cart is used, use<br />
caution when moving the cart / apparatus combination to avoid injury<br />
from tip-over.<br />
13. Unplug this apparatus during lightning storms or when unused for<br />
long periods of time.<br />
14. Refer all servicing to qualified service personnel. Servicing is required when the<br />
apparatus has been damaged in any way, such as power-supply cord or plug is<br />
damaged, liquid has been spilled or objects have fallen into the apparatus, the apparatus<br />
has been exposed to rain or moisture,does not operate normally, or has been dropped.<br />
Warnings and Precautions<br />
CAUTION: TO PREVENT ELECTRIC SHOCK, MATCH WIDE BLADE OF PLUG TO WIDE<br />
SLOT, AND FULLY INSERT PLUG.<br />
To reduce the risk of electric shock, do not remove cover (or back). There are no userserviceable<br />
parts inside. Please refer any servicing to qualified service personnel.<br />
WARNING: Using this product near fluorescent lighting may cause interference with of<br />
the remote. If the product is displaying erratic behavior, move away from any fluorescent<br />
lighting.<br />
The product shall not be exposed to dripping or splashing and that no objects filled with<br />
liquids such as vases, shall be placed on apparatus.<br />
The mains plug is used as the disconnect devide. It shall remain readily operable and should<br />
not be obstructed druing intended use. To be completely disconnected the apparatus from<br />
supply mains, the main plug of the product shall be disconnected from the mians socket<br />
outlet completely.<br />
3
Overview<br />
Overview<br />
Features<br />
• Powerful 50W RMS system enhances your music listening experience<br />
• iPod Drawer conveniently opens when needed and hidden when not in use<br />
• Plays and charges most dockable iPods<br />
Package Contents<br />
Soundbar<br />
Remote Control<br />
AC Adapter<br />
FM Antenna<br />
3.5mm Cable<br />
RCA Cable<br />
A<br />
CAUTION<br />
User’s<br />
Guide<br />
RISK OF ELECTRIC SHOCK<br />
Quick ! Start<br />
DO NOT OPEN<br />
Video Cable<br />
A<br />
CAUTION<br />
RISK OF ELECTRIC SHOCK<br />
DO NOT OPEN<br />
WARNING: To reduce the risk of fire or shock hazard,<br />
do not expose this product to rain or moisture.<br />
CAUTION: TO REDUCE THE RISK OF ELECTRIC<br />
SHOCK, DO NOT REMOVE THE COVER OR<br />
BACK. NO USER-SERVICEABLE PARTS INSIDE.<br />
REFER SERVICING TO QUALIFIED PERSONNEL.<br />
WARNING: To reduce the risk of fire or shock hazard,<br />
do not expose this product to rain or moisture.<br />
iPod / iPhone<br />
Dock Adapters CAUTION: (5) TO REDUCE THE RISK OF ELECTRIC<br />
SHOCK, DO NOT REMOVE THE COVER OR<br />
BACK. NO USER-SERVICEABLE PARTS INSIDE.<br />
REFER SERVICING TO QUALIFIED PERSONNEL.<br />
!<br />
!<br />
This lightning symbol is intended to alert<br />
you to the presence of uninsulated,<br />
dangerous voltage within this product’s<br />
enclosure that might be of sufficient<br />
magnitude to constitute a risk of electric<br />
shock. Do not open the product’s case.<br />
The exclamation symbol is intended to<br />
inform you that important operating and<br />
maintenance instructions are included in<br />
the literature accompanying this product.<br />
This lightning symbol is intended to alert<br />
you to the presence of uninsulated,<br />
dangerous voltage within this product’s<br />
enclosure that might be of sufficient<br />
4
Front View<br />
POWER<br />
Turn your soundbar<br />
on and off<br />
FUNCTION<br />
Select FM radio,<br />
iPod, IN1, IN 2, or<br />
AUX mode<br />
EFFECT<br />
Turn 3D virtural sound<br />
effect on and off,<br />
press and hold for<br />
8 seconds to reset<br />
settings to default in<br />
standby mode<br />
VOL– / VOL+<br />
Decrease and<br />
increase volume<br />
AUX<br />
3.5 mm line input<br />
jack to connect<br />
addtional sound<br />
devices<br />
Overview<br />
iPhone / iPod Dock<br />
Select and insert the docking adapter<br />
for your iPhone/iPod model, then insert<br />
your iPhone or iPod<br />
Press to open<br />
5
Overview<br />
Back View<br />
FM ANT<br />
Connect FM<br />
antenna<br />
SUB OUT<br />
Connect an external<br />
subwoofer<br />
STEREO RCA<br />
INPUT<br />
Connect to the audio<br />
output jacks on your<br />
external device (TV, DVD,<br />
game system, etc.)<br />
VIDEO OUT<br />
Connect to the<br />
video output jacks<br />
on your external<br />
device<br />
DC IN 15V<br />
Connect supplied<br />
DC15V power cord<br />
Back-up Battery<br />
Install batteries to keep clock memory during power failure.<br />
Mount your Speaker (Optional)<br />
1. Use 2 screws (not supplied) with heads no bigger<br />
than the mount holes on your speaker.<br />
2. Place the mount holes and slide down to secure the<br />
speaker.<br />
6
Remote Control<br />
MUTE – Turn sound on or off<br />
EFFECT<br />
Turn 3D virtual surround<br />
effect on or off<br />
Overview<br />
FUNCTION – Select<br />
desired input mode<br />
POWER – Turn the<br />
soundbar on or off.<br />
DISPLAY / TIME<br />
Enter time setting mode,<br />
view current mode.<br />
Number Buttons (0-9)<br />
Input a radio station number.<br />
VOL + / VOL –<br />
Increase or decrease the volume<br />
SUB + / SUB –<br />
Increase or decrease subwoofer<br />
volume<br />
MENU – Return to previous<br />
menu on a docked iPod.<br />
//;<br />
Navigate left and right through<br />
menus, play, pause, skip forward<br />
or skip backward in iPod mode.<br />
TONE / DIMMER –<br />
Adjust bass and treble levels,<br />
select display brightness.<br />
ENTER – Make selections<br />
<br />
Navigate up and down<br />
through menus<br />
REPEAT / ST<br />
Select repeat options from a<br />
docked iPod, select stereo or<br />
mono sound in FM radio mode.<br />
SHUFFLE – Play tracks<br />
from your iPod / iPhone in<br />
random order.<br />
7
Setup<br />
1 Connect the FM Antenna<br />
Plug the supplied FM antenna into the FM ANT jack.<br />
Setup<br />
2 Connect External Devices (Optional)<br />
Subwoofer<br />
Connect an external subwoofer<br />
Audio Inputs<br />
Use an audio cable to connect<br />
each device’s audio output<br />
jacks to the soundbar’s audio<br />
jacks, IN 1 or IN 2. Red jacks<br />
are for right audio, and white<br />
jacks are for left audio.<br />
Video Outputs<br />
Use the video cable to connect<br />
each device’s video input jack<br />
to the soundbar’s VIDEO<br />
OUT jack.<br />
8
AUX<br />
Connect an audio device using<br />
the 3.5mm mini-phono cable, or a<br />
3.5 mm mini phono to RCA cable<br />
(not included) into the AUX jack.<br />
Connect the other end into the<br />
audio output/headphone output<br />
on your audio device.<br />
Setup<br />
3 Install Back-up Battery<br />
Install batteries in the battery compartment at the back of your soundbar to keep clock<br />
memory during power failure.<br />
1. Push the battery compartment cover down to open.<br />
2. Insert two AAA batteries (not supplied) as<br />
indicated by the polarity symbols (+ and –)<br />
marked inside.<br />
3. Replace the battery cover.<br />
AAA<br />
AAA<br />
9
4 Connect Power<br />
Connect the plug to the soundbar first, then connect AC plug to the power outlet.<br />
<br />
<br />
Setup<br />
5 Install Remote Control Batteries<br />
1. Press the tab to remove the battery cover.<br />
2. Insert two AAA batteries (not supplied) as indicated<br />
by the polarity symbols (+ and –) marked on the<br />
remote control.<br />
3. Replace the battery cover.<br />
AAA<br />
AAA<br />
b Battery Notes:<br />
<br />
Dispose of batteries promptly and properly. Do not<br />
burn or bury them.<br />
<br />
<br />
<br />
Use only fresh batteries of the required size and<br />
type.<br />
Do not mix old and new batteries, different types of<br />
batteries (alkaline, or rechargeable), or rechargeable batteries of different capacities.<br />
If you do not plan to use the remote control for a long time, remove the batteries.<br />
Batteries can leak chemicals that can damage electronic parts.<br />
6 Setting the Clock<br />
1. In standby mode, press DISPLAY/TIME on the remote control. The first hour digit<br />
flashes.<br />
2. Press or to adjust each hour and minutes digits.<br />
3. Press or to move to the hour or<br />
minutes digit you want to adjust.<br />
4. Press DISPLAY/TIME to save your settings.<br />
5. Press REPEAT/ST on the remote control to<br />
select 12 h or 24 h time format.<br />
12:00 AM<br />
10
Basic Operation<br />
FM <strong>Radio</strong><br />
1. Press POWER to turn on the unit.<br />
2. Press FUNCTION to select FM mode. FM<br />
displays.<br />
3. Press or to tune down or up to find a<br />
station.<br />
Press and hold or to auto search stations.<br />
4. Press VOL + or VOL – to adjust the volume.<br />
FM<br />
5. Press REPEAT/ST on the remote control to select stereo or mono mode.<br />
107.3 MHz<br />
Storing Stations<br />
1. Tune to the desired station.<br />
2. Press ENTER. The program location flashes.<br />
3. Press 0 through 9 on the remote control to<br />
select a memory location (total of 10 preset<br />
stations are available).<br />
4. Press ENTER to store the station.<br />
Recalling Station<br />
P01 107.3 MHz<br />
1. To recall stored stations, press number 0 through 9 to access the desired memory location.<br />
Basic Operation<br />
iPod/iPhone<br />
Dock and Charge<br />
1. Select the docking adapter that fits your iPod/iPhone model.<br />
Refer to the number marked on the adapters:<br />
Adapter No. Compatible Models<br />
10 Video 60G/80G & Classic 10G<br />
13 Nano 3G<br />
14 Touch 1G<br />
15 iPhone 3G<br />
16 Touch 2G<br />
11
2. Snap the adapter into the docking station.<br />
3. Plug your iPod / iPhone into the adapter.<br />
Basic Operation<br />
Playing Tracks<br />
1. Dock your iPod / iPhone.<br />
2. Press POWER to turn on the soundbar.<br />
3. Press FUNCTION to select iPod mode. IPOD<br />
displays.<br />
4. Press ; to start and pause iPod / iPhone playback.<br />
Press or to skip to the previous track or to the next track.<br />
Press and hold or to search backwards or forwards in the current track.<br />
Press REPEAT/ST to select repeat the current track, repeat album or playlist or repeat<br />
off.<br />
Press SHUFFLE to play tracks in an album randomly in your iPod/iPhone.<br />
Press MENU to access the docked iPod menu.<br />
Press or to navigate iPod / iPhone menus.<br />
n Note: Your iPod / iPhone must be updated with the latest firmware from Apple in order<br />
for it to work properly with your sound bar.<br />
Audio Settings<br />
3D Sound<br />
Press EFFECTS to turn 3D sound on and off.<br />
IPOD<br />
3D ON<br />
Adjusting Bass and Treble<br />
1. Press TONE/DIMMER on the remote control<br />
until the display shows BASS or TREB.<br />
2. Press VOL + or VOL – to adjust to the desired<br />
level.<br />
BASS 00dB<br />
Display Brightness<br />
1. Press TONE/DIMMER on the remote control<br />
until the display shows DIMMER level.<br />
DIMMER2<br />
2. Press VOL + or VOL – to adjust to the display brightness to the desired level.<br />
12
Select Source<br />
To play devices connected to your soundbar, you must select the correct input source.<br />
1. Press FUNCTION repeatedly to select:<br />
• IN1 or IN2 to play devices connected to<br />
Audio Inputs.<br />
• AUX to play device connected to the line<br />
input jack.<br />
Additional Information<br />
Troubleshooting<br />
IN1<br />
No sound<br />
Problem<br />
Remote control does not<br />
work.<br />
Poor FM reception<br />
Possible Solution<br />
Make sure the power cord is plugged in.<br />
The batteries in the remote control may be dead. Replace the<br />
batteries and try again.<br />
The power outlet may be faulty. Plug in another device. If it<br />
does not work, have an electrician inspect the outlet.<br />
Reset the soundbar. Turn off the soundbar and unplug the<br />
power cord from the wall. Wait a few seconds, then plug the<br />
power cord back into the AC outlet.<br />
Check all wire connections. See pages 8-9.<br />
Replace batteries in the remote control.<br />
Be sure batteries are installed with correct polarity.<br />
Remove any obstacles between the remote control and TV.<br />
Make sure FM antenna is plugged in.<br />
Specifications<br />
Output Power/Ch (@ 10% THD)............................... 12.5W x 2 + 25 W (Total 50W RMS/ 100W Peak)<br />
Freq. Response............................................................................................................... 50Hz ~ 20KHz<br />
Operation Power.......................................................................... 100V~240V AC 50/60Hz.DC:15V 4A<br />
Weight..........................................................................................................................155.2 oz (4400g)<br />
Dimensions (H × W × D).....................................................4.9 × 31.2 × 5.3 in (12.5 × 79.4 × 13.4 cm)<br />
Specifications are subject to change and improvement without notice. Actual product may vary from the<br />
images found in this document.<br />
Additional Info<br />
13
FCC Information<br />
This equipment has been tested and found to comply with the limits for a Class B digital device, pursuant<br />
to Part 15 of the FCC Rules. These limits are designed to provide reasonable protection against harmful<br />
interference in a residential installation. This equipment generates, uses and can radiate radio frequency<br />
energy and, if not installed and used in accordance with the instructions, may cause harmful interference<br />
to radio communications. However, there is no guarantee that interference will not occur in a particular<br />
installation. If this equipment does cause harmful interference to radio or television reception, which can<br />
be determined by turning the equipment off and on, the user is encouraged to try to correct the interference<br />
by one or more of the following measures:<br />
• Reorient or relocate the receiving antenna.<br />
• Increase the separation between the equipment and receiver.<br />
• Connect the equipment into an outlet on a circuit different from that to which the receiver is connected.<br />
• Consult the dealer or an experienced radio/TV technician for help.<br />
Changes or modifications not expressly approved by Ignition L.P. may cause interference and void the<br />
user’s authority to operate the equipment.<br />
This device complies with Part 15 of the FCC Rules. Operation is subject to the following two conditions:<br />
(1) This device may not cause harmful interference, and (2) this device must accept any interference<br />
received, including interference that may cause undesired operation.<br />
Product<br />
Model 40-294<br />
Responsible<br />
Party<br />
32” 100W Soundbar with Dock for<br />
iPod or iPhone<br />
Ignition L.P.,<br />
3102 Maple Ave Suite 450<br />
Dallas, TX 75201<br />
Phone 866-315-0426<br />
Additional Info<br />
Limited Warranty<br />
Ignition L.P. warrants this product against defects in materials and workmanship under normal use by<br />
the original purchaser for one (1) year after the date of purchase. IGNITION L.P. MAKES NO OTHER<br />
EXPRESS WARRANTIES.<br />
This warranty does not cover: (a) damage or failure caused by or attributable to abuse, misuse, failure to<br />
follow instructions, improper installation or maintenance, alteration, accident, Acts of God (such as floods<br />
or lightning), or excess voltage or current; (b) improper or incorrectly performed repairs by persons who<br />
are not a Ignition L.P. Authorized Service Facility; (c) consumables such as fuses or batteries; (d) ordinary<br />
wear and tear or cosmetic damage; (e) transportation, shipping or insurance costs; (f) costs of product<br />
removal, installation, set-up service, adjustment or reinstallation; and (g) claims by persons other than the<br />
original purchaser.<br />
Should a problem occur that is covered by this warranty, take the product and the sales receipt as proof<br />
of purchase date to the place of purchase in the U.S. Ignition L.P. will, at its option, unless otherwise<br />
provided by law: (a) repair the product without charge for parts and labor; (b) replace the product with<br />
the same or a comparable product; or (c) refund the purchase price. All replaced parts and products, and<br />
products on which a refund is made, become the property of Ignition L.P. New or reconditioned parts and<br />
products may be used in the performance of warranty service. Repaired or replaced parts and products<br />
are warranted for the remainder of the original warranty period. You will be charged for repair or replacement<br />
of the product made after the expiration of the warranty period.<br />
IGNITION L.P. EXPRESSLY DISCLAIMS ALL WARRANTIES AND CONDITIONS NOT STATED IN THIS<br />
LIMITED WARRANTY. ANY IMPLIED WARRANTIES THAT MAY BE IMPOSED BY LAW, INCLUDING<br />
THE IMPLIED WARRANTY OF MERCHANTABILITY AND, IF APPLICABLE, THE IMPLIED WARRANTY<br />
14
OF FITNESS FOR A PARTICULAR PURPOSE, SHALL EXPIRE ON THE EXPIRATION OF THE STATED<br />
WARRANTY PERIOD.<br />
EXCEPT AS DESCRIBED ABOVE, IGNITION L.P. SHALL HAVE NO LIABILITY OR RESPONSIBILITY TO<br />
THE PURCHASER OF THE PRODUCT OR ANY OTHER PERSON OR ENTITY WITH RESPECT TO ANY<br />
LIABILITY, LOSS OR DAMAGE CAUSED DIRECTLY OR INDIRECTLY BY USE OR PERFORMANCE OF<br />
THE PRODUCT OR ARISING OUT OF ANY BREACH OF THIS WARRANTY,<br />
INCLUDING, BUT NOT LIMITED TO, ANY DAMAGES RESULTING FROM INCONVENIENCE AND ANY<br />
LOSS OF TIME, DATA, PROPERTY, REVENUE, OR PROFIT AND ANY INDIRECT, SPECIAL, INCIDENTAL,<br />
OR CONSEQUENTIAL DAMAGES, EVEN IF IGNITION L.P. HAS BEEN ADVISED OF THE POSSIBILITY OF<br />
SUCH DAMAGES.<br />
Some States do not allow limitations on how long an implied warranty lasts or the exclusion or limitation<br />
of incidental or consequential damages, so the above limitations or exclusions may not apply to you.<br />
This warranty gives you specific legal rights, and you may also have other rights which vary from State to<br />
State. You may contact Ignition L.P. at:<br />
Ignition L.P., 3102 Maple Ave. Suite 450, Dallas, TX 75201 02/09<br />
For product support, call 1-866-315-0426<br />
Additional Info<br />
15
Protect the environment by recycling used electronics. Go to<br />
E-CyclingCentral.com to find an electronic recycling center near you.<br />
Get more from your audio and video equipment. See<br />
what you’ve been missing. With Auvio, you control the<br />
experience.<br />
Auvio was established by a group of technophiles to<br />
provide high quality audio and video products without<br />
the high sticker price. The Auvio philosophy is for you<br />
to experience audio and video as it was intended to be:<br />
pure and distortion free.<br />
We know electronics can be intimidating. Auvio simplifies<br />
your experience by providing the right products,<br />
with the right specs, to work with your equipment.<br />
Be confident about your purchase: your new Auvio product<br />
incorporates the latest technology, is built to the highest<br />
quality standards, and reduces environmental impact by<br />
complying with RoHS environmental restrictions.<br />
© 2010. Ignition L.P. All rights reserved. Auvio is a trademark used by Ignition L.P.<br />
Package and user’s guide are recyclable. User’s guide contains recycled material.<br />
iPod is a trademark of Apple Inc., registered in the U.S. and other countries.<br />
iPhone is a trademark of Apple Inc.<br />
Printed<br />
in China<br />
03A10<br />
40-294