VariOS Tips - Roland Scandinavia a/s
VariOS Tips - Roland Scandinavia a/s
VariOS Tips - Roland Scandinavia a/s
Create successful ePaper yourself
Turn your PDF publications into a flip-book with our unique Google optimized e-Paper software.
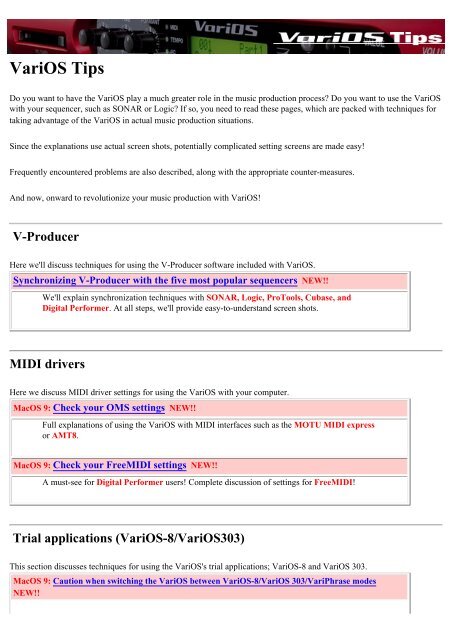
<strong>VariOS</strong> <strong>Tips</strong><br />
Do you want to have the <strong>VariOS</strong> play a much greater role in the music production process? Do you want to use the <strong>VariOS</strong><br />
with your sequencer, such as SONAR or Logic? If so, you need to read these pages, which are packed with techniques for<br />
taking advantage of the <strong>VariOS</strong> in actual music production situations.<br />
Since the explanations use actual screen shots, potentially complicated setting screens are made easy!<br />
Frequently encountered problems are also described, along with the appropriate counter-measures.<br />
And now, onward to revolutionize your music production with <strong>VariOS</strong>!<br />
V-Producer<br />
Here we'll discuss techniques for using the V-Producer software included with <strong>VariOS</strong>.<br />
Synchronizing V-Producer with the five most popular sequencers NEW!!<br />
We'll explain synchronization techniques with SONAR, Logic, ProTools, Cubase, and<br />
Digital Performer. At all steps, we'll provide easy-to-understand screen shots.<br />
MIDI drivers<br />
Here we discuss MIDI driver settings for using the <strong>VariOS</strong> with your computer.<br />
MacOS 9: Check your OMS settings NEW!!<br />
Full explanations of using the <strong>VariOS</strong> with MIDI interfaces such as the MOTU MIDI express<br />
or AMT8.<br />
MacOS 9: Check your FreeMIDI settings NEW!!<br />
A must-see for Digital Performer users! Complete discussion of settings for FreeMIDI!<br />
Trial applications (<strong>VariOS</strong>-8/<strong>VariOS</strong>303)<br />
This section discusses techniques for using the <strong>VariOS</strong>'s trial applications; <strong>VariOS</strong>-8 and <strong>VariOS</strong> 303.<br />
MacOS 9: Caution when switching the <strong>VariOS</strong> between <strong>VariOS</strong>-8/<strong>VariOS</strong> 303/VariPhrase modes<br />
NEW!!
When you turn the power of the <strong>VariOS</strong> on/off to switch the <strong>VariOS</strong> program, MIDI<br />
communication between the <strong>VariOS</strong> and your application may fail. If this occurs, the problem<br />
usually lies with OMS.<br />
MIDI settings when using <strong>VariOS</strong>-8/303 with your sequencer NEW!!<br />
Settings when using <strong>VariOS</strong>-8/303 with a sequencer such as SONAR or Logic. Prevent<br />
doubled notes!<br />
Synchronizing <strong>VariOS</strong>303 to the tempo of your sequencer (coming soon)<br />
A thorough discussion of synchronizing the <strong>VariOS</strong> 303 step sequencer to your sequencer<br />
software such as SONAR or Logic!<br />
Synchronizing <strong>VariOS</strong>-8 to the tempo of your sequencer (coming soon)<br />
Everything you need to know about synchronizing the <strong>VariOS</strong>-8 arpeggiator to your sequencer<br />
software!<br />
Recording <strong>VariOS</strong>-8/303 controller knob movements in your sequencer (coming soon)<br />
This provides a full explanation of how to record <strong>VariOS</strong>-8/303 controller knob movements in<br />
your sequencer (e.g., SONAR or Logic).<br />
Controlling <strong>VariOS</strong>-8/303 from your MIDI controller (coming soon)<br />
This provides tips for controlling <strong>VariOS</strong>-8/303 from your MIDI controller (we'll use the<br />
Edirol PCR series as an example).
Synchronizing V-Producer with the five most popular synthesizers<br />
V-Producer can use MIDI Clock or MTC (MIDI Time Code) to synchronize with a variety of other software.<br />
If you want to synchronize V-Producer to a MIDI sequencer (SONAR,<br />
ProTools, Logic, Cubase, Digital, Performer, etc.) installed in the same<br />
computer, using MIDI Clock for synchronization is the simplest, so it is the<br />
recommended method. When synchronizing with MIDI Clock, V-Producer<br />
will play according to the tempo of the master sequencer program.<br />
If you want to synchronize with a MIDI sequencer that is running on the<br />
same computer, select the MIDI device as “<strong>Roland</strong> <strong>VariOS</strong> Sync” (the<br />
dedicated synchronization port for the <strong>VariOS</strong>).<br />
Here we will describe settings for some typical MIDI sequencers.<br />
●<br />
V-Producer synchronization settings (slave)<br />
From "<strong>Roland</strong> <strong>VariOS</strong> Sync," make settings so that MIDI Clock will be received.<br />
●<br />
Synchronization settings for your sequencer software (Master)<br />
Set "<strong>Roland</strong> <strong>VariOS</strong> Sync" so that MIDI Clock will be transmitted.<br />
❍ SONAR<br />
❍ Logic Audio<br />
❍ ProTools<br />
❍ Cubase VST<br />
❍ Digital Performer
V-Producer synchronization settings<br />
Make the following settings so that V-Producer will operate (as a slave) according to the MIDI clock of your MIDI sequencer.<br />
* If you are using Mac OS 9.x, you should first check the OMS settings as described in "OMS settings."<br />
1. Choose Option - MIDI Sync.<br />
2. In the Sync Mode dialog box, select "<strong>Roland</strong> <strong>VariOS</strong> Sync" for "IN" under Sync IN.<br />
3. Set the Type of sync field to “MIDI Clock.”
* You can also switch the Sync mode by using the Sync buttons in the locator.<br />
4. Click [OK]. V-Producer will now synchronize to the playback of the master program.<br />
* If V-Producer's loop mode is on, V-Producer will give priority to its own looping rather than to the playback location of the master<br />
MIDI sequencer.<br />
* If Sync mode is [MIDI], you cannot use the controls of the locator section to start playback or control the tempo. If you want to<br />
control playback from the locator, set the Sync mode to [INT].<br />
Most sequencers do not re-transmit playback position data at the beginning of a loop. Thus, if your master sequencer is set to loop the<br />
playback, V-Producer will ignore the looping of the sequencer, and will simply continue playing as it had been. To avoid this<br />
problem, set V-Producer to the same loop region as the loop region in your master sequencer, and turn on loop mode.<br />
Next, make synchronization settings for your MIDI sequencer.
OMS settings for using the <strong>VariOS</strong> with Mac OS 9.x<br />
If you will be using the <strong>VariOS</strong> on Mac OS 9.x with a MIDI interface such as AMT8 or MIDI EXPRESS, make OMS settings as<br />
follows.<br />
* Most problems that occur when using the <strong>VariOS</strong> on Mac OS 9.x are due to incorrect OMS settings. Please re-create your<br />
OMS settings once again.<br />
The <strong>VariOS</strong> does not work correctly<br />
Your MIDI interface (e.g., AMT8 or MIDI EXPRESS) has stopped working<br />
Your software such as Logic or Pro Tools has stop working correctly<br />
You can't use V-Producer simultaneously with software such as Logic or Pro Tools<br />
1. Install OMS. (If you have already installed OMS, proceed to step 2.)<br />
On the <strong>VariOS</strong> CD-ROM, navigate to the English - (for OS 9 )- Driver - OMS2.3.8 folder, and double-click<br />
"Install OMS 2.3.8." to perform the installation.<br />
* In this step you should install the OMS driver for the MIDI interface you are using (e.g., AMT8 or<br />
MIDI EXPRESS). For details, refer to the owner's manual of your MIDI interface.<br />
2. Install the <strong>VariOS</strong> OMS driver.<br />
On the <strong>VariOS</strong> CD-ROM, navigate to the English - (for OS 9 )- Driver -<strong>VariOS</strong> OMS Driver-E folder, and<br />
double-click "<strong>VariOS</strong> OMS Driver-E Installer" to perform the installation.<br />
3. Connect all your MIDI equipment (including the <strong>VariOS</strong>) to your Mac, and turn on the power.<br />
4. Double-click OMS Setup.<br />
Within the location (hard disk) to which you installed OMS, go to the Opcode - OMS Applications folder, and<br />
double-click OMS Setup.<br />
5. Select the File menu and click “New Studio Setup.”
6. In the “Create a New Studio Setup” dialog box, click [OK].<br />
7. In the OMS Driver Search dialog box, click [Search] without checking the check box.<br />
8. Make sure that the OMS Driver Setup dialog box correctly indicates <strong>VariOS</strong> USB IF.<br />
Only the MIDI devices connected directly to the Macintosh are displayed here. Verify that your device(s) are<br />
displayed correctly, and click [OK].<br />
* As an example here, we will show how to connect the "MIDI Express XT" MIDI interface.
9. The OMS MIDI Device Setup window will appear<br />
Scroll the screen, check all items, and click [OK].<br />
10. In the screen for saving the studio setup, click [Save] to save the setup.
11. Assign the following names to each port of the <strong>VariOS</strong>.<br />
Port name displayed Assign the following port name Function<br />
Port1 <strong>Roland</strong> <strong>VariOS</strong> MIDI Port for the <strong>VariOS</strong> sound module section<br />
Port2 <strong>Roland</strong> <strong>VariOS</strong> External MIDI Port for the <strong>VariOS</strong> rear panel MIDI connector<br />
DX7 II <strong>Roland</strong> <strong>VariOS</strong> Sync Macintosh internal synchronization (sync) port<br />
12. [Important] Enable "Use MIDI in the background."
From the Edit menu, choose OMS MIDI Setup. In the dialog box that appears, check [Use MIDI in the<br />
background], and click [OK].<br />
* Unless you make these settings, you will not be able to use V-Producer simultaneously with software<br />
such as Logic and Pro Tools.<br />
13. From the File menu, choose Make Current.<br />
If you are unable to select Make Current, it has already been applied, and you may continue to the next step.<br />
14. From the File menu choose Quit to exit OMS Setup.<br />
A dialog box will suggest that you save, so click [Save]. Basic settings for OMS are now completed.
SONAR synchronization settings<br />
First make synchronization settings for V-Producer.<br />
* The explanation in this document uses SONAR 2.0. Please be aware that some screens and menu names may differ in other<br />
versions.<br />
* Depending on the MIDI interface you are using, you may be unable to hear the sound from the <strong>VariOS</strong> if you first start<br />
SONAR 2.0 and then start V-Producer. If this occurs, start V-Producer first, and then start SONAR 2.0.<br />
1. Choose Options - MIDI Devices.<br />
2. In the MIDI Device dialog box, choose “<strong>Roland</strong> <strong>VariOS</strong> Sync” in the Output Devices field.<br />
At this time, make a note of the port number for <strong>Roland</strong> <strong>VariOS</strong> Sync.<br />
The top MIDI device that is selected in the list of output devices is assigned to MIDI output port 1, and the<br />
next MIDI device is assigned to MIDI output port 2, and so on.<br />
3. Click [OK].<br />
4. Choose Options - Project.<br />
5. In the Project Options dialog box, click the [MIDI Out] tab.
Set the “Send MIDI Sync” fields as shown below.<br />
* Set the “Locate Delay for SPP Recipient” in the range of 30Ð40.<br />
* Set the MIDI output port to the <strong>Roland</strong> <strong>VariOS</strong> Sync MIDI port number you noted in step 2.<br />
6. Click [OK].
Logic synchronization settings<br />
First make synchronization settings for V-Producer.<br />
* If you are using Mac OS 9.x, you should first check the OMS settings as described in "OMS settings."<br />
* The explanation in this document is for Logic Audio 6.0. Please be aware that differences in the software version may<br />
mean that the windows or menu items may be slightly different.<br />
* [Important] If you are using Mac OS 9.x, check "Use OMS if available" in [Options] - [Preferences] - [MIDI Interface<br />
Communication...].<br />
1. Choose [Options] - [Song Settings] - [Synchronization Settings...].<br />
* On the Mac OS X version, this will be [File] - [Song Settings] - [Synchronization Settings...].<br />
2. Click the [MIDI]tab.<br />
Check the “Transmit MIDI Clock” option, and choose “<strong>Roland</strong> <strong>VariOS</strong> Sync” as the output destination.<br />
Uncheck “Allow Song Position Pointer while playing.”
3. Click the [General] tab, and uncheck “Auto enable external Sync.”<br />
* [NOTE] MIDI Clock loop happened inside Logic may freeze the programs if you do not make this<br />
setting.
4. Close the dialog box.<br />
If you are using Mac OS 9.x, and hang-ups (MIDI Clock loops) still occur even though you have made<br />
the above setting, try making the following setting.<br />
1. Choose [Options] - [Preferences] - [OMS Preferences] - [Input Mapping...].<br />
2. Uncheck the “Connect all Real OMS Input Instruments with Logic” check box.<br />
Then choose "Input connection setting" only for the MIDI port used for input to Logic (e.g.,<br />
the port connected to the MIDI keyboard you use for input). However, do not select "<strong>Roland</strong><br />
<strong>VariOS</strong> Sync" for "Input connection setting."
3. Close the dialog box.
ProTools synchronization settings<br />
First make synchronization settings for V-Producer.<br />
* If you are using Mac OS 9.x, you should first check the OMS settings as described in "OMS settings."<br />
* The explanation in this document uses Pro Tools LE 5.0.1 for MacOS. Please be aware that some screens and menu<br />
names may differ in other versions.<br />
* [NOTE]If you are running ProTools and V-Producer on the same computer and synchronizing them, you must<br />
first start up ProTools and then V-Producer. If an application that uses OMS (such as V-Producer) is already<br />
running, ProTools may fail to start up.<br />
1. Choose MIDI - MIDI Beat clock.<br />
2. Check the “Enable MIDI Beat Clock” and “<strong>Roland</strong> <strong>VariOS</strong> Sync” check boxes.<br />
3. Click [OK].
Cubase VST synchronization settings<br />
First make synchronization settings for V-Producer.<br />
* If you are using Mac OS 9.x, you should first check the OMS settings as described in "OMS settings."<br />
* The explanation in this document uses Cubase VST 5.0 for MacOS. Please be aware that some screens and menu names<br />
may differ in other versions.<br />
* [Important] If you are using Mac OS 9.x, make settings so that Cubase will use OMS.<br />
Go to Options - MIDI Setup - System, and change the OMS Compatibility setting from “No OMS” to “IN & OUT.” Then<br />
re-start Cubase.<br />
1. Choose Options - Synchronization.<br />
2. In the Sync Out area of the Synchronization dialog box, select “<strong>Roland</strong> <strong>VariOS</strong> Sync” for the MIDI Clock field, and turn<br />
it “On” as shown below.<br />
3. Click [OK].
Digital Performer synchronization settings<br />
* The explanation in this document uses Digital Performer 3.0. Please be aware that some screens and menu names may differ in<br />
other versions.<br />
FreeMIDI settings<br />
1. First, make Free MIDI settings.<br />
V-Producer synchronization settings<br />
2. Select FreeMIDI as the MIDI driver that V-Producer will use.<br />
From V-Producer' [Option] menu, choose “MIDI Settings...”<br />
In the FreeMIDI MIDI Settings dialog box, set MIDI Driver to “FreeMIDI Driver.”
Click [OK] to close the FreeMIDI MIDI Settings dialog box.<br />
3. Next, make settings so that V-Producer will synchronize to the MIDI clock data transmitted from Digital Performer.<br />
From V-Producer' [Option] menu, choose “MIDI Sync...”<br />
In the Sync Mode dialog box, set the Sync IN “IN” field to “<strong>Roland</strong> <strong>VariOS</strong> Sync” as shown below.<br />
In the Sync IN “Type of sync” field, select “MIDI Clock.”<br />
Click [OK] to close the Sync Mode dialog box.<br />
4. From V-Producer' [Option] menu, choose “MIDI Settings...”<br />
In the FreeMIDI MIDI Settings dialog box, uncheck the “MIDI Clock” box.<br />
* [NOTE] Step 4 is a special setting used when you want to synchronize V-Producer and Digital Performer. If you<br />
fail to uncheck this box, V-Producer will play at double speed when synchronized. If you want to play V-Producer<br />
in Internal Mode, check this box once again.
Click [OK] to close the FreeMIDI MIDI Settings dialog box.<br />
Digital Performer settings<br />
* The explanation in this document uses Digital Performer 3.0. Please be aware that some screens and menu names may differ in<br />
other versions.<br />
5. From Digital Performer' [Basics] menu, choose “Transmit Sync...”<br />
In the Transmit dialog box, set the “Transmit beat clocks via port(s)” field to “<strong>VariOS</strong> Port.”
Click [OK] to close the Transmit dialog box.
Settings for using the <strong>VariOS</strong> with FreeMIDI<br />
You can use the <strong>VariOS</strong> with Mark of the Unicorn Corporation's FreeMIDI (*1). In order to use it, you will need to<br />
separately obtain FreeMIDI Version 1.35 or later.<br />
*1: FreeMIDI (Developer: Mark of the Unicorn, Inc.)<br />
FreeMIDI is MIDI driver software that passes data between the computer and MIDI sound modules.<br />
Installing the <strong>VariOS</strong> driver for FreeMIDI<br />
* The <strong>VariOS</strong> driver included on the disc is provided as an additional module that allows the <strong>VariOS</strong> to be used with<br />
FreeMIDI. In order to use it, FreeMIDI must already be installed on the startup hard disk.<br />
1. Install the <strong>VariOS</strong> driver for FreeMIDI.<br />
In the <strong>VariOS</strong> CD-ROM, open the folder English - (for OS 9 )- Driver - <strong>VariOS</strong> FreeMIDI Driver-E, and<br />
double-click the "FM Driver-E Installer" icon to install the software.<br />
FreeMIDI settings<br />
1. Use a USB cable to connect the <strong>VariOS</strong> and your computer.<br />
2. Turn on the power of the <strong>VariOS</strong> and all MIDI equipment connected to your Mac.<br />
3. Open the "FreeMIDI Applications" folder, and double-click the "FreeMIDI Setup" icon.<br />
4. Select "FreeMIDI Preferences" from the File menu.<br />
* The first time FreeMIDI is started up, a "Welcome to FreeMIDI!" dialog box will appear. Click<br />
[Continue].
5. In the "FreeMIDI Preferences" dialog box, check "<strong>VariOS</strong> Port" which is located below <strong>VariOS</strong> Driver in MIDI<br />
Configuration, and click [OK]. If you have connected MIDI equipment other than the <strong>VariOS</strong>, check it as well.<br />
* If the dialog box does not show "<strong>VariOS</strong> Driver," check whether the <strong>VariOS</strong> is connected correctly, and<br />
start up FreeMIDI Setup once again.<br />
6. The About Quick Setup dialog box will appear. Click [Continue].<br />
* If the dialog will not appear, select "Quick Setup" from the "Configuration" menu.<br />
7. In the dialog box that appears, select the MIDI devices connected to the various ports of the <strong>VariOS</strong>.<br />
Manufacturer:<br />
Select "<strong>Roland</strong>."<br />
Model:
Select "Other."<br />
Studio Location:<br />
Select "<strong>VariOS</strong>, <strong>VariOS</strong> Port."<br />
8. Select "1" under "Cable," and click [ >>Add>> ].<br />
9. Select "2" under "Cable," and click [ >>Add>> ].<br />
10. Select "3" under "Cable," and click [ >>Add>> ]. When you've completed this, click [Done].<br />
* If, in addition to the <strong>VariOS</strong>, you have other MIDI devices connected, you should use the same<br />
procedure to "Add" them as well.
A setting window will appear.<br />
11. Each device has the following function.<br />
Port name displayed Assign the following port name<br />
Function
Device 1 <strong>Roland</strong> <strong>VariOS</strong> MIDI Port for the <strong>VariOS</strong> sound generating section<br />
Device 2<br />
<strong>Roland</strong> <strong>VariOS</strong> External MIDI Port for the <strong>VariOS</strong> rear panel MIDI connector<br />
Device 3 <strong>Roland</strong> <strong>VariOS</strong> Sync Macintosh internal sync port<br />
Double-click "Device" for "<strong>VariOS</strong>." The "Free MIDI Device Specification" window shown below will appear. Make the<br />
following settings.<br />
Name:<br />
Assign a name as listed above.<br />
Device ID: Enter "17."<br />
Transmit Channels: Check all of them (1-16).<br />
Receive Channels: Check all of them (1-16).<br />
12. From the File menu, select [Save], and save your settings<br />
This completes the driver settings.
Mac OS 9: Caution when switching the <strong>VariOS</strong> between <strong>VariOS</strong>-8, <strong>VariOS</strong><br />
303, and VariPhrase modes<br />
[Important] If you turn the power of the <strong>VariOS</strong> off, then on again, you must also close (and re-open) all OMS<br />
applications.<br />
If even one OMS application is running (such as V-Producer, <strong>VariOS</strong>-8/<strong>VariOS</strong> 303 Controller, or OMS Setup), you will<br />
be unable to use the <strong>VariOS</strong> driver no matter how many times you have closed and restarted a given application.<br />
Be aware that if you turn the power of the <strong>VariOS</strong> on/off while an application is running, the <strong>VariOS</strong>'s MIDI port may still<br />
be visible from the application, but it will actually be unusable.
Using <strong>VariOS</strong>-8/303 with your sequencer<br />
* [Important] When using <strong>VariOS</strong>-8/303 with a sequencer such as SONAR or Logic, you must start up your system<br />
in the following order:<br />
(1) Power up the <strong>VariOS</strong><br />
(2) Start up <strong>VariOS</strong>-8/303 Controller<br />
(3) Start up your sequencer (e.g., Logic)<br />
If you power up the <strong>VariOS</strong> after starting up your sequencer (e.g., Logic), the <strong>VariOS</strong> USB MIDI driver may not be<br />
recognized by your sequencer.<br />
<strong>VariOS</strong>-8/303 Controller settings<br />
If you want to use <strong>VariOS</strong>-8/303 Controller simultaneously with a sequencer such as SONAR or Logic, set the <strong>VariOS</strong>-<br />
8/303 Controller setting MIDI through OUT to “None.”<br />
* [Important] If you fail to make this setting, <strong>VariOS</strong>-8/303 will sound notes in duplicate when you play the<br />
keyboard.<br />
1. From the menu, select [Setup]-[Setup MIDI Devices].<br />
Set the [Through] parameter [Output] to “None.”
If you are using <strong>VariOS</strong>-8/303 Controller by itself, set the [Through] parameter [Output] to “<strong>Roland</strong> <strong>VariOS</strong><br />
MIDI.”


