32 026 189 - SaabDocs.com
32 026 189 - SaabDocs.com
32 026 189 - SaabDocs.com

Create successful ePaper yourself
Turn your PDF publications into a flip-book with our unique Google optimized e-Paper software.
SCdefault<br />
7900 Installation instructions<br />
SITdefault<br />
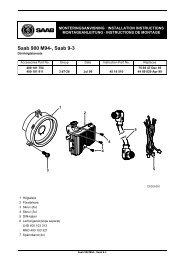
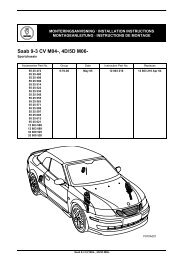
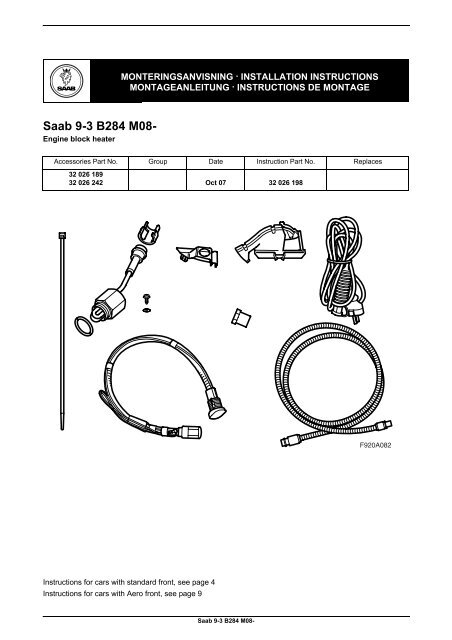
Saab 9-3 B284 M08-<br />
Engine block heater<br />
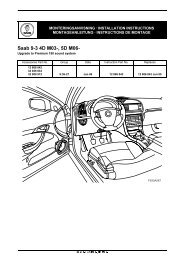
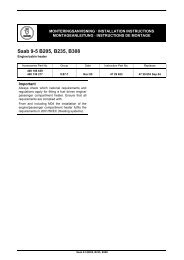
MONTERINGSANVISNING · INSTALLATION INSTRUCTIONS<br />
MONTAGEANLEITUNG · INSTRUCTIONS DE MONTAGE<br />
Accessories Part No. Group Date Instruction Part No. Replaces<br />
<strong>32</strong> <strong>026</strong> <strong>189</strong><br />
<strong>32</strong> <strong>026</strong> 242 Oct 07 <strong>32</strong> <strong>026</strong> 198<br />
F920A082<br />
Instructions for cars with standard front, see page 4<br />
Instructions for cars with Aero front, see page 9<br />
Saab 9-3 B284 M08-
2 <strong>32</strong> <strong>026</strong> 198<br />
9<br />
1<br />
3<br />
2<br />
11<br />
12<br />
8 7<br />
10<br />
4<br />
6<br />
5<br />
F920A083<br />
Cars with standard front<br />
1 Heating element<br />
2 Washer<br />
3 Extension cable<br />
4 Connecting cable with ground cable<br />
5 Connecting cable, extension piece<br />
6 Plastic nut<br />
7 Inner bracket<br />
8 Outer bracket<br />
9 Retaining clip (x2)<br />
10 Cable tie<br />
11 Screw<br />
12 Serrated washer<br />
Saab 9-3 B284 M08-
<strong>32</strong> <strong>026</strong> 198 3<br />
3<br />
9<br />
8<br />
10<br />
7<br />
2<br />
1<br />
11<br />
6<br />
4<br />
5<br />
F920A065<br />
Cars with Aero front<br />
1 Heating element<br />
2 Washer<br />
3 Extension cable<br />
4 Connecting cable with ground cable<br />
5 Connecting cable, extension piece<br />
6 Holder<br />
7 Screw (x2)<br />
8 Retaining clip<br />
9 Cable tie<br />
10 Screw<br />
11 Serrated washer<br />
Saab 9-3 B284 M08-
4 <strong>32</strong> <strong>026</strong> 198<br />
Cars with standard front<br />
A A A A<br />
A<br />
A<br />
D<br />
D<br />
D<br />
D<br />
A<br />
A<br />
A<br />
D<br />
B<br />
D<br />
C<br />
F920A073<br />
1 Remove the expansion tank cap.<br />
WARNING<br />
The cooling system is under pressure. Hot coolant<br />
and steam can be released.<br />
- Therefore, open the cap slowly to release the<br />
pressure.<br />
- Carelessness can cause eye and burn injuries<br />
6 Remove the left-hand front wheel.<br />
7 Remove the left-hand front wing liner (D).<br />
8 Remove the bumper shell.<br />
2 Remove the bumper's upper screws (A).<br />
3 Raise the car.<br />
4 Remove the bumper's lower screws (A), unplug<br />
the bumper's connector (B) and remove it from<br />
the holder (C) on the spoiler shield.<br />
Cars with headlamp washers: Unhook the<br />
hose from the spoiler shield.<br />
5 Place a receptacle under the engine, open the<br />
drain plug on the bottom of the coolant pump<br />
and drain the coolant. Close the drain plug.<br />
WARNING<br />
Exercise caution if the engine is hot. Coolant is hot<br />
and there is also the risk of burns from the exhaust<br />
manifold.<br />
Saab 9-3 B284 M08-
<strong>32</strong> <strong>026</strong> 198 5<br />
A<br />
C<br />
B<br />
F<br />
E<br />
D<br />
C<br />
F920A074<br />
9 Fit the bracket (A) to the bumper. The bracket<br />
should snap in.<br />
10 Route the connecting cable (B) through the<br />
bracket and fit the nut (C).<br />
11 Turn the bumper over.<br />
12 Fit the inner bracket (D), check that it locks, and<br />
fit the connecting cable (E) in the bracket.<br />
13 Tighten the nut (C) by hand.<br />
14 Undo the screw (F) for the fog light, route the<br />
connecting cable (E) under the fog light bracket.<br />
Refit the screw (F).<br />
Saab 9-3 B284 M08-
6 <strong>32</strong> <strong>026</strong> 198<br />
A<br />
B<br />
F920A084<br />
15 Lower the car.<br />
16 Guide one end of the extension cable down<br />
between the turbocharger and the front of the<br />
battery.<br />
17 Route the extension cable in the recess on the<br />
battery cover. Route the other end of the extension<br />
cable backwards and push it down by the<br />
brake pipes and further down on the rear of the<br />
gearbox.<br />
18 Secure the extension cable with cable ties in the<br />
battery cover (A) and the output on the duct (B).<br />
Adapt the attachment of the extension cable<br />
with regard to the length to the heating element.<br />
WARNING<br />
Make sure the cable does not rub against any<br />
sharp edges or hot surfaces. Damage caused by<br />
chafing and melting could cause a short circuit or<br />
even fire.<br />
Saab 9-3 B284 M08-
<strong>32</strong> <strong>026</strong> 198 7<br />
B<br />
C<br />
D<br />
A<br />
E<br />
E<br />
F920A085<br />
19 Raise the car.<br />
20 Remove the plug (A) from the engine block.<br />
21 Fit the heating element (B) with the washer.<br />
22 Tighten the heating element, use special tool,<br />
part no. 8996480.<br />
Tightening torque 100 Nm (75 lbf ft)<br />
23 Connect the extension cable (C) to the heating<br />
element, apply non-acidic Vaseline,<br />
part no. 30 15 286, or equivalent on the connecting<br />
cable O-ring and connect the cable to the<br />
heating element.<br />
24 Fit the retaining clip (D) over the connection. A<br />
click should be heard when the retaining clip is<br />
fitted correctly.<br />
25 Secure the extension cable with cable ties (E) to<br />
the steering gear.<br />
WARNING<br />
Make sure the cable does not rub against any<br />
sharp edges or hot surfaces. Damage caused by<br />
chafing and melting could cause a short circuit or<br />
even fire.<br />
WARNING<br />
It is essential to lubricate the connecting cable O-<br />
ring before it is connected and to ensure that all<br />
connections are pressed in firmly. A bad contact<br />
can cause overheating and fire.<br />
Saab 9-3 B284 M08-
8 <strong>32</strong> <strong>026</strong> 198<br />
E<br />
D<br />
E<br />
E<br />
E<br />
A<br />
C<br />
B<br />
E<br />
E<br />
F920A077<br />
26 Route the connecting cable through the hole<br />
(A).<br />
27 Fit the front bumper shell, fit the bumper's connector<br />
into the holder and plug in the connector.<br />
Cars with headlamp washers: Hook the hose<br />
to the spoiler shield.<br />
28 Apply non-acidic Vaseline, part no. 30 15 286, or<br />
equivalent on the connecting cable O-ring and<br />
connect the extension cable (B) to the branch<br />
connector/connecting cable.<br />
29 Fit the retaining clip (C) over the connection. A<br />
click should be heard when the retaining clip is<br />
fitted correctly.<br />
Fit any excess connecting cable in the bumper<br />
space and secure with cable ties.<br />
WARNING<br />
It is essential to lubricate the connecting cable O-<br />
ring before it is connected and to ensure that all<br />
connections are pressed in firmly. A bad contact<br />
can cause overheating and fire.<br />
30 Fit the ground cable to the grounding point (D)<br />
with the existing domed nut.<br />
31 Fit the front wing liner (E).<br />
<strong>32</strong> Fit the left-hand front wheel.<br />
33 Lower the car.<br />
34 Cars with headlamp washers: Check the function<br />
of the headlamp washers.<br />
35 Fill with coolant and fit the cap on the expansion<br />
tank. Check the system for leaks.<br />
36 Bleed the cooling system in the following way:<br />
WARNING<br />
The cooling system is under pressure. Hot coolant<br />
and steam can be released.<br />
- Therefore, open the cap slowly to release the<br />
pressure.<br />
- Carelessness can cause eye and burn injuries<br />
Note<br />
The A/C or ACC should be turned OFF.<br />
Fill the cooling system to the MAX level. Close<br />
the cap on the expansion tank, start the engine<br />
and run it to operating temperature at varying<br />
engine speeds.<br />
Make sure there is a continuous flow of coolant<br />
from the hose leading from the thermostat housing<br />
to the expansion tank.<br />
Run the engine until the thermostat opens.<br />
Carefully open the expansion tank cap and top<br />
up to the MAX level. Close the cap. Switch off<br />
the engine and if necessary top the coolant up<br />
to the MAX level.<br />
Saab 9-3 B284 M08-
<strong>32</strong> <strong>026</strong> 198 9<br />
Cars with Aero front<br />
A<br />
D<br />
C<br />
B<br />
F920A086<br />
1 Raise the car.<br />
2 Remove the spoiler shield (A), unplug the bumper<br />
connector and remove it from the holder on<br />
the spoiler shield.<br />
Cars with headlamp washers: Unhook the<br />
hose from the spoiler shield.<br />
3 Place a receptacle under the radiator. Connect<br />
a hose to the radiator (B) and drain the coolant.<br />
4 Lower the car.<br />
5 Remove the expansion tank cap (C).<br />
6 Remove the battery cover (D).<br />
7 Guide one end of the extension cable down<br />
between the turbocharger and the front of the<br />
battery.<br />
8 Route the extension cable between the battery<br />
and the turbocharger. Guide the other end of the<br />
extension cable backwards and push it down by<br />
the brake pipes and further down on the rear<br />
side of the gearbox.<br />
Saab 9-3 B284 M08-
10 <strong>32</strong> <strong>026</strong> 198<br />
B<br />
C<br />
D<br />
A<br />
E<br />
E<br />
F920A087<br />
9 Raise the car.<br />
10 Turn off the radiator cock.<br />
11 Remove the plug (A) from the engine block.<br />
12 Fit the heating element (B) with the washer.<br />
13 Tighten the heating element, use special tool,<br />
part no. 8996480.<br />
Tightening torque 100 Nm (75 lbf ft)<br />
14 Connect the extension cable (C) to the heating<br />
element.<br />
15 Fit the retaining clip (D).<br />
16 Secure the extension cable with cable ties (E) in<br />
the steering gear.<br />
WARNING<br />
Make sure the cable does not rub against any<br />
sharp edges or hot surfaces. Damage caused by<br />
chafing and melting could cause a short circuit or<br />
even fire.<br />
Saab 9-3 B284 M08-
<strong>32</strong> <strong>026</strong> 198 11<br />
A<br />
E<br />
B<br />
C,D<br />
C,D<br />
F920A088<br />
17 Saw away the grille using a jig saw in accordance<br />
with the marking (A).<br />
18 Align the holder in accordance with position (B),<br />
as far in towards the grille as possible to prevent<br />
the connector from protruding. The holder<br />
should fit into the bumper radius. Make the hole<br />
with an awl (C).<br />
19 Fit the connector plug in the holder, the arrow on<br />
the holder should point forward and the cover<br />
should open upward. Fit the holder with the<br />
screws (D).<br />
20 Detach the connector located on the structural<br />
member. Using a 3.5 mm bit, drill a hole in the<br />
structural member (E) for the ground cable.<br />
Important<br />
Drill the hole immediately next to the square hole.<br />
21 Scrape away the paint to make a good ground<br />
connection and secure the ground cable using<br />
the screw and serrated washer (E) (the serrated<br />
washer should be located between the ground<br />
cable terminal and the body). Apply thin anticorrosion<br />
protection.<br />
22 Plug in the connector located on the structural<br />
member.<br />
23 Plug the connecting cable into the extension<br />
cable.<br />
Saab 9-3 B284 M08-
12 <strong>32</strong> <strong>026</strong> 198<br />
A<br />
B<br />
F920A084<br />
24 Lower the car.<br />
25 Fit the battery cover.<br />
26 Secure the extension cable with cable ties (A) in<br />
the battery cover and at the output of the wiring<br />
harness duct (B).<br />
WARNING<br />
Make sure the cable does not rub against any<br />
sharp edges or hot surfaces. Damage caused by<br />
chafing and melting could cause a short circuit or<br />
even fire.<br />
27 Fill with coolant and fit the cap on the expansion<br />
tank. Check the system for leaks.<br />
28 Bleed the cooling system in the following way:<br />
WARNING<br />
The cooling system is under pressure. Hot coolant<br />
and steam can be released.<br />
- Therefore, open the cap slowly to release the<br />
pressure.<br />
- Carelessness can cause eye and burn injuries<br />
Note<br />
The A/C or ACC should be turned OFF.<br />
Fill the coolant system to the MAX level. Close<br />
the expansion tank cap. Start the engine and run<br />
at varying engine speeds until the radiator fan<br />
cuts in. Carefully open the expansion tank cap<br />
and top up to the MAX level. Close the cap.<br />
Switch off the engine and if necessary top the<br />
coolant up to the MAX level.<br />
Saab 9-3 B284 M08-
<strong>32</strong> <strong>026</strong> 198 13<br />
B<br />
A<br />
F920A089<br />
29 Raise the car.<br />
30 Fit any excess connecting cable (A) between<br />
the charge air hose and the plastic shield.<br />
Secure with cable ties.<br />
31 Lift up the spoiler shield, fit the bumper connector<br />
into the holder and plug in the connector. Fit<br />
the spoiler shield (B).<br />
Cars with headlamp washers: Hook the hose<br />
to the spoiler shield.<br />
<strong>32</strong> Lower the car.<br />
Saab 9-3 B284 M08-
14 <strong>32</strong> <strong>026</strong> 198<br />
User instructions<br />
• The extension cable must be made of oil-resistant<br />
rubber and approved for outdoor use with a<br />
cross-sectional area of at least 3x1.5 mm 2 .<br />
• The heater system may only be connected to a<br />
grounded socket.<br />
• Handle all cables with care. Pay particular attention<br />
to the risk of pinching between the bonnet<br />
and the body of the car and the risk of cuts on<br />
sharp metal <strong>com</strong>ponents.<br />
WARNING<br />
Check the ground connection between the connecting<br />
cable ground pin, the heater casing and<br />
the car body regularly to prevent electric shocks.<br />
• Inspect regularly the extension cable for damage<br />
or ageing. Damaged cables must be renewed<br />
immediately.<br />
Note<br />
The function of the heater will be at risk if:<br />
• there are impurities in the coolant<br />
• the coolant level is too low or if there is air in<br />
the system<br />
• there is ice slush in the system<br />
• radiator sealant is used<br />
Saab 9-3 B284 M08-