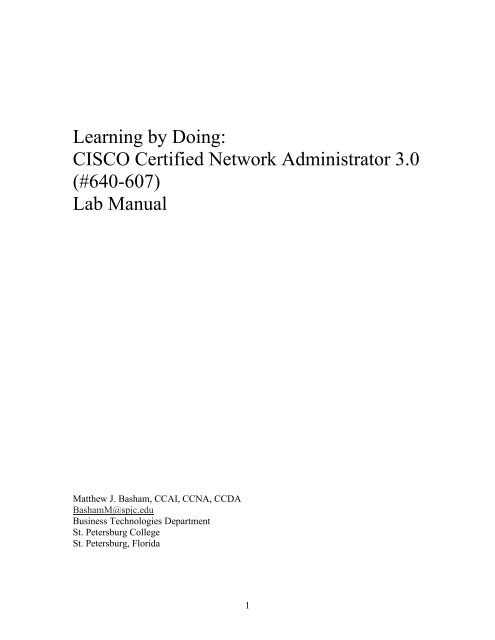
Learning by Doing: CISCO Certified Network ... - SCN Research
Learning by Doing: CISCO Certified Network ... - SCN Research
Learning by Doing: CISCO Certified Network ... - SCN Research

You also want an ePaper? Increase the reach of your titles
YUMPU automatically turns print PDFs into web optimized ePapers that Google loves.
<strong>Learning</strong> <strong>by</strong> <strong>Doing</strong>:<br />
<strong>CISCO</strong> <strong>Certified</strong> <strong>Network</strong> Administrator 3.0<br />
(#640-607)<br />
Lab Manual<br />
Matthew J. Basham, CCAI, CCNA, CCDA<br />
BashamM@spjc.edu<br />
Business Technologies Department<br />
St. Petersburg College<br />
St. Petersburg, Florida<br />
1
<strong>Learning</strong> <strong>by</strong> <strong>Doing</strong>:<br />
<strong>CISCO</strong> <strong>Certified</strong> <strong>Network</strong> Administrator 3.0 (#640-607)<br />
Lab Manual<br />
Matthew J. Basham<br />
Copyright ©2002 Prentice-Hall Press<br />
Published <strong>by</strong>:<br />
Prentice-Hall Press<br />
Tampa, Florida USA<br />
All rights reserved. No part of this book may be reproduced or transmitted in any form or<br />
<strong>by</strong> any means electronic or mechanical, including photocopying, recording, or <strong>by</strong> any<br />
information storage and retrieval system, without written permission from the publisher,<br />
except for the inclusion of brief quotations in a review.<br />
Printed in the United States of America 2 3 4 5 6 7 8 9 0<br />
This manuscript was supplied camera-ready <strong>by</strong> the author.<br />
ISBN: 1-12345-678-9<br />
Warning and Disclaimer<br />
This book is designed to provide information to prepare students for the <strong>CISCO</strong> #640-<br />
607 examination. Every effort has been made to make this book as complete and<br />
accurate as possible, but no warranty or fitness is implied.<br />
The information is provided on an as-is basic. The author and Prentice-Hall Press shall<br />
have neither liability nor responsibility to any person or entity with respect to any loss or<br />
damages arising from the information contained in this book or from the use of the<br />
programs that accompany it.<br />
This opinions expressed in this book belong to the author and are not necessarily those of<br />
Cisco Systems, Inc. or Prentice-Hall Press.<br />
Trademark Acknowledgements<br />
All terms mentioned in this book are known to be trademarks or service marks have been<br />
appropriately capitalized. Prentice-Hall Press or Cisco Systems, Inc., cannot attest to the<br />
accuracy of this information. Use of a term in this book should not be regarded as<br />
affecting the validity of any trademark or service mark.<br />
2
About the Author<br />
Matthew Basham is the Program Director Main Contact and Lead Instructor for the St.<br />
Petersburg College-<strong>CISCO</strong> Regional <strong>Network</strong>ing Academy in Clearwater, Florida. Mr.<br />
Basham has been employed (adjunct and full-time) with SPC since 1996. He has<br />
completed his CCAI (<strong>CISCO</strong> instructor), CCNA 2.0, and CCDA. Currently he is<br />
finishing the instructor CCNP 2.0 track. He holds an M.A.M.C. from the University of<br />
Florida and a B.A. from Oakland University (Rochester, Michigan). Mr. Basham has<br />
been working professionally in networking as a network administrator, technical writer,<br />
teacher, and consultant since 1993. He has been using computers since the 1970's and<br />
still owns his original Commodore 64. He has held certifications or trained students in<br />
Novell 3 and 4, NT 4.0 workstation, TCP/IP, NT 4.0 server, A+, <strong>Network</strong>+, COBOL,<br />
Fortran, Pascal, DOS, BASIC, and HTML. His hobbies include computer security,<br />
cyber-law, and anti-hacking techniques for network administrators and educators. In<br />
2002 he will be a panel member for a discussion of cybersecurity education in<br />
Washington D.C. and be attending a summer school session at Harvard Law School on<br />
Internet Law.<br />
Acknowledgements<br />
I would like to thank my wonderful textbook representative for the inspiration to collect<br />
my notes, handouts, and scribbles and turn them into this lab manual…Kristin<br />
Cunningham…without her this lab manual would still only be an “idea.”<br />
I would like to thank many people: my family, grandparents (rest in peace), Worrell<br />
family, Wolfe family, Jeanette LaBelle and family, Autumn, Krysta, Rachel (no<br />
particular order), Beth & the Bindle family (if you hadn’t turned me down I wouldn’t<br />
probably be writing this), Ronda Tranter (legal inspiration), Frank Ferrano (you’re<br />
right…we aren’t all dumb kids), Dr. Mary Ann Ferguson (for never giving up on me),<br />
Arturo David Vasquez, Converse family, the poker gang and their wives, Uncle Bill,<br />
Aunt Mary, cousin David, Jaime, Dave, Kent, Rich, Kyle, Ms. Minton, Julie and Lisa (for<br />
the ambition or revenge to do even better), all my Operation Paycheck students, and to all<br />
my students everywhere!<br />
3
Preface<br />
This manual was developed to prepare students for hands-on training to accompany<br />
classroom lectures on <strong>CISCO</strong> networking theory for the <strong>CISCO</strong> CCNA 3.0 (#640-607)<br />
examination. These labs are intended to supplement and enhance the Cisco <strong>Network</strong>ing<br />
Academy Program with additional information, explanations, and laboratory materials,<br />
not to replace them. If you are looking for a lot of theory, then you have got the wrong<br />
book.<br />
All labs and exercises contain four basic parts:<br />
1. An objective section giving a brief topic for exploration in the lab or exercise<br />
2. A tools and materials list<br />
3. Steps needed to complete the lab or exercise<br />
4. Supplemental lab or exercise challenge activities<br />
Some sections include background information if needed. Answers, where required, is<br />
included on the companion CD-ROM.<br />
Some of the labs contain “guest router names” that are borrowed from computer security<br />
history. I do this to spice up the labs a bit and give you a cross-reference and some<br />
history of computer security.<br />
4
Acknowledgements<br />
Preface<br />
Table of Contents<br />
iii<br />
iv<br />
v<br />
Part 1 <strong>Network</strong> Fundamentals 1<br />
Searching <strong>CISCO</strong> for CCNA test information 2<br />
DOS Lab 6<br />
Windows Utilities Lab 19<br />
Installing a NIC: Hardware 21<br />
Changing TCP/IP settings on Your Computer 22<br />
Paper Lab: ICONS for computer diagrams 26<br />
Paper Lab: Proper Cable for the Proper Job 34<br />
Peer-to-Peer <strong>Network</strong>ing/File and Print Sharing 41<br />
Small Single Hub <strong>Network</strong>s 45<br />
Small Multiple Hub <strong>Network</strong>s 47<br />
Paper Lab: Binary Numbering 49<br />
Paper Lab: Hexadecimal Numbering 59<br />
Paper Lab: OSI Model and Encapsulation 63<br />
Paper Lab: LAN Topologies 70<br />
Paper Lab: Ethernet Packet Structures 75<br />
Paper Lab: Broadcast and Collision Domains 81<br />
Paper Lab: Subnetting 90<br />
<strong>Network</strong> Design with Subnets 108<br />
Subnetting Example: John’s Brewhouse 110<br />
Intermediate DOS Lab: Troubleshooting Utilities 112<br />
DHCP Lab 116<br />
Free Protocol Inspector 120<br />
Using a Protocol Inspector 122<br />
TFTP/FTP Lab 125<br />
Paper Lab: <strong>Network</strong> Protocols and the OSI Model 128<br />
Telnet Lab 135<br />
Basic Remote Access Lab 139<br />
Using Hyperterminal 141<br />
Your Modem and You 150<br />
Part 2 Router Fundamentals 154<br />
An Overview of <strong>CISCO</strong> Routers and Switches 155<br />
Basic Router Commands 160<br />
Router Boot Sequence 168<br />
Basic Router Configuration 177<br />
Routing Protocols: RIP 181<br />
Basic Troubleshooting: Router-to-Router 188<br />
Loopback Interfaces 197<br />
Basic RIP with Protocol Inspector 203<br />
Router Telnet Lab 207<br />
Route Summarization with RIP 210<br />
5
Intermediate RIP with 3 Routers 216<br />
RIP Metrics and the Limitations of RIP 219<br />
Dynamic Host Configuration Protocol (DHCP) Lab 222<br />
Subnetting with DHCP 225<br />
Paper Lab: Variable Length Subnet Masking (VLSM) 227<br />
Static and Dynamic Routes with Discontiguous RIP <strong>Network</strong>s 230<br />
Overcoming Problems with Routing Loops 235<br />
Routing Protocols: RIP Version 2 and Redistribution with RIP 237<br />
Part 2 Command Review 240<br />
Whole Enchilada/Crazy Insano Lab #1 (WECIL): Routing 242<br />
Whole Enchilada/Crazy Insano Lab #2 (WECIL): Routing 244<br />
Troubleshooting scenarios for part 2 245<br />
Part 3 Switching 246<br />
Switch Maintenance 247<br />
Basic STP 252<br />
Basic STP with one router 256<br />
Intermediate STP 257<br />
Basic VLAN 262<br />
Basic VLAN with one router 264<br />
Intermediate VLAN’s 266<br />
Mixing it up: VLAN’s, STP, and RIP 267<br />
Subnetting Example: ABC Packaging Company 269<br />
Basic VTP 270<br />
Part 3 Command Review 273<br />
Whole Enchilada/Crazy Insano Lab #1 (WECIL): Switching 275<br />
Whole Enchilada/Crazy Insano Lab #2 (WECIL): Switching 275<br />
Whole Enchilada/Crazy Insano Lab #3 (WECIL): Switching 276<br />
Whole Enchilada/Crazy Insano Lab #4 (WECIL): Switching 277<br />
Whole Enchilada/Crazy Insano Lab #5 (WECIL): Switching 278<br />
Part 4 More on Routing 280<br />
Paper Lab: <strong>CISCO</strong> Hierarchical Model 281<br />
Protocol Deathmatch! Rip versus Ripv2 283<br />
Routing Protocols: IGRP 284<br />
Packet Structure of IGRP with Protocol Inspectors 288<br />
Intermediate IGRP: Metrics 292<br />
Redistribution of RIP and IGRP 299<br />
Routing Protocols: EIGRP 306<br />
Routing Protocols: OSPF 312<br />
Routing Protocols: BGP 317<br />
Paper Lab: Routing Protocol Categories 322<br />
Routing Protocols IPX with Dynamic Routing 325<br />
Routing Protocols IPX with IPX Static Routing 330<br />
Paper Lab: Wildcard Masks 335<br />
Paper Lab: Access Control Lists 337<br />
6
Basic Access Control Lists 342<br />
Extended Access Control Lists 347<br />
Named Access Control Lists 351<br />
Making a Protocol Inspector with ACL’s 354<br />
Firewall Basics using Reflexive ACL’s 359<br />
Part 4 Command Review 362<br />
Whole Enchilada/Crazy Insano Lab #1 (WECIL): IGRP/RIP 364<br />
Whole Enchilada/Crazy Insano Lab #2 (WECIL): IP/IPX 365<br />
Part 5 Wide Area <strong>Network</strong> Fundamentals 366<br />
Registering for your CCNA exam 367<br />
Auxiliary Port Configuration<br />
Remote Access Lab: Using a Modem with a Router (AUX) 368<br />
Serial Line Configuration<br />
Point-to-Point Protocol 371<br />
PPP with Authentication 376<br />
Remote Access DUN with PPP Encapsulation 387<br />
Setting up a Router to be a Frame Relay Switch 391<br />
Frame Relay with 2 Routers 393<br />
Frame Relay: Hub and Spoke with 3 routers 396<br />
Fully-Meshed Frame Relay with 3 Routers and Sub-interfaces 399<br />
Frame Relay Operation and Troubleshooting 405<br />
WIC’s and <strong>Network</strong> Module Plug-in Configuration<br />
Basic ISDN Configuration with BRI interface (MERGE) 412<br />
Basic ISDN Configuration with BRI interface (ADTRAN) 416<br />
ISDN Operation and Troubleshooting 420<br />
ISDN Configuration with Multiple Routers (ADTRAN) 446<br />
Frame Relay with ISDN Backup 451<br />
Homestretch<br />
Part 5 Command Review 454<br />
Whole Enchilada/Crazy Insano Lab #1 (WECIL) 456<br />
7
Part 1:<br />
<strong>Network</strong>ing Fundamentals<br />
1
Searching <strong>CISCO</strong> for CCNA Test information<br />
Objective:<br />
To learn how to find out the latest CCNA test information from the <strong>CISCO</strong> website.<br />
Tools and Materials:<br />
(1) PC with Internet access<br />
Step-By-Step Instructions:<br />
1. Open a browser window.<br />
2. Navigate to www.cisco.com. You should see:<br />
Figure 1—The main <strong>CISCO</strong> webpage.<br />
3. Next, scroll down. On the left hand side you should see a link under the<br />
“Training, Events, & Seminars” heading called “Training/Certifications.” You<br />
should see:<br />
Figure 2—Scroll down to the Training heading and look for “certifications.”<br />
2
4. Click on the link for “certifications.” The page you should see next is:<br />
Figure 3—Training and Certifications main page.<br />
5. Then scroll down again to the “current exams and outlines” link. It will take you<br />
to the page for current exams and outlines (isn’t that nice?). You should see:<br />
Figure 4—Current exams and outlines page.<br />
6. Once again, scroll down until you find the CCNA 640-607 exam. You should see<br />
(figure 5 on next page).<br />
3
Figure 5—Scroll down to CCNA exam.<br />
7. Click on the link “640-607” and another window should open. You should see:<br />
Figure 6—CCNA test main page.<br />
8. Again, scroll down a bit and you should see some available options (hyperlinks).<br />
You should see (figure 7 on next page):<br />
4
practice simulation<br />
very general topics…really not too much help<br />
Figure 7—CCNA main page.<br />
9. The simulation tool link will open another page. The instructions will read<br />
“Effective March 12, 2002, in addition to multiple choice and fill-in response<br />
questions, Cisco Career Certifications exams may include performance simulation<br />
questions. Performance simulations are test problems that approximate a real-life<br />
environment on a candidate's computer screen. Candidates will be presented with<br />
a real-life scenario and a networking topology to address specific tasks through<br />
appropriate responses. The responses that a candidate enters must be the same as<br />
those one would expect in a real-life networking situation. Prior to taking the<br />
CCNA 640-607 exam (the first exam to include simulations), candidates should<br />
become familiar with the exam simulation tool. Such practice will allow<br />
candidates to focus their exam-taking effort on the exam questions rather than<br />
how to correctly use the tool. To learn more about the simulation tool, use the<br />
following graphic tutorial.” You may want to spend some time going through the<br />
instructions. Figure out if short-cut keystrokes are allowed or not.<br />
10. Also look at the description of exam topics. Use this to guide your studies as you<br />
progress through your CCNA training.<br />
So what have I learned here?<br />
In this lab you have learned how to find the CCNA test objectives. Consider this sort of a<br />
“table of contents” for your studies, even though <strong>CISCO</strong> is extremely vague with their<br />
test information. It really doesn’t help all that much.<br />
5
Objective:<br />
This lab is designed to become familiar with basic DOS commands and utilities on<br />
Windows Operating Systems.<br />
Tools and Materials:<br />
(1) Computer with Windows 95/98.<br />
paper and pencil<br />
DOS Lab<br />
Background:<br />
In this lab you will learn about DOS…no, DOS is not dead! Being able to master simple<br />
DOS commands and utilities will enhance your networking skills considerably, especially<br />
in troubleshooting network problems. You may even wish to purchase a DOS tutorial at<br />
some point in your networking career. Many operating systems (windows-based too) use<br />
DOS commands for updates, patches, and maintenance. I know the Novell system<br />
frequently makes use of changing file attributes before applying new patches to the<br />
operating system. These are done with DOS-like commands. UNIX/LINUX is heavily<br />
DOS-command style oriented. If you want to get into computer security then you will<br />
have to live, eat, and breath DOS and UNIX.<br />
Step-By-Step Instructions:<br />
1. Opening DOS. Open the MS-DOS prompt into a full-window. If you are not<br />
sure, then follow these steps.<br />
a. Click on the “start” button on your task bar.<br />
b. Click on “programs.”<br />
c. Search for and click on MS-DOS prompt (see figure 1). A black screen or<br />
a window with a black screen should appear.<br />
Figure 1—Starting MS-DOS from the task bar.<br />
6
d. If you want to be a show-off then click on “Start” then “Run.” The pop-up<br />
window should see something like figure 2 (without the Windows menu<br />
on the side).<br />
Figure 2—Starting the “run” utility.<br />
e. Type in “command” (without quote marks) and the black screen DOS<br />
window should appear (see figure 3).<br />
Figure 3—The MS-DOS prompt window.<br />
f. To make the window fill your entire screen press the button with the<br />
arrows in all direction (like a compass pointer). If you want to get the<br />
window back then press Alt+Enter. If you want to leave the MS-DOS<br />
prompt session open in a full window, but you want to copy something<br />
from Windows you can use Alt+tab to “shuttle” between open programs.<br />
This is the hallmark of “switching between windows.”<br />
7
g. If you really have some time to kill then go to “Start” then “Programs”<br />
then (but don’t click on it) “MS-DOS Prompt.” Once you are there rightclick<br />
on it and select properties. You should see a window like figure 4.<br />
Figure 4—MS-DOS properties.<br />
h. Ok…now you can really start showing off…click on the “misc” tab. You<br />
will see something like figure 5.<br />
Figure 5—MS-DOS prompt miscellaneous settings.<br />
8
i. Here you can change which shortcut keys are allowed, sensitivity, etc.<br />
There are some neat settings under the screen tab also. Lots of things to<br />
play with and lots of things to do with DOS.<br />
2. DOS prompt and directory file structure. The DOS prompt and DOS system can<br />
be thought of similar to a filing cabinet. If you have three drives (C, D, and E)<br />
then each one can be thought of as separate filing cabinets C, D, and E. Each of<br />
those cabinets are then called the “root” directory of each cabinet. Each root<br />
directory can contain many different “directories.” These directories can be<br />
thought of as drawers in the cabinets. From there each directory can contain<br />
many different “sub-directories” similar to folders. Each “sub-directory” can<br />
contain other subdirectories and so on…at any point (root, directory, subdirectory,<br />
etc) can contain computer files (thought of similar to documents…they<br />
can be placed in a folder, drawer, etc). So lets take a peak and put this all into<br />
perspective…<br />
C:\<br />
C:\Windows<br />
C:\Windows\System<br />
Root prompt<br />
directory called “windows” of root “C”<br />
sub-directory called “system” in directory<br />
“windows” of root “C”<br />
Let’s look at an example of navigation with DOS. Using the directory “tree”<br />
structure shown on the next page (figure 6) we could write down the paths for<br />
certain files. For example the complete path to the album.zip file would become:<br />
C:\MY_Documents\My_Pictures\album.zip<br />
See if you can give the complete path for the following files (This is not what<br />
your computer will look like…just a make-believe one for this exercise):<br />
autoexec.bat ______________________________________________________<br />
letter.doc__________________________________________________________<br />
winzip.exe ________________________________________________________<br />
word.exe __________________________________________________________<br />
command.com _____________________________________________________<br />
9
C:\<br />
|___CDDROM\<br />
|___MY_Documents\<br />
| |___My_Pictures\<br />
| | |___picnic.gif<br />
| | |___Christmas.gif<br />
| | |___album.zip<br />
| |<br />
| |___My _Files\<br />
| | |___addresses.doc<br />
| | |___letter.doc<br />
| | |___resume.doc<br />
| |<br />
| |___My_Webs\<br />
|<br />
|___Program_Files\<br />
| |___Accessories\<br />
| | |___Backup\<br />
| | | |___System\<br />
| | |___Hyperterminal\<br />
| |___Microsoft_Office\<br />
| | |___Office\<br />
| | | |___Excel\<br />
| | | |___Powerpoint\<br />
| | | |___Word\<br />
| | | |___word.exe<br />
| | |___Stationery\<br />
| | |___Templates\<br />
| |___WinZip\<br />
| |___winzip.exe\<br />
|___Temp\<br />
|<br />
|___Windows\<br />
| |___System\<br />
|<br />
|___autoexec.bat<br />
|___config.sys<br />
|___command.com<br />
Figure 6—Hypothetical directory tree.<br />
Make a map of the structure of the C:\ drive on your computer. Be sure to include<br />
all sub-directories and folders if you have time. (This is probably gonna take a<br />
while…)<br />
10
Navigation. The next thing to learn is navigating and finding files in DOS. We have<br />
several commands and techniques for doing this. Sometimes this is called navigating the<br />
“tree.” The first command you will learn allows you to change directories. You do this<br />
<strong>by</strong> typing “CD” or “CHDIR” at any prompt and the root/directory/ subdirectory you wish<br />
to change to. For example, when we first open our DOS window we see the prompt:<br />
“C:\Windows\desktop>” If we wanted to navigate to the my documents file directory<br />
(C:\windows\my documents) we could switch to it in one of several ways…(1) type “CD<br />
C:\windows\mydocu~1” or (2) type “CD..” this will change you from the directory<br />
“desktop” prompt to the “C:\windows” prompt. Then type “CD mydocu~1” to change to<br />
the my documents directory. Please note that you can use the dot-dot to go back one<br />
level with the CD command. If your prompt was C:\windows\system\oobe you could<br />
type “CD ….” to return to the root. Two dots for one level and one dot for every level<br />
thereafter. This is called “going up the tree.” Its opposite, “going down the tree,”<br />
requires you typing in each directory or subdirectory. For example, to go from “C:” to<br />
“C:\windows\system\oobe” you could type “CD: C:\ windows\system\oobe” or from the<br />
root prompt type “CD windows” hit enter then type “CD system” hit enter, then type “CD<br />
oobe.” There are literally many different ways to do the same thing.<br />
So using figure 6 as a guide what would you type at the following prompts (don’t<br />
actually do it…your computer file structure will be way different)?<br />
From c:\windows to get to the root prompt ___________________________<br />
From letter.doc back up two levels ____________________________________<br />
From winzip folder to system folder ____________________________________<br />
From word.exe to temp folder ________________________________________<br />
3. Finding Files in DOS. DOS incorporates a searching mechanism. To find a<br />
specific file you use a directory statement, then the file name. For example, if we<br />
were looking for the c:\autoexec.bat file we would (1) open the MS-DOS prompt<br />
window, (2) switch to the root directory, and (3) use a directory statement to find<br />
the file. (See script 1 for syntax). You must be in the correct folder to find the<br />
file otherwise you will be unsuccessful.<br />
C:\windows><br />
C:\windows> CD..<br />
C:\dir autoexec.bat<br />
Autoexec.bat 338<br />
12-02-2001 7:52a autoexec.bat<br />
Script 1—finding a specific file<br />
11
Sometimes we do not always know or cannot remember the exact file name. For<br />
those times we can use a wildcard character. Say for example we knew it was an<br />
autoexec file but couldn’t remember the extension. We can just do a directory for<br />
all files named autoexec <strong>by</strong> typing “dir autoexec.*” The asterisk will replace any<br />
one or any number of characters as in “dir *utoexec.*” If files named<br />
butoexec.com, cutoexec.zip, and futoexec.wiz existed on the directory being<br />
searched, then they all would be listed. As Emeril says, “let’s kick it up a notch!”<br />
If we wanted to see all files in a directory then we would type “dir *.*” but, be<br />
careful, too many files might whiz <strong>by</strong>…in that case we could append /p to the end<br />
of the command to only list one page at a time…then we would have to hit any<br />
key to see the next page(s) one at a time “dir *.* /p” Getting tired of too many<br />
pages? Just press control+C to cancel the action. You can get a “widescreen”<br />
view using the /w option…“dir *.* /w” or combine them: “dir *.* /w /p”<br />
What batch files (.bat) are found at the root, the windows, and windows\system<br />
folders on your computer?<br />
__________________________________________________________________<br />
__________________________________________________________________<br />
__________________________________________________________________<br />
__________________________________________________________________<br />
What command files (.com) are found at the root, the windows, and<br />
windows\system folders on your computer?<br />
__________________________________________________________________<br />
__________________________________________________________________<br />
__________________________________________________________________<br />
__________________________________________________________________<br />
What executable files (.exe) are found at the root, the windows, and<br />
windows\system folders on your computer?<br />
__________________________________________________________________<br />
__________________________________________________________________<br />
__________________________________________________________________<br />
__________________________________________________________________<br />
What system files (*.sys) are found at the root, the windows, and windows\system<br />
folders on your computer?<br />
__________________________________________________________________<br />
__________________________________________________________________<br />
__________________________________________________________________<br />
__________________________________________________________________<br />
What are some of the other files found on your root?<br />
__________________________________________________________________<br />
__________________________________________________________________<br />
__________________________________________________________________<br />
12
4. Getting help. To find out any subcommand or options available with a command<br />
just append /? to the command. For example, if we wanted to find out the<br />
subcommands available with ping type “ping /?” and read away!<br />
What do these commands do? (Hint: some will not have anything listed for help)<br />
Internal commands: Built into the operating system file (command.com) and<br />
loaded into memory whenever your computer is turned on.<br />
break ______________________________________________________<br />
call ______________________________________________________<br />
cd<br />
______________________________________________________<br />
chcp ______________________________________________________<br />
cls ______________________________________________________<br />
copy ______________________________________________________<br />
ctty ______________________________________________________<br />
date ______________________________________________________<br />
del ______________________________________________________<br />
echo ______________________________________________________<br />
exit ______________________________________________________<br />
for ______________________________________________________<br />
goto ______________________________________________________<br />
if<br />
______________________________________________________<br />
mkdir ______________________________________________________<br />
path ______________________________________________________<br />
pause ______________________________________________________<br />
prompt ______________________________________________________<br />
rem ______________________________________________________<br />
ren ______________________________________________________<br />
rmdir ______________________________________________________<br />
set ______________________________________________________<br />
shift ______________________________________________________<br />
time ______________________________________________________<br />
type ______________________________________________________<br />
ver ______________________________________________________<br />
verify ______________________________________________________<br />
vol ______________________________________________________<br />
External commands: files with *.com or *.exe extensions. These are not built into<br />
the operating system and can vary between operating system versions.<br />
attrib<br />
chkdsk<br />
command<br />
deltree<br />
diskcopy<br />
fc<br />
fdisk<br />
______________________________________________________<br />
______________________________________________________<br />
______________________________________________________<br />
______________________________________________________<br />
______________________________________________________<br />
______________________________________________________<br />
______________________________________________________<br />
13
find<br />
format<br />
keyb<br />
label<br />
mode<br />
more<br />
nlsfunc<br />
setver<br />
sort<br />
subst<br />
sys<br />
xcopy<br />
______________________________________________________<br />
______________________________________________________<br />
______________________________________________________<br />
______________________________________________________<br />
______________________________________________________<br />
______________________________________________________<br />
______________________________________________________<br />
______________________________________________________<br />
______________________________________________________<br />
______________________________________________________<br />
______________________________________________________<br />
______________________________________________________<br />
5. Make some files. Open up your notepad and create some files in the c:\temp<br />
folder:<br />
File name<br />
Dave.txt<br />
Matt.txt<br />
Scott.txt<br />
Tim.txt<br />
Contents<br />
This is Dave’s text file…so keep out!<br />
This is Matt’s text file…so keep out!<br />
This is Scott’s text file…so keep out!<br />
This is Tim’s text file…so keep out!<br />
6. RENAME. One of those tools you might require when loading patches or<br />
something is the ability to rename a file. It’s usually a good idea to make a back<br />
up of a file before doing something drastically with it. For example if we had an<br />
executable called matt.exe that we were going to upgrade we should copy it to<br />
another directory and make a backup of it first. See script 2.<br />
Copy c:\windows\matt.exe c:\temp<br />
Ren c:\temp\matt.exe c:\temp\matt.bak<br />
Script 2—Copying and renaming a file to make a backup.<br />
On the second line we see our rename command. First we indicate the rename,<br />
the file to be renamed, and then what the new file name will be.<br />
7. DOS utilities. Let’s find out about some really neat dos utilities on your<br />
computer. Try each file and getting help for each file. These are some from the<br />
same sub-directory as my command.com file. The ones in bold will be used a lot<br />
in up-coming labs.<br />
ARP.EXE<br />
CDPLAYER.EXE<br />
CLIPBRD.EXE<br />
_______________________________________________<br />
_______________________________________________<br />
_______________________________________________<br />
14
15<br />
CLSPACK.EXE<br />
_______________________________________________<br />
CLEANMGR.EXE<br />
_______________________________________________<br />
CONTROL.EXE<br />
_______________________________________________<br />
CVT1.EXE<br />
_______________________________________________<br />
DEFRAG.EXE<br />
_______________________________________________<br />
DIALER.EXE<br />
_______________________________________________<br />
DRVSPACE.EXE<br />
_______________________________________________<br />
EDIT.EXE<br />
_______________________________________________<br />
EXPLORER.EXE<br />
_______________________________________________<br />
FREECELL.EXE<br />
_______________________________________________<br />
FTP.EXE<br />
_______________________________________________<br />
IPCONFIG.EXE<br />
_______________________________________________<br />
JVIEW.EXE<br />
_______________________________________________<br />
MPLAYER.EXE<br />
_______________________________________________<br />
MSHEARTS.EXE<br />
_______________________________________________<br />
NBTSTAT.EXE<br />
_______________________________________________<br />
NET.EXE<br />
_______________________________________________<br />
NETSTAT.EXE<br />
_______________________________________________<br />
NETWATCH.EXE<br />
_______________________________________________<br />
NOTEPAD.EXE<br />
_______________________________________________<br />
PACKAGER.EXE<br />
_______________________________________________<br />
PBRUSH.EXE<br />
_______________________________________________<br />
PING.EXE<br />
_______________________________________________<br />
PROGMAN.EXE<br />
_______________________________________________<br />
QFECHECK.EXE<br />
_______________________________________________<br />
REGEDIT.EXE<br />
_______________________________________________<br />
ROUTE.EXE<br />
_______________________________________________<br />
RSRCMTR.EXE<br />
_______________________________________________<br />
SCANDSKW.EXE<br />
_______________________________________________<br />
SCANREGW.EXE<br />
_______________________________________________<br />
SETDEBUG.EXE<br />
_______________________________________________<br />
SETVER.EXE<br />
_______________________________________________<br />
SIGVERIF.EXE<br />
_______________________________________________<br />
SMARTDRV.EXE<br />
_______________________________________________<br />
SNDREC32.EXE<br />
_______________________________________________<br />
SNDVOL32.EXE<br />
_______________________________________________<br />
SOL.EXE<br />
_______________________________________________<br />
SYSMON.EXE<br />
_______________________________________________<br />
TASKMAN.EXE<br />
_______________________________________________<br />
TELNET.EXE<br />
_______________________________________________<br />
TOUR98.EXE<br />
_______________________________________________<br />
TRACERT.EXE<br />
_______________________________________________<br />
TUNEUP.EXE<br />
_______________________________________________<br />
UPWIZUN.EXE<br />
_______________________________________________<br />
VCMUI.EXE<br />
_______________________________________________<br />
WELCOME.EXE<br />
_______________________________________________
WINREP.EXE<br />
WINFILE.EXE<br />
WINHELP.EXE<br />
WINHLP32.EXE<br />
WINIPCFG.EXE<br />
WINMINE.EXE<br />
WINPOPUP.EXE<br />
WINVER.EXE<br />
WJVIEW.EXE<br />
WRITE.EXE<br />
WUPDMGR.EXE<br />
_______________________________________________<br />
_______________________________________________<br />
_______________________________________________<br />
_______________________________________________<br />
_______________________________________________<br />
_______________________________________________<br />
_______________________________________________<br />
_______________________________________________<br />
_______________________________________________<br />
_______________________________________________<br />
_______________________________________________<br />
8. Let’s look at those in bold a little closer…type the command and /? or ? to find<br />
out the available options for the command.<br />
ARP.EXE<br />
NET.EXE<br />
PING.EXE<br />
ROUTE.EXE<br />
_______________________________________________<br />
_______________________________________________<br />
_______________________________________________<br />
_______________________________________________<br />
_______________________________________________<br />
_______________________________________________<br />
_______________________________________________<br />
_______________________________________________<br />
_______________________________________________<br />
_______________________________________________<br />
_______________________________________________<br />
_______________________________________________<br />
_______________________________________________<br />
_______________________________________________<br />
_______________________________________________<br />
_______________________________________________<br />
_______________________________________________<br />
_______________________________________________<br />
_______________________________________________<br />
_______________________________________________<br />
_______________________________________________<br />
_______________________________________________<br />
_______________________________________________<br />
_______________________________________________<br />
_______________________________________________<br />
_______________________________________________<br />
_______________________________________________<br />
_______________________________________________<br />
_______________________________________________<br />
_______________________________________________<br />
16
NETSTAT.EXE<br />
IPCONFIG.EXE<br />
NBTSTAT.EXE<br />
_______________________________________________<br />
_______________________________________________<br />
_______________________________________________<br />
_______________________________________________<br />
_______________________________________________<br />
_______________________________________________<br />
_______________________________________________<br />
_______________________________________________<br />
_______________________________________________<br />
_______________________________________________<br />
_______________________________________________<br />
_______________________________________________<br />
_______________________________________________<br />
_______________________________________________<br />
_______________________________________________<br />
_______________________________________________<br />
_______________________________________________<br />
_______________________________________________<br />
_______________________________________________<br />
_______________________________________________<br />
_______________________________________________<br />
_______________________________________________<br />
9. DOSKEY. One very nice command for use with DOS is the DOSKEY command.<br />
If you enable this during a DOS session you will be able to use the up and down<br />
arrows to recall any previously typed commands. This is very nice when you are<br />
trying to ping different computers on the same network. Try it, you’ll like it!<br />
(Hint: you can also use F3).<br />
10. EDIT. The DOS editor is used to match basic DOS files like batch files. Here<br />
you can read the contents of some files. Go through and select all options from<br />
each pull-down menu to see what they do…don’t forget to read the help too!<br />
REM *****************************************************************<br />
REM * Batch file to change names of those four text files *<br />
REM *****************************************************************<br />
REM<br />
REM By Matthew J. Basham, 02/21/2002<br />
REM Copyright 2002<br />
REM May not be reproduced without explicit written permission of the<br />
REM author.<br />
ECHO<br />
ECHO Let's start those little buggers up!<br />
ECHO<br />
Pause<br />
copy c:\temp\dave.txt c:\temp\dave.bak<br />
17
pause<br />
copy c:\temp\matt.txt c:\temp\matt.bak<br />
pause<br />
copy c:\temp\scott.txt c:\temp\scott.bak<br />
pause<br />
copy c:\temp\tim.txt c:\temp\tim.bak<br />
pause<br />
ECHO ALL DONE!<br />
Supplemental Lab or Challenge Activity:<br />
1. Go out to the web and find out what 8.3 means in regards to DOS (especially<br />
file names).<br />
2. Write a batch file to install a \temp folder on the root drive of a computer and<br />
make it a hidden folder.<br />
So What Have I Learned Here?<br />
In this lab you have learned the basics of DOS. I find that many students do not have the<br />
experience with DOS that I had as I was brought up through the Commodore 64’s,<br />
IBM’s, 386’s, 486’s, etc. To me it is old-hat…to many newcomers though it is totally<br />
foreign. You will be using DOS while you are working on many of the labs in this book<br />
so I thought it best to put it right up front. Keep referring back to this lab as often as you<br />
need to.<br />
18
Windows Utilities Lab<br />
Objective:<br />
To become better aware of utilities included with Windows 95/98 Operating systems.<br />
Tools and Materials:<br />
(1) computer with Win 95/98<br />
paper and pencil<br />
Win 95/98 CD may be needed<br />
Background:<br />
In this lab you will learn the answer to “Why didn’t anyone tell me these programs were<br />
here?” Well, quite simply, you have no one to blame but yourself. No one gives you<br />
anything for free, you have to go out and get it for yourself. As such, this lab is designed<br />
to help you explore little-publicized Windows utilities, some of which are pretty nifty.<br />
If you are not familiar with basic DOS commands you should do the DOS commands lab<br />
first. As a network administrator you will need to know basic DOS commands including:<br />
searching for files, wild-card characters, changing directories, and manipulating file<br />
names with DOS.<br />
Step-By-Step Instructions:<br />
1. Open the MS-DOS prompt into a full window.<br />
2. Enable DOSKEY.<br />
3. Start hunting for any executable, command, and batch files from the following<br />
prompts: root, windows subdirectory and windows/system subdirectory.<br />
Write down all files on your paper.<br />
4. Go back and execute each file one at a time noting what happens. Some will<br />
do absolutely nothing noticeable. Be sure to check for any available<br />
subcommands and options using the DOS help feature.<br />
5. Pare the list down to just the interesting programs.<br />
Supplemental Lab or Challenge Activity:<br />
1. Which programs did you find that may be useful to you as a network<br />
administrator?<br />
2. If you had two different computers, one with 95 and one with 98, what are the<br />
differences between the available programs?<br />
3. Try a Windows 2000 or XP using the same techniques.<br />
4. Make a chart comparing the “evolution” of programs in each operating<br />
system over time. What has changed for the better, stayed the same, or<br />
changed for the worse?<br />
So What Have I Learned Here?<br />
This is actually almost a repeat of the DOS lab…I just wanted to make sure everyone<br />
realized the difference in the two and that no one skipped over either of these labs.<br />
19
Cool Windows 95/98 Utilities<br />
KRNL386.exe<br />
IPCONFIG.exe<br />
WINREP.exe<br />
NETWATCH.exe<br />
WUPDMGR.exe<br />
QFECHECK.exe<br />
WINPOPUP.exe<br />
ARP.exe<br />
FTP.exe<br />
PING.exe<br />
ROUTE.exe<br />
TRACERT.exe<br />
TELNET.exe<br />
NBTSTAT.exe<br />
NETSTAT.exe<br />
NET.exe<br />
EMM386.exe<br />
*.pwl<br />
SYSEDIT.exe<br />
REGEDIT.exe<br />
Never, never, never ever delete. This is the “glue” for the windows<br />
operating system. Get rid of this and you have got trouble.<br />
Shows IP, MAC, and gateway addresses of your workstation<br />
A “mini-help desk” type program. Good for gathering information about<br />
your workstation.<br />
Monitors access to your workstations and servers<br />
Takes you (conveniently?) to the Microsoft website for software updates.<br />
No fumbling around that old website trying to find the right spot.<br />
When you log into the Microsoft site this program runs and reports to<br />
Microsoft to make sure all Microsoft software is registered with Microsoft<br />
including license numbers.<br />
A private messaging utility.<br />
Shows address resolution protocol table of your workstation.<br />
File transfer program.<br />
Troubleshooting program. Lots of options. This can be used to generate<br />
network traffic for testing too. A must see!<br />
Adds a gateway to your computer from the DOS prompt.<br />
Shows routes between your computer and a destination. A good<br />
troubleshooting tool.<br />
Opens terminal emulation sessions between networking devices. A must<br />
see!<br />
Displays protocol statistics and current TCP/IP connections using NETBIOS<br />
over TCP/IP.<br />
Shows active connections to your workstation. Lets you do remote<br />
administration to other workstations.<br />
Shows who can share what resources on your network.<br />
Shows expanded memory services available. Never, never, ever delete.<br />
Password list files. If these disappear then you will be prompted to input a<br />
new password.<br />
System file editor and configuration utility. Good for looking at the most<br />
important system files quickly in windows.<br />
Utility for editing the registry. If you don’t know what you are doing, then I<br />
would advise you to stay out of this. Always backup the registry before<br />
making any registry changes.<br />
20
Installing a NIC: Hardware<br />
Objectives:<br />
To be able to install a network interface card (NIC) into a personal computer (PC). In the<br />
next lab you will complete the installation of the NIC <strong>by</strong> performing the software<br />
installation.<br />
Tools and Materials:<br />
(1) PC<br />
a variety of NIC’s<br />
screwdrivers and nutdrivers<br />
Step-<strong>by</strong>-Step Instructions:<br />
I guess the old phrase “you get what you pay for” really applies to NIC’s. The more<br />
inexpensive the NIC, usually the more problems you will have installing it. It usually<br />
applies more to the software side but I have seen alignment problems with the hardware<br />
side. Do not go cheap on NIC’s unless you want to experiment or have had good<br />
experiences with a certain brand of NIC’s before.<br />
1. Unplug the PC power cord from the wall or outlet.<br />
***Warning***<br />
Do not attempt to install a NIC into an energized PC. Electrocution could<br />
occur.<br />
***Warning***<br />
Some computer towers have extremely sharp edges within them. In the<br />
field we call these “ginsu” covers.<br />
2. Remove the cover from the PC using screwdrivers or nutdrivers. Every PC is<br />
different so go slowly, don’t force anything, and ask questions whenever needed.<br />
3. Remove a cover plate from an available slot (usually a PCI or EISA slot) using a<br />
screwdriver.<br />
4. Gently slide the NIC into the appropriate slot.<br />
5. Attach the NIC with a screw to the case foundation.<br />
6. Replace the cover.<br />
7. Plug in the PC again (it works better that way).<br />
8. You are now ready for the software portion of the installation.<br />
Supplemental Lab or Challenge Activity:<br />
1. Try to see how a Token Ring NIC differs from an Ethernet NIC.<br />
2. Go and find out the differences in motherboard slots: MCA, ISA, EISA, etc.<br />
So What Have I Learned Here?<br />
You have learned how to physically install a NIC. In the next lab you will be installing<br />
the software portion of a NIC installation.<br />
21
Changing TCP/IP Settings on Your Computer<br />
Objective:<br />
In this lab you will complete the installation of the NIC <strong>by</strong> performing the software<br />
installation and changing TCP/IP settings. You will be changing TCP/IP settings in<br />
many of the labs in this book.<br />
Tools and Materials:<br />
(1) Workstation<br />
Lab Diagram:<br />
e0/0<br />
192.168.1.1/24<br />
Workstation “A”<br />
IP 192.168.1.2<br />
SM 255.255.255.0<br />
GW 192.168.1.1<br />
Step-<strong>by</strong>-Step Instructions:<br />
In this lab you will be configuring only the workstation portion of the above lab diagram.<br />
It is just shown as an overall reference perspective.<br />
1. Open the <strong>Network</strong> Neighborhood icon on the desktop using a right-click. Then<br />
click on “properties.” You should see the network window:<br />
Figure 1—<strong>Network</strong> window.<br />
22
2. Then scroll down to the TCP/IP configuration for your NIC. On my computer I<br />
picked this one (highlighted):<br />
Figure 2—Finding the TCP/IP configuration for the NIC.<br />
3. Double-click it or highlight it and select properties. You should see another pop<br />
up window like this:<br />
Figure 3—TCP/IP Properties pop up window.<br />
4. Now, say we are told to put in an IP address of 192.168.1.3 with a subnet mask of<br />
255.255.255.0 and a gateway of 192.168.1.1. Here is how we would do it. First<br />
we would select “specify an IP address” and then put in IP address and mask on<br />
this window. After doing that the window should look like this:<br />
23
Gateway Tab<br />
Figure 4—Putting in an IP address and mask.<br />
5. Next we need to switch to the gateway tab (see figure 4) and put in the gateway<br />
address. We would type it in and click “add.” Your pop up window will look<br />
like this:<br />
Figure 5—Adding a gateway.<br />
6. Almost done. To finish it up we click on “ok” on the TCP/IP Properties window,<br />
and then “OK” in the network window. You should then be prompted to reboot<br />
your computer to make the settings take effect. If you do not reboot then they<br />
will not work properly.<br />
7. You can double-check your settings using those DOS or windows commands<br />
“IPCONFIG.EXE” or “WINIPCFG.EXE.”<br />
24
Supplemental Lab or Challenge Activity:<br />
1. Try to find out about all of those other tabs and settings in the network and<br />
TCP/IP Properties windows.<br />
2. What is a gateway?<br />
So What Have I Learned Here?<br />
Now you are talking about the meat and potatoes of things to come. In almost every lab<br />
you will be installing workstation TCP/IP settings. Better learn it good now.<br />
25
Paper Lab: ICONS for Computer Diagrams<br />
Objective:<br />
To learn about ICONS used in <strong>CISCO</strong> drawings and for what each represents.<br />
Tools and Materials:<br />
None.<br />
Step-By-Step Instructions:<br />
Let’s just go through all of them one <strong>by</strong> one:<br />
Router—Layer 3 device. Models include 2500 and 2600<br />
series for access layer.<br />
Communication Server—This provide access to<br />
networking devices over a LAN or WAN using Serial Line<br />
Internet Protocol (SLIP). You won’t probably use this too<br />
much since other technologies are getting cheaper and<br />
easier to use.<br />
Gateway—Device that acts as a “gateway” to the network<br />
or Internet.<br />
Bridge—Old school layer 2 device not used too much<br />
anymore.<br />
Workgroup switch—Layer 2 device that you will use<br />
plenty. A CCIE-guy told me “one good future in<br />
networking is in switching” (the other is in security).<br />
100BaseT hub—Not used too much anymore since<br />
switches cost about the same.<br />
26
10BaseT Hub—Not used too much anymore since switches<br />
cost about the same.<br />
<strong>CISCO</strong> CAT5000/5500—Older switching technology that<br />
uses “set” based commands. Newer 4000’s replace these.<br />
Router switch processor (RSP)—The brain of a switch<br />
router that handles routing functions on a switch.<br />
Putting those two together…<strong>CISCO</strong> Big-Cat’s 4000/5000<br />
with route switch processors (RSP).<br />
ATM switch—Not hard…a switch for ATM networks.<br />
ISDN switch—ditto for ISDN networks.<br />
TAG router switch—uses TAG’s to forward packets. Does<br />
routing functions too.<br />
Broadband router—Router for broadband connections.<br />
27
<strong>CISCO</strong> Net Ranger—<strong>CISCO</strong> security device.<br />
ATM Router—Router for ATM. 8500 series routers.<br />
<strong>CISCO</strong> 7505 Router—distribution/core layer router.<br />
<strong>CISCO</strong> 7507 Router—distribution/core layer router.<br />
<strong>CISCO</strong> 7500 (7513) Router—distribution/core layer router.<br />
ATM TAG switch/router—higher level switch routing.<br />
Typically 7000 series related.<br />
MAIN Frame—oh…that’s the old school stuff.<br />
IBM A/S 400—ditto, although these are still found in<br />
accounting departments.<br />
28
CSU/DSU<br />
CSU/DSU—Channel Service Unit/Data Service<br />
Unit…from the “WAN cloud” into this and then into your<br />
router.<br />
PIX Firewall—Security device. Only works with IP. All<br />
other protocols must be tunneled through it…so what’s the<br />
point of having it?<br />
Small PBX—mini telephone company service that goes in<br />
your company. If you dial a “9” to get an outside line, then<br />
you have a PBX.<br />
The “Cloud”—This is where all WAN starts and ends. We<br />
use this in many instances…to represent the Internet, a<br />
frame relay cloud, an ISDN cloud, a POTS cloud, etc.<br />
PC/Workstation—I really should not have to explain this<br />
one.<br />
Dumb terminal—Like a regular PC, but no hard disk. It<br />
was mainly used to connect to mainframe who did the<br />
storage and processing for them.<br />
Printer—I really should not have to explain this one either.<br />
So there.<br />
29
Laptop—ditto.<br />
File server—Used on networks to hold files and share<br />
processing requests from workstations. Some here, some<br />
on the PC. It’s called client-server networking.<br />
Supercomputer—See Nasa, Berkely, MIT, etc. Kind of<br />
like the W.O.P.R. in Wargames.<br />
Web cluster—A special cloud indicating several web<br />
devices are contained within the cloud.<br />
Web server—Holds the Internet pages of a company.<br />
Microsoft IIS and Apache are common software packages<br />
on these.<br />
Repeater—Layer 1 device that performs no intelligent<br />
processing, only cleaning up, amplifying, and re-timing the<br />
signals.<br />
Token<br />
Ring<br />
Token Ring—ICON to represent a layer 2 token ring<br />
topology.<br />
30
FDDI<br />
FDDI—Icon to represent a layer 2 FDDI topology.<br />
Ethernet—Icon to represent a layer 1/2 Ethernet cable.<br />
Serial—Icon to represent a layer 1/2 cable. V.35 and V.24<br />
are common examples.<br />
Circuit Switched Serial—ditto.<br />
Modem—Modulator/Demodulator. Translates analog into<br />
digital signals.<br />
Phone—I should not have to explain this.<br />
PC Camera—Itty bitty camera for your computer.<br />
PolyComm phone—Speaker phone commonly used for<br />
conference calls.<br />
31
Firewall—<strong>Network</strong> Address Translation device. Great<br />
when they work properly. There is a big future in computer<br />
security…especially if you can get these things to work<br />
right.<br />
Router with firewall—Just what it sounds like…a router<br />
with the addition of firewall commands.<br />
Satellite—If you have the bucks you can set up a network<br />
with this…sometimes you have no choice…think about a<br />
cruise ship company.<br />
Satellite dish—used with satellites.<br />
<strong>CISCO</strong> Call manager—Works with Voice over IP<br />
equipment. Starting to be a “hot” item for resumes and<br />
career development.<br />
IP telephone—yes you really can read your email over this<br />
phone…gets its own IP address and everything.<br />
You will see some of these used in the drawings in this book. I put the other ones in here<br />
because I see them in articles and books.<br />
More ICONs on the web!<br />
http://www.cisco.com/warp/public/784/packet/icons/<br />
http://www.cisco.com/warp/public/503/2.html<br />
32
So what have I learned here?<br />
You have been given a brief introduction to icons used in network drawings. Let’s test<br />
your knowledge here. Without looking back at the pages can you identify what these<br />
icons represent?<br />
_________________________________________<br />
_________________________________________<br />
_________________________________________<br />
_________________________________________<br />
_________________________________________<br />
_________________________________________<br />
_________________________________________<br />
_________________________________________<br />
33
Paper Lab: Proper Cable for the Proper Job<br />
Objective:<br />
To learn which type of networking cable to use in which instance.<br />
Tools and Materials:<br />
Paper and pencils<br />
Different colored pencils or markers would be nice.<br />
Background:<br />
You will be putting together lots of equipment with plenty of cables during your career.<br />
Knowing which cable to use and when will save you plenty of time, trouble, and potential<br />
embarrassment if you get it right from the start. Heck, you can even help someone else<br />
later…most network administrators do not know a straight through from a rollover.<br />
Telephones have been around since the late 1800’s and our wiring patterns have evolved<br />
from the telephone industry. The two most common wiring patterns are EIA/TIA 568A<br />
and EIA/TIA 568B (Electronics Industry Association/Telecommunications Industry<br />
Association). There are four pairs of wires in a Category 5-type cable. Pair 1 is the blue<br />
pair, pair 2 is the orange pair, pair 3 is the green pair, and pair 4 is the brown pair. For<br />
you football fans…”The Blue and Orange Gators play on the Green Grass with the<br />
Brown Football.” In fact, 66 and 110 punch down blocks are wired in this fashion:<br />
White/blue<br />
Blue<br />
White/Orange<br />
Orange<br />
White/Green<br />
Green<br />
White/Brown<br />
Brown<br />
White/blue<br />
Blue<br />
White/Orange<br />
Orange<br />
White/Green<br />
Green<br />
White/Brown<br />
Brown<br />
Figure 1—punch down block.<br />
Unfortunately our wiring patterns for our cables could not align easily with this pattern<br />
(figure 2). They had to go and come up with some other ones (see figure 3).<br />
White/blue—blue—white/orange—orange—white/green—green—white/brown—brown<br />
Figure 2—Matt’s “nice” pattern.<br />
34
EIA/TIA 568A<br />
EIA/TIA568B<br />
White/green 2 White/orange<br />
3 Green Orange<br />
White/Orange<br />
White/green<br />
2 1 Blue 3 1 Blue<br />
White/Blue<br />
White/Blue<br />
Orange<br />
Green<br />
4 White/Brown 4 White/Brown<br />
Brown<br />
Brown<br />
Figure 3—EIA/TIA 568A and B wiring patterns.<br />
Straight Through (ST): Used for connecting dis-similar devices (workstations to hubs,<br />
switches to routers, hubs to switches, etc.). The cables are wired with the same wiring<br />
pattern on each end.<br />
EIA/TIA<br />
568A<br />
ST<br />
EIA/TIA<br />
568A<br />
EIA/TIA<br />
568B<br />
ST<br />
EIA/TIA<br />
568B<br />
Crossover (xo): Used for connecting similar devices (workstations to workstations,<br />
switches to switches, hubs to hubs, etc). The cables are wired with pairs 2 and 3<br />
“crossing over” from one end to the other (see also figure 3).<br />
EIA/TIA<br />
568A<br />
xo<br />
EIA/TIA<br />
568B<br />
EIA/TIA<br />
568B<br />
xo<br />
EIA/TIA<br />
568A<br />
35
Rollover (ro): Used for connecting communication ports to other communication ports<br />
(workstation com ports to router console ports, etc). It does not matter which colors are<br />
used here as long as the pattern “rolls over” from one side to the other.<br />
12345678 ro 87654321<br />
In the following diagrams indicate which type of cable is used, label each cable, apply the<br />
appropriate pattern in the drawing, and indicate which port or connection would be used<br />
at the each end of the cable.<br />
Peer-to-Peer Cabling<br />
Crossover Rollover Straight-through<br />
(xo) (ro) (ST)<br />
Two workstations and a hub<br />
36
Three workstations and a hub<br />
Six workstations (3 to a hub) and two hubs<br />
37
Change hubs to switches:<br />
38
Add in a router:<br />
39
Add in a web access:<br />
DSU/CSU<br />
WWW<br />
40
Peer-to-Peer <strong>Network</strong>ing/File and Print Sharing<br />
Objective:<br />
To learn how to set up two computers to communicate and share files.<br />
Tools and Materials:<br />
(2) Workstations<br />
(1) Cross-connect cable (a.k.a cross-over cable)<br />
Lab Diagram:<br />
NIC XO NIC<br />
IP address: 192.168.1.1 192.168.1.2<br />
Subnet Mask: 255.255.255.0 255.255.255.0<br />
Gateway: 192.168.1.2 192.168.1.1<br />
Step-By-Steps Instructions:<br />
1. Cable the lab as shown. Put one end of the crossover cable in the NIC on one<br />
computer and the other end in the NIC of the other computer. Make certain<br />
the LED lights up on the NIC when the cable is plugged into BOTH ends. If<br />
the lights do not turn on, then check to make sure you have a good crossover<br />
cable. Ask your instructor for help if necessary.<br />
2. Change the TCP/IP settings on each computer. Do not reboot just yet…we<br />
have to enable file and print sharing first, then we can reboot the computer.<br />
Use the lab on “Installing a NIC: software” if you get stuck.<br />
3. To enable file and print sharing right click on “network neighborhood” (just<br />
like you did for changing the TCP/IP settings. You should see:<br />
file and print sharing<br />
Figure 1—<strong>Network</strong> settings control panel.<br />
41
4. Click on the file and print sharing box. You will see:<br />
Figure 2—file and print sharing control panel<br />
5. Then select the “pick box” for file sharing.” You can pick the one for print<br />
sharing if you have printers that need to be shared also. Now you can re-boot<br />
(it’s a Canadian term) your computer. It should look like this when you are<br />
finished:<br />
Figure 3—file and print sharing control panel<br />
6. When your computer is rebooting you will still have to put in user names and<br />
passwords otherwise you will not have your full networking capabilities. I<br />
know it doesn’t sound right but it is Microsoft after all. Once your computer<br />
reboots we have to actually share some files. Otherwise you wouldn’t see<br />
anything when you access the other computer. One easy way to enable file<br />
sharing is with the “my computer icon” on your desktop. Double-click on it<br />
and you will see something like:<br />
Figure 4—My computer control panel.<br />
42
7. Then right click on the “C” drive and select sharing. On the other folder you<br />
should only see the “C” drive (which in our case is everything).<br />
Figure 5—Now file sharing can be accomplished.<br />
8. If you only want to share a specific folder or document double click on the C<br />
drive to open it and then select the folder or document and pick sharing. On<br />
the other computer you should only see that folder or document. You should<br />
see something like this (pay no attention to that casino folder…its only an<br />
example for another lab ☺ )<br />
Figure 6—Selecting a specific folder to be shared.<br />
9. In either case you will be presented with a window for setting the parameters<br />
for the share. You can create a name for the drive, folder, or document. You<br />
can allow full access, read only, or password-protected access to the drive,<br />
folder or document.<br />
43
Figure 7—Selecting the options for a share.<br />
10. Once you are finished select “apply”, then “OK,” and you should be able to<br />
see the drive, folder, or document on the other computer.<br />
Supplemental Lab or Challenge Activity:<br />
1. Pick one computer to be the computer for your boss. The other will be the<br />
employee. Have only certain folders and documents sharable on the boss’s<br />
computer. Have all drives shared on the employee’s computer. Can your<br />
boss find out where you have been on the Internet?<br />
2. Why do we use a crossover cable? Why wouldn’t a straight through cable<br />
work?<br />
3. Put a dollar sign ($) on the end of a shared file name and see what happens.<br />
So What Have I Learned Here?<br />
In this lab you have learned how to hook up two computers using peer-to-peer<br />
networking and file and print sharing. For this you needed to use your knowledge of<br />
TCP/IP software settings you learned in an earlier lab. In later labs you will be<br />
expanding upon this knowledge to build more complicated networks and more in-depth<br />
file and print sharing exercises.<br />
44
Small Single-Hub <strong>Network</strong>s<br />
Objective:<br />
To learn how to hook up several computers with a hub and share files between them.<br />
Tools and Materials:<br />
(3) Workstations<br />
(1) Hub<br />
(3) Straight-through cables<br />
Lab Design:<br />
1 3 5<br />
NIC NIC NIC<br />
Name: A B C<br />
IP address: 192.168.1.3 192.168.1.4 192.168.1.5<br />
Mask: 255.255.255.0 255.255.255.0 255.255.255.0<br />
Gateway: none none none<br />
Step-By-Step Instructions:<br />
1. Cable the lab as shown. Each straight-through cable should be connected<br />
from the NIC on the workstation to the respective port on the hub.<br />
2. Set up the IP addresses and masks on each workstation. No gateway number<br />
is needed because no single device acts as a gateway.<br />
3. Ping from A to B. Ping from A to C. Ping from B to A. Ping from B to C. It<br />
should work just fine.<br />
4. Enable file sharing on each computer. Pick something different on each<br />
computer to share…a drive, a folder, or several folders.<br />
5. You should be able to access the files from computer to computer now using<br />
network neighborhood. If you cannot “see” the icon for the other computer<br />
then go out to DOS and try to ping them. If you can ping them then use the<br />
“Find computer option in Windows Explorer” to manually bring them up in<br />
<strong>Network</strong> Neighborhood (gotta love that quirky Microsoft in small networks).<br />
45
You should see something like this:<br />
Figure 1—Using windows explorer to “find” computers on the network.<br />
Figure 2—The “find computer” option pop up window.<br />
If it doesn’t work then check everything you have done so far and reboot<br />
everything.<br />
Supplemental Lab or Additional Activities:<br />
1. Try to add in more computers. You will have to pick addresses that will<br />
work.<br />
2. Try to add in another computer with an IP address of 172.16.1.2 and a mask of<br />
255.255.255.0. Do you think it will work? What happens when you try to<br />
find it on the network? Ping it? Share files with it?<br />
3. Is it possible to hide or secretly share a file? How would it work?<br />
4. How would you change the identity of your computer on the network?<br />
So What Have I Learned Here?<br />
You have learned how to hook up several workstations to share files using a hub. You<br />
learned that the IP addresses had to be within the same subnet in order to communicate<br />
with each other. Also you were acquainted with the quirks of Microsoft networking for<br />
small networks. Microsoft really likes having that hub out there to work.<br />
46
Small Multiple-Hub <strong>Network</strong>s<br />
Objective:<br />
To learn how to hook up several computers with a hub and share files between them.<br />
Tools and Materials:<br />
(6) Workstations<br />
(6) Hub<br />
(6) Straight-through cables (ST)<br />
(1) Cross-over cable (XO)<br />
Lab Design:<br />
D E F<br />
NIC NIC NIC<br />
1 3 5<br />
2<br />
XO<br />
2<br />
1 3 5<br />
NIC NIC NIC<br />
A B C<br />
Name: A B C<br />
IP address: 192.168.1.3 192.168.1.4 192.168.1.5<br />
Mask: 255.255.255.0 255.255.255.0 255.255.255.0<br />
Gateway: none none none<br />
Name: D E F<br />
IP address: 192.168.1.13 192.168.1.14 192.168.1.15<br />
Mask: 255.255.255.0 255.255.255.0 255.255.255.0<br />
Gateway: none none none<br />
Step-By-Step Instructions:<br />
1. Cable the lab as shown. Each straight-through cable should be connected from<br />
the NIC on the workstation to the respective port on the hub. Use a crossover<br />
cable between the two hubs. It should not matter which port you use depending<br />
upon your type of hub. Some have uplink ports that must be used for this<br />
47
purpose. Check your documentation. Don’t have any documentation? Go out to<br />
the web and download it.<br />
2. Set up the IP addresses and masks on each workstation. No gateway number is<br />
needed because no single device acts as a gateway.<br />
3. Ping from each workstation to each other.<br />
4. Enable file sharing on each computer. Pick something different on each computer<br />
to share…a drive, a folder, or several folders.<br />
5. You should be able to access the files from computer to computer now using<br />
network neighborhood. If you cannot “see” the icon for the other computer then<br />
go out to DOS and try to ping them. If you can ping them then use the “Find<br />
computer option in Windows Explorer” to manually bring them up in <strong>Network</strong><br />
Neighborhood (gotta love that quirky Microsoft in small networks).<br />
If it doesn’t work then check everything you have done so far and reboot<br />
everything.<br />
Supplemental Lab or Additional Activities:<br />
1. Try to add in another computer with an IP address of 172.16.1.2 and a mask of<br />
255.255.255.0. Do you think it will work? What happens when you try to find it<br />
on the network? Ping it? Share files with it?<br />
2. Put in two computers with the same IP address. What kind of message do you<br />
see? Does it appear on one workstation or multiple ones?<br />
So What Have I Learned Here?<br />
You have learned how to hook up several workstations to share files using multiple hubs.<br />
You learned that the IP addresses had to be within the same subnet in order to<br />
communicate with each other. As you build larger and larger networks you can see<br />
where planning for IP addresses is important. Errors make the network act weird. Also<br />
you were acquainted with the quirks of Microsoft networking for small networks.<br />
Microsoft really likes having that hub out there to work<br />
48
Paper Lab: Binary Numbering<br />
Objective:<br />
To learn how to convert binary numbers into decimal numbers and vice versa.<br />
Tools and Materials:<br />
Paper and pencil<br />
“Bit Bashing” worksheet<br />
Background: Converting Binary to Decimal<br />
If I asked you to count from zero to nine I would expect everyone would have no<br />
problem with it. You would respond with “zero-one-two-three-four-five-six-seven-eightnine.”<br />
This is what is known as the decimal (or base 10) system. There are ten possible<br />
combinations available for each column. Each column represents a progressively higher<br />
power of ten. For example the number 532:<br />
10 2 10 1 10 0<br />
100 10 1<br />
532 = 5 3 2<br />
This represents 5 units of 10 2 (10x10=100) which is 5 hundreds, 3 units of 10 1 (10x1=10)<br />
which is 3 tens or 30, and 2 units of 10 0 (1) which is 2. Put them all together and you get<br />
five hundred and thirty-two. Ok. I know you know this stuff already it will just make the<br />
transition to learning stuff on binary easier.<br />
Binary is a base 2 system. Instead of ten numbers we only have two numbers: zero and<br />
one (0 or 1). Like our decimal system our columns each represents a progressively<br />
higher power of 2.<br />
2 7 2 6 2 5 2 4 2 3 2 2 2 1 2 0<br />
128 64 32 16 8 4 2 1<br />
Each column heading represents a decimal number with a binary power. To convert<br />
between binary and decimal the rule is simple: Any place you have a “1” you just add the<br />
column heading to get the decimal total. For example, if we were given a binary number<br />
of 01101101 to convert into decimal we would write it under our “bit-bashing” chart.<br />
Then, in any column where a 1 appeared, we would add the column headings together.<br />
That would be our binary to decimal equivalent.<br />
2 7 2 6 2 5 2 4 2 3 2 2 2 1 2 0<br />
128 64 32 16 8 4 2 1<br />
0 1 1 0 1 1 0 1<br />
64+32+8+4+1=109<br />
49
Now along the column headings we see a 1 in the columns for 64, 32, 8, 4, and 1. So we<br />
add these numbers together 64+32+8+4+1=109. Therefore the binary number 01101101<br />
is equivalent to the decimal number 109. Let’s do another one…convert 10010101 to<br />
decimal.<br />
2 7 2 6 2 5 2 4 2 3 2 2 2 1 2 0<br />
128 64 32 16 8 4 2 1<br />
1 0 0 1 0 1 0 1<br />
128 + 16+ 4 + 1=149.<br />
It’s another one of those things: easy when you know how. Let’s take a quick time out<br />
and let you try some binary to decimal conversions:<br />
1. 10101010<br />
2. 01010101<br />
3. 11001100<br />
4. 11000101<br />
5. 11111111<br />
Now let’s check your answers with the answer section. Did you get the right ones? I<br />
certainly hope so. Try not to use a calculator. You will not be allowed to use one on<br />
the CCNA test so get practice without it now.<br />
Converting from Decimal to Binary:<br />
This is just the opposite of what we just did except we use subtraction. If we are given<br />
the decimal number 141 to convert to binary we just subtract our number (141) from each<br />
column heading in succession until we have a remainder of zero. If we encounter a<br />
negative number then we put a zero in our bit bashing column. This is tough to explain<br />
without working it through…so let’s learn <strong>by</strong> doing. Starting out with our 128 column<br />
heading: 141 - 128 = 13. So we put a “1” under the 128 heading and move to the next<br />
column heading.<br />
2 7 2 6 2 5 2 4 2 3 2 2 2 1 2 0<br />
128 64 32 16 8 4 2 1<br />
1<br />
Our next one: 13 - 64 = -51. Since this is negative we put a zero in the column heading<br />
for 64 and move on to the next one.<br />
2 7 2 6 2 5 2 4 2 3 2 2 2 1 2 0<br />
128 64 32 16 8 4 2 1<br />
1 0<br />
50
Our next one: 13 - 32 = -19. Since this is negative we put a zero in the column heading<br />
for 32 and move on to the next one.<br />
2 7 2 6 2 5 2 4 2 3 2 2 2 1 2 0<br />
128 64 32 16 8 4 2 1<br />
1 0 0<br />
Our next one: 13 - 16 = -3. Since this is negative we put a zero in the column heading for<br />
16 and move on to the next one.<br />
2 7 2 6 2 5 2 4 2 3 2 2 2 1 2 0<br />
128 64 32 16 8 4 2 1<br />
1 0 0 0<br />
Our next one: 13 - 8 = 5. So we put a “1” under the 8 heading and move to the next<br />
column heading.<br />
2 7 2 6 2 5 2 4 2 3 2 2 2 1 2 0<br />
128 64 32 16 8 4 2 1<br />
1 0 0 0 1<br />
Our next one: 5 - 4 = 1. So we put a “1” under the 4 heading and move to the next<br />
column heading.<br />
2 7 2 6 2 5 2 4 2 3 2 2 2 1 2 0<br />
128 64 32 16 8 4 2 1<br />
1 0 0 0 1 1<br />
Our next one: 1 - 2 = -1. Since this is negative we put a zero in the column heading for 2<br />
and move on to the next one.<br />
2 7 2 6 2 5 2 4 2 3 2 2 2 1 2 0<br />
128 64 32 16 8 4 2 1<br />
1 0 0 0 1 1 0<br />
Our next one: 1 - 1 = 0. So we put a “1” under the 1 heading.<br />
2 7 2 6 2 5 2 4 2 3 2 2 2 1 2 0<br />
128 64 32 16 8 4 2 1<br />
1 0 0 0 1 1 0 1<br />
And we are done…right? Wrong! We should always double-check our work. To do this<br />
we convert from binary back to decimal. By adding the column headings:<br />
128+8+4+1=141. It worked!<br />
51
Let’s try another one: 223. Starting out with our 128 column heading: 223 - 128 = 95.<br />
So we put a “1” under the 128 heading and move to the next column heading.<br />
2 7 2 6 2 5 2 4 2 3 2 2 2 1 2 0<br />
128 64 32 16 8 4 2 1<br />
1<br />
Our next one: 95 - 64 = 31. So we put a “1” under the 64 heading and move to the next<br />
column heading.<br />
2 7 2 6 2 5 2 4 2 3 2 2 2 1 2 0<br />
128 64 32 16 8 4 2 1<br />
1 1<br />
Our next one: 31 - 32 = -1. Since this is negative we put a zero in the column heading for<br />
32 and move on to the next one.<br />
2 7 2 6 2 5 2 4 2 3 2 2 2 1 2 0<br />
128 64 32 16 8 4 2 1<br />
1 1 0<br />
Our next one: 31 - 16 = 15. So we put a “1” under the 16 heading and move to the next<br />
column heading.<br />
2 7 2 6 2 5 2 4 2 3 2 2 2 1 2 0<br />
128 64 32 16 8 4 2 1<br />
1 1 0 1<br />
Our next one: 15 - 8 = 7. So we put a “1” under the 8 heading and move to the next<br />
column heading.<br />
2 7 2 6 2 5 2 4 2 3 2 2 2 1 2 0<br />
128 64 32 16 8 4 2 1<br />
1 1 0 1 1<br />
Our next one: 7 - 4 = 3. So we put a “1” under the 4 heading and move to the next<br />
column heading.<br />
2 7 2 6 2 5 2 4 2 3 2 2 2 1 2 0<br />
128 64 32 16 8 4 2 1<br />
1 1 0 1 1 1<br />
52
Our next one: 3 - 2 = 1. So we put a “1” under the 2 heading and move to the next<br />
column heading.<br />
2 7 2 6 2 5 2 4 2 3 2 2 2 1 2 0<br />
128 64 32 16 8 4 2 1<br />
1 1 0 1 1 1 1<br />
Our next one: 1 - 1 = 0. So we put a “1” under the 1 heading.<br />
2 7 2 6 2 5 2 4 2 3 2 2 2 1 2 0<br />
128 64 32 16 8 4 2 1<br />
1 1 0 1 1 0 0 1<br />
And we are done…right? Wrong! We should always double-check our work. To do this<br />
we convert from binary back to decimal. By adding the column headings:<br />
128+64+16+8+4+2+1=223. It worked!<br />
Let’s take a quick time out and let you try some decimal to binary conversions:<br />
1. 84<br />
2. 243<br />
3. 24<br />
4. 254<br />
5. 179<br />
Now let’s check your answers with the answer section. Did you get the right ones? I<br />
certainly hope so. Try not to use a calculator. You will not be allowed to use one on the<br />
CCNA test so get practice without it now. Notice in this lab we have been using 8 binary<br />
numbers for our conversions. Each one of those binary numbers is called a “bit” and 8 of<br />
them together (which is extremely common in computers) is called an “octet” or “<strong>by</strong>te.”<br />
We can do conversions for more or less bits, but it is just a matter of adding more or less<br />
columns to our bit-bashing table.<br />
Supplemental Lab or Challenge Activity:<br />
1. Make a binary to decimal conversion chart for all decimal numbers between 0 and<br />
255.<br />
2. Try to calculate the binary numbers for these decimal numbers:<br />
a. 1024<br />
b. 4096<br />
c. 3333<br />
d. 4309<br />
e. 64768<br />
3. See if you can find out what are hexadecimal, octal, gray code, and binary coded<br />
decimal conversions.<br />
4. You can make a “binary to decimal” self-tutoring aid using standard index cards.<br />
On one side of the index card write a big “0” on it. On the other side write a big<br />
“1” on it. Then arrange the index cards so all zeroes or all ones are facing up.<br />
53
Then, using a different color marker write one of the column headings in small<br />
numbers along the bottom. Then flip them and do the same on the other side.<br />
They should look like this on one side:<br />
0 0 0 0 0 0 0 0<br />
128 64 32 16 8 4 2 1<br />
And like this on the other side:<br />
1 1 1 1 1 1 1 1<br />
128 64 32 16 8 4 2 1<br />
Now, instead of adding column headings you can just flip the index cards as<br />
needed. Let’s work through one with the index flip cards. Let’s convert 234 from<br />
decimal to binary. Start with your cards like this:<br />
0 0 0 0 0 0 0 0<br />
128 64 32 16 8 4 2 1<br />
Then just subtract the column headings (in this case the little numbers on the<br />
bottom of the card)…234-128=106. Since it is a positive number flip the card and<br />
move on to the next one.<br />
1 0 0 0 0 0 0 0<br />
128 64 32 16 8 4 2 1<br />
106 - 64 = 42. Since it is a positive number flip the card and move on to the next<br />
one.<br />
1 1 0 0 0 0 0 0<br />
128 64 32 16 8 4 2 1<br />
54
42 - 32 = 10. Since it is a positive number flip the card and move on to the next<br />
one.<br />
1 1 1 0 0 0 0 0<br />
128 64 32 16 8 4 2 1<br />
10 - 16 = -6. Since it is a negative number leave the card on zero and move on to<br />
the next one.<br />
1 1 1 0 0 0 0 0<br />
128 64 32 16 8 4 2 1<br />
10 – 8 = 2. Since it is a positive number flip the card and move on to the next<br />
one.<br />
1 1 1 0 1 0 0 0<br />
128 64 32 16 8 4 2 1<br />
2 – 4 = -2. Since it is a negative number leave the card on zero and move on to<br />
the next one.<br />
1 1 1 0 1 0 0 0<br />
128 64 32 16 8 4 2 1<br />
2 – 2 = 0. Since it is a positive number flip the card and move on to the next one.<br />
Since our remainder is zero then all other numbers to the right are also zero (only<br />
one card in this case).<br />
1 1 1 0 1 0 1 0<br />
128 64 32 16 8 4 2 1<br />
55
Let me just walk through one more…you can do the math yourself. Let’s convert 158 to<br />
binary.<br />
1 0 0 0 0 0 0 0<br />
128 64 32 16 8 4 2 1<br />
1 0 0 0 0 0 0 0<br />
128 64 32 16 8 4 2 1<br />
1 0 0 0 0 0 0 0<br />
128 64 32 16 8 4 2 1<br />
1 0 0 1 0 0 0 0<br />
128 64 32 16 8 4 2 1<br />
1 0 0 1 1 0 0 0<br />
128 64 32 16 8 4 2 1<br />
1 0 0 1 1 1 0 0<br />
128 64 32 16 8 4 2 1<br />
1 0 0 1 1 1 1 0<br />
128 64 32 16 8 4 2 1<br />
1 0 0 1 1 1 1 0<br />
128 64 32 16 8 4 2 1<br />
So what have I learned here?<br />
In this lab you learned how to do binary to decimal and decimal to binary conversions.<br />
You will be using these later in subnetting labs using IP addresses in decimal and being<br />
able to convert them to binary. You will find bit-bashing sheets on the next two pages.<br />
56
2 7 2 6 2 5 2 4 2 3 2 2 2 1 2 0<br />
128 64 32 16 8 4 2 1<br />
57
2 7 2 6 2 5 2 4 2 3 2 2 2 1 2 0<br />
128 64 32 16 8 4 2 1<br />
58
Hexadecimal Numbering<br />
Objective:<br />
To learn how to convert between Hexadecimal, Decimal, and Binary numbers.<br />
Tools and Materials:<br />
Pencil and Paper<br />
Bit-bashing worksheet<br />
Background:<br />
In the previous lab you learned how to convert between a base 2 numbering system<br />
(binary) and a base 10 numbering system (decimal). As Emeril says we will be “kicking<br />
it up a notch” here <strong>by</strong> adding in base 16 numbering systems (hexadecimal). Just like our<br />
decimal system used the numbers zero-one-two-three-four-five-six-seven-eight-nine to<br />
represent the 10 places in a base 10 system we use zero-one-two-three-four-five-sixseven-eight-nine-ten-eleven-twelve-thirteen-fourteen-fifteen<br />
to represent the 16 places in<br />
a base 16 system. The only difference is since we cannot distinguish a one-four from a<br />
fourteen we use letters for ten through fifteen. Therefore our base 16 system is coded:<br />
0-9 0-9<br />
10 A<br />
11 B<br />
12 C<br />
13 D<br />
14 E<br />
15 F<br />
It’s actually easy once you get used to it. Once again, just like our decimal and binary<br />
system, each column would be represented as a power with base 16. If we look at the<br />
“column headings” for five bits of hexadecimal numbers they become:<br />
16 4 16 3 16 2 16 1 16 0<br />
65536 4096 256 16 1<br />
Let’s start with binary to hexadecimal conversions using octets…they are the easiest.<br />
Since there is eight bits these are easy:<br />
1. We just divide the octet into two groups of 4 bits<br />
2. Make new column headings<br />
3. Add them up.<br />
4. Then, with those totals, we use our decimal to hexadecimal conversion chart<br />
above to complete the conversion.<br />
59
For example, lets convert the binary octet 11001101 to hexadecimal.<br />
1. We just divide the octet into two groups of 4 bits<br />
1 1 0 0 1 1 0 1<br />
1 1 0 0 1 1 0 1<br />
2. Make new column headings<br />
3. Add them up.<br />
8 4 2 1 8 4 2 1<br />
1 1 0 0 1 1 0 1<br />
8 4 2 1 8 4 2 1<br />
1 1 0 0 1 1 0 1<br />
8+4=12 8+4+1=13<br />
4. Then, with those totals, we use our decimal to hexadecimal conversion chart<br />
above to complete the conversion.<br />
12=C 13=D<br />
The binary octet “11001101” is equivalent to the hexadecimal number “CD.”<br />
Let’s do another one: convert 10010111 from binary to hexadecimal.<br />
1. We just divide the octet into two groups of 4 bits<br />
1 0 0 1 0 1 1 1<br />
1 0 0 1 0 1 1 1<br />
2. Make new column headings<br />
3. Add them up.<br />
8 4 2 1 8 4 2 1<br />
1 0 0 1 0 1 1 1<br />
8 4 2 1 8 4 2 1<br />
1 0 0 1 0 1 1 1<br />
8+1=9 4+2+1=7<br />
60
4. Then, with those totals, we use our decimal to hexadecimal conversion chart<br />
above to complete the conversion.<br />
9=9 7=7<br />
The binary octet “11001101” is equivalent to the hexadecimal number “97.”<br />
Don’t think in terms of decimal…this is NOT ninety-seven. In hexadecimal this<br />
is “nine-seven.”<br />
You can convert from decimal to binary and then to hexadecimal. We use subscripts to<br />
denote which base of number we are using (2 for binary, 10 for decimal and 16 for<br />
hexadecimal). Try it with these:<br />
1. 143 10<br />
2. 244 10<br />
3. 78 10<br />
4. 128 10<br />
5. 191 10<br />
Check your answers. Hopefully you are correct! If you have decimal numbers with more<br />
than 255 (our binary octet upper limit) then we have ways to convert them too. To<br />
convert a decimal number to hexadecimal we just keep dividing it <strong>by</strong> 16 until we get to<br />
zero. The remainders, in reverse order, are used to code the hexadecimal. For example<br />
let’s convert the decimal number 28436 to hexadecimal:<br />
28436 divided <strong>by</strong> 16 = 1777 R 4<br />
1777 divided <strong>by</strong> 16 = 111 R 1<br />
111 divided <strong>by</strong> 16 = 6 R 15<br />
6 divided <strong>by</strong> 16 = 0 R 6<br />
The remainders, in reverse order, are 6-15-1-4. When we replace 15 with F we get our<br />
hexadecimal conversion of 6F14 (“six-F-one-four”). Ok…So I know a lot of you cheated<br />
and used a calculator. Here is a chart for the remainders converted to whole numbers:<br />
R 0 0/16 0.0000 R 8 8/16 0.5000<br />
R 1 1/16 0.0625 R 9 9/16 0.5625<br />
R 2 2/16 0.1250 R 10 10/16 0.6250<br />
R 3 3/16 0.1875 R 11 11/16 0.6875<br />
R 4 4/16 0.2500 R 12 12/16 0.7500<br />
R 5 5/16 0.3125 R 13 13/16 0.8125<br />
R 6 6/16 0.3750 R 14 14/16 0.8750<br />
R 7 7/16 0.4375 R 15 15/16 0.9375<br />
61
To convert a large hexadecimal number into decimal we just write down our hexadecimal<br />
codes from the bottom up and then multiply them with successively larger powers of 16.<br />
For example let’s convert the hex number 8C3B into decimal:<br />
B 11 multiplied <strong>by</strong> 16 0 = 11 x 1 = 11<br />
3 3 multiplied <strong>by</strong> 16 1 = 3 x 16 = 48<br />
C 12 multiplied <strong>by</strong> 16 2 = 12 x 256 = 3072<br />
8 8 multiplied <strong>by</strong> 16 3 = 8 x 4096 = +32768<br />
8C3B 16 (hex) is equivalent to 35899 10 (dec)<br />
Supplemental Lab or Challenge Activity:<br />
1. Here are some more to try converting. Be sure to include binary, decimal and<br />
hexadecimal conversions for each number.<br />
a. 2047 10<br />
b. 1011011101 2<br />
c. 9BBB 16<br />
d. 248 16<br />
e. 35898 10<br />
2. Try adding hexadecimal conversions to that table you made in the binary<br />
numbering lab (from zero to 255).<br />
So What Have I Learned Here?<br />
In this lab you have learned about hexadecimal conversions. Hexadecimal is used for<br />
MAC addresses and for sending information over the Internet. Later, when you learn to<br />
use protocol inspectors, you will be able to see the actual codes sent in packet form over<br />
the network. Then you can double-check the hexadecimal codes with binary and decimal<br />
conversions. After all, we are not making you do math to be mean old fuddy-duddies.<br />
62
Paper Lab: OSI Model and Encapsulation<br />
Objective:<br />
To be able to learn more about the OSI model, its layers, and their descriptions.<br />
Tools and Materials:<br />
Paper and pencil<br />
Background:<br />
In your textbook you have learned about the layers of the OSI model, what happens on<br />
each layer, and descriptions of each layer. You probably took the time to memorize<br />
exactly the definitions of each layer. I got news for you…on “the” test the definitions are<br />
completely different from the ones in the book. Wouldn’t it be nice if they did something<br />
consistent for once? Actually the definitions are similar, just completely worded<br />
differently. So here we will look at the definitions you were told and try to create some<br />
alternate wordings. Your test will probably have something like a drag and drop scenario<br />
for it so we will just use simple matching exercises here.<br />
The OSI Model<br />
There are seven layers in the OSI model. From bottom to top we number them from<br />
layer 1 to layer 7. They are the: physical, data link, network, transport, session,<br />
presentation, and application layers.<br />
The reason we need to understand which layer is which number is to be able to decipher<br />
sales brochures. Sometimes they refer to layer 2 devices, of which we could think<br />
“bridges.”<br />
As a memory device we can remember from the top down that All Presidents Seem To<br />
Need Data Processors or “All People Seem To Need Domino’s Pizza.” There are other<br />
mnemonic memory devices like something about taking spinach pizza always, but these<br />
seems to work best for most people<br />
Let’s take a brief look at each layer:<br />
Application<br />
Presentation<br />
Session<br />
Transport<br />
identifies and establishes the availability of intended communication<br />
partners, synchronizes cooperating applications, and establishes agreement<br />
on procedures for error recovery and control of data integrity. “browsers”<br />
translates multiple data representation formats <strong>by</strong> using a common data<br />
representation format. “concerned with data structures and negotiation data<br />
transfer syntax” “encoding, representation of data, ASCII”<br />
synchronizes dialogue between presentation layer entities and manages their<br />
data exchange. Information is encapsulated into data blocks here.<br />
Responsible for reliable network communication between end nodes and<br />
provides transport mechanisms for the est., maintenance, and termination of<br />
virtual circuits, transport fault detection and recovery and information flow<br />
control.<br />
63
<strong>Network</strong><br />
Data Link<br />
Physical<br />
Provides connectivity and path selection between two end systems where<br />
routing occurs. Segments are encapsulated into packets here.<br />
Concerned with physical addressing, network topology, and media access.<br />
Packets are encapsulated into frames here.<br />
Describes the various types of networking media. Frames are converted into<br />
bits here. Defines the electrical and functional specifications for activating<br />
and maintaining the link between end systems.<br />
note: stress underlined areas as “buzz words” to remember for each layer.<br />
Let's take a peek at each layer…<br />
Now when you go to communicate over the network your host computer will begin<br />
readying for transmission from the top down. Therefore, we will start with Layer 7: the<br />
Application layer.<br />
Layer 7: the Application layer<br />
The official definition is the application layers "identifies and establishes the availability<br />
of intended communication partners, synchronizes cooperating applications, and<br />
establishes agreement on procedures for error recovery and control of data integrity.<br />
“browsers” This is the layer the user will see. Correlation's here include FTP, HTTP,<br />
MS-Word, etc.<br />
Visual representation: Application box (MS-WORD, etc), big eyes<br />
Layer 6: The Presentation layer<br />
The official definition of the presentation layer is that it "translates multiple data<br />
representation formats <strong>by</strong> using a common data representation format. “concerned with<br />
data structures and negotiation data transfer syntax” “encoding, representation of data,<br />
ASCII”<br />
This is the layer that is in charge of "Super Secret Spy Stuff" and "Key" coding. This is<br />
where we compress and encrypt our information before sending. Examples here include<br />
ASCII and PKZIP.<br />
Visual Representation: sunglasses and hat; big key<br />
Layer 5: The Session layer<br />
The official definition of the session layer is that it "synchronizes dialogue between<br />
presentation layer entities and manages their data exchange. Information is encapsulated<br />
into data blocks here."<br />
This is the layer that says "HEY!" I want to establish a networking session. In fact, if you<br />
have internet access from your home computer then you may even see the message<br />
"establishing session" during the connection process.<br />
Visual Representation: Big lips<br />
64
Layer 4: The Transport layer<br />
The official definition of the transport layer is that is "Responsible for reliable network<br />
communication between end nodes and provides transport mechanisms for the<br />
establishment, maintenance, and termination of virtual circuits, transport fault detection<br />
and recovery and information flow control."<br />
This is the layer where information is readied for transmission. For example, if we were<br />
to make a large packaging machine about 60 feet long and 20 feet wide that we wish to<br />
ship we would have to "break it down" into smaller chunks before sending it. These<br />
chunks would be numbered 1 of x, 2 of x, 3 of x, etc. In this manner we could assure that<br />
all packages were sent and received. All of the chunks would be placed into the semitrucks<br />
for transport. Could they be delivered now? Nope, lets move on to the next layer.<br />
Visual Representation: Semi-truck<br />
Layer 3: The <strong>Network</strong> layer<br />
The official definition of this layer is that it "provides connectivity and path selection<br />
between two end systems where routing occurs. Segments are encapsulated into packets<br />
here."<br />
Now before we can start sending out our shipment we need to give it a destination and<br />
the directions on how to get from here to there. This layer is also in charge of logical<br />
addressing.<br />
Visual Representation: map<br />
Layer 2: The Data Link layer<br />
The official definition of this layer is that it is "concerned with physical addressing,<br />
network topology, and media access. Packets are encapsulated into frames here.<br />
The data link layer is in charge of physical addressing and a little bit of error checking<br />
called "cyclic redundancy checking." CRC calculates the total size of the packets,<br />
divides the total size <strong>by</strong> a unique prime number (a number divisible only <strong>by</strong> itself and<br />
one) and attaches it to the packet. This is also the layer where the NIC card functions.<br />
Visual Representation: MAC, CRC, LLC.<br />
Layer 1: The Physical layer<br />
The official definition of this layer is that it "describes the various types of networking<br />
media. Frames are converted into bits here. Defines the electrical and functional<br />
specifications for activating and maintaining the link between end systems.<br />
The physical layer is, simply put, the media or cabling.<br />
Visual Representation: cables<br />
65
Encapsulation<br />
As we move down the OSI model a process called encapsulation takes place. At<br />
the session layer the information is called "data." At the transport layer the data is<br />
converted into "segments." At the network layer the segments are encapsulated into<br />
"packets." At the data link layer the packets are now encapsulated into "frames."<br />
Finally, at the physical layer the frames are converted into "bits."<br />
A good way to remember this is “Don’t Send People Free Beer.” Beer is on the<br />
physical layer because its macho. If you want to remember it from the bottom up (which<br />
might confuse you with the OSI model direction) you can remember “Been free people<br />
since democracy.”<br />
Pay close attention to when the information headers and footers are added. This<br />
can be somewhat confusing. Let’s take a look at a make believe situation between two<br />
users communicating over the Internet. Suppose Joe wants to send an email to Casey.<br />
His message is 50,000 <strong>by</strong>tes in size at the application layer. This email is passed down to<br />
the presentation layer where it is compressed, encrypted, and formatted down to a<br />
message of 30,000 <strong>by</strong>tes in size (ok…so it really won’t be this neat but cut me a break it<br />
is easier to explain this way). Then the 30,000 <strong>by</strong>te compressed, formatted, and<br />
encrypted data is sent to the session layer. Here Joe’s computer establishes a session with<br />
Casey’s computer…<br />
Session layer communication:<br />
Joe: Hey Casey…can I hook up with you (no pun intended)<br />
Casey: I acknowledge that you are requesting a hook up<br />
Joe: I received your acknowledgement of my request for a hookup.<br />
Casey: I received your acknowledgement of my acknowledgment of your request<br />
for a hookup.<br />
Then the data is passed to the transport layer for numbering. Here the 30,000 <strong>by</strong>te data is<br />
broken down into 6 segments and numbered: 1 of 6, 2 of 6, 3 of 6, 4 of 6, 5 of 6 and 6 of<br />
6. Handshaking and windowing takes place to finish the establishment of the session.<br />
Transport layer communication:<br />
Joe: I want to send information so how quickly can I send it?<br />
Casey: I acknowledge that you are requesting to send information.<br />
Joe: I received your acknowledgement of my request to send information.<br />
Casey: I received your acknowledgement of my acknowledgment of your request<br />
to send information.<br />
Casey: I am not busy so you can transmit at 22300 bps.<br />
Joe: I acknowledge that you can transmit at 22300 bps.<br />
Casey: I received your acknowledgement of my request to transmit at 22300 bps.<br />
Joe: I received your acknowledgement of my acknowledgment of your ability<br />
to receive information at 22300 bps.<br />
Then the transport layer segment is passed to the network layer. The network layer adds<br />
the source and destination ip addresses (logical addresses) plus some other stuff (we will<br />
look at later). Then the new “packet” is sent to the data link layer. There the data link<br />
66
layer adds LLC, CRC, and MAC information. The LLC is just instructions on how to get<br />
from layer 1 to layer 3. MAC information is the hexadecimal, 48-bit, physical address of<br />
the source and destination. The CRC is an error-checking mechanism for the data link<br />
layer. It essentially works like this: Now that the “frame” is nearly completed the overall<br />
number of bits is divided <strong>by</strong> a unique prime number (a number divisible only <strong>by</strong> one and<br />
itself…17 and 31 are most common). With all the overhead of the headers and footers<br />
our individual frames may be 6808 <strong>by</strong>tes in size <strong>by</strong> now. So the CRC divides 6808 <strong>by</strong> 17<br />
(I picked which one our network is using arbitrarily)..and we get 400 with a remainder of<br />
8. The 17 is attached along with the remainder of 8. When this frame gets to Casey the<br />
division will take place again. If the same remainder is attained then Casey will assume<br />
everything came over ok. Also, since all of our Ethernet, Token Ring, Frame Relay,<br />
ATM, etc. is found on the data link layer that information also is added (before the CRC<br />
stuff). Finally the entire frame is passed to the physical layer where it is converted from<br />
hex into decimal and transmitted over the network. On Casey’s computer the information<br />
is received, checked and re-assembled. In our case 6 chunks of information that are 6808<br />
<strong>by</strong>tes are received (40,848). If we follow our same compression ratio of 5:3 then we<br />
would expect the 40,848 to be un-compressed to over 68,000 <strong>by</strong>tes. However, since all<br />
of the headers and footers are removed after being de-compressed our original message<br />
will be back to its original size of 50,000 <strong>by</strong>tes. This is why, when you download<br />
something from the Internet, a 100,000 <strong>by</strong>te download counts up to about 130,000 <strong>by</strong>tes<br />
before being “finished” but then is only 100,000 <strong>by</strong>tes when you look at it. Aha!<br />
Mysteries of the Internet Revealed! Even better than Geraldo and the Capone’s Vault.<br />
Step-By-Step Instructions:<br />
Ok…so those are the definitions/encapsulations that they asked you to know. Let’s take<br />
a few seconds to re-write them in our own words.<br />
Layer <strong>CISCO</strong> definition Your definition<br />
Application<br />
Presentation<br />
identifies and establishes the<br />
availability of intended<br />
communication partners,<br />
synchronizes cooperating<br />
applications, and establishes<br />
agreement on procedures for<br />
error recovery and control of<br />
data integrity. “browsers”<br />
translates multiple data<br />
representation formats <strong>by</strong><br />
using a common data<br />
representation format.<br />
“concerned with data<br />
structures and negotiation data<br />
transfer syntax” “encoding,<br />
representation of data, ASCII”<br />
67
Session<br />
Transport<br />
<strong>Network</strong><br />
Data Link<br />
Physical<br />
synchronizes dialogue between<br />
presentation layer entities and<br />
manages their data exchange.<br />
Information is encapsulated<br />
into data blocks here.<br />
Responsible for reliable<br />
network communication<br />
between end nodes and<br />
provides transport mechanisms<br />
for the est., maintenance, and<br />
termination of virtual circuits,<br />
transport fault detection and<br />
recovery and information flow<br />
control.<br />
Provides connectivity and path<br />
selection between two end<br />
systems where routing occurs.<br />
Segments are encapsulated into<br />
packets here.<br />
Concerned with physical<br />
addressing, network topology,<br />
and media access. Packets are<br />
encapsulated into frames here.<br />
Describes the various types of<br />
networking media. Frames are<br />
converted into bits here.<br />
Defines the electrical and<br />
functional specifications for<br />
activating and maintaining the<br />
link between end systems.<br />
Let’s compare. My definitions of the OSI model layers are:<br />
Application—Where most non-networking programs function. This is the layer where<br />
networking (like client-server) and the encapsulation process starts and ends.<br />
Presentation—The second step in networking. This is where data is compressed,<br />
formatted or encrypted. The “super-secret-spy-stuff” layer.<br />
Session—This is where networking “sessions” between two devices are started, managed,<br />
and terminated. The information is called “data.”<br />
Transport—This is where the data is “chunked” into “segments” before being passed to<br />
the network layer. Each chunk/segment is labeled 1 of X, 2 of X, 3 of X, etc. This is the<br />
layer predominantly in charge of error control, even though each individual layer has its<br />
own error control (to a lesser extent).<br />
<strong>Network</strong>—This is where each segment is given directions on how to get from here to<br />
there using logical addresses. After this information is added the segment is called a<br />
“packet.”<br />
68
Data Link—Takes care of topologies and physical addresses. The packet is now called a<br />
“frame.”<br />
Physical—Where the media is located. No intelligent processing takes place here just<br />
conversion to binary.<br />
Matching:<br />
Please match the definition on the left with the corresponding OSI layer on the right.<br />
1. ____ Agreement of using ASCII is performed here. Presentation<br />
Physical<br />
2. _____ Signals are amplified here. Session<br />
Transport<br />
3. _____ Version of protocol used will be found here. Data Link<br />
Application<br />
4. _____ Responsible for terminating communication between <strong>Network</strong><br />
network devices.<br />
Please match the item on the left with the corresponding OSI layer on the right.<br />
1. _____ Manage communication session Presentation<br />
Transport<br />
2. _____ Capturing Packets Session<br />
<strong>Network</strong><br />
3. _____ Flow Control Application<br />
Physical<br />
4. _____ Logical addressing Data link<br />
So What Have I Learned Here?<br />
That they really want you to know your layers inside and out…not just an exact<br />
definition but other similar definitions. Let’s face it…its enough to drive you friggin<br />
nuts. The only advice I can give is to memorize the one’s that are extremely technical,<br />
geeky, and just plain obnoxious. Then write your own definitions to check your<br />
understanding of the layers and have someone else (like a teacher or really<br />
knowledgeable friend) check them over for accuracy.<br />
69
Objective:<br />
To be able to learn more about the LAN topologies used in networking.<br />
Tools and Materials:<br />
Paper and pencil<br />
Paper Lab: LAN Topologies<br />
Background:<br />
In your textbook you have read about many topologies. Let’s take some time to go over<br />
the specifics of each topology. Many textbooks seem to broadly categorize three types of<br />
topologies as the “basics.” These include: bus, star, and ring.<br />
A bus topology has all devices connected to a central backbone cable with terminating<br />
resistors on each end of the central backbone cable. This really is not used too much<br />
anymore since one computer, connector, or cable segment can cause the entire network to<br />
go down.<br />
Bus Topology Diagram:<br />
Terminating<br />
Resistor<br />
Terminating<br />
Resistor<br />
Bus topologies typically used coaxial cabling (50 to 62 ohm…not the 75 ohm for your<br />
cable television). Names here include “thick net” and “thin net.”<br />
Star topologies have all networking devices connected to a central device. In fact you<br />
have already built one in your earlier labs on small networks with a hub.<br />
Star Topology Diagram:<br />
1 3 5<br />
NIC NIC NIC<br />
A B C<br />
Star topologies usually used category 5 or 5e UTP or STP cabling. Star topologies are<br />
used in Ethernet networks.<br />
70
Ring topologies have every device connected to exactly two other devices. As a good<br />
example have your class stand up and hold hands to form a ring. Ok…so it’s a bit corny<br />
but it is a good “hands on” (so to speak) example of a ring topology.<br />
Ring topology diagram:<br />
Ring topologies are used in FDDI networks too.<br />
It is fairly certain that most larger networks fall into the general category called “hybrid”<br />
which means some of this and some of that.<br />
Hybrid <strong>Network</strong>:<br />
Star-Ring Hybrid <strong>Network</strong><br />
71
There are all kinds of other topologies that are just “more extreme” versions of the three<br />
basic topologies:<br />
1. Extended Star<br />
2. Mesh<br />
3. Tree<br />
4. Irregular<br />
5. Cellular<br />
Extended Star: Two or more star networks connected together with a backbone cable.<br />
D E F<br />
NIC NIC NIC<br />
1 3 5<br />
2<br />
XO<br />
2<br />
1 3 5<br />
NIC NIC NIC<br />
A B C<br />
Mesh or Full-mesh: Every computer or networking device connected to every other<br />
computer or networking device (used primarily in frame relay networks).<br />
72
Tree: Like a hard drive structure with folders and documents. (I just used workstations<br />
to show the overall structure…other networking devices would be included and used to<br />
pass network traffic).<br />
Irregular: Free-form networking. (I just used workstations to show the overall<br />
structure…other networking devices would be included and used to pass network traffic).<br />
Cellular: Exacting cells with a networking device at the middle. Nodes and networking<br />
device use wireless networking. (I just used workstations to show the overall<br />
structure…other networking devices would be included and used to pass network traffic).<br />
73
Supplemental Lab or Challenge Activity:<br />
1. Draw the network for your classroom and identify the LAN topology.<br />
2. Draw the network for your floor or building and identify the LAN topology.<br />
Document each sub-network type (ie. A backbone ring to connect the star<br />
topologies in each classroom).<br />
So What Have I Learned Here?<br />
In later labs you will look at LAN topologies from other companies (which will mostly<br />
be hybrids…but you will “see” elements of our basics…bus, star, and ring). As your<br />
familiarity with these topologies and network design grows so will your level of<br />
understanding grow about the pro’s and con’s of each network topology.<br />
74
Ethernet Packet Structures<br />
Objective:<br />
To learn about the structure of Ethernet packets.<br />
Background:<br />
So far we have been talking about networking and packets passing over the network. In<br />
this lab we will look at the precise structure of packets. Later when we use protocol<br />
inspectors you will be able to understand the information better.<br />
Ethernet<br />
Ethernet generally refers to a standard developed <strong>by</strong> a consortium of the Digital<br />
Equipment Corporation (DEC), Intel, and Xerox. It is one of the most widely used<br />
encapsulation standards in use for networking today. There have been many versions and<br />
revisions to it over the past twenty years. So trying to “nail-down” the exact structure of<br />
an Ethernet packet is as easy as nailing jello to the wall. Simply put, you need to be more<br />
specific about which Ethernet packet structure you want to examine. There have many<br />
different types of Ethernet, or “flavors” if you will, and we will look at the two most<br />
common ones: the “generic Ethernet” and “Ethernet SNAP.” Basically our two Ethernet<br />
packet structures are the same except the SNAP packet uses part of the data field for LLC<br />
sub-layer and SNAP information. In either case the minimum/maximum size of our<br />
Ethernet packet is 64-1518 <strong>by</strong>tes. If the information in the data field will be smaller than<br />
the minimum size allowed then it will be “padded” with contiguous zeros to fill the data<br />
field up to the minimum size.<br />
802.2/802.3 Ethernet (RFC 894)<br />
Preamble SOF DA SA Type Data FCS<br />
Figure 1—Generic Ethernet packet structure.<br />
This “Standard for the Transmission of IP Datagrams Over Ethernet <strong>Network</strong>s” was<br />
written <strong>by</strong> Charles Hornig in 1984 (ftp://ftp.isi.edu/in-notes/rfc894.txt ).<br />
Stripped <strong>by</strong> the NIC:<br />
The preamble can vary in length. The preamble basically is used to help set up the<br />
transmission and reception of the information through synchronization. The actual<br />
amounts of bits have varied over the years but the principle is still the same: a series of<br />
alternating zeroes and ones encompass the preamble. Some of these can be lost during<br />
transmission but that is ok. The incoming stream of bits “establishes” that the reception<br />
of a packet has started. Most agree on 62 bits. (In hex: 1555555555555 In binary:<br />
010101010101010101010101010101010101010101010101010101010101010101010101<br />
0101010101). You will not see this with a protocol sniffer because it is stripped and<br />
dumped.<br />
75
The Start of Frame Delimiter (SOF) further helps to set up the transmission and<br />
reception of the information and synchronization. This is only a 2-bit portion with just<br />
two one’s. No matter how many zeros and one’s come before the SOF the NIC does<br />
nothing until it gets to the one-one (SOF). This information is stripped <strong>by</strong> the NIC and<br />
the NIC can “do its work” on the rest of the packet. (In hex: 3 In binary: 11) You will<br />
not see this with a protocol sniffer because it is stripped and dumped.<br />
Used in de-encapsulation:<br />
The Destination Address (DA) is the physical address (MAC) of the networking device<br />
the information is going to be sent to. This is 48 bits in hexadecimal. This will be the<br />
first “bits” of information you will see with a protocol inspector.<br />
The Source Address (SA) is the physical address (MAC) of the networking device<br />
sending the information. This is 48 bits in hexadecimal.<br />
The Type indicates what types of request will follow. This will be given in hexadecimal.<br />
This field is usually 2 <strong>by</strong>tes. A 0800 in the type field indicates an IP datagram will<br />
follow. A 0806 in the type field indicates an ARP request will follow. A 0835 in the<br />
type field indicates a RARP request will follow. Current type codes can be found at<br />
http://www.iana.org/numbers.html#<br />
The Data is what it sounds like…it’s the “meat” of the information transmitted. For<br />
“generic” Ethernet this can be as small as 46 <strong>by</strong>tes and up to 1500 <strong>by</strong>tes. The first part of<br />
the data field contains the IP header information. See the discussion below on the<br />
composition of the data field for both types of Ethernet packets.<br />
The Frame Check Sequence (FCS) is the CRC information for error control. This is 4<br />
<strong>by</strong>tes in hexadecimal. There are many different error control calculations. (Is it a<br />
coincidence there are many flavors of Jell-O too?) I described one in an earlier lab using<br />
unique prime numbers. Another FCS calculation is called “AUTODIN II.” It is<br />
calculated using this formula:<br />
(X 32 + X 26 + X 23 + X 22 + X 16 + X 12 + X 11 + X 10 + X 8 + X 7 + X 5 + X 4 + X 2 + X 1 +1)<br />
802.2/802.3 Ethernet (RFC 1042)<br />
802.3 MAC Information 802.2 Info<br />
Preamble SOF DA SA Length LLC SNAP Data FCS<br />
Figure 2—Ethernet SNAP packet structure.<br />
The “Standard for the Transmission of IP Datagrams Over IEEE 802 <strong>Network</strong>s” was<br />
written <strong>by</strong> Postel and Reynolds in 1988 (ftp://ftp.isi.edu/in-notes/rfc1042.txt ). This is<br />
more commonly used today.<br />
76
Stripped <strong>by</strong> the NIC:<br />
The preamble can vary in length. The preamble basically is used to help set up the<br />
transmission and reception of the information through synchronization. The actual<br />
amounts of bits has varied over the years but the principle is still the same: a series of<br />
alternating zeroes and ones encompass the preamble. Some of these can be lost during<br />
transmission but that is ok. The incoming stream of bits “establishes” that the reception<br />
of a packet has started. Most agree on 62 bits. (In hex: 1555555555555 In binary:<br />
010101010101010101010101010101010101010101010101010101010101010101010101<br />
0101010101). You will not see this with a protocol sniffer because it is stripped and<br />
dumped.<br />
The Start of Frame Delimiter (SOF) further helps to set up the transmission and<br />
reception of the information and synchronization. This is only a 2-bit portion with just<br />
two one’s. No matter how many zeros and one’s come before the SOF the NIC does<br />
nothing until it gets to the one-one (SOF). This information is stripped <strong>by</strong> the NIC and<br />
the NIC can “do its work” on the rest of the packet. (In hex: 3 In binary: 11) You will<br />
not see this with a protocol sniffer because it is stripped and dumped.<br />
Used in de-encapsulation:<br />
The Destination Address (DA) is the physical address (MAC) of the networking device<br />
the information is going to be sent to. This is 48 bits in hexadecimal. This will be the<br />
first “bits” of information you will see with a protocol inspector.<br />
The Source Address (SA) is the physical address (MAC) of the networking device<br />
sending the information. This is 48 bits in hexadecimal.<br />
The Length indicates how much information will follow (but not including the CRC<br />
information).<br />
802.2 LLC 802.2 SNAP<br />
DSAP SSAP con Org Type<br />
The 802.2 LLC packet is composed of three fields:<br />
The Destination Service Access Point (DSAP) field determines what protocol this<br />
is coming from (Novell/IP etc). The DSAP field is usually set to 0xaa for<br />
Ethernet. This is 1 <strong>by</strong>te.<br />
The Source Service Access Point (SSAP) field determines what protocol this is<br />
going to (Novell/IP etc). The DSAP field is usually set to 0xaa for Ethernet. This<br />
is 1 <strong>by</strong>te.<br />
77
The Control (con) is 1 <strong>by</strong>te long and is usually set to a hexadecimal 03 for<br />
Ethernet.<br />
The 802.2 SNAP packet is composed of two fields:<br />
The Organization Code (Org) is 3 <strong>by</strong>tes that are all usually set to zeros. In<br />
hexadecimal that would be 000000.<br />
The Type indicates what types of request will follow. This will be given in<br />
hexadecimal. This field is usually 2 <strong>by</strong>tes. A 0800 in the type field indicates an<br />
IP datagram will follow. A 0806 in the type field indicates an ARP request will<br />
follow. A 0835 in the type field indicates a RARP request will follow. Current<br />
type codes can be found at http://www.iana.org/numbers.html#<br />
The Data is what it sounds like…it’s the “meat” of the information transmitted. For<br />
“generic” Ethernet this can be as small as 46 <strong>by</strong>tes and up to 1500 <strong>by</strong>tes. The first part of<br />
the data field contains the LLC information, then the SNAP information and finally the<br />
IP header information. See the discussion below on the composition of the data field for<br />
both types of Ethernet packets.<br />
The Frame Check Sequence (FCS) is the CRC information for error control. This is 4<br />
<strong>by</strong>tes in hexadecimal. There are many different error control calculations. (Is it a<br />
coincidence there are many flavors of jello too?) I described one in an earlier lab using<br />
unique prime numbers.<br />
IP Data Field Composition<br />
The “Internet Protocol” Standard was written <strong>by</strong> Postel in 1981 (ftp://ftp.isi.edu/innotes/rfc791.txt<br />
). Geeze…it almost sounds like the egg came before the chicken? Well<br />
anyway, the IP data field is begun with a header portion of 20 <strong>by</strong>tes unless options are<br />
used.<br />
Ver Hlen TOS Length<br />
ID Flags FO TTL Prot HC SA DA Opt Data<br />
Figure 3—IP Data Field Composition<br />
The Version field is 4 bits. This is usually set for IP version 4 (IPv4) although IPv6 is<br />
emerging quickly. IPv4 uses 4 <strong>by</strong>tes and IPv6 uses 6 <strong>by</strong>tes. In hexadecimal IPv4 is<br />
denoted with a 45. IPv6 is denoted with 0x86dd.<br />
The Header Length field is also 4 bits. It indicates how many 32-bit portions are in the<br />
IP header (including options). The maximum is 60 <strong>by</strong>tes.<br />
78
The Type-of-Service field is 8 bits long. The first three bits are not used anymore. The<br />
next four are the “type of service” bits and the last bit is always set to zero because it is<br />
not used. Only one of the four “type of service” bits can be set to a one at a time while<br />
all other bits are set to zero. These indicate what type of service will be performed. The<br />
types of service are given <strong>by</strong>:<br />
Type of Service Binary Hexadecimal<br />
Normal service 0000 0x00<br />
NNTP (Usenet news) 0001 0x02<br />
IGP/SNMP 0010 0x04<br />
FTP data//SMTP data/ 0100 0x08<br />
DNS zone xfr/<br />
Telnet/Rlogin/DNS UDP<br />
query/SMTP command<br />
phase/TFTP<br />
1000 0x10<br />
The Length field is the length of the IP datagram portion in <strong>by</strong>tes (maximum size of<br />
65536 <strong>by</strong>tes).<br />
The Identification field contains a unique number for each sent packet. It is 16 bits and<br />
given in hexadecimal.<br />
The Flags field uses one bit of it’s 3 bits to identify that “this packet is part of a larger<br />
packet that has been fragmented.”<br />
The Fragment Offset field contains the extra information required with a fragmented<br />
packet. The last of this 13-bit field is able to tell the sending node to “never fragment the<br />
packet.” If fragmentation is needed and this bit is set it will generate an error message<br />
and the information will not be processed. Ahh…playground of the hackers.<br />
The Time to Live (TTL) field sets the maximum number of hops (or routers) that the<br />
packet can pass through on the way to its destination.<br />
The Protocol (Prot) field shows which protocol was used to encapsulate and create the<br />
data. This field is 8 bits long.<br />
The Header Checksum (HC) is an error control mechanism for this point to the end of<br />
the data field. It is 16 bits long.<br />
The Source Address (SA) is the logical address (IP) of the networking device sending the<br />
information. This is 32 bits in hexadecimal. Notice how in IP the source address comes<br />
before the destination address.<br />
The Destination Address (DA) is the logical address (IP) of the networking device the<br />
information is going to be sent to. This is 32 bits in hexadecimal.<br />
79
The Options (Opt) field can vary in length and is set to accommodate options with IP<br />
including security. Again, playground for hackers. Pad <strong>by</strong>tes of 0 are added here if<br />
needed to make the minimum Ethernet packet size.<br />
Last the data field comes. This will vary based upon which type of Ethernet is<br />
encapsulating it.<br />
Supplemental Lab or Challenge Activity:<br />
1. Go out and research the latest RFC’s related to IP addressing and Ethernet<br />
structure.<br />
2. Go out to the website for National Semiconductor and download the technical<br />
specifications for Ethernet cards. They are very technical but have some good<br />
information.<br />
So What Have I Learned Here?<br />
You have learned the complicated structures of Ethernet in networking. For your CCNA<br />
test you will probably not have anything this extensive and detailed. But when you get to<br />
the lab on using protocol inspectors it will be easier to understand.<br />
80
Broadcast and Collision Domains<br />
Objective:<br />
To learn how to identify broadcast and collision domains in a network topology.<br />
Tools and Materials:<br />
Pencil and paper<br />
Background:<br />
In any networking design selection of networking devices can depend upon<br />
isolation of traffic using knowledge of broadcast domains and collision domains.<br />
A broadcast domain is an area in which any “network broadcast” is sent to every<br />
device in the broadcast domain. For example, if a workstation is set up to get its IP<br />
address from a DHCP server it uses a “broadcast address” that is sent over the network to<br />
retrieve the IP address from the DHCP server. So, in a way, a broadcast address is like a<br />
maintenance channel. It exists so individual devices can broadcast messages to one or<br />
every device within the broadcast domain. By keeping the broadcast domains smaller we<br />
are reducing the overall network traffic. We use routers to create separate broadcast<br />
domains. Each interface on a router is a completely separate broadcast domain.<br />
Therefore broadcasts within one network on an interface will not pass to the network on<br />
another interface (unless we program the router to do so which is not likely).<br />
A collision domain is an area where collisions can occur in a network. Using<br />
Layer 1 devices create one large collision domain. Each port on a Layer 2 device is its<br />
own collision domain reducing the possibility of collisions and errors down to nothing.<br />
So let’s jump into defining and identifying collision and broadcast domains.<br />
Along the way you will also learn more about how networking devices function.<br />
1 3 5 7<br />
Workstation Workstation Workstation Workstation<br />
“A” “B” “C” “D”<br />
Figure 1—Small hubbed network.<br />
Since no “intelligent functions” can take place with a hub (they only clean-up,<br />
amplify and re-time signals) we have one big broadcast domain and one big collision<br />
domain. The likelihood of collisions is high. A hub basically allows transmission on<br />
81
only one port at a time. The hub allows port one “x” seconds to transmit (but it doesn’t<br />
send a notification to port 1 that it is their turn) then changes to port two if no information<br />
is transmitted. It allows port one to finish then changes to port two. It will allow port<br />
two “x” seconds to transmit and then it will change to port three if no information is<br />
transmitted. The process is repeated on port three, then four, then five and then to all the<br />
ports one at a time. But, as we have said, hubs are not intelligent. Once the hub finds<br />
information being transmitted over a port it does not go to the next port it starts back over<br />
at the first port. Therefore you want your more important devices on the first ports.<br />
In our diagram let’s look at an example for workstation “A” to send information<br />
to workstation “D.” The information from workstation “A” enters the hub on port 1. The<br />
hub then makes duplicate copies of that information and sends it to each port (active or<br />
not). In this case workstations “B,” “C,” and “D” will receive the copies. The<br />
to:00-00-00-00-00-04<br />
from: 00-00-00-00-00-01<br />
1 3 5 7<br />
Workstation Workstation Workstation Workstation<br />
“A” “B” “C” “D”<br />
mac: 00-00-00-00-00-01 00-00-00-00-00-04<br />
Figure 2—Workstation A sends a request to workstation D.<br />
to:00-00-00-00-00-04<br />
from: 00-00-00-00-00-01<br />
1 3 5 7<br />
Workstation Workstation Workstation Workstation<br />
“A” “B” “C” “D”<br />
mac: 00-00-00-00-00-01 00-00-00-00-00-04<br />
Figure 3—The information is duplicated and sent to every node attached to the hub.<br />
82
information is received on the workstations and the de-encapsulation process is started.<br />
The frame has the header and footer information removed. First the CRC process will<br />
reveal if the information is correct. Next, the destination MAC address is checked to see<br />
if it matches the MAC on the workstation (Is this for me?). If they match then the deencapsulation<br />
process continues (which it does only on computer D). If they do not<br />
match (which it does not on computers B and C) then the frame and all its information is<br />
discarded and ignored. Therefore only the destination device (computer D), for which it<br />
was intended, will process the information.<br />
As we have seen with a hub making multiple copies of each incoming request the<br />
chances for a collision are high. Let’s look a bit deeper at what happens during a<br />
“collision.” Most textbooks and teachers will tell you workstations will “listen” before<br />
transmitting. Do they have ears? I do not think so. A NIC just monitors the transmitting<br />
ping and receiving pin for voltage for a short period of time. By detecting this voltage<br />
the workstation is “listening” to the network for transmissions. When the voltage is<br />
detected on both pins the networking devices “sees” this as a collision and grounds the<br />
media for a period of time (which stops the collision…this is called a “jam signal”).<br />
Then the workstation randomly picks a number of milliseconds to wait to re-transmitting<br />
its information (called the back-off algorithm).<br />
This is why we must select our networking devices carefully: to reduce the<br />
possibility of collisions. Today higher-level networking devices, such as switches and<br />
routers, are available at lower costs, which make them more accessible for installation.<br />
Switches eliminate the possibility of collisions because each port is its own collision<br />
domain. With one device on a port we have absolutely no chance of a collision<br />
happening. Using a switch also “divides” up the available bandwidth from a backbone<br />
line to each port. Unlike a hub, our switch can have many simultaneous transmissions.<br />
The switch is therefore a more robust device that performs better in networks. We didn’t<br />
use them as much in our networks before because they used to be really expensive. In the<br />
past few years the prices have come down so much that it is not even worth buying hubs<br />
because switches are only a few dollars more. I can buy a 8 port switch for under a<br />
hundred dollars. So the only reason to use hubs is when you already have them and do<br />
not have the money to spend to upgrade. You should just “phase them in.”<br />
In our previous example we demonstrated how collisions occur. In this example<br />
we replace the hub with a switch, which eliminates the possibility of collisions. Each<br />
port becomes its own collision domain. A switch, unlike a hub, also has the possibility to<br />
store information to be sent out later. That way, if workstation A and D were<br />
transmitting at the same time the switch could store information from one workstation<br />
while passing on the transmission from the other over the backbone.<br />
A switch is an intelligent device. It allows us to change the priorities of our ports<br />
to determine who gets to transmit first in the event of tie. The information from the other<br />
port would be stored and transmitted later after the first one is done. Since the<br />
possibilities of two workstations transmitting at exactly the same time is remote, we<br />
usually won’t have to monkey around with it. I know…I know…I just said we use<br />
switches to eliminate collision problems…so why go through all of that hassle and<br />
expense to replace hubs with switches? First, as we have said switches do not cost much<br />
anymore. Second, a key word in networking design is “scalability” the ability to grow<br />
without replacing equipment. We get more functionality out of a switch than with a hub<br />
83
1 3 5 7<br />
Workstation Workstation Workstation Workstation<br />
“A” “B” “C” “D”<br />
Figure 4—Small switched network.<br />
so why not just use it now? A switch is more scalable than a hub. And, third, switches<br />
are cool. Many of my cohorts and colleagues believe switching will become more<br />
prevalent in networking than routing. We use switches at the core of our networks, not<br />
routers. Switches only use layer 2 information to make decisions. Routers need layer 2<br />
and 3 information to make decisions so they tend to be slower (in geek-speak: switches<br />
have less latency than routers).<br />
So where were we? Oh yeah, switches eliminate collision domain problems.<br />
Let’s look at our network diagram again. Now we have many collision domains (one per<br />
port) and one big broadcast domain. Workstation A and D could communicate almost<br />
instantaneously with each other or to other ports and their devices.<br />
But we still have that one big broadcast domain hanging out there…don’t get me<br />
wrong big broadcast domains aren’t necessarily bad but we would like to keep them as<br />
small as possible. As we said earlier a broadcast domain is used for network<br />
“maintenance.” One analogy for a broadcast domain may be the public address system<br />
in your classroom. The staff can make announcements to the whole school or can<br />
communicate with just an individual classroom. By keeping the broadcast domain as<br />
small as possible we keep our “overhead” traffic as minimal as possible and, therefore,<br />
lessen any possible network traffic.<br />
You may have heard someone refer to Novell as a “chatty” network. What they<br />
really mean is there is a lot of network broadcasting on the broadcast channel. Each<br />
networking device in a Novell uses “SAP” (Service Advertising Protocol). Periodically<br />
every single device in a Novell network sends out a broadcast “here I am!” message over<br />
the broadcast channel (typically every 60 seconds). As you can deduce if you had 100<br />
devices this could create a lot of traffic. Other protocol suites use the broadcast address<br />
channel, albeit to a lesser extent. TCP/IP uses the broadcast channel for ARP/RARP<br />
(Address Resolution Protocol, Reverse Address Resolution Protocol). These are used<br />
when the workstations are booted that need to find their IP or MAC addresses if they<br />
have not been “statically” configured. You will learn more about ARP/RARP later.<br />
Now let’s say our company is growing so we need to add in another network.<br />
84
“A” “B” “C” “D” “E” “F” “G” “H”<br />
Figure 5—Small multiple-switched network.<br />
Now we would have 8 collisions in our one broadcast domain. Would you think our link<br />
between the switches be considered a collision domain too? Gotta say no here because<br />
switches have the ability to store information and send it off later (geek speak: queueing).<br />
Therefore no collision possibility exists.<br />
Now that we have multiple switches we have the possibility for excessive<br />
broadcasts that could slow our network down. Ok…with three or four workstations on<br />
each switch it would never get that bad, even with Novell, but cut me a break here ok?<br />
We could use a router to reduce our broadcast domain size. Each interface on a router, in<br />
fact, is its own broadcast domain. So let’s add a router into our network. Here we would<br />
have eight collision domains and two broadcast domains.<br />
“A” “B” “C” “D” “E” “F” “G” “H”<br />
Figure 6—Small network.<br />
85
Supplemental Labs or Challenge Activities:<br />
Let’s have you count up the number of collision domains and broadcast domains in<br />
several network types.<br />
1. Collision Domains: ____________ Broadcast Domains: ___________________<br />
2. Collision Domains: ____________ Broadcast Domains: ___________________<br />
3. Collision Domains: ____________ Broadcast Domains: ___________________<br />
4. Collision Domains: ____________ Broadcast Domains: ___________________<br />
5. Collision Domains: ____________ Broadcast Domains: ___________________<br />
86
6. Collision Domains: ____________ Broadcast Domains: ___________________<br />
7. Collision Domains: ____________ Broadcast Domains: ___________________<br />
8. Collision Domains: ____________ Broadcast Domains: ___________________<br />
The redundant link will act as a backup in cast the main link goes down. You will<br />
learn how to set up redundant links between switches in Part 3.<br />
Ok…got the idea? Let’s start getting bigger!<br />
87
9. Collision Domains: ____________ Broadcast Domains: ___________________<br />
20 PC’s 20 PC’s 20 PC’s 20 PC’s<br />
Classroom 101 Classroom 102 Classroom 103 Classroom 104<br />
10. Collision Domains: ____________ Broadcast Domains: ___________________<br />
Internet<br />
20 PC’s 20 PC’s 20 PC’s 20 PC’s<br />
Classroom 101 Classroom 102 Classroom 103 Classroom 104<br />
This is an “OK” design.<br />
11. Collision Domains: ____________ Broadcast Domains: ___________________<br />
Internet<br />
20 PC’s 20 PC’s 20 PC’s 20 PC’s<br />
Classroom 101 Classroom 102 Classroom 103 Classroom 104<br />
This is a better design.<br />
88
12. Collision Domains: ____________ Broadcast Domains: ___________________<br />
Internet<br />
Detroit<br />
Chicago<br />
20 PC’s 20 PC’s 20 PC’s 20 PC’s<br />
Admin/Sales Engineering Admin/Sales Engineering<br />
So What Have I Learned Here?<br />
In this lab you learned how selecting networking devices can enhance or degrade network<br />
performance. You learned how switches and hubs work. You also learned how to<br />
identify broadcast and collision domains.<br />
89
Paper Lab: Subnetting<br />
Objective:<br />
To learn, in a progressive manner, more about subnets, subnet masking, and IP design.<br />
Background:<br />
In this lab many different questions (multiple choice, true-false, essays) are used to bring<br />
you up to speed on subnetting. This will give you more practice learning about<br />
subnetting that does not jump back and forth between topics too much. Each of my<br />
students seemed relieved to have something like this…not just here’s topic, here’s two<br />
questions and let’s jump ahead, then back.<br />
Changing MAC/IP addresses and <strong>Network</strong> devices<br />
1. Bridges make low-level, simple comparisons and decisions about whether or not<br />
to forward traffic on a network.<br />
A. True<br />
B. False.<br />
2. If the bridge determines that the destination MAC address carried <strong>by</strong> a data packet<br />
is part of the same network segment as the source, it does not forward the data to<br />
other segments of the network.<br />
A. False<br />
B. True<br />
3. Bridges solve the problem of too much traffic on a network <strong>by</strong> dividing the<br />
network into segments and filtering traffic based on the MAC address.<br />
A. True<br />
B. False.<br />
4. When a bridge forwards data on a network, it determines precisely what segment<br />
of the network the data will be forwarded to.<br />
A. True<br />
B. False<br />
5. When a bridge makes a decision about whether to forward data on a network or<br />
not, it uses only the IP address carried <strong>by</strong> the data in its header.<br />
A. False<br />
B. True<br />
90
6. Which of the following definitions best describes what a frame is?<br />
A. Router or access server, or several routers or access servers, designated as<br />
a buffer between any connected public networks and a private network. It<br />
ensures security of the private network.<br />
B. 32-bit address assigned to hosts using TCP/IP. It belongs to one of five<br />
classes and is written as 4 octets separated with periods.<br />
C. Logical grouping of information sent as a data link layer unit over a<br />
transmission medium.<br />
D. Something used with art to give it another unique perspective.<br />
7. At which of the following layers of the OSI model does routing occur?<br />
A. Physical layer<br />
B. Data link layer<br />
C. <strong>Network</strong> layer<br />
D. Transport layer<br />
8. At which of the following layers of the OSI model does bridging occur?<br />
A. Physical layer<br />
B. Data link layer<br />
C. <strong>Network</strong> layer<br />
D. Transport layer<br />
9. At which of the following layers of the OSI model is the MAC address located?<br />
A. Physical layer<br />
B. Data link layer<br />
C. <strong>Network</strong> layer<br />
D. Transport layer<br />
10. If a workstation is moved within a network, then what will happen to its MAC and IP<br />
addresses?<br />
A. its MAC address and IP address will stay the same<br />
B. its MAC address will change but the IP address will stay the same<br />
C. its IP address will change but the MAC address will stay the same<br />
D. both IP and MAC address will change<br />
11. If a workstation is moved from one network to another network, then what will<br />
happen to its MAC and IP addresses?<br />
A. its MAC address and IP address will stay the same<br />
B. its MAC address will change but the IP address will stay the same<br />
C. its IP address will change but the MAC address will stay the same<br />
D. both IP and MAC address will change<br />
91
12. Routers pass packets between ______________?<br />
A. servers on the different networks<br />
B. routers on the same network<br />
C. hosts on the different networks<br />
D. hubs on the same network<br />
13. Which part of the IP address does a router ignore during path determination?<br />
A. the host address<br />
B. the network address<br />
C. the source address<br />
D. the destination address<br />
14. MAC addresses use a __________ scheme while IP addresses use a<br />
_______________ scheme.<br />
A. hierarchical, flat<br />
B. flat, hierarchical<br />
C. flat, layered<br />
D. layered, flat<br />
15. Which type of address is included in an IP header?<br />
A. source MAC, source IP<br />
B. destination IP, destination MAC<br />
C. source IP, destination IP, source MAC<br />
D. source and destination IP and MAC addresses<br />
IP addresses<br />
Are the following statements TRUE or FALSE?<br />
1. If a device on network A is moved to network B, its IP address will change.<br />
A. True<br />
B. False<br />
2. IP addresses are used to identify a machine on a network and the network to<br />
which it is attached.<br />
A. True<br />
B. False<br />
3. Each network connected to the Internet has a unique network number.<br />
A. False<br />
B. True<br />
4. The network portion of every IP address is assigned <strong>by</strong> the local network<br />
administrator.<br />
A. True<br />
B. False<br />
92
5. How many bits are in an IP address?<br />
A. 4<br />
B. 8<br />
C. 32<br />
D. 16<br />
6. How many <strong>by</strong>tes are in an IP address?<br />
A. 4<br />
B. 8<br />
C. 32<br />
D. 16<br />
7. What is the minimum decimal value in an octet?<br />
A. 0<br />
B. 1<br />
C. 2<br />
D. 8<br />
8. What is the maximum decimal value in a <strong>by</strong>te?<br />
A. 0<br />
B. 255<br />
C. 8<br />
D. FF<br />
9. How many bits are in a <strong>by</strong>te?<br />
A. 2<br />
B. 4<br />
C. 6<br />
D. 8<br />
10. How many <strong>by</strong>tes are in a MAC address?<br />
A. 2<br />
B. 4<br />
C. 6<br />
D. 8<br />
Classes of IP addresses<br />
1. To which class of IP address would the IP address of 197.22.103.221 belong?<br />
A. class "A"<br />
B. class "B"<br />
C. class "C"<br />
D. class “D”<br />
E. class “E”<br />
93
2. Which of the following dotted notations cannot represent an IP address?<br />
A. 301.188.12.77<br />
B. 167.78.35.202<br />
C. 122.31.22.226<br />
D. 254.254.254.254<br />
3. In a class "A" network using an IP addressing scheme, the first sixteen bits are<br />
used for the network part of the address, and the last two octets are reserved for<br />
the host part of the address.<br />
A. True<br />
B. False<br />
4. To what class of network would the following IP address belong: 144.26.108.15?<br />
A. Class "A" network<br />
B. Class "B" network<br />
C. Class "C" network<br />
D. Class “D” network<br />
5. To what class of network would the IP address, 18.12.245.10, belong?<br />
A. Class "A" network<br />
B. Class "B" network<br />
C. Class "C" network<br />
D. Class “D” network<br />
6. In the IP address, 190.233.21.12, how many octets have been assigned <strong>by</strong> the<br />
NIC?<br />
A. One<br />
B. Two<br />
C. Three<br />
D. Four<br />
7. In the IP address, 88.224.73.201, how many octets could be assigned locally <strong>by</strong><br />
the network administrator?<br />
A. One<br />
B. Two<br />
C. Three<br />
D. Four<br />
8. Select the IP address below which would belong to the largest network.<br />
A. 69.22.214.158<br />
B. 144.144.144.3<br />
C. 220.91.144.222<br />
D. 255.255.255.255<br />
94
9. Which of the following best describes a class "B" network?<br />
A. network.network.host.host<br />
B. network.network.network.host<br />
C. network.host.host.host<br />
D. host.network.host.network<br />
10. There are three classes of commercial networks.<br />
A. False<br />
B. True<br />
11. IP addresses with numbers 224 through 255 are reserved for multicast and<br />
experimental purposes.<br />
A. True<br />
B. False<br />
12. A class "C" network address would have all binary 0s in its final octet.<br />
A. True<br />
B. False<br />
13. A class "B" network address would have all binary 0s in its final two octets.<br />
A. True<br />
B. False<br />
14. Which of the following is an example of a class "C" network address?<br />
A. 196.25.10.0<br />
B. 113.0.0.0<br />
C. 113.22.104.0<br />
D. 74.255.255.255<br />
15. Which of the following best describes a class “C” network?<br />
A. network.network.host.host<br />
B. network.network.network.host<br />
C. network.host.host.host<br />
D. host.host.host.network<br />
16. Which of the following best describes a class “A” network?<br />
A. network.network.host.host<br />
B. network.network.network.host<br />
C. network.host.host.host<br />
D. host.host.host.network<br />
17. Which of the following is a class “C” IP address?<br />
A. 220.15.64.126<br />
B. 191.15.64.126<br />
C. 127.15.64.126<br />
D. 242.15.64.126<br />
95
18. Select the IP address for the smallest network.<br />
A. 220.15.64.126<br />
B. 191.15.64.126<br />
C. 127.15.64.126<br />
D. 242.15.64.126<br />
19. How many octets have been assigned <strong>by</strong> InterNIC in a class “C” network?<br />
A. one<br />
B. two<br />
C. three<br />
D. four<br />
20. If you have a class “A” IP address, then how many <strong>by</strong>tes have been assigned to<br />
you for your hosts?<br />
A. one<br />
B. two<br />
C. three<br />
D. four<br />
Binary to decimal conversions<br />
1. Which of the following decimal numbers equals the binary number 11111111?<br />
A. 128<br />
B. 254<br />
C. 255<br />
D. 17<br />
2. How would the IP address 197.15.22.31 be expressed in a binary numbering<br />
scheme?<br />
A. 11000101.00001111.00010110.00011110<br />
B. 11000101.00001111.00010110.00011111<br />
C. 11000101.00001111.00010110.00010111<br />
D. 11000101.00001101.00010110.00011110<br />
3. How would the IP address 197.15.22.127 be expressed in a binary numbering<br />
scheme?<br />
A. 11000101.00001111.00010110.01111111<br />
B. 11000101.00001111.00010110.01111110<br />
C. 11000101.00001111.00010110.11111110<br />
D. 11000101.00001111.00010111.11111110<br />
4. In binary notation, the subnet mask for a Class “B” network may be given as:<br />
11111111.11111111.11111110.00000000. What would this be in dotted decimal?<br />
A. 256.256.255.0<br />
B. 256.255.254.0<br />
C. 255.255.254.0<br />
D. 254.254.254.0<br />
96
5. What would the correct binary sequence be for a subnet range that borrowed three<br />
bits?<br />
A. 111,110,101,100,011,010,001,000<br />
B. 000,001,011,010,100,110,101,111<br />
C. 111,101,110,100,010,011,001,000<br />
D. 000,001,010,011,100,101,110,111<br />
6. What is the binary to decimal conversion for 01010101?<br />
A. 128<br />
B. 127<br />
C. 85<br />
D. 4<br />
7. What is the binary to decimal conversion for 01111110?<br />
A. 126<br />
B. 63<br />
C. 85<br />
D. 124<br />
8. What is the binary to decimal conversion for 00010000?<br />
A. 15<br />
B. 32<br />
C. 1<br />
D. 16<br />
9. What is the binary to decimal conversion for 01100110?<br />
A. 102<br />
B. 103<br />
C. 4<br />
D. 104<br />
10. What is the binary to decimal conversion for 00001000?<br />
A. 8<br />
B. 12<br />
C. 16<br />
D. 4<br />
11. What is the decimal to binary conversion for 17?<br />
A. 01000111<br />
B. 00010001<br />
C. 10001001<br />
D. 11101110<br />
97
12. What is the decimal to binary conversion for 128?<br />
A. 01000110<br />
B. 01001000<br />
C. 10000000<br />
D. 01111111<br />
13. What is the decimal to binary conversion for 220?<br />
A. 01000111<br />
B. 11010001<br />
C. 00101001<br />
D. 11011100<br />
14. What is the decimal to binary conversion for 240?<br />
A. 11110000<br />
B. 111000001<br />
C. 10111001<br />
D. 11101110<br />
15. What is the decimal to binary conversion for 191?<br />
A. 01000100<br />
B. 10111111<br />
C. 10001001<br />
D. 11101010<br />
Broadcast and subnet addresses<br />
1. Which of the following definitions best describes a “broadcast?”<br />
A. Data packet that will be sent to all nodes on a network segment.<br />
B. Section of a network that is bounded <strong>by</strong> bridges, routers, or switches.<br />
C. Binary digit used in the binary numbering system that can be 0 or 1.<br />
D. Screaming at the top of your lungs until you can’t breathe.<br />
2. Which of the following is an example of a class "C" broadcast address?<br />
A. 190.12.253.255<br />
B. 190.44.255.255<br />
C. 221.218.253.255<br />
D. 221.218.253.0<br />
3. In a class "C" subnet address up to six bits can be borrowed from the host field.<br />
A. True<br />
B. False<br />
4. Which of the following is a valid class “B” IP broadcast address using subnets?<br />
A. 68.140.74.0<br />
B. 129.37.0.255<br />
C. 129.37.0.0<br />
D. 190.37.255.255<br />
98
5. Which of the following is reserved for the broadcast address in 198.64.74.x/27?<br />
A. .0<br />
B. .127<br />
C. .192<br />
D. .254<br />
6. Which of the following is a valid class “C” IP subnet number?<br />
A. .191<br />
B. .127<br />
C. .128<br />
D. .129<br />
7. Which of the following is a valid class “B” IP subnet broadcast address?<br />
A. 10101011.01011101.00010000.01011110<br />
B. 00101011.01011101.00010000.01111111<br />
C. 10110110.01011101.00000000.01111111<br />
D. 11100110.01011101.00000000.01111111<br />
8. Which type of IP address can borrow one bit from the last octet to create subnets?<br />
A. Class “C” IP addresses<br />
B. Class “B” IP addresses<br />
C. None can borrow 1 bit from the last octet<br />
D. Class A, B, and C can borrow 1 bit from the last octet<br />
E. Both Class “A” and “B”<br />
9. Which of the following best describes the address 147.30.74.01<br />
A. Class “A” host address<br />
B. Class “A” broadcast address<br />
C. Class “B” host address<br />
D. Class “B” subnet address<br />
Subnetting possible vs. useable<br />
Are the following statements TRUE or FALSE?<br />
1. Subnet addresses are assigned locally.<br />
A. False<br />
B. True<br />
2. Subnet addresses include only a network number and a host number.<br />
A. True<br />
B. False<br />
3. Each time the number of bits borrowed from an eight bit octet decreases, the<br />
decimal value representing that octet in the subnet mask increases <strong>by</strong> a power of<br />
two<br />
A. True<br />
B. False<br />
99
4. How many possible subnets can be created if four bits are borrowed from the host<br />
field?<br />
A. 2<br />
B. 4<br />
C. 8<br />
D. 16<br />
5. How many possible subnetworks can be created if five bits are borrowed from the<br />
host field?<br />
A. 5<br />
B. 8<br />
C. 16<br />
D. 32<br />
6. How many possible subnetworks can be created if six are borrowed from the host<br />
field?<br />
A. 6<br />
B. 12<br />
C. 32<br />
D. 64<br />
7. How many actual subnets can be created if four bits are borrowed from the host<br />
field?<br />
A. 2<br />
B. 4<br />
C. 6<br />
D. 14<br />
E. 16<br />
8. How many actual subnetworks can be created if five bits are borrowed from the<br />
host field?<br />
A. 15<br />
B. 20<br />
C. 25<br />
D. 30<br />
9. How many possible subnetworks can be created if six are borrowed from the host<br />
field?<br />
A. 6<br />
B. 16<br />
C. 62<br />
D. 64<br />
100
10. On a class "C" network with three bits borrowed for subnets to which subnetwork<br />
would the IP subnet and host range 01100001 belong?<br />
A. second subnet<br />
B. third subnet<br />
C. fourth subnet<br />
D. fifth subnet<br />
11. How would the subnetwork 01100001 field for a Class “C” IP address with six<br />
useable subnets be expressed in binary numbers?<br />
A. 001111<br />
B. 01111<br />
C. 0111<br />
D. 011<br />
12. How would the third useable subnet range of a Class “C” IP address with eight<br />
possible subnets be expressed in decimal numbers?<br />
A. 64<br />
B. 96<br />
C. 128<br />
D. 32<br />
13. How would the decimal number 220 be expressed as a binary number written as<br />
an octet?<br />
A. 11011100<br />
B. 11011101<br />
C. 01101110<br />
D. 11101101<br />
14. How would the sixth possible subnetwork field of a Class “C” IP address be<br />
expressed in binary numbers?<br />
A. 100<br />
B. 101<br />
C. 110<br />
D. 111<br />
15. To what subnetwork on a Class “C” network with three bits for a subnet would a<br />
fourth octet expressed as 10101101 belong?<br />
A. first<br />
B. sixth<br />
C. fifth<br />
D. seventh<br />
101
16. How would the host field be expressed in binary numbers of a Class “C” IP<br />
address which has 6 useable subnets for host number 13?<br />
A. 01101<br />
B. 01100<br />
C. 01110<br />
D. 01111<br />
17. Which of the following best describes the maximum number of bits that can be<br />
borrowed in a Class “C” network?<br />
A. 6<br />
B. 8<br />
C. 14<br />
D. 12<br />
18. Which of the following best describes the maximum number of bits that can be<br />
borrowed in a Class “B” network?<br />
A. 14<br />
B. 6<br />
C. 8<br />
D. 4<br />
19. If two bits are borrow from the host field of a Class “C” network, then how many<br />
possible subnetworks can be created?<br />
A. 16<br />
B. 4<br />
C. 8<br />
D. 2<br />
20. If four bits are borrowed from the host field of a Class “B” network, then how<br />
many subnetworks can be created?<br />
A. 16<br />
B. 32<br />
C. 8<br />
D. 4<br />
21. If four bits are borrowed from the host field of a Class "B” network, then how<br />
many hosts per subnetwork can be created?<br />
A. 256<br />
B. 4096<br />
C. 16<br />
D. 8<br />
102
22. If two bits are borrowed from the host field of a Class “C” network, then, how<br />
many hosts per subnetwork can be created?<br />
A. 2048<br />
B. 256<br />
C. 64<br />
D. 32<br />
23. If we have 4 possible subnets in our network then how many bits have been<br />
borrowed from the host field?<br />
A. 4<br />
B. 3<br />
C. 2<br />
D. 6<br />
24. If we have 4 possible subnets in our network then what will the range of binary<br />
host field numbers be for the first subnetwork?<br />
A. 00000-11111<br />
B. 00000000-111111111<br />
C. 000000-111111<br />
D. 0000-1111<br />
25. If we have 4 possible subnets in our network then what decimal value would be<br />
assigned to an octet expressed as 01011011?<br />
A. .191<br />
B. .67<br />
C. .91<br />
D. .92<br />
26. If we have 2 possible subnets in our network then what would the binary<br />
subnetwork field number be for the decimal host number expressed as .196?<br />
A. 01<br />
B. 10<br />
C. 11<br />
D. 00<br />
27. In a network with two bits borrowed for subnets, what would the binary host field<br />
number be for the decimal host number expressed as .49?<br />
A. 011001<br />
B. 110001<br />
C. 00110001<br />
D. 111001<br />
103
Subnet masking<br />
1. How would the subnet mask 255.255.255.0 be represented in dotted binary<br />
notation?<br />
A. 1111111.1111111.1111111.00000000<br />
B. 11111111.11111111.11111111.00000000<br />
C. 11111111.11111111.11111111.11111111<br />
D. 11111111.11111111.11111111.10000000<br />
2. If only seven bits are borrowed in a Class “B” network then what would the<br />
subnet mask be in dotted decimal notation?<br />
A. 255.255.255.0<br />
B. 255.255.254.0<br />
C. 254.255.255.0<br />
D. 254.254.254.0<br />
3. What would the subnet mask be in dotted decimal notation if only five bits were<br />
borrowed from the third octet in a class “B” address?<br />
A. 255.255.254.0<br />
B. 255.255.255.0<br />
C. 255.255.248.0<br />
D. 254.254.248.0<br />
4. What would the subnet mask be in dotted decimal notation if only one bit were<br />
borrowed from the third octet in a Class “A” address?<br />
A. 128.255.128.0<br />
B. 255.255.255.0<br />
C. 255.255.128.0<br />
D. cannot borrow only one bit<br />
5. Subnet masks tell devices which part of an address is the network number<br />
including the subnet and which part is the host.<br />
A. True<br />
B. False<br />
6. Subnet masks are 16 bits long and are divided into two octets.<br />
A. False<br />
B. True<br />
7. Subnet masks have all 0’s in the network and subnetwork portions of their<br />
addresses.<br />
A. False<br />
B. True<br />
104
8. Binary bits in the subnet mask are used to represent which of the following:<br />
A. host bits<br />
B. subnet bits<br />
C. network bits<br />
D. both b and c<br />
9. What will the use of subnets do regarding the amount of broadcast traffic?<br />
A. decrease, because broadcasts are not forwarded outside<br />
B. decrease, because it will take less time for a host to get broadcasts from<br />
the router<br />
C. increase, because packets are forwarded to all subnets<br />
D. increase, because bandwidth will decrease<br />
Router functions<br />
1. In the graphic below (on the next page), if device A3 is sending data to device C3,<br />
out of what port will the router send the data?<br />
A. A5<br />
B. C4<br />
C. C1<br />
D. A4<br />
2. In the graphic below (on the next page), how many IP addresses does the router<br />
have?<br />
A. 1<br />
B. 15<br />
C. 4<br />
A. 5<br />
3. In the graphic, if device A2 wants to send data to device A4, will the router<br />
forward the data to <strong>Network</strong> B?<br />
A. Yes<br />
B. No<br />
4. How many ports does the router in this graphic have?<br />
A. 8<br />
B. 4<br />
C. 1<br />
D. 5<br />
105
Whole enchilada problems<br />
1. Which of the following is the dotted decimal notation value of the host portion of<br />
a Class “A” IP address 38.0.53.228 with a subnet mask of 255.255.252.0?<br />
A. 0.228<br />
B. 53.228<br />
C. 1.228<br />
D. 5.228<br />
2. Which of the following subnet masks will not be applicable to a Class “C” IP<br />
address but can be used with a Class “B” IP address?<br />
A. 255.2555.0<br />
B. 255.255.255.192<br />
C. 255.255.255.240<br />
D. 255.255.255.128<br />
3. Which of the following is a valid address for a Class “A” IP address with a subnet<br />
mask of 255.255.240.0?<br />
A. 38.255.240.2<br />
B. 38.0.192.0.<br />
C. 38.0.240.255<br />
D. 38.255.255.255<br />
4. Which of the following is a valid Class “B” IP address with a subnet mask of<br />
255.255.255.224?<br />
A. 18.200.3.55<br />
B. 130.0.0.1<br />
C. 154.255.0.31<br />
D. 147.255.0.48<br />
106
5. Which of the following is the first available address for a Class “A” IP address of<br />
2.x.x.x. with a subnet mask of 255.255.255.128?<br />
A. 2.1.1.1<br />
B. 2.0.0.129<br />
C. 2.1.2.3<br />
D. 2.0.0.1<br />
6. Which of the following addresses is a valid address when using a subnet mask of<br />
255.255.255.192?<br />
A. 2.0.0.0<br />
B. 129.1.0.63<br />
C. 177.255.255.195<br />
D. 215.1.8.188<br />
Having trouble with the “whole enchiladas?” Hint: Look to eliminate any addresses<br />
where subnet portion or host portions contain all zeros or all ones.<br />
107
Objective:<br />
To learn how to design networks from “essay” type information.<br />
<strong>Network</strong> Design with Subnets<br />
Background:<br />
In this lab you will be presented with a variety of networking scenarios. For each you are<br />
to design the networks, subnets, and IP addresses. Each one here will be progressively<br />
more difficult. Do not become upset if you have trouble with this…sometimes it takes<br />
doing this many times before some people “get it.” Its actually like getting struck <strong>by</strong><br />
lightning. After many times of not getting it you feel like lightning knocks you out of<br />
your chair and you suddenly get it. So let’s keep hammering the examples so everyone<br />
can get it…after all we learn <strong>by</strong> doing. There are many different ways that these can be<br />
done…so the answers I give are not necessarily the only answers.<br />
Real Estate Office<br />
You are working as an independent consultant for a real estate broker. He has 16 agents<br />
and one receptionist working for him. There are three printers and one file server in the<br />
office. He wants to have Internet access and email accounts for everyone with a DSL<br />
line. Please design him a network for the least amount of money possible. Those small<br />
businesses typically do not have a lot of money. Don’t forget to include your expenses<br />
(figure $150 an hour for installation and setup).<br />
Veterinarian’s Office<br />
Your cousin is a vet in the Jacksonville, Florida area. He has asked you to help design<br />
and set up a network for him as inexpensively as possible. (Since it’s for family you are<br />
doing it for free). He has a main office in Mandarin where he spends 5 days (all but<br />
Wednesday) with his receptionist (who does scheduling on the database server), an office<br />
manager (who does accounting, billing, etc on the database server), and his office<br />
computer (where he keeps all his medical stuff). He also has a dot matrix and a laser jet<br />
printer there. He would like to connect to the Internet with a DSL line and have dial-in<br />
access to his home computer. His office in St. Augustine (open only on Wednesdays)<br />
will have a computer for the doctor and for the receptionist. They need to have access to<br />
the database server at the main office (use dial-in via the PSTN). There is a laser jet at<br />
the St. Augustine office.<br />
ABC Packaging Company—Part 1<br />
You are working as the network administrator for ABC Packaging Company in Tarpon<br />
Springs. You are to design a network that focuses upon scalability and adaptability.<br />
There are five departments: Administration (14 people, 5 printers), Engineering (22<br />
people, 5 printers, 1 file server), Production (5 people), Accounting (11 people, 4<br />
printers, 1 database and file server), and Sales/Marketing (11 people, 4 printers, 1 file<br />
server). Each department will require a separate subnet. The servers will have their own<br />
subnet. Be sure to connect them to the Internet with a T-1 line.<br />
108
Website Company<br />
You are the network administrator for an upstart website publishing company. They have<br />
offices in two adjacent buildings on different floors. Lately, they have realized the costs<br />
of their individual Internet accounts far exceeds the costs of installing and maintaining a<br />
T-1 line. As the network guru you are to design a network that will utilize FDDI between<br />
the buildings. The west building uses floors 3, 4, and 5 for the sales and admin staff.<br />
Here you will want to use a <strong>CISCO</strong> Catalyst 5000 with a FDDI module, a management<br />
module, and a 24-port switch module. From there each floor will distribute access via a<br />
<strong>CISCO</strong> 1924 switch to each of its 20 nodes (workstations, servers, and printers). The east<br />
building uses floors 1 through 5 for the design and engineering staff. Here you will want<br />
to use a <strong>CISCO</strong> Catalyst 5500 with a FDDI module, a management module, and a 24-port<br />
switch module. You will also have a <strong>CISCO</strong> 2610 router with T-1 module, and a<br />
Kentrox CSU/DSU for your full T-1 line. Your ISP, ComBase has sold you two blocks<br />
of 62 IP addresses: 198.74.56.x (1-62) and (65-126). Combase will also provide the DNS<br />
services, unlike most ISP’s where more than 24 IP’s are ordered. Design your network,<br />
including cabling and grounds, to include all IP’s, subnet masks, gateways, and anything<br />
else you need to include.<br />
109
Subnetting Example: John’s Brewhouse<br />
Objective:<br />
To use your subnet knowledge to design an IP addressing scheme for the John’s<br />
Brewhouse Restaurant <strong>Network</strong>.<br />
Tools and Materials:<br />
Paper and pencil<br />
Background:<br />
John Harvard’s Brewhouse is a microbrewery/restaurant chain in New England. They<br />
have locations in Cambridge (MA), Framingham (MA), Wayne (PA), Springfield (PA),<br />
Pittsburgh (PA), Manchester (CT), Wilmington (DE), Providence (RI), Lake Grove<br />
(NY), and Washington DC. Three network topologies are provided here. You task is to<br />
design an IP addressing scheme that will address all current needs as well as future<br />
expandability. If you see anything that may want to address feel free to note it.<br />
Scalability, adaptability, reliability and performance are the key issues in this design.<br />
You will be using private addressing in your network. All lines are 10BaseT unless<br />
noted.<br />
Lab Design:<br />
Typical Restaurant:<br />
Dial-up for Credit Card<br />
Authorization and<br />
Application support<br />
Telephone<br />
Company<br />
Dial-up to HQ<br />
2-NCR 3259 Pentium 200 (NT 4.0 Servers)<br />
(code, inventory, payment, RAS)<br />
(5) NCR 7453 Point-of-Sale Terminals<br />
HQ in Boston HP NetServer E45 P2/266 (NT 4.0)<br />
(inventory, payment, PDC)<br />
T-1 to RCS<br />
telco<br />
Compaq ProLiant 2500<br />
(Netware 4.10 Server)<br />
HP Vectra P200 Vectra<br />
RAS server<br />
(25) Compaq ProLiant 200 PC’s<br />
with Win 95<br />
110
Restaurant Consulting Services (RCS) Danvers, Mass.<br />
From HQ<br />
Internet<br />
Dedicated <strong>CISCO</strong> <strong>CISCO</strong><br />
T-1 2501 2514 T-1<br />
Adtran<br />
Adtran<br />
<strong>CISCO</strong> 2501<br />
(25) Compaq ProLiant 200 PC’s<br />
with Win 95<br />
HP NetServer E45 HP NetServer2H2 HPNetServerLH2<br />
(NT 4.0) Backup SQL Database (NT 4.0) Proxy Server (NT 4.0)<br />
From <strong>Network</strong>ing Computing Magazine Centerfold: John Harvard’s Brewhouse.<br />
http://www.networkcomputing.com/1005/1005centerfoldtext.html<br />
111
Intermediate DOS Lab: Troubleshooting Utilities<br />
Objective:<br />
To learn about DOS utilities to use for troubleshooting in networks.<br />
Tools and Materials:<br />
(2) workstations<br />
(1) cross-over cable (xo)<br />
Lab Diagram:<br />
xo<br />
Step-By-Step Instructions:<br />
1. Cable the lab as shown.<br />
2. Pick IP addresses and masks to make this peer-to-peer network function<br />
properly. Refer to the peer-to-peer lab if needed.<br />
3. In this lab we will be using ping and trace route commands for<br />
troubleshooting (layer 3 commands). Let’s start <strong>by</strong> opening a DOS window<br />
and finding out what options are available with ping. Trace route does not<br />
have any options.<br />
C:\WINDOWS>ping /?<br />
Usage: ping [-t] [-a] [-n count] [-l size] [-f] [-i TTL] [-v TOS]<br />
[-r count] [-s count] [[-j host-list] | [-k host-list]]<br />
[-w timeout] destination-list<br />
Options:<br />
-t Ping the specified host until stopped.<br />
To see statistics and continue - type Control-Break;<br />
To stop - type Control-C.<br />
-a Resolve addresses to hostnames.<br />
-n count Number of echo requests to send.<br />
-l size Send buffer size.<br />
-f Set Don't Fragment flag in packet.<br />
-i TTL Time To Live.<br />
-v TOS Type Of Service.<br />
-r count Record route for count hops.<br />
-s count Timestamp for count hops.<br />
-j host-list Loose source route along host-list.<br />
-k host-list Strict source route along host-list.<br />
-w timeout Timeout in milliseconds to wait for each reply.<br />
112
4. The first step in troubleshooting is testing layer 1 and working our way up the<br />
OSI model. Check the cabling. Be certain the LED on the NIC’s is lit up.<br />
You can also do a visual verification on the cable to be certain you are using<br />
the correct one.<br />
5. First we can test the functionality of the NIC (layers 1-2) and the computer for<br />
its ability to communicate with networking. We can do this <strong>by</strong> using ping to<br />
any address on the 127.0.0.1-127.255.255.254 network. This is called the<br />
“loopback adapter network.” So I pick an IP address from the 127 network<br />
and ping it. You should see something like this if everything is fine:<br />
C:\WINDOWS\Desktop>ping 127.127.127.127<br />
Pinging 127.127.127.127 with 32 <strong>by</strong>tes of data:<br />
Reply from 127.127.127.127: <strong>by</strong>tes=32 time<br />
6. Next we can test our basic network connection between the two computers<br />
using ping (layer 3). If my workstation used 192.168.1.1 and the other one<br />
used 192.168.1.2 then I would ping 192.168.1.2 to test connectivity. If you<br />
cannot ping the other workstation then check the IP addresses and masks on<br />
each workstation. When all else fails reboot the workstations too.<br />
C:\WINDOWS\Desktop>ping 192.168.1.2<br />
Pinging 192.168.1.2 with 32 <strong>by</strong>tes of data:<br />
Reply from 192.168.1.2: <strong>by</strong>tes=32 time<br />
113
7. We know we have good connections between the two. When you have more<br />
than two computers in a network you can also use another layer 3 tool: trace<br />
route. If you are having difficulty connecting to another device several hops<br />
away trace route will show you exactly which device “looses” your<br />
communication. For example, if I had a network with several routers and was<br />
trying to get to www.spjc.edu I could find the faulty device. First, since it<br />
helps to have a baseline before something goes bad let’s look at a good trace<br />
route to our destination:<br />
C:\WINDOWS\Desktop>tracert www.spjc.edu<br />
Tracing route to www.spjc.edu [172.16.1.68]<br />
over a maximum of 30 hops:<br />
1 1 ms 1 ms 1 ms 192.168.151.1<br />
2 4 ms 5 ms 5 ms 192.168.154.1<br />
3 5 ms 7 ms 4 ms do-esr5000 [172.23.1.1]<br />
4 6 ms 6 ms 6 ms 192.168.100.27<br />
5 6 ms 6 ms 6 ms www.spjc.edu [172.16.1.68]<br />
Trace complete.<br />
C:\WINDOWS\Desktop><br />
Now, when troubleshooting if we ran a trace route and got this:<br />
C:\WINDOWS\Desktop>tracert www.spjc.edu<br />
Tracing route to www.spjc.edu [172.16.1.68]<br />
over a maximum of 30 hops:<br />
1 1 ms 1 ms 1 ms 192.168.151.1<br />
2 4 ms 5 ms 5 ms 192.168.154.1<br />
3 5 ms 7 ms 4 ms do-esr5000 [172.23.1.1]<br />
4 * * * Request timed out<br />
5 * * * Request timed out<br />
Trace complete.<br />
C:\WINDOWS\Desktop><br />
Then we would have a good idea there is a problem with the do-esr5000 device<br />
with IP address 172.23.1.1. In this case it’s a 5000 series router at district office.<br />
114
Basic Troubleshooting<br />
Check cabling and lights Layer 1<br />
Ping the loopback adapter Layer 1-2<br />
Ping, trace route Layer 3<br />
Supplemental Lab or Challenge Activity:<br />
1. Write a ping command that will continuously ping another workstation.<br />
When would you want to do this? Be careful! This is illegal…find out why.<br />
2. Write a ping command to send 50000 <strong>by</strong>tes packets.<br />
3. Write a ping command to send ten 50000 <strong>by</strong>te packets.<br />
4. Write a ping command to send 100000 <strong>by</strong>te packets.<br />
5. Open up multiple DOS windows and send pings to each workstation in your<br />
classroom only at the same time.<br />
6. Go find out what a traffic generator is…how could you use your knowledge of<br />
ping to make a traffic generator?<br />
7. Make a traffic generator using ping commands that will choke out your<br />
network. You will know it is working when they start timing out. Figure out<br />
the optimal ping size that starts choking the network and the maximum size<br />
just before the network chokes. This will be cool to use later to test your<br />
networks.<br />
So What Have I Learned Here?<br />
In this lab you learned the basics of troubleshooting workstation network problems. You<br />
will be using this knowledge as you “Learn <strong>by</strong> <strong>Doing</strong>” and practicing for your CCNA<br />
Exam.<br />
115
DHCP Lab<br />
Objective:<br />
To learn about DHCP and how it works with a workstation.<br />
Materials and Tools:<br />
(1) Workstation on network with DHCP server<br />
Background:<br />
Most workstations connected to networks use a DHCP server from which to obtain their<br />
IP address automatically. As you found out in the multiple hub networks using static<br />
addresses can cause problems very quickly. In this lab you will learn how to release and<br />
renew the IP address and mask from your workstation using DOS commands and<br />
windows utilities.<br />
Step-By-Step Instructions:<br />
1. Open up a DOS window.<br />
2. Then type “ipconfig” to see your IP settings using DOS. If you type “winipcfg”<br />
here it will open a windows utility to do the same. From DOS you should see<br />
something like this:<br />
C:\WINDOWS\Desktop>ipconfig<br />
Windows 98 IP Configuration<br />
0 Ethernet adapter :<br />
IP Address. . . . . . . . . : 0.0.0.0<br />
Subnet Mask . . . . . . . . : 0.0.0.0<br />
Default Gateway . . . . . . :<br />
1 Ethernet adapter :<br />
IP Address. . . . . . . . . : 192.168.151.122<br />
Subnet Mask . . . . . . . . : 255.255.255.0<br />
Default Gateway . . . . . . : 192.168.151.1<br />
C:\WINDOWS\Desktop><br />
3. It’s always a good idea to get a snapshot of the settings before we start changing<br />
them in case we need to put them back in later. Do not rely on your memory,<br />
write them down or print them out! Before we start changing these settings from<br />
DOS let’s explore the options available with the ipconfig command. I have<br />
highlighted the commands we are more likely to use as networking<br />
administrators.<br />
116
C:\WINDOWS\Desktop>ipconfig /?<br />
Windows 98 IP Configuration<br />
Command line options:<br />
/All - Display detailed information.<br />
/Batch [file] - Write to file or ./WINIPCFG.OUT<br />
/renew_all - Renew all adapters.<br />
/release_all - Release all adapters.<br />
/renew N - Renew adapter N.<br />
/release N - Release adapter N.<br />
C:\WINDOWS\Desktop><br />
4. From DOS we can now type ipconfig /release_all to let go of our IP address.<br />
After doing that you should see:<br />
C:\WINDOWS\Desktop>ipconfig /release_all<br />
Windows 98 IP Configuration<br />
0 Ethernet adapter :<br />
IP Address. . . . . . . . . : 0.0.0.0<br />
Subnet Mask . . . . . . . . : 0.0.0.0<br />
Default Gateway . . . . . . :<br />
1 Ethernet adapter :<br />
IP Address. . . . . . . . . : 0.0.0.0<br />
Subnet Mask . . . . . . . . : 0.0.0.0<br />
Default Gateway . . . . . . :<br />
C:\WINDOWS\Desktop><br />
Then we can use ipconfig /renew_all to get a new one from the DHCP server.<br />
You should see:<br />
C:\WINDOWS\Desktop>ipconfig<br />
Windows 98 IP Configuration<br />
0 Ethernet adapter :<br />
IP Address. . . . . . . . . : 0.0.0.0<br />
Subnet Mask . . . . . . . . : 0.0.0.0<br />
Default Gateway . . . . . . :<br />
1 Ethernet adapter :<br />
IP Address. . . . . . . . . : 192.168.151.124<br />
Subnet Mask . . . . . . . . : 255.255.255.0<br />
Default Gateway . . . . . . : 192.168.151.1<br />
C:\WINDOWS\Desktop><br />
117
5. Notice how our address may differ slightly. When we give up our IP address it<br />
usually will go to one of the next devices requesting an IP…sometimes we get the<br />
same one back and sometimes we do not. Sometimes we encounter an error like<br />
this:<br />
C:\WINDOWS\Desktop>ipconfig /renew_all<br />
IP ConfigurationError<br />
DHCP Server Unavailable: Renewing adapter ""<br />
Windows 98 IP Configuration<br />
0 Ethernet adapter :<br />
IP Address. . . . . . . . . : 0.0.0.0<br />
Subnet Mask . . . . . . . . : 0.0.0.0<br />
Default Gateway . . . . . . :<br />
1 Ethernet adapter :<br />
IP Address. . . . . . . . . : 169.254.60.217<br />
Subnet Mask . . . . . . . . : 255.255.0.0<br />
Default Gateway . . . . . . :<br />
C:\WINDOWS\Desktop><br />
Notice how our IP address is within the 169 network. Does this mean it worked?<br />
Not at all. Microsoft uses the 169 address as a “place holder” in case something<br />
goes wrong with DHCP.<br />
6. Next, let’s try the same thing with Windows. You can type winipcfg from the<br />
DOS prompt or from the RUN utility. You should see something like this when<br />
you first open it up:<br />
118
Notice how the IP configuration window comes up on the PPP adapter. This is<br />
not our NIC. We need to scroll down from the PPP adapter to our NIC. First,<br />
let’s open up the scroll window:<br />
You can see I am using a 3Com Etherlink PCI NIC in my computer. When I<br />
select that one then I can see my IP settings:<br />
release all<br />
renew all<br />
The settings are similar to what we found in DOS. Instead of typing ipconfig<br />
/release_all now we can just hit the Release All button. When you release it will<br />
clear the ip addresses, masks and gateways. When you renew then you will get<br />
them back.<br />
Supplemental Labs or Challenge Activities:<br />
1. What kind of information can be found using the “more info” button? Can you<br />
get the same information from DOS?<br />
2. Why did the IP information come up on “1 Ethernet Adapter” and not on the “0<br />
Ethernet Adapter?”<br />
So What Have I Learned Here?<br />
You have learned how to release and renew the DHCP address from a workstation. In<br />
part 2 you will work more with DHCP and need to know how to do what we learned in<br />
this lab.<br />
119
Free Protocol Inspector<br />
Objective:<br />
You will find here instructions on how and where to download a free protocol inspector.<br />
It’s not real pretty but it works…and it’s free. I use it through out this book.<br />
Step-By-Step Instructions:<br />
1. Go to www.ethereal.com (note: only one “r” the site—figure 1-- with two “rr’s” is a<br />
magazine…you will know you are at the wrong page if you see something in<br />
French—figure 2).<br />
Figure 1—The “right” site.<br />
Figure 2—The “wrong site.”<br />
2. On the left-hand side of the “Information” window click on “Download.”<br />
3. Scroll down until you find the link for the windows operating system (see figure 3).<br />
4. Click on the link for “local archive” (see figure 3).<br />
Figure 3—Click on “local archive.”<br />
Figure 4—Click on Winpcap.<br />
5. You need a driver library to make this work. Click on the Winpcap packet driver<br />
library link (see figure 4).<br />
6. Click on “downloads” on the left side tool bar (see figure 5).<br />
120
7. Click on Winpcap Auto-installer (driver + library) link (see figure 6). The file should<br />
start the download process. Don’t forget where you put it. Execute this download<br />
file before running Ethereal or you will get an error message.<br />
Figure 5—Click on downloads.<br />
Figure 6—Click on winpcap auto-installer.<br />
8. Click on the back browser to get back to the ethereal download window (see fig. 4).<br />
9. Scroll down and click on the “ethereal-setup-0.9.1.exe.” The file download process<br />
should start.<br />
10. To start a capture use “control+K” then select your NIC card. By default this thing<br />
likes to use MAC as an interface (yeah…no icmp with MAC). Click “OK” at the<br />
bottom of that window to start the capture.<br />
Figure 7—Click on ethereal-setup.<br />
121
Objective:<br />
To learn how to use a protocol inspector in a simple network setting.<br />
Tools and Materials:<br />
(2) workstations with Protocol Inspectors<br />
(1) cross-over cable (xo)<br />
Lab Diagram:<br />
Using a Protocol Inspector<br />
Step-By-Step Instructions:<br />
1. Set up and cable the lab as shown. Be sure to use IP addresses on the same subnet<br />
and using the same mask. Test your connectivity <strong>by</strong> pinging each other.<br />
2. Open up Ethereal.<br />
3. Start a “capture” of packets <strong>by</strong> using “control” plus “K” at the same time or using<br />
the capture pull-down menu and selecting start.<br />
4. The capture preferences will open. Change from the MAC to the Ethernet<br />
Adapter. It should look like this (my NIC is ELO9x):<br />
122
5. Then click on “ok.” You should see the counters start for each protocol. It will<br />
look something like this:<br />
6. Now we need to generate some traffic. We can ping the other workstation. You<br />
should see the ICMP counter increase <strong>by</strong> 8. Four icmp packets sent to destination<br />
and four returned (“echoed”) from the destination. Then click on stop. The<br />
packets that were captured will load into Ethereal. You should see something<br />
like:<br />
123
Notice how we have three frames within the window. The top one shows us basic overall<br />
information about the packets captured. When we highlight on we are asking Ethereal<br />
to show us the contents of that packet. The middle frame is more user friendly. It shows<br />
us block <strong>by</strong> block what we are looking at. The bottom frame shows us the hexadecimal<br />
composition of the actual packet.<br />
Supplemental Labs or Challenge Activities:<br />
1. Go to the Ethereal website and find the sample packets. Get the one on IPv6.<br />
How does it differ from IPv4?<br />
2. Go to the web and look up 2001 Senate Bill 1562 that allows any law<br />
enforcement agent to “capture” packets from the internet at any time for any<br />
purpose…no subpoena required. They say they can only look at the first 65<br />
<strong>by</strong>tes of header and footer information but we know better. Using your<br />
protocol inspector find out how much they can really see and cannot see.<br />
3. We’ve looked at Ethernet packet structure. Go out and research icmp packet<br />
structures.<br />
124
FTP/TFTP Lab<br />
Objective:<br />
To learn the basics about file transfer programs.<br />
Background:<br />
The File Transfer Program (FTP) has probably been used <strong>by</strong> nearly everyone who uses<br />
the web, whether they know it or not. This program is used to transfer files from one<br />
computer to another. The Trivial File Transfer Program (TFTP) is a similar program but<br />
is used for more specific applications like downloading software to a router (like a<br />
<strong>CISCO</strong> router…aha!). Here you will learn how to use FTP and its basic commands to<br />
upload and download a file. In a later lab you will use the similar TFTP program to<br />
download an operating system to a router.<br />
Step-<strong>by</strong>-Step Instructions:<br />
1. Open the MS-DOS prompt.<br />
2. Type “ftp ftp1.ipswitch.com”<br />
3. When prompted use “anonymous” and joe@hotmail.com for password (use your<br />
email address). If you log in correctly you will see:<br />
C:\WINDOWS\Desktop>ftp ftp1.ipswitch.com<br />
Connected to ftp1.ipswitch.com.<br />
220-ftp1.ipswitch.com X2 WS_FTP Server 3.0.1 (859535212)<br />
220-Welcome to ftp1.ipswitch.com<br />
220-This server is located in Massachusetts, USA<br />
220 ftp1.ipswitch.com X2 WS_FTP Server 3.0.1 (859535212)<br />
User (ftp1.ipswitch.com:(none)): anonymous<br />
331 Password required<br />
Password:<br />
230 user logged in<br />
ftp><br />
4. Type “dir” to see what files and directories are available. List those here:<br />
__________________________________________________________________<br />
__________________________________________________________________<br />
__________________________________________________________________<br />
__________________________________________________________________<br />
__________________________________________________________________<br />
__________________________________________________________________<br />
__________________________________________________________________<br />
__________________________________________________________________<br />
__________________________________________________________________<br />
__________________________________________________________________<br />
__________________________________________________________________<br />
__________________________________________________________________<br />
__________________________________________________________________<br />
125
5. Type cd pub to change to the pub sub-directory.<br />
6. Type dir to see what files and directories are available. Write them down here:<br />
__________________________________________________________________<br />
__________________________________________________________________<br />
__________________________________________________________________<br />
__________________________________________________________________<br />
__________________________________________________________________<br />
__________________________________________________________________<br />
__________________________________________________________________<br />
7. Type cd msdos to change to the msdos sub-directory.<br />
8. Type dir to see what files and directories are available. Write them down here:<br />
__________________________________________________________________<br />
__________________________________________________________________<br />
__________________________________________________________________<br />
__________________________________________________________________<br />
__________________________________________________________________<br />
__________________________________________________________________<br />
__________________________________________________________________<br />
9. Type “get mmap.exe” to download the file to your computer.<br />
10. Type “lcd” to find out where it put it on your computer. Where did it go?<br />
__________________________________________________________________<br />
__________________________________________________________________<br />
11. Now you can go out an open the program. It will show you a map of your<br />
memory on your computer.<br />
12. Type ? to see what commands are available. Write them down.<br />
__________________________________________________________________<br />
__________________________________________________________________<br />
__________________________________________________________________<br />
__________________________________________________________________<br />
__________________________________________________________________<br />
__________________________________________________________________<br />
__________________________________________________________________<br />
__________________________________________________________________<br />
__________________________________________________________________<br />
__________________________________________________________________<br />
__________________________________________________________________<br />
__________________________________________________________________<br />
__________________________________________________________________<br />
__________________________________________________________________<br />
126
13. Type help ____ for each command for a more detailed explanation of each<br />
command…for example the first one listed is “!” so type “help !” and write down<br />
what it says.<br />
Help ! ____________________________________________________________<br />
__________________________________________________________________<br />
__________________________________________________________________<br />
__________________________________________________________________<br />
__________________________________________________________________<br />
__________________________________________________________________<br />
__________________________________________________________________<br />
__________________________________________________________________<br />
__________________________________________________________________<br />
__________________________________________________________________<br />
__________________________________________________________________<br />
__________________________________________________________________<br />
__________________________________________________________________<br />
__________________________________________________________________<br />
__________________________________________________________________<br />
__________________________________________________________________<br />
14. I would tell you how to leave the session but you will be able to figure out many<br />
ways to do it after you explore those commands a bit.<br />
Supplemental Labs or Challenge Activities:<br />
1. Go out and find a program called “CuteFTP” and compare it to FTP.<br />
2. Your instructor will have the TFTP program (or you can download it from<br />
<strong>CISCO</strong>). How do these programs differ?<br />
So What Have I Learned Here?<br />
You have learned about basic FTP commands and how FTP works. I have seen some<br />
CCNA test review software that ask about the FTP commands (get and put specifically)<br />
so I wrote this lab for all of you. Ain’t that nice?<br />
127
Protocols and the OSI Model<br />
Objective:<br />
To be able to identify protocols, protocol suites, and their relationships to the OSI model.<br />
Step-By-Step Instructions:<br />
1. Find a network protocol table or poster somewhere on the Internet. If this site<br />
still works:<br />
http://www.sniffer.com/naicommon/registration/survey.asp?code=gw73a This<br />
is a good protocol poster but they come and go so quickly. It is a registration<br />
site and then they will mail you a poster…they claim it will take 2-3<br />
weeks…doesn’t help you much here though. Instant access:<br />
http://ihide.virtualave.net/archive/protpost.pdf<br />
2. Fill in the tables for the various protocol suites. Some protocols have overlap<br />
so be careful.<br />
TCP/IP Suite<br />
OSI Model<br />
7<br />
Protocol<br />
6<br />
5<br />
4<br />
3<br />
Novell Suite<br />
OSI Model<br />
7<br />
6<br />
5<br />
4<br />
3<br />
Protocol<br />
128
Yeah…I know…I didn’t include layers 1 and 2…those are common to all<br />
suites and I will put them at the end.<br />
IBM Suite<br />
OSI Model<br />
7<br />
Protocol<br />
6<br />
5<br />
4<br />
3<br />
ISO Suite<br />
OSI Model<br />
7<br />
Protocol<br />
6<br />
5<br />
4<br />
3<br />
129
DECnet Suite<br />
OSI Model<br />
7<br />
Protocol<br />
6<br />
5<br />
4<br />
3<br />
XNS Suite (Xerox)<br />
OSI Model<br />
7<br />
Protocol<br />
6<br />
5<br />
4<br />
3<br />
130
Appletalk Suite<br />
OSI Model<br />
7<br />
Protocol<br />
6<br />
5<br />
4<br />
3<br />
Banyan Vines Suite<br />
OSI Model<br />
7<br />
Protocol<br />
6<br />
5<br />
4<br />
3<br />
131
Layer 2 Technologies: LAN’s<br />
OSI Model<br />
Protocol<br />
Layer 2 Technologies: WAN’s<br />
OSI Model<br />
Protocol<br />
132
Layer 1 Technologies<br />
OSI Model<br />
Protocol<br />
133
Supplemental Labs or Challenge Activities:<br />
1. With which layers of the OSI model and Protocol Suite are these protocols<br />
associated?<br />
a. SMTP<br />
b. NetBIOS<br />
c. ASP<br />
d. SLIP<br />
e. PPP<br />
f. FTP<br />
g. HDLC<br />
h. CDP<br />
i. RIP<br />
j. Token Ring<br />
k. SCP<br />
l. CSMA/CD<br />
m. EIGRP<br />
So What Have I Learned Here?<br />
You have started looking at a “holistic” view of networking. It is extremely possible that<br />
you may see questions about protocols and their relationship to the OSI model on your<br />
CCNA. I would strongly recommend knowing the TCP/IP suite inside-out and being<br />
familiar with the Novell Suite at a minimum.<br />
134
Telnet Lab<br />
Objective:<br />
To learn how to use terminal emulation (TELNET) software for Internet connectivity.<br />
Background:<br />
During your studies you will use many different software packages: FTP, TFTP, DOS,<br />
Protocol Inspector, and now you will learn TELNET. We saw it briefly back in the DOS<br />
lab but now we will use it to visit government sites, gopher sites, and other types of sites.<br />
We will also look briefly at “port-surfing.”<br />
Step-By-Step Instructions:<br />
1. Open the telnet application. A quick way to do this is to click on Start>Run then<br />
type in telnet and press “ok.” You should see the program come up like this:<br />
2. Start <strong>by</strong> reviewing everything in the help files. This will acquaint you more with<br />
what telnet can and cannot do.<br />
3. Let’s start with an easy one. Let’s telnet to the Library of Congress. Start with<br />
this:<br />
135
Once you click “connect” you should see this (after a couple of seconds):<br />
4. Let’s try to telnet to a “MUD” site (multiple user dungeon)…it’s a gaming site.<br />
5. If there is an available line you will see:<br />
136
6. Fun…isn’t it? Here’s one for the “Hard Drive Café”<br />
7. You can also telnet to specific ports on the computer. We could also telnet in to<br />
port 23 on the same machine (the telnet port). Like this:<br />
8. We can telnet to all kinds of sites. This is not used as much anymore because<br />
everyone pretty much uses http on port 80. If you know how to use it you can<br />
really zip around and you can find much more information (although some of it is<br />
older). Think about it…the web sites will tell you where to buy the book, but<br />
telnet/BBS/FTP sites may have the full text documents…they have been around a<br />
lot longer than the “commercial Internet.” On the next page you will find some<br />
“fun ports to surf.”<br />
Supplemental Labs or Challenge Activities:<br />
1. Go out and perform the tutorials on how to use telnet and its associated websites:<br />
http://www.cs.indiana.edu/docproject/zen/zen-1.0_7.html<br />
2. Find some more BBS and telnet sites at http://www.thedirectory.org/ . It’s fun for<br />
the whole family.<br />
3. Go out and find all port numbers and their associations.<br />
So What Have I Learned Here?<br />
You have learned about more utilities that can be used, but are not used as much<br />
anymore. Let’s face it…it’s the old school stuff…unforgiving, DOS-like, tough to use<br />
programs. The Internet is easier, but this will help “round you out.”<br />
137
Fun Ports to Surf with Telnet<br />
To open Telnet, go to START, then RUN, and type “TELNET” then press enter.<br />
***Be careful when surfing telnet ports. If you are not authorized on<br />
anyone’s computer then you will be guilty of a 2 nd Degree Felony,<br />
punishable <strong>by</strong> a minimum of 15 years for the 1 st offense!****<br />
Port Service What it is…<br />
7 Echo Whatever you type in is repeated<br />
9 Discard/null<br />
11 Systat Lots of info on users in network<br />
13 Daytime Time and date at computer’s location<br />
15 Netstat Lots of info on network—a must see!<br />
19 Chargen ASCII character stream<br />
21 ftp Transfer files<br />
23 telnet Terminal emulation program<br />
25 Smpt Mail program<br />
37 Time Time<br />
39 Rlp Resource location<br />
43 Whois info on hosts and networks<br />
53 Domain Name server<br />
70 Gopher Out-of-date information tool<br />
79 Finger UNIX information finder<br />
80 http Web server<br />
110 Pop Email post box server<br />
119 nntp News group servers<br />
443 Shttp Secure web servers<br />
512 biff Mail notification<br />
513 rlogin Remote login<br />
514 Shell Shell account for UNIX<br />
520 Route Routing information protocol<br />
138
Hyperterminal Lab<br />
Objectives:<br />
Learn how to set up a router and login through a router console port from a workstation<br />
using the Hyperterminal program.<br />
Tools and Materials:<br />
Workstation with Hyperterminal Program<br />
<strong>CISCO</strong> router<br />
(1) rollover cable (ro)<br />
Background:<br />
“Easy when you know how…” is very applicable when accessing a router through a<br />
workstation. This lab is designed to show you how to set up the hyperterminal program,<br />
to connect cabling and how to access the router.<br />
Lab Diagram:<br />
COM1<br />
ro<br />
CON<br />
Step-By-Step Instructions:<br />
1. Verify the existence of the hyperterminal program on your Windows workstation.<br />
Check this path: Start>Programs>Accessories>Hyperterminal or<br />
Start>Programs>Communications>Hyperterminal. If you do not have it installed<br />
on your workstation, then follow these steps (you will probably need your<br />
Windows CD):<br />
1. go to Start>Settings>Control Panel>Add/Remove Programs<br />
2. select the middle tab “Windows Setup”<br />
3. select “Communications”<br />
4. select the “Hyperterminal” pick box<br />
5. follow the prompts to finish the installation<br />
2. Open the Hyperterminal folder/program using the path you just found.<br />
3. Open the “hypertrm” icon.<br />
4. Type in a name for the session and select an icon.<br />
5. Pick “Connect using direct to COM1”<br />
139
6. Make sure you have the following settings:<br />
9600 bits per second<br />
8 data bits<br />
None parity<br />
1 stop bit<br />
Hardware flow control<br />
Later on you may have to change these settings. Some switches (like Cabletron)<br />
like to use flow control set to “none” instead of “hardware.”<br />
7. Connect the router from the console port to COM1 on your workstation using a<br />
rollover cable. You many need to add in a DB-9 to RJ-45 adapter to your COM1<br />
port.<br />
8. Now you can turn the power “on” to the router. After a couple of seconds you<br />
should start seeing some information on the Hyperterminal window.<br />
Troubleshooting:<br />
Are you connected to COM1?<br />
Do you have a rollover cable?<br />
Is your rollover cable good?<br />
Do you have your Hyperterminal settings correct?<br />
Is COM1 correctly set up in your BIOS?<br />
Supplemental Lab or Challenge Activity:<br />
1. Go search the Internet for instructions on COM ports, their settings, and what they<br />
do. Why do we set to 9600 bps, 8 databits, no parity, and 1 stop bit? What is<br />
parity?<br />
2. Look up a program called “Kermit” on the web. How does it differ from<br />
Hyperterminal? What about “Xmodem?”<br />
3. Go to downloads.com and see if there are other communications software<br />
packages available.<br />
4. Go to www.sigmanet.com and download the utilities for the Adtran Atlas 550.<br />
They have a communication tool package their too. See if you can use their<br />
communication package to hyperterminal into a router too.<br />
5. Is hyperterminal only for routers? Try it <strong>by</strong> connecting to lynx.cc.ukans.edu<br />
6. It is possible to capture text from a hyperterminal session and save it to a text file<br />
WHILE you are working. In this manner you can see everything you did during<br />
an active session. Click on the “transfer” pull-down menu, then enter a path and<br />
file name to save it too. It’s just that easy!<br />
So What Have I Learned Here:<br />
Another day, another utility to use. Gosh! Will they ever stop? Oh who cares…more<br />
knowledge, more tricks in our arsenal, more lines on the resume. We learned about some<br />
more communication software. Hyperterminal is going to be used quite a lot through out<br />
the rest of this book. Who know? Be different and use another communications tool to<br />
access the router and impress your friends or just show off smugly.<br />
140
Remote Access Lab<br />
Objective:<br />
To learn how to set up windows dial-up networking (DUN) and connect to another<br />
computer to share files.<br />
Materials:<br />
(3) PC workstations<br />
(3) External Hayes modems (or internals if you must)<br />
(3) RS-232 to DB-9 adapters<br />
(3) RJ-11 (phone cords)<br />
(1) Adtran<br />
Lab Diagram:<br />
Scott<br />
555-6002<br />
com1:DB-9<br />
RS-232<br />
RJ-11<br />
PSTN<br />
Matt<br />
Dave<br />
555-6001 555-6003<br />
AOL MSN Netcom<br />
555-6004 555-6005 555-6006<br />
WWW<br />
Background:<br />
Setting up DUN is easy. There are three steps: (1) configure a connection on the PC, (2)<br />
configure the communication rules, and (3) set up to receive calls.<br />
141
(Step 1) Configure a connection on the PC<br />
1. Check to see if you computer has dial-up networking capabilities first. If not,<br />
then you will have to install dial-up networking software from your Windows<br />
installation CD.<br />
a. Double-click on the “my computer” icon on your desktop.<br />
b. If you have a folder called “dial-up networking,” then you have DUN<br />
installed and are ready to go!<br />
c. If not, then you will have to install DUN.<br />
i. Click on Start>Settings>Control Panel>Add/Remove Programs<br />
ii. Click on the tab for “Windows Setup”<br />
iii. The computer will search for settings. Then select<br />
“Communications.”<br />
iv. Select “Dial-up <strong>Network</strong>ing.”<br />
v. Select “Dial-up Server.” This will allow you to receive calls.<br />
Figure 1—Select Dial-up <strong>Network</strong>ing and Dial-up Server.<br />
vi. Click on “ok.” You may be prompted for the Windows installation<br />
CD rom.<br />
If you are doing this at school, then chances are your school<br />
network administrator may have put the installation files (*.cab<br />
files) on the computer (so you won’t need the cd). These are<br />
files that contain compressed images of the Windows operating<br />
system. A long time ago, before CD-roms, we had to install<br />
operating systems from floppy diskettes. These *.cab files are<br />
an off-shoot from those days. Currently your operating system<br />
may need as many as 30-35 floppy diskettes to make a back-up<br />
copy from the CD-rom. In the “old-days” we could make<br />
back-up copies with seven floppy diskettes (Windows 3.x) or<br />
even three (DOS).<br />
142
vii. Click on “ok.”<br />
viii. You may have to re-boot your computer.<br />
2. Check to see if your computer has a modem and software installed.<br />
a. Click on Start>Settings>Control Panel>Modems. If you have one<br />
installed, then you should see one here. It may look like this:<br />
Figure 2—Laptop with PCMCIA modem card installed.<br />
b. If you do not have one, then you will have to add one. We will walk<br />
through adding an external modem to your computer here.<br />
i. Click on “start>settings>control panel>add new hardware<br />
ii. When the “add new hardware wizard” opens click on “next” twice.<br />
iii. Click on “no, I want to select the hardware from a list.”<br />
iv. Then click on “next.”<br />
v. Select “modem.”<br />
vi. Click on “next.”<br />
vii. Make sure your modem is connected. I used an RS-232 adapter on<br />
the DTE of the modem to a DB-9 connector on my COM1 port.<br />
The RS-232-DB-9 were on the ends of one cord.<br />
viii. Click on “next.” The computer should find your modem on<br />
COM1.<br />
ix. If not, select “next.”<br />
x. Select “have disk” and change to the CD-drive.<br />
xi. Select the modem. I selected Hayes V.90 PCI modem for my<br />
external one.<br />
xii. Select “next.”<br />
xiii. Select “finish.”<br />
3. Make yourself a new connection. You can actually make many different<br />
connections with each one set up to dial a different number. In our lab<br />
diagram above we could make three different connections, one for each<br />
different user, and put icons on the desktop to make it easier to dial. To make<br />
a dial-up connection:<br />
a. Double-click on “my computer”<br />
143
. Double-click on “dial-up networking”<br />
c. Click on “make a new connection”<br />
d. Give the connection a name (matt, scott, dave, etc)<br />
e. Select a modem to use<br />
f. Click on “next”<br />
g. Put in the phone number to call…In our example if I was configuring<br />
“matt” to call “dave” then I would use 555-6003.<br />
h. Select a country or region code (US)<br />
(Step 2) Configure the communication rules<br />
4. Configure the communication rules (“protocols”):<br />
a. On that connection we just made in the dial-up networking folder, rightclick<br />
it<br />
b. Select “properties”<br />
c. Make optional selections in the next steps.<br />
5. Along the top you will see some tabs to configure various communications<br />
rules for this connection (step 6-10 explain these settings in more detail):<br />
a. Server types—will allow you to select the type of dial-up server to be<br />
called along with some optional settings, will allow you to select the<br />
“allowable network protocols,” and will allow you to see or change your<br />
TCP/IP settings.<br />
b. Scripting—allows us the option to use a modem script or another type of<br />
script for the dial-up access.<br />
c. Multilink—allows us the option of using multi-link for connections.<br />
Server Types Tab:<br />
6. For most connections you will probably just use a connection to a “PPP:<br />
Internet, Windows NT Server, Windows 98” dial-up server. This is usually<br />
used at home to dial into an ISP like AOL, MSN, or Netcom. Your ISP<br />
should be able to walk you through these steps via technical support or will<br />
have “self-installing” software to do this for you.<br />
7. You can select any “advanced options.”<br />
a. Log on to network—Used only when using DUN to have access to a<br />
Microsoft NT controlled network. Most ISP’s run on UNIX so you<br />
probably will not need this.<br />
b. Enable software compression—If your ISP requires use of compression<br />
technologies (most do not) then select this.<br />
c. Require encrypted password—Almost all dial-in connections require a<br />
password. Select this only if your password must be encrypted. Since the<br />
encryption settings must be identical on each end, changes are, at this<br />
point in your networking career, you won’t need this to be enabled.<br />
d. Require data encryption—Ditto..this just encrypts the data.<br />
e. Record a log file for this connection—With this enabled a record of all<br />
activities during the connection will be made. This is similar to keyboard<br />
recorders except more information is included.<br />
144
8. You can select any “allowable network protocols.” This helps to establish the<br />
routed protocols to be used during your connection. Ok, ok, so netbeui is nonroutable…don’t<br />
sue me for Microsoft putting it here…actually netbeui is<br />
encapsulated within another protocol to allow it to be routed. Select TCP/IP<br />
for your networking connection. Most of the time you will be using this<br />
protocol suite. Heck, even Macintoshes and Novell use TCP/IP. If you want<br />
to check all three to feel safer, then go ahead. Just be aware that IPX sends<br />
out its own little broadcasts every 60 seconds which can affect the<br />
performance of your connection.<br />
Scripting Options Tab:<br />
9. Here you can select a file with script settings to establish the DUN. You can<br />
also select if you want the script lines to be “stepped” through which means<br />
you will be prompted (asked) before each line if you wish that line to be<br />
processed. Finally you can select if you want the terminal screen to be<br />
minimized when you start.<br />
Multilink Tab:<br />
10. Multilink will allow you to use additional devices for establishing and<br />
maintaining connections. Think of this as something like a “conference call.”<br />
(Step 3) Set up to receive calls<br />
11. In the dial-up networking window select “connections” from the pull-down<br />
menu and then “Dial-up server.”<br />
12. Select “allow caller access.”<br />
Figure 3—Setting up Dial-up Server.<br />
13. Put a password in if you want.<br />
14. Click on “server type.”<br />
15. Select “Type of Dial-up Server.”<br />
16. Select “PPP: Internet, Windows NT Server, Windows 98.”<br />
17. Disable “Require encrypted password” if none will be used.<br />
18. Click on “OK” twice. You are now set up to send and receive calls.<br />
145
Step-By-Step Instructions:<br />
1. You are to establish, maintain, and tear-down DUN’s on Matt’s, Scott’s and<br />
Dave’s workstations to each other. You will then share files between each of<br />
the workstations. To begin you need to make some files and folders for<br />
sharing.<br />
a. On each computer make a folder for each user.<br />
i. On Matt’s computer make a folder called c:\matt<br />
ii. On Scott’s computer make a folder called c:\scott<br />
iii. On Dave’s computer make a folder called c:\dave<br />
b. On each computer put an IP address in the TCP/IP setting for each dial-up<br />
adapter. Use 192.168.1.1/24 for Matt, 192.168.1.2/24 for Scott, and<br />
192.168.1.3/24 for Dave. This is not the same TCP/IP setting you have<br />
been using. See figure 4. How you set them will look identical. Just<br />
make sure you pick the right one.<br />
Figure 4—Selecting the TCP/IP for the Dial-up Adapter<br />
c. On each computer make a text document for each user.<br />
i. On Matt’s computer<br />
1. in c:\matt make a document called c:\matt\matt.txt<br />
2. In that document write “This is Matt’s file”<br />
ii. On Scott’s computer<br />
1. in c:\scott make a document called c:\scott\scott.txt<br />
2. In that document write “This is Scott’s file”<br />
iii. On Dave’s computer<br />
1. in c:\dave make a document called c:\dave\dave.txt<br />
2. In that document write “This is Dave’s file”<br />
146
2. Make DUN’s for each computer to contact each other. Here are instructions for<br />
making a DUN to Scott on Matt’s computer:<br />
d. Open “my computer.”<br />
e. Double-click on “dial up networking” folder<br />
f. Double-click on “make a new connection.”<br />
g. Give a name to the connection<br />
h. Select modem to use<br />
i. Click on “next.”<br />
j. Put in the phone number.<br />
k. Click on “next.”<br />
l. Click on “finish.”<br />
m. If you need to change any properties then go back and right-click the DUN<br />
and make the changes.<br />
3. Have Matt establish a DUN to Scott. You will see a window similar to Figure<br />
5 when you are connected. Go ahead and select “more information” to see<br />
what is available to you.<br />
Figure 5a—Dialing to connect to Dave from Matt via dial-up networking.<br />
Figure 5b—Verifying user name and password (none) to connect to Dave from Matt.<br />
Figure 5c—Logging on to the network to connect to Dave from Matt.<br />
147
Figure 5d—Isn’t that nice?<br />
4. Copy c:\scott\scott.txt into c:\matt\. Can’t find the other computer in<br />
“networking neighborhood?” In the DOS window try to ping it. If it returns a<br />
ping, then it is there and windows is being difficult. In windows explorer<br />
search for the computer using the “find” utility under the tools menu. Search<br />
<strong>by</strong> IP address and it should be found. If not, then re-check your IP settings.<br />
5. On Matt’s computer open explorer and verify there are now two files in<br />
c:\matt. If not, then double-check your file and print sharing. You may see a<br />
window similar to figure 6 during the connection. If not, then go back into the<br />
dial-up networking window, click on “connect to Dave” and then “details.”<br />
Figure 6—Active connection with DUN.<br />
6. Close the connection.<br />
7. Have Matt establish a DUN to Dave.<br />
8. Copy c:\dave\dave.txt into c:\matt\.<br />
9. On Matt’s computer open explorer and verify there are now three files in<br />
c:\matt. If not, then double-check your file and print sharing.<br />
148
10. Close the connection.<br />
11. Have Scott establish a DUN to Matt.<br />
12. Copy c:\matt\matt.txt into c:\scott\.<br />
13. On Scott’s computer open explorer and verify there are now two files in<br />
c:\scott. If not, then double-check your file and print sharing.<br />
14. Close the connection.<br />
15. Have Scott establish a DUN to Dave.<br />
16. Copy c:\dave\dave.txt into c:\scott\.<br />
17. On Scott’s computer open explorer and verify there are now three files in<br />
c:\scott. If not, then double-check your file and print sharing.<br />
18. Close the connection.<br />
19. Have Dave establish a DUN to Matt.<br />
20. Copy c:\matt\matt.txt into c:\dave\.<br />
21. On Dave’s computer open explorer and verify there are now two files in<br />
c:\dave. If not, then double-check your file and print sharing.<br />
22. Close the connection.<br />
23. Have Dave establish a DUN to Scott.<br />
24. Copy c:\scott\scott.txt into c:\dave\.<br />
25. On Dave’s computer open explorer and verify there are now three files in<br />
c:\dave. If not, then double-check your file and print sharing.<br />
26. Close the connection.<br />
Ok…so it was a bit of over-kill doing connections to everyone else but you know they all<br />
work now and can share any files between them.<br />
Supplemental Lab or Challenge Activities:<br />
1. Turn on logging. Find the log file and view the contents after a connection is<br />
closed.<br />
2. Share only certain files.<br />
3. Use a protocol inspector to view session establishments.<br />
4. Set up three computers to simulate ISP’s.<br />
5. Instead of using the dial-up networking try using Hyperterminal. Go ahead get<br />
crazy and type stuff in too!<br />
149
Your Modem and You<br />
Objective:<br />
This lab will familiarize you with the features of modems, the AT command set, and<br />
modem scripts. This lab is more information-based than hands-on oriented.<br />
Tools and Materials:<br />
(3) PC workstations<br />
(3) External Hayes modems (or internals if you must)<br />
(3) RS-232 to DB-9 adapters<br />
(3) RJ-11 (phone cords)<br />
(1) Adtran<br />
Lab Diagram:<br />
Scott<br />
555-6002<br />
com1:DB-9<br />
RS-232<br />
RJ-11<br />
PSTN<br />
Matt<br />
Dave<br />
555-6001 555-6003<br />
(phone)<br />
(phone)<br />
555-6006 555-6008<br />
(phone)<br />
555-6007<br />
Background:<br />
Modem configurations vary <strong>by</strong> manufacturer. Fortunately some vendors have attempted<br />
to follow a “AT command set” standard (non-formalized). It is not really a standard, or<br />
protocol, just an attempt to be consistent (how nice for us!). When you buy a modem you<br />
should receive a modem configuration book, disk or CD (or at least instructions on where<br />
to download them). Fear not! On the <strong>CISCO</strong> website there is a comprehensive AT<br />
command set book (76 pages!). You should go download that if you want thorough<br />
knowledge of AT command sets.<br />
150
Modems use their own little language. Every language has its own alphabet and modemspeak<br />
is no different. Here is the common “alphabet” of modem-speak:<br />
a-z “alphabet” * “asterisk”<br />
^ “carat” - “hyphen”<br />
$ “dollar sign” : “colon”<br />
% “percent sign” @ “character command set”<br />
& “ampersand” \ “backslash”<br />
) “parenthesis” # “character command set”<br />
Each one is unique and each one can be command with other “alphabet letters” to make<br />
scripts in modem-speak. I have filled in a chart with some common commands for my<br />
Hayes modem and what they do. Complete the chart with commands for your modem.<br />
Your modem My Hayes V.90 Description of command<br />
AT<br />
attention<br />
D<br />
dial<br />
H<br />
Hang up<br />
^V<br />
Display bootstrap revision<br />
$B57600 Set serial port to 57600 bps<br />
$D Run power-up diagnostics<br />
%M Set modulation<br />
&C1<br />
Set up modem for carrier detect<br />
&D3<br />
Set up modem for when the data terminal ready (dtr)<br />
transitions to “off”<br />
&F<br />
Load factory defaults and settings<br />
&K3<br />
Set hardware flow control<br />
&Q9<br />
Set compression<br />
&T<br />
Diagnostic test mode<br />
&W<br />
Save configuration to modem<br />
-D Repeat dial<br />
@E<br />
Detailed modem call status<br />
\E Echo<br />
\S Read on-line status<br />
Writing scripts:<br />
You can combine several modem-speak commands to write scripts. The one I frequently<br />
use is:<br />
AT&FS0=1&C1&D3&K3&Q9&W<br />
Let’s break it down and see what it really does…<br />
151
AT&F load factory defaults and settings<br />
S0=1 set modem to answer on first ring<br />
&C1&D3 set modem up for “action” (cd/dtr)<br />
&K3 set hardware flow control<br />
&Q9 set compression<br />
&W save configuration to modem<br />
During the course of using modems there are several other “abbreviations” you should<br />
also be familiar with. You will see these when using modems with routers and using the<br />
“debug” commands:<br />
TxD transmit data DSR Data Set Ready<br />
RxD receive data GRD Signal ground<br />
RTS request to send CD Carrier detect<br />
CTS clear to send DTR Data terminal ready<br />
You have also seen “blinking lights” on an external modem (if you used the external<br />
type). On my Hayes here is what those lights mean:<br />
HS High-speed Lights when communicating at more than 4800kbps<br />
RI Ring Indicate Blinks on and off when detecting incoming ring<br />
CD Carrier Detect Lights when the DCD signal from the fax modem to<br />
the computer is on<br />
OH Off Hook Lights when the fax modem is off hook<br />
RD Receive Data Light flashes when data is sent from the fax modem<br />
to your computer or other serial device. At high speeds the light may appear to be<br />
always “on.”<br />
SD Send Data Flashes whenever data or commands are transmitted<br />
from the serial port of your computer or other device to the fax modem.<br />
TR Terminal Ready Lights when the computer is ready to send or<br />
receive data. Indicates the status of the DTR signal from the terminal or<br />
computer.<br />
MR Modem Ready Lights when the fax modem is turned on. Flashes<br />
during self-test.<br />
Above information from “Hayes Installation Guide” (2000).<br />
Step-By-Step Instructions:<br />
1. Set up the lab and cable it as shown.<br />
2. Have each computer, one at a time, establish DUN between each other. Be<br />
sure to watch the indicator lights on the modem. Try to record the order<br />
during a call establishment and termination.<br />
3. Try calling from one phone to another.<br />
4. Try calling from one phone into another computer. As it tries to go you will<br />
hear negotiation taking place (Screech! Squak! Scratch!)<br />
152
Supplemental or Challenge Activities:<br />
1. Go out to <strong>CISCO</strong> and download the AT command set.<br />
2. Try writing different scripts for your modem.<br />
a. Write one to limit line speed to 9600 bps.<br />
b. Write another to answer on the second ring.<br />
c. Write one to show default settings during the boot.<br />
3. Try using a protocol inspector to “see” the negotiation between two PC’s<br />
using DUN. Change the settings for protocols and stuff.<br />
So What Have I Learned Here?<br />
Ok…so this is a bit more in-depth than you really need to get with modems. If you<br />
continue on with your <strong>CISCO</strong> training then you will have to be very familiar with these<br />
commands. We use these to set up the ability to dial into a router and make changes.<br />
Again, this is one of those labs where I grew up doing this but newer people to the field<br />
have not had the need for anything like this…call it a catch-up if you want.<br />
153
Part 2:<br />
Basic Routing I<br />
154
An Overview of <strong>CISCO</strong> Routers and Switches<br />
Objectives:<br />
To become familiar with <strong>CISCO</strong> networking categories which, in turn, will enable you to<br />
more easily find technical information about networking devices on the <strong>CISCO</strong> website:<br />
http://www.cisco.com.<br />
Background:<br />
During the course of your studies you may encounter many different models of <strong>CISCO</strong><br />
routers and switches. This lab is designed to give you a general overview of how <strong>CISCO</strong><br />
routers and switches fit into their “3-layer hierarchical model” which, will allow you to<br />
more easily find technical information about specific models. This lab will also give you<br />
an overview of some of the features of the 2500 and 2600 routers and 1900 and 2900<br />
switches that you may encounter during your CCNA studies.<br />
3-layer Hierarchical model<br />
As you may recall from <strong>CISCO</strong> textbooks, <strong>CISCO</strong> strongly suggests using a 3-layer<br />
styled model for designing networks. The “core” of any network design should be<br />
implemented for high-speed switching. This layer just wants to move the information<br />
around as quickly as possible. The distribution layer helps to re-distribute those fast<br />
moving information packets, but may be slowed down <strong>by</strong> some decision-making from a<br />
router. Finally the access layer is where users connect to the network. This is considered<br />
to be the “slowest” layer because of the extensive decision-making that may be taking<br />
place here.<br />
CORE<br />
DISTRIBUTION<br />
ACCESS<br />
The core layer (high-speed switching) is where you would find the most redundancy<br />
between devices. The distribution layer is where you would find network policy<br />
implementations, some security, and routing between VLAN’s. The access layer is<br />
where you would find your users connected to the network, workgroups, servers, and<br />
some security. As you progress through your studies you will learn more about the<br />
functions of each layer and how they play an important role in network design.<br />
155
More importantly to you right now if you wanted to find information about a <strong>CISCO</strong><br />
2500 router at <strong>CISCO</strong>’s website you would almost need a miracle to find it unless you<br />
knew a 2500 router is classified as an “Access” router. Now, you could go to the <strong>CISCO</strong><br />
website, access the technical document section, then select the “access” or “modular<br />
access” routers heading, and then select 2500’s to get your information. This is much<br />
easier. I guess the old phrase “easy when you know how” really fits here. Table 1 shows<br />
a general overview of the <strong>CISCO</strong> routers and switches and which layer they are typically<br />
attributed.<br />
CORE<br />
6500 switches<br />
8500 switches<br />
7000 routers<br />
10000 routers<br />
12000 routers<br />
DISTRIBUTION<br />
4000 switches<br />
5000 switches<br />
6000 switches<br />
3600 routers<br />
4000 routers<br />
ACCESS<br />
700 routers<br />
800 routers<br />
1700 routers<br />
2500 routers<br />
2600 routers<br />
1900 switches<br />
2820 switches<br />
2900 switches<br />
Table 1—<strong>CISCO</strong> routers and switches as they correlate to the 3-layer hierarchical design<br />
model.<br />
The 2500 router seems to be the staple of many CCNA Academies worldwide. Too bad<br />
for them, because <strong>CISCO</strong> has recently declared these products to be “End of Life” and<br />
will not be supporting them, or doing software upgrades on them very shortly. There<br />
certainly will be a lot of schools scrambling to find money to replace them. Let’s look at<br />
what some people call the “front” of a 2500 router in figures 1, 2, and 3. The 2500’s are,<br />
for the most part, “fixed” units. There is very little we can do to change them. If we<br />
need three Ethernet ports, then we will have to add another router. At best we can have<br />
two Ethernet ports (using transceivers on the AUI ports).<br />
156
Figure 1—<strong>CISCO</strong> 2501 router “front” view.<br />
Nothing fancy here…personally I consider this to be the “rear” of the router since I do all<br />
of my work on the other side. So let’s take a look at the <strong>CISCO</strong>-termed “rear” of the<br />
2500 router.<br />
(AUI port Serial Console Power Power<br />
requires Ports Aux Switch Plug<br />
transceiver)<br />
Figure 2—<strong>CISCO</strong> 2501 router “rear” view, dual serial, single AUX.<br />
AUI ports Serial Console Power Power<br />
(requires Ports Aux Switch Plug<br />
transceivers)<br />
Figure 3—<strong>CISCO</strong> 2514 router “rear” view, dual serial, dual AUX.<br />
The 2600’s, on the other hand, are more “modular” in style. From figures 4 and 5 we can<br />
see some removable plates/covers. This is where a variety of modules can be inserted.<br />
The two smaller plates can have WAN Interface Cards (WIC’s) inserted. These are<br />
things like dual serial interfaces, ISDN modules and T-1 modules. The larger removable<br />
plate/cover is for, well, larger modules with many Ethernet, serial interfaces or even<br />
multiple ISDN interfaces. We are talking up to 24 or so lines. A far cry from those<br />
2500’s huh? Different routers can use different modules so check your documentation<br />
carefully.<br />
157
Ethernet Console AUX Power Power<br />
Port Port Switch Plug<br />
Figure 4—<strong>CISCO</strong> 2610 router “rear” view, single Ethernet, no serial.<br />
Ethernet Ports Console Aux Power Power<br />
Port Port Switch Plug<br />
Figure 5—<strong>CISCO</strong> 2611 router “rear” view, dual Ethernet, no serial.<br />
10BaseT ports<br />
Uplinks<br />
(1-24) (2)<br />
Figure 6—<strong>CISCO</strong> 1924 switch “front” view, 24-port switch (10Base T ports with 2<br />
uplinks).<br />
Power AUI Console<br />
Plug<br />
port<br />
Figure 7—<strong>CISCO</strong> 1924 switch “rear” view, 24-port switch (10Base T ports with 2<br />
uplinks)—same on 2924.<br />
158
Figure 8—<strong>CISCO</strong> 2924 switch “front” view, 24-port switch (100 Base T ports—all ports<br />
capable of being uplinks).<br />
Figures 6 and 7 show the switches common to most students in these labs. These<br />
switches have 24-10BaseT ports and two ports at 100BaseT that serve as uplink/downlink<br />
ports. Heck, they are even called ports “26” and “27.” Now there is a task…try to figure<br />
out where port “25” is located! In figure 8 we see the 2924 switch common to CCNP<br />
labs. The only difference between the two is every port is 100BaseT and capable up<br />
uplink/downlink. That is why no “extra” ports 26 and 27 are out to the right side.<br />
Supplemental Lab or Challenge Activity:<br />
Go to www.cisco.com and look up:<br />
1. Release Notes for <strong>CISCO</strong> 2500 Series Routers<br />
2. Hardware Installation Notes for 2600 Series Routers<br />
3. Catalyst 1900/2820 Enterprise Edition Software Configuration Guide<br />
4. Catalyst 2900 User Guide<br />
Print out the first page of each as evidence of completion for your instructor.<br />
So What Have I Learned Here?<br />
In this lab you have been introduced to the <strong>CISCO</strong> hierarchical model. We won’t be<br />
doing too much with this here in the CCNA course but if you want to learn about the<br />
design stuff (CCDA) plan on seeing it in your sleep. We also have a lab on it again in<br />
Part 3. This is a nifty overview of the routers and switches that you may encounter<br />
during your CCNA studies.<br />
159
Objective:<br />
To become familiar with basic router commands including how to get help.<br />
Basic Router Commands<br />
Background:<br />
In this lab we take you into the mysterious world of the router. You kind of messed<br />
around with it before with the Hyperterminal lab, but eventually you new you would be<br />
learning <strong>by</strong> doing. In this lab you will become familiar with the help commands, the<br />
types of prompts you will use, and some basic router commands.<br />
Lab Design:<br />
Step-<strong>by</strong>-Step Instructions:<br />
1. In the lab design above fill in the types of cables used (xo, ro, st) and into which<br />
port they will be inserted.<br />
2. Cable the lab as shown.<br />
3. Open the hyperterminal session on the workstation.<br />
4. Turn the power on to the router and watch the text as the router boots. In a couple<br />
of labs you will learn the sequencing and purpose for all of that information.<br />
Finally the router will prompt you with the message:<br />
--- System Configuration Dialog ---<br />
Would you like to enter the initial configuration dialog? [yes/no]:<br />
5. If you put in “yes” then you will be able to set up your router using “menu-based”<br />
commands. But you didn’t come here to learn how to do anything menu-based.<br />
The menu-based commands are severely limited so you need to learn about<br />
command line interfaced (CLI) configuration anyways so you might as well dive<br />
right in! Put in either “no” or “n” (without the quote marks) and press enter. Also<br />
put in “yes” for terminating autoinstall. You should see something similar to:<br />
Would you like to terminate autoinstall? [yes/no]<br />
Press RETURN to get started!<br />
160
6. Well the next step should be very obvious…press RETURN to get started. You<br />
should see a bunch of messages flashing and scrolling down the hyperterminal<br />
session. When it stops, press enter, you should see something like this:<br />
00:00:51: %SYS-5-RESTART: System restarted --<br />
Cisco Internetwork Operating System Software<br />
IOS (tm) C2600 Software (C2600-DS-M), Version 12.0(13), RELEASE<br />
SOFTWARE (fc1)<br />
Copyright (c) 1986-2000 <strong>by</strong> cisco Systems, Inc.<br />
Compiled Wed 06-Sep-00 02:30 <strong>by</strong> linda<br />
Router><br />
This is known as the “user” prompt. You can tell the router prompt is in the user<br />
mode because the name (also known as the “host name”) of the router is followed<br />
<strong>by</strong> a carat “>”. This mode allows anyone to see a very limited amount of<br />
information about the status of the router. At this prompt you will not be able to<br />
change the programming of the router.<br />
7. To see what options are available for us at the user prompt we can “ask” our<br />
router for help. Computer devices are like that…if we get stuck, then we can ask<br />
it for help. On your workstation if you want some help then you can use your<br />
pull-down menus or even use the task bar help option (Start>help). Routers are<br />
helpful too. The phrase “easy when you know how” really applies. To get help<br />
you should start with the generic “help.” Then press enter.<br />
router>help<br />
You should see something like this:<br />
Help may be requested at any point in a command <strong>by</strong> entering a question<br />
mark '?'. If nothing matches, the help list will be empty and you must<br />
backup until entering a '?' shows the available options.<br />
Two styles of help are provided:<br />
1. Full help is available when you are ready to enter a command argument<br />
(e.g. 'show ?') and describes each possible argument.<br />
2. Partial help is provided when an abbreviated argument is entered and<br />
you want to know what arguments match the input (e.g. 'show pr?'.)<br />
Router><br />
8. Ok…so that didn’t give you much. Most computers or network systems the<br />
command “help” works very well. So remember it and use it when appropriate.<br />
There is a better way to get help using the question mark. Try typing this (and<br />
press enter):<br />
router>?<br />
161
9. Write down what you see on the worksheet entitled “user mode ? options.” Some<br />
of the commands you will using more than the others. Which one do you think<br />
they are and why? Don’t just quickly turn and start jotting them down from the<br />
answers…with routers you should take your time, examine everything twice, and<br />
examine the outcome. With router programming speed kills. If you see a line<br />
that says:<br />
-------More---------<br />
Then the router is waiting for you to press enter to continue. This just stops<br />
what’s on the screen for you to be able to read it. If you hit any other key it will<br />
take you back to the prompt without showing the rest of the information.<br />
10. Let’s try using a couple of those commands.<br />
11. Now let’s move on to the next type of prompt: the privileged mode prompt. To<br />
get to the privileged prompt you need to type either “enable” or “en” for a<br />
shortcut. Many commands can be short-cutted but for now get used to using the<br />
entire command. As you progress through these labs and get comfortable with the<br />
commands then you can start abbreviating the commands.<br />
router>enable<br />
router#<br />
Notice how the prompt changes from a carat to a pound sign. This is a visual cue<br />
to you that you are at the privileged mode prompt. To switch back to the user<br />
mode prompt simply type “disable.” Actually you can also type “exit” here and it<br />
will do the same thing, but “disable” is the technically most correct answer for<br />
how to get from the privileged mode prompt to the user mode prompt. Try both<br />
and see for yourself.<br />
12. Now let’s get back to exploring the privileged mode prompt command options.<br />
Just like we did at the user mode prompt we can request help for seeing all<br />
available command options with a question mark:<br />
router#?<br />
13. Write down what you see on the worksheet entitled “privileged mode ? options.”<br />
Like the user mode prompts some of the commands you will using more than the<br />
others. Which one do you think they are and why? In the answers for this lab I<br />
have also highlighted the ones you will be more likely to use than the others.<br />
14. Let’s try using a couple of those commands. Type “show run” and look at the<br />
output. This is actually the current running configuration script for your router.<br />
You will learn more about this in the next couple of labs. Then type “reload” and<br />
hit enter. You will need to hit enter one more time and the system will “reload”<br />
or in geek terms it will “reboot.”<br />
15. Ok…time to learn about shortcuts with router commands. I know, I know. I said<br />
they should not be used because speed kills…these are designed to help you more<br />
accurately work with your router. You can use the up and down arrows to view<br />
162
the previous commands. We did this earlier in part 1 with our workstation DOS<br />
prompt and the DOSKEY commands. If you do not see anything when you use<br />
the up arrow it may because you have not used any commands at that specific<br />
prompt mode. Next, lets look at some keystroke shortcuts. Suppose you typed a<br />
command similar to what you need to use next. Ping will be a good example<br />
here…suppose we wanted to ping to destinations 192.168.1.1 and 192.168.1.2.<br />
We could try it this way:<br />
router#ping 192.168.1.1<br />
router#ping 192.168.1.2<br />
(typed)<br />
(typed)<br />
or we could do it this way:<br />
router#ping 192.168.1.1 (typed)<br />
router#ping 192.168.1.1 (used the up arrow)<br />
router#ping 192.168.1. (back space one character)<br />
router#ping 192.168.1.2 (typed in a “2”)<br />
In this manner we used less keystrokes and we have reduced the possibility of a<br />
typing error on the second ping command. These types of short cuts are ok. You<br />
can use keystroke commands to move back and forth more quickly on the<br />
command line. I use the control+a and control+e with my up arrow quite<br />
frequently. Plus these combinations also sound like some mighty fine fodder for a<br />
certification exam, don’t they? Hint, hint, wink, wink, nudge, nudge, know what I<br />
mean, know what I mean? Fill in the chart below on keystroke shortcuts and what<br />
they do.<br />
Shortcut<br />
Control+a<br />
Control+b<br />
Escape+b<br />
Control+e<br />
Control+f<br />
Escape+f<br />
Control+n<br />
Control+p<br />
Tab<br />
Description<br />
Completes the entry<br />
16. Another way to view the progression of commands is using the “show history”<br />
command. The up arrow will only show you those commands one at a time, but<br />
router#show history<br />
the show history will show you the last 15 commands (default) you used. Heck,<br />
you can even change how many previous commands will be stored. Lets try that<br />
now:<br />
163
outer#terminal history size 5<br />
17. Using this command will set the number of commands retained in the history<br />
buffer to 5. If you were to “show history” then you would see the previous 5<br />
commands. This number can range from 0 to 256. (Sounds like a good CCNA<br />
question doesn’t it?).<br />
18. Ok. We are still moving with our prompts. Before we can make any changes to<br />
our router we need to be at the configuration mode prompt.<br />
router#config<br />
Configuring from terminal, memory, or network [terminal]?<br />
router#terminal<br />
router(config)#<br />
Or we can just <strong>by</strong>-pass that second statement <strong>by</strong> combining the two statements:<br />
router#config t<br />
router(config)#<br />
19. Let’s change the name of our router. We do this from the privileged mode prompt<br />
using the command “hostname.” Let’s change it to our name.<br />
router(config)#hostname matt<br />
matt(config)#<br />
Notice how the prompt changes immediately to our new hostname.<br />
To leave the configuration mode, just type exit.<br />
matt(config)#exit<br />
matt#<br />
20. It would be a shame if the power were to suddenly get turned off because<br />
everything would be erased. We can save our work to the file that is loaded when<br />
our router starts. Right now our changes are in a file called “runningconfiguration.”<br />
Here we can type in some changes and see if those changes have<br />
the desired effects. If they don’t then we can reverse those changes or even<br />
reboot the router (which would load the “start-configuration” file). Suppose we<br />
like what we have done. Then we just have to copy our running-configuration file<br />
to our start-configuration file. True. It does over write our start-configuration<br />
file, but that is what we want to do. Let’s try it.<br />
matt#copy running-configuration start-configuration<br />
Boy is that a lot to type…just to make it easier you can also type this:<br />
164
matt#copy run start<br />
Be very careful to type this in exactly. Sometimes I get typing too quickly and I<br />
type copy runs tart and hit enter quickly without looking at what I am doing.<br />
Voila poof! I have totally wrecked my files and the operating system needs to be<br />
totally re-loaded. You can see why speed can kill. <strong>CISCO</strong> has many versions of<br />
its operating system. The one you are using is probably a derivative of version<br />
12. Some of the older commands from previous versions still work with version<br />
12 but do not show up in your help menus. One really helpful command that<br />
duplicates the copy run start is the “write memory” command. All you have to<br />
type is “wr” and the router automatically copies the running configuration file<br />
over the start configuration file. Now you have no change of messing up the<br />
router operating system with misspelled copy commands.<br />
matt#wr<br />
21. Thought you were done with prompts? Nope. One other type of prompt is called<br />
the “global mode prompt.” From here we make changes to various parts of the<br />
router. For example, when we want to configure an interface we first must be in<br />
the “interface global mode prompt.” I know, lots of jargon. It really makes more<br />
sense after you have done it a couple of times. Let’s look at the various types of<br />
global mode prompts and the sequence from the user mode prompt we took to get<br />
here(you do not have to type these in…just look at them):<br />
matt><br />
matt>en<br />
matt#config t<br />
matt(config)#<br />
Interface matt(config)#interface e0/0<br />
matt(config-if)#<br />
Sub-interface<br />
Router<br />
matt(config)#interface e0/0.1<br />
matt(config-subif)#<br />
matt(config)#router rip<br />
matt(config-router)#<br />
Console line matt(config)#line vty 0 4<br />
matt(config-line)#<br />
Your interface name and number can vary with your model. For example the<br />
2500 routers use “e0” for the first Ethernet. The 2610 and 2611’s use “e0/0” and<br />
the 2620 and 2621’s use “fa0/0.” Just learn <strong>by</strong> doing. You can also use the show<br />
interface command (be sure you are not in config mode) too.<br />
165
Other modes you may use include: controller, map-list, route-map, ipx router and<br />
map-class. Use your knowledge of help commands to figure out what those<br />
prompts would look like.<br />
Supplemental Labs or Challenge Activity:<br />
1. Try going through the initial configuration setup (put in yes instead of no). See<br />
how it differs. Its actually very nice but don’t get too attached to it. You will<br />
learn more <strong>by</strong> configuring your router using the command line interface (CLI).<br />
2. What are the other options available with the copy command?<br />
3. If your router is already started then how would you get the router setup script<br />
back?<br />
So What Have I Learned Here?<br />
In this lab you learned basic router steps including getting help. I guarantee you will be<br />
using the help function many more times during your training. In the next lab we will<br />
look a bit deeper into how the router boots. I actually had a lot of fun writing that<br />
one…there is some information in there you won’t find in any books or documentation<br />
anywhere.<br />
User Mode ? Options<br />
Command Description<br />
166
Privileged Model Options<br />
Command<br />
Description<br />
167
Objectives:<br />
To more fully understand how routers hardware and software work together.<br />
Tools and Materials:<br />
<strong>CISCO</strong> router<br />
Workstation with Hyperterminal program<br />
(1) rollover cable<br />
Router Boot Sequence<br />
Background:<br />
All routers essentially have 5 types of logic processors: CPU, FLASH, ROM, RAM, and<br />
NVRAM. Finding out information about these devices from <strong>CISCO</strong> or on the Internet is<br />
problematic, to say the least. Here we will discuss the block diagram of generic routers,<br />
how to identify the components on 2500/2600 router boards (if you dare to open one up),<br />
and how to “see” those processes during the router boot sequence.<br />
Let’s start <strong>by</strong> looking at a generic block diagram of a router:<br />
CPU FLASH ROM RAM NVRAM<br />
<strong>Network</strong><br />
Modules<br />
BUS<br />
I/O Port<br />
MSC<br />
I/O Port<br />
MSC<br />
CPU-Central Processing Unit (usually Motorola)<br />
FLASH-Holds image of OS (ROM-type) (does not erase when off)<br />
ROM-Holds POST and Bootstrap Programs (does not erase when off)<br />
RAM/DRAM-Holds routing tables, packet buffering, etc. (erases when off)<br />
NVRAM-Holds configuration files (does not erase when off)<br />
MSC-Media Specific Converter<br />
The bus is simply a central transmission point for our bits. The top row of components is<br />
physically attached to the motherboard (CPU, NVRAM, etc). The bottom row of<br />
components (I/O Port MSC) is the Ethernet, Aux., serial connections, etc. Notice there<br />
are no “moving” parts in a router. Computer hard drives have moving parts, which<br />
require frequent replacement. Since routers do not have any moving parts they are said to<br />
“last longer.” Let’s turn our discussion to the boot sequence and how all of these<br />
components inter-relate with the software <strong>by</strong> looking at a boot sequence block diagram:<br />
168
Power “on”<br />
POST<br />
ROM<br />
Bootstrap<br />
ROM<br />
Check for<br />
Config file<br />
Confreg (finds the location of the OS)<br />
[Looks in NVRAM>Flash>TFTP]<br />
Locate OS<br />
From ROM into FLASH<br />
Load OS<br />
From ROM into FLASH<br />
into RAM/DRAM (decompresses)<br />
Locate<br />
Config<br />
ROM>NVRAM>RAM/DRAM<br />
This config sets up the interfaces after the<br />
OS is loaded<br />
Found<br />
Not found<br />
Load<br />
Config<br />
setup<br />
mode<br />
Initialize<br />
Router<br />
config<br />
169
So let’s look at a boot sequence with Hyperterminal. (My comments appear in cursive<br />
writing with italics.)<br />
1. Power on.<br />
2. ROM-runs power on diagnostics (you will see some lights<br />
on the router blink).<br />
3. ROM-runs bootstrap program version 11.3 here (do not<br />
confuse this with the IOS version). You should see the<br />
following with your Hyperterminal session:<br />
System Bootstrap, Version 11.3(2)XA4, RELEASE SOFTWARE (fc1)<br />
Copyright (c) 1999 <strong>by</strong> cisco Systems, Inc.<br />
TAC:Home:SW:IOS:Specials for info<br />
C2600 platform with 24576 K<strong>by</strong>tes of main memory<br />
4. ROM-directs Flash to load the IOS image from Flash into RAM/DRAM to be decompressed.<br />
program load complete, entry point: 0x80008000, size: 0x56c7ac<br />
Self decompressing the image :<br />
#################################################<br />
########################################################################<br />
########################################################################<br />
########################################################################<br />
########################################################################<br />
########################################################################<br />
########################################################################<br />
######## [OK]<br />
Restricted Rights Legend<br />
Use, duplication, or disclosure <strong>by</strong> the Government is<br />
subject to restrictions as set forth in subparagraph<br />
(c) of the Commercial Computer Software - Restricted<br />
Rights clause at FAR sec. 52.227-19 and subparagraph<br />
(c) (1) (ii) of the Rights in Technical Data and Computer<br />
Software clause at DFARS sec. 252.227-7013.<br />
cisco Systems, Inc.<br />
170 West Tasman Drive<br />
San Jose, California 95134-1706<br />
Cisco Internetwork Operating System Software<br />
IOS (tm) C2600 Software (C2600-DS-M), Version 12.0(13), RELEASE SOFTWARE<br />
(fc1)<br />
170
Copyright (c) 1986-2000 <strong>by</strong> cisco Systems, Inc.<br />
Compiled Wed 06-Sep-00 02:30 <strong>by</strong> linda<br />
Image text-base: 0x80008088, data-base: 0x80A065AC<br />
cisco 2610 (MPC860) processor (revision 0x203) with 21504K/3072K <strong>by</strong>tes of memory<br />
.<br />
Processor board ID JAD03428529 (932999778)<br />
M860 processor: part number 0, mask 49<br />
Bridging software.<br />
X.25 software, Version 3.0.0.<br />
1 Ethernet/IEEE 802.3 interface(s)<br />
2 Serial(sync/async) network interface(s)<br />
32K <strong>by</strong>tes of non-volatile configuration memory.<br />
8192K <strong>by</strong>tes of processor board System flash (Read/Write)<br />
5. Active configuration file (startup.cfg) is loaded from NVRAM<br />
into RAM/DRAM along with any active network maps or tables<br />
into RAM/DRAM. (none here…so system configuration dialog is<br />
displayed, but not requested). These include routing tables,<br />
ARP caches, fast-switching cache, packet buffering (shared<br />
RAM), and packet hold queues.<br />
--- System Configuration Dialog ---<br />
Would you like to enter the initial configuration dialog? [yes/no]: n<br />
Press RETURN to get started!<br />
00:00:15: %LINK-3-UPDOWN: Interface Ethernet0/0, changed state to up<br />
00:00:15: %LINK-3-UPDOWN: Interface Serial0/0, changed state to down<br />
00:00:15: %LINK-3-UPDOWN: Interface Serial0/1, changed state to down<br />
Lab Diagram:<br />
171
Step-<strong>by</strong>-Step Instructions:<br />
1. Hook up a router to a workstation and watch the steps as the router boots.<br />
2. Try the show commands and fill in the description of what each does. Which type<br />
of processor (CPU, NVRAM, FLASH, RAM/DRAM, ROM) does each command<br />
reside within? Which one (s) do you think you will be using the most, least, and<br />
why? How do you find out what is in ROM?<br />
Command description processor<br />
sh buf (show buffers)<br />
sh fla (show flash)<br />
sh int (show interface)<br />
sh mem (show memory)<br />
sh pro (show processes)<br />
sh prot (show protocols)<br />
sh ru (show run)<br />
sh start (show start)<br />
sh stacks (show stacks)<br />
sh tech (show tech)<br />
sh ver (show version)<br />
3. Let’s look at a basic router script (use show run). My comments are in<br />
handwriting:<br />
Router#sh ru<br />
Building configuration...<br />
Current configuration:<br />
!<br />
version 12.0<br />
Our IOS version<br />
service timestamps debug uptime enables time stamping 1<br />
service timestamps log uptime enables time stamping 1<br />
no service password-encryption disables service passencryption 2<br />
!<br />
hostname Router<br />
Our router name<br />
!<br />
memory-size iomem 15 sets memory i/o to 15 2<br />
ip subnet-zero<br />
Let’s us use subnet zero!<br />
interface Ethernet0/0<br />
interface<br />
no ip address<br />
ip address for this interface<br />
no ip directed-broadcast drops ip directed broadcasts 3<br />
(good…prevents Denial of<br />
Service attacks)<br />
shutdown<br />
Note: shut down <strong>by</strong> default<br />
!<br />
172
interface Serial0/0<br />
no ip address<br />
no ip directed-broadcast<br />
no ip mroute-cache Disables fast switching of IP packets 4<br />
shutdown<br />
!<br />
interface Serial0/1<br />
no ip address<br />
no ip directed-broadcast<br />
shutdown<br />
!<br />
ip classless Disables classless routing behavior 5<br />
!<br />
line con 0<br />
transport input none<br />
line aux 0<br />
line vty 0 4<br />
!<br />
no scheduler allocate<br />
end<br />
Router#<br />
Supplemental Lab or Challenge Activity:<br />
1. Repeat this lab with a pre-configured router and watch for changes.<br />
2. How do you think changing the configuration register would affect the boot<br />
sequence?<br />
3. Go out to www.cisco.com and try to find configuration register settings to alter<br />
the way the boot sequence happens with your router.<br />
4. Several of the explanations above are numbered 1-5 . Go out to <strong>CISCO</strong>’s website<br />
and find out what they do.<br />
5. Two commands were included <strong>by</strong> default on your router script above (transport<br />
input none and no scheduler allocate). Go out to <strong>CISCO</strong>’s website and find out<br />
what they do.<br />
So What Have I Learned Here?<br />
In this lab you learned about the router boot sequence. Your textbook will also show you<br />
some methods for changing how the router boots, loading IOS’s and other stuff. I have<br />
also attached some diagrams of motherboards for <strong>CISCO</strong> 2500 and 2600 routers. You<br />
probably won’t find those anywhere…let’s just say a little inside bird told me about this.<br />
Here are some really good, but technical books, if you want some more information.<br />
Bollapragada, Vijay, Murphy, C. and White, R. (2000). Inside <strong>CISCO</strong> IOS Software<br />
Architecture. Indianapolis, IND: <strong>CISCO</strong> Press. ISBN: 1-57870-181-3.<br />
Coulibaly, M. (2000). “Chapter 8: The Hardware-Software Relationship” in <strong>CISCO</strong> IOS<br />
Releases: The Complete Reference. Indianapolis, IND: <strong>CISCO</strong> Press. ISBN 1-<br />
57870-179-1.<br />
Held, Gil (2000). <strong>CISCO</strong> Router Performance: Field Guide. New York: McGraw-Hill.<br />
ISBN: 0-07-212513-6.<br />
173
NVRAM Flash RAM/DRAM<br />
ROM<br />
CPU<br />
Serial Interfaces DB25 EO E1 Aux0 Con0<br />
(MSC’s) (MSC’s)<br />
<strong>CISCO</strong> 2500 series Router Motherboard Configuration<br />
174
NVRAM Flash (built in FLASH) RAM/DRAM<br />
CPU<br />
<strong>Network</strong> WIC WIC<br />
Module Plug-in<br />
<strong>CISCO</strong> 2600 series Router Motherboard Configuration<br />
E0<br />
Aux0 Con0<br />
(MSC’s)<br />
175
Basic Router Configuration<br />
Objectives:<br />
To learn a method for configuring basic router commands that you will use many times.<br />
Background:<br />
During the course of your CCNA studies you will be setting up many routers with many<br />
different router configurations. It is a good idea to learn to set up routers in “steps.”<br />
Step 1—start with setting up basic router configuration.<br />
Step 2—configure interfaces<br />
Step 3—configure routing protocol<br />
Step 4—add any other items (ACL’s, security, routes, etc)<br />
In this lab you will learn about step 1: configuring the router’s name, configuring vty<br />
lines, console lines, and setting up passwords.<br />
Tools and Materials:<br />
<strong>CISCO</strong> router<br />
Workstation with Hyperterminal program<br />
(1) Rollover cable (ro)<br />
Cabling diagram:<br />
con<br />
ro<br />
COM1<br />
Step-<strong>by</strong>-Step Instructions:<br />
1. Boot up the router and do not use the setup program. Oh sure, setup is easy, but<br />
you need to learn it all from the command line. Enter the privileged mode:<br />
Router>enable<br />
Router#<br />
(or just “en”)<br />
since no enable password is set yet, the router does<br />
not ask for a password<br />
2. Enter configuration mode:<br />
Router#configure<br />
Router#terminal<br />
Router(config)#<br />
(or just “config t”)<br />
177
3. Configure the router’s name to be RouterA:<br />
Router(config)#hostname RouterA<br />
RouterA(config)#<br />
(note:the name changes<br />
immediately)<br />
4. Configure the vty lines with a password “cisco.” These are the available Telnet<br />
ports for use from the Internet or from other networking devices on your network.<br />
Without a password no one will be able to telnet into the router.<br />
RouterA(config)#line vty 0 4<br />
RouterA(config-line)#password cisco<br />
RouterA(config-line)#login<br />
RouterA(config-line)#exit<br />
5. Configure the console line so messages will not interrupt what you are typing and<br />
so your session does not time out:<br />
RouterA(config)#line con 0<br />
RouterA(config-line)#logging synchronous<br />
RouterA(config-line)#exec-timeout 0 0<br />
RouterA(config-line)#exit<br />
Feeling frisky? Change exec-timeout to 0 1. This will cause your router session<br />
to time out every 1 second (it can take up to about 5 minutes to start though).<br />
There are only two ways to fix it: router recovery or press the “down” arrow key<br />
while you change the exec timeout to a higher number with your other hand at the<br />
same time. <strong>Doing</strong> this generates a continuous interrupt request to the CPU and<br />
the session, therefore, does not time out. Logging synchronous is a nice<br />
command. When you are configuring a router sometimes messages will interrupt<br />
your work. Without this command in your script when you are interrupted you<br />
will have to remember exactly what you typed when you were interrupted. With<br />
this command the router will “refresh” what you typed on the current line.<br />
6. Configure the secret password “cisco” and the enable password “class.” These are<br />
required to have telnet access into your router. If you do not want anyone to be<br />
able to telnet into your router, then not setting a password is one way to do it.<br />
RouterA(config)#enable secret cisco<br />
RouterA(config)#enable password class<br />
7. To see what you have done so far you can always look at the runningconfiguration<br />
file:<br />
RouterA(config)#exit (or use control+Z to get all the way out)<br />
RouterA#sh ru (short for show run)<br />
178
8. Once you have determined that your configuration is what you would like on your<br />
router you need to save it to your startup-configuration file. Otherwise if your<br />
router is re-booted or you loose power then your configuration will be lost.<br />
RouterA#copy ru start (or wr)<br />
9. Great. Now you know how to save your configuration. But what if someone else<br />
saved a configuration and you want to get rid of it? Do this:<br />
RouterA#erase start (to erase the startup-configuration file)<br />
RouterA#reload<br />
10. So what if you made a mistake when you are typing something? Some things you<br />
can just re-type and they will be changed (like hostname) and some others you<br />
can un-do just <strong>by</strong> typing the word “no” and repeating the errant command.<br />
RouterA(config)#hostname mark<br />
Mark(config)#hostname matt<br />
Matt(config)#<br />
matt(config)#line vty 0 4<br />
matt(config-line)#password csico<br />
matt(config-line)#no password csico<br />
matt(config-line)#password cisco<br />
(darn! We wanted “matt”)<br />
(just type in “matt”)<br />
(darn! We wanted “cisco”)<br />
Supplemental Lab or Challenge Activity:<br />
1. Don’t have a router to practice this on at home? Just practice writing out this<br />
script over and over on paper. Don’t forget to write the prompts…they are<br />
important to know too.<br />
Router>en<br />
Router#config t<br />
Router(config)#hostname RouterA<br />
RouterA(config)#line vty 0 4<br />
RouterA(config-line)#password cisco<br />
RouterA(config-line)#login<br />
RouterA(config-line)#exit<br />
RouterA(config)#line con 0<br />
RouterA(config-line)#logging synchronous<br />
RouterA(config-line)#exec-timeout 0 0<br />
RouterA(config-line)#exit<br />
RouterA(config)#enable secret cisco<br />
RouterA(config)#enable password class<br />
2. Security/Hacking Tip on VTY lines: Port scans (which are legal) on your network<br />
can reveal ports 2000, 2001, 4000, 4001, 6000, or 6001 ports in use. These are<br />
179
eserved for <strong>CISCO</strong> routers. Yup…knowing which type of equipment is in use is<br />
beneficial to hackers. Most <strong>CISCO</strong> network administrators have it “drummed in<br />
their heads” that there are only 5 vty lines available (and, for you people studying<br />
for the CCNA there are only 5) but, enterprise versions of routers have up to 1000<br />
or so vty lines possible. Knowing a <strong>CISCO</strong> device exists and knowing most<br />
admins do not know about those “upper” vty lines creates security holes. For<br />
example, if I open up 6 simultaneous vty session with Telnet to a <strong>CISCO</strong><br />
device…<br />
Session 1>open vty 0 > password requested<br />
Session 2>open vty 1 > password requested<br />
Session 3>open vty 2 > password requested<br />
Session 4>open vty 3 > password requested<br />
Session 5>open vty 4 > password requested<br />
Session 6>open vty 5 > no password required=keys to the kingdom!<br />
To find out how many vty lines you have type this:<br />
Router>en<br />
Router#config t<br />
RouterA(config)#line vty 0 ?<br />
3. Want to keep people from walking up to your session and making changes? Put a<br />
password on it. Try to figure out how to do that.<br />
So What Have I Learned Here?<br />
In this lab you have learned how to set up the basics on a router. You will be using this<br />
information pretty much for every lab left in this book. After a while this will become<br />
automatic to you. In the next lab we will put this to use <strong>by</strong> learning about our first<br />
routing protocol: RIP.<br />
180
Basic Rip<br />
Objectives:<br />
To learn about the Routing Information Protocol (RIP version 1).<br />
Background:<br />
http://www.cisco.com/pcgi-bin/Support/PSP/psp_view.pl?p=Internetworking:RIP<br />
http://www.cisco.com/univercd/cc/td/doc/cisintwk/ito_doc/rip.htm<br />
Tools and Materials:<br />
(2) PC/workstations<br />
(2) Routers<br />
(2) Switches<br />
(4) Straight-through cables<br />
(1) DCE serial cable<br />
(1) DTE serial cable<br />
(2) rollover cables<br />
Lab Diagram:<br />
e0<br />
st<br />
con<br />
s0<br />
s1<br />
con<br />
st<br />
e0<br />
NIC<br />
st ro ro st<br />
COM1<br />
COM1<br />
NIC<br />
Workstation “A”<br />
Workstation “B”<br />
Addressing:<br />
Routers<br />
Hostnames Randy Ward<br />
E0 192.168.3.1/24 192.168.4.1/24<br />
S0 192.168.30.1/24 (DCE) n/a<br />
S1 n/a 192.168.30.2/24 (DTE)<br />
Workstations A B<br />
IP 192.168.3.2 192.168.4.2<br />
SM 255.255.255.0 255.255.255.0<br />
GW 192.168.3.1 192.168.4.1<br />
181
Step-<strong>by</strong>-Step Instructions:<br />
1. Cable the lab as shown. Be certain your serial cable is plugged in properly…in<br />
other words the DCE end goes with the interface command “clockrate.”<br />
2. Complete the basic router setup on each router.<br />
Router>en<br />
Router#config t<br />
Router(config)#hostname Randy (or hostname Ward)<br />
Randy(config)#line vty 0 4<br />
Randy(config-line)#password cisco<br />
Randy(config-line)#login<br />
Randy(config-line)#exit<br />
Randy(config)#line con 0<br />
Randy(config-line)#logging synchronous<br />
Randy(config-line)#exec-timeout 0 0<br />
Randy(config-line)#exit<br />
Randy(config)#enable secret cisco<br />
Randy(config)#enable password class<br />
3. Configure the interfaces on each router:<br />
Randy(config)#int e0<br />
Randy(config-if)#ip address 192.168.3.1 255.255.255.0<br />
Randy(config-if)#no shut<br />
Randy(config)#int s0<br />
Randy(config-if)#ip address 192.168.30.1 255.255.255.0<br />
Randy(config-if)#clockrate 56000<br />
Randy(config-if)#no shut<br />
Ward(config)#int e0<br />
Ward(config-if)#ip address 192.168.4.1 255.255.255.0<br />
Ward(config-if)#no shut<br />
Ward(config)#int s1<br />
Ward(config-if)#ip address 192.168.30.2 255.255.255.0<br />
Ward(config-if)#no shut<br />
4. Configure the routing protocol and advertise/associate/publish the router’s<br />
networks.<br />
Randy(config)#router rip<br />
Randy(config-router)#network 192.168.30.0<br />
Randy(config-router)#network 192.168.3.0<br />
Ward(config)#router rip<br />
Ward(config-router)#network 192.168.30.0<br />
Ward (config-router)#network 192.168.4.0<br />
5. Setup the workstations with IP address, subnet masks, and gateways addresses.<br />
You will need to reboot the workstations. If they ask for a password for network<br />
connectivity just put anything in and you should see a message something like<br />
“no domain server is available, you may not have some networking functions.”<br />
182
It’s ok if you see it, but you probably will not be able to ping outside of your<br />
workstation without seeing that error message. A quirk with Microsoft.<br />
6. Test connectivity from router to router (from the router) <strong>by</strong> using ping from<br />
Randy to Ward.<br />
You should see:<br />
RouterA#ping 192.168.30.2<br />
Type escape sequence to abort.<br />
Sending 5, 100-<strong>by</strong>te ICMP Echos to 192.168.30.2, timeout is 2 seconds:<br />
!!!!!<br />
Success rate is 100 percent (5/5), round-trip min/avg/max = 32/32/36 ms<br />
RouterA#<br />
7. Test connectivity from workstation to workstation (from DOS) <strong>by</strong> using ping<br />
from workstation A to workstation B.<br />
You should see:<br />
C:\WINDOWS\Desktop>ping 192.168.4.2<br />
Pinging 192.168.4.2 with 32 <strong>by</strong>tes of data:<br />
Reply from 192.168.4.2: <strong>by</strong>tes=32 time=21ms TTL=126<br />
Reply from 192.168.4.2: <strong>by</strong>tes=32 time=20ms TTL=126<br />
Reply from 192.168.4.2: <strong>by</strong>tes=32 time=21ms TTL=126<br />
Reply from 192.168.4.2: <strong>by</strong>tes=32 time=21ms TTL=126<br />
Ping statistics for 192.168.4.2:<br />
Packets: Sent = 4, Received = 4, Lost = 0 (0% loss),<br />
Approximate round trip times in milli-seconds:<br />
Minimum = 20ms, Maximum = 21ms, Average = 20ms<br />
C:\WINDOWS\Desktop><br />
8. Let’s see our route from workstation A to workstation B (from DOS).<br />
You should see:<br />
C:\WINDOWS\Desktop>tracert 192.168.4.2<br />
Tracing route to STAR10616119 [192.168.4.2]<br />
over a maximum of 30 hops:<br />
1 1 ms 1 ms 1 ms 192.168.3.1<br />
2 25 ms 25 ms 25 ms 192.168.30.2<br />
3 30 ms 30 ms 30 ms STAR10616119 [192.168.4.2]<br />
Trace complete.<br />
C:\WINDOWS\Desktop><br />
9. All good? Ok…now let’s have some fun with a challenge! Let’s see if we have<br />
some neighbors using our <strong>CISCO</strong> Discovery Protocol, a.k.a. CDP (enabled <strong>by</strong><br />
default at boot). CDP is a layer 2 protocol (good test question too).<br />
Randy>sh cdp neighbors<br />
183
You should see:<br />
Randy>sh cdp neighbors<br />
Capability Codes: R - Router, T - Trans Bridge, B - Source Route Bridge<br />
S - Switch, H - Host, I - IGMP, r - Repeater<br />
Device ID Local Intrfce Holdtme Capability Platform Port ID<br />
Ward Ser 0/0 128 R 2610 Ser 0/1<br />
Notice with CDP we can see the identification (Ward), address/interface type (Ser<br />
0/0), and platform (2610) of our neighbors. If we do not want to run CDP on all<br />
of our interfaces use the “no cdp run” command.<br />
10. Let’s see if we have any CDP traffic being generated. CDP updates every 60<br />
seconds <strong>by</strong> default.<br />
Randy>sh cdp traffic<br />
You should see:<br />
Randy>sh cdp traffic<br />
CDP counters :<br />
Packets output: 82, Input: 63<br />
Hdr syntax: 29, Chksum error: 0, Encaps failed: 9<br />
No memory: 0, Invalid packet: 0, Fragmented: 0<br />
We can see our CDP packets coming and going. We’ll look at that other stuff<br />
later.<br />
11. Let’s use the protocols command to see what we have.<br />
Randy>sh protocols<br />
You should see:<br />
Randy>sh protocols<br />
Global values:<br />
Internet Protocol routing is enabled<br />
Ethernet0/0 is up, line protocol is up<br />
Internet address is 192.168.3.1/24<br />
Serial0/0 is up, line protocol is up<br />
Internet address is 192.168.30.1/24<br />
Ethernet0/1 is administratively down, line protocol is down<br />
Serial0/1 is administratively down, line protocol is down<br />
This is good…IP is running and our interfaces are up. E0/1 is down because we<br />
didn’t configure it.<br />
12. Let’s look at our path or “route” from one router to another:<br />
Randy>sh ip route<br />
You should see:<br />
Randy>sh ip route<br />
Codes: C - connected, S - static, I - IGRP, R - RIP, M - mobile, B - BGP<br />
D - EIGRP, EX - EIGRP external, O - OSPF, IA - OSPF inter area<br />
N1 - OSPF NSSA external type 1, N2 - OSPF NSSA external type 2<br />
E1 - OSPF external type 1, E2 - OSPF external type 2, E - EGP<br />
i - IS-IS, L1 - IS-IS level-1, L2 - IS-IS level-2, * - candidate default<br />
U - per-user static route, o - ODR<br />
184
Gateway of last resort is not set<br />
C 192.168.30.0/24 is directly connected, Serial0/0<br />
R 192.168.4.0/24 [120/1] via 192.168.30.2, 00:00:07, Serial0/0<br />
C 192.168.3.0/24 is directly connected, Ethernet0/0<br />
Randy><br />
We see our directly connected routes and the one learned via our routing protocol.<br />
Getting stuck? Try using this command at the privileged prompt:clear ip route *<br />
several times on each router to “restart” the routing process (clears the tables,<br />
sends updates, receives updates, and re-creates the ip routing table). This is a<br />
really good command to remember and keep in your “arsenal.”<br />
13. Let’s watch ICMP packets as they pass from one router to another. Turn on<br />
debug, then ping and trace route from the workstation to generate icmp “traffic.”<br />
Side note: debug can really chew up resources. Be sure to use just enough debug<br />
to get the job done, then turn off debug. Notice how we had to change user<br />
modes:<br />
Randy#debug ip icmp<br />
(use “undebug ip icmp” or “undebug all” to<br />
turn off)<br />
You should see: {This is what I sent}<br />
Pinging 192.168.4.2 with 32 <strong>by</strong>tes of data:<br />
Reply from 192.168.4.2: <strong>by</strong>tes=32 time=23ms TTL=126<br />
Reply from 192.168.4.2: <strong>by</strong>tes=32 time=20ms TTL=126<br />
Reply from 192.168.4.2: <strong>by</strong>tes=32 time=20ms TTL=126<br />
Reply from 192.168.4.2: <strong>by</strong>tes=32 time=20ms TTL=126<br />
Ping statistics for 192.168.4.2:<br />
Packets: Sent = 4, Received = 4, Lost = 0 (0% loss),<br />
Approximate round trip times in milli-seconds:<br />
Minimum = 20ms, Maximum = 23ms, Average = 20ms<br />
C:\WINDOWS\Desktop>tracert 192.168.4.2<br />
Tracing route to STAR10616119 [192.168.4.2]<br />
over a maximum of 30 hops:<br />
1 2 ms 1 ms 1 ms 192.168.3.1<br />
2 25 ms 25 ms 25 ms 192.168.30.2<br />
3 30 ms 30 ms 30 ms STAR10616119 [192.168.4.2]<br />
Trace complete.<br />
C:\WINDOWS\Desktop><br />
You should see on RouterA:<br />
Randy#debug ip icmp<br />
ICMP packet debugging is on<br />
Randy#<br />
01:02:29: ICMP: time exceeded (time to live) sent to 192.168.3.2 (dest<br />
was 192.168.4.2)<br />
01:02:29: ICMP: time exceeded (time to live) sent to 192.168.3.2 (dest<br />
was 192.168.4.2)<br />
185
01:02:29: ICMP: time exceeded (time to live) sent to 192.168.3.2 (dest<br />
was 192.168.4.2)<br />
01:02:29: ICMP: dst (192.168.3.1) port unreachable sent to 192.168.3.2<br />
01:02:31: ICMP: dst (192.168.3.1) port unreachable sent to 192.168.3.2<br />
01:02:32: ICMP: dst (192.168.3.1) port unreachable sent to 192.168.3.2<br />
Randy#<br />
So this is confusing…our times are exceeded, our ports are unreachable, but our<br />
icmp’s still worked. Something for you to think about.<br />
14. Let’s see the RIP updates (sent every 30 seconds <strong>by</strong> default) as they pass through<br />
our routers (more on updates and timers in another lab).<br />
Randy#debug ip rip<br />
You should see:<br />
Randy#debug ip rip<br />
RIP protocol debugging is on<br />
Randy#<br />
01:05:48: network 192.168.30.0, metric 1<br />
01:05:48: network 192.168.4.0, metric 2<br />
01:05:48: network 192.168.3.0, metric 1<br />
Randy#<br />
15. We can use hostnames on our routers to make ping-ing a bit easier. Instead of<br />
using those long 32-bit IP addresses we can assign names to them. The order of<br />
input is important because the router will look at the first ip address, then the next,<br />
and so on, depending upon how many ip addresses you associate with a host<br />
name. Generally it is a good idea to put them in the order they are most likely to<br />
be used. I tend to put serial lines in front of Ethernet lines.<br />
Randy(config)#ip host ward 192.168.30.2 192.168.4.1<br />
OR<br />
Randy(config)#ip host wards0 192.168.30.2<br />
Randy(config)#ip host warde0 192.168.4.1<br />
Ward(config)#ip host randy 192.168.30.1 192.168.3.1<br />
OR<br />
Ward(config)#ip host randys1 192.168.30.1<br />
Ward(config)#ip host randye0 192.168.3.1<br />
16. What does the “description” command do when you are configuring an interface?<br />
Randy(config)#int e0/0<br />
Randy(config-if)#description DCE serial to Ward DTE<br />
186
Supplemental Lab or Challenge Activity:<br />
1. What would you expect to see on Ward? Try steps 1-6 over again on Ward.<br />
2. Try this with class “A” or “B” private or public IP addresses that you choose.<br />
3. Try this lab with one class “A” private IP address for the Ethernet network on<br />
RouterA, a class “B” private IP address over the serial line, and a class “C”<br />
private IP address on the Ethernet network on RouterB.<br />
4. Try mixing and matching private and public IP addresses.<br />
5. What are the available commands for router rip? List them and give a brief<br />
description of each.<br />
Router(config)#router rip<br />
Router(config-router)#?<br />
So What Have I Learned Here?<br />
Got questions about RIP? Good! Hopefully the next few labs should help provide some<br />
clarity about this “eccentric” little routing protocol.<br />
Guest Router Name Derivation<br />
Ward Christensen and Randy Suess are generally attributed as creating the first Bulletin<br />
Board System (BBS) in 1978. The BBS site, located in Chicago, Illinois is still supposed<br />
to be in operation today.<br />
History of BBS: http://www.zdnet.com/pcmag/issues/1414/pcm00161.htm<br />
187
Basic Troubleshooting: Router-to-Router<br />
Objectives:<br />
To be able to learn the fundamentals of troubleshooting router-to-router connections.<br />
Tools and Materials:<br />
(2) routers<br />
(2) switches<br />
(2) workstations<br />
(4) Straight-through cables<br />
(2) rollover cables<br />
(1) DCE cable<br />
(1) DTE cable<br />
Background:<br />
This lab works with the same configuration from the last lab.<br />
Lab Diagram:<br />
e0<br />
con<br />
s0<br />
s1<br />
con<br />
e0<br />
NIC<br />
COM1<br />
COM1<br />
NIC<br />
Workstation “A”<br />
Workstation “B”<br />
Addressing:<br />
Routers<br />
Hostnames Randy Ward<br />
E0 192.168.3.1/24 192.168.4.1/24<br />
S0 192.168.30.1/24 (DCE) n/a<br />
S1 n/a 192.168.30.2/24 (DTE)<br />
Workstations A B<br />
IP 192.168.3.2 192.168.4.2<br />
SM 255.255.255.0 255.255.255.0<br />
GW 192.168.3.1 192.168.4.1<br />
188
Step-<strong>by</strong>-Step Instructions:<br />
1. Troubleshooting goes along neatly with the OSI model. Just start at the bottom<br />
(Physical Layer) and work your way up. Step 1—check for lights on the<br />
interfaces. No lights? Then make sure they are plugged in and you have the right<br />
type of cable in the right place (DCE/DTE).<br />
2. Let’s go to the data link layer. Check the clockrate, ip/masks, and encapsulation<br />
very, very carefully. Look for transposed numbers or incorrect masks. When all<br />
else fails…try typing “no shut” on each interface configuration. You would be<br />
amazed how many problems “no shut” can fix. Use the sh int and sh run<br />
command to check things.<br />
Line Protocol what it means<br />
UP UP everything is fine.<br />
UP DOWN connection problems (check your cabling)<br />
DOWN DOWN interface problems<br />
AD. DOWN DOWN disabled…everything is wrong.<br />
With sh int you should see:<br />
Randy#sh int<br />
Ethernet0/0 is up, line protocol is up<br />
Hardware is AmdP2, address is 0002.fd45.ae60 (bia 0002.fd45.ae60)<br />
Internet address is 192.168.3.1/24<br />
MTU 1500 <strong>by</strong>tes, BW 10000 Kbit, DLY 1000 usec, rely 255/255, load<br />
1/255<br />
Encapsulation ARPA, loopback not set, keepalive set (10 sec)<br />
ARP type: ARPA, ARP Timeout 04:00:00<br />
Last input 00:04:50, output 00:00:00, output hang never<br />
Last clearing of "show interface" counters never<br />
Queueing strategy: fifo<br />
Output queue 0/40, 0 drops; input queue 0/75, 0 drops<br />
5 minute input rate 0 bits/sec, 0 packets/sec<br />
5 minute output rate 0 bits/sec, 0 packets/sec<br />
235 packets input, 37677 <strong>by</strong>tes, 0 no buffer<br />
Received 147 broadcasts, 0 runts, 0 giants, 0 throttles<br />
0 input errors, 0 CRC, 0 frame, 0 overrun, 0 ignored, 0 abort<br />
0 input packets with dribble condition detected<br />
616 packets output, 54789 <strong>by</strong>tes, 0 underruns<br />
70 output errors, 0 collisions, 12 interface resets<br />
0 babbles, 0 late collision, 0 deferred<br />
70 lost carrier, 0 no carrier<br />
0 output buffer failures, 0 output buffers swapped out<br />
Serial0/0 is up, line protocol is up<br />
Hardware is PowerQUICC Serial<br />
Internet address is 192.168.30.1/24<br />
189
MTU 1500 <strong>by</strong>tes, BW 1544 Kbit, DLY 20000 usec, rely 255/255, load<br />
1/255<br />
Encapsulation HDLC, loopback not set, keepalive set (10 sec)<br />
Last input 00:00:00, output 00:00:03, output hang never<br />
Last clearing of "show interface" counters never<br />
Queueing strategy: fifo<br />
Output queue 0/40, 0 drops; input queue 0/75, 0 drops<br />
5 minute input rate 0 bits/sec, 0 packets/sec<br />
5 minute output rate 0 bits/sec, 0 packets/sec<br />
562 packets input, 39641 <strong>by</strong>tes, 0 no buffer<br />
Received 422 broadcasts, 0 runts, 0 giants, 0 throttles<br />
0 input errors, 0 CRC, 0 frame, 0 overrun, 0 ignored, 0 abort<br />
576 packets output, 38825 <strong>by</strong>tes, 0 underruns<br />
0 output errors, 0 collisions, 27 interface resets<br />
0 output buffer failures, 0 output buffers swapped out<br />
8 carrier transitions<br />
DCD=up DSR=up DTR=up RTS=up CTS=up<br />
Ethernet0/1 is administratively down, line protocol is down<br />
Hardware is AmdP2, address is 0002.fd45.ae61 (bia 0002.fd45.ae61)<br />
MTU 1500 <strong>by</strong>tes, BW 10000 Kbit, DLY 1000 usec, rely 252/255, load<br />
1/255<br />
Encapsulation ARPA, loopback not set, keepalive set (10 sec)<br />
ARP type: ARPA, ARP Timeout 04:00:00<br />
Last input never, output 00:52:54, output hang never<br />
Last clearing of "show interface" counters never<br />
Queueing strategy: fifo<br />
Output queue 0/40, 0 drops; input queue 0/75, 0 drops<br />
5 minute input rate 0 bits/sec, 0 packets/sec<br />
5 minute output rate 0 bits/sec, 0 packets/sec<br />
0 packets input, 0 <strong>by</strong>tes, 0 no buffer<br />
Received 0 broadcasts, 0 runts, 0 giants, 0 throttles<br />
0 input errors, 0 CRC, 0 frame, 0 overrun, 0 ignored, 0 abort<br />
0 input packets with dribble condition detected<br />
69 packets output, 4140 <strong>by</strong>tes, 0 underruns<br />
69 output errors, 0 collisions, 0 interface resets<br />
0 babbles, 0 late collision, 0 deferred<br />
69 lost carrier, 0 no carrier<br />
0 output buffer failures, 0 output buffers swapped out<br />
Serial0/1 is administratively down, line protocol is down<br />
Hardware is PowerQUICC Serial<br />
MTU 1500 <strong>by</strong>tes, BW 1544 Kbit, DLY 20000 usec, rely 255/255, load<br />
1/255<br />
Encapsulation HDLC, loopback not set, keepalive set (10 sec)<br />
Last input never, output never, output hang never<br />
Last clearing of "show interface" counters never<br />
190
Input queue: 0/75/0 (size/max/drops); Total output drops: 0<br />
Queueing strategy: weighted fair<br />
Output queue: 0/1000/64/0 (size/max total/threshold/drops)<br />
Conversations 0/0/256 (active/max active/max total)<br />
Reserved Conversations 0/0 (allocated/max allocated)<br />
5 minute input rate 0 bits/sec, 0 packets/sec<br />
5 minute output rate 0 bits/sec, 0 packets/sec<br />
0 packets input, 0 <strong>by</strong>tes, 0 no buffer<br />
Received 0 broadcasts, 0 runts, 0 giants, 0 throttles<br />
0 input errors, 0 CRC, 0 frame, 0 overrun, 0 ignored, 0 abort<br />
0 packets output, 0 <strong>by</strong>tes, 0 underruns<br />
0 output errors, 0 collisions, 0 interface resets<br />
0 output buffer failures, 0 output buffers swapped out<br />
0 carrier transitions<br />
DCD=down DSR=down DTR=down RTS=down CTS=down<br />
Randy#<br />
Let’s go back over some of those things I highlighted in this example. Note the<br />
output from a show interface command. Pay special attention to the contents of<br />
the first five lines…this is our “bread and butter” lines. Be sure you know what is<br />
on which line and which line is in which order. We see a note about “MTU.”<br />
This is the maximum transmission unit. If the router is requesting to send a<br />
packet larger than the receiving router’s MTU, then the sending router will<br />
fragment the outgoing information into allowable sizes. Isn’t that nice? They can<br />
get along. Notice the default encapsulation type on serial lines is HDLC. We will<br />
be changing this when we get to the WAN part. Finally we see a MAC address<br />
per interface (necessary for proper routing to different interfaces). Guess what?<br />
We can change this if we want…I wouldn’t worry about it right now. If a hacker<br />
gets a request from a device with a MAC address they can determine which<br />
company manufactured it. Remember OUI’s? Once I know it is a <strong>CISCO</strong> device<br />
I can port scan to narrow down the devices. Once I know what device it<br />
specifically is I can use my knowledge of that device, its security problems, and<br />
gain access to it!<br />
3. Time for the network layer. Check to be sure the routing protocol is enabled and<br />
that you have the correct routing protocol enabled. Have you<br />
advertised/associated/published your networks properly? Test your router-torouter<br />
connectivity with ping or an extended ping command. Here is an example<br />
of using ping from the Randy console to Ward Ethernet interface:<br />
Randy#ping 192.168.4.1<br />
You should see:<br />
Randy#ping 192.168.4.1<br />
191
Type escape sequence to abort.<br />
Sending 5, 100-<strong>by</strong>te ICMP Echos to 192.168.4.1, timeout is 2 seconds:<br />
!!!!!<br />
Success rate is 100 percent (5/5), round-trip min/avg/max = 32/32/36 ms<br />
Possible responses when using ping (from most likely to least likely response):<br />
Response Description<br />
! Successful<br />
. Timed out<br />
U Destination unreachable<br />
& Packet Time to Live (TTL) exceeded<br />
? Packet type unknown<br />
C<br />
Congestion experienced during transit<br />
I<br />
Interruption of Ping packet<br />
You can also do an extended ping. This let’s you “set” the parameters of the ping<br />
packet. Here is the same example using an extended ping and what you should<br />
see:<br />
Randy#ping<br />
Protocol [ip]:<br />
Target IP address: 192.168.4.1<br />
Repeat count [5]: 7<br />
Datagram size [100]: 1000<br />
Timeout in seconds [2]: 4<br />
Extended commands [n]: n<br />
Sweep range of sizes [n]: n<br />
Type escape sequence to abort.<br />
Sending 7, 1000-<strong>by</strong>te ICMP Echos to 192.168.4.1, timeout is 4 seconds:<br />
!!!!!!!<br />
Success rate is 100 percent (7/7), round-trip min/avg/max = 288/290/293<br />
ms<br />
Randy#<br />
Once you find out if a destination is unreachable you can use the trace route<br />
command to “pin-point” where the problem may be:<br />
Randy#tracertoute 192.168.4.1.<br />
You should see:<br />
Randy#traceroute 192.168.4.1<br />
Type escape sequence to abort.<br />
Tracing the route to 192.168.4.1<br />
192
1 192.168.30.2 16 msec 16 msec *<br />
Randy#<br />
Possible responses when using traceroute (from most likely to least likely<br />
response):<br />
Response Description<br />
* Timed out<br />
U Port was unreachable<br />
N <strong>Network</strong> was unreachable<br />
P<br />
Protocol is unreachable<br />
!H Received but not forwarded…ACL is set<br />
Another layer 3 tool you can use to look for clues is the sh ip route command.<br />
Here you can determine if your router is advertising and receiving routes and if<br />
they are correctly being advertised and received. Here is an example routing table<br />
from Randy in our example:<br />
Randy>sh ip route<br />
Codes: C - connected, S - static, I - IGRP, R - RIP, M - mobile, B - BGP<br />
D - EIGRP, EX - EIGRP external, O - OSPF, IA - OSPF inter area<br />
N1 - OSPF NSSA external type 1, N2 - OSPF NSSA external type 2<br />
E1 - OSPF external type 1, E2 - OSPF external type 2, E - EGP<br />
i - IS-IS, L1 - IS-IS level-1, L2 - IS-IS level-2, * - candidate default<br />
U - per-user static route, o - ODR<br />
Gateway of last resort is not set<br />
C 192.168.30.0/24 is directly connected, Serial0/0<br />
R 192.168.4.0/24 [120/1] via 192.168.30.2, 00:00:07, Serial0/0<br />
C 192.168.3.0/24 is directly connected, Ethernet0/0<br />
Randy><br />
If you feel you have your routing protocol correct but the routes are not showing<br />
up in the ip routing table then clear them several times:<br />
Randy#clear ip route *<br />
Randy#clear ip route *<br />
Randy#clear ip route *<br />
Randy#<br />
Then try to see if your routes are correct. You may even have to clear them on all<br />
your routers. As a last resort take out your routing protocol and put it back in.<br />
Don’t ask me why…sometimes that is all that is needed.<br />
193
One last layer 3 tool…you can also turn your router into a mini-layer 3 protocol<br />
inspector with “debug” commands. Be careful when using these because they<br />
save all their information in RAM/DRAM. Too much information can *choke*<br />
out the performance of your router so only use debug commands sparingly. To<br />
view ping packets (aka ICMP packets) use the debug ip icmp command. You<br />
should see something like this.<br />
Randy#debug ip icmp<br />
ICMP packet debugging is on<br />
Randy#<br />
01:02:29: ICMP: time exceeded (time to live) sent to 192.168.3.2 (dest<br />
was 192.168.4.2)<br />
01:02:29: ICMP: time exceeded (time to live) sent to 192.168.3.2 (dest<br />
was 192.168.4.2)<br />
01:02:29: ICMP: time exceeded (time to live) sent to 192.168.3.2 (dest<br />
was 192.168.4.2)<br />
01:02:29: ICMP: dst (192.168.3.1) port unreachable sent to 192.168.3.2<br />
01:02:31: ICMP: dst (192.168.3.1) port unreachable sent to 192.168.3.2<br />
01:02:32: ICMP: dst (192.168.3.1) port unreachable sent to 192.168.3.2<br />
Randy#<br />
**Don’t forget to use undebug all or undebug ip icmp when you are finished.**<br />
4. Finally Telnet (terminal emulation), an application layer program, tests the<br />
functionality of all 7 layers. If you can telnet from one router to another, then<br />
everything should be working fine and you won’t need anything from this lab.<br />
Here is an example of using telnet from Randy to Ward. You should see:<br />
Randy#telnet 192.168.30.2<br />
Trying 192.168.30.2 ... Open<br />
User Access Verification<br />
Password:<br />
Ward><br />
One problem with telnet: if a vty password is not “set” on the other router you<br />
will not be able to access the router, even though everything is working fine.<br />
Let’s look at what you will see if you do not have a vty password set:<br />
Randy#telnet 192.168.30.2<br />
Trying 192.168.30.2 ... Open<br />
Password required, but none set<br />
[Connection to 192.168.30.2 closed <strong>by</strong> foreign host]<br />
Randy#<br />
194
5. Finally, do not forget about those workstations out there! Just because you can<br />
telnet router to router does not mean all is well…be sure you can ping from<br />
workstation A to workstation B.<br />
Supplemental Lab or Challenge Activity:<br />
1. In this lab if you were consoled into Ward from workstation B, then what would<br />
you expect to see if you typed this command ping 192.168.3.1? Assume<br />
everything is cabled, programmed, and working correctly.<br />
2. If you typed this command ping 192.168.3.1 from Ward and received five “U’s”<br />
then what would you test? (give several steps)<br />
3. If you typed this DOS command tracert 192.168.3.1 from workstation B and<br />
received a timeout message after the serial interface on Randy then what would<br />
you test? (give several steps)<br />
4. If you were having problems with a serial line (DCE) and typed sh int on Randy<br />
and found out the interface was “UP-DOWN” then what would you test? (give<br />
several steps)<br />
So What Have I Learned Here?<br />
In this lab you learned the basics of troubleshooting from one router to the other. As<br />
you move up in your studies you will learn more precise troubleshooting methods. I<br />
cannot tell you how many times a student told me their network didn’t work and all<br />
that was wrong was an unplugged cable. Keep it simple first. Let me introduce you<br />
to Murphy’s Law of Computers: It works better when it is plugged in. How true, how<br />
true.<br />
Guest Router Name Derivation<br />
Ward Christensen and Randy Suess are generally attributed as creating the first Bulletin<br />
Board System (BBS) in 1978. The BBS site, located in Chicago, Illinois is still supposed<br />
to be in operation today.<br />
History of BBS: http://www.zdnet.com/pcmag/issues/1414/pcm00161.htm<br />
195
BASIC TROUBLESHOOTING—RIP<br />
look for lights on the interfaces<br />
on<br />
off<br />
check not plugged plug it in layer 1<br />
cabling in<br />
check IP addresses & not fix them layer 2<br />
masks 1 , encapsulation, right<br />
clockrates (sh int and<br />
sh run)<br />
right<br />
Try typing “no shut” worked should be fixed<br />
on the interface<br />
didn’t work<br />
Check routing protocol,<br />
autonomous number,<br />
to see if the networks worked should be fixed Layer 3<br />
are advertised, or for<br />
correct routing info.<br />
(sh run, sh ip route<br />
clear ip route *)<br />
didn’t work<br />
Try to telnet worked should be fixed Layer 7<br />
didn’t work<br />
Time to get help!<br />
1 I know IP addressing is a layer 3 function, but it uses a layer 2 command sh int to view its status.<br />
196
Loopback Interfaces<br />
Objectives:<br />
To learn how and when to use loopback interfaces.<br />
Tools and Materials:<br />
(1) router<br />
(1) switch<br />
(2) Straight-through cables<br />
(1) rollover cable<br />
(1) workstation with Hyperterminal program<br />
Background:<br />
Loopback interfaces are used for a variety of situations: for OSPF selection,<br />
troubleshooting, and, for us, allowing us to test multiple connections without having to<br />
actually have a network set up.<br />
Lab Diagram:<br />
e0<br />
con<br />
s0<br />
NIC<br />
COM1<br />
Workstation “A”<br />
Routers<br />
Hostnames Bell<br />
E0 192.168.3.1/24<br />
S0 192.168.4.1/24<br />
S1<br />
n/a<br />
Workstations A<br />
IP 192.168.3.2<br />
SM 255.255.255.0<br />
GW 192.168.3.1<br />
Step-<strong>by</strong>-Step Instructions:<br />
1. Set up the lab as shown. Since there is no cable “physically” connected to serial 0<br />
we should not be able to ping it. We can verify that no cable is present <strong>by</strong> using<br />
197
the sh controller s0 command. This command is especially helpful when doing<br />
remote access to routers. With the show controllers command you should see:<br />
Bell#sh controller e0/0<br />
Interface Ethernet0/0<br />
Hardware is AMD Presidio2<br />
ADDR: 80F3A068, FASTSEND: 800255BC, MCI_INDEX: 0<br />
DIST ROUTE ENABLED: 0<br />
Route Cache Flag: 1<br />
LADRF=0x0020 0x0100 0x0000 0x0000<br />
CSR0 =0x00000072, CSR3 =0x00001044, CSR4 =0x0000491D,<br />
CSR15 =0x00000000<br />
CSR80 =0x0000D900, CSR114=0x00000001, CRDA =0x01D175C0,<br />
CXDA =0x01D17A20<br />
HW filtering information:<br />
Promiscuous Mode Disabled, PHY Addr Enabled, Broadcast Addr<br />
Enabled<br />
PHY Addr=0002.FD45.AE60, Multicast Filter=0x0020 0x0100 0x0000<br />
0x0000<br />
amdp2_instance=0x80F3B948, registers=0x40000000, ib=0x1D17460<br />
rx ring entries=32, tx ring entries=64<br />
rxring=0x1D174C0, rxr shadow=0x80F3BB20, rx_head=16, rx_tail=0<br />
txring=0x1D17700, txr shadow=0x80F3BBCC, tx_head=50, tx_tail=50,<br />
tx_count=0<br />
Software MAC address filter(hash:length/addr/mask/hits):<br />
0x57: 0 0100.5e00.0009 0000.0000.0000 0<br />
0xC0: 0 0100.0ccc.cccc 0000.0000.0000 0<br />
spurious_idon=0, throttled=0, enabled=0, disabled=0<br />
rx_framing_err=0, rx_overflow_err=0, rx_buffer_err=0<br />
rx_bpe_err=0, rx_soft_overflow_err=0, rx_no_enp=0, rx_discard=0<br />
tx_one_col_err=0, tx_more_col_err=0, tx_no_enp=0, tx_deferred_err=0<br />
tx_underrun_err=0, tx_late_collision_err=0, tx_loss_carrier_err=70<br />
tx_exc_collision_err=0, tx_buff_err=0, fatal_tx_err=0<br />
hsrp_conf=0, need_af_check=0<br />
Bell#sh controller s0/0<br />
Interface Serial0/0<br />
Hardware is PowerQUICC MPC860<br />
No serial cable attached<br />
idb at 0x80F4204C, driver data structure at 0x80F47560<br />
SCC Registers:<br />
General [GSMR]=0x2:0x00000000, Protocol-specific [PSMR]=0x8<br />
…<br />
0 transmitter CTS losts<br />
0 aborted short frames<br />
198
2. We can use a loopback interface as a “logical” interface. We can use whatever<br />
address we want with loopback addresses (ie., 1.1.1.1, 240.21.2.2, etc). So let’s<br />
configure a loopback interface:<br />
Bell(config)#int loop 0<br />
Bell(config-if)#ip address 1.1.1.1 255.255.255.0<br />
Bell(config-if)#no shut<br />
We really do not have to add the “no shut” since these are logical interfaces, but<br />
its good practice to always “no shut” anytime you are configuring an interface.<br />
Exit from the configuration mode and ping from the router to the looback<br />
interface. You should see:<br />
Bell#ping 1.1.1.1<br />
Type escape sequence to abort.<br />
Sending 5, 100-<strong>by</strong>te ICMP Echos to 1.1.1.1, timeout is 2 seconds:<br />
!!!!!<br />
Success rate is 100 percent (5/5), round-trip min/avg/max = 1/1/4 ms<br />
Bell#<br />
Ping from the workstation to the loopback interface. You should see:<br />
C:\WINDOWS\Desktop>ping 1.1.1.1<br />
Pinging 1.1.1.1 with 32 <strong>by</strong>tes of data:<br />
Reply from 1.1.1.1: <strong>by</strong>tes=32 time=2ms TTL=255<br />
Reply from 1.1.1.1: <strong>by</strong>tes=32 time=1ms TTL=255<br />
Reply from 1.1.1.1: <strong>by</strong>tes=32 time=1ms TTL=255<br />
Reply from 1.1.1.1: <strong>by</strong>tes=32 time=1ms TTL=255<br />
Ping statistics for 1.1.1.1:<br />
Packets: Sent = 4, Received = 4, Lost = 0 (0% loss),<br />
Approximate round trip times in milli-seconds:<br />
Minimum = 1ms, Maximum = 2ms, Average = 1ms<br />
C:\WINDOWS\Desktop><br />
3. We can do more…add these in and try to ping (from DOS) to each looback<br />
interface from your workstation:<br />
Loopback 1 11.11.11.11/24<br />
Loopback 2 22.22.22.22/24<br />
Loopback 3 33.33.33.33/24<br />
Loopback 4 44.44.44.44/24<br />
199
Then try to ping them. Here is what you will see from your router:<br />
Bell#ping 11.11.11.11<br />
Type escape sequence to abort.<br />
Sending 5, 100-<strong>by</strong>te ICMP Echos to 11.11.11.11, timeout is 2 seconds:<br />
!!!!!<br />
Success rate is 100 percent (5/5), round-trip min/avg/max = 1/2/4 ms<br />
Bell#ping 22.22.22.22<br />
Type escape sequence to abort.<br />
Sending 5, 100-<strong>by</strong>te ICMP Echos to 22.22.22.22, timeout is 2 seconds:<br />
!!!!!<br />
Success rate is 100 percent (5/5), round-trip min/avg/max = 1/2/4 ms<br />
Bell#ping 33.33.33.33<br />
Type escape sequence to abort.<br />
Sending 5, 100-<strong>by</strong>te ICMP Echos to 33.33.33.33, timeout is 2 seconds:<br />
!!!!!<br />
Success rate is 100 percent (5/5), round-trip min/avg/max = 1/1/4 ms<br />
Bell#ping 44.44.44.44<br />
Type escape sequence to abort.<br />
Sending 5, 100-<strong>by</strong>te ICMP Echos to 44.44.44.44, timeout is 2 seconds:<br />
!!!!!<br />
Success rate is 100 percent (5/5), round-trip min/avg/max = 1/1/4 ms<br />
Bell#<br />
Here is what you will see from your workstation:<br />
C:\WINDOWS\Desktop>ping 11.11.11.11<br />
Pinging 11.11.11.11 with 32 <strong>by</strong>tes of data:<br />
Reply from 11.11.11.11: <strong>by</strong>tes=32 time=3ms TTL=255<br />
Reply from 11.11.11.11: <strong>by</strong>tes=32 time=1ms TTL=255<br />
Reply from 11.11.11.11: <strong>by</strong>tes=32 time=1ms TTL=255<br />
Reply from 11.11.11.11: <strong>by</strong>tes=32 time=1ms TTL=255<br />
Ping statistics for 11.11.11.11:<br />
Packets: Sent = 4, Received = 4, Lost = 0 (0% loss),<br />
Approximate round trip times in milli-seconds:<br />
Minimum = 1ms, Maximum = 3ms, Average = 1ms<br />
C:\WINDOWS\Desktop><br />
200
C:\WINDOWS\Desktop>ping 22.22.22.22<br />
Pinging 22.22.22.22 with 32 <strong>by</strong>tes of data:<br />
Reply from 22.22.22.22: <strong>by</strong>tes=32 time=1ms TTL=255<br />
Reply from 22.22.22.22: <strong>by</strong>tes=32 time=1ms TTL=255<br />
Reply from 22.22.22.22: <strong>by</strong>tes=32 time=1ms TTL=255<br />
Reply from 22.22.22.22: <strong>by</strong>tes=32 time=1ms TTL=255<br />
Ping statistics for 22.22.22.22:<br />
Packets: Sent = 4, Received = 4, Lost = 0 (0% loss),<br />
Approximate round trip times in milli-seconds:<br />
Minimum = 1ms, Maximum = 1ms, Average = 1ms<br />
C:\WINDOWS\Desktop><br />
C:\WINDOWS\Desktop>ping 33.33.33.33<br />
Pinging 33.33.33.33 with 32 <strong>by</strong>tes of data:<br />
Reply from 33.33.33.33: <strong>by</strong>tes=32 time=1ms TTL=255<br />
Reply from 33.33.33.33: <strong>by</strong>tes=32 time=1ms TTL=255<br />
Reply from 33.33.33.33: <strong>by</strong>tes=32 time=1ms TTL=255<br />
Reply from 33.33.33.33: <strong>by</strong>tes=32 time=1ms TTL=255<br />
Ping statistics for 33.33.33.33:<br />
Packets: Sent = 4, Received = 4, Lost = 0 (0% loss),<br />
Approximate round trip times in milli-seconds:<br />
Minimum = 1ms, Maximum = 1ms, Average = 1ms<br />
C:\WINDOWS\Desktop><br />
C:\WINDOWS\Desktop>ping 44.44.44.44<br />
Pinging 44.44.44.44 with 32 <strong>by</strong>tes of data:<br />
Reply from 44.44.44.44: <strong>by</strong>tes=32 time=1ms TTL=255<br />
Reply from 44.44.44.44: <strong>by</strong>tes=32 time=1ms TTL=255<br />
Reply from 44.44.44.44: <strong>by</strong>tes=32 time=1ms TTL=255<br />
Reply from 44.44.44.44: <strong>by</strong>tes=32 time=1ms TTL=255<br />
Ping statistics for 44.44.44.44:<br />
Packets: Sent = 4, Received = 4, Lost = 0 (0% loss),<br />
201
Approximate round trip times in milli-seconds:<br />
Minimum = 1ms, Maximum = 1ms, Average = 1ms<br />
C:\WINDOWS\Desktop><br />
Supplemental Lab or Challenge Activity:<br />
1. When do you think you might use loopback interfaces?<br />
2. How many loopback interfaces can you have on a router?<br />
3. Why do you think you can use any IP address? Can you use 0.0.0.0? What is the<br />
upper and lower limit to loopback addresses?<br />
So What Have I Learned Here?<br />
In this lab you learned how to configure a loopback adapter. These are actually pretty<br />
cool. If we configured an Ethernet interface then we would have to have a cable and a<br />
switch or something to be able to ping it. A loopback is a virtual interface so no cable is<br />
needed. Later on, when you get up in your studies you will learn many more uses for<br />
loopbacks. Let’s add a protocol inspector to our RIP network and look at the packets!<br />
Guest Router Name Derivation<br />
In 1876 Alexander Graham Bell invented the telephone. Would you believe the first<br />
“hackers” came along a couple of years after that in 1878? Those first “phreakers”<br />
played pranks <strong>by</strong> switching calls to places they were not suppose to go, disconnecting<br />
some calls, and other pranks. Yup…it’s been around for a while now.<br />
202
Basic RIP with Protocol Inspector<br />
Objective:<br />
To use a protocol inspector to view network traffic on a RIP version 1 network.<br />
Tools and Materials:<br />
(2) PC/workstations with protocol inspectors<br />
(2) Routers<br />
(2) Switches<br />
(4) Straight-through cables<br />
(1) DCE serial cable<br />
(1) DTE serial cable<br />
(2) rollover cables<br />
Background:<br />
You can get a free protocol inspector at http://www.ethereal.com. See the lab in part 1<br />
for downloading instructions if you have not done so already.<br />
Lab Diagram:<br />
e0<br />
s0<br />
s1<br />
e0<br />
Addressing:<br />
Workstation “A”<br />
with protocol inspector<br />
Workstation “B”<br />
with protocol inspector<br />
Routers<br />
Hostnames Emmanuel Goldstein<br />
E0 10.1.3.1/24 10.1.4.1/24<br />
S0 10.1.192.1/24 (DCE) n/a<br />
S1 n/a 10.1.192.2/24 (DTE)<br />
Workstations A B<br />
IP 10.1.3.2 10.1.4.2<br />
SM 255.255.255.0 255.255.255.0<br />
GW 10.1.3.1 10.1.4.1<br />
203
Step-<strong>by</strong>-Step Instructions:<br />
1. Read all of these instructions carefully…you will be recording times and such so<br />
it is important that you are familiar with these steps BEFORE you do them.<br />
2. Cable and set up the lab as shown. Test for complete connectivity <strong>by</strong> sending<br />
icmp packets from one workstation to another.<br />
3. Enable the protocol inspector to begin “capture” of network packets from<br />
workstation A <strong>by</strong> control+k. Change the PPP interface to your NIC. Press “start.”<br />
Check your watch and record the time. See figure 1 below.<br />
Figure 1—Be sure to select the NIC as your capture interface.<br />
4. From workstation B ping workstation A and then trace the route between the two.<br />
We are essentially generating ICMP packets on our network. From our<br />
knowledge of <strong>CISCO</strong> routers we can expect to see RIP updates every 30 seconds<br />
(“other”), CDP every 60 seconds (“other”), and our ICMP packets as they are sent<br />
and received. See figure 2 below.<br />
Figure 2—A capture in progress.<br />
204
5. Wait two minutes. Remember, you won’t see them until you stop the capture and<br />
analyze what has happened.<br />
6. End the capture on the protocol inspector <strong>by</strong> pressing “stop.”<br />
7. Open the capture file.<br />
8. From workstation A you should see something like these pictures (results will<br />
vary somewhat):<br />
Figure 3—Here we can see what we were expecting…RIP and ICMP. And those<br />
STP packets? You will learn about them in part 3.<br />
Figure 4—We can even look down to the HEX information (bit-<strong>by</strong>-bit) at our RIP<br />
update captures. Notice how our RIP Operation is a “broadcast” (FF FF FF FF FF<br />
FF) on the network.<br />
205
Figure 5—We can even see CDP packets with our protocol. Notice how we see those<br />
CDP characteristics built into the frame: identification (device ID), address, and platform.<br />
Supplemental Lab or Challenge Activity:<br />
1. Try this lab again using nothing but specific debug commands. The first time<br />
through use specific debug commands. The second time through use the “debug<br />
all” command and see how it differs.<br />
2. Try to find out what “promiscuous mode” means as it applies to NIC’s. Why do<br />
you think this would be important as it relates to sniffers?<br />
3. If we didn’t want to run CDP on our network, then how do we disable it?<br />
So What Did We Learn Here?<br />
Tools of the trade. Get used to using protocol inspectors to examine your network health.<br />
They are really cool. If you want to do more with security they are essential.<br />
Guest Router Name Derivation<br />
Emmanuel Goldstein founded 2600 magazine (a.k.a. The Hacker Quarterly) back in<br />
1984. Every four months a magazine devoted entirely to the sharing of information<br />
related to the Internet is published. In many stores you have to ask for it <strong>by</strong> name<br />
because they keep it under the counter or back in the porn section. It has been suggested<br />
that purchasing 2600 with a check or credit card or subscribing to the magazine<br />
immediately signals the FBI to start a file on you as a “potential hacker.” Want to find<br />
out if you have a FBI file started on you? Netmatix0.virtualave.net/FBIFILES_TXT.txt<br />
Also, in the movie “Hackers” one of the names of a main character was “Emmanuel<br />
Goldstein.” Coincidence? I don’t think so.<br />
206
Router Telnet Lab<br />
Objective:<br />
To learn the intricacies of using “telnet” and commands related to telnet to move between<br />
<strong>CISCO</strong> routers.<br />
Tools and Materials:<br />
(2) PC/workstations<br />
(2) Routers<br />
(2) Switches<br />
(4) Straight-through cables<br />
(1) DCE serial cable<br />
(1) DTE serial cable<br />
(2) rollover cables<br />
Background:<br />
Using telnet between routers is similar to using telnet from a DOS or windows session,<br />
except that with routers we have certain keystrokes to suspend, resume disconnect, and<br />
end a telnet session. We also have certain show and debug tools that we can use as a<br />
“mini” protocol inspector to view telnet features.<br />
Lab Diagram:<br />
e0<br />
s0<br />
s1<br />
e0<br />
Workstation “A”<br />
Workstation “B”<br />
Addressing:<br />
Routers<br />
Hostnames William Gibson<br />
E0 180.11.3.1/24 180.11.4.1/24<br />
S0 180.11.12.1/24 (DTE) n/a<br />
S1 n/a 180.11.12.2/24 (DCE)<br />
Workstations A B<br />
IP 180.11.3.2 180.11.4.2<br />
SM 255.255.255.0 255.255.255.0<br />
GW 180.11.3.1 180.11.4.1<br />
207
Step-<strong>by</strong>-Step Instructions:<br />
1. Cable and setup the lab as shown. Test for complete connectivity <strong>by</strong> sending icmp<br />
packets from one workstation to another.<br />
2. From the William router initiate a telnet session into the Gibson router. If vty line<br />
passwords were not set on Gibson then you will not be able to telnet into it. If<br />
you are successful then you should see something like this:<br />
william#telnet 180.11.12.2<br />
Trying 180.11.12.2... Open<br />
User Access Verification<br />
Password:<br />
gibson><br />
3. Next we will suspend our session between Cleveland and Detroit <strong>by</strong> using these<br />
keys together: Control+Shift+6 and then X (sounds like a good CCNA question).<br />
You should see something like this:<br />
gibson><br />
william#<br />
4. To resume the session just hit or twice. You should see<br />
something like this:<br />
[Resuming connection 1 to 180.11.12.2 ... ]<br />
gibson><br />
5. To end a session just type exit. You should see something like this:<br />
gibson>exit<br />
[Connection to 180.11.12.2 closed <strong>by</strong> foreign host]<br />
william#<br />
6. To see all current sessions type sh sessions. You should see something like this (I<br />
started a telnet session so I would have something to show):<br />
gibson><br />
william#sh sessions<br />
Conn Host Address Byte Idle Conn Name<br />
* 1 180.11.12.2 180.11.12.2 0 0 180.11.12.2<br />
william#<br />
7. To view telnet information use the debug telnet command. Enable debug telnet<br />
on one Cleveland, then initiate a telnet session Cleveland from Detroit and watch<br />
the debug. You should see something like this:<br />
208
william#debug telnet<br />
Incoming Telnet debugging is on<br />
00:36:59: Telnet66: 1 1 251 1<br />
00:36:59: TCP66: Telnet sent WILL ECHO (1)<br />
00:36:59: Telnet66: 2 2 251 3<br />
00:36:59: TCP66: Telnet sent WILL SUPPRESS-GA (3)<br />
00:36:59: Telnet66: 80000 80000 253 24<br />
00:36:59: TCP66: Telnet sent DO TTY-TYPE (24)<br />
00:36:59: Telnet66: 10000000 10000000 253 31<br />
00:36:59: TCP66: Telnet sent DO WINDOW-SIZE (31)<br />
00:36:59: TCP66: Telnet received DO SUPPRESS-GA (3)<br />
00:36:59: TCP66: Telnet received WILL TTY-SPEED (32) (refused)<br />
00:36:59: TCP66: Telnet sent DONT TTY-SPEED (32)<br />
00:36:59: TCP66: Telnet received WILL WINDOW-SIZE (31)<br />
00:36:59: TCP66: Telnet received WILL LOCAL-FLOW (33)<br />
00:36:59: TCP66: Telnet sent DO LOCAL-FLOW (33)<br />
00:36:59: Telnet66: Sent SB 33 0<br />
00:36:59: TCP66: Telnet received DO ECHO (1)<br />
00:36:59: TCP66: Telnet received WONT TTY-TYPE (24)<br />
00:36:59: TCP66: Telnet sent DONT TTY-TYPE (24)<br />
Supplemental Lab or Challenge Activity:<br />
1. Try using telnet from a workstation into a router.<br />
2. Use the debug telnet with a workstation accessing a router with telnet.<br />
3. Try these commands again later when you have multiple routers set up in a<br />
network.<br />
4. Why would you not want to allow anyone to access your router with telnet? Why<br />
would you?<br />
5. Look at that telnet debug and figure out what is happening there.<br />
6. Put a different password on each of the vty sessions. Leave one open. Then open<br />
multiple sessions into that router. You can use the “terminal monitor” command<br />
to see syslog messages as they are generated on that remote telnet session. Be<br />
sure to try using show telnet, debug telnet, show users, show sessions, and show<br />
debugging.<br />
So What Have I Learned Here?<br />
In Part 1 you learned how to use telnet to get to places on the web. Well…routers are on<br />
the web too. So in this lab you learned about using telnet to your routers. In Part 3 you<br />
will learn how to telnet into switches. You may use this someday to telnet into the<br />
routers at work from your home…just think…no commute. Ahhh wouldn’t it be nice?<br />
Guest Router Name Derivation<br />
In 1982 William Gibson first coined the term “cyber-space” in his novel.<br />
209
Route Summarization with RIP<br />
Objectives:<br />
To further your understanding of the RIP routing protocol as it applies to subnetting<br />
design with classful addresses. You will also view updates sent and received with RIP.<br />
Tools and Materials:<br />
(2) PC/workstations with protocol inspectors<br />
(2) Routers<br />
(2) Switches<br />
(4) Straight-through cables<br />
(1) DCE serial cable<br />
(1) DTE serial cable<br />
(2) rollover cables<br />
Background:<br />
By default, when you enable RIP on a <strong>CISCO</strong> router you are enabling RIP version 1.<br />
There are two versions of RIP which, oddly enough, are called RIP version 1 (a.k.a. RIP)<br />
and RIP version 2 (a.k.a. RIPv2). RIP (version 1) is categorized as a “classful” routing<br />
protocol. When you enable RIP or RIPv2 the routers pass updates every 30 seconds <strong>by</strong><br />
default. RIP version 1 does not pass any subnet mask information with its updates. It<br />
just “truncates” (cuts-off) any information at the classful boundary (where the network<br />
portion stops and the subnet portion starts). In <strong>CISCO</strong>-speak: RIP uses “auto-summary”<br />
<strong>by</strong> default which cannot be disabled. For example, a class “B” address of 143.46.86.128<br />
with RIP version 1 would be truncated to 143.46.0.0 during its updates. Remember, class<br />
B is network-network-host-host. RIP version 2 does pass the subnet information with its<br />
updates, but you will learn more about RIPv2 in another lab. Confused? Yeah, me too.<br />
Let’s “learn <strong>by</strong> doing” using a class “B” address in this lab.<br />
Lab Design:<br />
Lo 0 Lo 0<br />
s0<br />
e0<br />
s1<br />
e0<br />
Workstation “A”<br />
Workstation “B”<br />
210
Addressing:<br />
Routers<br />
Hostnames Phiber Optik<br />
S0 161.20.4.1/30 (DCE) n/a<br />
S1 n/a 161.20.4.2/30 (DTE)<br />
L0 161.20.3.1/30 161.20.5.1/30<br />
E0 161.20.2.1/24 161.20.1.1/24<br />
Workstations A B<br />
IP 161.20.2.2 161.20.1.2<br />
SM 255.255.255.0 255.255.255.0<br />
GW 161.20.2.1 161.20.1.1<br />
Step-<strong>by</strong>-Step Instructions:<br />
1. Cable and set up the lab as shown. Test for connectivity from workstation A to its<br />
gateway and workstation B to its gateway. Test ping from workstation A to<br />
workstation B. This should NOT work. Test ping from workstation A to Loopback<br />
0. Test ping from workstation B to Loopback 0. These should work (virtual ports).<br />
Test ping from workstation B to its gateway and to workstation A. This one also<br />
should NOT work because of route summarization with RIP version 1. In<br />
short…route summarization “chopped” the network off at 161.20.0.0/16 and did not<br />
advertise the /24 routes. Follow the logic flow charts at the end of the lab.<br />
2. Let’s look a little deeper at what is happening. Since this is a routing issue lets issue<br />
the sh ip route command on Phiber. You should see that the loopback is directly<br />
connected on Phiber:<br />
phiber#sh ip route<br />
Codes: C - connected, S - static, I - IGRP, R - RIP, M - mobile, B - BGP<br />
D - EIGRP, EX - EIGRP external, O - OSPF, IA - OSPF inter area<br />
N1 - OSPF NSSA external type 1, N2 - OSPF NSSA external type 2<br />
E1 - OSPF external type 1, E2 - OSPF external type 2, E - EGP<br />
i - IS-IS, L1 - IS-IS level-1, L2 - IS-IS level-2, * - candidate default<br />
U - per-user static route, o - ODR<br />
Gateway of last resort is not set<br />
161.20.0.0/16 is variably subnetted, 4 subnets, 2 masks<br />
R 161.20.5.0/30 [120/1] via 161.20.4.2, 00:00:02, Serial0/0<br />
C 161.20.4.0/30 is directly connected, Serial0/0<br />
C 161.20.3.0/30 is directly connected, Loopback0<br />
C 161.20.2.0/24 is directly connected, Ethernet0/0<br />
phiber#<br />
211
We can see routes 161.20.2.0, 161.20.3.0, and 161.20.4.0 are directly connected<br />
with 161.20.5.0 being learned over the serial line but the 161.20.1.0 network is<br />
not listed because it was summarized. Likewise we similar things on Optik:<br />
optik#sh ip route<br />
Codes: C - connected, S - static, I - IGRP, R - RIP, M - mobile, B - BGP<br />
D - EIGRP, EX - EIGRP external, O - OSPF, IA - OSPF inter area<br />
N1 - OSPF NSSA external type 1, N2 - OSPF NSSA external type 2<br />
E1 - OSPF external type 1, E2 - OSPF external type 2, E - EGP<br />
i - IS-IS, L1 - IS-IS level-1, L2 - IS-IS level-2, * - candidate default<br />
U - per-user static route, o - ODR<br />
Gateway of last resort is not set<br />
C<br />
C<br />
C<br />
R<br />
161.20.0.0/16 is variably subnetted, 4 subnets, 2 masks<br />
161.20.5.0/30 is directly connected, Loopback0<br />
161.20.4.0/30 is directly connected, Serial0/1<br />
161.20.1.0/24 is directly connected, Ethernet0/0<br />
161.20.3.0/30 [120/1] via 161.20.4.1, 00:00:06, Serial0/1<br />
3. Let’s also see what is happening with RIP. Turn on debug ip rip on both routers to<br />
view the updates sent and received. You should see on Phiber:<br />
phiber#debug ip rip<br />
RIP protocol debugging is on<br />
phiber#<br />
01:26:15: RIP: received v1 update from 161.20.4.2 on Serial0/0<br />
01:26:15: 161.20.5.0 in 1 hops<br />
01:26:19: RIP:sending v1 update to 255.255.255.255 via Ethernet0/0 (161.20.2.1)<br />
- suppressing null update<br />
01:26:19: RIP: sending v1 update to 255.255.255.255 via Serial0/0 (161.20.4.1)<br />
01:26:19: subnet 161.20.3.0, metric 1<br />
01:26:19: RIP: sending v1 update to 255.255.255.255 via Loopback0 (161.20.3.1)<br />
01:26:19: subnet 161.20.5.0, metric 2<br />
01:26:19: subnet 161.20.4.0, metric 1<br />
01:26:41: RIP: received v1 update from 161.20.4.2 on Serial0/0<br />
01:26:41: 161.20.5.0 in 1 hops<br />
01:26:49: RIP: sending v1 update to 255.255.255.255 via Ethernet0/0<br />
(161.20.2.1) - suppressing null update<br />
01:26:49: RIP: sending v1 update to 255.255.255.255 via Serial0/0 (161.20.4.1)<br />
01:26:49: subnet 161.20.3.0, metric 1<br />
01:26:49: RIP: sending v1 update to 255.255.255.255 via Loopback0 (161.20.3.1)<br />
01:26:49: subnet 161.20.5.0, metric 2<br />
phiber#undebug ip rip<br />
RIP protocol debugging is off<br />
212
On Optik you should see:<br />
optik#debug ip rip<br />
RIP protocol debugging is on<br />
01:26:35: RIP: sending v1 update to 255.255.255.255 via Ethernet0/0<br />
(161.20.1.1) - suppressing null update<br />
01:26:35: RIP: sending v1 update to 255.255.255.255 via Serial0/1 (161.20.4.2)<br />
01:26:35: subnet 161.20.5.0, metric 1<br />
01:26:35: RIP: sending v1 update to 255.255.255.255 via Loopback0 (161.20.5.1)<br />
01:26:35: subnet 161.20.4.0, metric 1<br />
01:26:35: subnet 161.20.3.0, metric 2<br />
01:26:42: RIP: received v1 update from 161.20.4.1 on Serial0/1<br />
01:26:42: 161.20.3.0 in 1 hops<br />
optik#undebug ip rip<br />
RIP protocol debugging is off<br />
optik#<br />
Compare this to these logic flow charts:<br />
How RIP sends updates (for example from Phiber to Optik):<br />
Are you part of yes Do you have<br />
my major network?<br />
the same subnet<br />
mask?<br />
no no yes<br />
Router “Phiber” summarizes Router “Phiber” drops Router “Phiber”<br />
at the major net boundary and the network and does advertises the<br />
advertises the network. not advertise it. Subnet.<br />
How RIP receives updates (for example on Phiber to Optik):<br />
Is the subnet received on the no<br />
same major net as the intf.<br />
that received the update?<br />
Do any subnets of this major<br />
network already exist in the<br />
routing table?<br />
yes yes no<br />
Router “Optik” applies the ignore the update Router “Optik”<br />
mask of the interface that<br />
applies a classful<br />
received the update.<br />
mask.<br />
213
Supplemental Lab or Challenge Activity:<br />
1. You are the network administrator for a small real estate company in Tulsa,<br />
Oklahoma. You have to set up a network with two <strong>CISCO</strong> 2611 routers, 4 1924<br />
switches, and18 workstations and 4 printers per subnet. For security purposes you have<br />
decided that you do not want to advertise subnet information for one subnet on each<br />
router. Therefore you have decided to use discontiguous subnets so your routers will<br />
summarize routes. You will need to design and set up 4 subnets in the company. When<br />
you are finished designing it you will need to build it and be able to ping from each<br />
workstation to each other workstations where possible.<br />
2. A good command to remember is to use is clear ip route *. Sometimes you want to<br />
force your IP table to update and change and this is one good way to make that happen.<br />
3. Let’s look at some designs and have you determine whether all workstations could<br />
ping all other workstations before implementing it. In other words do you think that<br />
given the IP addressing design that the routers will summarize the networks or not?<br />
Scenario 1:<br />
Routers<br />
Hostnames Phiber Optik<br />
S0 10.2.4.1/30 (DCE) n/a<br />
S1 n/a 10.2.4.2/30 (DTE)<br />
E0 192.168.1.1/24 192.168.5.1/24<br />
E1 192.168.2.1/24 192.168.4.1/24<br />
Workstations A-E0 B-E0<br />
IP 192.168.1.2 192.168.5.2<br />
SM 255.255.255.0 255.255.255.0<br />
GW 192.168.1.1 192.168.5.1<br />
Workstations A-E1 B-E1<br />
IP 192.168.2.2 192.168.4.2<br />
SM 255.255.255.0 255.255.255.0<br />
GW 192.168.2.1 192.168.4.1<br />
Scenario 2:<br />
Routers<br />
Hostnames Phiber Optik<br />
S0 10.2.4.1/24 (DCE) n/a<br />
S1 n/a 10.2.4.2/24 (DTE)<br />
E0 192.168.1.1/24 192.168.5.1/24<br />
E1 192.168.2.1/24 192.168.4.1/24<br />
Workstations A-E0 B-E0<br />
IP 192.168.1.2 192.168.5.2<br />
SM 255.255.255.0 255.255.255.0<br />
GW 192.168.1.1 192.168.5.1<br />
Workstations A-E1 B-E1<br />
IP 192.168.2.2 192.168.4.2<br />
SM 255.255.255.0 255.255.255.0<br />
GW 192.168.2.1 192.168.4.1<br />
214
Scenario 3:<br />
Hostnames Phiber Optik<br />
S0 1.0.0.1/8 (DCE) n/a<br />
S1 n/a 1.0.0.2/8 (DTE)<br />
E0 2.0.0.1/8 4.0.0.1/8<br />
E1 3.0.0.1/8 5.0.0.1/8<br />
Workstations A-E0 B-E0<br />
IP 2.0.0.2/8 4.0.0.2/8<br />
SM 255.0.0.0 255.0.0.0<br />
GW 2.0.0.1/8 4.0.0.1/8<br />
Workstations A-E1 B-E1<br />
IP 3.0.0.1/8 5.0.0.2/8<br />
SM 255.0.0.0 255.255.255.0<br />
GW 3.0.0.1/8 5.0.0.1/8<br />
Use this for a lab design:<br />
So What Did I Learn Here?<br />
In this lab you learned about a geek-speak term “summarization.” Think back to the<br />
subnetting lab…network.network.host.host for a class B address. Between the network<br />
and host is the “classful boundary” which is where a router will summarize an address if<br />
it uses a protocol like RIP that does not pass subnet mask information. In the next lab we<br />
start introducing more routers into our network. It’s about time, right?<br />
Guest Router Name Derivation<br />
Phiber Optik was the leader of the Master’s of Deception (MoD) hackers ring in New<br />
York City in the 1980’s/early 1990’s. Allegedly he master-minded the Martin Luther<br />
King day crash of AT&T’s national phone service in 1990. Known for his daring actions<br />
and media stunts he appeared or was interviewed in many publications including<br />
Harper’s, Esquire, and the New York Times. Don’t worry…he got busted. Turk 182!<br />
215
Intermediate RIP with 3 routers<br />
Objectives:<br />
To learn how to implement networking schemes with more than 2 routers.<br />
Tools and Materials:<br />
(3) PC/workstations<br />
(3) Routers<br />
(3) Switches<br />
(6) Straight-through cables<br />
(2) DCE serial cable<br />
(2) DTE serial cable<br />
(3) rollover cables<br />
Lab Diagram:<br />
Addressing:<br />
Workstation “A” Workstation “B” Workstation “C”<br />
Routers<br />
Hostnames acid phreak scorpion<br />
E0 192.168.1.1/24 192.168.2.1/24 192.168.3.1/24<br />
S0 10.1.1.1/24 (DCE) 10.2.1.1/24 (DCE) n/a<br />
S1 n/a 10.1.1.2/24 (DTE) 10.2.1.2/24 (DTE)<br />
Workstations a b c<br />
IP 192.168.1.2 192.168.2.2 192.168.3.2<br />
SM 255.255.255.0 255.255.255.0 255.255.255.0<br />
GW 192.168.1.1 192.168.2.1 192.168.3.1<br />
Step-<strong>by</strong>-Step Instructions:<br />
1. Cable the lab as shown.<br />
2. Complete the basic router setup on each router.<br />
3. Configure the interfaces on each router.<br />
4. Configure the routing protocol and advertise the router’s networks.<br />
216
5. Setup the workstations with IP address, subnet masks, and gateways addresses.<br />
You will need to reboot the workstations. If they ask for a password for network<br />
connectivity just put anything in and you should see a message something like<br />
“no domain server is available, you may not have some networking functions.”<br />
It’s ok if you see it, but you probably will not be able to ping outside of your<br />
workstation without seeing that error message. A quirk with Microsoft.<br />
6. Test connectivity from router to router (from the router) <strong>by</strong> using ping from alpha<br />
to gamma. You should see:<br />
acid#ping 10.2.1.2<br />
Type escape sequence to abort.<br />
Sending 5, 100-<strong>by</strong>te ICMP Echos to 10.2.1.2, timeout is 2 seconds:<br />
!!!!!<br />
Success rate is 100 percent (5/5), round-trip min/avg/max = 32/32/36 ms<br />
acid#<br />
7. Test connectivity from workstation to workstation (from DOS) <strong>by</strong> using ping<br />
from workstation a to workstation c. You should see:<br />
C:\WINDOWS\Desktop>ping 192.168.3.2<br />
Pinging 192.168.3.2 with 32 <strong>by</strong>tes of data:<br />
Reply from 192.168.3.2: <strong>by</strong>tes=32 time=21ms TTL=126<br />
Reply from 192.168.3.2: <strong>by</strong>tes=32 time=20ms TTL=126<br />
Reply from 192.168.3.2: <strong>by</strong>tes=32 time=21ms TTL=126<br />
Reply from 192.168.3.2: <strong>by</strong>tes=32 time=21ms TTL=126<br />
Ping statistics for 192.168.3.2:<br />
Packets: Sent = 4, Received = 4, Lost = 0 (0% loss),<br />
Approximate round trip times in milli-seconds:<br />
Minimum = 20ms, Maximum = 21ms, Average = 20ms<br />
C:\WINDOWS\Desktop><br />
8. Let’s see our route from workstation a to workstation c (from DOS). You should<br />
see:<br />
C:\WINDOWS\Desktop>tracert 192.168.3.2<br />
Tracing route to STAR10616119 [192.168.3.2]<br />
over a maximum of 30 hops:<br />
1 1 ms 1 ms 1 ms 192.168.1.1<br />
2 25 ms 25 ms 25 ms 10.1.1.2<br />
3 30 ms 30 ms 30 ms 10.2.1.2<br />
4 45 ms 45 ms 45 ms STAR10616119 [192.168.3.2]<br />
Trace complete.<br />
217
Supplemental Lab or Challenge Activity:<br />
1. What would you expect to see if you used these commands?<br />
acid>sh cdp neighbors<br />
acid>sh cdp traffic<br />
acid>sh protocols<br />
acid>sh ip route<br />
acid#debug ip icmp<br />
acid#debug ip rip<br />
2. What would you expect to see on phreak? Try steps 1-6 over again on phreak.<br />
3. Try this with class “B” private IP addresses that you choose.<br />
4. Try this with class “A” private IP address that you choose.<br />
5. Try this lab with one class “A” private IP address for the Ethernet network on<br />
acid, a class “B” private IP address over the serial line, and a class “C” private IP<br />
address on the Ethernet network on phreak.<br />
6. Try this with class “C” public IP addresses that you choose.<br />
7. Try this with class “B” public IP addresses that you choose.<br />
8. Try this with class “A” public IP address that you choose.<br />
9. Try mixing and matching private and public IP addresses.<br />
10. Try adding a fourth router either before acid or after scorpion. Use it to simulate<br />
an ISP with a loopback interface. Obviously you do not want to broadcast your<br />
routing tables to the ISP so use a derivative of the “passive interface” command to<br />
stop those broadcasts out the serial interface. Oh, know don’t be so<br />
snotty…sooner or later you have to learn how to figure out things like this without<br />
exact instructions.<br />
So What Have I Learned Here?<br />
After thoroughly drenching ourselves in all things RIP with two routers we decided to<br />
tack on another router and bring our total to three. This actually introduces you to<br />
routing protocol issues. For example, even though the middle router may be able to ping<br />
everywhere in the network, the workstations or other routers may not be able to ping<br />
through the middle router, which is evidence of a routing problem on the middle router.<br />
This is actually a quite common scenario. The first thing I would do is clear the IP routes<br />
out of the tables and check the routes again. So why don’t we have any labs with four or<br />
five routers? Simple. If you can do three then four or five is easy. Since most classes<br />
are short it is actually a waste of time to set up four or five routers. By the time you get<br />
them set up for class it is time to go home. Well now off the soapbox and on to the next<br />
lab!<br />
Guest Router Name Derivation<br />
More members of the Master’s of Deception (MoD) hackers ring in New York City in the<br />
1980’s/early 1990’s. They were instrumental in starting the Great Hacker War against<br />
the Legion of Doom (LoD) hackers ring (also from NYC). Eventually the LoD were<br />
persuaded to cooperate with the police and helped to bust the MoD.<br />
218
RIP metrics and the Limitations of RIP<br />
Objectives:<br />
To learn how about the limitations of RIP and its metrics.<br />
Background:<br />
In this lab we will explore 3 of the 4 “features” of RIP (version 1). First, we will test the<br />
maximum hop count metric (15 is ok, 16 is unreachable). Next we will view the update<br />
broadcast of RIP (every 30 seconds) and then change the timer. Finally we look at the<br />
timers associated with RIP: route-timeout and flush timer. We will not look at the<br />
“feature of RIP” that RIP maintains only the best routes.<br />
Tools and Materials:<br />
(3) PC/workstations with protocol inspectors<br />
(3) Routers<br />
(3) Switches<br />
(6) Straight-through cables<br />
(2) DCE serial cable<br />
(2) DTE serial cable<br />
(3) rollover cables<br />
Lab Diagram:<br />
Workstation “A” Workstation “B” Workstation “C”<br />
Addressing:<br />
Routers<br />
Hostnames acid phreak scorpion<br />
E0 192.168.1.1/24 192.168.2.1/24 192.168.3.1/24<br />
S0 10.1.1.1/24 (DCE) 10.2.1.1/24 (DCE) n/a<br />
S1 n/a 10.1.1.2/24 (DTE) 10.2.1.2/24 (DTE)<br />
Workstations a b c<br />
IP 192.168.1.2 192.168.2.2 192.168.3.2<br />
SM 255.255.255.0 255.255.255.0 255.255.255.0<br />
GW 192.168.1.1 192.168.2.1 192.168.3.1<br />
219
Step-<strong>by</strong>-Step Instructions:<br />
1. Cable the lab as shown.<br />
2. Complete the basic router setup on each router.<br />
3. Configure the interfaces on each router.<br />
4. Configure the routing protocol and advertise/associate/publish the router’s<br />
networks.<br />
5. If you have enough routers then test the maximum hop count <strong>by</strong> adding in enough<br />
routers…I would suggest a total of 17. Ping from end to end and from the middle<br />
out. Test that 16 hop count limit to the max! Otherwise skip this step.<br />
6. Change the rip timer using these commands. Notice how I show you what the<br />
previous (default) RIP timers are before I changed them. The format is updatesinvalid<br />
timer-hold down timer-flush timer. Then I show you what they were after<br />
I changed them:<br />
Before (30-180-180-240):<br />
scorpion#sh ip protocols<br />
Routing Protocol is "rip"<br />
Sending updates every 30 seconds, next due in 1 seconds<br />
Invalid after 180 seconds, hold down 180, flushed after 240<br />
Outgoing update filter list for all interfaces is<br />
Incoming update filter list for all interfaces is<br />
Redistributing: rip<br />
Default version control: send version 1, receive any version<br />
Interface Send Recv Key-chain<br />
Ethernet0/0 1 1 2<br />
Serial0/1 1 1 2<br />
Routing for <strong>Network</strong>s:<br />
10.0.0.0<br />
192.168.3.0<br />
Routing Information Sources:<br />
Gateway Distance Last Update<br />
10.2.1.1 120 00:00:05<br />
Distance: (default is 120)<br />
During:<br />
scorpion#config t<br />
scorpion(config-router)#timers basic 15 30 60 90<br />
scorpion(config-router)#^Z<br />
After (15 30 60 90:<br />
scorpion#sh ip protocols<br />
Routing Protocol is "rip"<br />
Sending updates every 15 seconds, next due in 20 seconds<br />
Invalid after 30 seconds, hold down 60, flushed after 90<br />
Outgoing update filter list for all interfaces is<br />
Incoming update filter list for all interfaces is<br />
Redistributing: rip<br />
Default version control: send version 1, receive any version<br />
220
Interface Send Recv Key-chain<br />
Ethernet0/0 1 1 2<br />
Serial0/1 1 1 2<br />
Routing for <strong>Network</strong>s:<br />
10.0.0.0<br />
192.168.3.0<br />
Routing Information Sources:<br />
Gateway Distance Last Update<br />
10.2.1.1 120 00:00:07<br />
Distance: (default is 120)<br />
scorpion#<br />
Supplemental Lab or Challenge Activity:<br />
1. Why would you want to be able to change the timers? Come on now and think<br />
hard.<br />
2. Fill in the table below with the default timers for RIP to give you some<br />
perspective on the RIP metrics. They sound like nice CCNA questions don’t<br />
they?<br />
Metric<br />
Hop count<br />
Update timer<br />
Invalid timer<br />
Hold-down timer<br />
Flush timer<br />
Value<br />
So What Have I Learned Here?<br />
In this lab you learned about the metrics involved with RIP. Ok. So there aren’t that<br />
many, but other protocols will have many metrics so this is a good introduction. Next<br />
you will be turning your router into a DHCP server. Gosh that is fun!<br />
Guest Router Name Derivation<br />
Acid Phreak and Scorpion are more members of the Master’s of Deception (MoD)<br />
hackers ring in New York City in the 1980’s/early 1990’s. They were instrumental in<br />
starting the Great Hacker War against the Legion of Doom (LoD) hackers ring (also from<br />
NYC). Eventually the LoD were persuaded to cooperate with the police and helped to<br />
bust the MoD.<br />
221
Dynamic Host Configuration Protocol (DHCP) Lab<br />
Objective:<br />
To learn how to implement DHCP using <strong>CISCO</strong> routers in networks.<br />
Background:<br />
Although it is preferable to use an actual DHCP server for addressing in a network<br />
<strong>CISCO</strong> routers can be used to serve that purpose. The command you will need to be<br />
more familiar with is the ip helper address to point your subnets to the DHCP server. As<br />
you see below you must use at least one 2620 router as the DHCP server. This router has<br />
the memory and operating system capable of supporting DHCP. Sorry those 2500’s and<br />
2610/2611’s just won’t work.<br />
Tools and Materials:<br />
(2) PC/workstations<br />
(2) Routers (one must be at least a 2620).<br />
(2) Switches<br />
(4) Straight-through cables<br />
(1) DCE serial cable<br />
(1) DTE serial cable<br />
(2) rollover cables<br />
Lab Diagram:<br />
dhcp<br />
e0<br />
con<br />
s0<br />
s1<br />
con<br />
mitnik<br />
e0<br />
NIC<br />
COM1<br />
COM1<br />
NIC<br />
Workstation “A”<br />
Workstation “B”<br />
Addressing:<br />
Routers<br />
Hostnames kevin mitnik<br />
E0 10.0.0.1/8 192.168.3.1/24<br />
S0 192.168.1.2/24 (DCE) n/a<br />
S1 n/a 192.168.1.1/24 (DTE)<br />
Workstations A B<br />
IP 10.0.0.2 192.168.3.2<br />
SM 255.0.0.0 255.255.255.0<br />
GW 10.0.0.1 192.168.3.1<br />
222
Step-<strong>by</strong>-Step Instructions:<br />
1. Cable the lab as shown.<br />
2. Complete the basic router setup on each router.<br />
3. Configure the interfaces on each router.<br />
4. Configure the routing protocol and advertise/associate/publish the router’s<br />
networks.<br />
5. Setup the workstations with IP address, subnet masks, and gateways addresses.<br />
You will need to reboot the workstations.<br />
6. Test connectivity from router to router.<br />
7. Test connectivity from workstation A to workstation B from DOS.<br />
8. Verify your RIP routes are being advertised.<br />
9. Remove the IP address and gateway from workstation A and set it to obtain its<br />
address automatically. You will need to reboot.<br />
10. Program the dhcp router to start dhcp services with the 10.0.0.0/8 network. We<br />
will use the name for our dhcp pool as “pool 10-net.” Note how the prompt<br />
changes modes below. The last command establishes the default router address.<br />
kevin#config t<br />
kevin(config)#ip dhcp pool 10-net<br />
kevin(config-dhcp)#network 10.0.0.0 255.0.0.0<br />
kevin(config-dhcp)#default-router 10.0.0.1<br />
11. You should be able to release and renew the ip address. You should get an<br />
address of 10.0.0.2 on the workstation. (Use Start>run>winipcfg then press the<br />
release and renew buttons). Every now and then the ip addressing may seemingly<br />
“skip” an IP address. If you have x.x.x.1 on the interface and are expecting<br />
x.x.x.2 for the first address and you end up with x.x.x.3 because sometimes the<br />
switch may grab one of those numbers…go check your switch and don’t sweat it.<br />
Just be sure to plan for it.<br />
12. Test your connectivity between the two workstations.<br />
13. Remove the IP address and gateway from workstation B and set it to obtain its<br />
address automatically. You will need to reboot.<br />
14. Set up the class “C” pool on the dhcp router/server. The only difference with this<br />
IP pool is we know the interface on mitnik requires the first ip address in the pool<br />
so we need to exclude it (try it without the exclude command and you will see the<br />
error message).<br />
kevin#config t<br />
kevin(config)#ip dhcp pool 192-net<br />
kevin(config-dhcp)#network 192.168.3.0 255.255.255.0<br />
kevin(config-dhcp)#exit<br />
kevin(config)#ip dhcp excluded-address 192.168.3.1<br />
15. Program mitnik to pass DHCP requests to the DHCP router/server. It “helps” the<br />
router request from a workstation (from e0) for a dhcp address and directs the<br />
request to the dhcp server/router down the serial line.<br />
223
mitnik(config)#interface e0/0<br />
mitnik(config-int)#ip helper-address 192.168.1.2<br />
16. Do a release and renew on workstation B’s IP address.<br />
17. Test ping from workstation A to B and B to A. Everything should work just fine.<br />
Supplemental Lab or Challenge Activity:<br />
1. Go to www.cisco.com or use the help functions of your router to find out more<br />
ways to use the commands available with dhcp.<br />
2. How many DHCP address pools can you set up on one router?<br />
3. How does a DHCP server differ from a DNS server? What command could you<br />
use to enable a router to use a domain server?<br />
So What Have I Learned Here?<br />
In the first part you learned how to renew and release IP addresses from a workstation. In<br />
this lab you learned how to set up a router as a DHCP server. I really wouldn’t<br />
recommend using your router as a DHCP server if you could at all help it…why spends<br />
several thousand dollars for a router to act as a DHCP server when you could just set up<br />
an old workstation to do the same? Your call not mine.<br />
Guest Router Name Derivation<br />
To some, Kevin Mitnik is an icon in the hacking community. In 1986 he was arrested for<br />
breaking into the Digital Equipment Corporation network. He was arrested in 1995 again<br />
for allegedly stealing 20,000 credit card numbers, but was actually convicted for illegal<br />
use of cellular numbers. He was a regular contributing writer and guest lecturer at<br />
hacking conventions like Defcon. Too bad his last conviction prohibits him from ever<br />
using a computer, a telephone, or receiving monetary compensation from appearances<br />
and articles. Bummer, all that knowledge and he has to give it away for free…but that is<br />
what hackers are about anyways.<br />
224
Subnetting with DHCP<br />
Objectives:<br />
To learn how to design a network with a router used as a DHCP server.<br />
Tools and Materials:<br />
(3) PC/workstations<br />
(3) Routers (one must be a 2620)<br />
(3) Switches<br />
(6) Straight-through cables<br />
(2) DCE serial cable<br />
(2) DTE serial cable<br />
(3) rollover cables<br />
Lab Diagram:<br />
Addressing:<br />
Routers<br />
Hostnames<br />
E0/0<br />
E0/1<br />
S0/0<br />
S0/1<br />
Workstations<br />
IP<br />
SM<br />
GW<br />
Workstation “A” Workstation “B” Workstation “C”<br />
225
Step-<strong>by</strong>-Step Instructions:<br />
You are the network administrator for a small hospital in Vermont. The changeover from<br />
one hospital management group to another has caused massive cut-backs throughout the<br />
hospital staff and resources. You have been told to reduce or eliminate your expenditures<br />
and that all purchases are on hold. The only problem is you really, really needed that<br />
new server to set up a website/intranet for the staff. Heck, it would have really made<br />
your life so much better, but you just do not have the funds now. Since you remembered<br />
you can set up routers to act as DHCP servers you came up with an ingenious plan to<br />
cannibalize your DHCP server (and make it your new web server) and decided to “make<br />
it so.” Geeze, your boss will be wondering how you still managed to make it all work<br />
even with out the new server, right? No, they will probably cut you back more. Welcome<br />
to life on Dilbert’s side. So your task is to:<br />
1. Design a network addressing scheme using private IP addresses. The router on<br />
the far left of the diagram above should be the dhcp router/server. Each Ethernet<br />
interface should have a different private IP address class.<br />
2. Cable the lab as shown.<br />
3. Complete the basic router setup on each router.<br />
4. Configure the interfaces on each router.<br />
5. Configure the routing protocol and advertise the router’s networks.<br />
6. Configure DHCP and IP helper.<br />
7. Hang a loopback interface off the dhcp router with an address of 1.1.1.1 to<br />
“simulate” web access.<br />
8. Setup the workstations with IP address, subnet masks, and gateways addresses.<br />
You will need to reboot the workstations.<br />
9. Test connectivity from all workstations to the others.<br />
So What Have I Learned Here?<br />
In this lab you learned how to apply your knowledge of routing and DHCP. In those<br />
“other” lab books you never really get a change to think for yourself. Here, instead of<br />
mindlessly cranking out commands step-<strong>by</strong>-step you have to use your brain. Let’s just<br />
hope you have enough Dew to stay awake.<br />
226
Objective:<br />
To learn how to implement VLSM in subnet design.<br />
Paper Lab: Variable Length Subnet Masking (VLSM)<br />
Background:<br />
When designing networks it is preferable to be as efficient as possible when assigning IP<br />
addresses. As we have seen in previous labs sometimes we even need to use contiguous<br />
(sequential) numbers for our subnet schemes. As your skills in networking and<br />
networking design increase you will need to know how to efficiently utilize VLSM (RFC<br />
1219).<br />
Tools and Materials:<br />
Paper and pencils<br />
Super VLSM chart (http://www.henninger.net/downloads/ccna/tools/subnettable.pdf)<br />
Lab Diagram:<br />
to: IT HQ<br />
(servers: 2 IP’s)<br />
(24 IP’s)<br />
(39 IP’s)<br />
(57 IP’s)<br />
(6 IP’s) (14 IP’s)<br />
(12 IP’s) (28 IP’s)<br />
Problems:<br />
For the network diagrammed design an IP addressing scheme using VLSM to be as<br />
efficient as possible with IP address distribution.<br />
1. You have been assigned the class “C” private IP address <strong>by</strong> the upper-level IT<br />
staff. Other divisions have other Class “C” IP addresses. For now, you only need<br />
to know you have the 192.168.70.0/24 network to design.<br />
2. You have been assigned the class “B” private IP address <strong>by</strong> the upper-level IT<br />
staff. Other divisions have other Class “B” IP addresses. For now, you only need<br />
to know you have the 172.168.128.0/18 network to design.<br />
3. You have been assigned the class “A” private IP address <strong>by</strong> the upper-level IT<br />
staff. Other divisions have other Class “A” IP addresses. For now, you only need<br />
to know you have the 10.16.0.0/12 network to design.<br />
Supplemental Lab or Challenge Activity:<br />
If the router to HQ was used for DHCP could you set this network up with RIP and make<br />
it work? Try it.<br />
227
Let’s go through one example using the above network design and a class “C” network<br />
address given as 212.14.17.x/24.<br />
1. Determine largest network needed: 57 IP’s. This will fit into a network in our first<br />
column (62 hosts max). So we put down 212.14.17.64/26 for that network and color<br />
out the ip address ranges from .64 to .124 on our chart (all the way across the chart).<br />
Our actual usable addresses are .65 to .126…the columns all the way on the left are<br />
not that specific.<br />
2. Determine the next largest network needed: 39 IP’s. This will fit into a network in<br />
our first column (62 hosts max). So we put down 212.14.17.128/26 for that network<br />
and color out the ip address ranges from .128 to .188 on our chart (all the way across<br />
the chart). Our actual usable addresses are .129-.190.<br />
3. Determine the next largest network needed: 28 IP’s. This will fit into a network in<br />
our second column (30 hosts max). So we put down 212.14.17.32/27 for that network<br />
and color out the ip address ranges from .32 to .60 on our chart (all the way across the<br />
chart). Our actual usable addresses are .33-.62.<br />
4. Determine the next largest network needed: 24 IP’s. This will fit into a network in<br />
our second column (30 hosts max). So we put down 212.14.17.192/27 for that<br />
network and color out the ip address ranges from .192 to .220 on our chart (all the<br />
way across the chart). Our actual usable addresses are .193-.222.<br />
5. Determine the next largest network needed: 14 IP’s. This will fit into a network in<br />
our third column (14 hosts max). So we put down 212.14.17.16/28 for that network<br />
and color out the ip address ranges from .16 to .28 on our chart (all the way across the<br />
chart). Our actual usable addresses are .17-.30.<br />
6. Determine the next largest network needed: 12 IP’s. This will fit into a network in<br />
our third column (14 hosts max). So we put down 212.14.17.224/28 for that network<br />
and color out the ip address ranges from .224 to .236 on our chart (all the way across<br />
the chart). Our actual usable addresses are .225-.238.<br />
7. Determine the next largest network needed: 6 IP’s. This will fit into a network in our<br />
fourth column (6 hosts max). So we put down 212.14.17.8/29 for that network and<br />
color out the ip address ranges from .8 to .12 on our chart (all the way across the<br />
chart). Our actual usable addresses are .9-.14.<br />
8. Determine the next largest network needed: 2 IP’s. This will fit into a network in our<br />
fifth column (2 hosts max). So we put down 212.14.17.4/30 for that network and<br />
color out the ip address ranges from .4 to .8 on our chart (all the way across the<br />
chart). Our actual usable addresses are .5-.6.<br />
9. Don’t forget about those serial lines between our routers! They need subnets with IP’s<br />
too. For those we picked, basically what is left. 212.14.17.240/30 (useable .241-<br />
.242), 212.14.17.244/30 (useable .245-.246), and 212.14.17.248/30 (useable .249-<br />
.250).<br />
These are the addresses for this lab…can you “see” the variable length subnet mask?<br />
212.14.17.x/24 212.14.17.224/28<br />
212.14.17.64/26 212.14.17.8/29<br />
212.14.17.128/26 212.14.17.4/30<br />
212.14.17.32/27 212.14.17.240/30<br />
212.14.17.192/27 212.14.17.244/30<br />
212.14.17.16/28 212.14.17.248/30<br />
228
So What Have I Learned Here?<br />
In this lab you learned about VLSM. This is a topic in the CCNP classes. So why did I<br />
put it here? Simple, I have seen it on the CCNA test AND it makes sense. I have no idea<br />
why it is introduced in the CCNP stuff and not here. It makes more sense as an extension<br />
to subnetting. We learned about discontiguous routes and classful boundaries earlier.<br />
Now, with your knowledge that RIP does not pass subnet mask information you can<br />
make an intelligent decision not to use VLSM if you are using RIP. See how it all starts<br />
to come together? Let’s look at the difference between static and dynamic routing. You<br />
have already been doing dynamic routing with the router rip command.<br />
229
Static and Dynamic Routes with Discontiguous RIP <strong>Network</strong>s<br />
Objective:<br />
To learn how static routes can be used in network design to overcome the problems<br />
encountered with discontiguous networks.<br />
Background:<br />
In our earlier lab you learned about route summarization. In that lab you learned what<br />
routes are passed with RIP and which ones are not. Just suppose we inherited our<br />
network with some given IP addresses and re-assigning IP addresses was not an option.<br />
We could use a static route to be able to “route” between what was once “un-routable.”<br />
Tools and Materials:<br />
(2) PC/workstations<br />
(2) Routers<br />
(2) Switches<br />
(4) Straight-through cables<br />
(1) DCE serial cable<br />
(1) DTE serial cable<br />
(2) rollover cables<br />
Lab Design:<br />
Lo 0 Lo 0<br />
s0<br />
e0<br />
s1<br />
e0<br />
Addressing:<br />
Workstation “A”<br />
Workstation “B”<br />
Routers<br />
Hostnames Phiber Optik<br />
S0 161.20.4.1/30 (DCE) n/a<br />
S1 n/a 161.20.4.2/30 (DTE)<br />
L0 161.20.3.1/30 161.20.5.1/30<br />
E0 161.20.2.1/24 161.20.1.1/24<br />
230
Workstations A B<br />
IP 161.20.2.2 161.20.1.2<br />
SM 255.255.255.0 255.255.255.0<br />
GW 161.20.2.1 161.20.1.1<br />
Step-<strong>by</strong>-Step Instructions:<br />
1. Cable and set up the lab as shown.<br />
2. Complete the basic router setup on each router.<br />
3. Configure the interfaces on each router.<br />
4. Configure the routing protocol and advertise/associate/publish the router’s<br />
networks. Configure the workstations. You should NOT be able to ping from<br />
workstation A to workstation B or vice versa. You should be able to ping from<br />
workstation A or B to either loopback. And then try showing the route from<br />
…you should see the loopback interface for Phiber (learned via RIP) in the<br />
routing table for Optik:<br />
optik#sh ip route<br />
Codes: C - connected, S - static, I - IGRP, R - RIP, M - mobile, B - BGP<br />
D - EIGRP, EX - EIGRP external, O - OSPF, IA - OSPF inter area<br />
N1 - OSPF NSSA external type 1, N2 - OSPF NSSA external type 2<br />
E1 - OSPF external type 1, E2 - OSPF external type 2, E - EGP<br />
i - IS-IS, L1 - IS-IS level-1, L2 - IS-IS level-2, * - candidate default<br />
U - per-user static route, o - ODR<br />
Gateway of last resort is not set<br />
161.20.0.0/16 is variably subnetted, 4 subnets, 2 masks<br />
C 161.20.5.0/30 is directly connected, Loopback0<br />
C 161.20.4.0/30 is directly connected, Serial0/1<br />
C 161.20.1.0/24 is directly connected, Ethernet0/0<br />
R 161.20.3.0/30 [120/1] via 161.20.4.1, 00:00:06, Serial0/1<br />
optik#<br />
5. So let’s fix that little problem here:<br />
optik(config)#ip route 161.20.2.0 255.255.255.0 161.20.4.1<br />
What this line says to the router is “to get to the network 161.20.2.0/24 use the<br />
interface with the address of 161.20.4.1.” (note: it’s the address on the far side of<br />
the serial line…more on that in a bit). Now a request from workstation B to the<br />
Ethernet interface has directions on how to get to that address. We have provided<br />
them to the router with manual (static) instructions. Our router has summarized<br />
our networks because of the addresses we used but, ha-ha!, we are one step ahead<br />
of that router because we let it know who’s the boss <strong>by</strong> slapping a static route in<br />
there…take that!<br />
6. Now you should be able to ping from workstation B to the Ethernet interface on<br />
Phiber and to workstation A. Now try to ping from workstation A to B. You<br />
231
should not be able to ping. This is because Phiber has no way to direct traffic,<br />
even though we did it on Optik. We must add another static route from Phiber to<br />
Optik to allow workstation A to be able to ping workstation B. Go ahead and add<br />
the route. (Can’t tell you everything step-<strong>by</strong>-step, otherwise you wouldn’t learn<br />
much…ok…if you get stuck you can check the answers.)<br />
7. Static routes are really good for troubleshooting. Later on when you learn about<br />
setting up routers with multiple routes to a destination you will learn to use static<br />
source<br />
router<br />
destination<br />
router<br />
routes to “force” communication over one path in particular to test that specific<br />
path. Suppose the route given <strong>by</strong> the “<br />
“ in the picture above was<br />
chosen <strong>by</strong> the source router to be the “best path” to the destination router. But we<br />
wanted to test the capabilities of a “lesser path” (given as “<br />
“) to the<br />
destination router. We could force the route with a static route.<br />
8. We can actually specify the interface, rather than using the IP address for setting<br />
up a static route (told you we’d come back to it!). So instead of this:<br />
optik(config)#ip route 192.168.1.0 255.255.255.0 179.40.6.1<br />
For the same thing we could use this:<br />
optik(config)#ip route 192.168.1.0 255.255.255.0 serial0/0<br />
If you forget your options then use your help command:<br />
optik(config)#ip route 192.168.1.0 255.255.255.0 ?<br />
A.B.C.D Forwarding router's address<br />
FastEthernet FastEthernet IEEE 802.3<br />
Loopback Loopback interface<br />
Null Null interface<br />
Serial Serial<br />
232
Now let’s explore some of the other options for static routes:<br />
optik(config)#ip route 1.0.0.0 255.0.0.0 serial0/1 ?<br />
Distance metric for this route<br />
A.B.C.D Forwarding router's address<br />
name Specify name of the next hop<br />
permanent permanent route<br />
tag Set tag for this route<br />
The first option we see a distance metric for this route. Each routing protocol has<br />
a different default distance metric assigned to it. RIP has a default static route<br />
distance of 120. So actually we already put that in our command, even though it<br />
does not appear in our ip route command. What this is used for is when we want<br />
to put in more than one static route on our router. The router will automatically<br />
select the static route with the lowest distance metric first then, if that route is not<br />
available, go to the route with the second lowest distance metric and then so on.<br />
Distance metrics, as you can see, vary from 1 to 255. Here are some common<br />
metrics for you to know about here at this time:<br />
Connected interface 0<br />
Static route 1<br />
RIP 120<br />
Unknown 255<br />
If we were to add another router in then we would need to add in another static<br />
route. Using that methodology if we had a network with many routers we could<br />
bury ourselves in static routes which has the possibility of causing major<br />
problems. In our example we just did instead of setting a static route between the<br />
two routers we could set a default network route on optik. This will essentially<br />
allow us to add routers at will without all those static routes. Setting many static<br />
routes essentially defeats the purposes of having routers make decisions anyways.<br />
So there. In the next couple of labs you will learn more about different types of<br />
routes and their uses. In the meantime let’s try to do some more exercises and<br />
learn <strong>by</strong> doing!<br />
9. Ok. Let’s try putting a loop back into our network. Connect another serial line<br />
from s0/1 (DTE) on phiber to s0/0 (DCE) on optik. Use 56000 for the clockrate.<br />
We know from our routing loop labs that our split-horizon is set <strong>by</strong> default to<br />
prevent routing loops, but if we have two paths wouldn’t we want to take<br />
advantage of that? Absolutely! If all of our metrics are equal, then our routers<br />
will perform load-balancing across the equal lines. Now, of course, you know we<br />
can change that. The command to change load-balancing is “variance.” Use your<br />
knowledge of the <strong>CISCO</strong> technical support site and router help features to find<br />
out more about this command and how to use it. What we are more concerned<br />
with in this lab is static routing. Set your new serial connection to have a<br />
different administrative distance than the main line so it will act as a backup line.<br />
10. Ping and trace the route between workstation A and B.<br />
233
11. Take the main line down (just unplug one end of the serial cable) and ping and<br />
trace the route again. Remember RIP may take a few seconds to “catch” up.<br />
Your traffic should now be re-routed across the back up line.<br />
12. Bring the main line back up and re-ping and re-trace the route. Unless you used<br />
the “permanent” suffix to the ip route command the back up line should still be<br />
the preferred line. But…you know how to fix that too.<br />
Supplemental Labs or Challenge Activities:<br />
1. Set a whole network with 4-5 routers with routes that are summarized and use<br />
static lines to enable “routing.” Now you can see why we don’t always prefer<br />
using them.<br />
2. Find out what the other administrative distances are for the other routing<br />
protocols. Hint: look on <strong>CISCO</strong>’s website.<br />
So What Have I Learned Here?<br />
In this lab you learned that, while useful, static routes can become a pain in the admin. It<br />
is best to do dynamic routing only when absolutely necessary. Later, as you progress in<br />
your studies you will better learn when and where to use static routes. But for now just<br />
forget about them.<br />
Guest Router Name Derivation<br />
Phiber Optik was the leader of the Master’s of Deception (MoD) hackers ring in New<br />
York City in the 1980’s/early 1990’s. Allegedly he master-minded the Martin Luther<br />
King day crash of AT&T’s national phone service in 1990. Known for his daring actions<br />
and media stunts he appeared or was interviewed in many publications including<br />
Harper’s, Esquire, and the New York Times. Don’t worry…he got busted. Turk 182!<br />
234
Overcoming Problems with Routing Loops<br />
Objective:<br />
To understand the problems routing loops can cause in a network and how to overcome<br />
those problems.<br />
Tools and Materials:<br />
(3) PC/workstations<br />
(3) Routers<br />
(3) Switches<br />
(6) Straight-through cables<br />
(3) DCE serial cable<br />
(3) DTE serial cable<br />
(3) rollover cables<br />
Lab Diagram:<br />
Addressing:<br />
Workstation “A” Workstation “B” Workstation “C”<br />
Routers<br />
Hostnames Prophet Knight Lightning<br />
E0 172.16.1.1/16 172.16.2.1/16 172.16.3.1/16<br />
S0 10.1.1.1/24 (DCE) 10.2.1.1/24 (DCE) 10.3.1.2/24 (DTE)<br />
S1 10.3.1.1/24 (DTE) 10.1.1.2/24 (DTE) 10.2.1.2/24 (DTE)<br />
Workstations a b<br />
IP 172.16.1.2/16 172.16.2.2/16 172.16.3.2/16<br />
SM 255.255.0.0 255.255.0.0 255.255.0.0<br />
GW 172.16.1.1 172.16.2.1 172.16.3.1<br />
Step-<strong>by</strong>-Step Instructions:<br />
1. Cable the lab as shown except for the serial line between Prophet and Lightning.<br />
2. Complete the basic router setup on each router.<br />
3. Configure the interfaces on each router.<br />
4. Configure the routing protocol and advertise the router’s networks.<br />
235
5. Setup the workstations with IP address, subnet masks, and gateways addresses.<br />
You will need to reboot the workstations. If they ask for a password for network<br />
connectivity just put anything in and you should see a message something like “no<br />
domain server is available, you may not have some networking functions.” It’s ok<br />
if you see it, but you probably will not be able to ping outside of your workstation<br />
without seeing that error message.<br />
6. Test connectivity from workstation A to workstation C.<br />
7. Turn on debug ip rip on each router.<br />
8. Now let’s add in that other serial line between Prophet and Lightning. This will<br />
create a routing loop in our network. By default <strong>CISCO</strong> routers are prepared for<br />
routing loops. To create a problem with a routing loop use this command:<br />
prophet(config)#interface s0/0<br />
prophet(config-if)#no ip split-horizon<br />
9. You should see lots of debug messages about routing loops now. To stop those<br />
routing loop problems type “ip split-horizon” again on the serial interface or just<br />
disconnect that serial line. This problem is known as “counting to infinity.”<br />
Supplemental Lab or Challenge Activity:<br />
1. You can also solve the problem of routing loops <strong>by</strong> changing the metrics for the<br />
routing protocol. Having just completed the lab on RIP metrics, try this lab again<br />
changing the metrics for RIP from 16 hops to 3 and see what happens.<br />
2. Define and differentiate between split-horizon, poison reverse update and count to<br />
infinity. More than likely you will see a question about these on your test.<br />
So What Have I Learned Here?<br />
In this lab you learned that problems with routing loops are automatically taken care of<br />
<strong>by</strong> the ip split-horizon command in your router. Why did we bother learning about it?<br />
Well no network is pure and chances are you will have routers from other vendors in your<br />
network. No all of them automatically eliminate routing loop problems so you need to be<br />
aware of them.<br />
Guest Router Name Derivation<br />
In September 1998 a hacker known as “Prophet” (Robert Riggs) cracked the BellSouth<br />
network and downloaded copies of operating manuals to his own computer and copied<br />
them to a BBS. He also sent them to another hacker “Knight Lightning” (Craig Neidorf)<br />
who published the information in his underground electronic magazine “Phrack.”<br />
Prophet pled guilty to wire fraud. Knight Lightning fought his case because he had only<br />
taken a copy of the document and “didn’t hurt anything.” It turned out the document was<br />
also available for sale from Bellsouth, but Knight Lightning was still left with a six-figure<br />
legal bill for a document he could have purchased legally for $13.00 and Prophet has a<br />
criminal record.<br />
236
RIP Version 2 and Redistribution with RIP<br />
Objective:<br />
To learn about RIP version 2.<br />
Background:<br />
In our earlier lab you learned about route summarization. In that lab you learned what<br />
routes are passed with RIP and which ones are not. We learned that we could use a static<br />
route to be able to “route” between what was once “un-routable.” This was known as<br />
“auto-summarization” and, <strong>by</strong> default it is enabled with RIP (and cannot be disabled).<br />
We also learned that too many static routes can cause problems for us as administrators.<br />
Another way to solve that problem would have been to switch to a routing protocol that<br />
allowed subnet masks to be passed. One such protocol that does it is RIP version 2.<br />
Tools and Materials:<br />
(2) PC/workstations<br />
(2) Routers<br />
(2) Switches<br />
(4) Straight-through cables<br />
(1) DCE serial cable<br />
(1) DTE serial cable<br />
(2) rollover cables<br />
Lab Design:<br />
Lo 0 Lo 0<br />
s0<br />
e0<br />
s1<br />
e0<br />
Workstation “A”<br />
Workstation “B”<br />
Addressing:<br />
Routers<br />
Hostnames Phiber Optik<br />
S0 161.20.4.1/30 (DCE) n/a<br />
S1 n/a 161.20.4.2/30 (DTE)<br />
L0 161.20.3.1/30 161.20.5.1/30<br />
E0 161.20.2.1/24 161.20.1.1/24<br />
237
Workstations A B<br />
IP 161.20.2.2 161.20.1.2<br />
SM 255.255.255.0 255.255.255.0<br />
GW 161.20.2.1 161.20.1.1<br />
Step-<strong>by</strong>-Step Instructions:<br />
1. Cable and set up the lab as shown.<br />
2. Complete the basic router setup on each router.<br />
3. Configure the interfaces on each router.<br />
4. Configure the workstations. You should NOT be able to ping from workstation A to<br />
anywhere. Silly billy…we haven’t configured a routing protocol yet.<br />
5. So let’s fix that little problem here using RIP version 2. Configure the routing<br />
protocol and advertise the router’s networks using RIP version 2 <strong>by</strong> doing this:<br />
phiber(config)#router rip<br />
phiber(config-router)#network 161.20.0.0<br />
phiber(config-router)#version 2<br />
And on the other router:<br />
optik(config)#router rip<br />
optik(config-router)#network 161.20.0.0<br />
optik(config-router)#version 2<br />
6. Now you should be able to ping from each workstation to the other workstation, to<br />
the loopbacks on both routers and everywhere. BAM! Problem solved much easier<br />
than with static routes. Yeah…it’s that easy. ☺<br />
7. Now let’s take it up another level and add some more routers to our network (look for<br />
the lab diagram at the end of this lab). One router will act as an ISP and the other will<br />
be a new company we just acquired. They are running RIP on their network. The<br />
boss their likes RIP because she is familiar with it so you decide to leave it intact.<br />
But you need to be able to pass your routing information over your network so you<br />
use your knowledge of the <strong>CISCO</strong> website and find out information about two<br />
commands you can use to “redistribute” your routing protocol:<br />
ip rip send version 1<br />
ip rip receive version 1<br />
8. Also you do not want your ISP to have the information about your network so you<br />
decided to stop all routing table broadcasts out the serial interface on phiber. You<br />
enter this command:<br />
phiber(config)#router rip<br />
phiber(config-router)#passive-interface serial0/1<br />
238
9. Use your knowledge of debug commands, both before and after implementing the<br />
passive interface command, to verify it is working properly. Heck, even a show ip<br />
route would work too.<br />
10. Did you remember to statically connect your network to the ISP? Tsk, tsk.<br />
ISP<br />
RIPv2<br />
RIPv2<br />
RIPv1<br />
Addressing:<br />
Workstation “A” Workstation “B” Workstation “C”<br />
Routers<br />
Hostnames ISP RIPv1<br />
E0 n/a 192.168.1.1/24<br />
L0 172.16.1.1/16 n/a<br />
S0 220.221.222.253/30(DCE) n/a<br />
S1 n/a 161.20.6.2/24 (DTE)<br />
So What Have I Learned Here?<br />
In this lab you learned about RIP version 2. It does pass the subnet masks so we can use<br />
that VLSM that we learned about a couple of labs ago…See, a place for everything and<br />
everything in its place. Isn’t that nice? I think that will about do it for part 2. In the next<br />
couple of parts you will learn about switching and then start picking up more routing<br />
protocols now that you have mastered the basics of your router, RIP, and troubleshooting.<br />
Guest Router Name Derivation<br />
Phiber Optik was the leader of the Master’s of Deception (MoD) hackers ring in New<br />
York City in the 1980’s/early 1990’s. Allegedly he master-minded the Martin Luther<br />
King day crash of AT&T’s national phone service in 1990. Known for his daring actions<br />
and media stunts he appeared or was interviewed in many publications including<br />
Harper’s, Esquire, and the New York Times. Don’t worry…he got busted. Turk 182!<br />
239
Part 2 Command Review<br />
Objective:<br />
To list all commands utilized in Part 2 of this textbook.<br />
Step-<strong>by</strong>-Step Instructions:<br />
1. For each of the commands give a description of the command, the prompt for<br />
configuration, and any abbreviations for that command.<br />
Prompt Command Shortcut Description<br />
setup<br />
help<br />
?<br />
enable<br />
disable<br />
exit<br />
history<br />
show<br />
configuration<br />
terminal<br />
hostname<br />
copy<br />
running-configuration<br />
start-configuration<br />
write memory<br />
show buffers<br />
show flash<br />
show interface<br />
show memory<br />
show protocols<br />
show processes<br />
show run<br />
show start<br />
show stacks<br />
show tech<br />
show version<br />
password cisco<br />
login<br />
line vty<br />
line con<br />
line aux<br />
logging synchronous<br />
exec-timeout<br />
enable password<br />
240
Prompt Command Shortcut Description<br />
enable secret<br />
ip host<br />
no shut<br />
interface e0/0<br />
clockrate<br />
ip address<br />
router rip<br />
network<br />
ping<br />
traceroute<br />
show cdp<br />
sh ip route<br />
debug ip icmp<br />
debug ip rip<br />
undebug<br />
show controller s0/0<br />
interface loopback 0<br />
telnet<br />
show sessions<br />
ip dhcp pool<br />
ip dhcp excludedaddress<br />
ip helper-address<br />
default-router<br />
ip route<br />
version 2<br />
241
Whole Enchilada/Crazy Insano Lab #1 (WECIL): Routing<br />
Objectives:<br />
To give you an idea of what a practical exam may be designed like to encompass all of<br />
the objectives from this part.<br />
Lab Design:<br />
ISP<br />
WWW<br />
172.16.1.1/16<br />
dhcp<br />
Workstation “A”<br />
Workstation “B”<br />
You are the network administrator for a medium-sized manufacturing company in<br />
Atlanta. They house all of their operations in three buildings on a city block. Each<br />
building has a router and six switches. There is a connection from one building to the<br />
ISP that is also used as a DHCP router/server. The ISP has assigned you to the<br />
212.14.39.253/30. The ISP serial interface provides clocking and has an IP address of<br />
212.14.39.254/30. Your task is to design an addressing scheme using private IP<br />
addresses. You will need to implement a routing protocol that allows workstation A to be<br />
able to ping to workstation B. As an extra measure of security you should not allow your<br />
networks to advertise themselves outside of your network. Both workstations should<br />
receive their IP address from the DHCP router/server. Since your equipment is limited<br />
use a logical interface to emulate the other switches on each router. Both workstations<br />
should be able to ping to every logical interface and to 172.16.1.1<br />
Variants:<br />
Class “A,” “B,” or “C” private IP addresses only.<br />
Mixed “A,” “B,” or “C” private IP addresses.<br />
Class “A,” “B,” or “C” public IP addresses only.<br />
Mixed “A,” “B,” or “C” public IP addresses.<br />
Mixed public and private addressing.<br />
242
Design a network using VLSM and then anyone of the above scenarios.<br />
Design a network addressing scheme that summarizes addresses on one of the routers.<br />
Change metrics on routers.<br />
Lab Design:<br />
ISP<br />
WWW<br />
172.16.1.1/16<br />
dhcp<br />
Workstation “A”<br />
Workstation “B”<br />
More options with this design:<br />
Force path selection with static routes.<br />
Add a routing loop.<br />
Force path selection on a network with a routing loop using dynamic routes.<br />
243
Whole Enchilada/Crazy Insano Lab #2 (WECIL): Routing<br />
ISP<br />
WWW<br />
172.16.1.1/16<br />
workstation “C”<br />
dhcp<br />
Workstation “A”<br />
Workstation “B”<br />
Make part of your network RIP and part of it RIPv2.<br />
244
Troubleshooting scenarios for Part 2<br />
Here is just a “small” list of the items I might mess with on a troubleshooting test related<br />
to this section:<br />
Bad straight through cable<br />
Bad console cable<br />
Unhooked straight through cable<br />
Unhooked console cable<br />
Reversed DCE/DTE cable<br />
Change passwords<br />
Change RIP to RIPv2<br />
Change RIPv2 to RIP<br />
Remove RIP<br />
Remove IP host list<br />
No clockrate on Serial DCE<br />
Remove IP from Serial Interface<br />
Remove IP from Eth Interface<br />
Change mask on serial interface<br />
Change mask on eth interface<br />
Change ip on workstation<br />
Remove gateway from host<br />
Remove Loopback<br />
Change RIP metrics<br />
Remove ip split horizon<br />
Remove ip subnet-zero<br />
Change baud of router<br />
Change ip hostname (for ping)<br />
Remove static line<br />
Change subnet mask to summarize<br />
Remove ip helper address<br />
245
Part 3:<br />
Switching<br />
246
Switch Maintenance<br />
Objective:<br />
In this lab you will learn the basics of switch maintenance including telnetting/using a<br />
web browser to console into a switch, resetting a switch and password recovery on a<br />
switch.<br />
Tools and Materials:<br />
(1) workstation<br />
(1) console cable<br />
(1) switch<br />
(1) straight through cable<br />
Lab Design:<br />
192.168.1.1/24<br />
192.168.1.2/24<br />
192.168.1.1 gw<br />
Step-By-Step Instructions:<br />
Each of these topics are really too small for an individual lab so I lumped them all<br />
together in this one. Before we can do these first two we need an IP address, mask, and<br />
gateway on the workstation and an IP address and mask on the switch. To set up the<br />
switch from the main menu select:<br />
1. [I] IP configuration<br />
2. [I] IP address<br />
a. 192.168.1.1<br />
3. [S] Subnet mask<br />
a. 255.255.255.0<br />
4. then, like our routers, we need a password in order to be able to telnet into this<br />
device:<br />
a. [X] Exit to previous menu<br />
5. [M] Menus<br />
6. [C] Console Settings<br />
7. [M] Modify password<br />
a. cisco<br />
b. cisco<br />
c. enter<br />
247
Telnetting/using a web browser to console into a switch:<br />
1. Without an IP address and subnet mask you cannot telnet into a switch. If you<br />
have put one on it then just start telnet and use the ip address with the telnet port.<br />
Its really cool. Open telnet <strong>by</strong> using Start then Run and typing telnet. The telnet<br />
window should open. Then click on “connect” and “remote session.” When the<br />
pop up window opens type in the IP address of the switch and click on “Connect.”<br />
You should see something like this:<br />
After only a couple of seconds you should see something like this:<br />
Notice how you no longer have the IP configuration option available.<br />
2. Guess what? You can also get to your switch over the web. Just type that IP<br />
address in a web page and see what happens. It’s really cool with pictures and<br />
everything. You should see something like this:<br />
248
Remember how we just put in a password? Yup…we use it only…no user name<br />
required.<br />
3. After putting in the password and clicking on “ok” you should see:<br />
So how cool is that? You cannot tell from this picture but you can actually “see”<br />
if a port is active…nice when you are not in front of the switch. You can click on<br />
the port and view the statistics or even make changes.<br />
4. But wait…there is more. You can also access the switch through the web<br />
browser. Scroll down and click on Fast etherchannel management and there will<br />
be a hyperlink for “telnet.” This will actually bring up a hyperterminal session to<br />
the router. You will see this (next page):<br />
249
Resetting a switch:<br />
1. Resetting a switch is really simple. First start <strong>by</strong> selecting [M] for menus.<br />
2. Then select [S] for system management.<br />
3. Select [F] for reset to factory defaults.<br />
4. Select [yes].<br />
5. Then select [R] for reload.<br />
6. Select [yes] and watch the switch reload. Its just that simple!<br />
Password recovery:<br />
1. You thought the last one was easy? Heck…this is the easiest password<br />
recovery you will ever do. Just unplug the switch (its ok…no matter what the<br />
configuration is saved…its not like a router where you have to do a copy to<br />
save the config…sounds like a good test question).<br />
2. When the switch reboots just watch the hyperterminal screen. During the boot<br />
it will ask you if you want to reset the password like this:<br />
250
Just click on “yes” to clear the passwords or ignore the message altogether to keep<br />
the current ones in use. Most people miss it because they are too busy watching<br />
all the blinking lights, talking with someone, or off getting their Dew.<br />
Supplemental Lab or Challenge Activity:<br />
1. Try doing these labs (this one and the ones to follow) using the command line<br />
interface. Some people have seen questions related to this on tests or on<br />
practice test CD-roms.<br />
2. Try setting up usernames with passwords for telnet access with your switch.<br />
So What Have I Learned Here?<br />
In this lab you learned about some miscellaneous, yet nifty, features about switches and<br />
maintaining switches. In the next lab you will start learning about the Spanning Tree<br />
Protocol.<br />
251
Basic STP<br />
Objective:<br />
To learn how to construct and understand Spanning Tree Protocol (STP) connections, to<br />
view and understand spanning tree states with a protocol inspector, and to construct and<br />
configure redundant backbones between switches.<br />
Tools and Materials:<br />
Three (3) cross-over cables<br />
Three <strong>CISCO</strong> switches (1900 series)<br />
Two (2) straight-through cables<br />
Two Windows PC workstations with Hyperterminal and Ethereal installed<br />
Lab Diagram:<br />
1 bx ax bx ax bx ax 1<br />
st xo xo st<br />
NIC<br />
xo<br />
workstation “A”<br />
workstation “B”<br />
Background:<br />
The main function of the Spanning-Tree Protocol (STP) is to allow us to set up<br />
redundant back up lines in case of emergency between switches. When a main line<br />
between two of the switches becomes dysfunctional the switch, through its STP states<br />
(Blocking, Listening, <strong>Learning</strong>, Forwarding, Disabled), implements the Spanning Tree<br />
Algorithm (STA) when a “link down” is detected. By default the switch checks the<br />
condition of its ports every 30 seconds. In other words, when a main line goes down, the<br />
redundant backbone should come up within 30 seconds (although sometimes it takes up<br />
to about 60 seconds with default settings). STP is implemented on switches, <strong>by</strong> default,<br />
for VLANs 1-64. This means all you have to do is plug in your redundant backbone (a<br />
cross over cable) into any available port between switches because all switches in their<br />
default state have all ports assigned to VLAN 1.<br />
The switch uses priorities to determine which lines are the main lines and which<br />
are the redundant backbones. The values can be 0 through 255. The lower number has<br />
the higher priority (the main lines). By default each 10BaseT port is assigned a priority<br />
of 128 and each 100BaseT port is assigned a priority of 10. On our 1900 series switches<br />
this means that the Ax and Bx ports will be selected as main backup lines before ones<br />
using the numbered (1-12 or 1-24) ports. In practice, we use the Ax and Bx lines to set<br />
our “Trunks” or backbone lines. Since the Ax and Bx lines are typically used for high<br />
speed this works best. In the next lab you will be configuring the backbone lines <strong>by</strong><br />
changing the settings (cost, priority, etc) on each port to determine statically which will<br />
be the main backbones and which will be the redundant backbones.<br />
252
Step-By-Step Instructions:<br />
1. You should set each switch back to its factory default settings. The power should be<br />
turned off when you are finished re-setting.<br />
Test default Spanning Tree Settings:<br />
1. Make sure the power is turned off on all of the switches. For ease, place each switch<br />
on top of each other. For this lab, the top switch will be called “SW-A,” the middle<br />
switch will be called “SW-B,” and the bottom switch will be called “SW-C.”<br />
2. Plug one end of a crossover cable into port “Ax” on SW-A and the other end into port<br />
“Bx” on SW-B.<br />
3. Plug one end of a crossover cable into port “Ax” on SW-B and the other end into port<br />
“Bx” on SW-C.<br />
4. Plug one end of a crossover cable into port “Ax” on SW-C and the other end into port<br />
“Bx” on SW-A. You have now created a loop in your switches.<br />
5. Turn on the power. After the switches cycle through their start-up procedures one <strong>by</strong><br />
one the lights over the Ax and Bx ports should change from amber-colored (Problem<br />
or not functioning) to green-colored (OK-operational). One of the lights should<br />
change back to amber. This line was chosen to be the redundant backbone because<br />
all priorities are equal in default mode.<br />
6. Let’s test the backup line. Unplug any one of the cables that appears with green<br />
lights on both ends. In about 60 seconds or so the redundant backbone line amber<br />
light will turn green. This indicates the switch is going through the five STP states.<br />
7. Plug the back up line back in…it will return back to its original state in only a couple<br />
of seconds.<br />
Test the ability to ping from (PC)-to (switch)-to (switch)-to (switch)-to (PC):<br />
1. Connect a PC workstation (PC-A) to SW-A using a straight-through cable.<br />
2. Change the TCP/IP settings to IP: 192.168.1.1 and S/M 255.255.255.0.<br />
3. Connect a PC workstation (PC-B) to SW-B using a straight-through cable.<br />
4. Change the TCP/IP settings to IP: 192.168.1.2 and S/M 255.255.255.0.<br />
5. Test the connectivity from PC-A to PC-B <strong>by</strong> pinging. This should be successful.<br />
6. Start an Ethereal capture on workstation “B.”<br />
7. Let’s test the backup line. Unplug any one of the cables that appears with green<br />
lights on both ends.<br />
8. WHILE THE LIGHT IS STILL AMBER—test the connectivity from PC-A to<br />
PC-B <strong>by</strong> pinging. It should not work.<br />
9. Within 60 seconds the redundant backbone line amber light will turn green.<br />
10. Test the connectivity from PC-A to PC-B again. This should be successful again.<br />
11. Stop the capture. Let’s see what we have in figure 1.<br />
253
Figure 1—Capture for ping and STP. (note: complete icmp request and replies).<br />
Manually select main and redundant backbones:<br />
1. Plug one end of a crossover cable into port “Ax” on SW-A and the other end into port<br />
“Bx” on SW-B.<br />
2. Plug one end of a crossover cable into port “Ax” on SW-B and the other end into port<br />
“Bx” on SW-C.<br />
3. Start an Ethereal capture on workstation “B.”<br />
4. Plug one end of a crossover cable into port “18” on SW-C and the other end into port<br />
“18” on SW-A. You have now created a loop in your switches. The cables in the Ax<br />
and Bx ports will have priorities of 10 (since they are 100BaseT <strong>by</strong> default) and the<br />
#18 ports will have priorities of 128. The higher priority cables will have the lower<br />
priority numbers. Do not use the Ax or Bx for either end of the cable.<br />
5. The light over the #18 ports on one end should be green and amber on the other. This<br />
line was chosen to be the redundant backbone because of its manually static priority<br />
setting in the default mode was a higher priority number (and therefore the last one to<br />
be enabled in this scenario). Stop the capture and let’s see our STP state with a cost<br />
of 10. See figure 2.<br />
254
Figure 2—STP showing cost of 10.<br />
6. We are looking at one with a cost of 110 because the 100 is added to the 10 for a total<br />
cost between two devices. Our “pure” cost for that line is 10.<br />
7. Let’s test the backup line. Unplug any one of the Ax/Bx cables that appears with<br />
green lights on both ends. Within 60 seconds the redundant backbone line amber<br />
light will turn green. This indicates the switch is going through the five STP states.<br />
Repeat steps 2-4 to return cabling to their original settings.<br />
Supplemental Activity or Challenge Lab:<br />
1. Try doing this lab with as many switches as you can. Sounds silly but it can be<br />
tricky.<br />
2. Start a ping storm <strong>by</strong> using many very large icmp packets. See what this does to your<br />
network performance and the time it takes for STP to bring up back up lines.<br />
Geeze…you thought it took long before.<br />
So What Have I Learned Here?<br />
To set up redundant lines between switches we just need to know which ports to use for<br />
best service. It really doesn’t matter which ones we use but certain ones are more<br />
preferred to others. In the next lab we will change settings.<br />
255
Basic STP with One Router<br />
Objective:<br />
To learn how to add a router into a switched network using a redundant backup line with<br />
STP.<br />
Tools and Materials:<br />
(2) workstations<br />
(4) straight through cables (st)<br />
(2) console cables<br />
(1) Cross over cable (xo)<br />
(2) 1900 series switches<br />
(1) 2500/2600 series router<br />
Lab Diagram:<br />
L0<br />
con<br />
E0<br />
st<br />
E1<br />
st<br />
2 3<br />
NIC<br />
1 ax xo bx<br />
st<br />
com1<br />
st<br />
com1<br />
workstation “A”<br />
workstation “B”<br />
Step-By-Step Instructions:<br />
1. Cable the lab as shown. Ok. Now the fun starts. Use the 83.x.x.x network with a<br />
16-bit mask. Oh don’t get complacent with the easy numbers. Pick your own<br />
routing protocol to use.<br />
2. Ping from workstation “A” to “B.” Ping from each workstation to the loopback<br />
adapter. Use trace route for all three pings to verify the paths.<br />
3. Use “sh ip route” to verify routes on the router.<br />
4. Use debug stp on the router to see the changes in stp states over the network.<br />
Take one of the main lines down and view the router messages.<br />
5. Repeat steps 2-3 again with the main line down.<br />
So What Have I Learned Here?<br />
How to add a router into a switched network using back up lines and STP. In the next lab<br />
you will work with the “metrics” with STP for selecting back up lines.<br />
256
Intermediate STP<br />
Objective:<br />
To be able to understand STP states, cost parameters, root bridges, priorities, ports and<br />
port fast mode.<br />
Tools and Materials:<br />
(4) switches<br />
(4) cross over cables<br />
(2) straight through cables<br />
(2) console cables<br />
(2) workstations<br />
Lab Design:<br />
Background:<br />
In the last lab we learned about basic STP construction. We learned Spanningtree<br />
frames called bridge protocol data units (BPDU’s) are sent and received <strong>by</strong> all<br />
switches in the network at regular intervals (usually every 2 seconds) and are used to<br />
determine the spanning tree topology. STP is implemented on switches, <strong>by</strong> default, for<br />
VLANs 1-64. This means all you have to do is plug in your redundant backbone into any<br />
available port. There are five states for every switch port:<br />
1. Blocking—port does not participate in frame-forwarding; port does not<br />
learn new addresses<br />
2. Listening—same as blocking, but switch is actively trying to bring the port<br />
into the forwarding state; the port does not learn new addresses<br />
3. <strong>Learning</strong>—port does not participate in frame-forwarding; port does learn<br />
new addresses; the switch is trying to change the port to frame-forwarding<br />
4. Forwarding—port does participate in frame forwarding; port does learn<br />
new addresses<br />
5. Disabled—port is removed from operation; administrative intervention is<br />
required to enable the port<br />
257
For each port, there are five parameters that may be changed for each port. Each of these<br />
affects which port connections are utilized as the main backbones and which are the<br />
redundant backbones:<br />
1. State—Blocking, Listening, <strong>Learning</strong>, Forwarding, Disabled<br />
2. Forward Transitions—number of times STP changing forwarding states. This<br />
number increases when STP detects network loops<br />
3. Path Cost—inversely proportional to LAN speed; path costs range from 1 to<br />
65,535—lower number means higher speed connection; default is 100.<br />
4. Priority—ranges from 0 to 255 (used in basic lab); 10BaseT priority is 128;<br />
100Bast T priority is 10<br />
5. Port Fast Mode—using this will accelerate the time it takes to bring a port into the<br />
forwarding state from blocking; Use Port Fast-Mode enabling on ports only for<br />
end station attachments; default for 10BaseT is enabled; default for 100BaseT is<br />
disabled; <strong>by</strong> default STP discovery is 30 seconds (don’t confuse this with BPDU’s<br />
every 2 seconds)<br />
With all switches reset to their factory defaults how do you think one backbone takes<br />
priority over the others if we use all 100BaseT connections? If all costs are equal, then<br />
the switch uses the MAC addresses to determine which ones will be the main and which<br />
ones will be the backup (redundant) lines.<br />
There are three steps involved in the Spanning Tree process: (1) Electing a root<br />
bridge, (2) electing root ports, and (3) electing designated ports.<br />
The root bridge is the bridge from which all other paths are decided. Only one<br />
switch can be the root bridge. The selection process uses the lowest bridge priority<br />
number first and then uses the lowest bridge ID number (the MAC address). The<br />
switches use the BPDU’s to elect a root bridge. When a switch first powers up, it will<br />
assume the role of root bridge until it is told otherwise. The default setting for <strong>CISCO</strong><br />
1900 series switches is 32768.<br />
Next the switches will search for any redundant paths or loops using BPDU’s. An<br />
election of main and backup paths is made using costs. By default, port cost is usually<br />
based upon bandwidth (as we saw in the basic lab). The port with the lowest root path<br />
cost will be elected as the root port/path. Any time a switch has a direct connection to the<br />
root switch it will serve as the root port, regardless of path cost.<br />
The designated port is the port that is advertising the lowest costs to the root<br />
bridge. When all three steps are complete the Spanning Tree is finished being set up.<br />
For this lab we will use private IP addressing with one subnet. You can use<br />
mixed subnet addresses but only <strong>by</strong> activating more complicated settings on the switches<br />
and/or using routers. Using different subnets will not allow you to ping with this<br />
topology.<br />
Step-By-Step Instructions:<br />
You should set each switch back to its factory default settings. The power should be<br />
turned off when you are finished re-setting.<br />
Calculate and identify root bridge and main and redundant backbones:<br />
1. Now then…this is a bit different than our three-switch configuration in the last lab.<br />
In that lab no matter which line was disconnected, each line still had a direct<br />
258
connection to the root switch. That is why we have added a fourth switch to this lab.<br />
Now each switch will not have a direct connection so we will have to do some<br />
research first. At this point no changes have been made to our switches (ie. we are<br />
still set to factory defaults). Turn on each switch (make sure there are no cable<br />
connections to any switch). Put a console cable from the switch console port into<br />
your PC workstation.<br />
2. Start hyperterminal (9600-8-N-1). Follow these choices: (1) select [I] for IP<br />
configuration or (2) select [M] for menus, [N] for network management, [I] for IP<br />
configuration, and then write down the MAC address of the switch (it will appear as<br />
“Ethernet address”):<br />
SW-A ____-____-____-____-____-____<br />
SW-B ____-____-____-____-____-____<br />
SW-C ____-____-____-____-____-____<br />
SW-D ____-____-____-____-____-____<br />
***Don’t forget to move the console cable to the console port of each switch. Right now<br />
you cannot telnet into each switch easily. It is quicker just to move the console<br />
cable.***<br />
3. From these MAC addresses you should be able to determine which switch <strong>by</strong> default<br />
will be the root bridge. Calculate which crossover cable will be selected as the<br />
backup line from their MAC addresses. Circle lowest MAC address as 1 st , next to<br />
lowest as 2 nd , etc.<br />
root<br />
bridge backup line<br />
SW-A Ax Bx 1 st 2 nd 3 rd 4 th<br />
SW-B Ax Bx 1 st 2 nd 3 rd 4 th<br />
SW-C Ax Bx 1 st 2 nd 3 rd 4 th<br />
SW-D Ax Bx 1 st 2 nd 3 rd 4 th<br />
The backup line will be the line between the highest two MAC addresses (3 rd and 4 th ).<br />
(The light on Ax for 3 rd will be amber).<br />
4. Turn off the power to the switches and remove the console cable.<br />
5. Plug one end of a crossover cable into port “Ax” on SW-A and the other end into port<br />
“Bx” on SW-B.<br />
6. Plug one end of a crossover cable into port “Ax” on SW-B and the other end into port<br />
“Bx” on SW-C.<br />
7. Plug one end of a crossover cable into port “Ax” on SW-C and the other end into port<br />
“Bx” on SW-D.<br />
259
8. Plug one end of a crossover cable into port “Ax” on SW-D and the other end into port<br />
“Bx” on SW-A. You have now created a loop in your switches.<br />
9. Turn on the power. After the switches cycle through their start-up procedures one <strong>by</strong><br />
one the lights over the Ax and Bx ports should change from amber-colored (Problem<br />
or not functioning) to green-colored (OK-operational). One of the lights should<br />
change back to amber. Were you right? Remember different groups on different<br />
groups of switches will have different answers…it all depends upon the MAC<br />
addresses.<br />
Manual selection of main and redundant backbones <strong>by</strong> changing port costs and priorities<br />
1. Disconnect the backbone cable that is not connected to the root bridge and is not<br />
selected as the redundant backbone.<br />
SW-A Ax Bx Root bridge (lowest MAC address)<br />
SW-B Ax Bx unplug this one<br />
SW-C Ax Bx<br />
SW-D Ax Bx (redundant backbone darkened)<br />
If you lab setting appears like the above drawing, then select the line between SW-B<br />
(Ax) and SW-C (Bx) to be disconnected. All remaining lights should be green.<br />
2. Switch the crossover cable which you just disconnected to any two ports on SW-C<br />
and SW-D (let’s just use port #7 on each). Note: this will vary dependent upon which<br />
one is the root bridge. This line should become a redundant backup, mostly because<br />
of the lower priority for the slower speed (10BaseT instead of 100BaseT). This line<br />
will now become the redundant backbone. We just forced it to be <strong>by</strong> using our<br />
knowledge of default port priority settings. (Just like we did in the last lab).<br />
3. Reconnect that cable back into the Ax and Bx ports.<br />
4. Remove one of the main crossover cables that is attached to the root bridge (like the<br />
one between SW-A (Ax) and SW-B (Bx) above).<br />
5. Give it about 60 seconds for the STP to switch the redundant backbone to a main<br />
backbone.<br />
6. Connect that crossover cable to ports #7 on SW-A and SW-B. This should<br />
reconfigure as the new redundant backbone because of the lower port priority of<br />
10BaseT connections. It should change back almost immediately.<br />
7. Now let’s go in and change the port costs for these ports. Put the console cable into<br />
the switch with the amber light of the redundant backbone line. Use [M] menus, [P]<br />
port configuration, [select port number 7], and then [C] cost. Change this value to 1.<br />
When you hit enter you should almost immediately see the line change from amber to<br />
green (from backup to main). The line with the next lowest priority will become the<br />
redundant backup line. If you change the end of the line at the port where you<br />
changed the priority (for example from port 7 to port 5) the line will become a<br />
redundant backbone again.<br />
260
8. Change the cost of port 7 back to 100 and return the line back to the Ax-Bx ports.<br />
9. Repeat if needed on the Ax-Bx ports.<br />
Supplemental Lab or Challenge Activity:<br />
1. Use your protocol inspector to capture and view STP packets with your changes.<br />
So What Did I Learn Here?<br />
Now you can manually configure backbones between switches and automatically set<br />
priorities for backbone selection using the port configuration menu and costs. Just<br />
remember this is dependent upon the MAC addresses, with all other factors set to default.<br />
This lab also does not work well with three switches because each line will still be<br />
connected to the root bridge. To work well you really need at least 4 switches for this<br />
lab. In the next couple of labs you will be adding routers to this “flat-switching”<br />
network.<br />
261
Basic VLAN<br />
Objective:<br />
To learn how to construct and understand how to use basic Virtual LAN’s in a network.<br />
Tools and Materials:<br />
(1) <strong>CISCO</strong> switch (1900 series)<br />
(2) straight-through cables<br />
(2) Windows PC workstations with Hyperterminal and Ethereal installed<br />
(1) console cable<br />
Lab Diagram:<br />
NIC<br />
4 14<br />
st<br />
st<br />
NIC<br />
workstation “A” workstation “B”<br />
192.168.1.1/24 192.168.1.2/24<br />
Background:<br />
Virtual Lan’s (VLAN’s) are used to keep devices from communicating to each other<br />
without the services of a layer 3 device (router). If you were designing a school it would<br />
be nice to use a VLAN for teachers and a VLAN for students. No communication would<br />
be possible without the use of a router. So let’s get to the “learning <strong>by</strong> doing!”<br />
Step-By-Step Instructions:<br />
1. Set up and cable the lab as shown. The switch requires no ip address, mask or<br />
gateway.<br />
2. Ping from workstation A to B using DOS. It should work just fine.<br />
3. Now let’s put the teachers on one VLAN and the students on another. From<br />
the switch console let’s create the two VLANs:<br />
a. Click on [M] for menus<br />
b. Click on [V] for VLANs<br />
c. Click on [A] for add a VLAN (this will become VLAN #2)<br />
d. Click on [1] for “Ethernet” type VLAN<br />
e. Click on [S] to save and exit<br />
f. Click on [V] for VLANs<br />
g. Click on [A] for add a VLAN (this will become VLAN #3)<br />
h. Click on [1] for “Ethernet” type VLAN<br />
i. Click on [S] to save and exit<br />
262
4. Now we need to assign ports to the VLAN’s:<br />
a. Click on [E] for VLAN membership<br />
b. Click on [V] for VLAN assignment<br />
c. **Type in the ports to assign for the VLAN: 4-12 (I have a 24-port switch)<br />
d. Click on [2] to assign them to VLAN #2<br />
e. Click on [E] for VLAN membership<br />
f. Click on [V] for VLAN assignment<br />
g. **Type in the ports to assign for the VLAN: 13-24 (I have a 24-port<br />
switch)<br />
h. Click on [3] to assign them to VLAN #3<br />
i. All done! You can exit back to the main menu.<br />
** We typically do not want to use VLAN #1…we reserve it for network<br />
management functions…I saved 3 ports on my 24 port switch for VLAN<br />
#1…If you take the semester 7 “Building <strong>CISCO</strong> Switched Multi-Layered<br />
<strong>Network</strong>s” then you will learn more about using VLAN 1…for now restrict<br />
users to VLAN #2 and above.<br />
5. Try pinging again from workstation A to B using DOS. It should not work<br />
now. The VLAN’s “electrically separate” the two networks…it’s kind of like<br />
using two switches.<br />
Supplemental Lab or Challenge Activity:<br />
1. Add a protocol inspector and observe the VLAN information.<br />
2. Go to <strong>CISCO</strong>’s website and research VLAN information.<br />
3. Try setting up a switch with 5 VLAN’s.<br />
So What Have I Learned Here?<br />
VLANs are nice to use in large networks. Instead of physically separating network users<br />
from each other with separate (and sometimes expensive devices) we can now do it<br />
logically without using added equipment. In the next lab we will add a router into our<br />
little lab design and see how it improves or messes up our network<br />
263
Basic VLAN with One Router<br />
Objective:<br />
To learn how to construct and understand how to use basic Virtual LAN’s in a network.<br />
Tools and Materials:<br />
(1) <strong>CISCO</strong> switch (1900 series)<br />
(4) straight-through cables<br />
(2) Windows PC workstations with Hyperterminal and Ethereal installed<br />
(1) console cable<br />
(1) Router<br />
Lab Diagram:<br />
E0<br />
E1<br />
5 15<br />
(VLAN 2) 4 14 (VLAN 3)<br />
NIC<br />
st<br />
st<br />
NIC<br />
workstation “A” workstation “B”<br />
192.168.1.1/24 192.168.2.1/24<br />
Background:<br />
Notice in this lab that we have two subnets now…this is required for our two different<br />
ports on our router. So with our VLAN’s, especially because they are on different<br />
subnets, now they really should not be able to communicate…right? Wrong. Remember<br />
our VLAN’s can act as substitutes for equipment…this is a lab we have done several<br />
times before EXCEPT that we used multiple switches…we can redo it with one switch<br />
and some VLANs configured on it to save on equipment. As a matter of fact they can<br />
communicate just fine and dandy.<br />
Step-By-Step Instructions:<br />
1. Set up and cable the lab as shown. The switch requires no ip address, mask or<br />
gateway. Pick out the IP addresses for the router Ethernet ports that would work with<br />
the IP addresses assigned to the workstations. Don’t forget to add a routing protocol<br />
and advertise/publish your networks.<br />
2. Now let’s put the teachers on one VLAN and the students on another (pick which one<br />
is which). From the switch console let’s create the two VLANs:<br />
a. Click on [M] for menus<br />
b. Click on [V] for VLANs<br />
264
c. Click on [A] for add a VLAN (this will become VLAN #2)<br />
d. Click on [1] for “Ethernet” type VLAN<br />
e. Click on [S] to save and exit<br />
f. Click on [V] for VLANs<br />
g. Click on [A] for add a VLAN (this will become VLAN #3)<br />
h. Click on [1] for “Ethernet” type VLAN<br />
i. Click on [S] to save and exit<br />
3. Now we need to assign ports to the VLAN’s:<br />
a. Click on [E] for VLAN membership<br />
b. Click on [V] for VLAN assignment<br />
c. **Type in the ports to assign for the VLAN: 4-12 (I have a 24-port switch)<br />
d. Click on [2] to assign them to VLAN #2<br />
e. Click on [E] for VLAN membership<br />
f. Click on [V] for VLAN assignment<br />
g. **Type in the ports to assign for the VLAN: 13-24 (I have a 24-port<br />
switch)<br />
h. Click on [3] to assign them to VLAN #3<br />
i. All done! You can exit back to the main menu.<br />
** We typically do not want to use VLAN #1…we reserve it for network<br />
management functions…I saved 3 ports on my 24 port switch for VLAN #1…If you<br />
take the semester 7 “Building <strong>CISCO</strong> Switched Multi-Layered <strong>Network</strong>s” then you<br />
will learn more about using VLAN 1…for now restrict users to VLAN #2 and above.<br />
4. Try pinging again from workstation A to B using DOS. It should work. The<br />
VLAN’s “electrically separate” the two networks but the router allows<br />
communication between them.<br />
Supplemental Lab or Challenge Activity:<br />
1. Add a protocol inspector and observe the VLAN information. You will have to put<br />
one on each subnet…alas a limitation of our mighty Ethereal…it only collects<br />
information from the directly attached subnet.<br />
2. Go to <strong>CISCO</strong>’s website and research VLAN information.<br />
So What Have I Learned Here?<br />
It’s ok if you are confused right now…I showed you this cool tool for saving on<br />
resources and then wiped out any hope <strong>by</strong> adding a router. Later on you will learn about<br />
access control lists (ACL’s) on routers…these will allow you to deny communications<br />
between VLAN’s once again if you want…so buck up! You are coming along nicely. In<br />
the next lab we take this design a step further <strong>by</strong> creating a partially meshed “flatswitching”<br />
network with four switches. That’s right…we are going to lose the router and<br />
set up redundancy between several switches and VLANs.<br />
265
Intermediate VLAN<br />
Objective:<br />
To learn how to construct and understand how to configure VLAN’s in a partiallymeshed<br />
flat-switching network.<br />
Tools and Materials:<br />
(4) <strong>CISCO</strong> switch (1900 series)<br />
(4) straight-through cables (st)<br />
(4) Windows PC workstations with Hyperterminal and Ethereal installed<br />
(1) console cable<br />
(4) Cross-over cables (xo)<br />
Lab Diagram:<br />
Teachers<br />
Students<br />
Master<br />
Master<br />
VLAN 2 VLAN 3<br />
4 5 14 15<br />
5 15 5 15<br />
(VLAN 2) 4 14 (VLAN 3) (VLAN 2) 4 14 (VLAN 3)<br />
NIC<br />
st<br />
st<br />
NIC<br />
workstation “A” workstation “B” workstation “a” workstation “b”<br />
192.168.1.1/24 192.168.2.1/24 192.168.1.2/24 192.168.2.2/24<br />
Step-By-Step Instructions:<br />
1. Set up and cable the lab as shown. Do not forget to use cross-over cables<br />
from switch to switch.<br />
2. A should only be able to ping to a.<br />
3. B should only be able to ping to b.<br />
Supplemental Lab or Challenge Activity:<br />
1. How would you use the Ax and Bx ports for faster connectivity?<br />
2. Why do you think we used “master” VLAN switches? I know we could have<br />
done this cheaper and easier with only two switches. Draw that diagram with<br />
only two switches. As you progress you will see why I did this lab in this<br />
manner.<br />
So What Have I Learned Here?<br />
In this quick little lab you learned about setting up a partially meshed VLAN network.<br />
For most of the labs for this section you will build upon this design.<br />
266
Mixing it up: VLAN’s with STP<br />
Objective:<br />
To learn how to construct and a network using VLAN’s and STP for redundancy.<br />
Tools and Materials:<br />
(4) <strong>CISCO</strong> switch (1900 series)<br />
(4) straight-through cables (st)<br />
(4) Windows PC workstations with Hyperterminal and Ethereal installed<br />
(1) console cable<br />
(6) Crossover cables (xo)<br />
Lab Diagram:<br />
Teachers<br />
Students<br />
Master<br />
Master<br />
VLAN 2 VLAN 3<br />
4 5 14 15<br />
5 15 5 15<br />
(VLAN 2) 4 14 (VLAN 3) (VLAN 2) 4 14 (VLAN 3)<br />
NIC<br />
st<br />
st<br />
NIC<br />
workstation “A” workstation “B” workstation “a” workstation “b”<br />
192.168.1.1/24 192.168.2.1/24 192.168.1.2/24 192.168.2.2/24<br />
Step-By-Step Instructions:<br />
1. Set up and cable the lab as shown. Do not forget to use crossover cables from switch<br />
to switch. On the top redundant cable we will be connecting VLAN 2 with<br />
redundancy. Plug it into port 7 on each lower switch. On the lower redundant cable<br />
we will be connecting VLAN 3 with redundancy. Plug it into port 17 on each lower<br />
switch.<br />
2. A should only be able to ping to a.<br />
3. B should only be able to ping to b.<br />
4. Now lets test the backup for VLAN 2. Unplug the crossover cable in port 5 on the<br />
lower left switch in our diagram. This will force the crossover cable between ports 7<br />
to become active. Once STP has had a chance to activate that line then A should be<br />
able to ping a once again. Go ahead and plug the crossover cable back into port 5.<br />
5. Now lets test the backup for VLAN 3. Unplug the crossover cable in port 15 on the<br />
lower left switch in our diagram. This will force the crossover cable between ports 17<br />
to become active. Once STP has had a chance to activate that line then A should be<br />
able to ping a once again. Go ahead and plug the crossover cable back into port 15.<br />
267
Supplemental Lab or Challenge Activity:<br />
1. How would you use the Ax and Bx ports for faster connectivity?<br />
2. Where else could we add redundancy? Be creative.<br />
So What Have I Learned Here?<br />
The numbers of labs left keep getting smaller and the hits just keep getting bigger! We<br />
are learning how to mix VLAN’s and STP…but are not adding in any routers just yet.<br />
We will do a couple of other labs and then come back to this design for our WECIL’s.<br />
268
Subnetting Example: ABC Packaging<br />
Objective:<br />
To use your subnet knowledge to design an IP addressing scheme for the ABC<br />
Packaging.<br />
Tools and Materials:<br />
Paper and pencil<br />
Background:<br />
(from Part 1) You are working as the network administrator for ABC Packaging. You<br />
are to design a network that focuses upon scalability and adaptability. There are five<br />
departments: Administration (14 people, 5 printers), Engineering (22 people, 5 printers, 1<br />
file server), Production (5 people), Accounting (11 people, 4 printers, 1 database and file<br />
server), and Sales/Marketing (11 people, 4 printers, 1 file server). Each department will<br />
require a separate subnet. The servers will have their own subnet. Be sure to connect<br />
them to the Internet with a T-1 line. You task is to design an IP addressing scheme that<br />
will address all current needs as well as future expandability. If you see anything that<br />
may want to address feel free to note it. Scalability, adaptability, reliability and<br />
performance are the key issues in this design. You will be using private addressing in<br />
your network.<br />
Continued:<br />
Ok…great…you just got your wonderful network designed and implemented, so now you<br />
know why it needed to be adaptable: the “eccentric” president read an article in the<br />
“Harvard Business Review” (yeah…he could almost understand the big words) and<br />
wanted to implement a divisional team format. Sounds good to everyone but it is really<br />
going to test your knowledge of networking to make it work. Every division will have<br />
engineers, accountants, and sales people. Where before they all were in their own little<br />
area connected to a switch, now they are scattered everywhere. You could buy tons of<br />
switches to make that work OR you could use your knowledge of switching technology<br />
to move them around nicely and easily. The new divisions are: north (5 engineers, 1<br />
accountant, and 2 sales people), south (4 engineers, 1 accountant, and 2 sales people),<br />
east (4 engineers, 1 accountant, and 2 sales people), west (5 engineers, 1 accountant, and<br />
2 sales people), special projects/ R&D (4 engineers, 1 accountant, and 2 sales people),<br />
and the administration/production staff (6 accountants, 1 sales person, and 19<br />
production).<br />
269
Basic VTP<br />
Objective:<br />
In this lab you will learn the basics of the Virtual Trunking Protocol (VTP). Also you<br />
will learn how and why it is used with switches in networks.<br />
Tools and Materials:<br />
(3) <strong>CISCO</strong> switch (1900 series)<br />
(3) straight-through cables (st)<br />
(3) Windows PC workstations with Hyperterminal and Ethereal installed<br />
(1) console cable<br />
(3) Crossover cables (xo)<br />
Lab Diagram:<br />
1<br />
bx ax workstation “a”<br />
192.168.1.1/24<br />
ax<br />
bx<br />
1 1<br />
workstation “c”<br />
workstation “b”<br />
192.168.1.3/24 192.168.1.2/24<br />
Background:<br />
Virtual Trunking Protocol (VTP) allows us to control network broadcasts from one<br />
switch leg to another. In our diagram above if we sent a broadcast from workstation B<br />
(for example, ping 192.168.1.255) then each switch and workstation would receive that<br />
broadcast message. Sometimes we may find our networks becoming congested and need<br />
to control those broadcasts a little bit better, especially in Novell networks. VTP is “off”<br />
<strong>by</strong> default on each port of a switch. This will allow all broadcasts through. If we enable<br />
(<strong>by</strong> turning VTP “on”) then we will stop ALL broadcasts to that port. It is kind of a<br />
double-edged sword because you cannot really be selective about which broadcasts to<br />
allow through…you can only select all of them. If we enable VTP on the bx port on the<br />
top switch you will stop any broadcasts from reaching workstation c.<br />
Step-By-Step Instructions:<br />
1. Set up and cable the lab as shown. Do not forget to use crossover cables from switch<br />
to switch.<br />
2. Start an Ethereal capture.<br />
3. Ping from b to c.<br />
270
4. Stop the capture. You should see good icmp request and reply statements. It should<br />
look something like this:<br />
Figure 1—Good icmp request and replies seen.<br />
5. a should be able to ping to b and c.<br />
6. b should be able to ping to a and c.<br />
7. c should be able to ping to a and b.<br />
8. Now let’s go and “enable” VTP on the bx port on the top switch:<br />
a. From the main menu, click on [M] for menus.<br />
b. Click on [V] for VLAN assignments<br />
c. Click on [T] for Trunk Configuration (only A and B are allowed to be<br />
trunks)<br />
d. Type in [b] to make changes to port bx<br />
e. Click on [T] for trunking (off <strong>by</strong> default)<br />
f. Type “1” to enable VTP (turn it on)<br />
g. Exit all the way out to the main menu if you want.<br />
9. Start the Ethereal capture again.<br />
10. Ping from workstation b to c again. (It should not work…“Request Timed Out”).<br />
11. Stop the Ethereal capture. You should see only icmp requests…no replies<br />
anywhere…this is because the VTP stops the requests from getting through. You<br />
should see something like figure 2 on the next page.<br />
271
Figure 2—Only ping requests with VTP enabled.<br />
12. Put VTP back on the switch. See the Switch Maintenance Lab for more in-depth<br />
instructions.<br />
Supplemental Lab or Challenge Activity:<br />
1. Someone asked me why we didn’t just enable VTP on the port for workstation C on<br />
the lower left switch. Well that is another option too. Can you think of reasons to<br />
do this or to not do this?<br />
2. Go out to <strong>CISCO</strong> and research VTP. Is this associated with VLAN’s in any way?<br />
So What Have I Learned Here?<br />
In this lab you have learned on method to control broadcasts to a port or switch. I really<br />
would not have included this here but I have heard some students mention basic VTP<br />
might have been on their test (hint, hint, wink, wink). I really cannot say for sure because<br />
we are not allowed to discuss test items. It was not on mine.<br />
272
Part 3 Command Review<br />
Objective:<br />
To list all commands utilized in Part 3 of this textbook.<br />
Step-<strong>by</strong>-Step Instructions:<br />
1. For each of the commands give a description of the command, the prompt for<br />
configuration, and any abbreviations for that command. You will have to list the<br />
commands here. ☺<br />
Prompt Command Shortcut Description<br />
273
Prompt Command Shortcut Description<br />
274
Whole Enchilada/Crazy Insano Lab #1 (WECIL): Switching<br />
Objective:<br />
To put all or most of the concepts together into one large lab. In this lab we will be<br />
simulating a school with 3 rooms using VLANs and STP.<br />
Tools and Materials:<br />
(5) <strong>CISCO</strong> switches (1900 series)<br />
(6) straight-through cables (st)<br />
(6) Windows PC workstations with Hyperterminal and Ethereal installed<br />
(1) console cable<br />
(10) Crossover cables (xo)<br />
Lab Diagram:<br />
Teachers<br />
Students<br />
Master<br />
Master<br />
VLAN 2 VLAN 3<br />
Room 101 102 103<br />
VLAN2 VLAN 3 VLAN2 VLAN 3 VLAN2 VLAN 3<br />
Step-By-Step Instructions:<br />
1. Devise an IP addressing scheme for the network shown. Be sure to include<br />
subnet masks and gateways for devices. Include an MDF/IDF drawing and a<br />
Hierarchical design drawing.<br />
2. Cable the lab as shown.<br />
3. All VLAN 2 devices should have communication to all VLAN 2 devices only.<br />
4. Test your redundant lines for VLAN 2.<br />
5. All VLAN 3 devices should have communication to all VLAN 3 devices only.<br />
6. Test your redundant lines for VLAN 3.<br />
7. Add redundant lines in between the individual room switches and the master<br />
VLAN switches.<br />
275
Whole Enchilada/Crazy Insano Lab #2 (WECIL): Switching<br />
Objective:<br />
To put all or most of the concepts together into one large lab. In this lab we will be<br />
simulating a school with 3 rooms using VLANs and STP.<br />
Tools and Materials:<br />
(5) <strong>CISCO</strong> switches (1900 series)<br />
(8) straight-through cables (st)<br />
(6) Windows PC workstations with Hyperterminal and Ethereal installed<br />
(1) console cable<br />
(10) Crossover cables (xo)<br />
(1) Router<br />
Lab Diagram:<br />
Teachers<br />
Students<br />
Master<br />
Master<br />
VLAN 2 VLAN 3<br />
Room 101 102 103<br />
VLAN2 VLAN 3 VLAN2 VLAN 3 VLAN2 VLAN 3<br />
Step-By-Step Instructions:<br />
1. In this lab we will do the same lab but add a router to the mix. How does that<br />
change your IP addressing scheme? So the next time you design a switching<br />
network that may include routers in the future how would you design the IP<br />
scheme. Redraw your network.<br />
2. All VLAN 2 devices should have communication to all devices.<br />
3. Test your redundant lines for VLAN 2.<br />
4. All VLAN 3 devices should have communication to all devices.<br />
5. Test your redundant lines for VLAN 3.<br />
6. Add redundant lines in between the individual room switches and the master<br />
VLAN switches.<br />
276
Whole Enchilada/Crazy Insano Lab #3 (WECIL): Switching<br />
Objective:<br />
To put all or most of the concepts together into one large lab. In this lab we will be<br />
simulating a school with 3 rooms using VLANs and STP.<br />
Tools and Materials:<br />
(5) <strong>CISCO</strong> switches (1900 series)<br />
(8) straight-through cables (st)<br />
(6) Windows PC workstations with Hyperterminal and Ethereal installed<br />
(1) console cable<br />
(10) Crossover cables (xo)<br />
(1) router<br />
Lab Diagram:<br />
Teachers<br />
Students<br />
Master<br />
Master<br />
VLAN 2 VLAN 3<br />
Room 101 102 103<br />
VLAN2 VLAN 3 VLAN2 VLAN 3 VLAN2 VLAN 3<br />
Step-By-Step Instructions:<br />
1. How come we don’t need any IP addresses, subnet masks, and gateways on<br />
our switches? Try this lab <strong>by</strong> redesigning your network with IP addresses,<br />
subnet masks and gateways on your switches.<br />
2. All VLAN 2 devices should have communication to all devices.<br />
3. Test your redundant lines for VLAN 2.<br />
4. All VLAN 3 devices should have communication to all devices.<br />
5. Test your redundant lines for VLAN 3.<br />
6. Add redundant lines in between the individual room switches and the master<br />
VLAN switches.<br />
277
Whole Enchilada/Crazy Insano Lab #4 (WECIL): Switching<br />
Objective:<br />
To put all or most of the concepts together into one large lab. In this lab we will be<br />
simulating a school with 3 rooms using VLANs and STP.<br />
Tools and Materials:<br />
(5) <strong>CISCO</strong> switches (1900 series)<br />
(6) straight-through cables (st)<br />
(6) Windows PC workstations with Hyperterminal and Ethereal installed<br />
(1) console cable<br />
(10) Crossover cables (xo)<br />
(1) DCE/DTE serial cable<br />
(2) routers<br />
Lab Diagram:<br />
L0 172.16.1.1<br />
S0 10.0.0.1/8 (DCE)<br />
S0<br />
10.0.0.2/8<br />
Teachers<br />
Students<br />
Master<br />
Master<br />
VLAN 2 VLAN 3<br />
Room 101 102 103<br />
VLAN2 VLAN 3 VLAN2 VLAN 3 VLAN2 VLAN 3<br />
Step-By-Step Instructions:<br />
1. Let’s repeat the last lab but add a web connection.<br />
2. All VLAN 2 devices should have communication to all devices.<br />
3. Test your redundant lines for VLAN 2.<br />
4. All VLAN 3 devices should have communication to all devices.<br />
5. Test your redundant lines for VLAN 3.<br />
6. Each workstation should be able to ping the loopback on the ISP router.<br />
278
Whole Enchilada/Crazy Insano Lab #5 (WECIL): Switching<br />
Objective:<br />
There is nothing to do here…I just wanted to show you the progression of “equipment” in<br />
these last wecil’s. The Catalyst 4000/5000 would take the place of the upper-layer stuff.<br />
More or less the Core layer. This is a much better design with redundancy built in than in<br />
the last WECIL.<br />
Lab Diagram:<br />
L0 172.16.1.1<br />
S0 10.0.0.1/8 (DCE)<br />
S0<br />
10.0.0.2/8<br />
Teachers<br />
Students<br />
Master<br />
Master<br />
VLAN 2 VLAN 3<br />
Room 101 102 103<br />
VLAN2 VLAN 3 VLAN2 VLAN 3 VLAN2 VLAN 3<br />
279
Part 4:<br />
More on Routing<br />
280
Paper Lab: <strong>CISCO</strong> Three-Layer Hierarchical Model<br />
Match the function with the layer.<br />
1. Provides workgroup and user access to the network. core<br />
2. Provides policy-based connectivity. distribution<br />
3. Provides optimal transport between sites. Access<br />
For the following please answer (1) for core-layer function, (2) for distribution-layer<br />
function, or (3) for access-layer function.<br />
4. _____ Usually a LAN or group of LAN’s.<br />
5. _____ Gives network services to multiple LAN’s within a WAN.<br />
6. _____ Provides users with network access.<br />
7. _____ Provides fast wide-area connections between geographically remote sites.<br />
8. _____ Where ACL’s are found.<br />
9. _____ Where security policies are implemented.<br />
10. _____ Used to tie together a number of campus networks in a WAN.<br />
11. _____ Where servers are connected.<br />
12. _____ Where the campus backbone is found.<br />
13. _____ Usually point-to-point links.<br />
14. _____ Broadcast/multicast domain definition.<br />
15. _____ Where filters are found.<br />
16. _____ T1/T3 lines are usually used here.<br />
17. _____ Where servers that will be access <strong>by</strong> different workgroups would be<br />
placed.<br />
18. _____ Used to connect together buildings on a single campus.<br />
19. _____ Shared bandwidth.<br />
20. _____ Provides boundary definition.<br />
21. _____ Frame Relay lines are usually used here.<br />
22. _____ Fast Ethernet is usually used here.<br />
23. _____ Switched bandwidth.<br />
24. _____ SMDS lines are usually used here.<br />
25. _____ Provides a fast path between remote sites.<br />
26. _____ MAC-layer filtering.<br />
27. _____ Departmental or workgroup access to the next layer.<br />
28. _____ Load Sharing, redundancy, and rapid convergence are essential.<br />
29. _____ Microsegmentation.<br />
30. _____ The layer where packet manipulation occurs.<br />
31. _____ Address or area aggregation.<br />
32. _____ Connects LAN’s into WAN’s.<br />
33. _____ Efficient use of bandwidth is a key concern here.<br />
34. _____ VLAN routing.<br />
35. _____ Where any media transitions occur.<br />
36. _____ Isolation of broadcast traffic.<br />
281
Match the <strong>CISCO</strong> networking device with its associated layer. Use a (1) for core-layer<br />
device, (2) for a distribution-layer device, or a (3) for an access-layer device.<br />
Routers: Layer: Features:<br />
700 _____ _______________________________________________<br />
800 _____ _______________________________________________<br />
1600 _____ _______________________________________________<br />
1720 _____ _______________________________________________<br />
2500 _____ _______________________________________________<br />
2600 _____ _______________________________________________<br />
3600 _____ _______________________________________________<br />
4000 _____ _______________________________________________<br />
7000 _____ _______________________________________________<br />
Switches:<br />
1548 _____ _______________________________________________<br />
1900 _____ _______________________________________________<br />
2900 _____ _______________________________________________<br />
4000 _____ _______________________________________________<br />
5000 _____ _______________________________________________<br />
6000 _____ _______________________________________________<br />
8000 _____ _______________________________________________<br />
282
Protocol Deathmatch: RIP versus RIPv2<br />
Objectives:<br />
To be able to discern between RIP and RIPv2 and when to use each. (A good review of<br />
part 2)<br />
Lab Design:<br />
Workstation “A”<br />
Router name: robert morris worm<br />
Workstation “B”<br />
Step-<strong>by</strong>-Step Instructions for RIP:<br />
1. Set up the network shown using a 24-bit mask with a Class “C” private address using<br />
RIP as the routing protocol. Don’t forget to advertise the routes.<br />
2. Test ping from workstation A to workstation B.<br />
3. Do a trace route from workstation A to workstation B.<br />
4. On each router view and record its routing table.<br />
5. Turn on all debug on Robert and Worm.<br />
6. Test ping from workstation A to workstation B and view the ICMP messages on<br />
Robert and Worm.<br />
7. Change the serial lines to a 30-bit mask. (hint: the IP numbers will also need to be<br />
changed).<br />
8. Repeat steps 2-6. About 60% of the time you will not be able to ping from<br />
workstation A to workstation B. A known quirk with RIP. Don’t sweat it if it works.<br />
9. Switch to using RIP version 2 on all routers.<br />
10. Repeat steps 2-6. So why do you think it works with RIPv2 and not RIP? Why or<br />
when would you use RIPv2 instead of RIP? Why or when would you use RIP instead<br />
of RIPv2?<br />
Guest Router Name Derivation<br />
In 1991 Robert Morris became the first individual convicted for violating the 1986<br />
Federal Computer Fraud and Abuse Act. He created an internet worm as part of a<br />
graduate school project whose sole purpose was to expose security vulnerabilities in<br />
networks so that network administrators could pro-actively fix any security holes.<br />
Unfortunately the project went amiss and computer networks crashed left and right when<br />
it was released errantly on the Internet. In hind-sight he should have kept it a little better<br />
under control. It just goes to show you that good intentions also get punished…<br />
“ignorance of the law is no excuse.”<br />
283
Basic IGRP<br />
Objective:<br />
To learn about the basics of the Interior Gateway Routing Protocol (IGRP) <strong>by</strong> making a<br />
small network.<br />
Tools and Materials:<br />
(2) PC/workstations<br />
(2) Routers<br />
(2) Switches<br />
(4) Straight-through cables<br />
(1) DCE serial cable<br />
(1) DTE serial cable<br />
(2) rollover cables<br />
Lab Diagram:<br />
e0<br />
st<br />
con<br />
s0<br />
s1<br />
con<br />
st<br />
e0<br />
NIC<br />
st ro ro st<br />
COM1<br />
COM1<br />
NIC<br />
Workstation “A”<br />
Workstation “B”<br />
Addressing:<br />
Routers<br />
Hostnames John Draper<br />
E0 184.34.67.1/16 184.36.67.1/16<br />
S0 184.35.67.1 (DCE) n/a<br />
S1 n/a 184.35.67.2/16 (DTE)<br />
Workstations A B<br />
IP 184.34.67.3 184.36.67.3<br />
SM 255.255.0.0 255.255.0.0<br />
GW 184.34.67.1 184.36.67.1<br />
Background:<br />
IGRP is proprietary distance-vector routing protocol created <strong>by</strong> <strong>CISCO</strong> in the later<br />
1980’s to overcome some of the limitations of RIP. It uses bandwidth and delay <strong>by</strong><br />
default as its metrics. It can, however, use other metrics such as reliability, load, and<br />
MTU. IGRP uses autonomous numbers for setting up its routing protocol. An<br />
autonomous system number is used to set up many different IGRP networks within our<br />
284
company and control access between them. There are three types of routes that are<br />
advertised with IGRP: internal, system and external. You will learn more about these in<br />
a later lab.<br />
Like RIP we must first enable IGRP and then advertise, publish or associate our<br />
networks with IGRP (all three things are the same…I have seen it many different ways<br />
on tests—hint-hint). IGRP shares characteristics of RIP that we saw in Part 2: it does not<br />
pass subnet mask information (geek speak: it truncates at the classful boundary”).<br />
Step-By-Step Instructions:<br />
1. Set up and cable the lab as shown. Then set up the basics and interfaces on<br />
each router.<br />
2. Add in IGRP as the routing protocol and advertise, publish or associate the<br />
networks like this:<br />
john(config)#router igrp 38<br />
john(config-router)#network 184.34.0.0<br />
john(config-router)#network 184.35.0.0<br />
draper(config)#router igrp 38<br />
draper(config-router)#network 184.35.0.0<br />
draper(config-router)#network 184.36.0.0<br />
Notice how I picked (out of thin air) to use #38 as my autonomous system<br />
number. It really does not matter which one I use just as long as I use the<br />
same one on both sides. Notice how I advertised (published/associated) my<br />
networks at the classful boundary…a limitation of IGRP.<br />
3. Test <strong>by</strong> pinging from one workstation to the other. It should work just fine.<br />
Do a show ip route. You should see something like this:<br />
draper#sh ip route<br />
Codes: C - connected, S - static, I - IGRP, R - RIP, M - mobile, B - BGP<br />
D - EIGRP, EX - EIGRP external, O - OSPF, IA - OSPF inter area<br />
N1 - OSPF NSSA external type 1, N2 - OSPF NSSA external type 2<br />
E1 - OSPF external type 1, E2 - OSPF external type 2, E - EGP<br />
i - IS-IS, L1 - IS-IS level-1, L2 - IS-IS level-2, * - candidate default<br />
U - per-user static route, o - ODR<br />
Gateway of last resort is not set<br />
I 184.34.0.0/16 [100/8576] via 184.35.67.1, 00:00:06, Serial0/1<br />
C 184.35.0.0/16 is directly connected, Serial0/1<br />
C 184.36.0.0/16 is directly connected, Ethernet0/0<br />
draper#<br />
285
C:\WINDOWS\Desktop>ping 184.36.67.3<br />
Pinging 184.36.67.3 with 32 <strong>by</strong>tes of data:<br />
Reply from 184.36.67.3: <strong>by</strong>tes=32 time=21ms TTL=126<br />
Reply from 184.36.67.3: <strong>by</strong>tes=32 time=21ms TTL=126<br />
Reply from 184.36.67.3: <strong>by</strong>tes=32 time=21ms TTL=126<br />
Reply from 184.36.67.3: <strong>by</strong>tes=32 time=21ms TTL=126<br />
Ping statistics for 184.36.67.3:<br />
Packets: Sent = 4, Received = 4, Lost = 0 (0% loss),<br />
Approximate round trip times in milli-seconds:<br />
Minimum = 21ms, Maximum = 21ms, Average = 21ms<br />
4. Let’s test IGRP’s classful routing capability <strong>by</strong> changing the serial cable<br />
addresses to 192.168.1.1/24 and 192.168.1.2/24. Then try to ping again.<br />
Sometimes it might work, but most times it won’t work. Remember we want<br />
reliability for our networks too.<br />
draper#sh ip route<br />
Codes: C - connected, S - static, I - IGRP, R - RIP, M - mobile, B - BGP<br />
D - EIGRP, EX - EIGRP external, O - OSPF, IA - OSPF inter area<br />
N1 - OSPF NSSA external type 1, N2 - OSPF NSSA external type 2<br />
E1 - OSPF external type 1, E2 - OSPF external type 2, E - EGP<br />
i - IS-IS, L1 - IS-IS level-1, L2 - IS-IS level-2, * - candidate default<br />
U - per-user static route, o - ODR<br />
Gateway of last resort is not set<br />
C 184.35.0.0/16 is directly connected, Serial0/1<br />
C 184.36.0.0/16 is directly connected, Ethernet0/0<br />
draper#<br />
C:\WINDOWS\Desktop>ping 184.36.67.3<br />
Pinging 184.36.67.3 with 32 <strong>by</strong>tes of data:<br />
Reply from 184.34.67.1: Destination host unreachable.<br />
Reply from 184.34.67.1: Destination host unreachable.<br />
Reply from 184.34.67.1: Destination host unreachable.<br />
Reply from 184.34.67.1: Destination host unreachable.<br />
Ping statistics for 184.36.67.3:<br />
Packets: Sent = 4, Received = 4, Lost = 0 (0% loss),<br />
Approximate round trip times in milli-seconds:<br />
Minimum = 0ms, Maximum = 0ms, Average = 0ms<br />
C:\WINDOWS\Desktop><br />
286
Supplemental Lab or Challenge Activity:<br />
1. Change the autonomous number on router to 39. Can the two workstations<br />
still ping each other?<br />
2. Repeat this lab using a class “A” IP addressing scheme.<br />
3. Repeat this lab using a class “C” IP addressing scheme.<br />
So What Did I Learn Here?<br />
In this lab you learned about a new routing protocol called IGRP. Over the next few labs<br />
we will learn more about this protocol and several other ones too. This will help build<br />
your repertoire of routing protocols and look pretty darned cool on a resume too.<br />
Guest Router Name Derivation<br />
John Draper, a.k.a. “Captain Crunch,” gained notoriety in the 1970’s as a “phreaker”<br />
(phone hacker) when he figured out how pay phones work. He discovered when you put<br />
a dime in a payphone (calls in the 1970’s used to be 10 cents) the telephone had an<br />
electromechanical converter that sent a 2600-hertz tone to the phone company as a<br />
“signal” that a dime had been inserted into the telephone. About the same time he<br />
discovered that a whistle given out in boxes of Captain Crunch cereal emitted a frequency<br />
of 2600 hertz. Aha! He then could make telephone calls essentially for free. Shortly<br />
thereafter he also discovered the “Oscar Meyer Wiener” whistles also emitted a 2600-<br />
hertz frequency. Today’s pay phones still work on the same premises. The 2600-hertz<br />
frequency was also used to derive the name for “2600” magazine, better known as “The<br />
Hacker Quarterly” started <strong>by</strong> Emmanuel Goldstein in 1984.<br />
287
Basic IGRP with Protocol Inspector<br />
Objective:<br />
To learn how to capture and dissect IGRP packets over a simple two-router network.<br />
Tools and Materials:<br />
(3) PC/workstations<br />
(2) Routers<br />
(3) Switches<br />
(7) Straight-through cables<br />
(2) rollover cables<br />
Lab Diagram:<br />
Workstation “A” Workstation “C” Workstation “B”<br />
Addressing:<br />
Routers<br />
Hostnames Kevin Paulsen<br />
E0 38.12.245.1/8 40.12.245.1/8<br />
E1 39.12.245.1 39.12.245.2/8<br />
Workstations A B C<br />
IP 38.12.245.2 40.12.245.2 39.12.245.3/8<br />
SM 255.0.0.0 255.0.0.0 255.0.0.0<br />
GW 1 38.12.245.1 40.12.245.1 39.12.245.1<br />
GW 2 n/a n/a 39.12.245.2<br />
Background:<br />
One of the disadvantages of using the Ethereal protocol inspector is that it will only<br />
capture packets on the subnet to which it is attached. In order to grab those IGRP packets<br />
we must set up a network that will allow us to do so. In the last lab we used a serial line<br />
between the two routers. Let’s change that to an Ethernet line (as well as using dual<br />
Ethernet routers) and try to capture IGRP packets with our Ethereal.<br />
288
Step-By-Step Instructions:<br />
1. Set up and cable the lab as shown. Notice how we need two gateway addresses<br />
on workstation C. Since the packets can travel either way we need to account for<br />
both gateways.<br />
2. Test ping from each workstation to each other. This should be just fine and jim<br />
dandy.<br />
3. Do a show ip route. It should look like this:<br />
kevin#sh ip route<br />
Codes: C - connected, S - static, I - IGRP, R - RIP, M - mobile, B - BGP<br />
D - EIGRP, EX - EIGRP external, O - OSPF, IA - OSPF inter area<br />
N1 - OSPF NSSA external type 1, N2 - OSPF NSSA external type 2<br />
E1 - OSPF external type 1, E2 - OSPF external type 2, E - EGP<br />
i - IS-IS, L1 - IS-IS level-1, L2 - IS-IS level-2, * - candidate default<br />
U - per-user static route, o - ODR<br />
Gateway of last resort is not set<br />
C 38.0.0.0/8 is directly connected, Ethernet0/0<br />
C 39.0.0.0/8 is directly connected, Ethernet0/1<br />
I 40.0.0.0/8 [100/1200] via 39.12.245.2, 00:01:15, Ethernet0/1<br />
kevin#<br />
4. Now start Ethereal on workstations B and C. Let it run for 2-3 minutes. Then<br />
stop and analyze it. On workstation C you should see something like this:<br />
You will have to expand the tree [+] buttons to see all of this information. Notice<br />
how we can see the metrics and their values here. Hmm…looks good.<br />
289
5. Then open up one for workstation B. When Ethereal first comes up everything is<br />
sequentially ordered <strong>by</strong> time. Let’s change to ordering <strong>by</strong> “protocol.” Just click<br />
on the protocol button near the headers to sort them alphabetically <strong>by</strong> protocol<br />
from A to Z. Clicking “protocol” again will sort them descending from Z to A.<br />
Notice here how we have two entry routes into the network.<br />
Click here<br />
Supplemental Lab or Challenge Activity:<br />
1. Try using workstation C without the second gateway. What happens when you try to<br />
ping both A and B?<br />
2. Since Ethereal is showing us our IGRP responses then where are the requests<br />
(queries)?<br />
3. We also see that we are using IGRP version 1…is there an IGRP version 2? We<br />
know RIP has a version 2.<br />
4. Why do we have two entries into our network on workstation B?<br />
5. What would you expect to see on workstation A?<br />
6. How could we force a IGRP routing update?<br />
7. Repeat this lab using a class “B” IP addressing scheme.<br />
8. Repeat this lab using a class “C” IP addressing scheme.<br />
So What Did I Learn Here?<br />
In this lab you learned how to capture IGRP packets with Ethereal. In our next lab you<br />
will expand upon this <strong>by</strong> changing the metrics over our Ethernet lines and “watch” the<br />
routing in action. Having fun yet? This stuff is just so much fun!<br />
290
Guest Router Name Derivation<br />
In 1990 Kevin Paulsen, a.k.a. “dark dante,” used his knowledge of the phone company<br />
and their operations to seize control of all telephone lines into KIIS-FM in Los Angeles.<br />
Then it was easy for him to be the 102 nd caller and win the shiny Porche. He also has<br />
been photographed picking locks to phone company property and admitted to hacking<br />
into the FBI to obtain lists of companies that are owned and operated <strong>by</strong> the FBI.<br />
291
Intermediate IGRP: Metrics<br />
Objective:<br />
To learn about the metrics used with IGRP.<br />
Tools and Materials:<br />
(4) PC/workstations<br />
(4) Routers<br />
(4) Switches<br />
(7) Straight-through cables<br />
(2) rollover cables<br />
Lab Diagram:<br />
Workstation “D”<br />
dennis ritchie ken thompson<br />
Workstation “A” Workstation “C” Workstation “B”<br />
Addressing:<br />
Routers<br />
Hostnames dennis ritchie<br />
E0 200.150.100.1/24 202.150.100.1/24<br />
E1 n/a 203.150.100.1/24<br />
S0 (DCE) 201.150.100.1/24 n/a<br />
S1 n/a 201.150.100.2/24<br />
Routers<br />
Hostnames ken Thompson<br />
E0 202.150.100.2/24 200.150.101.1/24<br />
E1 203.150.100.2/24 n/a<br />
S0 n/a 201.150.101.1/24<br />
S1 201.150.101.2/24 n/a<br />
292
Workstations A B<br />
IP 200.150.100.2 200.150.101.2<br />
SM 255.255.255.0 255.255.255.0<br />
GW 1 200.150.100.1 200.150.101.1<br />
GW 2 n/a n/a<br />
Workstations C D<br />
IP 202.150.100.3 203.150.100.3<br />
SM 255.255.255.0 255.255.255.0<br />
GW 1 202.150.100.1 203.150.100.1<br />
GW 2 202.150.100.2 203.150.100.2<br />
Background:<br />
In part 2 you learned that RIP uses “Hop Count” as its routing metric. IGRP uses<br />
bandwidth (BW) and delay (DLY), <strong>by</strong> default as its routing metrics. Unlike RIP, IGRP<br />
has other metrics that can be used for its routing process. Those other metrics include<br />
maximum transmission unit (MTU), reliability (RLY), and load. In this lab you will<br />
learn how to manipulate these metrics to suit your network needs. You will be<br />
“statically” configuring load balancing <strong>by</strong> changing the metrics to make one of two<br />
routes more desirable than the other. Finally you will learn how to set up “dynamic” load<br />
balancing so each route gets a nearly equal amount of the work.<br />
Step-By-Step Instructions:<br />
1. Set up and cable the lab as shown. Give yourself enough time to do this. Don’t rush<br />
through it otherwise your typos will cause headaches.<br />
2. Test ping from each workstation to each other. This should be just fine.<br />
3. Do a show ip route on each router. They should look like this:<br />
dennis#sh ip route<br />
Codes: C - connected, S - static, I - IGRP, R - RIP, M - mobile, B - BGP<br />
D - EIGRP, EX - EIGRP external, O - OSPF, IA - OSPF inter area<br />
N1 - OSPF NSSA external type 1, N2 - OSPF NSSA external type 2<br />
E1 - OSPF external type 1, E2 - OSPF external type 2, E - EGP<br />
i - IS-IS, L1 - IS-IS level-1, L2 - IS-IS level-2, * - candidate default<br />
U - per-user static route, o - ODR<br />
Gateway of last resort is not set<br />
I 202.150.100.0/24 [100/8576] via 201.150.100.2, 00:00:19, Serial0/0<br />
I 203.150.100.0/24 [100/8576] via 201.150.100.2, 00:00:19, Serial0/0<br />
I 201.150.101.0/24 [100/10576] via 201.150.100.2, 00:00:19, Serial0/0<br />
C 200.150.100.0/24 is directly connected, Ethernet0/0<br />
C 201.150.100.0/24 is directly connected, Serial0/0<br />
I 200.150.101.0/24 [100/10676] via 201.150.100.2, 00:00:19, Serial0/0<br />
dennis#<br />
293
itchie#sh ip route<br />
Codes: C - connected, S - static, I - IGRP, R - RIP, M - mobile, B - BGP<br />
D - EIGRP, EX - EIGRP external, O - OSPF, IA - OSPF inter area<br />
N1 - OSPF NSSA external type 1, N2 - OSPF NSSA external type 2<br />
E1 - OSPF external type 1, E2 - OSPF external type 2, E - EGP<br />
i - IS-IS, L1 - IS-IS level-1, L2 - IS-IS level-2, * - candidate default<br />
U - per-user static route, o - ODR<br />
Gateway of last resort is not set<br />
C 202.150.100.0/24 is directly connected, Ethernet0/0<br />
C 203.150.100.0/24 is directly connected, Ethernet0/1<br />
I 201.150.101.0/24 [100/8576] via 202.150.100.2, 00:00:58, Ethernet0/0<br />
[100/8576] via 203.150.100.2, 00:00:58, Ethernet0/1<br />
I 200.150.100.0/24 [100/8576] via 201.150.100.1, 00:00:27, Serial0/1<br />
C 201.150.100.0/24 is directly connected, Serial0/1<br />
I 200.150.101.0/24 [100/8676] via 202.150.100.2, 00:00:58, Ethernet0/0<br />
[100/8676] via 203.150.100.2, 00:00:58, Ethernet0/1<br />
ken#sh ip route<br />
Codes: C - connected, S - static, I - IGRP, R - RIP, M - mobile, B - BGP<br />
D - EIGRP, EX - EIGRP external, O - OSPF, IA - OSPF inter area<br />
N1 - OSPF NSSA external type 1, N2 - OSPF NSSA external type 2<br />
E1 - OSPF external type 1, E2 - OSPF external type 2, E - EGP<br />
i - IS-IS, L1 - IS-IS level-1, L2 - IS-IS level-2, * - candidate default<br />
U - per-user static route, o - ODR<br />
Gateway of last resort is not set<br />
C 202.150.100.0/24 is directly connected, Ethernet0/0<br />
C 203.150.100.0/24 is directly connected, Ethernet0/1<br />
C 201.150.101.0/24 is directly connected, Serial0/1<br />
I 200.150.100.0/24 [100/8676] via 202.150.100.1, 00:00:41, Ethernet0/0<br />
[100/8676] via 203.150.100.1, 00:00:41, Ethernet0/1<br />
I 201.150.100.0/24 [100/8576] via 202.150.100.1, 00:00:41, Ethernet0/0<br />
[100/8576] via 203.150.100.1, 00:00:41, Ethernet0/1<br />
I 200.150.101.0/24 [100/8576] via 201.150.101.1, 00:00:04, Serial0/1<br />
thompson#sh ip route<br />
Codes: C - connected, S - static, I - IGRP, R - RIP, M - mobile, B - BGP<br />
D - EIGRP, EX - EIGRP external, O - OSPF, IA - OSPF inter area<br />
N1 - OSPF NSSA external type 1, N2 - OSPF NSSA external type 2<br />
E1 - OSPF external type 1, E2 - OSPF external type 2, E - EGP<br />
i - IS-IS, L1 - IS-IS level-1, L2 - IS-IS level-2, * - candidate default<br />
U - per-user static route, o - ODR<br />
Gateway of last resort is not set<br />
294
I 202.150.100.0/24 [100/8576] via 201.150.101.2, 00:00:08, Serial0/0<br />
I 203.150.100.0/24 [100/8576] via 201.150.101.2, 00:00:08, Serial0/0<br />
C 201.150.101.0/24 is directly connected, Serial0/0<br />
I 200.150.100.0/24 [100/10676] via 201.150.101.2, 00:00:08, Serial0/0<br />
I 201.150.100.0/24 [100/10576] via 201.150.101.2, 00:00:08, Serial0/0<br />
C 200.150.101.0/24 is directly connected, Ethernet0/0<br />
thompson#<br />
4. Now start Ethereal on workstations C or D. Let it run for 2-3 minutes. Then stop and<br />
analyze it. On workstation C or D you should see something like this:<br />
You will have to expand the tree [+] buttons to see all of this information. Notice<br />
how we can see the metrics and their values here. Hmm…looks good. You can<br />
see our default metrics with IGRP are: delay set to 100, bandwidth set to 1000,<br />
MTU of 1500 <strong>by</strong>tes, reliability set to 255, and load set to 1. Hop count here is not<br />
a metric, per se, but a device to measure how far it is from here to the “entry point<br />
for the network.” Another way to view our default metrics is with the show<br />
interface command. Here is an example of the first five lines of output:<br />
ritchie#sh int ethernet0/0<br />
Ethernet0/0 is up, line protocol is up<br />
Hardware is AmdP2, address is 0002.fd45.ac80 (bia 0002.fd45.ac80)<br />
Internet address is 202.150.100.1/24<br />
MTU 1500 <strong>by</strong>tes, BW 10000 Kbit, DLY 1000 usec, rely 255/255, load 1/255<br />
Encapsulation ARPA, loopback not set, keepalive set (10 sec)<br />
ARP type: ARPA, ARP Timeout 04:00:00<br />
295
5. Now let’s try to see how workstation “A” is routed to workstation “B” <strong>by</strong> using trace<br />
route from the DOS prompt:<br />
C:\WINDOWS\Desktop>tracert 200.150.101.2<br />
Tracing route to STAR10616125 [200.150.101.2]<br />
over a maximum of 30 hops:<br />
1 2 ms 1 ms 1 ms 200.150.100.1<br />
2 25 ms 25 ms 25 ms 201.150.100.2<br />
3 25 ms 25 ms 26 ms 202.150.100.2<br />
4 49 ms 49 ms 50 ms 201.150.101.1<br />
5 60 ms 60 ms 60 ms STAR10616125 [200.150.101.2]<br />
Trace complete.<br />
C:\WINDOWS\Desktop><br />
The “crucial” step in our trace is in bold above. We can see the path is through the<br />
lower Ethernet path in our diagram. We can actually statically configure the Ethernet<br />
1 interface (on ritchie) to pass the packets through Ethernet 1 <strong>by</strong> lowering (or raising)<br />
the specific metrics to make the 203.x..x.x. route more desirable. Likewise we could<br />
also raise (or raise) the metrics on Ethernet 0 to make it less desirable.<br />
6. Let’s start <strong>by</strong> making the 203.x.x.x more desirable <strong>by</strong> increasing the delay on<br />
Ethernet 0 from 1000 to 10000. Since there is a longer delay on Ethernet 0 (which we<br />
statically set) then the 203.x.x.x network would become the preferred route (with all<br />
other metrics being equal).<br />
ritchie(config)#int e0/0<br />
ritchie(config-if)#delay 10000<br />
7. Now we can repeat our trace and see if it works the way we want (to force the path<br />
over the 203.x.x.x network):<br />
C:\WINDOWS\Desktop>tracert 200.150.101.2<br />
Tracing route to STAR10616125 [200.150.101.2] over a maximum of 30<br />
hops:<br />
1 1 ms 1 ms 1 ms 200.150.100.1<br />
2 68 ms 25 ms 25 ms 201.150.100.2<br />
3 25 ms 26 ms 26 ms 203.150.100.2<br />
4 49 ms 49 ms 49 ms 201.150.101.1<br />
5 59 ms 59 ms 59 ms STAR10616125 [200.150.101.2]<br />
Trace complete.<br />
C:\WINDOWS\Desktop><br />
8. Bingo! Just what we had hoped for…Let’s check this with Ethereal.<br />
296
Here we can see the entry for network 202.x.x.x now has a delay of 10000. Don’t<br />
you just love it when things work nicely?<br />
From the default settings you can decrease the delay from 1000 down to 500 on<br />
the Ethernet 1 interface and get the same effect. To force the trace from A to B<br />
on ritchie to always use the 203 route (it will always use the 202 route with<br />
default settings on each:<br />
203 route<br />
change: from to<br />
Bandwith 1000 E0 10000<br />
OR 1000 E1 500<br />
Delay 1000 E0 10000<br />
OR 1000 E1 500<br />
MTU 1500 E0 50<br />
OR 1500 E1 2000*<br />
RLY 255 E0 255**<br />
OR 255 E1 100<br />
Load 1 E0 255**<br />
OR 1 E1 100**<br />
* You wouldn’t want to go higher than 1500 if you are using Ethernet (max. size<br />
of 1518)<br />
** Minimum/Maximum size is already set.<br />
297
Supplemental Lab or Challenge Activity:<br />
1. What is the “Variance” command and how does it relate to IGRP?<br />
2. Repeat this lab using a class “B” IP addressing scheme.<br />
3. Repeat this lab using a class “C” IP addressing scheme.<br />
So What Did I Learn Here?<br />
In this lab you have learned how to statically and dynamically manipulate your metrics to<br />
achieve traffic flow in the manner you desire. Watch out for the “variance” command<br />
when you are studying for your test. This is a good “one-line wonder” question—the<br />
information only appears once, but you are still expected to know it anyway. In the next<br />
lab you will learn more about that autonomous number thing-a-ma-jiggie. Don’t erase<br />
your configurations…we will use the same one for the next lab.<br />
Guest Router Name Derivation<br />
In 1969 Dennis Ritchie and Ken Thompson invented the UNIX operating System. If they<br />
only knew then what they were doing…creating software that would help put a man on<br />
the moon, transmit pictures back from Mars, and the solar system…oh, yeah…and give a<br />
green light to hackers everywhere. Nobody said anything was perfect.<br />
298
Redistribution of IGRP and RIP<br />
Objective:<br />
To learn how to redistribute IGRP networks with IGRP networks and IGRP networks<br />
with RIP networks.<br />
Tools and Materials:<br />
(4) PC/workstations<br />
(4) Routers<br />
(4) Switches<br />
(7) Straight-through cables<br />
(2) rollover cables<br />
Lab Diagram:<br />
Workstation “D”<br />
IGRP 18 IGRP 38<br />
dennis ritchie ken thompson<br />
Workstation “A” Workstation “C” Workstation “B”<br />
Addressing:<br />
Routers<br />
Hostnames dennis ritchie<br />
E0 200.150.100.1/24 202.150.100.1/24<br />
E1 n/a 203.150.100.1/24<br />
S0 (DCE) 201.150.100.1/24 n/a<br />
S1 n/a 201.150.100.2/24<br />
Routers<br />
Hostnames ken Thompson<br />
E0 202.150.100.2/24 200.150.101.1/24<br />
E1 203.150.100.2/24 n/a<br />
S0 n/a 201.150.101.1/24<br />
S1 201.150.101.2/24 n/a<br />
299
Workstations A B<br />
IP 200.150.100.2 200.150.101.2<br />
SM 255.255.255.0 255.255.255.0<br />
GW 1 200.150.100.1 200.150.101.1<br />
GW 2 n/a n/a<br />
Workstations C D<br />
IP 202.150.100.3 203.150.100.3<br />
SM 255.255.255.0 255.255.255.0<br />
GW 1 202.150.100.1 203.150.100.1<br />
GW 2 202.150.100.2 203.150.100.2<br />
Background:<br />
Picture this…your company is running IGRP with an autonomous system number of 38.<br />
You have 17 routers in your network spread out over 4 states. Your company buys out<br />
another company with IGRP and an autonomous system number of 18 and 15 routers<br />
spread out over 2 other states. It would literally take you several days to convert the new<br />
network over to work with your network but your boss wants it up and running yesterday.<br />
No problem. You can redistribute those other autonomous system numbers into your<br />
own on only the “border router” with several simple commands. You can be done in<br />
minutes! In this lab you will learn how to redistribute IGRP with IGRP and IGRP with<br />
RIP.<br />
Step-By-Step Instructions:<br />
1. Since the last lab was so extensive to set up and this lab only modifies it a bit I<br />
thought I would save you some time.<br />
2. Now let’s set up a “brief version” of the scenario above:<br />
ritchie(config)#router igrp 38<br />
ritchie(config-router)#no network 201.150.100.0<br />
ritchie(config-router)#redistribute igrp 18<br />
ritchie(config-router)#router igrp 18<br />
ritchie(config-router)#network 201.150.100.0<br />
ritchie(config-router)#redistribute igrp 38<br />
dennis(config)#no router igrp 38<br />
dennis(config)#router igrp 18<br />
dennis(config-router)#network 201.150.100.0<br />
dennis(config-router)#network 200.150.100.0<br />
300
3. Now we can see how this affects our ip routes. On each router you will see:<br />
dennis#sh ip route<br />
Codes: C - connected, S - static, I - IGRP, R - RIP, M - mobile, B - BGP<br />
D - EIGRP, EX - EIGRP external, O - OSPF, IA - OSPF inter area<br />
N1 - OSPF NSSA external type 1, N2 - OSPF NSSA external type 2<br />
E1 - OSPF external type 1, E2 - OSPF external type 2, E - EGP<br />
i - IS-IS, L1 - IS-IS level-1, L2 - IS-IS level-2, * - candidate default<br />
U - per-user static route, o - ODR<br />
Gateway of last resort is not set<br />
I 202.150.100.0/24 [100/8576] via 201.150.100.2, 00:00:29, Serial0/0<br />
I 203.150.100.0/24 [100/8576] via 201.150.100.2, 00:00:30, Serial0/0<br />
I 201.150.101.0/24 [100/10576] via 201.150.100.2, 00:00:30, Serial0/0<br />
C 200.150.100.0/24 is directly connected, Ethernet0/0<br />
C 201.150.100.0/24 is directly connected, Serial0/0<br />
I 200.150.101.0/24 [100/10676] via 201.150.100.2, 00:00:30, Serial0/0<br />
dennis#<br />
ritchie#sh ip route<br />
Codes: C - connected, S - static, I - IGRP, R - RIP, M - mobile, B - BGP<br />
D - EIGRP, EX - EIGRP external, O - OSPF, IA - OSPF inter area<br />
N1 - OSPF NSSA external type 1, N2 - OSPF NSSA external type 2<br />
E1 - OSPF external type 1, E2 - OSPF external type 2, E - EGP<br />
i - IS-IS, L1 - IS-IS level-1, L2 - IS-IS level-2, * - candidate default<br />
U - per-user static route, o - ODR<br />
Gateway of last resort is not set<br />
C 202.150.100.0/24 is directly connected, Ethernet0/0<br />
C 203.150.100.0/24 is directly connected, Ethernet0/1<br />
I 201.150.101.0/24 [100/8576] via 203.150.100.2, 00:00:20, Ethernet0/1<br />
[100/8576] via 202.150.100.2, 00:00:20, Ethernet0/0<br />
I 200.150.100.0/24 [100/8576] via 201.150.100.1, 00:00:40, Serial0/1<br />
C 201.150.100.0/24 is directly connected, Serial0/1<br />
I 200.150.101.0/24 [100/8676] via 203.150.100.2, 00:00:20, Ethernet0/1<br />
[100/8676] via 202.150.100.2, 00:00:20, Ethernet0/0<br />
ritchie#<br />
ken#sh ip route<br />
Codes: C - connected, S - static, I - IGRP, R - RIP, M - mobile, B - BGP<br />
D - EIGRP, EX - EIGRP external, O - OSPF, IA - OSPF inter area<br />
N1 - OSPF NSSA external type 1, N2 - OSPF NSSA external type 2<br />
E1 - OSPF external type 1, E2 - OSPF external type 2, E - EGP<br />
i - IS-IS, L1 - IS-IS level-1, L2 - IS-IS level-2, * - candidate default<br />
U - per-user static route, o - ODR<br />
301
Gateway of last resort is not set<br />
C 202.150.100.0/24 is directly connected, Ethernet0/0<br />
C 203.150.100.0/24 is directly connected, Ethernet0/1<br />
C 201.150.101.0/24 is directly connected, Serial0/1<br />
I 200.150.100.0/24 [100/8676] via 202.150.100.1, 00:00:44, Ethernet0/0<br />
[100/8676] via 203.150.100.1, 00:00:44, Ethernet0/1<br />
I 201.150.100.0/24 [100/8576] via 202.150.100.1, 00:00:44, Ethernet0/0<br />
[100/8576] via 203.150.100.1, 00:00:44, Ethernet0/1<br />
I 200.150.101.0/24 [100/8576] via 201.150.101.1, 00:00:25, Serial0/1<br />
ken#<br />
thompson#sh ip route<br />
Codes: C - connected, S - static, I - IGRP, R - RIP, M - mobile, B - BGP<br />
D - EIGRP, EX - EIGRP external, O - OSPF, IA - OSPF inter area<br />
N1 - OSPF NSSA external type 1, N2 - OSPF NSSA external type 2<br />
E1 - OSPF external type 1, E2 - OSPF external type 2, E - EGP<br />
i - IS-IS, L1 - IS-IS level-1, L2 - IS-IS level-2, * - candidate default<br />
U - per-user static route, o - ODR<br />
Gateway of last resort is not set<br />
I 202.150.100.0/24 [100/8576] via 201.150.101.2, 00:00:38, Serial0/0<br />
I 203.150.100.0/24 [100/8576] via 201.150.101.2, 00:00:38, Serial0/0<br />
C 201.150.101.0/24 is directly connected, Serial0/0<br />
I 200.150.100.0/24 [100/10676] via 201.150.101.2, 00:00:38, Serial0/0<br />
I 201.150.100.0/24 [100/10576] via 201.150.101.2, 00:00:38, Serial0/0<br />
C 200.150.101.0/24 is directly connected, Ethernet0/0<br />
thompson#<br />
4. Now let’s change our igrp 18 network over to a RIP network. First let’s get rid of the<br />
igrp 18 information:<br />
ritchie(config)#router igrp 38<br />
ritchie(config-router)#no redistribute igrp 18<br />
ritchie(config)#no router igrp 18<br />
dennis(config)#no router igrp 18<br />
5. Now let’s change over to RIP and redistribute it in our network with IGRP:<br />
ritchie(config)#router igrp 38<br />
ritchie(config-router)#redistribute rip 1<br />
ritchie(config-router)#router rip<br />
ritchie(config-router)#network 201.150.100.0<br />
ritchie(config-router)#redistribute igrp 38<br />
302
dennis(config)#router rip<br />
dennis(config-router)#network 201.150.100.0<br />
dennis(config-router)#network 200.150.100.0<br />
You should be able to ping from router to router without too much problem.<br />
However, from workstation A to B will not work because the Time To Live will<br />
be exceeded. This is a known problem when redistributing RIP into IGRP where<br />
the potential for a routing loop exists. For now just disconnect the straight<br />
through cables on Ethernet 0 on both ritchie and ken. This will eliminate the<br />
routing loop problem. Relax. Remember RIP takes a while to converge so you<br />
might not see the routes or be able to ping for a few minutes. Also, clearing the ip<br />
routes a few times couldn’t hurt either:<br />
dennis#clear ip route *<br />
dennis#clear ip route *<br />
dennis#clear ip route *<br />
dennis#clear ip route *<br />
ritchie#clear ip route *<br />
ritchie#clear ip route *<br />
ritchie#clear ip route *<br />
ritchie#clear ip route *<br />
ken#clear ip route *<br />
ken#clear ip route *<br />
ken#clear ip route *<br />
ken#clear ip route *<br />
thompson#clear ip route *<br />
thompson#clear ip route *<br />
thompson#clear ip route *<br />
thompson#clear ip route *<br />
6. Once we have done this then now we can see how this affects our ip routes. On each<br />
router you will see:<br />
dennis#sh ip route<br />
Codes: C - connected, S - static, I - IGRP, R - RIP, M - mobile, B - BGP<br />
D - EIGRP, EX - EIGRP external, O - OSPF, IA - OSPF inter area<br />
N1 - OSPF NSSA external type 1, N2 - OSPF NSSA external type 2<br />
E1 - OSPF external type 1, E2 - OSPF external type 2, E - EGP<br />
i - IS-IS, L1 - IS-IS level-1, L2 - IS-IS level-2, * - candidate default<br />
U - per-user static route, o - ODR<br />
303
Gateway of last resort is not set<br />
R 203.150.100.0/24 [120/1] via 201.150.100.2, 00:00:11, Serial0/0<br />
R 201.150.101.0/24 [120/1] via 201.150.100.2, 00:00:12, Serial0/0<br />
C 200.150.100.0/24 is directly connected, Ethernet0/0<br />
C 201.150.100.0/24 is directly connected, Serial0/0<br />
R 200.150.101.0/24 [120/1] via 201.150.100.2, 00:00:12, Serial0/0<br />
ritchie#sh ip route<br />
Codes: C - connected, S - static, I - IGRP, R - RIP, M - mobile, B - BGP<br />
D - EIGRP, EX - EIGRP external, O - OSPF, IA - OSPF inter area<br />
N1 - OSPF NSSA external type 1, N2 - OSPF NSSA external type 2<br />
E1 - OSPF external type 1, E2 - OSPF external type 2, E - EGP<br />
i - IS-IS, L1 - IS-IS level-1, L2 - IS-IS level-2, * - candidate default<br />
U - per-user static route, o - ODR<br />
Gateway of last resort is not set<br />
C 203.150.100.0/24 is directly connected, Ethernet0/1<br />
I 201.150.101.0/24 [100/8576] via 203.150.100.2, 00:01:00, Ethernet0/1<br />
R 200.150.100.0/24 [120/1] via 201.150.100.1, 00:00:22, Serial0/1<br />
C 201.150.100.0/24 is directly connected, Serial0/1<br />
I 200.150.101.0/24 [100/8676] via 203.150.100.2, 00:01:00, Ethernet0/1<br />
ken#sh ip route<br />
Codes: C - connected, S - static, I - IGRP, R - RIP, M - mobile, B - BGP<br />
D - EIGRP, EX - EIGRP external, O - OSPF, IA - OSPF inter area<br />
N1 - OSPF NSSA external type 1, N2 - OSPF NSSA external type 2<br />
E1 - OSPF external type 1, E2 - OSPF external type 2, E - EGP<br />
i - IS-IS, L1 - IS-IS level-1, L2 - IS-IS level-2, * - candidate default<br />
U - per-user static route, o - ODR<br />
Gateway of last resort is not set<br />
C 203.150.100.0/24 is directly connected, Ethernet0/1<br />
C 201.150.101.0/24 is directly connected, Serial0/1<br />
I 200.150.100.0/24 [100/10000101] via 203.150.100.1, 00:00:10,<br />
Ethernet0/1<br />
I 201.150.100.0/24 [100/8576] via 203.150.100.1, 00:00:10, Ethernet0/1<br />
I 200.150.101.0/24 [100/8576] via 201.150.101.1, 00:01:11, Serial0/1<br />
thompson#sh ip route<br />
Codes: C - connected, S - static, I - IGRP, R - RIP, M - mobile, B - BGP<br />
D - EIGRP, EX - EIGRP external, O - OSPF, IA - OSPF inter area<br />
N1 - OSPF NSSA external type 1, N2 - OSPF NSSA external type 2<br />
E1 - OSPF external type 1, E2 - OSPF external type 2, E - EGP<br />
i - IS-IS, L1 - IS-IS level-1, L2 - IS-IS level-2, * - candidate default<br />
U - per-user static route, o - ODR<br />
304
Gateway of last resort is not set<br />
I 203.150.100.0/24 [100/8576] via 201.150.101.2, 00:01:13, Serial0/0<br />
C 201.150.101.0/24 is directly connected, Serial0/0<br />
I 200.150.100.0/24 [100/10002101] via 201.150.101.2, 00:01:13,<br />
Serial0/0<br />
I 201.150.100.0/24 [100/10576] via 201.150.101.2, 00:01:13, Serial0/0<br />
C 200.150.101.0/24 is directly connected, Ethernet0/0<br />
thompson#<br />
Notice our our RIP (R) routes are “redistributed” as IGRP (I) routes to the right of<br />
the ritchie router.<br />
Supplemental Lab or Challenge Activity:<br />
1. When redistributing IGRP with IGRP what happens if you only redistribute on one<br />
side (redistribute igrp 38 within 18 but not redistributing igrp 18 within 38)?<br />
2. Repeat this lab with a 26 bit subnet mask. Why does it or doesn’t it work very well<br />
now?<br />
So What Did I Learn Here?<br />
In this lab you started to learn the basics about redistribution with routing protocols.<br />
Sorry to tell you this is just the tip of the iceberg. Very few networks use the exact same<br />
routing protocol throughout the entire network (more likely in large networks). In fact<br />
later when you redistribute other protocols you will also have to put metrics in as well.<br />
Whew! RIP…done. IGRP…done. There are three other routing protocols we need to<br />
discuss in the next few labs: EIGRP, OSPF, and BGP. These three are covered in-depth<br />
in the upper-level <strong>CISCO</strong> courses but you should be aware of the basics regarding these<br />
protocols and for what they are used.<br />
Guest Router Name Derivation<br />
In 1969 Dennis Ritchie and Ken Thompson invented the UNIX operating System. If they<br />
only knew then what they were doing…creating software that would help put a man on<br />
the moon, transmit pictures back from Mars, and the solar system…oh, yeah…and give a<br />
green light to hackers everywhere. Nobody said anything was perfect.<br />
305
Enhanced IGRP<br />
Objective:<br />
To learn the basics about the EIGRP routing protocol and how to configure EIGRP in a<br />
small network.<br />
Tools and Materials:<br />
(2) PC/workstations<br />
(2) Routers<br />
(2) Switches<br />
(4) Straight-through cables<br />
(1) DCE serial cable<br />
(1) DTE serial cable<br />
(2) rollover cables<br />
Lab Diagram:<br />
e0<br />
st<br />
con<br />
s0<br />
s1<br />
con<br />
st<br />
e0<br />
NIC<br />
st ro ro st<br />
COM1<br />
COM1<br />
NIC<br />
Workstation “A”<br />
Workstation “B”<br />
Addressing:<br />
Routers<br />
Hostnames war games<br />
E0 138.74.16.1/20 220.34.98.17/28<br />
S0 14.32.0.1/12 (DCE) n/a<br />
S1 n/a 14.32.0.2/12 (DTE)<br />
Workstations A B<br />
IP 138.74.16.2 220.34.98.18<br />
SM 255.255.240.0 255.255.255.240<br />
GW 138.74.16.1 220.34.98.17<br />
Background:<br />
The Enhanced Interior Gateway Routing Protocol (EIGRP) is a proprietary hybrid<br />
(distance vector) routing protocol developed <strong>by</strong> <strong>CISCO</strong> to exceed the capabilities of<br />
IGRP. In a nutshell EIGRP is similar to IGRP except that its metrics are 256 times that<br />
of IGRP (sounds like a good test question). In fact, in most cases EIGRP and IGRP are<br />
interchangeable. We just talked about redistribution of IGRP and RIP. There is no need<br />
306
to add the extra metrics statements like with did with those. EIGRP and IGRP can be<br />
redistributed without those extra metric statements. How easy is that? Unlike IGRP,<br />
EIGRP supports Variable Length Subnet Masking (VLSM) so we do not have to be so<br />
concerned about the classful boundaries like we had to with IGRP (and RIP too). Instead<br />
of sending updates every x seconds like RIP and IGRP EIGRP sends out periodic<br />
“hello…I am still here” packets and will only send the entire routing table when a change<br />
is made. This helps to reduce the overhead traffic—another perk with EIGRP.<br />
Step-By-Step Instructions:<br />
1. Cable the lab as shown and configure the interfaces.<br />
2. Enable EIGRP as a routing protocol and advertise/publish/associate your<br />
networks. Like IGRP EIGRP requires an autonomous system number too:<br />
war(config)#router eigrp 88<br />
war(config-router)#network 138.74.16.0<br />
war(config-router)#network 14.32.0.0<br />
games(config)#router eigrp 88<br />
games(config-router)#netwrork 14.32.0.0<br />
games(config-router)#network220.34.98.0<br />
3. Try to ping from A to B. It should work just fine.<br />
4. Start Ethereal on workstation A. After about 30 packets disconnect the serial<br />
line, wait a few seconds, and then plug it back in. Remember EIGRP will<br />
only send the tables when a change occurs, otherwise it just sends “hello”<br />
packets. We should now see both:<br />
307
Do you see anything unusual here? How about our destination address of<br />
224.0.0.10? (you cannot see it on mine but you can see it on yours.) How about<br />
those metrics? Yeah…I know. Something to look up. You can also see the<br />
autonomous system number too.<br />
5. So how come you do not see any ‘updates” from when our line went down?<br />
Remember we have to be on the subnet too. Our workstations do not receive<br />
the update broadcasts. We can fudge it a bit <strong>by</strong> adding another router into our<br />
switch. Then we should be able to see the changes.<br />
New Lab Diagram:<br />
e0<br />
st<br />
con<br />
s0<br />
s1<br />
con<br />
st<br />
e0<br />
NIC<br />
st ro ro st<br />
COM1<br />
COM1<br />
NIC<br />
Workstation “A”<br />
Workstation “B”<br />
New Router: “WOPR”<br />
E0/0 138.74.16.2.20/20<br />
L0 1.1.1.1/8<br />
6. Don’t forget to update your route advertisements with EIGRP. Now we<br />
should be able to see those changes when we take down the serial line:<br />
308
7. Notice the reachable/not reachable routes and how our metrics changed from<br />
those “K” numbers to those like IGRP metrics. Neat!<br />
8. Let’s compare the protocol inspector out put to a debug eigrp packets:<br />
wopr#debug eigrp packets<br />
EIGRP Packets debugging is on<br />
(UPDATE, REQUEST, QUERY, REPLY, HELLO, IPXSAP, PROBE, ACK)<br />
00:08:10: EIGRP: Sending HELLO on Ethernet0/0<br />
00:08:10: AS 88, Flags 0x0, Seq 0/0 idbQ 0/0 iidbQ un/rely 0/0<br />
00:08:10: EIGRP: Received HELLO on Ethernet0/0 nbr 138.74.16.1<br />
00:08:10: AS 88, Flags 0x0, Seq 0/0 idbQ 0/0 iidbQ un/rely 0/0 peerQ<br />
un/rely 0/0<br />
00:08:10: EIGRP: Sending HELLO on Loopback0<br />
00:08:10: AS 88, Flags 0x0, Seq 0/0 idbQ 0/0 iidbQ un/rely 0/0<br />
00:08:10: EIGRP: Received HELLO on Loopback0 nbr 1.1.1.1<br />
00:08:10: AS 88, Flags 0x0, Seq 0/0 idbQ 0/0<br />
00:08:10: EIGRP: Packet from ourselves ignored<br />
00:08:17: EIGRP: Received QUERY on Ethernet0/0 nbr 138.74.16.1<br />
00:08:17: AS 88, Flags 0x0, Seq 16/0 idbQ 0/0 iidbQ un/rely 0/0 peerQ<br />
un/rely0/0<br />
00:08:17: EIGRP: Enqueueing ACK on Ethernet0/0 nbr 138.74.16.1<br />
00:08:17: Ack seq 16 iidbQ un/rely 0/0 peerQ un/rely 1/0<br />
00:08:17: EIGRP: Sending ACK on Ethernet0/0 nbr 138.74.16.1<br />
00:08:17: AS 88, Flags 0x0, Seq 0/16 idbQ 0/0 iidbQ un/rely 0/0 peerQ<br />
un/rely1/0<br />
00:08:17: EIGRP: Enqueueing REPLY on Ethernet0/0 nbr 138.74.16.1<br />
iidbQ un/rely 0<br />
/1 peerQ un/rely 0/0 serno 9-11<br />
00:08:17: EIGRP: Requeued unicast on Ethernet0/0<br />
00:08:17: EIGRP: Sending REPLY on Ethernet0/0 nbr 138.74.16.1<br />
00:08:17: AS 88, Flags 0x0, Seq 6/16 idbQ 0/0 iidbQ un/rely 0/0 peerQ<br />
un/rely0/1 serno 9-11<br />
00:08:17: EIGRP: Received ACK on Ethernet0/0 nbr 138.74.16.1<br />
00:08:17: AS 88, Flags 0x0, Seq 0/6 idbQ 0/0 iidbQ un/rely 0/0 peerQ<br />
un/rely 0/1<br />
00:08:31: EIGRP: Ethernet0/0 multicast flow blocking cleared<br />
wopr#<br />
9. Let’s reconnect it and look at our ip routes:<br />
wopr#sh ip route<br />
Codes: C - connected, S - static, I - IGRP, R - RIP, M - mobile, B - BGP<br />
D - EIGRP, EX - EIGRP external, O - OSPF, IA - OSPF inter area<br />
N1 - OSPF NSSA external type 1, N2 - OSPF NSSA external type 2<br />
E1 - OSPF external type 1, E2 - OSPF external type 2, E - EGP<br />
309
i - IS-IS, L1 - IS-IS level-1, L2 - IS-IS level-2, * - candidate default<br />
U - per-user static route, o - ODR<br />
Gateway of last resort is not set<br />
C 1.0.0.0/8 is directly connected, Loopback0<br />
D 220.34.98.0/24 [90/2221056] via 138.74.16.1, 00:00:59, Ethernet0/0<br />
D 14.0.0.0/8 [90/2195456] via 138.74.16.1, 00:01:04, Ethernet0/0<br />
C 138.64.0.0/12 is directly connected, Ethernet0/0<br />
wopr#<br />
war#sh ip route<br />
Codes: C - connected, S - static, I - IGRP, R - RIP, M - mobile, B - BGP<br />
D - EIGRP, EX - EIGRP external, O - OSPF, IA - OSPF inter area<br />
N1 - OSPF NSSA external type 1, N2 - OSPF NSSA external type 2<br />
E1 - OSPF external type 1, E2 - OSPF external type 2, E - EGP<br />
i - IS-IS, L1 - IS-IS level-1, L2 - IS-IS level-2, * - candidate default<br />
U - per-user static route, o - ODR<br />
Gateway of last resort is not set<br />
D 1.0.0.0/8 [90/409600] via 138.74.16.3, 00:05:46, Ethernet0/0<br />
138.74.0.0/16 is variably subnetted, 2 subnets, 2 masks<br />
D 138.74.0.0/16 is a summary, 00:23:55, Null0<br />
C 138.74.16.0/20 is directly connected, Ethernet0/0<br />
D 220.34.98.0/24 [90/2195456] via 14.32.0.2, 00:01:10, Serial0/0<br />
14.0.0.0/8 is variably subnetted, 2 subnets, 2 masks<br />
D 14.0.0.0/8 is a summary, 00:01:15, Null0<br />
C 14.32.0.0/12 is directly connected, Serial0/0<br />
games#sh ip route<br />
Codes: C - connected, S - static, I - IGRP, R - RIP, M - mobile, B - BGP<br />
D - EIGRP, EX - EIGRP external, O - OSPF, IA - OSPF inter area<br />
N1 - OSPF NSSA external type 1, N2 - OSPF NSSA external type 2<br />
E1 - OSPF external type 1, E2 - OSPF external type 2, E - EGP<br />
i - IS-IS, L1 - IS-IS level-1, L2 - IS-IS level-2, * - candidate default<br />
U - per-user static route, o - ODR<br />
Gateway of last resort is not set<br />
D 1.0.0.0/8 [90/2323456] via 14.32.0.1, 00:01:18, Serial0/1<br />
D 138.74.0.0/16 [90/2195456] via 14.32.0.1, 00:01:19, Serial0/1<br />
220.34.98.0/24 is variably subnetted, 2 subnets, 2 masks<br />
C 220.34.98.16/28 is directly connected, Ethernet0/0<br />
D 220.34.98.0/24 is a summary, 00:21:54, Null0<br />
14.0.0.0/8 is variably subnetted, 2 subnets, 2 masks<br />
D 14.0.0.0/8 is a summary, 00:01:23, Null0<br />
C 14.32.0.0/12 is directly connected, Serial0/1<br />
games#<br />
Notice how our EIGRP routes are noted with a “D” not an “E.”<br />
310
Supplemental Lab or Challenge Activity:<br />
1. How would you redistribute IGRP and EIGRP? RIP and EIGRP?<br />
2. Go out to <strong>CISCO</strong> and look up EIGRP on their technical documentation site.<br />
What is DUAL and RTP?<br />
3. How often are “hello” packets sent?<br />
So What Did I Learn Here?<br />
You learned about the hybrid <strong>CISCO</strong>-proprietary routing protocol EIGRP.<br />
Guest Router Name<br />
War Games is the first “great” hacker movie from 1984 staring Matthew Broderick, Alley<br />
Sheedy, and Dabney Coleman. In a round about way it created “idols” for young<br />
disenchanted computer geeks to become hackers. In the movie Matthew Broderick<br />
“hacked” into a military computer called “WOPR.” Most of the little geeks (me<br />
included) got the message loud and clear: if you become a hacker you get to date a very<br />
pretty girl and visit exotic locations without the permission of your parents. They got the<br />
“exotic locations” right…most ended up in jail. Not too many “girls” in there (the men’s<br />
facilities). I will leave it to your imagination though.<br />
311
Open Shortest Path First (OSPF)<br />
Objective:<br />
To learn how to configure a very basic OSPF network with two routers and to learn about<br />
wildcard masks.<br />
Tools and Materials:<br />
(2) PC/workstations<br />
(2) Routers<br />
(2) Switches<br />
(4) Straight-through cables<br />
(1) DCE/DTE serial cable<br />
(2) rollover cables<br />
Lab Diagram:<br />
e0<br />
st<br />
con<br />
s0<br />
s1<br />
con<br />
st<br />
e0<br />
NIC<br />
st ro ro st<br />
COM1<br />
COM1<br />
NIC<br />
Workstation “A”<br />
Workstation “B”<br />
Addressing:<br />
Routers<br />
Hostnames wash leung<br />
E0 172.16.1.1/24 172.16.3.1/24<br />
S0 172.16.2.1/24 (DCE) n/a<br />
S1 n/a 172.16.2.2/24 (DTE)<br />
Workstations A B<br />
IP 172.16.1.2 172.16.3.2/24<br />
SM 255.255.255.0 255.255.255.0<br />
GW 172.16.1.1 172.16.3.1<br />
Background:<br />
OSPF was developed in the late 1980’s as an alternative to the distance vector routing<br />
protocols (RIP, IGRP, etc). OSPF is link-state protocol that uses the Dijstra’s algorithm<br />
(Shortest Path First-SPF). OSPF does what it sounds like: it calculates the shortest route<br />
to a destination, but not necessarily the quickest one. Unlike IGRP and EIGRP the OSPF<br />
protocol is not proprietary to <strong>CISCO</strong> equipment. Unlike IGRP and RIP (version 1) OSPF<br />
can accommodate passing various lengths of subnets with data information<br />
312
(VLSM/CIDR). OSPF on a wider scale is better left to upper-level courses. You are<br />
only getting a brief overview here.<br />
Quick overview: Wildcard Masks<br />
A while back you learned about subnet masks. We use wildcard masks to instruct our<br />
devices to “only pay attention” to certain information. The easiest way I know to explain<br />
how to set up a wildcard mask is: a wildcard mask is usually the exact opposite of a<br />
subnet mask (in terms of binary one’s and zero’s). One last note: a wildcard mask, unlike<br />
a subnet mask, does not have to contain contiguous one’s…more on this later). Let’s<br />
look at an example:<br />
If we had a network 172.16.1.0/24 and wanted to use a routing protocol:<br />
• With RIP, IGRP, EIGRP, BGP (with subnet mask):<br />
o network 172.16.1.0 255.255.255.0<br />
o let’s see that subnet mask in binary:<br />
• 11111111.11111111. 11111111.00000000<br />
• With OSPF (with wildcard mask):<br />
o network 172.16.1.0 0.0.0.255<br />
o let’s see that wildcard mask in binary:<br />
• 00000000.00000000. 00000000.11111111<br />
Step-By-Step Instructions:<br />
1. Set up and cable the lab as shown. Do not use any routing protocol. Notice<br />
how our addresses extend beyond our address class boundary. OSPF will pass<br />
subnet information.<br />
2. Now let’s add in our OSPF routing protocol. We use the number 0 because<br />
OSPF requires at least one “area” be numbered 0. Yes…the number “1” is an<br />
autonomous system number too.<br />
wash(config)#router ospf 1<br />
wash(config-router)#network 172.16.1.0 0.0.0.255 area 0<br />
wash(config-router)#network 172.16.2.0 0.0.0.255 area 0<br />
leung(config)#router ospf 1<br />
leung(config-router)#network 172.16.2.0 0.0.0.255 area 0<br />
leung(config-router)#network 172.16.3.0 0.0.0.255 area 0<br />
3. We can use some show commands too:<br />
wash#sh ip route<br />
Codes: C - connected, S - static, I - IGRP, R - RIP, M - mobile, B - BGP<br />
D - EIGRP, EX - EIGRP external, O - OSPF, IA - OSPF inter area<br />
313
N1 - OSPF NSSA external type 1, N2 - OSPF NSSA external type 2<br />
E1 - OSPF external type 1, E2 - OSPF external type 2, E - EGP<br />
i - IS-IS, L1 - IS-IS level-1, L2 - IS-IS level-2, * - candidate default<br />
U - per-user static route, o - ODR<br />
Gateway of last resort is not set<br />
172.16.0.0/24 is subnetted, 3 subnets<br />
C 172.16.1.0 is directly connected, Ethernet0/0<br />
C 172.16.2.0 is directly connected, Serial0/0<br />
O 172.16.3.0 [110/74] via 172.16.2.2, 00:01:25, Serial0/0<br />
wash#<br />
leung#sh ip route<br />
Codes: C - connected, S - static, I - IGRP, R - RIP, M - mobile, B - BGP<br />
D - EIGRP, EX - EIGRP external, O - OSPF, IA - OSPF inter area<br />
N1 - OSPF NSSA external type 1, N2 - OSPF NSSA external type 2<br />
E1 - OSPF external type 1, E2 - OSPF external type 2, E - EGP<br />
i - IS-IS, L1 - IS-IS level-1, L2 - IS-IS level-2, * - candidate default<br />
U - per-user static route, o - ODR<br />
Gateway of last resort is not set<br />
172.16.0.0/24 is subnetted, 3 subnets<br />
O 172.16.1.0 [110/74] via 172.16.2.1, 00:01:29, Serial0/1<br />
C 172.16.2.0 is directly connected, Serial0/1<br />
C 172.16.3.0 is directly connected, Ethernet0/0<br />
leung#<br />
wash#sh ip ospf<br />
Routing Process "ospf 1" with ID 172.16.2.1<br />
Supports only single TOS(TOS0) routes<br />
SPF schedule delay 5 secs, Hold time between two SPFs 10 secs<br />
Minimum LSA interval 5 secs. Minimum LSA arrival 1 secs<br />
Number of external LSA 0. Checksum Sum 0x0<br />
Number of DCbitless external LSA 0<br />
Number of DoNotAge external LSA 0<br />
Number of areas in this router is 1. 1 normal 0 stub 0 nssa<br />
Area BACKBONE(0)<br />
Number of interfaces in this area is 2<br />
Area has no authentication<br />
SPF algorithm executed 3 times<br />
Area ranges are<br />
Number of LSA 2. Checksum Sum 0x848F<br />
Number of DCbitless LSA 0<br />
Number of indication LSA 0<br />
Number of DoNotAge LSA 0<br />
314
wash#<br />
leung#sh ip ospf<br />
Routing Process "ospf 1" with ID 172.16.3.1<br />
Supports only single TOS(TOS0) routes<br />
SPF schedule delay 5 secs, Hold time between two SPFs 10 secs<br />
Minimum LSA interval 5 secs. Minimum LSA arrival 1 secs<br />
Number of external LSA 0. Checksum Sum 0x0<br />
Number of DCbitless external LSA 0<br />
Number of DoNotAge external LSA 0<br />
Number of areas in this router is 1. 1 normal 0 stub 0 nssa<br />
Area BACKBONE(0)<br />
Number of interfaces in this area is 2<br />
Area has no authentication<br />
SPF algorithm executed 2 times<br />
Area ranges are<br />
Number of LSA 2. Checksum Sum 0x848F<br />
Number of DCbitless LSA 0<br />
Number of indication LSA 0<br />
Number of DoNotAge LSA 0<br />
leung#<br />
wash#sh ip ospf neighbor<br />
Neighbor ID Pri State Dead Time Address Interface<br />
172.16.3.1 1 FULL/ - 00:00:32 172.16.2.2 Serial0/0<br />
wash#<br />
leung#sh ip ospf neighbor<br />
Neighbor ID Pri State Dead Time Address Interface<br />
172.16.2.1 1 FULL/ - 00:00:31 172.16.2.1 Serial0/1<br />
leung#<br />
leung#debug ip ospf events<br />
OSPF events debugging is on<br />
00:10:09: OSPF: Rcv hello from 172.16.2.1 area 0 from Serial0/1<br />
172.16.2.1<br />
00:10:09: OSPF: End of hello processing<br />
00:10:19: OSPF: Rcv hello from 172.16.2.1 area 0 from Serial0/1<br />
172.16.2.1<br />
00:10:19: OSPF: End of hello processing<br />
00:10:29: OSPF: Rcv hello from 172.16.2.1 area 0 from Serial0/1<br />
172.16.2.1<br />
00:10:29: OSPF: End of hello processing<br />
315
Supplemental Lab or Challenge Activities:<br />
1. Go out to <strong>CISCO</strong> and find out how Designated Routers and Backup<br />
Designated Routers are elected.<br />
2. Find out why we use loopback address with OSPF.<br />
3. Capture and analyze the OSPF packet structure.<br />
4. What is a “hello” packet in OSPF?<br />
So What Did I Just Learn Here?<br />
In this lab you learned the basics of the OSPF routing protocol. Trust me…there is a lot<br />
more to this routing protocol. You also learned about the basics of wildcard masks. We<br />
will be using these in a couple more labs on Access Control Lists so now was a good time<br />
to bring this up.<br />
Guest Router Name<br />
Washington Leung was sentenced in early 2002 to 18 months in Federal prison and<br />
$92,000 in restitution for illegally accessing and deleting records at his former place of<br />
employment using the computers of his new place of employment (I will bet the new<br />
place of employment is now another former place of employment). Apparently he made<br />
unwanted advances to a female at his first company and was fired for it. He worked in<br />
the Human Resources Department on employment records, compensation, payroll, and<br />
passwords of accounts. After he was terminated from his first company he landed a job<br />
at a new company. Guess what? The first company never changed those passwords. So<br />
Leung copied and then deleted about 1000 records from the first company over the<br />
Internet using computers at his second job. He also gave that woman’s file a makeover: a<br />
$40,000 a year RAISE and a $100,000 bonus. Then he created a Hotmail account in the<br />
woman’s name and sent an email to the executives of the first company from “her” with<br />
an attachment of her original file. Don’t try this at home boys and girls: Forensic images<br />
of the computer he used at the second company revealed the hotmail account was created<br />
with that computer. Boo-ya! Busted prison style!<br />
316
Border Gateway Protocol (BGP)<br />
Objective:<br />
To learn the basics of setting up a one subnet BGP network and redistributing it with<br />
EIGRP.<br />
Tools and Materials:<br />
(2) PC/workstations<br />
(3) Routers<br />
(2) Switches<br />
(4) Straight-through cables<br />
(2) DCE/DTE serial cable<br />
(2) rollover cables<br />
Lab Diagram:<br />
L0<br />
ISP<br />
s0<br />
BGP 100<br />
s1 Cult<br />
Deadcow<br />
s0<br />
s1<br />
BGP 200 con e0<br />
st<br />
con<br />
st<br />
NIC<br />
st ro ro st<br />
COM1 EIGRP 13<br />
COM1<br />
NIC<br />
Workstation “A”<br />
Workstation “B”<br />
Addressing:<br />
Routers<br />
Hostnames ISP Cult Deadcow<br />
E0 n/a 192.168.1.1/24 192.168.3.1/24<br />
S0 210.1.1.1/24 (DCE) 192.168.2.1/24(DCE) n/a<br />
S1 n/a 210.1.1.2/24 192.168.2.2/24<br />
Loopback<br />
193.168.1.1/24 (L0)<br />
Workstations A B<br />
IP 192.168.1.3 192.168.3.3<br />
SM 255.255.255.0 255.255.255.0<br />
GW 192.168.1.2 192.168.3.2<br />
317
Background:<br />
BGP is primarily used between ISP’s for routing. In other words, it “is” the Internet.<br />
Right now there are about 100,000 BGP routes in the Internet. Unlike RIP, IGRP, or<br />
EIGRP you wouldn’t want to use BGP in a small network. Save this routing protocol for<br />
the huge corporations and Internet Service Providers. Some people think it is a very<br />
difficult protocol to configure and maintain while others think it is “a piece of cake…as<br />
long as you know what you are doing.” We are only going to touch on the real basics<br />
here. BGP is a very involved protocol and worthy of an entire course at the CCNP level<br />
at the least. Routers using BGP only exchange full routing tables when the connection is<br />
first established. After that there are no periodic updates, only when a change occurs.<br />
And then only the optimal route is broadcast not the entire table.<br />
Step-By-Step Instructions:<br />
1. Set up and cable the lab as shown. Put all the basics on the routers except for the<br />
routing protocols.<br />
2. Between Cult and Deadcow enable EIGRP with an autonomous system number of<br />
13.<br />
cult(config)#router eigrp 13<br />
cult(config-router)#network 192.168.1.0<br />
cult(config-router)#network 192.168.2.0<br />
deadcow(config)#router eigrp 13<br />
deadcow(config-router)#network 192.168.2.0<br />
deadcow(config-router)#network 192.168.3.0<br />
Test those routes between cult and deadcow. Now let’s move on to BGP.<br />
cult#sh ip route<br />
Codes: C - connected, S - static, I - IGRP, R - RIP, M - mobile, B - BGP<br />
D - EIGRP, EX - EIGRP external, O - OSPF, IA - OSPF inter area<br />
N1 - OSPF NSSA external type 1, N2 - OSPF NSSA external type 2<br />
E1 - OSPF external type 1, E2 - OSPF external type 2, E - EGP<br />
i - IS-IS, L1 - IS-IS level-1, L2 - IS-IS level-2, * - candidate default<br />
U - per-user static route, o - ODR<br />
Gateway of last resort is not set<br />
C 192.168.1.0/24 is directly connected, Ethernet0/0<br />
C 210.1.1.0/24 is directly connected, Serial0/1<br />
C 192.168.2.0/24 is directly connected, Serial0/0<br />
318
3. Let’s add in the BGP. It too uses an autonomous system number. Let’s use 100<br />
for the ISP and 200 for our serial 1 interface.<br />
ISP(config)# router bgp 100<br />
ISP(config-router)#no synchronization<br />
ISP(config-router)#network 193.168.1.0<br />
ISP(config-router)#network 210.1.1.0<br />
ISP(config-router)#neighbor 210.1.1.2 remote-as 200<br />
cult(config)#router bgp 200<br />
cult(config-router)#no synchronization<br />
cult(config-router)#network 210.1.1.0<br />
cult(config-router)#redistribute eigrp 13<br />
cult(config-router)#neighbor 210.1.1.1 remote-as 100<br />
4. Next we need to redistribute our routing protocols:<br />
cult(config)#router eigrp 13<br />
cult(config-router)#redistribute bgp 200<br />
cult(config-router)#passive-interface Serial0/1<br />
cult(config-router)#default-metric 1000 100 250 100 1500<br />
cult(config)#router bgp 200<br />
cult(config-router)#redistribute eigrp 13<br />
5. Now let’s see our ip routes:<br />
ISP#sh ip route<br />
Codes: C - connected, S - static, I - IGRP, R - RIP, M - mobile, B - BGP<br />
D - EIGRP, EX - EIGRP external, O - OSPF, IA - OSPF inter area<br />
N1 - OSPF NSSA external type 1, N2 - OSPF NSSA external type 2<br />
E1 - OSPF external type 1, E2 - OSPF external type 2, E - EGP<br />
i - IS-IS, L1 - IS-IS level-1, L2 - IS-IS level-2, * - candidate default<br />
U - per-user static route, o - ODR<br />
Gateway of last resort is not set<br />
C 193.168.1.0/24 is directly connected, Loopback0<br />
B 192.168.1.0/24 [20/0] via 210.1.1.2, 00:09:52<br />
C 210.1.1.0/24 is directly connected, Serial0/0<br />
B 192.168.2.0/24 [20/0] via 210.1.1.2, 00:09:52<br />
B 192.168.3.0/24 [20/2195456] via 210.1.1.2, 00:07:14<br />
319
cult#sh ip route<br />
Codes: C - connected, S - static, I - IGRP, R - RIP, M - mobile, B - BGP<br />
D - EIGRP, EX - EIGRP external, O - OSPF, IA - OSPF inter area<br />
N1 - OSPF NSSA external type 1, N2 - OSPF NSSA external type 2<br />
E1 - OSPF external type 1, E2 - OSPF external type 2, E - EGP<br />
i - IS-IS, L1 - IS-IS level-1, L2 - IS-IS level-2, * - candidate default<br />
U - per-user static route, o - ODR<br />
Gateway of last resort is not set<br />
B 193.168.1.0/24 [20/0] via 210.1.1.1, 00:22:06<br />
C 192.168.1.0/24 is directly connected, Ethernet0/0<br />
C 210.1.1.0/24 is directly connected, Serial0/0<br />
C 192.168.2.0/24 is directly connected, Serial0/0<br />
D 192.168.3.0/24 [90/2195456] via 192.168.2.2, 00:07:23, Serial0/0<br />
deadcow#sh ip route<br />
Codes: C - connected, S - static, I - IGRP, R - RIP, M - mobile, B - BGP<br />
D - EIGRP, EX - EIGRP external, O - OSPF, IA - OSPF inter area<br />
N1 - OSPF NSSA external type 1, N2 - OSPF NSSA external type 2<br />
E1 - OSPF external type 1, E2 - OSPF external type 2, E - EGP<br />
i - IS-IS, L1 - IS-IS level-1, L2 - IS-IS level-2, * - candidate default<br />
U - per-user static route, o - ODR<br />
Gateway of last resort is not set<br />
D EX 193.168.1.0/24 [170/3097600] via 192.168.2.1, 00:03:57, Serial0/1<br />
D 192.168.1.0/24 [90/2195456] via 192.168.2.1, 00:03:57, Serial0/1<br />
C 192.168.2.0/24 is directly connected, Serial0/1<br />
C 192.168.3.0/24 is directly connected, Ethernet0/0<br />
deadcow#<br />
6. We can use a command called show ip bgp to examine our bgp routes:<br />
ISP#sh ip bgp<br />
BGP table version is 65, local router ID is 193.168.1.1<br />
Status codes: s suppressed, d damped, h history, * valid, > best, i - internal<br />
Origin codes: i - IGP, e - EGP, ? - incomplete<br />
<strong>Network</strong> Next Hop Metric LocPrf Weight Path<br />
*> 192.168.1.0 210.1.1.2 0 0 200 ?<br />
*> 192.168.2.0 210.1.1.2 0 0 200 ?<br />
*> 192.168.3.0 210.1.1.2 2195456 0 200 ?<br />
*> 193.168.1.0 0.0.0.0 0 32768 i<br />
*> 210.1.1.0 0.0.0.0 0 32768 i<br />
* 210.1.1.2 0 0 200 i<br />
ISP#<br />
cult#sh ip bgp<br />
320
BGP table version is 24, local router ID is 210.1.1.2<br />
Status codes: s suppressed, d damped, h history, * valid, > best, i - internal<br />
Origin codes: i - IGP, e - EGP, ? - incomplete<br />
<strong>Network</strong> Next Hop Metric LocPrf Weight Path<br />
*> 192.168.1.0 0.0.0.0 0 32768 ?<br />
*> 192.168.2.0 0.0.0.0 0 32768 ?<br />
*> 192.168.3.0 192.168.2.2 2195456 32768 ?<br />
*> 193.168.1.0 210.1.1.1 0 0 100 i<br />
* 210.1.1.0 210.1.1.1 0 0 100 i<br />
*> 0.0.0.0 0 32768 i<br />
deadcow#sh ip bgp<br />
% BGP not active<br />
Supplemental Lab or Challenge Activities:<br />
1. Go out to <strong>CISCO</strong> and find out what are the definitions and descriptions of the<br />
metrics.<br />
2. Find out what is the difference between IBGP and EBGP.<br />
3. How would you redistribute BGP with IGRP? RIP?<br />
4. Try using your protocol inspector to capture BGP packets. Examine their<br />
structure carefully.<br />
5. For what is the “no synchronization” command used? What about the<br />
“passive-interface” command?<br />
6. When we use a clockrate command we have been using 56000. We know T-1<br />
lines are much faster than that…what is the upper limit of our clockrate<br />
command? (hint: it’s in the millions)<br />
So What Have I Learned Here?<br />
In this lab you learned the very basics of the BGP routing protocol. Trust me…you just<br />
touched on the tip of the iceberg here.<br />
Guest Router Name<br />
Cult of the Dead Cow (CdC) is a hacking gang who have been publishing their hacking<br />
materials since the 1980’s. One of their more famous contributions is the software<br />
known as “Back Orifice tool for Windows.” This program, when installed on a<br />
computer, makes it very easy for a hacker to manipulate the workstation just like a<br />
puppeteer does with a puppet.<br />
321
Paper Lab: Routing Protocols<br />
Objective:<br />
To be able to compare and contrast between the routing protocols used so far in our<br />
studies: RIP, RIP version 2, IGRP, EIGRP, BGP and OSPF.<br />
On your test you may see this as a drag and drop or even matching. In this lab I have<br />
created paper “exercises” to help “simulate” this as best as I can.<br />
Link State—Distance Vector—Hybrid<br />
Put each of the protocols into their “type” of routing protocol. Identify which algorithm<br />
is used for each.<br />
Link State Distance Vector Hybrid Alg.<br />
RIP<br />
yes<br />
RIP version 2<br />
no<br />
IGRP<br />
EIGRP<br />
BGP<br />
OSPF no SPF<br />
Which protocol(s) would be best used or more likely used in each situation and why?<br />
1. Your company is connecting to the Internet via an ISP.<br />
2. You wish to have your subnet mask information sent along with routing<br />
information.<br />
3. Your company is running nothing but <strong>CISCO</strong> equipment for networking.<br />
4. You are working in a small company using older equipment from <strong>CISCO</strong>.<br />
5. Your company is using <strong>CISCO</strong> equipment along with IBM, Nortel, and Bay<br />
networking equipment.<br />
6. You are working in a company that seems to merge many times with other<br />
companies. They also like to “absorb” smaller companies <strong>by</strong> purchasing<br />
them.<br />
Which protocols use autonomous system numbers in order to be configured? (circle all<br />
that apply)<br />
RIP IGRP RIPv2 OSPF BGP EIGRP<br />
Which protocols do not pass subnet mask information? (circle all that apply)<br />
RIP IGRP RIPv2 OSPF BGP EIGRP<br />
Which protocols pass the entire routing table? (circle all that apply)<br />
RIP IGRP RIPv2 OSPF BGP EIGRP<br />
322
What time interval for each protocol are updates/tables sent? (RIP 60, IGRP 90, etc)<br />
Updates Invalid Hold-down Flush<br />
RIP<br />
30 seconds<br />
RIP version 2<br />
IGRP 270 670<br />
EIGRP<br />
BGP<br />
OSPF<br />
Which of the following are the default metrics for each routing protocol?<br />
Bandwidth Reliability Load MTU Delay K-<br />
metrics<br />
RIP No No No No<br />
RIPv2 No No<br />
IGRP No No<br />
EIGRP<br />
BGP<br />
OSPF<br />
Hop<br />
count<br />
No<br />
No<br />
Enable routing<br />
If you type in:<br />
router(config)#router rip<br />
router(config-router)#network 172.16.1.1 255.255.255.0<br />
then what will appear with a show run?<br />
a. router rip<br />
network 172.16.1.0<br />
b. router rip<br />
network 172.16.1.1<br />
c. router rip<br />
network 172.16.1.1 255.255.255.0<br />
d. router rip<br />
network 172.16.1.0 255.255.255.0<br />
323
If you type in:<br />
router(config)#router igrp 38<br />
router(config-router)#network 172.16.1.1 255.255.255.0<br />
then what will appear with a show run?<br />
If you type in:<br />
a. router igrp 38<br />
network 172.16.1.0<br />
b. router igrp 38<br />
network 172.16.1.1<br />
c. router igrp 38<br />
network 172.16.1.1 255.255.255.0<br />
d. router igrp 38<br />
network 172.16.1.0 255.255.255.0<br />
router(config)#router eigrp 38<br />
router(config-router)#network 172.16.1.1 255.255.255.0<br />
then what will appear with a show run?<br />
a. router eigrp 38<br />
network 172.16.1.0<br />
b. router eigrp 38<br />
network 172.16.1.1<br />
c. router eigrp 38<br />
network 172.16.1.1 255.255.255.0<br />
d. router eigrp 38<br />
network 172.16.1.0 255.255.255.0<br />
324
Basic IP/IPX with Dynamic Routing<br />
Objective:<br />
To learn how to set up basic IP/IPX between two routers on a network using dynamic<br />
routing.<br />
Tools and Materials:<br />
(2) PC/workstations<br />
(2) Routers<br />
(2) Switches<br />
(4) Straight-through cables<br />
(1) DCE/DTE serial cable<br />
(2) rollover cables<br />
IP Lab Diagram:<br />
e0<br />
st<br />
con<br />
s0<br />
s1<br />
con<br />
st<br />
e0<br />
NIC<br />
st ro ro st<br />
COM1<br />
COM1<br />
NIC<br />
Workstation “A”<br />
Workstation “B”<br />
IP Addressing:<br />
Routers<br />
Hostnames Steve Gibson<br />
E0 192.168.1.1/24 192.168.3.1/24<br />
S0 192.168.2.1/24 (DCE) n/a<br />
S1 n/a 192.168.2.2/24 (DTE)<br />
Workstations A B<br />
IP 192.168.1.2 192.168.3.2<br />
SM 255.255.255.0 255.255.255.0<br />
GW 192.168.1.1 192.168.3.1<br />
Step-By-Step Instructions:<br />
1. Set up and cable the lab as shown. Enable IGRP as a routing protocol using<br />
autonomous system number 16.<br />
2. Test ping from workstation a to b.<br />
325
IPX Lab Diagram:<br />
network 100<br />
enc SAP<br />
<strong>Network</strong> BB<br />
enc HDLC<br />
0000.1234.1111 0000.1234.2222<br />
s0<br />
e0<br />
s1<br />
e0<br />
<strong>Network</strong> 200<br />
enc SAP<br />
Workstation “A”<br />
Workstation “B”<br />
3. Now that we know everything works fine lets add in our IPX with dynamic<br />
(automatic) routing. We found out from our Novell geek that we need to use<br />
808.2 (Ethernet—SAP) for our IPX routing:<br />
steve(config)#ipx routing 0000.1234.1111<br />
steve(config)#int e0/0<br />
steve(config-if)#ipx network 100 enc SAP<br />
steve(config)#int s0/0<br />
steve(config-if)#ipx network BB<br />
The first line enables IPX routing on our router with the router having an IPX<br />
number of 0000.1234.1111. In the next two groups of commands we bind<br />
IPX network numbers and their frame types to the interfaces. For dynamic<br />
routing that is about it…here are the commands for the other router too:<br />
gibson(config)#ipx routing 0000.1234.2222<br />
gibson(config)#int e0/0<br />
gibson(config-if)#ipx network 200 enc SAP<br />
gibson(config)#int s0/1<br />
gibson(config-if)#ipx network BB<br />
4. Now we can test ping our network. This requires the use of the network<br />
number plus the ipx number. Since we do not have IPX enabled on our<br />
workstations we will have to rely upon ping from one router to the other.<br />
Let’s see it in action!<br />
326
gibson#ping ipx 0000.1234.1111<br />
% Unrecognized host or address, or protocol not running.<br />
See? We have to add the network (BB) number to ping with IPX:<br />
gibson#ping ipx BB.0000.1234.1111<br />
Type escape sequence to abort.<br />
Sending 5, 100-<strong>by</strong>te IPXcisco Echoes to BB.0000.1234.1111, timeout is 2<br />
seconds:<br />
!!!!!<br />
Success rate is 100 percent (5/5), round-trip min/avg/max = 32/33/36 ms<br />
gibson#<br />
5. Let’s look at some of the IPX show commands.<br />
steve#sh ipx route<br />
Codes: C - Connected primary network, c - Connected secondary<br />
network<br />
S - Static, F - Floating static, L - Local (internal), W - IPXWAN<br />
R - RIP, E - EIGRP, N - NLSP, X - External, A - Aggregate<br />
s - seconds, u - uses, U - Per-user static<br />
2 Total IPX routes. Up to 1 parallel paths and 16 hops allowed.<br />
No default route known.<br />
C BB (HDLC), Se0/0<br />
C 100 (SAP), Et0/0<br />
Don’t you just love it when everything works? We can see that we have used<br />
dynamic routing and have both our routes being advertised properly!<br />
steve#sh ipx traffic<br />
System Traffic for 0.0000.0000.0001 System-Name: steve<br />
Rcvd: 33 total, 0 format errors, 0 checksum errors, 0 bad hop count,<br />
3 packets pitched, 33 local destination, 0 multicast<br />
Bcast: 18 received, 34 sent<br />
Sent: 51 generated, 0 forwarded<br />
0 encapsulation failed, 0 no route<br />
SAP: 2 Total SAP requests, 0 Total SAP replies, 0 servers<br />
2 SAP general requests, 0 ignored, 0 replies<br />
0 SAP Get Nearest Server requests, 0 replies<br />
0 SAP Nearest Name requests, 0 replies<br />
0 SAP General Name requests, 0 replies<br />
0 SAP advertisements received, 0 sent<br />
327
0 SAP flash updates sent, 0 SAP format errors<br />
RIP: 2 RIP requests, 0 ignored, 2 RIP replies, 2 routes<br />
11 RIP advertisements received, 24 sent<br />
4 RIP flash updates sent, 0 RIP format errors<br />
Echo: Rcvd 10 requests, 5 replies<br />
Sent 5 requests, 10 replies<br />
0 unknown: 0 no socket, 0 filtered, 0 no helper<br />
0 SAPs throttled, freed NDB len 0<br />
Watchdog:<br />
0 packets received, 0 replies spoofed<br />
Queue lengths:<br />
IPX input: 0, SAP 0, RIP 0, GNS 0<br />
SAP throttling length: 0/(no limit), 0 nets pending lost route reply<br />
Delayed process creation: 0<br />
EIGRP: Total received 0, sent 0<br />
Updates received 0, sent 0<br />
Queries received 0, sent 0<br />
Replies received 0, sent 0<br />
SAPs received 0, sent 0<br />
Trace: Rcvd 0 requests, 0 replies<br />
Sent 0 requests, 0 replies<br />
For good measure let’s look on the ipx route on the other router too:<br />
gibson#sh ipx route<br />
Codes: C - Connected primary network, c - Connected secondary<br />
network<br />
S - Static, F - Floating static, L - Local (internal), W - IPXWAN<br />
R - RIP, E - EIGRP, N - NLSP, X - External, A - Aggregate<br />
s - seconds, u - uses, U - Per-user static<br />
2 Total IPX routes. Up to 1 parallel paths and 16 hops allowed.<br />
No default route known.<br />
C BB (HDLC), Se0/1<br />
C 200 (SAP), Et0/0<br />
6. Now let’s check out some debug commands with IPX:<br />
gibson#debug ipx ?<br />
all<br />
compression<br />
eigrp<br />
ipxwan<br />
nlsp<br />
packet<br />
redistribution<br />
routing<br />
sap<br />
spoof<br />
IPX activity (all)<br />
IPX compression<br />
IPX EIGRP packets<br />
Novell IPXWAN events<br />
IPX NLSP activity<br />
IPX activity<br />
IPX route redistribution<br />
IPX RIP routing information<br />
IPX Service Advertisement information<br />
IPX and SPX Spoofing activity<br />
328
gibson#debug ipx sap ?<br />
activity IPX Service Advertisement packets<br />
activity IPX Service Advertisement packets<br />
gibson#debug ipx sap activity<br />
IPX service debugging is on<br />
gibson#<br />
00:21:23: IPXSAP: positing update to 200.ffff.ffff.ffff via Ethernet0/0<br />
(broadcast) (full)<br />
00:21:30: IPXSAP: positing update to BB.ffff.ffff.ffff via Serial0/1<br />
(broadcast) (full)<br />
00:22:23: IPXSAP: positing update to 200.ffff.ffff.ffff via Ethernet0/0<br />
(broadcast) (full)<br />
00:22:30: IPXSAP: positing update to BB.ffff.ffff.ffff via Serial0/1<br />
(broadcast) (full)<br />
gibson#undebug all<br />
Notice our SAP packets here and how often they are broadcast. These are what<br />
makes Novell a “chatty” network. Remember these SAP packets act like little<br />
children demanding attention: “Here I am! Here I am! Here I am!” Get it?<br />
Good.<br />
Supplemental Lab or Challenge Activity:<br />
1. Try adding Novell-ether as an encapsulation. Do you have to add it for every<br />
interface or is it on <strong>by</strong> default?<br />
2. Add in a third router and keep the IPX party going!<br />
3. Try switching the mask to 20 bits. What changes have to be made in your<br />
planning? Ok…now go do it!<br />
So What Have I Learned Here?<br />
In this lab you learned how to implement dynamic IPX routing along with dynamic IP<br />
routing. We just did this to make things easier even though it sounds complicated. There<br />
is not much IPX left in the “real world…” In some schools, some banks, and some<br />
companies but it seems to being dying out. Too bad…its really nice…it’s even similar to<br />
IPv6…coincidence? I think not.<br />
Guest Router Name<br />
Steve Gibson runs a nice security website: http://www.grc.com His site will scan your<br />
system (free) and tell you of any security leaks or potential port problems. His site says<br />
they will not keep any information. Heck, it’s a good start any many of my security<br />
colleagues frequently use the site.<br />
329
Basic IP/IPX with Static Routing<br />
Objective:<br />
To learn how to set up basic IP/IPX between two routers on a network using static<br />
routing.<br />
Tools and Materials:<br />
(2) PC/workstations<br />
(3) Routers<br />
(2) Switches<br />
(4) Straight-through cables<br />
(2) DCE/DTE serial cable<br />
(2) rollover cables<br />
IP Lab Diagram:<br />
e0<br />
st<br />
con<br />
s0<br />
s1<br />
con<br />
st<br />
e0<br />
NIC<br />
st ro ro st<br />
COM1<br />
COM1<br />
NIC<br />
Workstation “A”<br />
Workstation “B”<br />
IP Addressing:<br />
Routers<br />
Hostnames Steve Gibson<br />
E0 192.168.1.1/24 192.168.3.1/24<br />
S0 192.168.2.1/24 (DCE) n/a<br />
S1 n/a 192.168.2.2/24 (DTE)<br />
Workstations A B<br />
IP 192.168.1.2 192.168.3.2<br />
SM 255.255.255.0 255.255.255.0<br />
GW 192.168.1.1 192.168.3.1<br />
Step-By-Step Instructions:<br />
1. Set up and cable the lab as shown. Enable IGRP as a routing protocol using<br />
autonomous system number 16. Use the same IPX settings from the last lab.<br />
2. Test ping from workstation a to b.<br />
330
IPX Lab Diagram:<br />
network 100<br />
enc SAP<br />
<strong>Network</strong> BB<br />
enc HDLC<br />
0000.1234.1111 0000.1234.2222<br />
s0<br />
e0<br />
s1<br />
e0<br />
<strong>Network</strong> 200<br />
enc SAP<br />
Workstation “A”<br />
Workstation “B”<br />
3. Now we can test ping our IPX network. This requires the use of the network<br />
number plus the ipx number. Since we do not have IPX enabled on our<br />
workstations we will have to rely upon ping from one router to the other. Let’s<br />
see it in action!<br />
gibson#ping ipx BB.0000.1234.1111<br />
Type escape sequence to abort.<br />
Sending 5, 100-<strong>by</strong>te IPXcisco Echoes to BB.0000.1234.1111, timeout is 2<br />
seconds:<br />
!!!!!<br />
Success rate is 100 percent (5/5), round-trip min/avg/max = 32/33/36 ms<br />
gibson#<br />
4. So how come it worked? Oh yeah. For any sort of static routing to take place we<br />
really have to use a third router here, otherwise everything is automatically routed<br />
over directly connected lines. So let’s add a third router in:<br />
gibson(config)#int s0/0<br />
gibson(config-if)#ip address 192.168.4.1 255.255.255.0<br />
gibson(config-if)#clockrate 56000<br />
gibson(config-if)#network CC<br />
staticIPX(config)#ipx routing 0000.1234.3333<br />
staticIPX(config)#int s0/1<br />
staticIPX(config-if)#ip address 192.168.4.2 255.255.255.0<br />
staticIPX(config-if)#network CC<br />
staticIPX(config-if)#no shut<br />
331
IPX Lab Diagram:<br />
<strong>Network</strong> BB<br />
enc HDLC<br />
0000.1234.1111 0000.1234.2222<br />
s0<br />
s1 s0<br />
e0<br />
<strong>Network</strong> CC<br />
enc HDLC<br />
s1<br />
network 100<br />
enc SAP<br />
e0<br />
<strong>Network</strong> 200<br />
enc SAP<br />
Workstation “A”<br />
Workstation “B”<br />
5. Now let’s try to ping from our new router all the way through:<br />
staticIPX#ping ipx bb.0000.1234.2222<br />
Type escape sequence to abort.<br />
Sending 5, 100-<strong>by</strong>te IPXcisco Echoes to BB.0000.1234.2222, timeout is 2<br />
seconds:<br />
!!!!!<br />
Success rate is 100 percent (5/5), round-trip min/avg/max = 64/64/65 ms<br />
staticIPX#<br />
That’s ok…we expected this…it is directly connected.<br />
staticIPX#ping ipx bb.0000.1234.1111<br />
Type escape sequence to abort.<br />
Sending 5, 100-<strong>by</strong>te IPXcisco Echoes to BB.0000.1234.1111, timeout is 2<br />
seconds:<br />
.....<br />
Success rate is 0 percent (0/5)<br />
steve#<br />
6. Next we need to add those static IPX routes in:<br />
staticIPX(config)#ipx route BB CC.0000.1234.2222<br />
steve(config)#ipx route CC BB.0000.1234.2222<br />
Since gibson is directly connected to both we do not need any static routes<br />
here…if we added more routers into our network then we would need more.<br />
332
7. Now let’s try that ping IPX again:<br />
staticIPX#ping ipx bb.0000.1234.1111<br />
Type escape sequence to abort.<br />
Sending 5, 100-<strong>by</strong>te IPXcisco Echoes to BB.0000.1234.1111, timeout is 2<br />
seconds:<br />
!!!!!<br />
Success rate is 100 percent (5/5), round-trip min/avg/max = 64/64/65 ms<br />
staticIPX#<br />
8. Let’s also “See” those static IPX routes (highlighted):<br />
staticIPX#sh ipx route<br />
Codes: C - Connected primary network, c - Connected secondary network<br />
S - Static, F - Floating static, L - Local (internal), W - IPXWAN<br />
R - RIP, E - EIGRP, N - NLSP, X - External, A - Aggregate<br />
s - seconds, u - uses, U - Per-user static<br />
2 Total IPX routes. Up to 1 parallel paths and 16 hops allowed.<br />
No default route known.<br />
C CC (HDLC), Se0/1<br />
S BB via CC.0000.1234.2222, Se0/1<br />
gibson#sh ipx route<br />
Codes: C - Connected primary network, c - Connected secondary network<br />
S - Static, F - Floating static, L - Local (internal), W - IPXWAN<br />
R - RIP, E - EIGRP, N - NLSP, X - External, A - Aggregate<br />
s - seconds, u - uses, U - Per-user static<br />
4 Total IPX routes. Up to 1 parallel paths and 16 hops allowed.<br />
No default route known.<br />
C BB (HDLC), Se0/1<br />
C CC (HDLC), Se0/0<br />
C 200 (SAP), Et0/0<br />
S 100 via BB.0000.1234.1111, Se0/1<br />
steve#sh ipx route<br />
Codes: C - Connected primary network, c - Connected secondary network<br />
S - Static, F - Floating static, L - Local (internal), W - IPXWAN<br />
R - RIP, E - EIGRP, N - NLSP, X - External, A - Aggregate<br />
s - seconds, u - uses, U - Per-user static<br />
3 Total IPX routes. Up to 1 parallel paths and 16 hops allowed.<br />
333
No default route known.<br />
C BB (HDLC), Se0/0<br />
C 100 (SAP), Et0/0<br />
S CC via BB.0000.1234.2222, Se0/0<br />
steve#<br />
Supplemental Lab or Challenge Activity:<br />
1. Try adding Novell-ether as an encapsulation.<br />
2. Add in a fourth router and keep the IPX party going!<br />
3. Try switching the mask to 20 bits. What changes have to be made in your planning?<br />
Ok…now go do it!<br />
So What Have I Learned Here?<br />
In this lab you learned how to implement static IPX routing along with dynamic IP<br />
routing. Next let’s take a few moments to look more closely at our IPX show commands,<br />
debug commands, and encapsulation types.<br />
Guest Router Name<br />
Steve Gibson runs a nice security website: http://www.grc.com His site will scan your<br />
system (free) and tell you of any security leaks or potential port problems. His site says<br />
they will not keep any information. Heck, it’s a good start any many of my security<br />
colleagues frequently use the site.<br />
334
Objective:<br />
To learn how to create wildcard masks for use with Access Control Lists.<br />
Paper Lab: Wildcard Masks<br />
Background:<br />
People confuse wildcard masks with subnet masks all the time. They are similar after all<br />
because they both are masks but they really are different. A wildcard mask helps an<br />
access control list determine which ip addresses to implement the access control list<br />
commands upon. A nice, neat, simple rule: zero’s denote “exact” match bits…think of<br />
that little razor knife: an “exact-o” knife. Let’s dig in to an example:<br />
1. Write a wildcard mask for a host ip address of 172.16.2.34:<br />
Can you see what they are asking? They want an exact match for a host ip<br />
address here. Let’s convert the ip address to binary:<br />
10101100.00010000.00000010.00100010<br />
Since they want an exact match for all bits then the wildcard mask is filled in with<br />
zero’s (ok…so the bits conversion wasn’t needed but give me a break…you will<br />
see why we added this step in next…)<br />
00000000.00000000.00000000.00000000<br />
Therefore, when we convert this wildcard mask back to decimal we get a wildcard<br />
mask of 0.0.0.0 for our exact host match.<br />
2. Write a wildcard mask for a entire subnet containing the ip address of<br />
172.16.2.34/27<br />
Can you see what they are asking? They want an exact match for the subnet<br />
containing the host ip address here. Let’s convert the ip address to binary:<br />
10101100.00010000.00000010.00100010<br />
Then let’s figure out the network, subnet, and host portions:<br />
10101100.00010000.00000010.00100010<br />
network.network.network.subnet host<br />
Since they want an exact match for all network plus subnet bits then the wildcard<br />
mask is filled in with zero’s in the network and subnet portions and one’s in the<br />
host portion:<br />
00000000.00000000.00000000.00011111<br />
335
Therefore, when we convert this wildcard mask back to decimal we get a wildcard<br />
mask of 0.0.0.31 for our subnet wildcard mask.<br />
3. Finally, unlike subnet masks, wildcard masks do not have to be contiguous (all<br />
zeros in a row)…we can mask out certain ips. Write a wildcard mask for a the<br />
odd numbered ips in the entire subnet containing the ip address of 172.16.2.34/27<br />
Let’s convert the ip address to binary:<br />
10101100.00010000.00000010.00100010<br />
Then let’s figure out the network, subnet, and host portions:<br />
10101100.00010000.00000010.00100010<br />
network.network.network.subnet host<br />
Since they want an exact match for all network plus subnet bits then the wildcard<br />
mask is filled in with zero’s in the network and subnet portions and one’s in the<br />
host portion except the last bit (this determines odd or even…it’s the “1” bit):<br />
00000000.00000000.00000000.00011110<br />
Therefore, when we convert this wildcard mask back to decimal we get a wildcard<br />
mask of 0.0.0.30 for our subnet wildcard mask. This one can be confusing…later<br />
on when you learn about writing access control lists doing something like this will<br />
depend upon whether you are permitting or denying something. For now just<br />
realize the bits do not have to be contiguous.<br />
Supplemental Labs or Challenge Activities:<br />
1. Write a wildcard mask that will mask the 192.168.1.0/24 network. We are<br />
looking for an exact match of the network and subnet portions only.<br />
2. Write a wildcard mask that will mask the host portions of the 192.168.1.0/24<br />
network. We are looking for an exact match of the host portions only.<br />
3. Write a wildcard mask that will mask the odd ip addresses of the<br />
172.16.23.0/16 network. We are looking for an exact match of the network,<br />
subnet and odd-numbered ip’s in the host portion.<br />
4. Write a wildcard mask that will mask the upper half of the 10.128.0.0/11<br />
network. Here we will mask 129-255 in the second octet and 0-255 in the<br />
third and fourth octets (so we need exact matches for them).<br />
5. Write a wildcard mask that will mask the lower half of the 200.210.128.0/27<br />
network. Here we need to mask the lower half of the host portion for the 128<br />
subnet.<br />
**as I said these are subjective in respect to the needs of the access control list**<br />
336
Paper Lab: Access Control Lists<br />
Objective:<br />
To learn the fundamentals of writing standard, extended, and named Access Control List<br />
statements.<br />
Background:<br />
An access control lists (ACL) is a sequential collection of statements that control access<br />
to or from a network or subnet. The ACL statements are processed in the order in which<br />
they appear. There really is nothing magical about them…we just need to use them<br />
carefully and understand the logic of ACL’s. ACL’s consume large amounts of resources<br />
since every single packet coming and going is compared against every single ACL<br />
statement. In this respect we want to use them sparingly. Large amounts of ACL<br />
statements are best left to firewall and security devices…if you use lots of ACL<br />
statements you are actually turning your router into a firewall device. Creating and<br />
implementing ACL’s is a two step process:<br />
1. create the ACL<br />
2. apply the ACL to an interface<br />
You can write ACL’s for a variety of conditions and scenario’s. You will learn about 3<br />
of the basic ACL’s: Standard, Extended, and Named. Two of the other ACL’s you will<br />
learn about in CCNP school are Dynamic (a.k.a “Lock and Key”) and Reflexive. A<br />
standard ACL controls access using an IP address or range of addresses. An extended<br />
ACL controls access to specific ports for IP addresses. A named ACL uses a name<br />
instead of a number to do the same thing as standard or extended ACL’s<br />
We have some very simple rules to follow when creating ACL’s on your router.<br />
We have already discussed the first:<br />
1. ACL’s are sequentially processed<br />
2. ACL’s are compared until a match is made…if no match is made then the<br />
packets are dropped and not processed.<br />
3. There is an implicit “deny” statement at the end of every permit statement,<br />
BUT no implicit “permit” statement for every deny…watch out!<br />
4. Place standard ACL’s as close to the destination as possible. For now use<br />
“out” with standard ACL’s on the interface (more on this later).<br />
5. Place extended ACL’s as close to the source as possible. (The S’s do not<br />
go together) For now use “in” with extended ACL’s on the interface.<br />
Access Control Lists are also numbered. We have different numbers for our different<br />
purposes, protocols, and types of ACL’s. Let’s look at those numbers now:<br />
337
Table 1—ACL numbering.<br />
1-99 IP standard<br />
100-199 IP extended<br />
200-299 Protocol type-code<br />
300-399 DECnet<br />
400-499 XNS standard<br />
500-599 XNS extended<br />
600-601 Appletalk<br />
700-799 48-bit MAC address<br />
800-899 IPX standard<br />
900-999 IPX extended<br />
1000-1099 IPX SAP<br />
1100-1199 Extended 48-bit MAC address<br />
1200-1299 IPX summary address<br />
Standard ACL’s<br />
A standard ACL controls access using an IP address or range of addresses. The best way<br />
to figure these out is to dig right in and learn <strong>by</strong> doing! Let’s write a standard ACL to for<br />
hosts on the sales network to be denied access to the HR server, but allow them access to<br />
the marketing network and the WWW.<br />
server<br />
HR<br />
192.168.10.15/24 192.168.10.0/24<br />
e0/0<br />
e0/1 WWW<br />
s0/0<br />
EGR e0/2<br />
192.168.30.0/24<br />
Sales<br />
192.168.40.0/24<br />
Now lets create our ACL:<br />
Router(config)#access-list 1 deny 192.168.40.0 0.0.0.255<br />
Router(config)#access-list 1 permit ip any<br />
Here we created our access-list and gave it the number 1 (tells us it is a standard<br />
ACL…see table 1). Then we put in our source IP’s (in this case a network) and the<br />
wildcard mask. In this mask we wanted to exactly match the network and subnet portion<br />
and didn’t really care about the host portions. Therefore our mask became 0.0.0.255<br />
(nnnnnnnn.nnnnnnnn.ssssssss.hhhhhhhh).<br />
338
Now we just need to do the second step: apply it to an interface. Since this is a standard<br />
ACL we want to apply it as close to the destination as possible using “out.” If we look at<br />
our diagram we can see that the Ethernet interface 0/0 is the closest to the destination<br />
network.<br />
Router(config)#interface e0/0<br />
Router(config-if)#ip access-group 1 out<br />
Extended ACL’s<br />
An extended ACL controls access to specific ports for IP addresses. Here we are doing<br />
basically the same thing but restricting access for something specific like ftp access,<br />
telnet access, or even icmp access. Using our lab diagram again let’s write an ACL for<br />
the EGR network to have no (deny) telnet access to the HR network:<br />
(1) Create the ACL:<br />
a. Router(config)#access-list 100 deny tcp 192.168.30.0 0.0.0.255 any eq 23<br />
b. Router(config)#access-list 100 permit ip any any<br />
(2) Apply the ACL to an interface:<br />
a. Router(config)int e0/2<br />
b. Router(config-if)#ip access-group 100 in<br />
Using our lab diagram again let’s write an ACL for the EGR network to have no (deny)<br />
ability to ping (icmp) to the HR network:<br />
(1) Create the ACL:<br />
a. Router(config)#access-list 100 deny icmp 192.168.30.0 0.0.0.255<br />
b. Router(config)#access-list 100 permit icmp any any<br />
(2) Apply the ACL to an interface:<br />
a. Router(config)int e0/2<br />
b. Router(config-if)#ip access-group 100 in<br />
Named ACL’s<br />
A named ACL uses a name instead of a number to do the same thing as standard or<br />
extended ACL’s. Let’s write a named ACL to for hosts on the sales network to be denied<br />
access to the HR server, but allow them access to the marketing network and the WWW.<br />
Notice the changes in the prompt.<br />
(1) Create the ACL:<br />
a. Router(config)#ip access-list standard no_salesHR<br />
b. Router(config-std-nacl)#deny 192.168.40.0 0.0.0.255<br />
c. Router(config-std-nacl)#permit ip any<br />
(2) Apply the ACL to an interface:<br />
a. Router(config)#interface e0/0<br />
b. Router(config-if)#ip access-group no_salesHR out<br />
339
Supplemental Lab or Challenge Activity:<br />
For the following ACL’s tell if the ACL is correct or incorrectly written for the<br />
instructions given. Use the lab diagram above as a guide. If the ACL is incorrect, then<br />
re-write it correctly to achieve its goals.<br />
1. Write an ACL for the EGR network to be denied access to the Sales network<br />
using a standard ACL. Those crafty engineers like to mess with the Sales<br />
database files (like changing due dates of projects and stuff).<br />
Router(config)#access-list 101 deny 192.168.30.0 0.0.0.255<br />
Router(config)#access-list 101 permit ip any any<br />
Router(config)#int e0/2<br />
Router(config-if)#ip access-group 101 out<br />
Correct? ___________________<br />
Incorrect? __________________<br />
What’s wrong? _________________________________________________<br />
______________________________________________________________<br />
______________________________________________________________<br />
______________________________________________________________<br />
2. Write an ACL for no one to have telnet use using an extended ACL.<br />
Router(config)#access-list 101 deny tcp 192.168.0.0 0.0.255.255 any eq 23<br />
Router(config)#access-list 101 permit tcp any any<br />
Router(config)#int e0/0<br />
Router(config-if)#ip access-group 101 in<br />
Router(config)#int e0/1<br />
Router(config-if)#ip access-group 101 in<br />
Router(config)#int e0/2<br />
Router(config-if)#ip access-group 101 in<br />
Correct? ___________________<br />
Incorrect? __________________<br />
What’s wrong? _________________________________________________<br />
______________________________________________________________<br />
______________________________________________________________<br />
______________________________________________________________<br />
340
Now let’s try to “free-hand” some ACL’s<br />
1. Write a standard ACL to permit access from the EGR network (ip numbers<br />
192.168.30.24, 192.168.30.37, 192.168.30.45 and 192.168.30.221) to the<br />
Sales network. Assume these are the IP addresses for supervisors. All other<br />
IP’s from the EGR should be denied access to the Sales network.<br />
2. Write a named ACL to do the same thing.<br />
3. Write an extended ACL to deny FTP access to everyone in the network.<br />
4. Write a named ACL to allow only the EGR network to have www access.<br />
5. Just for giggles lets allow the sales and HR network to have www access but<br />
not have dns access. In this manner they can get to web pages only if they<br />
know the specific dot-decimal address of the web page. Tee-hee, isn’t this a<br />
snort?<br />
6. Write an extended ACL to allow only the HR people with odd numbered ip<br />
addresses to have the ability to use FTP.<br />
So What Have I Learned Here?<br />
In this lab you learned the intricacies of writing standard, extended and named access<br />
control lists. There is not a lot of material written about ACL’s so you just have to come<br />
up with your own ideas, test them, and learn from them…again…learning <strong>by</strong> doing.<br />
Now that we may have our “theories” down the next few labs will allow us to put ACL’s<br />
to work in our networks.<br />
341
Objective:<br />
To implement a standard access control list on a simple network.<br />
Tools and Materials:<br />
(4) workstations<br />
(6) straight-through cables<br />
(2) routers<br />
(1) DCE/DTE cable<br />
(2) switches (or one switch with 2 VLAN’s)<br />
Lab Diagram:<br />
Standard Access Control Lists<br />
gates<br />
ISP<br />
s0/0<br />
s0/1 L0<br />
e0/0 e0/1<br />
Net. Admin Sales1 EGR1 EGR2<br />
IP 192.168.1.2/24 192.168.1.3/24 192.168.3.2/24 192.168.3.3/24<br />
GW 192.168.1.1 192.168.1.1 192.168.3.1 192.168.3.1<br />
Addressing<br />
Router Gates ISP<br />
S0/0 (DCE) n/a 192.168.2.1<br />
S0/1 (DTE) 192.168.2.2 n/a<br />
E0/0 192.168.1.1 n/a<br />
E0/1 192.168.3.1 n/a<br />
L0 n/a 172.16.1.1/16<br />
Step-By-Step Instructions:<br />
1. Set up and cable the lab as shown. Use RIPv2 for routing. Enable file sharing<br />
on each computer.<br />
2. Test ping from each workstation to each other and to the loopback interface.<br />
3. Make a folder on the desktop of each computer.<br />
342
4. Make four text files and put one in each workstation. One message should be<br />
“This is my note for the one dot two workstation” that should be saved as<br />
1dot2.txt and saved in that folder on the 192.168.1.2 workstation. It could<br />
look like this:<br />
Repeat for each workstation. Put a shortcut for each desktop folder on each<br />
workstation. It should look like this:<br />
5. Try to access the folders and text files on each workstation from each other<br />
workstation. It should work just fine and jim dandy.<br />
343
6. Write a standard ACL to deny access for the host 192.168.1.2 to the<br />
192.168.3.0 network. Step 1: create the ACL:<br />
gates(config)#access-list 10 deny 192.168.1.2 0.0.0.0 OR<br />
gates(config)#access-list 10 deny host 192.168.1.2<br />
7. Step 2: apply the ACL to an interface. Since this is a standard ACL it should<br />
be placed nearest the destination as possible using “out.”<br />
gates(config)#int e0/1<br />
gates(config-if)#ip access-group 10 out<br />
8. From 192.168.1.2 try to ping 192.168.3.3. It should not work and be<br />
unreachable:<br />
C:\WINDOWS\Desktop>ping 192.168.3.3<br />
Pinging 192.168.3.3 with 32 <strong>by</strong>tes of data:<br />
Reply from 192.168.1.1: Destination net unreachable.<br />
Reply from 192.168.1.1: Destination net unreachable.<br />
Reply from 192.168.1.1: Destination net unreachable.<br />
Reply from 192.168.1.1: Destination net unreachable.<br />
Ping statistics for 192.168.3.3:<br />
Packets: Sent = 4, Received = 4, Lost = 0 (0% loss),<br />
Approximate round trip times in milli-seconds:<br />
Minimum = 0ms, Maximum = 0ms, Average = 0ms<br />
C:\WINDOWS\Desktop><br />
9. Use Windows explorer to find the computer. It won’t find it:<br />
344
10. Try the shortcut to the 192.168.3.3 folder from 192.168.1.2. It won’t work.<br />
In fact the computer will appear to freeze and give you an icky message like<br />
this:<br />
11. Try steps 8-10 again but from the 192.168.1.3 workstation. It should work<br />
fine because we only denied the host. Oh fudge! We forgot our pecking order<br />
with ACL’s…they are sequential and we need permits for denies. Let’s go<br />
add that in:<br />
gates(config)#access-list 10 permit ip any<br />
12. Now it should work fine…If you have any problems reboot the computers.<br />
Microsoft is quirky in small networks. I had to do it several times too. What<br />
the heck it may take some time but when you charge $100 an hour…who<br />
cares?<br />
13. Ok…let’s play…let’s verify that we really got our “out” statement correct <strong>by</strong><br />
changing it to “in” and see what happens.<br />
gates(config)#int e0/1<br />
gates(config-if)#no ip access-group 10 out<br />
gates(config-if)#ip access-group 10 in<br />
Everything will still work…drat! That is not what we wanted!<br />
14. Let’s finish off this puppy with some show and debug commands.<br />
gates#sh access-lists<br />
Standard IP access list 10<br />
deny 192.168.1.2<br />
permit any<br />
gates#<br />
This will show us, in brief, our standard access list statements. And, to the<br />
big kahuna:<br />
gates#debug ip packet detail<br />
IP packet debugging is on (detailed)<br />
gates#<br />
18:32:05: ICMP type=8, code=0<br />
18:32:05: IP: s=192.168.1.1 (local), d=192.168.1.2 (Ethernet0/0), len 56, sending<br />
345
18:32:05: ICMP type=3, code=13<br />
18:32:06: IP: s=192.168.1.2 (Ethernet0/0), d=192.168.3.2 (Ethernet0/1), len 60,<br />
access denied<br />
18:32:06: ICMP type=8, code=0<br />
18:32:06: IP: s=192.168.1.1 (local), d=192.168.1.2 (Ethernet0/0), len 56, sending<br />
18:32:06: ICMP type=3, code=13<br />
18:32:07: IP: s=192.168.1.2 (Ethernet0/0), d=192.168.3.2 (Ethernet0/1), len 60,<br />
access denied<br />
18:32:07: ICMP type=8, code=0<br />
18:32:07: IP: s=192.168.1.1 (local), d=192.168.1.2 (Ethernet0/0), len 56, sending<br />
18:32:07: ICMP type=3, code=13<br />
18:32:08: IP: s=192.168.1.2 (Ethernet0/0), d=192.168.3.2 (Ethernet0/1), len 60,<br />
access denied<br />
18:32:08: ICMP type=8, code=0<br />
18:32:08: IP: s=192.168.1.1 (local), d=192.168.1.2 (Ethernet0/0), len 56, sending<br />
18:32:08: ICMP type=3, code=13<br />
gates#<br />
Type 8 with code 0 is for an ICMP echo.<br />
Type 3 with code 13 is for “administratively prohibited.”<br />
Supplemental Lab or Challenge Activity:<br />
1. Design a network using 3 or more routers using a different routing protocol than<br />
RIPv2. Vary the IP address classes. Deny certain subnets access to each other.<br />
2. Design a network for a school that uses even-numbered IP addresses for teachers<br />
and odd-numbered IP addresses for students. Allow only the teachers to be able<br />
to use the WWW and telnet. Set up students for web access but without DNS<br />
capabilities.<br />
3. Go out to <strong>CISCO</strong> and find out other type and codes for ACL’s using the debug ip<br />
packet detail command.<br />
So What Have I Learned Here?<br />
In this lab you learned how to implement a standard ACL in a simple network. You also<br />
learned about the basic show and debug commands for use with ACL’s. Finally you got<br />
a refresher in basic networking with Microsoft. In the next lab you will work with<br />
extended ACL’s.<br />
Guest Router Name<br />
Gates…if you haven’t guessed it <strong>by</strong> now…Bill Gates is one of the founders of<br />
Microsoft—the world’s largest computer software empire. Microsoft is one of the most<br />
hated targets of hackers because of the closed source code. On the other hand they say<br />
Apple’s are almost un-hackable…mainly because hackers do not use Apples, do not care<br />
about Apples, and never really will as long as Microsoft is around. TNT had a good<br />
biography on Bill Gates with Anthony M. Hall as Bill Gates. See it if you get the chance.<br />
346
Objective:<br />
To implement an extended access control list on a simple network.<br />
Tools and Materials:<br />
(4) workstations<br />
(6) straight-through cables<br />
(2) routers<br />
(1) DCE/DTE cable<br />
(2) switches (or one switch with 2 VLAN’s)<br />
Lab Diagram:<br />
Extended Access Control Lists<br />
gates<br />
ISP<br />
s0/0<br />
s0/1 L0<br />
e0/0 e0/1<br />
Net. Admin Sales1 EGR1 EGR2<br />
IP 192.168.1.2/24 192.168.1.3/24 192.168.3.2/24 192.168.3.3/24<br />
GW 192.168.1.1 192.168.1.1 192.168.3.1 192.168.3.1<br />
Addressing<br />
Router Gates ISP<br />
S0/0 (DCE) n/a 192.168.2.1<br />
S0/1 (DTE) 192.168.2.2 n/a<br />
E0/0 192.168.1.1 n/a<br />
E0/1 192.168.3.1 n/a<br />
L0 n/a 172.16.1.1/16<br />
Step-By-Step Instructions:<br />
1. Clear the ACL’s on the router. Verify with “show run” after you clear them.<br />
gates(config)no access-list 10<br />
gates(config)#int e0/1<br />
gates(config-if)#no ip access-group 10 out<br />
347
2. Test ping from each workstation to each other and to the loopback interface.<br />
3. Write an extended ACL to deny icmp from 192.168.1.2 to everywhere. Step 1: create<br />
the ACL:<br />
gates(config)#access-list 138 deny icmp host 192.168.1.2 any<br />
gates(config)#access-list 138 permit ip any any<br />
Isn’t that weird how with extended ACL’s you have to use “ip any any” and with<br />
standard ACL’s you only needed “ip any?”<br />
4. Step 2: apply the ACL to an interface. Since this is an extended ACL it should be<br />
placed nearest the source as possible using “in.”<br />
gates(config)#int e0/0<br />
gates(config-if)#ip access-group 138 in<br />
5. From 192.168.1.2 try to ping 192.168.3.3. It should not work and be unreachable:<br />
C:\WINDOWS\Desktop>ping 192.168.3.3<br />
Pinging 192.168.3.3 with 32 <strong>by</strong>tes of data:<br />
Reply from 192.168.1.1: Destination net unreachable.<br />
Reply from 192.168.1.1: Destination net unreachable.<br />
Reply from 192.168.1.1: Destination net unreachable.<br />
Reply from 192.168.1.1: Destination net unreachable.<br />
Ping statistics for 192.168.3.3:<br />
Packets: Sent = 4, Received = 4, Lost = 0 (0% loss),<br />
Approximate round trip times in milli-seconds:<br />
Minimum = 0ms, Maximum = 0ms, Average = 0ms<br />
C:\WINDOWS\Desktop><br />
6. Try to ping from 192.168.1.2 to 192.168.3.2 and 172.16.1.1…both will not work.<br />
7. Let’s assume this person will need to be able to ping to 172.16.1.1 but not to<br />
192.168.3.0. So let’s modify our ACL a bit:<br />
gates(config)#no access-list 138<br />
**(you can see where a text editor would be helpful right?)<br />
gates(config)#access-list 138 deny icmp host 192.168.1.2 192.168.3.0<br />
0.0.0.255<br />
gates(config)#access-list 138 permit icmp any any<br />
Let’s look at our statement. We set up ACL 138 to deny ICMP from (source) host<br />
192.168.1.2 to (dest) 192.168.3.0 (network) with a wildcard mask to match the<br />
network 0.0.0.255.<br />
348
8. Now let’s try the show access lists again:<br />
gates#sh access-list<br />
Extended IP access list 138<br />
deny icmp host 192.168.1.2 192.168.3.0 0.0.0.255 (14 matches)<br />
permit icmp any any (4 matches)<br />
gates#<br />
Aha! With extended ACL’s we can see the number of matches (or attempts) to get<br />
through our little router “mini-firewall.” We can even see from who it comes and<br />
how many times an attempt was made. Hmmm…almost like a protocol inspector.<br />
The debug ip packet details will show similar results.<br />
9. Let’s add another ACL to stop 192.168.3.2 from telnetting to 172.16.1.1. But first<br />
let’s try to telnet to be certain it works. If it works you should see:<br />
10. Now let’s create the extended ACL:<br />
gates(config)#access-list 150 deny tcp host 192.168.3.2 any eq 23<br />
gates(config)#access-list 150 permit tcp any any<br />
11. And apply it to the interface:<br />
gates(config)#int e0/1<br />
gates(config-if)#ip access-group 150 in<br />
12. Now telnet should work on 192.168.3.3 but not on 192.168.3.2. You will see this<br />
type of message if telnet is not working:<br />
349
Supplemental Lab or Challenge Activity:<br />
1. Design a network using 3 or more routers using a different routing protocol than<br />
RIPv2. Vary the IP address classes. Deny telnet access to everyone.<br />
2. Go out to <strong>CISCO</strong> and find out other port numbers for extended ACL’s.<br />
3. Try using a protocol inspector to capture packets.<br />
So What Have I Learned Here?<br />
In this lab you learned how to implement a standard ACL in a simple network. You also<br />
learned about the basic show and debug commands for use with ACL’s. Finally you got<br />
a refresher in basic networking with Microsoft. In the next lab you will work with<br />
extended ACL’s.<br />
Guest Router Name<br />
Gates…if you haven’t guessed it <strong>by</strong> now…Bill Gates is one of the founders of<br />
Microsoft—the world’s largest computer software empire. Microsoft is one of the most<br />
hated targets of hackers because of the closed source code. On the other hand they say<br />
Apple’s are almost un-hackable…mainly because hackers do not use Apples, do not care<br />
about Apples, and never really will as long as Microsoft is around. TNT had a good<br />
biography on Bill Gates with Anthony M. Hall as Bill Gates. See it if you get the chance.<br />
350
Objective:<br />
To implement a named access control list on a simple network.<br />
Tools and Materials:<br />
(4) workstations<br />
(6) straight-through cables<br />
(2) routers<br />
(1) DCE/DTE cable<br />
(2) switches (or one switch with 2 VLAN’s)<br />
Lab Diagram:<br />
Named Access Control Lists<br />
gates<br />
ISP<br />
s0/0<br />
s0/1 L0<br />
e0/0 e0/1<br />
Net. Admin Sales1 EGR1 EGR2<br />
IP 192.168.1.2/24 192.168.1.3/24 192.168.3.2/24 192.168.3.3/24<br />
GW 192.168.1.1 192.168.1.1 192.168.3.1 192.168.3.1<br />
Addressing<br />
Router Gates ISP<br />
S0/0 (DCE) n/a 192.168.2.1<br />
S0/1 (DTE) 192.168.2.2 n/a<br />
E0/0 192.168.1.1 n/a<br />
E0/1 192.168.3.1 n/a<br />
L0 n/a 172.16.1.1/16<br />
Step-By-Step Instructions:<br />
1. Clear the ACL’s on the router. Verify with “show run” after you clear them.<br />
2. Test ping from each workstation to each other and to the loopback interface.<br />
3. Write a named ACL to deny icmp from 192.168.1.2 to everywhere. Include a named<br />
ACL to deny telnet from 192.168.3.2 to everywhere. Step 1: create the ACL:<br />
351
gates(config)#access-list extended no_ping<br />
gates(config-ext-nac;)#deny icmp host 192.168.1.2 192.168.3.0 0.0.0.255<br />
gates(config-ext-nacl)#permit icmp any any<br />
gates(config-ext-nacl)#exit<br />
gates(config)#ip access-list extended no_telnet<br />
gates(config-ext-nacl)#deny tcp host 192.168.3.2 any eq 23<br />
gates(config-ext-nacl)#permit tcp any any<br />
4. Step 2: apply the ACL to an interface. Since this is an extended ACL it should be<br />
placed nearest the source as possible using “in.”<br />
gates(config)#int e0/0<br />
gates(config-if)#ip access-group no_ping in<br />
gates(config)#int e0/1<br />
gates(config-if)#ip access-group no_telnet in<br />
5. From 192.168.1.2 try to ping 192.168.3.3. It should not work and be unreachable:<br />
C:\WINDOWS\Desktop>ping 192.168.3.3<br />
Pinging 192.168.3.3 with 32 <strong>by</strong>tes of data:<br />
Reply from 192.168.1.1: Destination net unreachable.<br />
Reply from 192.168.1.1: Destination net unreachable.<br />
Reply from 192.168.1.1: Destination net unreachable.<br />
Reply from 192.168.1.1: Destination net unreachable.<br />
Ping statistics for 192.168.3.3:<br />
Packets: Sent = 4, Received = 4, Lost = 0 (0% loss),<br />
Approximate round trip times in milli-seconds:<br />
Minimum = 0ms, Maximum = 0ms, Average = 0ms<br />
C:\WINDOWS\Desktop><br />
6. Try to ping from 192.168.1.2 to 192.168.3.2 and 172.16.1.1…both will not work.<br />
Telnet to 172.16.1.1 should work on 192.168.3.3 but not on 192.168.3.2. You will<br />
see this type of message if telnet is not working:<br />
352
Supplemental Lab or Challenge Activity:<br />
1. Why would you want to use named ACL’s instead of numbered ACL’s?<br />
2. Can you use the same name ACL on different routers in the same network?<br />
So What Have I Learned Here?<br />
In this lab you learned how to implement a named ACL in a simple network. You<br />
learned we can replace standard and extended ACL’s with named ACL’s to help us out<br />
and to be able to use more than 100 ACL’s on a router (even though we don’t want to do<br />
that). In the next lab we will turn it up a bit <strong>by</strong> creating a protocol inspector on our router<br />
<strong>by</strong> using ACL statements.<br />
Guest Router Name<br />
Gates…if you haven’t guessed it <strong>by</strong> now…Bill Gates is one of the founders of<br />
Microsoft—the world’s largest computer software empire. Microsoft is one of the most<br />
hated targets of hackers because of the closed source code. On the other hand they say<br />
Apple’s are almost un-hackable…mainly because hackers do not use Apples, do not care<br />
about Apples, and never really will as long as Microsoft is around. TNT had a good<br />
biography on Bill Gates with Anthony M. Hall as Bill Gates. See it if you get the chance.<br />
353
Objective:<br />
To learn how to use ACL’s to build a mini-protocol inspector.<br />
Tools and Materials:<br />
(2) workstations<br />
(4) straight-through cables<br />
(1) DCE/DTE serial cable<br />
(2) routers<br />
(2) switches (or 1 with 2 VLAN’s)<br />
Lab Diagram:<br />
Making a Protocol Inspector with ACL’s<br />
Goodguys<br />
ISP<br />
e0 s0/1 e0<br />
s0/0<br />
Good Guy WS ☺<br />
Bad Guy WS <br />
192.168.1.2/24 172.16.1.2/16<br />
Addressing:<br />
Router goodguys ISP<br />
S0/0 (DCE) n/a 220.100.50.1/24<br />
S0/1 (DTE) 220.100.50.2/24 n/a<br />
E0/0 192.168.1.1/24 172.16.1.1/16<br />
Background:<br />
A denial of service attack (DoS) occurs when disruption of services to legitimate users<br />
occurs. Denial of service attacks are gaining in number as evidenced in the media.<br />
Lately we have seen denial of service attacks that have crashed the networks of Yahoo,<br />
Ebay, Buy.com, CNN.com, E*Trade, ZDNet, Microsoft, and others. Initiating DoS<br />
attacks are very simple…the tools are readily available over the Internet. To launch a<br />
DoS attack the attacker needs only a Linux/UNIX box with one of the following<br />
programs: Trinoo, TFN, TFN2K, and Stacheldraht.<br />
There are essentially three main categories of denial of service attacks: smurf,<br />
fraggle, and sync attacks. A smurf attack (not the little blue guy) is caused <strong>by</strong> a flood of<br />
icmp messages. A fraggle attack is caused <strong>by</strong> a flood of UDP packets. A sync attack is<br />
caused <strong>by</strong> a flood of TCP packets. As we can see all three are closely related. We can<br />
354
actually build a mini-protocol inspector to help us detect these three types of DoS attacks<br />
when other equipment is not available.<br />
Allow me to “set the stage…”<br />
You are the network administrator in a small company…you do not have the big<br />
bucks to buy those expensive protocol analyzers and network inspectors.<br />
However, you have noticed your internet speeds, while guaranteed at T-1 for your<br />
38 users, has actually been extremely slow. In fact, everyday it seems to get<br />
slower. Also the computers have been randomly crashing and being disconnected<br />
from the network with no clear indications why they have been doing that. You<br />
are really starting to rack your brain over this one…<br />
What is happening is your network is the victim of one of these denial of service attacks.<br />
You can put a small acl which acts like a protocol inspector. Let’s see how.<br />
Step-By-Step Instructions:<br />
1. Set up and cable the lab as shown.<br />
2. Add in our “mini-protocol inspector”<br />
goodguys(config)#access-list 100 permit icmp any any echo<br />
goodguys(config)#access-list 100 permit icmp any any echo-reply<br />
goodguys(config)#access-list 100 permit udp any any eq echo<br />
goodguys(config)#access-list 100 permit udp any eq echo any<br />
goodguys(config)#access-list 100 permit tcp any any established<br />
goodguys(config)#access-list 100 permit tcp any any<br />
goodguys(config)#access-list 100 permit ip any any<br />
goodguys(config)#int s0/1<br />
goodguys(config-if)#ip access-group 100 in<br />
The first two lines helps us monitor and record Smurf attacks, the next two helps<br />
us monitor and record fraggle attacks, and the next two help us monitor for sync<br />
attacks. Once we know where the attacks are coming from we can write other<br />
acl’s to stop them (and to tell the authorities).<br />
3. Let’s use the “evil” workstation to launch a vicious icmp flood to our goody two<br />
shoes network using DOS<br />
***Remember this is highly illegal…do not do this outside of lab conditions***<br />
Ping 192.168.1.2 –t –l 50000 (or try 500 then 5000)<br />
4. Then let’s up it a bit <strong>by</strong> opening more DOS windows and slamming goody some<br />
more…three or four windows should suffice.<br />
5. When we have had our fun we can use control+C to stop the ping storm.<br />
6. Next we can use the show access-list command to look for matches (and potential<br />
attacks).<br />
355
goodguys#show access-list<br />
Extended ip access list 100<br />
permit icmp any any echo (610 matches)<br />
permit icmp any any echo-reply<br />
permit udp any any eq echo<br />
permit udp any any eq echo any<br />
permit tcp any any established<br />
permit tcp any any<br />
permit ip any any (88 matches)<br />
We have a good clue that an icmp flood (DoS) is occurring because of the large<br />
number of matches. Next we need to log our inputs and view the source ip<br />
addresses.<br />
7. To start logging we just tack it on the end of the line with our matches. We don’t<br />
do it right away because it chews up valuable router resources. We save it for<br />
when we need it. First we copy and paste our acl to a notepad. Then we erase<br />
access-list 100 from our router:<br />
goodguys(config)#no access-list 100<br />
Then we make the changes to our acl in the notepad and then copy and paste it<br />
back into our router. Since we are interested only in the icmp section that will be<br />
all that is put back. In this manner we are conserving our resources. Since the<br />
icmp is throwing up a “red flag” with us we opt to log it and enable logging to run<br />
as the events happen:<br />
goodguys(config)#access-list 100 permit icmp any any echo log-input<br />
goodguys(config)#access-list 100 permit icmp any any echo-reply<br />
goodguys(config)#logging buffered<br />
The last line will let us see any notices as they occur…we will also see them in<br />
the log.<br />
8. Next start ethereal on 192.168.1.2 and then start the pings again from 172.16.1.2.<br />
9. Now we can repeat our ping storm, stop it, stop our ethereal and view our log:<br />
goodguys(config)#sh log<br />
You should see something like this:<br />
goodguys#sh log<br />
Syslog logging: enabled (0 messages dropped, 0 flushes, 0 overruns)<br />
Console logging: level debugging, 49 messages logged<br />
Monitor logging: level debugging, 0 messages logged<br />
Buffer logging: level debugging, 19 messages logged<br />
Trap logging: level informational, 53 message lines logged<br />
356
Log Buffer (4096 <strong>by</strong>tes):<br />
00:27:14: %SYS-5-CONFIG_I: Configured from console <strong>by</strong> console<br />
00:28:45: %SEC-6-IPACCESSLOGDP: list 100 permitted icmp<br />
172.16.1.2 (Serial0/1 *HDLC*) -> 192.168.1.1 (8/0), 1 packet<br />
00:29:11: %SEC-6-IPACCESSLOGDP: list 100 permitted icmp<br />
172.16.1.2 (Serial0/1 *HDLC*) -> 220.100.50.2 (8/0), 1 packet<br />
00:30:17: %SEC-6-IPACCESSLOGDP: list 100 permitted icmp<br />
172.16.1.2 (Serial0/1 *HDLC*) -> 192.168.1.2 (8/0), 208 packets<br />
00:32:29: %SEC-6-IPACCESSLOGDP: list 100 permitted icmp<br />
220.100.50.1 (Serial0/1*HDLC*) -> 220.100.50.2 (8/0), 1 packet<br />
00:34:09: %SYS-5-CONFIG_I: Configured from console <strong>by</strong> console<br />
00:34:17: %SEC-6-IPACCESSLOGDP: list 100 permitted icmp<br />
172.16.1.2 (Serial0/1 *HDLC*) -> 192.168.1.1 (8/0), 3 packets<br />
00:34:59: %SYS-5-CONFIG_I: Configured from console <strong>by</strong> console<br />
00:36:04: %SYS-5-CONFIG_I: Configured from console <strong>by</strong> console<br />
00:37:49: %SEC-6-IPACCESSLOGDP: list 100 permitted icmp<br />
172.16.1.2 (Serial0/1 *HDLC*) -> 220.100.50.2 (8/0), 4 packets<br />
00:37:50: %SYS-5-CONFIG_I: Configured from console <strong>by</strong> console<br />
00:39:28: %SYS-5-CONFIG_I: Configured from console <strong>by</strong> console<br />
00:41:18: %SEC-6-IPACCESSLOGDP: list 100 permitted icmp<br />
172.16.1.2 (Serial0/1 *HDLC*) -> 192.168.1.2 (8/0), 35 packets<br />
00:45:45: %SYS-5-CONFIG_I: Configured from console <strong>by</strong> console<br />
00:46:18: %SEC-6-IPACCESSLOGDP: list 100 permitted icmp<br />
172.16.1.2 (Serial0/1 *HDLC*) -> 192.168.1.2 (8/0), 247 packets<br />
goodguys#<br />
Can you see all the icmp packets below? Notice how most are fragmented.<br />
10. So now we can stop our evil workstation (if only temporarily) using our log<br />
information:<br />
357
goodguys(config)#access-list 1 deny host 172.16.1.2<br />
goodguys(config)#access-list 1 permit any<br />
goodguys(config)#int e0/0<br />
goodguys(config-if)#ip access-group 1 out<br />
11. Then when the evil workstation pings again the “destination is unreachable.” The<br />
evil workstation will change ip addresses or targets…hopefully the later.<br />
Supplemental Lab or Challenge Activity:<br />
1. Information from this lab was obtained from the <strong>CISCO</strong> website…I just made<br />
up new IP addresses, ACL’s numbers and added workstations. Go out to the<br />
website and find these papers:<br />
2. Find out what “AAA” is from the <strong>CISCO</strong> website (NOT car insurance<br />
company you big goofs).<br />
3. Investigate <strong>CISCO</strong> security certificate information from the website.<br />
4. Can you use a debug to see those icmp packets? Try it.<br />
5. Go out and research what trouble fragmented packets can cause on<br />
networking equipment.<br />
So What Have I Learned Here?<br />
Whew! This one can be rough. Don’t get too frustrated…ACL’s can cause problems and<br />
solve them too. I actually had to re-install my routing protocol after loading the<br />
ACL’s…stupid routers. Here you have learned about how you can apply access control<br />
lists in a little bit different manner. You have learned about denial of service attacks and<br />
icmp attacks in particular. Later, as you become more skilled, you can simulate tcp and<br />
udp attacks on your own private networks too. We are wrapping up this section and<br />
moving in to WAN’s…this stuff is fun, isn’t it?<br />
358
Firewall Basics using Reflexive ACL’s<br />
Objective:<br />
To learn how a router can be set up as a mini-firewall using access control lists.<br />
Hopefully this will be a good transition from routers to firewalls.<br />
Tools and Materials:<br />
(2) routers<br />
(3) switches (or one with 3 VLAN’s)<br />
(6) straight-through cables<br />
(1) DTE/DCE cable<br />
(3) workstations<br />
Lab Diagram:<br />
Workstation “C”<br />
WWW<br />
ISP<br />
s0/0<br />
BrFW<br />
e0/0<br />
“outside” network<br />
DMZ (not safe)<br />
e0/1 Workstation “B”<br />
Workstation<br />
“A”<br />
“inside” network<br />
(safe)<br />
Addressing:<br />
Router BrFW ISP<br />
S0/0 214.72.83.12/24 (DTE) 214.72.83.11/24 (DCE)<br />
E0/0 10.0.1.1/24 50.0.1.1/24<br />
E0/0 206.16.1.1/24 n/a<br />
Workstations A B C<br />
IP 10.0.1.2/24 202.16.1.2/24 50.0.1.2/24<br />
GW 10.0.1.1 202.16.1.1 50.0.1.1<br />
359
Background:<br />
We just learned about the standard, extended, and named access control lists (ACL’s) and<br />
how they work. We were told that too many ACL’s effectively turn the router into a<br />
firewall and severely degrades its overall performance. In fact routers and firewalls are<br />
very close in construction…they just have slightly different operating systems. Plus they<br />
cost about the same. Here is the front and rear views of a <strong>CISCO</strong> PIX Firewall.<br />
“front view” of PIX 515<br />
“rear view” of PIX 515<br />
Not too different huh? In this lab you will learn about a fourth type of access control list<br />
called a “reflexive” access control list. The reflexive access control list allows certain<br />
information out of a router port with a time to live counter. If the requested information<br />
returns before the timer expires then it is let back into that interface. Only information<br />
that originates from that interface is therefore allowed out and back in. Kind of like<br />
having a back stage pass huh? Take me to the green room! Typically firewalls allow<br />
private addresses (and address translation) on an “inside” portion of a network—totally<br />
shielded from the outside. Plus they have a “DMZ” zone which is not shielded from the<br />
outside…we tend to put our pesky sales people who are only contract employees out<br />
there. If you leap into the <strong>CISCO</strong> security certificate training then this lab provides a<br />
nice transition into the PIX firewall course.<br />
Step-By-Step Instructions:<br />
1. Cable the lab as shown.<br />
2. Set up the basics and interfaces for each router. Use EIGRP or RIP version 2 for<br />
your routing protocol.<br />
3. Put the IP addresses, masks, and gateways on the workstations.<br />
4. Test ping from each workstation to the others. It should work just fine.<br />
5. Let’s make an ACL to simulate a firewall:<br />
BrFW(config)#access-list 1 permit 10.0.0.0 0.255.255.255<br />
BrFW(config)#access-list 1 deny any<br />
BrFW(config)#int e0/0<br />
BrFW(config-if)#ip access-group 1 out<br />
6. Test ping again. Workstation B and C should be able to ping each other but not to<br />
A. Workstation A should not be able to get past any interface on its router<br />
(request times out).<br />
360
7. Even though that ACL works let’s remove that ACL and make a better one using<br />
reflexive ACL’s. This one will not only keep people out of the inside network but<br />
will not “imprison” the inside network. We will set it up to be able to use icmp to<br />
and from the inside network but anything outside of the network will not be able<br />
to ping into it (destination net unreachable).<br />
BrFW(config)#ip access-list extended filterincoming<br />
BrFW(config)#permit icmp 10.0.0.0 0.255.255.255 any reflect internaltraffic<br />
BrFW(config)#deny icmp any any<br />
BrFW(config)#evaluate internaltraffic<br />
BrFW(config)#ip access-list extended filteroutgoing<br />
BrFW(config)#permit icmp 10.0.0.0 0.255.255.255 any reflect internaltraffic<br />
BrFW(config)#evaluate internaltraffic<br />
Then we need to apply them to the interface:<br />
BrFW(config)#int e0/0<br />
BrFW(config-if)#ip access-group filterincoming in<br />
BrFW(config-if)# ip access-group filteroutgoing out<br />
What we are doing here is creating two named ACL’s (filterincoming and<br />
filteroutgoing). Then we select which icmp addresses will be allowed (with<br />
wildcard mask) and then, in the same command, turn it into a reflexive ACL with<br />
the reflect command. Last in that command we create a temporary placeholder<br />
called “internaltraffic” which will hold our source information for the duration of<br />
the timer. When the packets come back we ask it to be evaluated with the<br />
information in our temporary placeholder “internaltraffic.” Finally, the reflexive<br />
ACL is applied to an interface. Notice how we used both in and out for our<br />
extended part…I told you earlier there are many uses of ACL’s and you would<br />
start learning more later.<br />
8. Test ping again. Workstation B and C should be able to ping each other but not to<br />
A. Workstation A should now be able to ping everything.<br />
Supplemental Lab or Challenge Activity:<br />
1. Go out to <strong>CISCO</strong> and do some research on the features of the PIX firewall.<br />
2. One problem with PIX firewall is they only work with IP. No IPX, Apple,<br />
XNS, etc. How could you get around that sort of problem?<br />
3. What are dynamic access control lists? How could I use them here?<br />
So What Have I Learned Here?<br />
In this lab you have learned the basics of firewall technology. As you progress in your<br />
studies you will learn more about techniques related to firewalls and security including<br />
content based access control, dynamic access control lists (lock and key), and AAA.<br />
361
Part 4 Command Review<br />
Objective:<br />
To list all commands utilized in Part 4 of this textbook.<br />
Step-<strong>by</strong>-Step Instructions:<br />
1. For each of the commands give a description of the command, the prompt for<br />
configuration, and any abbreviations for that command.<br />
Prompt Command Shortcut Description<br />
362
Prompt Command Shortcut Description<br />
363
Whole Enchilada/Crazy Insano Lab #1 (WECIL): IGRP/RIP<br />
Objective:<br />
To put all or most of the concepts together into one large lab. In this lab we will be<br />
mixing IGRP and RIP. Basically picture yourself working for a company with a large<br />
IGRP network on two VLAN’s. Recently your company just acquired a company with<br />
several hundred hosts using static RIP addressing on the 192.168.x.x private network.<br />
You don’t have time to change all those static addresses so you decide to just redistribute<br />
everything. You would like to restrict those RIP workstations from being able to telnet<br />
and ping to your network though. Don’t forget about your good planning <strong>by</strong> making<br />
redundant backup lines between your switches. Your IGRP network receives its<br />
addresses via DHCP from your border router. Hang several loopback interfaces on the<br />
back side of the ISP addressed with 172.16.1.1 to 172.16.1.10. Think of the oddnumbered<br />
loopbacks as evil workstations smurfing your network. Write an ACL to keep<br />
those odd ones from being able to smurf your network. Oh yeah. You will need to make<br />
up your own addresses.<br />
Tools and Materials:<br />
(3) routers<br />
(6) switches<br />
(11) straight-through cables<br />
(10) cross-over cables<br />
(8) workstations<br />
Lab Design:<br />
RIPv1<br />
ISP<br />
s0/0 222.45.67.253/24<br />
s0/1 222.45.67.252/24<br />
DHCP<br />
IGRP 67<br />
VLAN2 VLAN3 VLAN2 VLAN3 VLAN2 VLAN3<br />
364
Whole Enchilada/Crazy Insano Lab #2 (WECIL): IP/IPX<br />
Objective:<br />
To put all or most of the concepts together into one large lab. In this lab we will be<br />
mixing IP and IPX. Basically picture yourself working for ABC company with a large<br />
IGRP network on two VLAN’s. Set up your company to use static RIP addressing on the<br />
192.168.x.x private network. You would like to restrict those all workstations from being<br />
able to telnet and ping except for one subnet for you (network administrator). Don’t<br />
forget about your good planning <strong>by</strong> making redundant backup lines between your<br />
switches. Hang a loopback interface with a 172.16.1.1 address to test ping from the<br />
workstations. Oh yeah. You will need to make up your own IPX addresses that are in<br />
use on VLAN2. Those are the accountants using Novell 4.11.<br />
Tools and Materials:<br />
(2) routers<br />
(5) switches<br />
(10) straight-through cables<br />
(10) cross-over cables<br />
(8) workstations<br />
Lab Design:<br />
VLAN2 VLAN3 VLAN2 VLAN3 VLAN2 VLAN3 VLAN3 VLAN3<br />
365
Part 5:<br />
Wide Area <strong>Network</strong> Routing<br />
366
Registering for Your CCNA Exam<br />
Objective:<br />
To learn how to register for the current CCNA test.<br />
Question and Answers about the CCNA:<br />
Where can I register? With any Prometrics center. You can also call 1-800-204-EXAM<br />
for more information.<br />
How much does it cost? $125 per attempt for each test.<br />
What is a passing score? For CCNA 849 of 1000 is a passing score. This are<br />
about 45-55 questions to complete in 75 minutes.<br />
What is it like? The new test has simulations and drag and drop questions. It is<br />
<strong>CISCO</strong>’s attempt at a practical exam for CCNA. Supposedly if you cannot work<br />
on the equipment then you should not be able to pass the test. This works well for<br />
you because you are “learning <strong>by</strong> doing.” The rest of the test is mostly multiplechoice<br />
questions. Some are command line entries, matching, and fill in the blanks.<br />
There are eight sections: Bridging/Switching, OSI reference model & layered<br />
communications, network protocols, routing, WAN protocols, network<br />
management, lan design, and <strong>CISCO</strong> basics, IOS and network basics. Unlike<br />
other tests you are NOT allowed to mark a question to return to later. You get one<br />
look at a question. You will be given a computer workstation, a dry wipe marker,<br />
and a two-sided laminated card for notes AND NOTHING ELSE! You are not<br />
allowed any food, drinks, notes, etc. You will need two picture ID's.<br />
What if I fail? Study a bit more, practice some more on the equipment and retake<br />
it soon. If you miss <strong>by</strong> only one or two questions, then most people re-take<br />
the exam right then and there and usually pass. Don't feel bad. Most people need a<br />
time or two through the first one.<br />
When should I take it? You should take it as soon as you finish Semester 4 while<br />
the information is still fresh in your mind. Don't wait too long.<br />
For which test do I register? You are being prepared for the Routing and<br />
Switching tracks. Currently, for the CCNA you should register for CCNA 3.0<br />
640-607.<br />
Visit http://www.cisco.com/warp/public/10/wwtraining/certprog/ for more information<br />
and to demo a course simulation.<br />
367
Remote Access to a Router with AUX (and Banners)<br />
Objective:<br />
To be able to access a router using dial-up networking (DUN).<br />
Tools and Materials:<br />
(2) Workstations<br />
(2) modems<br />
(1) DB-9 to RJ-45 adapter<br />
(2) RS-232 to RJ-45 adapter<br />
(1) Straight-through cable<br />
(2) rollover cables<br />
(2) RJ-11 (phone lines)<br />
(1) Adtran 550 with Octal ports<br />
Lab Diagram:<br />
com1:DB-9 to RJ-45<br />
RS-232-to-RJ45 adapter<br />
RJ-45 to RS-232 rollover AUX<br />
RJ-11<br />
PSTN<br />
Matt ST Router<br />
555-6001 555-6002<br />
Step-By-Step Instructions:<br />
1. Set up and cable the lab as shown.<br />
2. Check to see which line number is used for dial-in connections:<br />
Router>sh line<br />
You should see(I cut-off the stuff on the right):<br />
Tyt Typ Tx/Rx A Modem Roty<br />
* 0 CTY - - -<br />
* 65 AUX 19200/19200 - inout -<br />
66 VTY - - -<br />
67 VTY - - -<br />
68 VTY - - -<br />
69 VTY - - -<br />
70 VTY - - -<br />
Line(s) not in async mode –or- with no hardware support: 1-64<br />
368
3. Configure the router to receive incoming calls.<br />
Router(config)#line aux 0 (or line 65)<br />
Router(config-line)#login<br />
Router(config-line)#password auxpass<br />
Router(config-line)#speed 115200<br />
Router(config-line)#flowcontrol hardware<br />
Router(config-line)#stopbits 1<br />
Router(config-line)#transport input all<br />
Router(config-line)#modem inout<br />
Router(config-line)#modem autoconfigure discovery<br />
The last line will attempt to discover your modem type automatically. Probably not<br />
needed but nice to have.<br />
4. To troubleshoot a connection use “debug modem” on the router and establish the<br />
connection.<br />
5. On the PC dial into the router using Hyperterminal. You will be prompted for a<br />
password. If you are successful then you should see the user mode prompt.<br />
6. You may want to have a message appear when someone accesses your router. Some<br />
people are very friendly and make a banner like:<br />
“Welcome to the ABC network.”<br />
Wrong answer recruit…a banner like this is like a welcome mat being thrown out.<br />
In fact a case where a “defendant” hacked into a router was thrown out because<br />
the administrator had a banner like the one above. In short, don’t welcome me in,<br />
if I am not supposed to be there. You will probably want to make one more like:<br />
“WARNING: Authorized admittance only. Unauthorized entrance will be<br />
prosecuted to the fullest extent of the law.”<br />
Or something like that…if you have a corporate lawyer then have them come up<br />
with one…they live for that stuff.<br />
7. So let’s get <strong>by</strong> the legal mumbo-jumbo and put up a login banner. You have many<br />
different ways to do this…let’s find out…<br />
Router#banner ?<br />
You should see:<br />
LINE c banner-text c, where ‘c’ is a delimiting character<br />
Exec set EXEC process creation banner<br />
Incoming set incoming terminal line banner<br />
Login set login banner<br />
Motd Set message of the day banner<br />
369
8. We simply type our command, subcommand, the letter ‘c,’ our message, then another<br />
‘c’ to end it:<br />
Router(config)#banner login c stay out or get prosecuted c<br />
9. So which subcommand do we pick? Login? Motd? Right now it really does not<br />
matter…they will all just about do the same thing.<br />
Supplemental Lab or Activities:<br />
1. Try setting up a dial-in connection on a serial port. You will need a different cable<br />
from your modem to router and some commands on the serial port. Try it.<br />
2. Try using DUN to access the router. Where and why does it crap out?<br />
So What Did I Learn Here?<br />
In this lab you learned how to dial into the AUX port of a router from home (or<br />
somewhere). This lab is a good transition into the remote access class later. There you<br />
will learn about reverse telnet and modem strings with routers and stuff like that. For<br />
now let’s call it quits with dial up and move over to the serial interfaces and WAN<br />
connections.<br />
370
Point-to-Point Protocol (PPP)<br />
Objective:<br />
To learn more about serial line encapsulation types:<br />
Tools and Materials:<br />
(2) Workstations<br />
(2) Console cables<br />
(2) DTE cables<br />
(2) DCE cables<br />
(3) Routers<br />
Lab Diagram:<br />
s0/0 s0/1 s0/0 s0/1 L0<br />
L0<br />
L0<br />
Name: Terminus Leftist Urvile<br />
S0/0 200.200.200.1/24 201.200.200.1/24 n/a<br />
S0/1 n/a 200.200.200.2/24 201.200.200.2/24<br />
L0 10.0.0.1/8 11.0.0.1/8 12.0.0.1/8<br />
Background:<br />
Back in part 2 we learned the default encapsulation type on a serial line is HDLC. This is<br />
<strong>CISCO</strong>’s proprietary “Serial HDLC Synchronous” line protocol. Needless to say it does<br />
not always work well with non-<strong>CISCO</strong> devices. For example, IBM routers would need to<br />
use SDLC for its serial line encapsulations. So how do we know what encapsulations are<br />
available to us? That’s easy…we just need to use our handy-dandy help feature at the<br />
right moment on the router. So let’s look:<br />
Router(config)#int s0/0<br />
Router(config-if)#enc ?<br />
371
You should see:<br />
Router(config-if)#enc ?<br />
Atm-dxi<br />
ATM-DXI encapsulation<br />
bstun<br />
Block Serial tunneling (BSTUN)<br />
frame-relay Frame Relay networks<br />
hdlc<br />
Serial HDLC synchronous<br />
lapb LAPB (X.25 Level 2)<br />
ppp<br />
Point-to-Point protocol<br />
sdlc<br />
SDLC<br />
sdlc-primary SDLC (primary)<br />
sdlc-secondary SDLC (secondary)<br />
smds<br />
Switched Megabit Data Service (SMDS)<br />
stun<br />
Serial Tunneling (STUN)<br />
x25 X.25<br />
Encapsulations on serial lines are easy. What you have set on one end, you must have the<br />
same set on the other otherwise no communication can take place.<br />
Step-By-Step Instructions:<br />
1. Set up the lab and cable it as shown. Use EIGRP as your routing protocol.<br />
Use the same autonomous number for each network.<br />
2. Ping from the router prompt of Terminus to Leftist and then to Urvile. It<br />
should work jiffy spiffy-like. Do a trace route between them.<br />
3. Now change the encapsulation on Terminus S0/0 to PPP:<br />
terminus(config)#int s0/0<br />
terminus(config-if)#enc ppp<br />
4. Ping from the router prompt of Terminus to Leftist and then from Terminus to<br />
Urvile (loopback). It should not work so jiffy spiffy-like. You should see:<br />
terminus#ping 200.200.200.2<br />
Type escape sequence to abort.<br />
Sending 5, 100-<strong>by</strong>te ICMP Echos to 200.200.200.2, timeout is 2 seconds:<br />
.....<br />
Success rate is 0 percent (0/5)<br />
Do a trace route between them. You should not get anywhere because the<br />
encapsulation types have to be the same on both ends in order to communicate.<br />
Then change the encapsulation on S0/1 of leftist. Let’s change the encapsulation<br />
type on s0/1 on leftist. Verify your encapsulation with “show interface.” You<br />
should see:<br />
Serial0/0 is up, line protocol is up<br />
Hardware is PowerQUICC Serial<br />
Internet address is 200.200.200.1/24<br />
372
MTU 1500 <strong>by</strong>tes, BW 128 Kbit, DLY 20000 usec,<br />
reliability 255/255, txload 1/255, rxload 1/255<br />
Encapsulation PPP, loopback not set<br />
Keepalive set (10 sec)<br />
LCP Open<br />
Open: IPCP, CDPCP<br />
Last input 00:00:01, output 00:00:04, output hang never<br />
Last clearing of "show interface" counters 00:03:45<br />
Queueing strategy: fifo<br />
Output queue 0/40, 0 drops; input queue 0/75, 0 drops<br />
5 minute input rate 0 bits/sec, 0 packets/sec<br />
5 minute output rate 0 bits/sec, 0 packets/sec<br />
81 packets input, 6663 <strong>by</strong>tes, 0 no buffer<br />
Received 0 broadcasts, 0 runts, 0 giants, 0 throttles<br />
1 input errors, 0 CRC, 1 frame, 0 overrun, 0 ignored, 0 abort<br />
85 packets output, 7435 <strong>by</strong>tes, 0 underruns<br />
0 output errors, 0 collisions, 2 interface resets<br />
0 output buffer failures, 0 output buffers swapped out<br />
8 carrier transitions<br />
DCD=up DSR=up DTR=up RTS=up CTS=up<br />
5. Now that the encapsulation types match on each end of the serial line, ping<br />
from the router prompt of Terminus to Leftist. It should work just fine. You<br />
should see:<br />
terminus#ping 200.200.200.2<br />
Type escape sequence to abort.<br />
Sending 5, 100-<strong>by</strong>te ICMP Echos to 200.200.200.2, timeout is 2 seconds:<br />
!!!!!<br />
Success rate is 100 percent (5/5), round-trip min/avg/max = 32/32/36 ms<br />
Ping from Terminus to Urvile. Initially you may think it should not work so jiffy<br />
spiffy-like because you have PPP as an encapsulation on one serial line and HDLC as<br />
the encapsulation on the other line. But since we have the same encapsulation on<br />
each end of the serial line we can mix and match encapsulations over the entire<br />
network. Geeze. If we could not then the entire Internet would have to run on only<br />
one encapsulation type.<br />
You should see:<br />
terminus#ping 12.0.0.1<br />
Type escape sequence to abort.<br />
Sending 5, 100-<strong>by</strong>te ICMP Echos to 12.0.0.1, timeout is 2 seconds:!!!!!<br />
Success rate is 100 percent (5/5), round-trip min/avg/max = 64/64/68 ms<br />
373
Do a trace route between the three. You should see:<br />
terminus#traceroute 12.0.0.1<br />
Type escape sequence to abort.<br />
Tracing the route to 12.0.0.1<br />
1 200.200.200.2 16 msec 16 msec 16 msec<br />
2 201.200.200.2 32 msec 32 msec *<br />
Let’s also look at our ip route:<br />
terminus#sh ip route<br />
Codes: C - connected, S - static, I - IGRP, R - RIP, M - mobile, B - BGP<br />
D - EIGRP, EX - EIGRP external, O - OSPF, IA - OSPF inter area<br />
N1 - OSPF NSSA external type 1, N2 - OSPF NSSA external type 2<br />
E1 - OSPF external type 1, E2 - OSPF external type 2, E - EGP<br />
i - IS-IS, L1 - IS-IS level-1, L2 - IS-IS level-2, ia - IS-IS inter area<br />
* - candidate default, U - per-user static route, o - ODR<br />
P - periodic downloaded static route<br />
Gateway of last resort is not set<br />
200.200.200.0/24 is variably subnetted, 2 subnets, 2 masks<br />
C 200.200.200.0/24 is directly connected, Serial0/0<br />
C 200.200.200.2/32 is directly connected, Serial0/0<br />
D 201.200.200.0/24 [90/21024000] via 200.200.200.2, 00:02:23, Serial0/0<br />
C 10.0.0.0/8 is directly connected, Loopback0<br />
D 11.0.0.0/8 [90/20640000] via 200.200.200.2, 00:02:23, Serial0/0<br />
D 12.0.0.0/8 [90/21152000] via 200.200.200.2, 00:02:23, Serial0/0<br />
terminus#<br />
6. To change the encapsulation back we would just reverse the process and use<br />
HDLC:<br />
terminus(config)#int s0/0<br />
terminus(config-if)#enc hdlc<br />
7. You can change all serial interfaces to PPP for its encapsulation and it should<br />
work just fine. Remember: it’s got to be the same on both ends to work.<br />
Challenge Lab or Supplemental Activities:<br />
1. Go to the web and find out for what all those other encapsulation types are<br />
primarily used.<br />
2. Can SDLC-primary on one end of a serial line communicate with SDLCsecondary<br />
on the other end?<br />
374
So what have I learned here?<br />
In this lab you have learned there are many different encapsulation types on a serial<br />
interface and that <strong>CISCO</strong> routers use HDLC <strong>by</strong> default. Other manufactures use different<br />
encapsulations, for example IBM routers use SDLC for their encapsulations <strong>by</strong> default.<br />
Why is this lab here and not in part 2? PPP allows us to set authentication parameters<br />
(ew! Geek-speak). In “real-people” talk this means we can set user names and passwords<br />
for people to “dial-in” (aha! Remote access=WAN technology) to our serial lines.<br />
Remember our serial lines typically run over the web or telephone lines over great<br />
distances. This usually means security is very important (refer to guest names below). In<br />
the next lab you will learn how to set up those user names and passwords with PPP.<br />
Guest Router Name Derivation<br />
Terminus, Leftist, and Urvile were three hackers from the Legion of Doom, who lived in<br />
Georgia, that were busted in 1990 <strong>by</strong> the U.S. Secret Service in connection with the<br />
Martin Luther King Day AT&T long distance network crash. They were known as<br />
“switching gurus” and as “heavy hitters” within the LoD because they frequently<br />
accessed BellSouth’s network. Apparently BellSouth, at that time, did not have very<br />
strict security in place.<br />
375
Objective:<br />
To learn more about PPP’s authentication methods: PAP and CHAP<br />
Tools and Materials:<br />
(2) Workstations<br />
(2) Console cables<br />
(2) DTE cables<br />
(2) DCE cables<br />
(3) Routers<br />
Authentication with PPP<br />
Lab Diagram:<br />
pap<br />
chap<br />
s0/0 s0/1 s0/0 s0/1 L0<br />
L0<br />
L0<br />
Name: Terminus Leftist Urvile<br />
S0/0 200.200.200.1/24 201.200.200.1/24 n/a<br />
S0/1 n/a 200.200.200.2/24 201.200.200.2/24<br />
L0 10.0.0.1/8 11.0.0.1/8 12.0.0.1/8<br />
Background:<br />
In the last lab you learned about different encapsulations on serial lines. In this lab you<br />
will delve more deeply into the PPP encapsulation. PPP can use passwords and user<br />
names for authentication over serial lines before communication can take place. Here<br />
you will learn how PPP works, how to configure PPP authentication, and troubleshooting<br />
tools for PPP. During the establishment of PPP five things can take place:<br />
1. First, the serial line establishment will take place. This is where any<br />
negotiation will take place. (LCP—Link Control Protocol)<br />
2. Second, if user names and passwords are used, authentication of those names<br />
and passwords will take place.<br />
3. Next, the network layer will negotiate which protocols will be in use during<br />
the session. (NCP-<strong>Network</strong> Control Protocol).<br />
4. Then the line comes up and communication can take place.<br />
5. Finally the link will be terminated after all communication is finished.<br />
You will “see” each of these steps during this lab. When configuring authentication with<br />
user names and passwords we have two methods to accomplish this: PAP or CHAP.<br />
376
PAP (Password Authentication Protocol) uses passwords that are sent in clear text during<br />
a two-way handshake process (how secure is that? What is the point?) Basically a<br />
remote user requests a connection <strong>by</strong> sending a username and password request (one part<br />
of the two-way handshake) the device to be accessed then processes the information and<br />
either accepts or rejects the username and password (the other part of the two-way<br />
handshake). PAP only requests username and passwords once.<br />
CHAP (Challenge Handshaking Authentication Protocol) is similar to PAP except the<br />
username and passwords are encrypted (much better), a three-way handshake is used, and<br />
periodically CHAP re-requests usernames and passwords for authentication. With CHAP<br />
a remote user requests a connection (one part of the three-way handshake), the device to<br />
be accessed then requests a username and password (the second part of the three-way<br />
handshake), the remote user responds with the username and password (still the second<br />
part of the three-way handshake), and the device to be accessed then accepts or rejects the<br />
username and password (the third part).<br />
You will configure and “see” each of these in this lab.<br />
Step-By-Step Instructions:<br />
1. Set up the lab and cable it as shown. Use EIGRP as your routing protocol. Use<br />
the same autonomous number for each network. Use PPP for encapsulation on the<br />
serial lines.<br />
2. Ping from the router prompt of Terminus to Leftist and then to Urvile. It should<br />
work jiffy spiffy-like. Do a trace route between them to verify connectivity.<br />
3. Now that we know everything works lets look at the default state of PPP (without<br />
any user names or passwords):<br />
terminus#debug ppp tasks<br />
Then disconnect the serial line for about 10 seconds and then re-connect it. You<br />
will see the LCP task negotiation and the line come back up. You should see<br />
something like:<br />
terminus# debug ppp tasks<br />
(line is disconnected)<br />
00:52:38: %LINK-3-UPDOWN: Interface Serial0/0, changed state to down<br />
00:52:39: %LINEPROTO-5-UPDOWN: Line protocol on Interface Serial0/0,<br />
changed state to down<br />
(line is reconnected)<br />
00:52:49: %LINK-3-UPDOWN: Interface Serial0/0, changed state to up<br />
00:52:49: Se0/0: AAA_PER_USER LCP_UP (0x81483B3C) id 0 (0s.)<br />
queued 1/1/1<br />
00:52:49: Se0/0: AAA_PER_USER LCP_UP (0x81483B3C) id 0 (0s.)<br />
busy/0 started 1/1/1<br />
00:52:49: Se0/0: AAA_PER_USER LCP_UP (0x81483B3C) id 0 (0s.)<br />
busy/0 done in 0 s. 0/0/1<br />
00:52:50: %LINEPROTO-5-UPDOWN: Line protocol on Interface Serial0/0,<br />
changed state to up<br />
377
Let’s look at what is happening here <strong>by</strong> “cleaning up our debug” a bit:<br />
terminus# debug ppp tasks<br />
(line is disconnected)<br />
Line protocol on Interface Serial0/0, changed state to down<br />
(line is reconnected)<br />
Interface Serial0/0, changed state to up<br />
AAA_PER_USER LCP_UP<br />
AAA_PER_USER LCP_UP<br />
AAA_PER_USER LCP_UP<br />
Line protocol on Interface Serial0/0, changed state to up<br />
We can see that when our line is disconnected no “task” packets are communicated over<br />
the ppp line. But we do have LCP task packets being communicated when the line comes<br />
back “up.” Remember our PPP five step process: line is reconnected, LCP is negotiated,<br />
any username/passwords are verified, NCP is negotiated, line comes up and<br />
communication takes place, and the session is terminated. With the debug tasks we can<br />
only see LCP packets.<br />
Next we can look at the actual negotiation steps with debug. Be sure to turn off all<br />
debugging so we get a “clear” debug ppp negotiation. You should see:<br />
terminus#undebug ppp tasks<br />
PPP background processing debugging is off<br />
terminus#debug ppp negotiation<br />
PPP protocol negotiation debugging is on<br />
(line is disconnected)<br />
00:54:27: %LINK-3-UPDOWN: Interface Serial0/0, changed state to down<br />
00:54:27: Se0/0 IPCP: State is Closed<br />
00:54:27: Se0/0 CDPCP: State is Closed<br />
00:54:27: Se0/0 PPP: Phase is TERMINATING<br />
00:54:27: Se0/0 LCP: State is Closed<br />
00:54:27: Se0/0 PPP: Phase is DOWN<br />
00:54:27: Se0/0 IPCP: Remove route to 200.200.200.2<br />
00:54:28: %LINEPROTO-5-UPDOWN: Line protocol on Interface Serial0/0,<br />
changed state to down<br />
(line is reconnected)<br />
00:54:36: %LINK-3-UPDOWN: Interface Serial0/0, changed state to up<br />
00:54:36: Se0/0 PPP: Treating connection as a dedicated line<br />
00:54:36: Se0/0 PPP: Phase is ESTABLISHING, Active Open<br />
00:54:36: Se0/0 LCP: O CONFREQ [Closed] id 3 len 10<br />
00:54:36: Se0/0 LCP: MagicNumber 0x04158C08 (0x050604158C08)<br />
00:54:36: Se0/0 LCP: I CONFREQ [REQsent] id 4 len 10<br />
00:54:36: Se0/0 LCP: MagicNumber 0x01C88BB2 (0x050601C88BB2)<br />
00:54:36: Se0/0 LCP: O CONFACK [REQsent] id 4 len 10<br />
00:54:36: Se0/0 LCP: MagicNumber 0x01C88BB2 (0x050601C88BB2)<br />
00:54:36: Se0/0 LCP: I CONFACK [ACKsent] id 3 len 10<br />
00:54:36: Se0/0 LCP: MagicNumber 0x04158C08 (0x050604158C08)<br />
00:54:36: Se0/0 LCP: State is Open<br />
00:54:36: Se0/0 PPP: Phase is UP<br />
378
00:54:36: Se0/0 IPCP: O CONFREQ [Closed] id 3 len 10<br />
00:54:36: Se0/0 IPCP: Address 200.200.200.1 (0x0306C8C8C801)<br />
00:54:36: Se0/0 CDPCP: O CONFREQ [Closed] id 3 len 4<br />
00:54:36: Se0/0 IPCP: I CONFREQ [REQsent] id 4 len 10<br />
00:54:36: Se0/0 IPCP: Address 200.200.200.2 (0x0306C8C8C802)<br />
00:54:36: Se0/0 IPCP: O CONFACK [REQsent] id 4 len 10<br />
00:54:36: Se0/0 IPCP: Address 200.200.200.2 (0x0306C8C8C802)<br />
00:54:36: Se0/0 CDPCP: I CONFREQ [REQsent] id 4 len 4<br />
00:54:36: Se0/0 CDPCP: O CONFACK [REQsent] id 4 len 4<br />
00:54:36: Se0/0 IPCP: I CONFACK [ACKsent] id 3 len 10<br />
00:54:36: Se0/0 IPCP: Address 200.200.200.1 (0x0306C8C8C801)<br />
00:54:36: Se0/0 IPCP: State is Open<br />
00:54:36: Se0/0 CDPCP: I CONFACK [ACKsent] id 3 len 4<br />
00:54:36: Se0/0 CDPCP: State is Open<br />
00:54:36: Se0/0 IPCP: Install route to 200.200.200.2<br />
00:54:37: %LINEPROTO-5-UPDOWN: Line protocol on Interface Serial0/0,<br />
changed state to up<br />
01:02:50: %LINK-3-UPDOWN: Interface Serial0/0, changed state to up<br />
Ok…all those numbers and stuff can be confusing. Let’s strip that output down to<br />
just the information in bold and see what is happening (I put the numbers in for<br />
easier explanation):<br />
1. debug ppp negotiation<br />
2. (line is disconnected)<br />
3. Interface Serial0/0, changed state to down<br />
4. IPCP: State is Closed<br />
5. CDPCP: State is Closed<br />
6. PPP: Phase is TERMINATING<br />
7. LCP: State is Closed<br />
8. PPP: Phase is DOWN<br />
9. IPCP: Remove route to 200.200.200.2<br />
10. Line protocol on Interface Serial0/0, changed state to down<br />
11. (line is reconnected)<br />
12. Interface Serial0/0, changed state to up<br />
13. PPP: Phase is ESTABLISHING, Active Open<br />
14. CONFREQ [Closed]<br />
15. LCP: I CONFREQ [REQsent]<br />
16. LCP: O CONFACK [REQsent]<br />
17. LCP: I CONFACK [ACKsent]<br />
18. LCP: State is Open<br />
19. PPP: Phase is UP<br />
20. IPCP: O CONFREQ [Closed]<br />
21. IPCP: Address 200.200.200.1<br />
22. CDPCP: O CONFREQ [Closed]<br />
23. IPCP: I CONFREQ [REQsent]<br />
24. IPCP: Address 200.200.200.2<br />
25. IPCP: O CONFACK [REQsent]<br />
26. IPCP: Address 200.200.200.2<br />
27. CDPCP: I CONFREQ [REQsent]<br />
379
28. CDPCP: O CONFACK [REQsent]<br />
29. IPCP: I CONFACK [ACKsent]<br />
30. IPCP: Address 200.200.200.1<br />
31. IPCP: State is Open<br />
32. CDPCP: I CONFACK [ACKsent]<br />
33. CDPCP: State is Open<br />
34. IPCP: Install route to 200.200.200.2<br />
35. Line protocol on Interface Serial0/0, changed state to up<br />
In lines 4-9 we can see what is involved with “tearing down” a connection<br />
session. Obviously we would expect to have to re-create those to establish a new<br />
PPP session. We see that IPCP went down, then CDPCP, then PPP and finally<br />
LCP. Lastly the route was removed. We would expect to see the creation in the<br />
reverse order.<br />
In line 13 we see, after our serial line is re-connected, the beginning step of<br />
establishing a PPP session.<br />
In 15-18 we see our LCP negotiation phase:<br />
1. a request from s0/0 to s0/1 (line 15),<br />
2. the acknowledgement of that request from s0/1 that s0/0 wants to<br />
establish LCP (line 16),<br />
3. then the acknowledgement of s0/0 that s0/1 received the request from<br />
s0/0 to establish an LCP (line 17).<br />
4. Then LCP is “open” (line 18).<br />
Then we see our PPP “phase” is set to up in line 19.<br />
Then we see our IPCP and CDPCP being brought back up just about the same<br />
time in the remainder of our script. During the IPCP:<br />
1. We see s0/0 send it’s ip address (200.200.200.1) to s0/1 (lines 20-21)<br />
2. Then s0/1 sends it’s ip address (200.200.200.2) to s0/0 (lines 23-24)<br />
3. Then s0/0 sends an acknowledgement to s0/1 that it received the ip<br />
address from s0/1 (lines 25-26)<br />
4. Then s0/1 sends an acknowledgement to s0/0 that it received the ip<br />
address from s0/0 (lines 29-30)<br />
5. Finally the route is established (line 34)<br />
During the CDPCP:<br />
1. a CDPCP configuration request is sent from s0/0 to s0/1 (line 22/27)<br />
2. an acknowledgement of receipt of that request is sent from s0/1 to s0/0<br />
(line 28).<br />
3. an acknowledgement of receiving that acknowledgement is sent from<br />
s0/0 to s0/1 (line 32).<br />
4. The CDPCP state is set to “open.”<br />
Our order has reversed itself and our connection, via PPP encapsulation, is now<br />
ready to communicate!<br />
380
4. Let’s turn off debugging. Use “undebug all” or “undebug ppp.”<br />
5. Now let’s set up PPP with PAP authentication. Just remember with our<br />
encapsulations on serial lines what we do on one end we must do on the other end<br />
too. If you just use “ppp authentication pap” you will not be able to have a ppp<br />
connection because no username/password authentication will be able to take<br />
place.<br />
terminus(config)#int s0/0<br />
terminus(config-if)#enc ppp<br />
terminus(config-if)#ppp authentication pap<br />
terminus(config-if)#ppp pap sent-username prophet password legodoom<br />
terminus(config-if)#exit<br />
terminus(config)#username prophet password legodoom<br />
Before we change the other end of the line let’s look at a “failed” PPP negotiation<br />
process. Here we will see s0/1 refusing the connection because we have not set<br />
up authentication on it yet (notice how we never make it past the LCP negotiation<br />
phase):<br />
terminus#debug ppp negotiation<br />
PPP protocol negotiation debugging is on<br />
terminus#<br />
01:18:42: Se0/0 LCP: I CONFREQ [Listen] id 208 len 10<br />
01:18:42: Se0/0 LCP: MagicNumber 0x01DE98E6 (0x050601DE98E6)<br />
01:18:42: Se0/0 LCP: O CONFREQ [ACKsent] id 109 len 14<br />
01:18:42: Se0/0 LCP: AuthProto PAP (0x0304C023)<br />
01:18:42: Se0/0 LCP: MagicNumber 0x042BA23D (0x0506042BA23D)<br />
01:18:42: Se0/0 LCP: I CONFREJ [ACKsent] id 109 len 8<br />
01:18:42: Se0/0 LCP: AuthProto PAP (0x0304C023)<br />
(redundant lines removed)<br />
01:18:42: Se0/0 PPP: Closing connection because remote won't<br />
authenticate<br />
01:18:42: Se0/0 LCP: O TERMREQ [ACKsent] id 111 len 4<br />
01:18:42: Se0/0 LCP: O CONFREQ [TERMsent] id 112 len 14<br />
01:18:42: Se0/0 LCP: AuthProto PAP (0x0304C023)<br />
01:18:42: Se0/0 LCP: MagicNumber 0x042BA23D (0x0506042BA23D)<br />
01:18:42: Se0/0 LCP: I TERMACK [TERMsent] id 111 len 4<br />
01:18:42: Se0/0 LCP: State is Closed<br />
01:18:42: Se0/0 PPP: Phase is DOWN<br />
01:18:42: Se0/0 PPP: Phase is ESTABLISHING, Passive Open<br />
01:18:42: Se0/0 LCP: State is Listen<br />
01:18:44: Se0/0 LCP: TIMEout: State Listen<br />
381
Watch out! This one can really be tough to stop on your router. Remember your<br />
up arrow to quickly find the “undebug all” to try stopping this. You may even<br />
have to disconnect the line again to help slow down the debug messages even<br />
after you have turned off all debugging. Then do it on the other end of the serial<br />
line (router “leftist”):<br />
leftist (config)#int s0/1<br />
leftist (config-if)#enc ppp<br />
leftist (config-if)#ppp authentication pap<br />
leftist (config-if)#ppp pap sent-username prophet password legodoom<br />
leftist (config-if)#exit<br />
leftist(config)#username prophet password legodoom<br />
As soon as you put in the ppp pap username/passwords you should see something<br />
like this:<br />
leftist(config)#int s0/1<br />
leftist(config-if)#ppp pap sent-username prophet password legodoom<br />
leftist(config-if)#01:23:27: %LINEPROTO-5-UPDOWN: Line protocol on<br />
Interface Serial0/1, changed state to up<br />
leftist(config-if)#01:23:29: %LINK-3-UPDOWN: Interface Serial0/1, changed<br />
state to up<br />
leftist(config-if)#<br />
Notice the process here…the line protocol comes up then the state comes up.<br />
6. Let’s look at our PAP negotiation process:<br />
1. leftist#debug ppp negotiation<br />
2. PPP protocol negotiation debugging is on<br />
3. leftist#<br />
4. 01:24:37:%LINK-3-UPDOWN: Interface Serial0/1, changed state to down<br />
5. 01:24:37: Se0/1 IPCP: State is Closed<br />
6. 01:24:37: Se0/1 CDPCP: State is Closed<br />
7. 01:24:37: Se0/1 PPP: Phase is TERMINATING<br />
8. 01:24:37: Se0/1 LCP: State is Closed<br />
9. 01:24:37: Se0/1 PPP: Phase is DOWN<br />
10. 01:24:37: Se0/1 IPCP: Remove route to 200.200.200.1<br />
11. 01:24:38: %LINEPROTO-5-UPDOWN: Line protocol on Interface<br />
Serial0/1, changed state to down<br />
12. 01:24:46: %LINK-3-UPDOWN: Interface Serial0/1, changed state to up<br />
13. 01:24:46: Se0/1 PPP: Treating connection as a dedicated line<br />
14. 01:24:46: Se0/1 PPP: Phase is ESTABLISHING, Active Open<br />
15. 01:24:46: Se0/1 LCP: O CONFREQ [Closed] id 76 len 14<br />
16. 01:24:46: Se0/1 LCP: AuthProto PAP (0x0304C023)<br />
17. 01:24:46: Se0/1 LCP: MagicNumber 0x01E48949 (0x050601E48949)<br />
18. 01:24:46: Se0/1 LCP: I CONFREQ [REQsent] id 187 len 14<br />
19. 01:24:46: Se0/1 LCP: AuthProto PAP (0x0304C023)<br />
382
20. 01:24:46: Se0/1 LCP: MagicNumber 0x04318B4D (0x050604318B4D)<br />
21. 01:24:46: Se0/1 LCP: O CONFACK [REQsent] id 187 len 14<br />
22. 01:24:46: Se0/1 LCP: AuthProto PAP (0x0304C023)<br />
23. 01:24:46: Se0/1 LCP: MagicNumber 0x04318B4D (0x050604318B4D)<br />
24. 01:24:46: Se0/1 LCP: I CONFACK [ACKsent] id 76 len 14<br />
25. 01:24:46: Se0/1 LCP: AuthProto PAP (0x0304C023)<br />
26. 01:24:46: Se0/1 LCP: MagicNumber 0x01E48949<br />
(0x050601E48949)<br />
27. 01:24:46: Se0/1 LCP: State is Open<br />
28. 01:24:46: Se0/1 PPP: Phase is AUTHENTICATING, <strong>by</strong> both<br />
29. 01:24:46: Se0/1 PAP: O AUTH-REQ id 2 len 21 from "prophet"<br />
30. 01:24:46: Se0/1 PAP: I AUTH-REQ id 2 len 21 from "prophet"<br />
31. 01:24:46: Se0/1 PAP: Authenticating peer prophet<br />
32. 01:24:46: Se0/1 PAP: O AUTH-ACK id 2 len 5<br />
33. 01:24:46: Se0/1 PAP: I AUTH-ACK id 2 len 5<br />
34. 01:24:46: Se0/1 PPP: Phase is UP<br />
35. 01:24:46: Se0/1 IPCP: O CONFREQ [Closed] id 8 len 10<br />
36. 01:24:46: Se0/1 IPCP: Address 200.200.200.2 (0x0306C8C8C802)<br />
37. 01:24:46: Se0/1 CDPCP: O CONFREQ [Closed] id 8 len 4<br />
38. 01:24:46: Se0/1 IPCP: I CONFREQ [REQsent] id 7 len 10<br />
39. 01:24:46: Se0/1 IPCP: Address 200.200.200.1 (0x0306C8C8C801)<br />
40. 01:24:46: Se0/1 IPCP: O CONFACK [REQsent] id 7 len 10<br />
41. 01:24:46: Se0/1 IPCP: Address 200.200.200.1 (0x0306C8C8C801)<br />
42. 01:24:46: Se0/1 CDPCP: I CONFREQ [REQsent] id 7 len 4<br />
43. 01:24:46: Se0/1 CDPCP: O CONFACK [REQsent] id 7 len 4<br />
44. 01:24:46: Se0/1 IPCP: I CONFACK [ACKsent] id 8 len 10<br />
45. 01:24:46: Se0/1 IPCP: Address 200.200.200.2 (0x0306C8C8C802)<br />
46. 01:24:46: Se0/1 IPCP: State is Open<br />
47. 01:24:46: Se0/1 CDPCP: I CONFACK [ACKsent] id 8 len 4<br />
48. 01:24:46: Se0/1 CDPCP: State is Open<br />
49. 01:24:46: Se0/1 IPCP: Install route to 200.200.200.1<br />
50. 01:24:47: %LINEPROTO-5-UPDOWN: Line protocol on Interface<br />
Serial0/1, changed state to up<br />
We see our differences now in lines 28-33 with our username and<br />
acknowledgements being displayed.<br />
7. Let’s turn off debugging. Use “undebug all” or “undebug ppp negotiation.”<br />
8. Finally let’s look at our ppp authentication process.<br />
leftist#debug ppp authentication<br />
PPP authentication debugging is on<br />
04:26:10: %LINK-3-UPDOWN: Interface Serial0/1, changed state to<br />
down<br />
04:26:11: %LINEPROTO-5-UPDOWN: Line protocol on Interface<br />
Serial0/1, changed state to down<br />
383
04:26:16: Se0/1 PPP: Treating connection as a dedicated line<br />
04:26:16: %LINK-3-UPDOWN: Interface Serial0/1, changed state to up<br />
04:26:16: Se0/1 PPP: Phase is AUTHENTICATING, <strong>by</strong> both<br />
04:26:16: Se0/1 PAP: O AUTH-REQ id 32 len 21 from "prophet"<br />
04:26:16: Se0/1 PAP: I AUTH-REQ id 32 len 21 from "prophet"<br />
04:26:16: Se0/1 PAP: Authenticating peer prophet<br />
04:26:16: Se0/1 PAP: O AUTH-ACK id 32 len 5<br />
04:26:16: Se0/1 PAP: I AUTH-ACK id 32 len 5<br />
04:26:17: %LINEPROTO-5-UPDOWN: Line protocol on Interface<br />
Serial0/1, changed state to up<br />
leftist#<br />
From the leftist router this time we see a request from “prophet” on s0/1 and then<br />
an authorization request (meaning “Ok I found you, I accept your username and<br />
password”). Then a couple of acknowledgements and acknowledgement of<br />
acknowledgements and the line comes up ready to communicate!<br />
9. Let’s turn off debugging. Use “undebug all” or “undebug ppp authentication.”<br />
10. Let’s switch to CHAP. First, start <strong>by</strong> removing the PAP stuff:<br />
leftist(config)#int s0/0<br />
leftist(config-if)#ppp authentication chap<br />
leftist(config-if)#exit<br />
leftist(config)#no username prophet password legodoom<br />
urvile(config)#int s0/1<br />
urvile(config-if)#ppp authentication chap<br />
urvile(config-if)#exit<br />
urvile(config)#no username prophet password legodoom<br />
One way we could do this is to use the hostnames of the routers and the enable<br />
passwords for easy access.<br />
leftist(config)#int s0/0<br />
leftist(config-if)#enc ppp<br />
leftist(config-if)#ppp authentication chap<br />
leftist(config-if)#exit<br />
leftist(config)#username urvile password cisco<br />
urvile(config)#int s0/0<br />
urvile(config-if)#enc ppp<br />
urvile(config-if)#ppp authentication chap<br />
urvile(config-if)#exit<br />
urvile(config)#username leftist password cisco<br />
But, generally we want to have remote users whose names we can input for<br />
CHAP access to the router. This actually makes more sense and is more of a<br />
384
“real-world” scenario. Undo all of the last steps. This time use similar<br />
commands except the username and passwords are set a bit differently. The<br />
username must match the hostname of the destination router. Use the line<br />
between leftist and urvile to set up chap.<br />
leftist(config)#int s0/0<br />
leftist(config-if)#enc ppp<br />
leftist(config-if)#ppp authentication chap<br />
leftist(config-if)#exit<br />
leftist(config)#username prophet password cisco<br />
This will set up a username to “dial-in” and be “authenticated” to the urvile<br />
router. We chose to use the username prophet and are obligated to use the<br />
password cisco since we already set it up in our router basics. Next, on urvile, we<br />
use similar commands except that we set the username to the router which will be<br />
calling in. We must also include the hostname that will be calling in to urvile.<br />
urvile(config)#int s0/0<br />
urvile(config-if)#enc ppp<br />
urvile(config-if)#ppp authentication chap<br />
urvile(config-if)#ppp authentication chap callin<br />
urvile(config)#ppp chap hostname prophet<br />
urvile(config-if)#exit<br />
urvile(config)#username leftist password cisco<br />
Don’t forget to change the settings on both sides! (Use S0/1 on urvile.) Notice<br />
how we now have to use the hostname of the other router and the “enable secret”<br />
of “cisco” (the encrypted one). You will know when you have the right<br />
combination of user names and passwords when the line and protocol both come<br />
up.<br />
11. Then view the CHAP with the same debugs…debug tasks, debug negotiation, and<br />
debug authentication. They should be similar to the PAP ones except that there is<br />
a three-way handshake and our passwords are encrypted. Can you see it?<br />
Challenge Lab or Supplemental Activities:<br />
1. Try switching the order of which router will be called into and which one will<br />
do the calling. Why would this be important? Why would you want to do<br />
this?<br />
2. Try configuring PAP and CHAP on the same router. Why would you want to<br />
do this?<br />
3. Can we do any authentication with HDLC? Try it and find out. When would<br />
you want to use PPP with authentication and when would you want to use<br />
HDLC?<br />
4. What are the other debug options available with PPP? What does each of<br />
them do?<br />
385
5. What options are available for PPP on a serial interface? (hint: ppp ?) For<br />
what is each used?<br />
6. Use a protocol inspector to try “stealing” passwords over PAP and CHAP<br />
lines.<br />
7. What the heck is a “magic number?” Go and find out.<br />
8. What are those acronyms in our debug ppp negotiation? What do they mean?<br />
What is a IPCP and CDPCP?<br />
9. When would you use Microsoft-chap?<br />
10. Does our username/passwords set up under our interface have to match those<br />
put on our router?<br />
So what have I learned here?<br />
In this lab you have learned some of the options available with PPP authentication. You<br />
have seen the five steps in PPP negotiation. You should now be able to define and<br />
differentiate between PAP and CHAP and when you would want to use each. You have<br />
seen that CHAP is better, from a security perspective, because the username and<br />
passwords are encrypted. This means they cannot as easily be “stolen” with a protocol<br />
inspector and used illegally. Do you remember what PAP and CHAP stand for? I would<br />
want to know if I was taking a test on it…hint, hint, wink, wink. In the next lab you will<br />
learn how to use another serial line encapsulation: frame relay.<br />
Guest Router Name Derivation<br />
Terminus, Leftist, and Urvile were three hackers from the Legion of Doom, who lived in<br />
Georgia, that were busted in 1990 <strong>by</strong> the U.S. Secret Service in connection with the<br />
Martin Luther King Day AT&T long distance network crash. They were known as<br />
“switching gurus” and as “heavy hitters” within the LoD because they frequently<br />
accessed BellSouth’s network. Apparently BellSouth, at that time, did not have very<br />
strict security in place.<br />
386
Remote Access DUN with PPP Encapsulation<br />
Objective:<br />
To learn how to set up a dial-up networking connection into a serial port to allow the use<br />
of the PPP protocol.<br />
Tools and Materials:<br />
(5) Workstations<br />
(2) routers<br />
(4) modems<br />
(3) DB-9 to RJ-45 adapters (PC Com1)<br />
(4) RS-232 to RJ-45 adapters<br />
(4) RJ-11 cables<br />
(4) Straight-through cables<br />
(1) cross-over cable<br />
(2) console cables<br />
(file servers and switches will not be used…you will need the IPX numbers for<br />
configuring the routers. We will use loopbacks to emulate the networks.)<br />
Lab Diagram:<br />
PSTN<br />
S0/0 s0/1 s0/1<br />
Router Dark Lord<br />
S0/0 192.168.1.1/24 n/a<br />
S0/1 192.168.2.1/24 192.168.2.2/24<br />
Loop0 1.1.1.1/8 2.2.2.2/8<br />
IP <strong>Network</strong> 1.0.0.0/8 2.0.0.0/8<br />
IPX <strong>Network</strong> 100 (802.3) 200 (802.3)<br />
Router IPX 0000.AAAA.0001 0000.BBBB.0002<br />
FileServer 1000.0000.0000.0001 2000.0000.0000.0002<br />
S0/1-S0/1 IPX <strong>Network</strong> 192 (802.3)<br />
387
Step-By-Step Instructions:<br />
The key here is to break the lab down into “ba<strong>by</strong> steps.” Forget about the IPX stuff<br />
completely…save it for last. Our plan of attack will be to set up our internal network and<br />
test it. Then configure the dial up networking and test it. And then finish it off with IPX.<br />
1. Set up the lab and cable it as shown. Check it twice!<br />
2. Set up the basics on each router.<br />
3. Configure the interfaces and loopbacks.<br />
4. Pick a routing protocol and advertise the networks.<br />
5. Test your connectivity <strong>by</strong> using ping between loopbacks on the routers. Use<br />
trace route and sh ip route also.<br />
6. Configure the dial-up networking on the workstations if they already have not<br />
been done.<br />
7. Configure the serial interface on “dark” to accept dial-up networking. Oh?<br />
You say you haven’t done that before? Sure you have…sort of. Use the same<br />
commands you used to set up the AUX port. The only difference between the<br />
two is now we can use PPP as an encapsulation type (with usernames and<br />
passwords if we want---not shown below). We could not easily do that with<br />
an AUX port DUN. You can add a banner or MOTD if you wish.<br />
dark(config)#int s0/0 (or line 65)<br />
dark(config-if)#login<br />
dark(config-if)#password dark<br />
dark(config-if)#speed 115200<br />
dark(config-if)#flowcontrol hardware<br />
dark(config-if)#stopbits 1<br />
dark(config-if)#transport input all<br />
dark(config-if)#modem inout<br />
dark(config-if)#modem autoconfigure discovery<br />
dark(config-if)#enc ppp<br />
8. Test your dial up networking from each workstation into the network. When<br />
dialed in each workstation should be able to ping all of the connections<br />
including the loopbacks.<br />
9. Add in the IPX stuff. We only put the file servers in the picture because that<br />
information needs to be included in the router programs. Ok…I will make it<br />
easy for you:<br />
dark(config)#ipx routing 0000.AAAA.0001<br />
dark(config-router)#exit<br />
dark(config)#int loop 0<br />
dark(config-if)#ipx network 100 encapsulation Novell-Ether<br />
dark(config-if)#int s0/1<br />
dark(config-if)#ipx network 192<br />
dark(config-if)#ipx sap-interval 0<br />
388
lord(config)#ipx routing 0000.BBBB.0002<br />
lord(config-router)#exit<br />
lord(config)#int loop 0<br />
lord(config-if)#ipx network 200 encapsulation Novell-Ether<br />
lord(config-if)#int s0/1<br />
lord(config-if)#ipx network 192<br />
lord(config-if)#ipx sap-interval 0<br />
Then you can decide if you want to do your ipx routing statically (with static<br />
routes) or dynamically (using router ipx with advertised networks).<br />
Statically:<br />
dark(config)#ipx route 200 192.0000.BBBB.0002<br />
dark(config)#ipx route 2000 192.0000.BBBB.0002<br />
dark(config)#ipx sap 4 2000.0000.0000.0002 451 2<br />
dark(config)#ipx router rip<br />
dark(config-router)#no network 192<br />
lord(config)#ipx route 100 192.0000.AAAA.0001<br />
lord(config)#ipx route 1000 192.0000.AAAA.0001<br />
lord(config)#ipx sap 4 1000.0000.0000.0001 451 2<br />
lord(config)#ipx router rip<br />
lord(config-router)#no network 192<br />
Or dynamically:<br />
dark(config)#router rip<br />
dark(config-router)#version 2<br />
dark(config-router)#network 192.168.1.0<br />
dark(config-router)#network 1.0.0.0<br />
lord(config)#router rip<br />
lord(config-router)#version 2<br />
lord(config-router)#network 192.168.1.0<br />
lord(config-router)#network 2.0.0.0<br />
Challenge Lab or Supplemental Activities:<br />
1. Try changing IPX numbers.<br />
2. Try changing to different IPX frame types (ie., from 802.3 to 802.2 or SNAP,<br />
etc).<br />
3. Try the lab once with static IPX routing and then with the dynamic IPX<br />
routing. Which one do you prefer?<br />
So what have I learned here?<br />
This is actually a mini-whole enchilada/crazy insane lab for the remote access part. Eh,<br />
what the heck we even through in some IPX for good measure. The biggest reason why<br />
389
this is here is to get you to start thinking about breaking down networks into “ba<strong>by</strong> steps”<br />
when configuring them. They do not look as intimidating then. You will find those<br />
people who have problems setting up their networks are also the same people who “skip”<br />
steps or “lump several things together” in order to save time. Hmpf! Take your time<br />
because you are getting paid <strong>by</strong> the hour anyway.<br />
Guest Router Name Derivation<br />
Jason Allen Diekman, a.k.a. “Shadow Knight” or “Dark Lord,” was charged with hacking<br />
into Nasa, Oregon State Univeristy, and a San Francisco area ISP in 2002. He was<br />
sentenced to 21 months in Federal Prison, ordered to pay restitution of $87,736.29, and<br />
will have 3 years of probation, which includes no computer accessing. Apparently he<br />
used stolen credit card numbers to transfer money through Western Union and to try<br />
buying equipment from NASA’s Jet Propulsion Laboratory. While free on bail from<br />
charges the “defendant” (use whatever word you want there) hacked into several other<br />
university computer systems. Boy this one is a case study in stupidity 101. Even<br />
“geniuses” do not always have “common sense.” Won’t shower time be fun for him too?<br />
390
Setting up a Router to be a Frame Relay Switch<br />
Objective:<br />
In this lab you learn how to “change” a router into a frame relay switch.<br />
Tools and Materials:<br />
(1) router<br />
(1) workstation<br />
(1) console cable<br />
Lab Diagram:<br />
s0/0<br />
dlic#18 s0/1<br />
dlci#16<br />
Background:<br />
Many people do not have the luxury of having an Adtran Atlas 550 for frame relay<br />
simulation. This lab will show you how you can transform a router into a frame relay<br />
switch. You can then use this for some of the basic frame relay experiments that only<br />
require a frame relay switch between two routers. If you have a 4000 series router then<br />
you can make a frame switch with 3 or more fully-meshed frame lines. What? You only<br />
have 2500’s or 2600’s? Oh well, you can only set up the router as a static frame relay<br />
switch between two routers.<br />
Step-By-Step Instructions:<br />
1. Set up the basics on the router.<br />
router>en<br />
router#config t<br />
router(config)#hostname Frswitch<br />
Frswitch(config)#en secret cisco<br />
Frswitch(config)#en password class<br />
Frswitch(config)#line con 0<br />
Frswitch(config-line)#exec-timeout 0 0<br />
Frswitch(config-line)#logging synchronous<br />
Frswitch(config-line)#line vty 0 4<br />
Frswitch(config-line)#login<br />
Frswitch(config-line)#password cisco<br />
2. Enable the router to become a frame relay switch:<br />
Frswitch(config)#frame-relay switching<br />
391
3. Set up the interfaces on the router.<br />
Frswitch(config)#int s0/0<br />
Frswitch(config-if)#enc frame-relay<br />
Frswitch(config-if)#frame-relay intf-type dce<br />
Frswitch(config-if)#clockrate 56000<br />
Frswitch(config-if)#no shut<br />
Frswitch(config)#int s0/1<br />
Frswitch(config-if)#enc frame-relay<br />
Frswitch(config-if)#frame-relay intf-type dce<br />
Frswitch(config-if)#clockrate 56000<br />
Frswitch(config-if)#no shut<br />
4. Then configure a dlci-switching table on EACH interface.<br />
Frswitch(config)#int s0/0<br />
Frswitch(config-if)#frame-relay route 18 interface s0/1 16<br />
Frswitch(config)#int s0/1<br />
Frswitch(config-if)# frame-relay route 16 interface s0/0 18<br />
5. You are now ready to start using your frame–relay switch. Don’t forget to<br />
save the configuration.<br />
Supplemental Lab or Challenge Activities:<br />
1. Go out and research how many serial lines can be put into a 2610, 2611, 2620,<br />
or 2620 router. Why are we limited to just 2 serial lines or can we have more?<br />
Surely we might need more than two routers hooked together with frame<br />
relay. For example:<br />
Seattle<br />
S0/3 Detroit<br />
(dlci#19) s0/2<br />
(dlci#17 )<br />
s0/0 (dlci#16) s0/1 (dlci#18)<br />
Los Angeles<br />
Tampa<br />
So what have I learned here?<br />
In this lab you learned how to turn a router into a frame relay switch. Would you do this<br />
inside a company? Almost always no. Your serial lines with HDLC can provide<br />
clocking to move the information. In the next couple of labs you will learn about<br />
configuring different topologies with frame relay networking.<br />
392
Objective:<br />
To learn how to set up a basic frame relay network with 2 routers.<br />
Tools and Materials:<br />
(3) routers<br />
(2) DCE-to-DTE cables<br />
(1) console cable<br />
(1) workstation<br />
Lab Diagram:<br />
Basic Frame Relay With Two Routers<br />
S0/0 S0/1<br />
dlci 16 dlci 18<br />
Make<br />
Turner<br />
Router Make Turner<br />
S0/0 192.168.1.2/24 192.168.1.1/24<br />
Dce/dte dte dte<br />
Dlci 16 18<br />
Loop 0 2.2.2.2/8 1.1.1.1/8<br />
Step-By-Step Instructions:<br />
1. Set up a frame relay switch with two routes (see last lab).<br />
2. Set up the basics on one router.<br />
router#config t<br />
router(config)#hostname turner<br />
turner(config)#enable secret cisco<br />
turner(config)#enable password class<br />
turner(config)#line con 0<br />
turner(config-line)#logging synchronous<br />
turner(config-line)#exec-timeout 0 0<br />
turner(config-line)#line vty 0 4<br />
turner(config-line)#password cisco<br />
turner(config-line)#login<br />
393
Add interface configurations.<br />
turner(config)#int s0/0<br />
turner(config-if)#ip address 192.168.1.1 255.255.255.0<br />
turner(config-if)#enc frame-relay<br />
turner(config-if)#no shut<br />
turner(config)#int loop 0<br />
turner(config-if)#ip address 1.1.1.1 255.0.0.0<br />
turner(config-if)#no shut<br />
Add routing protocol.<br />
turner(config)#router eigrp 38<br />
turner(config-router)#network 192.168.1.0<br />
turner(config-router)#network 1.0.0.0<br />
3. Now, do the same for the other router.<br />
4. Verify connectivity. When you check your routes, ping, and view the frame relay<br />
circuit status you should see:<br />
turner#sh ip route<br />
Codes: C - connected, S - static, I - IGRP, R - RIP, M - mobile, B - BGP<br />
D - EIGRP, EX - EIGRP external, O - OSPF, IA - OSPF inter area<br />
N1 - OSPF NSSA external type 1, N2 - OSPF NSSA external type 2<br />
E1 - OSPF external type 1, E2 - OSPF external type 2, E - EGP<br />
i - IS-IS, L1 - IS-IS level-1, L2 - IS-IS level-2, * - candidate default<br />
U - per-user static route, o - ODR<br />
Gateway of last resort is not set<br />
C 1.0.0.0/8 is directly connected, Loopback0<br />
D 2.0.0.0/8 [90/2297856] via 192.168.1.2, 00:11:14, Serial0/1<br />
C 192.168.1.0/24 is directly connected, Serial0/1<br />
turner#<br />
turner#ping 2.2.2.2<br />
Type escape sequence to abort.<br />
Sending 5, 100-<strong>by</strong>te ICMP Echos to 2.2.2.2, timeout is 2 seconds:<br />
!!!!!<br />
Success rate is 100 percent (5/5), round-trip min/avg/max = 64/65/68 ms<br />
turner#<br />
You can check the status of the frame relay circuit connection with “show framerelay<br />
pvc.”<br />
394
turner#sh frame-relay pvc<br />
PVC Statistics for interface Serial0/1 (Frame Relay DTE)<br />
DLCI = 16, DLCI USAGE = LOCAL, PVC STATUS = ACTIVE,<br />
INTERFACE = Serial0/1<br />
input pkts 40 output pkts 38 in <strong>by</strong>tes 3302<br />
out <strong>by</strong>tes 3130 dropped pkts 0 in FECN pkts 0<br />
in BECN pkts 0 out FECN pkts 0 out BECN pkts 0<br />
in DE pkts 0 out DE pkts 0<br />
out bcast pkts 15 out bcast <strong>by</strong>tes 926<br />
pvc create time 00:12:39, last time pvc status changed 00:12:19<br />
turner #<br />
Challenge Lab or Supplemental Activities:<br />
1. Switch address schemes to a pure Class “B” network.<br />
2. Switch address schemes to a pure Class “A” network.<br />
So what have I learned here?<br />
In this lab you have learned how to set up the bare minimum requirements for a Frame<br />
relay main connection using a router set up as a frame relay switch. In the next couple of<br />
labs you will learn some more intermediate-level commands for setting up multiple router<br />
frame relay networks.<br />
Guest Router Name Derivation<br />
Patrice Williams was sent to prison in 2002 after she, and a partner (Makeebrah Turner),<br />
hacked into the Chase Financial Corporation. Apparently this dastardly duo stole credit<br />
card numbers and used them to purchase about $600,000 worth of merchandise on 68<br />
different accounts. They also “distributed” some of those numbers to someone else in<br />
Georgia who, in turn, purchased about $100,000. The brain trust plea-bargained down to<br />
a one-year and a day prison term in return<br />
395
Frame Relay: Hub and Spoke with 3 routers<br />
Objective:<br />
To be able to configure a “hub and spoke” frame relay network using 3 routers.<br />
Background:<br />
You can configure frame relay as a “hub and spoke” topology. Essentially one router<br />
acts as a “master” or “primary” route controller (the “hub”). All others act as “slaves” or<br />
“secondary” routes (the “spokes”) with configurations leading to the “master” or<br />
“primary” controller. If this were to be a “fully-meshed” frame relay network then each<br />
would have routes to all others. In our example below see how router “Lloyd” and<br />
“Allen” map back to “Timothy” while Timothy routes to both Lloyd and Allen. We use<br />
hub and spokes for control over the network and, sometimes, to reduce costs.<br />
Materials Needed:<br />
(3) routers<br />
(3) DTE cables<br />
(1) Adtran atlas 550<br />
(1) PC/workstation<br />
(1) console cable<br />
Lab Diagram:<br />
Lloyd<br />
Timothy<br />
Allen<br />
Router Timothy Allen Lloyd<br />
S0/0 192.168.20.1/24 192.168.20.2/24 192.168.20.3/24<br />
Loop 0 192.168.1.1/24 192.168.2.1/24 192.168.3.1/24<br />
Adtran 1/1 1/2 2/1<br />
Dlci 16 18 17<br />
Master? Yes No No<br />
Maps 192.168.20.3-dlci 17 192.168.20.1-dlci 16 192.168.20.1-dlci16<br />
192.168.20.2-dlci 18<br />
396
Step-By-Step Instructions:<br />
1. Cable the lab as shown and set up the basics on each router. Choose a routing<br />
protocol and set it up on each router (don’t forget to advertise your networks).<br />
Add the loopback interface configurations.<br />
2. To set up the “master” or “primary” router as a “hub:”<br />
timothy(config)#int s0/0<br />
timothy(config-if)#ip address 192.168.20.1 255.255.255.0<br />
timothy(config-if)#enc frame-relay<br />
timothy(config-if)#frame-relay map ip 192.168.20.2 18 broadcast<br />
timothy(config-if)#frame-relay map ip 192.168.20.3 17 broadcast<br />
timothy(config-if)#frame-relay lmi-type ansi<br />
timothy(config-if)#no shut<br />
Basically you are setting the ip, changing the encapsulation type to frame-relay<br />
and then making maps to the other routers and broadcasting the maps (with ip’s<br />
and dlci numbers). The Adtran’s have been configured for lmi-type ansi.<br />
3. To set up the ““slaves” or “secondary” routers:<br />
allen(config)#int s0/0<br />
allen(config-if)#ip address 192.168.20.2 255.255.255.0<br />
allen(config-if)#enc frame-relay<br />
allen(config-if)#frame-relay map ip 192.168.20.1 16 broadcast<br />
allen(config-if)#frame-relay lmi-type ansi<br />
allen(config-if)#no shut<br />
lloyd(config)#int s0/0<br />
lloyd(config-if)#ip address 192.168.20.3 255.255.255.0<br />
lloyd(config-if)#enc frame-relay<br />
lloyd(config-if)#frame-relay map ip 192.168.20.1 16 broadcast<br />
lloyd(config-if)#frame-relay lmi-type ansi<br />
lloyd(config-if)#no shut<br />
4. Test your configuration using “sh frame pvc,” “ping,” and “sh ip route.” You<br />
should see:<br />
timothy#sh frame pvc<br />
PVC Statistics for interface Serial0/0 (Frame Relay DTE)<br />
DLCI = 17, DLCI USAGE = LOCAL, PVC STATUS = ACTIVE,<br />
INTERFACE = Serial0/0<br />
input pkts 42 output pkts 45 in <strong>by</strong>tes 3464<br />
out <strong>by</strong>tes 3676 dropped pkts 1 in FECN pkts 0<br />
in BECN pkts 0 out FECN pkts 0 out BECN pkts 0<br />
397
in DE pkts 0 out DE pkts 0<br />
out bcast pkts 18 out bcast <strong>by</strong>tes 1152<br />
pvc create time 00:23:24, last time pvc status changed 00:16:49<br />
DLCI = 18, DLCI USAGE = LOCAL, PVC STATUS = ACTIVE,<br />
INTERFACE = Serial0/0<br />
input pkts 54 output pkts 53 in <strong>by</strong>tes 4472<br />
out <strong>by</strong>tes 4364 dropped pkts 0 in FECN pkts 0<br />
in BECN pkts 0 out FECN pkts 0 out BECN pkts 0<br />
in DE pkts 0 out DE pkts 0<br />
out bcast pkts 21 out bcast <strong>by</strong>tes 1344<br />
pvc create time 00:23:18, last time pvc status changed 00:19:50<br />
Notice you are on “timothy” which uses dlci #16 to connect to the Adtran. When<br />
you do a sh frame pvc you see the status of dcli #17 and #18…the other two<br />
dlci’s.<br />
Challenge Lab or Supplemental Activities:<br />
1. Change the map statements to reflect a “full-mesh” topology. Note any<br />
differences in pvc’s, ip routes, etc.<br />
2. Why do we need to use the same subnet over all three frame relay interfaces?<br />
I thought we needed separate subnet numbers on each?<br />
3. Put an error on the serial interface on the hub router (timothy—shut down the<br />
interface, remove the lmi type, etc). See if you can still get connectivity<br />
between all three routers. What about connectivity between allen and Lloyd?<br />
So what have I learned here?<br />
So far we have learned that frame relay is just another encapsulation that we can use on a<br />
serial interface (which is HDLC <strong>by</strong> default). In this lab you have learned to set up a “hub<br />
and spoke” frame relay network. Each router is connected with a circuit to a master<br />
router that contains maps to all others. We do this to save money because each circuit<br />
connection costs money. Obviously if we can purchase two frame relay circuits instead<br />
of three then we would be saving money. In the next lab you will learn how to configure<br />
a full-mesh frame relay network using subinterfaces.<br />
Guest Router Name Derivation<br />
Timothy Lloyd Allen was a chief network program designer for Omega Engineering<br />
Corp (New Jersey) who was sentenced to 41 months in prison for unleashing a $10<br />
million “time bomb” within a manufacturing software program he helped design. After<br />
11 years with the company he was “suddenly laid off,” but, ha-ha, he would “get his<br />
revenge.” And boy did he. Now he’s got to hope he finds a bigger boy friend than<br />
everyone else. Won’t shower time be fun?<br />
398
Fully-Meshed Frame Relay with 3 Routers and Sub-interfaces<br />
Objective:<br />
To be able to configure a “fully-meshed” frame relay network using 3 routers and subinterfaces.<br />
Background:<br />
After learning how to configure “hub and spoke” networks it is now time to configure a<br />
fully-meshed frame relay network. Unlike the hub and spoke network which had all<br />
serial interfaces on one subnet we will have to use a different subnet for every connection<br />
in our meshed network. This will require two or more ip addresses on every serial<br />
interface used. Since we cannot use more than one ip address on an interface we will be<br />
using sub-interfaces with different ip addresses. To geek it up the sub-interfaces are<br />
“logical” sub-interfaces on our “physical” main interface. You will also begin to see why<br />
we identified our DLCI’s in the manner we have been using.<br />
Materials Needed:<br />
(3) routers<br />
(3) DTE cables<br />
(1) Adtran atlas 550<br />
(1) PC/workstation<br />
(1) console cable<br />
Lab Diagram:<br />
Shadow<br />
1/2<br />
dlci 18<br />
1/1 2/1<br />
dlci 16 dlci 17<br />
Diekman<br />
Knight<br />
Router Diekman Shadow Knight<br />
Serial int. in text in text in text<br />
Loop 0 1.1.1.1/8 2.2.2.2/8 3.3.3.3/8<br />
Adtran 1/1 1/2 2/1<br />
Dlci 16 18 17<br />
399
Step-By-Step Instructions:<br />
1. Cable the lab as shown and set up the basics on each router. Choose a routing<br />
protocol and set it up on each router (don’t forget to advertise your networks).<br />
Add the loopback interface configurations.<br />
2. To set up the routers for subinterfaces. The important thing here is to<br />
understand which ip addresses and which dlci numbers to use. Let’s look at<br />
the three PVC’s we will be creating here first:<br />
Shadow<br />
18<br />
circuit #1 circuit #2<br />
16 17<br />
Diekman<br />
circuit #3<br />
Knight<br />
The design key is to remember the dlci connection number. If you are<br />
configuring “knight” router (almost funny, huh?) which has a connection to dlci<br />
17 then you will need to set up connection with dlci 16 and 18. The drawings<br />
used <strong>by</strong> <strong>CISCO</strong> are difficult to understand unless you have developed your own<br />
step-<strong>by</strong>-step method (what a coincidence! That is what you are getting here!).<br />
First we need to pick out some subnet numbers for our three circuits. Let’s use<br />
these:<br />
circuit #1 192.168.1.0 network (use .1 and .2)<br />
circuit #2 192.168.2.0 network (use .1 and .2)<br />
circuit #3 192.168.3.0 network (use .1 and .2)<br />
Next we need to associate them with the dlci numbers. Usually you will see them<br />
given in a picture as shown on the top of the next page. You can see why these<br />
things can be confusing. The DLCI’s really help. It is easier to<br />
400
Shadow<br />
16 17<br />
18 18<br />
Diekman 17 16 Knight<br />
understand if you add the dlci connection (in this case to our Adtran) within a<br />
table format. Start <strong>by</strong> putting “none” in the sub-interface configuration space<br />
(notice the format s0/0.16 for dlci #16) for the dlci to which the serial line<br />
connects (Use the first drawing not the one above…it can be confusing):<br />
Router Diekman Shadow Knight<br />
S0/0 none none none<br />
Adtran 1/1 1/2 2/1<br />
Dlci 16 18 17<br />
S0/0.16 none<br />
S0/0.17<br />
none<br />
S0/0.18<br />
none<br />
Next, add in the ip address for the subnet/sub-interface… Let’s start with circuit<br />
#1 (192.168.1.0 network using .1 and .2):<br />
Router Diekman Shadow Knight<br />
S0/0 none none none<br />
Adtran 1/1 1/2 2/1<br />
Dlci 16 18 17<br />
S0/0.16 none 192.168.1.2<br />
S0/0.17<br />
none<br />
S0/0.18 192.168.1.1 none<br />
See? Our circuit #1 has a connection on dlci #18 on Diekman and dlci #16 on<br />
Shadow. Since we are using the 192.168.1.0 network we arbitrarily pick which<br />
one has which address. We will be using the sub-interface number that<br />
corresponds with the dlci number. We don’t have too it is just easier that way.<br />
401
Next, let’s fill in the information for circuit #2 (192.168.2.0 network using .1 and<br />
.2):<br />
Router Diekman Shadow Knight<br />
S0/0 none none none<br />
Adtran 1/1 1/2 2/1<br />
Dlci 16 18 17<br />
S0/0.16 none 192.168.1.2<br />
S0/0.17 192.168.2.1 none<br />
S0/0.18 192.168.1.1 none 192.168.2.2<br />
Finally, let’s fill in the information for circuit #3 (192.168.3.0 network using .1<br />
and .2):<br />
Router Diekman Shadow Knight<br />
S0/0 none none none<br />
Adtran 1/1 1/2 2/1<br />
Dlci 16 18 17<br />
S0/0.16 none 192.168.1.2 192.168.3.2<br />
S0/0.17 192.168.3.1 192.168.2.1 none<br />
S0/0.18 192.168.1.1 none 192.168.2.2<br />
Eh, voila! We are ready to configure our routers. Let’s configure our serial<br />
interface and sub-interfaces on “knight” (dlci #17)<br />
knight(config)#int s0/0<br />
knight(config-if)#enc frame-relay<br />
knight(config-if)#frame-relay lmi-type ansi<br />
knight(config-if)#no shut<br />
knight(config-if)#int s0/0.16 point-to-point<br />
knight(config-if)#ip address 192.168.3.2 255.255.255.0<br />
knight(config-if)#no shut<br />
knight(config-if)#frame-relay interface-dlci 16<br />
knight(config-if)#int s0/0.18 point-to-point<br />
knight(config-if)#ip address 192.168.2.2 255.255.255.0<br />
knight(config-if)#no shut<br />
knight(config-if)#frame-relay interface-dlci 18<br />
do not forget to use your “cut and paste” utilities…these are a time-saver!<br />
The last line (frame-relay interface-dlci 18) just identifies the dlci connection<br />
(in this case to our Adtran). Now isn’t that nice that we already have it in our<br />
drawing. Notice how there is no ip address on S0/0. A good way to doublecheck<br />
yourself: Knight connects using dlci #17 so we should have sub-<br />
402
interface connections for #16 and #18. You can never be too careful during<br />
configuration. So now we can configure the next router: Shadow (dlci #18).<br />
shadow(config)#int s0/0<br />
shadow(config-if)#enc frame-relay<br />
shadow(config-if)#frame-relay lmi-type ansi<br />
shadow(config-if)#no shut<br />
shadow(config-if)#int s0/0.16 point-to-point<br />
shadow(config-if)#ip address 192.168.1.2 255.255.255.0<br />
shadow(config-if)#no shut<br />
shadow(config-if)#frame-relay interface-dlci 16<br />
shadow(config-if)#int s0/0.17 point-to-point<br />
shadow(config-if)#ip address 192.168.2.1 255.255.255.0<br />
shadow(config-if)#no shut<br />
shadow(config-if)#frame-relay interface-dlci 17<br />
So now we can configure the next router: Diekman (dlci# 16)<br />
diekman(config)#int s0/0<br />
diekman(config-if)#enc frame-relay<br />
diekman(config-if)#frame-relay lmi-type ansi<br />
diekman(config-if)#no shut<br />
diekman(config-if)#int s0/0.17 point-to-point<br />
diekman(config-if)#ip address 192.168.3.1 255.255.255.0<br />
diekman(config-if)#no shut<br />
diekman(config-if)#frame-relay interface-dlci 17<br />
diekman(config-if)#int s0/0.18 point-to-point<br />
diekman(config-if)#ip address 192.168.1.1 255.255.255.0<br />
diekman(config-if)#no shut<br />
diekman(config-if)#frame-relay interface-dlci 18<br />
3. Test your configuration using “sh frame pvc,” “ping,” and “sh ip route.” You<br />
should see:<br />
diekman#sh frame pvc<br />
PVC Statistics for interface Serial0/0 (Frame Relay DTE)<br />
DLCI = 17, DLCI USAGE = LOCAL, PVC STATUS = ACTIVE,<br />
INTERFACE = Serial0/0<br />
input pkts 42 output pkts 45 in <strong>by</strong>tes 3464<br />
out <strong>by</strong>tes 3676 dropped pkts 1 in FECN pkts 0<br />
in BECN pkts 0 out FECN pkts 0 out BECN pkts 0<br />
403
in DE pkts 0 out DE pkts 0<br />
out bcast pkts 18 out bcast <strong>by</strong>tes 1152<br />
pvc create time 00:23:24, last time pvc status changed 00:16:49<br />
DLCI = 18, DLCI USAGE = LOCAL, PVC STATUS = ACTIVE,<br />
INTERFACE = Serial0/0<br />
input pkts 54 output pkts 53 in <strong>by</strong>tes 4472<br />
out <strong>by</strong>tes 4364 dropped pkts 0 in FECN pkts 0<br />
in BECN pkts 0 out FECN pkts 0 out BECN pkts 0<br />
in DE pkts 0 out DE pkts 0<br />
out bcast pkts 21 out bcast <strong>by</strong>tes 1344<br />
pvc create time 00:23:18, last time pvc status changed 00:19:50<br />
Notice you are on “diekman” which uses dlci #16 to connect to the Adtran. When<br />
you do a sh frame pvc you see the status of dcli #17 and #18…the other two<br />
dlci’s.<br />
Challenge Lab or Supplemental Activities:<br />
1. Why did we use “point-to-point?” Our other option when configuring our subinterface<br />
was “multi-point.” Find out when we use each.<br />
2. Put an error on the serial interface on one of the routers (shut down the interface,<br />
remove the lmi type, etc). See if you can still get connectivity between all three<br />
routers.<br />
So what have I learned here?<br />
So far we have learned that frame relay is just another encapsulation that we can use on a<br />
serial interface (which is HDLC <strong>by</strong> default). You have also learned how to set up a “hub<br />
and spoke” frame relay network which only has partial meshed connectivity. We did that<br />
to save money. In this lab you learned how to configure a fully meshed frame relay<br />
network. You learned that you need multiple ip addresses on your physical serial<br />
interface (which you cannot do) so you used logical sub-interfaces to set up your circuits.<br />
My, my, my so much to do! Next we will start expanding upon your knowledge of hub<br />
and spoke networks and fully-meshed networks <strong>by</strong> adding in some networking “twists.”<br />
Guest Router Name Derivation<br />
Jason Allen Diekman, a.k.a. “Shadow Knight” or “Dark Lord,” was charged with hacking<br />
into Nasa, Oregon State Univeristy, and a San Francisco area ISP in 2002. He was<br />
sentenced to 21 months in Federal Prison, ordered to pay restitution of $87,736.29, and<br />
will have 3 years of probation, which includes no computer accessing. Apparently he<br />
used stolen credit card numbers to transfer money through Western Union and to try<br />
buying equipment from NASA’s Jet Propulsion Laboratory. While free on bail from<br />
charges the “defendant” (use whatever word you want there) hacked into several other<br />
university computer systems. Boy this one is a case study in stupidity 101. Even<br />
“geniuses” do not always have “common sense.” Won’t shower time be fun for him too?<br />
404
Frame Relay Operation and Troubleshooting<br />
Objective:<br />
To learn how to troubleshooting frame relay problems.<br />
Theory of operation:<br />
Frame relay is a layer 2 technology. Troubleshooting it is simple. It is when frame is<br />
combined with other stuff that it becomes complicated. In a simple, basic frame relay<br />
connection you only need to configure:<br />
1. the ip addresses on the same subnet with the proper mask<br />
2. set the encapsulation type to frame relay<br />
3. bring the interface up<br />
4. set the lmi-type, if needed.<br />
That is it. To troubleshoot we can use our OSI layer-<strong>by</strong>-layer technique:<br />
Snapshot of activity: show frame-relay pvc<br />
show controller s0/0 layer 1<br />
show interface s0/0 layer 1<br />
show frame-relay pvc layer 2<br />
show frame-relay lmi layer 2<br />
debug frame-relay events layer 2<br />
show frame-relay map layer 2/3<br />
show ip route layer 3<br />
Step-By-Step Instructions:<br />
1. Frame relay is one of the easier problems to troubleshoot because there really<br />
is not much that can go wrong with frame relay: it either works or it doesn’t.<br />
Let’s start <strong>by</strong> viewing our available frame relay show and debug commands. I<br />
have high-lighted some of the more commonly-used commands:<br />
router#sh frame ?<br />
end-to-end<br />
fragment<br />
ip<br />
lapf<br />
lmi<br />
map<br />
pvc<br />
qos-autosense<br />
route<br />
svc<br />
Frame-relay end-to-end VC information<br />
show frame relay fragmentation information<br />
show frame relay IP statistics<br />
show frame relay lapf status/statistics<br />
show frame relay lmi statistics<br />
Frame-Relay map table<br />
show frame relay pvc statistics<br />
show frame relay qos-autosense information<br />
show frame relay route<br />
show frame relay SVC stuff<br />
405
traffic<br />
vofr<br />
Frame-Relay protocol statistics<br />
Show frame-relay VoFR statistics<br />
router#debug frame-relay ?<br />
detailed<br />
Detailed Debug: Only for Lab use<br />
dlsw<br />
Frame Relay dlsw<br />
end-to-end Frame-relay end-to-end VC information<br />
events<br />
Important Frame Relay packet events<br />
foresight Frame Relay router ForeSight support<br />
fragment Frame Relay fragment<br />
hpr<br />
Frame Relay APPN HPR<br />
ip<br />
Frame Relay Internet Protocol<br />
l3cc<br />
Frame Relay Layer 3 Call Control<br />
l3ie<br />
Frame Relay IE parsing/construction<br />
lapf Frame Relay SVC Layer 2<br />
llc2<br />
Frame Relay llc2<br />
lmi<br />
LMI packet exchanges with service provider<br />
nli<br />
<strong>Network</strong> Layer interface<br />
packet<br />
Frame Relay packets<br />
ppp<br />
PPP over Frame Relay<br />
rsrb<br />
Frame Relay rsrb<br />
verbose<br />
Frame Relay<br />
2. Next let’s use some of those more common commands to see “good” traffic,<br />
packets and statistics on a frame relay connection between two routers (one<br />
dlci #16 the other dlci#18). As always we like to start with an overall<br />
“snapshot” of our connection. We use show frame pvc to show our permanent<br />
virtual circuit statistics (layer 2):<br />
router#sh frame pvc<br />
PVC Statistics for interface Serial0/1 (Frame Relay DTE)<br />
DLCI = 18, DLCI USAGE = LOCAL, PVC STATUS = ACTIVE,<br />
INTERFACE = Serial0/1<br />
input pkts 18 output pkts 23 in <strong>by</strong>tes 1758<br />
out <strong>by</strong>tes 2114 dropped pkts 0 in FECN pkts 0<br />
in BECN pkts 0 out FECN pkts 0 out BECN pkts 0<br />
in DE pkts 0 out DE pkts 0<br />
out bcast pkts 1 out bcast <strong>by</strong>tes 30<br />
pvc create time 00:05:19, last time pvc status changed 00:00:30<br />
router#<br />
Which dlci is this router connected to? If you said 18 then you were incorrect.<br />
The frame status we see is for the other one. If we have more than one dlci in our<br />
406
network we will see all but our own dlci number. For example, if we were<br />
connected to dlci #16 and our other routers were connected to dlci#17, 18, and 19,<br />
then a show frame pvc command would show us the statistics for dlci #17, 18,<br />
and 19. Now let’s look at our LMI statistics. This does not show us much except<br />
our LMI type is <strong>CISCO</strong>. Obviously I didn’t use an ADTRAN because the LMI<br />
type is set to ANSI on those.<br />
router#sh frame lmi<br />
LMI Statistics for interface Serial0/1 (Frame Relay DTE) LMI TYPE =<br />
<strong>CISCO</strong><br />
Invalid Unnumbered info 0 Invalid Prot Disc 0<br />
Invalid dummy Call Ref 0 Invalid Msg Type 0<br />
Invalid Status Message 0 Invalid Lock Shift 0<br />
Invalid Information ID 0 Invalid Report IE Len 0<br />
Invalid Report Request 0 Invalid Keep IE Len 0<br />
Num Status Enq. Sent 118 Num Status msgs Rcvd 118<br />
Num Update Status Rcvd 0 Num Status Timeouts 0<br />
router#<br />
We can see our frame relay map. Since we only are using two routers we should<br />
only see one map statement:<br />
router#sh frame map<br />
Serial0/1 (up): ip 192.168.1.2 dlci 18(0x12,0x420), dynamic,<br />
broadcast,, status defined, active<br />
router#<br />
3. Some of the more common problems you will encounter in a basic frame relay<br />
connection will be:<br />
Wrong type of serial cable (dce/dte) layer 1<br />
No serial connection layer 1/2<br />
Incorrect serial line encapsulation layer 2<br />
Wrong ip address/mask layer 3<br />
No routing protocol (dynamic or static) layer 3<br />
Let’s take a few pages to look at what will happen to your frame relay connection<br />
and what your troubleshooting commands will show you.<br />
4. Wrong type of serial cable (dce/dte). Let’s start with an overview of our frame<br />
relay connection:<br />
router#sh frame pvc<br />
PVC Statistics for interface Serial0/0 (Frame Relay DTE)<br />
router#<br />
407
Ouch! Obviously trouble here. We can see we are suppose to be a DTE<br />
connection. Let’s start at layer 1 and work our way up:<br />
make#sh controller s0/0<br />
Interface Serial0/0<br />
Hardware is PowerQUICC MPC860<br />
DCE V.35, no clock<br />
idb at 0x80F3DD50, driver data structure at 0x80F43264<br />
Whammo! Nailed that one quicker than a new bucket of chicken at an all you can<br />
eat buffet! The show controllers command tells us we have the dce with no clock,<br />
which is wrong. We must use dte.<br />
5. No serial connection. This one is just as easy.<br />
router#sh frame pvc<br />
PVC Statistics for interface Serial0/0 (Frame Relay DTE)<br />
router#sh controller s0/0<br />
Interface Serial0/0<br />
Hardware is PowerQUICC MPC860<br />
No serial cable attached<br />
6. Incorrect serial line encapsulation<br />
router#sh frame pvc<br />
router#sh controller s0/0<br />
Interface Serial0/0<br />
Hardware is PowerQUICC MPC860<br />
DTE V.35 TX and RX clocks detected.<br />
make#sh int s0/0<br />
Serial0/0 is up, line protocol is up<br />
Hardware is PowerQUICC Serial<br />
Internet address is 192.168.1.2/24<br />
MTU 1500 <strong>by</strong>tes, BW 1544 Kbit, DLY 20000 usec, rely 255/255, load 1/255<br />
Encapsulation HDLC, loopback not set, keepalive set (10 sec)<br />
Bingo! We go back and change our encapsulation type to frame relay and it<br />
works.<br />
408
7. Wrong ip address/mask Here I just changed the network number on one side.<br />
We start with our show frame pvc and work through the commands:<br />
router#sh frame pvc<br />
PVC Statistics for interface Serial0/0 (Frame Relay DTE)<br />
DLCI = 16, DLCI USAGE = LOCAL, PVC STATUS = ACTIVE,<br />
INTERFACE = Serial0/0<br />
input pkts 3 output pkts 6 in <strong>by</strong>tes 158<br />
out <strong>by</strong>tes 334 dropped pkts 0 in FECN pkts 0<br />
in BECN pkts 0 out FECN pkts 0 out BECN pkts 0<br />
in DE pkts 0 out DE pkts 0<br />
out bcast pkts 3 out bcast <strong>by</strong>tes 124<br />
pvc create time 00:01:53, last time pvc status changed 00:01:53<br />
router#sh controller s0/0<br />
Interface Serial0/0<br />
Hardware is PowerQUICC MPC860<br />
DTE V.35 TX and RX clocks detected.<br />
router#sh int s0/0<br />
Serial0/0 is up, line protocol is up<br />
Hardware is PowerQUICC Serial<br />
Internet address is 193.168.1.2/24<br />
MTU 1500 <strong>by</strong>tes, BW 1544 Kbit, DLY 20000 usec, rely 255/255, load<br />
1/255<br />
Encapsulation FRAME-RELAY, loopback not set, keepalive set (10<br />
sec)<br />
LMI enq sent 52, LMI stat recvd 53, LMI upd<br />
recvd 0, DTE LMI up<br />
A hint! We can check our ip address against the ip address on the other end of<br />
our frame-relay line with show frame map:<br />
router#sh frame map<br />
Serial0/0 (up): ip 192.168.1.1 dlci 16(0x10,0x400), dynamic,<br />
broadcast,, status defined, active<br />
router#<br />
We can see it in our frame relay map and our show interface s0/0. So we fix it<br />
(back to 192.168.1.2/24) and it works.<br />
409
8. No routing protocol (dynamic or static).<br />
router#sh frame pvc<br />
PVC Statistics for interface Serial0/0 (Frame Relay DTE)<br />
DLCI = 16, DLCI USAGE = LOCAL, PVC STATUS = ACTIVE,<br />
INTERFACE = Serial0/0<br />
input pkts 1 output pkts 6 in <strong>by</strong>tes 30<br />
out <strong>by</strong>tes 550 dropped pkts 0 in FECN pkts 0<br />
in BECN pkts 0 out FECN pkts 0 out BECN pkts 0<br />
in DE pkts 0 out DE pkts 0<br />
out bcast pkts 1 out bcast <strong>by</strong>tes 30<br />
pvc create time 00:00:23, last time pvc status changed 00:00:23<br />
router#sh controllers s0/0<br />
Interface Serial0/0<br />
Hardware is PowerQUICC MPC860<br />
DTE V.35 TX and RX clocks detected.<br />
router#sh int s0/0<br />
Serial0/0 is up, line protocol is up<br />
Hardware is PowerQUICC Serial<br />
Internet address is 192.168.1.2/24<br />
MTU 1500 <strong>by</strong>tes, BW 1544 Kbit, DLY 20000 usec, rely 255/255, load<br />
1/255<br />
Encapsulation FRAME-RELAY, loopback not set, keepalive set (10<br />
sec)<br />
LMI enq sent 45, LMI stat recvd 47, LMI upd recvd 0, DTE LMI up<br />
LMI enq recvd 0, LMI stat sent 0, LMI upd sent 0<br />
LMI DLCI 1023 LMI type is <strong>CISCO</strong> frame relay DTE<br />
make#sh frame lmi<br />
LMI Statistics for interface Serial0/0 (Frame Relay DTE) LMI TYPE =<br />
<strong>CISCO</strong><br />
Invalid Unnumbered info 0 Invalid Prot Disc 0<br />
Invalid dummy Call Ref 0 Invalid Msg Type 0<br />
Invalid Status Message 0 Invalid Lock Shift 0<br />
Invalid Information ID 0 Invalid Report IE Len 0<br />
Invalid Report Request 0 Invalid Keep IE Len 0<br />
Num Status Enq. Sent 52 Num Status msgs Rcvd 54<br />
Num Update Status Rcvd 0 Num Status Timeouts 0<br />
410
outer#sh frame map<br />
Serial0/0 (up): ip 192.168.1.1 dlci 16(0x10,0x400), dynamic,<br />
broadcast,, status defined, active<br />
router #sh ip route<br />
Codes: C - connected, S - static, I - IGRP, R - RIP, M - mobile, B - BGP<br />
D - EIGRP, EX - EIGRP external, O - OSPF, IA - OSPF inter area<br />
N1 - OSPF NSSA external type 1, N2 - OSPF NSSA external type 2<br />
E1 - OSPF external type 1, E2 - OSPF external type 2, E - EGP<br />
i - IS-IS, L1 - IS-IS level-1, L2 - IS-IS level-2, * - candidate default<br />
U - per-user static route, o - ODR<br />
Gateway of last resort is not set<br />
C 2.0.0.0/8 is directly connected, Loopback0<br />
C 192.168.1.0/24 is directly connected, Serial0/0<br />
Ok…we can take a hint here…with our show frame map we see we are expecting<br />
dynamic routing to take place. But we don’t see any routes learned via dynamic<br />
routing in our sh ip route. So let’s check our router config. We find no routing<br />
protocol. Therefore we add in the same routing protocol that is enabled on the<br />
other side:<br />
router(config)#router eigrp 38<br />
router(config-router)#network 192.168.1.0<br />
router(config-router)#network 1.0.0.0<br />
So what have I learned here?<br />
Nothing really glamorous just frame relay operation and troubleshooting. Again it is<br />
easy when you know how. Unlike the other troubleshooting labs this one relies more<br />
upon over-all troubleshooting commands (like show controllers and sh ip route) than<br />
upon specific frame-relay only troubleshooting commands. Keep in mind that your<br />
problem may not be frame-relay related at all…it could be host names, ip addresses,<br />
etc. If you really, really get stuck, then save your configs, turn everything off and go<br />
do something for an hour or so. A clear head can really help in troubleshooting.<br />
411
Basic ISDN Configuration with BRI interface (MERGE)<br />
Objective:<br />
To learn how to set up a basic ISDN connection, using BRI interfaces, between two<br />
routers. In this lab you will be using a MERGE box for ISDN emulation.<br />
Tools and Materials:<br />
(2) routers<br />
(2) straight-through cables<br />
(1) workstation<br />
(1) MERGE ISDN emulator<br />
(2) PC/workstations<br />
(2) console cables<br />
Lab Design:<br />
st<br />
st<br />
Router Smarts Kissane<br />
Loop 0 192.168.100.1/24 192.168.200.1/24<br />
BRI0 192.168.1.1/24 192.168.1.2/24<br />
Merge Port A B<br />
Phone number 555-1000 555-2000<br />
Step-By-Step Instructions:<br />
1. Configure the basics on each router. Set up and cable the lab as shown. Pick<br />
a routing protocol to use and advertise the networks.<br />
2. Set the ISDN switch type on each router:<br />
smarts(config)#isdn switch-type basic-5ess<br />
smarts(config)#dialer-list 1 protocol ip permit<br />
kissane(config)#isdn switch-type basic-5ess<br />
kissane(config)# dialer-list 1 protocol ip permit<br />
412
3. Configure the ISDN interface on “smarts.” You will be configuring the ip<br />
address, “no shut,” dialer group, and a dialer map (how to get from here to<br />
there).<br />
smarts(config)#int bri0/0<br />
smarts(config-if)#ip address 192.168.1.1 255.255.255.0<br />
smarts(config-if)#no shut<br />
smarts(config-if)#dialer-group 1<br />
smarts(config-if)#dialer map ip 192.168.1.2 name kissane 5552000<br />
4. Configure the ISDN interface on “kissane” with similar commands. You will<br />
be configuring the ip address, the isdn spid (service profile identifiers), and a<br />
dialer map (how to get from here to there).<br />
kissane(config)#int bri0/0<br />
kissane(config-if)#ip address 192.168.1.2 255.255.255.0<br />
kissane(config-if)#no shut<br />
kissane(config-if)# dialer-group 1<br />
kissane(config-if)#dialer map ip 192.168.1.1 name smarts 5551000<br />
5. Test the connection using ping, sh ip route, and sh cdp nei from BRI0/0 to<br />
BRI0/0. Use “show isdn status” to inspect the status of the BRI interfaces.<br />
You should see:<br />
smarts#sh isdn status<br />
Global ISDN Switchtype = basic-5ess<br />
ISDN BRI0/0 interface<br />
dsl 0, interface ISDN Switchtype = basic-5ess<br />
Layer 1 Status:<br />
ACTIVE<br />
Layer 2 Status:<br />
TEI = 86, Ces = 1, SAPI = 0, State =<br />
MULTIPLE_FRAME_ESTABLISHED<br />
Layer 3 Status:<br />
1 Active Layer 3 Call(s)<br />
Activated dsl 0 CCBs = 1<br />
CCB:callid=8001, sapi=0, ces=1, B-chan=1, calltype=DATA<br />
The Free Channel Mask: 0x80000002<br />
Total Allocated ISDN CCBs = 1<br />
smarts#<br />
Here we can see an “active” good ISDN connection.<br />
6. Try to ping the loopback. You should not be able to see it. It should not have<br />
shown up in the ip routing table either. The ISDN line comes up, stays active,<br />
and then shuts off pretty quickly. Its actually faster than the routing protocol<br />
413
(I used EIGRP). In order to make this work we need to set up some static<br />
routes between the two.<br />
smarts(config)#ip route 192.168.200.0 255.255.255.0 192.168.1.2<br />
This route basically is saying. “in order to get to the 192.168.200.0/24<br />
network use the 192.168.1.2 interface.”<br />
kissane(config)# ip route 192.168.100.0 255.255.255.0 192.168.1.1<br />
This route basically is saying, “in order to get to the 192.168.100.0/24 network<br />
use the 192.168.1.1 interface.” You should be able to ping and see all networks.<br />
Now you should see:<br />
kissane#ping 192.168.1.1<br />
Type escape sequence to abort.<br />
Sending 5, 100-<strong>by</strong>te ICMP Echos to 192.168.1.1, timeout is 2 seconds:<br />
.!!!!<br />
Success rate is 80 percent (4/5), round-trip min/avg/max = 32/32/33 ms<br />
00:21:07: %LINK-3-UPDOWN: Interface BRI0/0:1, changed state to up<br />
00:21:07: %ISDN-6-CONNECT: Interface BRI0/0:1 is now connected to<br />
5551000<br />
00:21:08: %LINEPROTO-5-UPDOWN: Line protocol on Interface BRI0/0:1,<br />
changed state to up<br />
kissane#ping 192.168.1.1<br />
Type escape sequence to abort.<br />
Sending 5, 100-<strong>by</strong>te ICMP Echos to 192.168.1.1, timeout is 2 seconds:<br />
!!!!!<br />
Success rate is 100 percent (5/5), round-trip min/avg/max = 32/32/32 ms<br />
kissane#sh ip route<br />
Codes: C - connected, S - static, I - IGRP, R - RIP, M - mobile, B - BGP<br />
D - EIGRP, EX - EIGRP external, O - OSPF, IA - OSPF inter area<br />
N1 - OSPF NSSA external type 1, N2 - OSPF NSSA external type 2<br />
E1 - OSPF external type 1, E2 - OSPF external type 2, E - EGP<br />
i - IS-IS, L1 - IS-IS level-1, L2 - IS-IS level-2, * - candidate default<br />
U - per-user static route, o - ODR<br />
Gateway of last resort is 192.168.1.1 to network 0.0.0.0<br />
C 192.168.200.0/24 is directly connected, Loopback0<br />
C 192.168.1.0/24 is directly connected, BRI0/0<br />
S 192.168.100.0/24 [1/0] via 192.168.1.1<br />
S* 0.0.0.0/0 [1/0] via 192.168.1.1<br />
414
Challenge Lab or Supplemental Activities:<br />
1. Repeat the lab using Class “B” addresses.<br />
2. Repeat the lab using Class “A” addresses.<br />
3. Use the help features to find out all commands for isdn and what they mean.<br />
So what have I learned here?<br />
In this lab you have learned how to set up the bare minimum requirements for an ISDN<br />
BRI connection using the MERGE ISDN simulators. In later labs you will learn more<br />
about “real-world” applications using PPP, ISDN SPID’s and Dial on Demand Routing<br />
(DDR).<br />
Guest Router Name Derivation<br />
Timothy Kissane was a software developer for a company called System Management<br />
Arts Incorporated (“SMARTS”). When he was hired he signed a confidentiality<br />
agreement that he would never reveal any of the source code he developed for a program<br />
called “InCharge” (a network monitoring program). After he was fired a couple of the<br />
competitors to SMARTs received email messages from “Joe Friday” via Hotmail offering<br />
the source code for InCharge for sale. These were forwarded from the competitors back<br />
to SMARTS (aha! They are all in it together!). He was arrested in February 2002,<br />
released on bail and is awaiting trial on charges of “theft of a trade secret” in connection<br />
with his prior employment.<br />
415
Basic ISDN Configuration with BRI interface (ADTRAN)<br />
Objective:<br />
To learn how to set up a basic ISDN connection, using BRI interfaces, between two<br />
routers. In this lab you will be using an ADTRAN box for ISDN emulation.<br />
Tools and Materials:<br />
(2) routers<br />
(2) straight-through cables<br />
(1) workstation<br />
(1) ADTRAN Atlas 550<br />
(2) PC/workstations<br />
(2) console cables<br />
Lab Design:<br />
st 1 2 st<br />
Router Smarts Kissane<br />
Loop 0 192.168.100.1/24 192.168.200.1/24<br />
BRI0 192.168.1.1/24 192.168.1.2/24<br />
Adtran Port 1 2<br />
Phone number 555-1234 555-4000<br />
Step-By-Step Instructions:<br />
1. Configure the basics on each router. Set up and cable the lab as shown. Pick a<br />
routing protocol to use and advertise the networks.<br />
2. Set the ISDN switch type on each router:<br />
smarts(config)# isdn switch-type basic-ni<br />
smarts(config)#dialer-list 1 protocol ip permit<br />
kissane(config)# isdn switch-type basic-ni<br />
kissane(config)# dialer-list 1 protocol ip permit<br />
416
3. Configure the ISDN interface on “smarts.” You will be configuring the ip<br />
address, the isdn spid (service profile identifiers), and a dialer map (how to get<br />
from here to there).<br />
smarts(config)#int bri0/0<br />
smarts(config-if)#ip address 192.168.1.1 255.255.255.0<br />
smarts(config-if)#no shut<br />
smarts(config-if)#dialer-group 1<br />
smarts(config-if)#dialer map ip 192.168.1.2 name kissane 5554000<br />
4. Configure the ISDN interface on “kissane” with similar commands. You will be<br />
configuring the ip address, the isdn spid (service profile identifiers), and a dialer<br />
map (how to get from here to there).<br />
kissane(config)#int bri0/0<br />
kissane(config-if)#ip address 192.168.1.2 255.255.255.0<br />
kissane(config-if)#no shut<br />
kissane(config-if)#dialer-group 1<br />
kissane(config-if)#dialer map ip 192.168.1.1 name smarts 5551234<br />
5. Test the connection using ping, sh ip route, and sh cdp nei from BRI0/0 to<br />
BRI0/0. Use “show isdn status” to inspect the status of the BRI interfaces. You<br />
should see:<br />
kissane#ping 192.168.100.1<br />
Type escape sequence to abort.<br />
Sending 5, 100-<strong>by</strong>te ICMP Echos to 192.168.100.1, timeout is 2 seconds:<br />
.....<br />
Success rate is 0 percent (0/5)<br />
kissane#sh isdn status<br />
Global ISDN Switchtype = basic-ni<br />
ISDN BRI0/0 interface<br />
dsl 0, interface ISDN Switchtype = basic-ni<br />
Layer 1 Status:<br />
ACTIVE<br />
Layer 2 Status:<br />
Layer 2 NOT Activated<br />
Layer 3 Status:<br />
0 Active Layer 3 Call(s)<br />
Activated dsl 0 CCBs = 1<br />
CCB:callid=0x8002, sapi=0x0, ces=0x1, B-chan=1<br />
The Free Channel Mask: 0x80000002<br />
Total Allocated ISDN CCBs = 1<br />
417
Here we can see a problem with our ISDN connection. Unlike the MERGE box<br />
we need to include service profile identifiers, ppp and authentication.<br />
smarts(config-if)#isdn spid1 51055512340001 5551234<br />
smarts(config-if)#isdn spid2 51055512350001 5551235<br />
smarts(config-if)#enc ppp<br />
smarts(config-if)#ppp authentication chap<br />
smarts(config)#username kissane password 0 cisco<br />
smarts(config)#ip host kissane 192.168.1.2<br />
kissane(config-if)#isdn spid1 51055540000001 5554000<br />
kissane(config-if)#isdn spid2 51055540010001 5554001<br />
kissane(config-if)#enc ppp<br />
kissane(config-if)#ppp authentication chap<br />
kissane(config)#username smarts password 0 cisco<br />
kissane(config)#ip host smarts 192.168.1.1<br />
6. Try to ping the loopback. You should not be able to see it. It should not have<br />
shown up in the ip routing table either. The ISDN line comes up, stays active,<br />
and then shuts off pretty quickly. Its actually faster than the routing protocol (I<br />
used EIGRP). In order to make this work we need to set up some static routes and<br />
a quad-zero (“gateway of last resort”) between the two.<br />
smarts(config)#ip route 192.168.200.0 255.255.255.0 192.168.1.2<br />
This route basically is saying. “in order to get to the 192.168.200.0/24 network<br />
use the 192.168.1.2 interface.”<br />
kissane(config)#ip route 192.168.100.0 255.255.255.0 192.168.1.1<br />
kissane(config)#ip route 0.0.0.0 0.0.0.0 192.168.1.2<br />
This route basically is saying, “in order to get to the 192.168.100.0/24 network<br />
use the 192.168.1.1 interface.” You should be able to ping and see all networks.<br />
Now you should see:<br />
kissane#ping 192.168.1.1<br />
Type escape sequence to abort.<br />
Sending 5, 100-<strong>by</strong>te ICMP Echos to 192.168.1.1, timeout is 2 seconds:<br />
.!!!!<br />
Success rate is 80 percent (4/5), round-trip min/avg/max = 32/32/33 ms<br />
00:21:07: %LINK-3-UPDOWN: Interface BRI0/0:1, changed state to up<br />
00:21:07: %ISDN-6-CONNECT: Interface BRI0/0:1 is now connected to<br />
5551000<br />
418
00:21:08: %LINEPROTO-5-UPDOWN: Line protocol on Interface BRI0/0:1,<br />
changed state to up<br />
kissane#ping 192.168.1.1<br />
Type escape sequence to abort.<br />
Sending 5, 100-<strong>by</strong>te ICMP Echos to 192.168.1.1, timeout is 2 seconds:<br />
!!!!!<br />
Success rate is 100 percent (5/5), round-trip min/avg/max = 32/32/32 ms<br />
kissane#sh ip route<br />
Codes: C - connected, S - static, I - IGRP, R - RIP, M - mobile, B - BGP<br />
D - EIGRP, EX - EIGRP external, O - OSPF, IA - OSPF inter area<br />
N1 - OSPF NSSA external type 1, N2 - OSPF NSSA external type 2<br />
E1 - OSPF external type 1, E2 - OSPF external type 2, E - EGP<br />
i - IS-IS, L1 - IS-IS level-1, L2 - IS-IS level-2, * - candidate default<br />
U - per-user static route, o - ODR<br />
Gateway of last resort is 192.168.1.1 to network 0.0.0.0<br />
C 192.168.200.0/24 is directly connected, Loopback0<br />
C 192.168.1.0/24 is directly connected, BRI0/0<br />
S 192.168.100.0/24 [1/0] via 192.168.1.1<br />
S* 0.0.0.0/0 [1/0] via 192.168.1.1<br />
Challenge Lab or Supplemental Activities:<br />
1. Repeat the lab using Class “B” addresses.<br />
2. Repeat the lab using Class “A” addresses.<br />
3. Try using PAP as an encapsulation for PPP. Try HDLC.<br />
So what have I learned here?<br />
In this lab you have learned how to set up the bare minimum requirements for an ISDN<br />
BRI connection using the ADTRAN ISDN simulators. In later labs you will learn more<br />
about “real-world” applications using PPP, ISDN SPID’s and Dial on Demand Routing<br />
(DDR).<br />
Guest Router Name Derivation<br />
Timothy Kissane was a software developer for a company called System Management<br />
Arts Incorporated (“SMARTS”). When he was hired he signed a confidentiality<br />
agreement that he would never reveal any of the source code he developed for a program<br />
called “InCharge” (a network monitoring program). After he was fired a couple of the<br />
competitors to SMARTs received email messages from “Joe Friday” via Hotmail offering<br />
the source code for InCharge for sale. These were forwarded from the competitors back<br />
to SMARTS (aha! They are all in it together!). He was arrested in February 2002,<br />
released on bail and is awaiting trial on charges of “theft of a trade secret” in connection<br />
with his prior employment.<br />
419
ISDN Operation and Troubleshooting<br />
Objective:<br />
This paper lab explains the fundamentals of ISDN operation. Here we will start with the<br />
theory of ISDN operation, then break it down a little more in-depth layer <strong>by</strong> layer,<br />
discuss troubleshooting commands for ISDN, and then finish <strong>by</strong> looking at how to<br />
decipher the debug and show command outputs of working and non-working ISDN lines.<br />
ISDN Theory of Operation:<br />
ISDN, as a WAN technology, is fairly simple: once you know how to set it up and use it.<br />
It is a technology that has been around for a while now and is used for main WAN<br />
connections or, more likely, as backup connections for other WAN technologies. Once<br />
you understand how ISDN operates you should be more likely to understand what you<br />
need to set up on your routers and how to troubleshoot it.<br />
ISDN operation is a simple (I think it is…) three-step operation that correlates nicely with<br />
the lower three layers of the OSI model:<br />
1. ISDN DDR generates “interesting” traffic PHYSICAL<br />
2. ISDN call is made DATA LINK<br />
3. PPP handshaking NETWORK<br />
Then you are ready to go! Let’s look at each step a bit more in-depth.<br />
Layer-By-Layer ISDN Operation:<br />
Physical Layer<br />
As we discuss the steps they will be numbered and correlated to the router configuration.<br />
Use this to correlate the discussion (“the theory”) with the implementation (“learning <strong>by</strong><br />
doing”). (1) Of course no traffic will pass through a physical interface if it is physically<br />
“shut down” so we must also configure our interfaces to be up during this phase. (2)<br />
ISDN uses Dial on Demand Routing (DDR) to establish the first phase of connection at<br />
the physical layer. We set up access control lists in our configuration that determine<br />
“what is” and “what is not interesting traffic.” This will decide whether or not we move<br />
on to the second phase. Finally you may see the term “spoofing” used during<br />
troubleshooting or checking the status of an ISDN connection. The router “spoofs”<br />
(fakes) a connection during the set up phases to imitate an active state, otherwise the next<br />
steps could not take place. Some commands that must be used to set up a basic ISDN<br />
connection include:<br />
router(config)#int bri0/0 (1)<br />
router(config-if)#ip address 192.168.1.1 255.255.255.0 (1)<br />
router(config-if)#no shut (1)<br />
router(config-if)#dialer-group 1 (2)<br />
router(config-if)dialer map ip 192.168.1.2 name routerB 5552000 (2)<br />
router(config)#dialer-list 1 protocol ip permit (2)<br />
420
Data Link Layer<br />
Two things happen here: The bearer channel (B-channel) is set up and the data channels<br />
(D-channel) are set up. This, essentially, is how a call is made. There is a bit of overlap<br />
with the physical layer (dialer strings/maps) much. (1) The D-channel is uses a protocol<br />
called “Link Access Protocol-D” or LAPD. This uses Q.921 for establishment.<br />
Therefore it makes sense for us to debug Q.921 during troubleshooting. (2) If a protocol<br />
is used then it must hand-shake (establish, negotiate, and maintain of LCP-Link Control<br />
Protocol). This is where service profile identifiers (SPID) may or may not be used (a.k.a<br />
“TEI”)and username/password problems can be found. Also, certain manufacturers of<br />
networking equipment do not require specific encapsulations. Nine times out of ten they<br />
do require PPP for encapsulation. For example, MERGE boxes do not require PPP but<br />
ADTRAN units do require PPP. Good stuff to know when setting them up.<br />
router(config-if)dialer map ip 192.168.1.2 name routerB 5552000 (2)<br />
router(config-if)isdn spid1 51055512340001 5551234 (2)<br />
router(config-if)isdn spid2 51055512350001 5551235 (2)<br />
router(config-if)#enc ppp (2)<br />
router(config-if)#ppp authentication chap (2)<br />
router(config)#username joe password cisco (2)<br />
router(config)#ip host joe 192.168.1.1 (2)<br />
<strong>Network</strong> Layer<br />
(1) This is where our network layer implementation of PPP takes place (NCP-<strong>Network</strong><br />
Control Prtocol). This is where username and password problems can also be found. (Ok<br />
so there is some overlap). Here we will also find the Q.931 protocol to finish our ISDN<br />
connection.<br />
router(config)#username joe password cisco (2)<br />
router(config)#ip host joe 192.168.1.1 (2)<br />
Troubleshooting ISDN:<br />
Just like we have done before you will start at the physical layer and work your way up<br />
the OSI model:<br />
1. ISDN DDR generates “interesting” traffic PHYSICAL<br />
2. ISDN call is made DATA LINK<br />
3. PPP handshaking NETWORK<br />
Physical layer:<br />
Step 1: Since ISDN uses interesting traffic to initiate a call we must first generate<br />
interesting traffic. The easiest way is to ping the other ISDN interface to see if the line<br />
comes up. To check for interesting traffic beyond what happens we can use these<br />
commands (use them in this order too):<br />
sh controllers bri<br />
sh int bri0/0<br />
421
sh protocols<br />
debug dialer packets<br />
debug dialer<br />
Problems that cause ISDN to not work: no cable, dialer interface shut down, dialer list<br />
configured improperly or not at all, or problems with the dialer string/map.<br />
Data Link layer:<br />
Step 2: We need to see if our LAP-D and PPP are completing properly. We can use these<br />
commands for that:<br />
debug isdn q921<br />
debug ppp negotiation<br />
(LAPD)<br />
(PPP)<br />
Problems that cause ISDN to not work: problems with the dialer string/map, problems<br />
with the layer 2 ISDN line, or problems with ppp.<br />
<strong>Network</strong> layer:<br />
Step 3: Check for confirmation of a good connection using these commands:<br />
debug isdn q931<br />
show isdn status<br />
Problems that cause ISDN to not work: problems with the dialer string/map, problems<br />
with the layer 2 ISDN line, or problems with ppp.<br />
ISDN <strong>Network</strong> Scenarios:<br />
Ok. Great. Now you are ready to fire up an ISDN connection and troubleshoot it with no<br />
problems, right? Maybe. Let’s take some time to look at some of the output from these<br />
debug and show commands. We have already seen how cryptic they can be. For these<br />
let’s work from the network layer down. We will show a good connection and then<br />
introduce problems and see how the debug/show commands change with problems and<br />
what causes them.<br />
Here is the output of each of those commands for a good working ISDN connection using<br />
an ADTRAN between two routers. To bring the line up I pinged the BRI interface. You<br />
can see the first ping packet does not work. It generates the interesting traffic, the BRI<br />
line comes up and the other four succeed.<br />
kissane#ping 192.168.1.1<br />
Type escape sequence to abort.<br />
Sending 5, 100-<strong>by</strong>te ICMP Echos to 192.168.1.1, timeout is 2 seconds:.!!!!<br />
Success rate is 80 percent (4/5), round-trip min/avg/max = 32/32/32 ms<br />
00:13:26: %LINK-3-UPDOWN: Interface BRI0/0:1, changed state to up<br />
00:13:26: %ISDN-6-CONNECT: Interface BRI0/0:1 is now connected to<br />
5551234<br />
422
00:13:27: %LINEPROTO-5-UPDOWN: Line protocol on Interface BRI0/0:1,<br />
changed state to up<br />
00:13:32: %ISDN-6-CONNECT: Interface BRI0/0:1 is now connected to<br />
5551234 smarts<br />
<strong>Network</strong> Layer:<br />
With a good, active connection we can see our ISDN active status:<br />
kissane#sh isdn status<br />
Global ISDN Switchtype = basic-ni<br />
ISDN BRI0/0 interface<br />
dsl 0, interface ISDN Switchtype = basic-ni<br />
Layer 1 Status:<br />
ACTIVE<br />
Layer 2 Status:<br />
TEI = 64, Ces = 1, SAPI = 0, State =<br />
MULTIPLE_FRAME_ESTABLISHED<br />
TEI = 65, Ces = 2, SAPI = 0, State =<br />
MULTIPLE_FRAME_ESTABLISHED<br />
Spid Status:<br />
TEI 64, ces = 1, state = 8(established)<br />
spid1 configured, spid1 sent, spid1 valid<br />
Endpoint ID Info: epsf = 0, usid = 70, tid = 1<br />
TEI 65, ces = 2, state = 5(init)<br />
spid2 configured, spid2 sent, spid2 valid<br />
Endpoint ID Info: epsf = 0, usid = 70, tid = 2<br />
Layer 3 Status:<br />
1 Active Layer 3 Call(s)<br />
Activated dsl 0 CCBs = 1<br />
CCB:callid=0x8004, sapi=0x0, ces=0x1, B-chan=1<br />
The Free Channel Mask: 0x80000002<br />
Total Allocated ISDN CCBs = 1<br />
kissane#<br />
We can see our layer 1 status is “active.” Our layer 2 has two active “multiple frames<br />
established” which is one for each spid. Finally our layer 3 has one active call. To see<br />
more details about that call:<br />
kissane#sh isdn active<br />
----------------------------------------------------------------------------------------------------------<br />
ISDN ACTIVE CALLS<br />
----------------------------------------------------------------------------------------------------------<br />
History table has a maximum of 100 entries.<br />
History table data is retained for a maximum of 15 Minutes.<br />
-----------------------------------------------------------------------------------------------------------<br />
423
Call Calling Called Remote Seconds Seconds Seconds Charges<br />
Type Number Number Name Used Left Idle Units/Currency<br />
------------------------------------------------------------------------------------------------------------<br />
Out 5551234 smarts 9 114 5 0<br />
------------------------------------------------------------------------------------------------------------<br />
Finally we can see what happens if everything is fine with our debug isdn q931<br />
command. First I waited until the BRI connection was administratively down. Then I<br />
enabled the debug command. Finally I pinged the other BRI to bring the line back up.<br />
You should see:<br />
kissane#debug isdn q931<br />
ISDN Q931 packets debugging is on<br />
kissane#ping 192.168.1.1<br />
Type escape sequence to abort.<br />
Sending 5, 100-<strong>by</strong>te ICMP Echos to 192.168.1.1, timeout is 2 seconds:.!!!!<br />
Success rate is 80 percent (4/5), round-trip min/avg/max = 32/33/36 ms<br />
01:33:55: ISDN BR0/0: TX -> SETUP pd = 8 callref = 0x07<br />
01:33:55: Bearer Capability i = 0x8890<br />
01:33:55: Channel ID i = 0x83<br />
01:33:55: Keypad Facility i = '5551234'<br />
01:33:236223242240: ISDN BR0/0: RX
In line 1 we see our Q931 requesting (transmission: TX) a handshake procedure to setup<br />
an ISDN connection with certain parameters. Here the source is asking “can I connect to<br />
you?” Line 2 is the reception of the setup request to allow the “call to proceed.” In<br />
other words, the destination is responding with “I am not busy so you can connect to me.”<br />
Line 3 is our source actually connecting to the destination. Line 4-5 shows us the line<br />
coming up and connected with a number (555-1234). Line 6 is our destination telling the<br />
source “the line is established so you can bring up your interface and start sending<br />
information.” Line 7 shows us the source BRI is brought up and we can now transmit our<br />
data.<br />
Data Link Layer:<br />
Let’s start with our LAP-D negotiation (Q.921). This will negotiate the setting up of our<br />
SPID’s. Again, I used a BRI that was not connected, enabled the debug isdn q921, and<br />
then pinged the other BRI. (Don’t forget to turn off debug from the last step…it would<br />
be too confusing).<br />
kissane#debug isdn q921<br />
ISDN Q921 packets debugging is on<br />
kissane#ping 192.168.1.1<br />
Type escape sequence to abort.<br />
Sending 5, 100-<strong>by</strong>te ICMP Echos to 192.168.1.1, timeout is 2 seconds:.!!!!<br />
Success rate is 80 percent (4/5), round-trip min/avg/max = 32/32/32 ms<br />
01:52:21: ISDN BR0/0:TX -> INFOc sapi = 0 tei = 64 ns = 22 nr = 20 i = 0x0<br />
8010805040288901801832C0735353531323334<br />
01:52:90194354176: ISDN BR0/0: RX INFOc sapi = 0 tei = 64 ns = 23 nr = 22 i = 0x0<br />
801080F<br />
01:52:90194313216: ISDN BR0/0: RX
01:52:27: %ISDN-6-CONNECT: Interface BRI0/0:1 is now connected to<br />
5551234 smarts<br />
kissane#<br />
01:52:133144027136: ISDN BR0/0: RX RRf sapi = 0 tei = 64 nr = 22<br />
Once again, let’s cut out all the mumbo-jumbo and look at the text in “bold.”<br />
1. TX -> INFOc sapi = 0 tei = 64 (from source)<br />
2. ISDN BR0/0: RX INFOc sapi = 0 tei = 64 (from source)<br />
10. ISDN BR0/0: RX
Type escape sequence to abort.<br />
Sending 5, 100-<strong>by</strong>te ICMP Echos to 192.168.1.1, timeout is 2 seconds:..!!!<br />
Success rate is 60 percent (3/5), round-trip min/avg/max = 32/32/32 ms<br />
02:04:20: %LINK-3-UPDOWN: Interface BRI0/0:1, changed state to up<br />
02:04:20: %ISDN-6-CONNECT: Interface BRI0/0:1 is now connected to<br />
5551234<br />
02:04:20: BR0/0:1 PPP: Treating connection as a callout<br />
02:04:20: BR0/0:1 PPP: Phase is ESTABLISHING, Active Open<br />
02:04:20: BR0/0:1 LCP: O CONFREQ [Closed] id 27 len 15<br />
02:04:20: BR0/0:1 LCP: AuthProto CHAP (0x0305C22305)<br />
02:04:20: BR0/0:1 LCP: MagicNumber 0x0208BEB7 (0x05060208BEB7)<br />
02:04:22: BR0/0:1 LCP: I CONFREQ [REQsent] id 7 len 15<br />
02:04:22: BR0/0:1 LCP: AuthProto CHAP (0x0305C22305)<br />
02:04:22: BR0/0:1 LCP: MagicNumber 0x045572BC (0x0506045572BC)<br />
02:04:22: BR0/0:1 LCP: O CONFACK [REQsent] id 7 len 15<br />
02:04:22: BR0/0:1 LCP: AuthProto CHAP (0x0305C22305)<br />
02:04:22: BR0/0:1 LCP: MagicNumber 0x045572BC (0x0506045572BC)<br />
02:04:22: BR0/0:1 LCP: TIMEout: State ACKsent<br />
02:04:22: BR0/0:1 LCP: O CONFREQ [ACKsent] id 28 len 15<br />
02:04:22: BR0/0:1 LCP: AuthProto CHAP (0x0305C22305)<br />
02:04:22: BR0/0:1 LCP: MagicNumber 0x0208BEB7 (0x05060208BEB7)<br />
02:04:22: BR0/0:1 LCP: I CONFACK [ACKsent] id 28 len 15<br />
02:04:22: BR0/0:1 LCP: AuthProto CHAP (0x0305C22305)<br />
02:04:22: BR0/0:1 LCP: MagicNumber 0x0208BEB7 (0x05060208BEB7)<br />
02:04:22: BR0/0:1 LCP: State is Open<br />
02:04:22: BR0/0:1 PPP: Phase is AUTHENTICATING, <strong>by</strong> both<br />
02:04:22: BR0/0:1 CHAP: O CHALLENGE id 7 len 28 from "kissane"<br />
02:04:22: BR0/0:1 CHAP: I CHALLENGE id 7 len 27 from "smarts"<br />
02:04:22: BR0/0:1 CHAP: I CHALLENGE id 7 len 27 from "smarts"<br />
02:04:22: BR0/0:1 CHAP: I SUCCESS id 7 len 4<br />
02:04:22: BR0/0:1 CHAP: I RESPONSE id 7 len 27 from "smarts"<br />
02:04:22: BR0/0:1 CHAP: O SUCCESS id 7 len 4<br />
02:04:22: BR0/0:1 PPP: Phase is UP<br />
02:04:22: BR0/0:1 IPCP: O CONFREQ [Closed] id 7 len 10<br />
02:04:22: BR0/0:1 IPCP: Address 192.168.1.2 (0x0306C0A80102)<br />
02:04:22: BR0/0:1 CDPCP: O CONFREQ [Closed] id 7 len 4<br />
02:04:22: BR0/0:1 IPCP: I CONFREQ [REQsent] id 7 len 10<br />
02:04:22: BR0/0:1 IPCP: Address 192.168.1.1 (0x0306C0A80101)<br />
02:04:22: BR0/0:1 IPCP: O CONFACK [REQsent] id 7 len 10<br />
02:04:22: BR0/0:1 IPCP: Address 192.168.1.1 (0x0306C0A80101)<br />
02:04:22: BR0/0:1 CDPCP: I CONFREQ [REQsent] id 7 len 4<br />
02:04:22: BR0/0:1 CDPCP: O CONFACK [REQsent] id 7 len 4<br />
02:04:22: BR0/0:1 IPCP: I CONFACK [ACKsent] id 7 len 10<br />
02:04:22: BR0/0:1 IPCP: Address 192.168.1.2 (0x0306C0A80102)<br />
02:04:22: BR0/0:1 IPCP: State is Open<br />
427
02:04:22: BR0/0:1 CDPCP: I CONFACK [ACKsent] id 7 len 4<br />
02:04:22: BR0/0:1 CDPCP: State is Open<br />
02:04:22: BR0/0 IPCP: Install route to 192.168.1.1<br />
02:04:23: %LINEPROTO-5-UPDOWN: Line protocol on Interface BRI0/0:1,<br />
changed state to up<br />
02:04:26: %ISDN-6-CONNECT: Interface BRI0/0:1 is now connected to<br />
5551234 smarts<br />
Then let’s strip it down. If you recall PPP sets up in three stages (hence a three-way<br />
hand-shaking process): LCP, IPCP, and CDPCP.<br />
1. PPP: Phase is ESTABLISHING<br />
2. LCP: O CONFREQ (from source)<br />
3. LCP: AuthProto CHAP (from destination)<br />
4. LCP: I CONFREQ [REQsent] (from source)<br />
5. LCP: AuthProto CHAP (from destination)<br />
6. LCP: O CONFACK [REQsent] (from source)<br />
7. LCP: AuthProto CHAP (from destination)<br />
8. LCP: TIMEout: State ACKsent (from source)<br />
9. LCP: O CONFREQ [ACKsent] (from source)<br />
10. LCP: AuthProto CHAP (from destination)<br />
11. LCP: I CONFACK [ACKsent] (from source)<br />
12. LCP: AuthProto CHAP (from destination)<br />
13. LCP: State is Open (from source)<br />
14. PPP: Phase is AUTHENTICATING, <strong>by</strong> both (from destination)<br />
15. CHAP: O CHALLENGE from "kissane" (from source)<br />
16. CHAP: I CHALLENGE from "smarts" (from destination)<br />
17. CHAP: I CHALLENGE from "smarts" (from destination)<br />
18. CHAP: I SUCCESS (from source)<br />
19. CHAP: I RESPONSE from "smarts" (from destination)<br />
20. CHAP: O SUCCESS (from source)<br />
21. PPP: Phase is UP (from destination)<br />
22. IPCP: O CONFREQ [Closed] (from source)<br />
23. IPCP: Address 192.168.1.2 (from destination)<br />
24. CDPCP: O CONFREQ (from source)<br />
25. IPCP: I CONFREQ [REQsent] (from source)<br />
26. IPCP: Address 192.168.1.1 (from destination)<br />
27. IPCP: O CONFACK [REQsent] (from source)<br />
28. IPCP: Address 192.168.1.1 (from destination)<br />
29. CDPCP: I CONFREQ [REQsent] (from source)<br />
30. CDPCP: O CONFACK [REQsent] (from source)<br />
31. IPCP: I CONFACK [ACKsent] (from source)<br />
32. IPCP: Address 192.168.1.2 (from destination)<br />
33. IPCP: State is Open (from source)<br />
34. CDPCP: I CONFACK [ACKsent] (from source)<br />
35. CDPCP: State is Open (from destination)<br />
428
36. IPCP: Install route to 192.168.1.1 (from source)<br />
37. Line protocol on Interface BRI0/0:1, changed state to up<br />
38. Interface BRI0/0:1 is now connected to 5551234 smarts<br />
In line 1 we see our PPP request beginning. Line 2 shows us a request from our source to<br />
start an LCP session. Line 3 shows our destination requesting CHAP password<br />
authentication from the source. Lines 4-7 repeat this process until, in line 8, the CHAP<br />
password authentication times out. (See? Nothing is perfect). In line 9 a request from<br />
our source to start an LCP session is repeated. Line 10 shows our destination requesting<br />
a CHAP password for authentication. Line 11 shows acknowledgement of the CHAP<br />
request. Line 12 shows acknowledgement of the acknowledgement that the information<br />
requesting CHAP password verification, the LCP state is set to open, and the next phase<br />
of PPP establishment starts. Lines 15-20 show us a similar process for verifying the<br />
CHAP password. Line 21 sets our PPP phase (LCP) as up. Line 22 starts our IPCP<br />
negotiation. (This intermingles with CDPCP so I will break them out separately.) Here a<br />
request for the BRI ip address of the destination is requested. Lines 23-28 and 21-33<br />
show the exchange of ip addresses between source and destination. Lines 29-30 and 34-<br />
25 show the CDPCP exchange sequence. Finally our route is installed in line 36. Then<br />
our state is up and connected in lines 37-38.<br />
Physical Layer:<br />
Now lets look at our dialer events and interface states.<br />
kissane#debug dialer<br />
Dial on demand events debugging is on<br />
1. 02:07:54: BR0/0 DDR: Dialing cause ip (s=192.168.1.2, d=192.168.1.1)<br />
2. 02:07:54: BR0/0 DDR: Attempting to dial 5551234<br />
3. 02:07:54: %LINK-3-UPDOWN:Interface BRI0/0:1, changed state to up<br />
4. 02:07:54: %ISDN-6-CONNECT: Interface BRI0/0:1 is now connected<br />
to 5551234<br />
5. 02:07:56: BR0/0:1 DDR: dialer protocol up<br />
6. 02:07:57: %LINEPROTO-5-UPDOWN: Line protocol on Interface<br />
BRI0/0:1, changed state to up<br />
7. 02:08:00: %ISDN-6-CONNECT: Interface BRI0/0:1 is now connected<br />
to 5551234 smarts<br />
Since there is not a lot here let’s just go line <strong>by</strong> line. Line 1 shows our DDR dialing with<br />
source and destination addresses. Then, in line 2 we dial our destination number set in<br />
our dialer map statement. Our state comes up on our source, we are connected, the dialer<br />
protocol comes up, our state comes up on our destination, and our BRI line is connected.<br />
Not too tough. For a more exacting look combine the debug dialer with debug ppp<br />
negotiation.<br />
429
Debug dialer packet gives us similar information but includes the icmp information. I will<br />
let you figure out what is happening here (hints in bold):<br />
kissane#debug dialer packets<br />
Dial on demand packets debugging is on<br />
kissane#ping 192.168.1.1<br />
Type escape sequence to abort.<br />
Sending 5, 100-<strong>by</strong>te ICMP Echos to 192.168.1.1, timeout is 2 seconds:..!!!<br />
Success rate is 60 percent (3/5), round-trip min/avg/max = 32/32/32 ms<br />
03:02:19: BR0/0 DDR: ip (s=192.168.1.2, d=224.0.0.10), 60 <strong>by</strong>tes, outgoing<br />
interesting (ip PERMIT)<br />
03:02:20: BR0/0 DDR: ip (s=192.168.1.2, d=192.168.1.1), 100 <strong>by</strong>tes, outgoing<br />
interesting (ip PERMIT)<br />
03:02:20: %LINK-3-UPDOWN: Interface BRI0/0:1, changed state to up<br />
03:02:20: %ISDN-6-CONNECT: Interface BRI0/0:1 is now connected to<br />
5551234<br />
03:02:22: BR0/0 DDR: ip (s=192.168.1.2, d=192.168.1.1), 100 <strong>by</strong>tes, outgoing<br />
interesting (ip PERMIT)<br />
03:02:23: %LINEPROTO-5-UPDOWN: Line protocol on Interface BRI0/0:1,<br />
changed state to up<br />
03:02:23: BR0/0 DDR: cdp, 277 <strong>by</strong>tes, outgoing uninteresting (no list matched)<br />
03:02:23: BR0/0 DDR: cdp, 277 <strong>by</strong>tes, outgoing uninteresting (no list matched)<br />
03:02:23: BR0/0 DDR: cdp, 277 <strong>by</strong>tes, outgoing uninteresting (no list matched)<br />
03:02:23: BR0/0 DDR: ip (s=192.168.1.2, d=224.0.0.10), 60 <strong>by</strong>tes, outgoing<br />
interesting (ip PERMIT)<br />
03:02:24: BR0/0 DDR: ip (s=192.168.1.2, d=192.168.1.1), 100 <strong>by</strong>tes, outgoing<br />
interesting (ip PERMIT)<br />
03:02:24: BR0/0 DDR: ip (s=192.168.1.2, d=192.168.1.1), 100 <strong>by</strong>tes, outgoing<br />
interesting (ip PERMIT)<br />
03:02:24: BR0/0 DDR: ip (s=192.168.1.2, d=192.168.1.1), 100 <strong>by</strong>tes, outgoing<br />
interesting (ip PERMIT)<br />
kissane#<br />
03:02:26: %ISDN-6-CONNECT: Interface BRI0/0:1 is now connected to<br />
5551234 smarts<br />
We never want to forget about our interface states.<br />
kissane#sh controller bri<br />
BRI unit 0:BRI unit 0 with U interface:<br />
Layer 1 internal state is ACTIVATED<br />
Layer 1 U interface is ACTIVATED.<br />
ISDN Line Information:<br />
Last C/I from ISDN transceiver:<br />
AI:Activation Indication<br />
430
Last C/I to ISDN transceiver:<br />
AI:Activation Indication<br />
Current EOC commands:<br />
RTN - Return to normal<br />
(there is a ton of information with this one…I cut it off here).<br />
kissane#sh int bri0/0<br />
BRI0/0 is up (spoofing), line protocol is up (spoofing)<br />
Hardware is PQUICC BRI with U interface<br />
Internet address is 192.168.1.2/24<br />
MTU 1500 <strong>by</strong>tes, BW 64 Kbit, DLY 20000 usec, rely 255/255, load 1/255<br />
Encapsulation PPP, loopback not set<br />
Last input 00:04:09, output never, output hang never<br />
Last clearing of "show interface" counters never<br />
Input queue: 0/75/34 (size/max/drops); Total output drops: 0<br />
Queueing strategy: weighted fair<br />
Output queue: 0/1000/64/0 (size/max total/threshold/drops)<br />
Conversations 0/1/256 (active/max active/max total)<br />
Reserved Conversations 0/0 (allocated/max allocated)<br />
5 minute input rate 0 bits/sec, 0 packets/sec<br />
5 minute output rate 0 bits/sec, 0 packets/sec<br />
3256 packets input, 13283 <strong>by</strong>tes, 0 no buffer<br />
Received 1 broadcasts, 0 runts, 0 giants, 0 throttles<br />
34 input errors, 34 CRC, 0 frame, 0 overrun, 0 ignored, 19 abort<br />
3256 packets output, 13475 <strong>by</strong>tes, 0 underruns<br />
0 output errors, 0 collisions, 6 interface resets<br />
0 output buffer failures, 0 output buffers swapped out<br />
6 carrier transitions<br />
kissane#<br />
kissane#sh prot<br />
Global values:<br />
Internet Protocol routing is enabled<br />
Ethernet0/0 is administratively down, line protocol is down<br />
Serial0/0 is administratively down, line protocol is down<br />
BRI0/0 is up, line protocol is up<br />
Internet address is 192.168.1.2/24<br />
BRI0/0:1 is down, line protocol is down<br />
BRI0/0:2 is down, line protocol is down<br />
Serial0/1 is administratively down, line protocol is down<br />
Loopback0 is up, line protocol is up<br />
Internet address is 192.168.200.1/24<br />
kissane#<br />
431
Troubleshooting in Action:<br />
Now let’s see what happens to each of these troubleshooting outputs when you have<br />
problems in your network.<br />
Dialer interface shut down (layer 1)<br />
No isdn cable connected (layer 1)<br />
No dialer list (layer 2)<br />
Incorrect dialer list (layer 2)<br />
Incorrect spid (layer 2/3)<br />
No ppp (layer 2/3)<br />
Incorrect username/password (layer 2/3)<br />
Missing username/password (layer 2/3)<br />
Bad ip address/mask (layer 3)<br />
The first thing you will want to do is “sh isdn status.” This will pin-point the layer where<br />
your trouble lies.<br />
Dialer interface shut down (layer 1)<br />
Here, since we always start at layer 1 when troubleshooting, we want to check our cables<br />
and interfaces. Debug dialer and debug dialer packets will show absolutely nothing if<br />
you try to ping the other interface.<br />
kissane#sh isdn status<br />
Global ISDN Switchtype = basic-ni<br />
ISDN BRI0/0 interface<br />
dsl 0, interface ISDN Switchtype = basic-ni<br />
Layer 1 Status:<br />
DEACTIVATED<br />
Layer 2 Status:<br />
TEI = 64, Ces = 1, SAPI = 0, State = TEI_ASSIGNED<br />
TEI = 65, Ces = 2, SAPI = 0, State = TEI_ASSIGNED<br />
Spid Status:<br />
TEI 64, ces = 1, state = 5(init)<br />
spid1 configured, spid1 sent, spid1 valid<br />
Endpoint ID Info: epsf = 0, usid = 70, tid = 1<br />
TEI 65, ces = 2, state = 5(init)<br />
spid2 configured, spid2 sent, spid2 valid<br />
Endpoint ID Info: epsf = 0, usid = 70, tid = 2<br />
Layer 3 Status:<br />
0 Active Layer 3 Call(s)<br />
Activated dsl 0 CCBs = 0<br />
The Free Channel Mask: 0x80000003<br />
Total Allocated ISDN CCBs = 0<br />
432
kissane#sh controller bri<br />
BRI unit 0:BRI unit 0 with U interface:<br />
Layer 1 internal state is DEACTIVATED<br />
Layer 1 U interface is ACTIVATED.<br />
kissane#sh int bri0/0<br />
BRI0/0 is administratively down, line protocol is down<br />
Hardware is PQUICC BRI with U interface<br />
Internet address is 192.168.1.2/24<br />
MTU 1500 <strong>by</strong>tes, BW 64 Kbit, DLY 20000 usec, rely 255/255, load 1/255<br />
Encapsulation PPP, loopback not set<br />
kissane#sh prot<br />
Global values:<br />
Internet Protocol routing is enabled<br />
Ethernet0/0 is administratively down, line protocol is down<br />
Serial0/0 is administratively down, line protocol is down<br />
BRI0/0 is administratively down, line protocol is down<br />
Internet address is 192.168.1.2/24<br />
BRI0/0:1 is administratively down, line protocol is down<br />
BRI0/0:2 is administratively down, line protocol is down<br />
Serial0/1 is administratively down, line protocol is down<br />
Loopback0 is up, line protocol is up<br />
Internet address is 192.168.200.1/24<br />
To fix this, go into your configuration under the BRI interfaces and type “no shut.”<br />
No ISDN cable connected (layer 1)<br />
If you are trying these one at a time, then verify good proper operation after trying each.<br />
It will keep you from being confused. For this scenario I just unplugged one of the BRI<br />
straight-through cables from the BRI interface on the router. Interestingly sh int an sh<br />
protocols still show the line as up. Only the sh controllers show it being deactivated. If it<br />
is not connected then the debugs will not work. Ok. So you are wondering why not just<br />
look at the connections in front of you? Because sometimes one router will be in Detroit<br />
and the other one will be in Chicago (or something like that) and it is nice to “learn” if a<br />
cable is physically connected without physically being there.<br />
kissane#sh isdn status<br />
Global ISDN Switchtype = basic-ni<br />
ISDN BRI0/0 interface<br />
dsl 0, interface ISDN Switchtype = basic-ni<br />
Layer 1 Status:<br />
DEACTIVATED<br />
Layer 2 Status:<br />
TEI = 64, Ces = 1, SAPI = 0, State = TEI_ASSIGNED<br />
Spid Status:<br />
433
TEI 64, ces = 1, state = 5(init)<br />
spid1 configured, spid1 sent, spid1 valid<br />
Endpoint ID Info: epsf = 0, usid = 70, tid = 1<br />
TEI Not Assigned, ces = 2, state = 1(terminal down)<br />
spid2 configured, spid2 NOT sent, spid2 NOT valid<br />
Layer 3 Status:<br />
0 Active Layer 3 Call(s)<br />
Activated dsl 0 CCBs = 0<br />
The Free Channel Mask: 0x80000003<br />
Total Allocated ISDN CCBs = 0<br />
Ok. Since we troubleshoot from the bottom-up and we see a layer 1 problem let’s go<br />
through the layer 1 troubleshooting tools.<br />
kissane#sh controllers bri<br />
BRI unit 0:BRI unit 0 with U interface:<br />
Layer 1 internal state is DEACTIVATED<br />
Layer 1 U interface is DEACTIVATED.<br />
(rest of output omitted—about 5 pages worth!)<br />
Just for good measure I added in layer 2 and 3 outputs from those commands that had<br />
some output:<br />
kissane#debug dialer packets<br />
Dial on demand packets debugging is on<br />
kissane#ping 192.168.1.1<br />
Type escape sequence to abort.<br />
Sending 5, 100-<strong>by</strong>te ICMP Echos to 192.168.1.1, timeout is 2 seconds:.....<br />
Success rate is 0 percent (0/5)<br />
05:05:33: BR0/0 DDR: ip (s=192.168.1.2, d=192.168.1.1), 100 <strong>by</strong>tes, outgoing<br />
interesting (ip PERMIT)<br />
05:05:33: BR0/0 DDR: ip (s=192.168.1.2, d=224.0.0.10), 60 <strong>by</strong>tes, outgoing<br />
interesting (ip PERMIT)<br />
05:05:34: BR0/0 DDR: cdp, 277 <strong>by</strong>tes, outgoing uninteresting (no list matched)<br />
kissane#debug dialer<br />
Dial on demand events debugging is on<br />
kissane#ping 192.168.1.1<br />
Type escape sequence to abort.<br />
Sending 5, 100-<strong>by</strong>te ICMP Echos to 192.168.1.1, timeout is 2 seconds:.....<br />
Success rate is 0 percent (0/5)<br />
kissane#<br />
05:04:28: BR0/0 DDR: Dialing cause ip (s=192.168.1.2, d=192.168.1.1)<br />
05:04:28: BR0/0 DDR: Attempting to dial 5551234<br />
05:04:35: BRI0/0: wait for isdn carrier timeout, call id=0x8014<br />
05:04:35: BR0/0:1 DDR: disconnecting call<br />
434
05:04:35: BR0/0:2 DDR: disconnecting call<br />
05:04:36: BR0/0 DDR: Dialing cause ip (s=192.168.1.2, d=192.168.1.1)<br />
05:04:36: BR0/0 DDR: Attempting to dial 5551234<br />
kissane#<br />
kissane#debug ppp nego<br />
PPP protocol negotiation debugging is on<br />
kissane#ping 192.168.1.1<br />
Type escape sequence to abort.<br />
Sending 5, 100-<strong>by</strong>te ICMP Echos to 192.168.1.1, timeout is 2 seconds:.....<br />
Success rate is 0 percent (0/5)<br />
kissane#<br />
05:14:06: BR0/0:1 LCP: State is Closed<br />
05:14:06: BR0/0:1 PPP: Phase is DOWN<br />
05:14:06: BR0/0:2 LCP: State is Closed<br />
05:14:06: BR0/0:2 PPP: Phase is DOWN<br />
kissane#<br />
Obviously to fix this we just plug that cable in to the BRI interface.<br />
No dialer list (layer 2):<br />
For this one I just removed the dialer map statement.<br />
kissane#sh isdn status<br />
Global ISDN Switchtype = basic-ni<br />
ISDN BRI0/0 interface<br />
dsl 0, interface ISDN Switchtype = basic-ni<br />
Layer 1 Status:<br />
ACTIVE<br />
Layer 2 Status:<br />
TEI = 64,Ces = 1,SAPI = 0,State =MULTIPLE_FRAME_ESTABLISHED<br />
Spid Status:<br />
TEI 64,ces = 1,state = 5(init)<br />
spid1 configured, spid1 sent, spid1 valid<br />
Endpoint ID Info: epsf = 0, usid = 70, tid = 1<br />
TEI Not Assigned, ces = 2, state = 1(terminal down)<br />
spid2 configured, spid2 NOT sent, spid2 NOT valid<br />
Layer 3 Status:<br />
0 Active Layer 3 Call(s)<br />
Activated dsl 0 CCBs = 0<br />
The Free Channel Mask: 0x80000003<br />
Total Allocated ISDN CCBs = 0<br />
Layer 1 is active (normal), only 1 TEI on layer 2 (abnormal), and nothing on layer 3<br />
(abnormal). We still need some more information.<br />
435
kissane#sh controller bri<br />
BRI unit 0:BRI unit 0 with U interface:<br />
Layer 1 internal state is ACTIVATED<br />
Layer 1 U interface is ACTIVATED.<br />
Not much help here…we expected it because we already learned our layer 1 is<br />
fine. We get the bri is “good” with sh int bri0/0 and sh prot too. But show<br />
protocols tells us something is wrong. Let’s move to our layer 2 commands. This<br />
is where we should find our problems.<br />
kissane#debug dialer packets<br />
Dial on demand packets debugging is on<br />
kissane#sh controller bri<br />
05:31:22: BR0/0 DDR: ip (s=192.168.1.2, d=224.0.0.10), 60 <strong>by</strong>tes, outgoing<br />
interesting (ip PERMIT)<br />
kissane#debug dialer packets<br />
05:31:26: BR0/0 DDR: ip (s=192.168.1.2, d=224.0.0.10), 60 <strong>by</strong>tes, outgoing<br />
interesting (ip PERMIT)<br />
Interesting traffic is being generated but the interface and protocol is not coming up. We<br />
need to look a bit further.<br />
kissane#undebug all<br />
All possible debugging has been turned off<br />
kissane#debug isdn q921<br />
ISDN Q921 packets debugging is on<br />
kissane#ping 192.168.1.1<br />
Type escape sequence to abort.<br />
Sending 5, 100-<strong>by</strong>te ICMP Echos to 192.168.1.1, timeout is 2 seconds:.....<br />
Success rate is 0 percent (0/5)<br />
05:32:53688777932: ISDN BR0/0: RX RRf sapi = 0 tei = 64 nr = 4<br />
Again, not much help here. The q.921 is being sent and received. Now let’s look at our<br />
PPP negotiation.<br />
kissane#undebug all<br />
All possible debugging has been turned off<br />
kissane#debug ppp nego<br />
PPP protocol negotiation debugging is on<br />
kissane#ping 192.168.1.1<br />
436
Type escape sequence to abort.<br />
Sending 5, 100-<strong>by</strong>te ICMP Echos to 192.168.1.1, timeout is 2 seconds:.....<br />
Success rate is 0 percent (0/5)<br />
Aha! No PPP is being negotiated at all. We would expect some problem with PPP not<br />
being on the routers at all. Since we have several hints we just need to go back and<br />
double-check very closely our configurations for our layer 2 commands:<br />
router(config-if)dialer map ip 192.168.1.2 name routerB 5552000 (2)<br />
router(config-if)isdn spid1 51055512340001 5551234 (2)<br />
router(config-if)isdn spid2 51055512350001 5551235 (2)<br />
router(config-if)#enc ppp (2)<br />
router(config-if)#ppp authentication chap (2)<br />
router(config)#username joe password cisco (2)<br />
router(config)#ip host joe 192.168.1.1 (2)<br />
To fix this we just add in the dialer map statement.<br />
Incorrect dialer list (layer 2):<br />
For this I just changed the dialer map statement from so the number called would be<br />
incorrect (actually to itself). You will have the same outputs as if you did not even have<br />
a map.<br />
Incorrect spid (layer 2/3):<br />
If you have more than one spid then you will have to change them all. The other spids<br />
are secondary and will be used in case the primary spid does not work. This one is easy<br />
to spot…the spid gets rejected.<br />
kissane#ping 192.168.1.1<br />
Type escape sequence to abort.<br />
Sending 5, 100-<strong>by</strong>te ICMP Echos to 192.168.1.1, timeout is 2 seconds:.....<br />
Success rate is 0 percent (0/5)<br />
06:00:43: %ISDN-6-LAYER2UP: Layer 2 for Interface BR0/0, TEI 64 changed<br />
to up<br />
06:00:43: %ISDN-4-INVALID_SPID: Interface BR0/0, Spid1 was rejected<br />
kissane#<br />
Just for sake of continuity let’s check our isdn status too.<br />
kissane#sh isdn status<br />
Global ISDN Switchtype = basic-ni<br />
ISDN BRI0/0 interface<br />
dsl 0, interface ISDN Switchtype = basic-ni<br />
Layer 1 Status:<br />
ACTIVE<br />
Layer 2 Status:<br />
TEI = 64,Ces = 1,SAPI = 0,State =MULTIPLE_FRAME_ESTABLISHED<br />
437
Spid Status:<br />
TEI 64, ces = 1, state = 6(not initialized)<br />
spid1 configured, spid1 sent, spid1 NOT valid<br />
TEI Not Assigned, ces = 2, state = 1(terminal down)<br />
spid2 configured, spid2 NOT sent, spid2 NOT valid<br />
Layer 3 Status:<br />
0 Active Layer 3 Call(s)<br />
Activated dsl 0 CCBs = 0<br />
The Free Channel Mask: 0x80000003<br />
Total Allocated ISDN CCBs = 0<br />
kissane#<br />
Fairly simple to spot…then go back and put in the correct spid numbers.<br />
No ppp (layer 2/3):<br />
Here I just removed PPP from the BRI interface.<br />
kissane#sh isdn status<br />
Global ISDN Switchtype = basic-ni<br />
ISDN BRI0/0 interface<br />
dsl 0, interface ISDN Switchtype = basic-ni<br />
Layer 1 Status:<br />
ACTIVE<br />
Layer 2 Status:<br />
TEI = 64,Ces = 1,SAPI = 0,State =MULTIPLE_FRAME_ESTABLISHED<br />
TEI = 65,Ces = 2,SAPI = 0, State=MULTIPLE_FRAME_ESTABLISHED<br />
Spid Status:<br />
TEI 64, ces = 1, state = 8(established)<br />
spid1 configured, spid1 sent, spid1 valid<br />
Endpoint ID Info: epsf = 0, usid = 70, tid = 1<br />
TEI 65, ces = 2, state = 8(established)<br />
spid2 configured, spid2 sent, spid2 valid<br />
Endpoint ID Info: epsf = 0, usid = 70, tid = 2<br />
Layer 3 Status:<br />
0 Active Layer 3 Call(s)<br />
Activated dsl 0 CCBs = 0<br />
The Free Channel Mask: 0x80000003<br />
Total Allocated ISDN CCBs = 0<br />
kissane#<br />
Everything looks good until we get to our Layer 3 status. So we need to go through our<br />
commands. Our hunch would have us start at Layer 3.<br />
kissane#ping 192.168.1.1<br />
Type escape sequence to abort.<br />
438
Sending 5, 100-<strong>by</strong>te ICMP Echos to 192.168.1.1, timeout is 2 seconds:.....<br />
Success rate is 0 percent (0/5)<br />
kissane#<br />
06:19:44: ISDN BR0/0: TX -> SETUP pd = 8 callref = 0x35<br />
06:19:44: Bearer Capability i = 0x8890<br />
06:19:44: Channel ID i = 0x83<br />
06:19:44: Keypad Facility i = '5551234'<br />
06:19:188978601984: ISDN BR0/0: RX DISCONNECT pd = 8 callref = 0x35<br />
06:19:58: Cause i = 0x8090 - Normal call clearing<br />
06:19:251270015772: ISDN BR0/0: RX RELEASE_COMP pd = 8 callref = 0x35<br />
06:19:59: %LINEPROTO-5-UPDOWN: Line protocol on Interface BRI0/0:1,<br />
changed state to down<br />
kissane#<br />
So we see our line come up and go back down right away. Since we have “used” all of<br />
our layer 3 commands we need to go back and use some layer 2 commands.<br />
kissane#debug isdn q921<br />
ISDN Q921 packets debugging is on<br />
kissane#ping 192.168.1.1<br />
Type escape sequence to abort.<br />
Sending 5, 100-<strong>by</strong>te ICMP Echos to 192.168.1.1, timeout is 2 seconds:.....<br />
Success rate is 0 percent (0/5)<br />
kissane#<br />
06:23:81604378624: ISDN BR0/0: RX RRf sapi = 0 tei = 64 nr = 10<br />
06:23:19: ISDN BR0/0: TX -> INFOc sapi = 0 tei = 64 ns = 13 nr = 10 i = 0x0<br />
8013605040288901801832C0735353531323334<br />
06:23:81604419584: ISDN BR0/0: RX
06:23:83766291092: ISDN BR0/0: RX RRr sapi = 0 tei = 64 nr = 11<br />
06:23:81604419584: ISDN BR0/0: RX RRr sapi = 0 tei = 64 nr = 12<br />
06:23:19: %LINK-3-UPDOWN: Interface BRI0/0:1, changed state to up<br />
06:23:19: %ISDN-6-CONNECT: Interface BRI0/0:1 is now connected to<br />
5551234<br />
06:23:19: ISDN BR0/0: TX -> INFOc sapi = 0 tei = 64 ns = 14 nr = 12 i = 0x0<br />
801360F<br />
06:23:85899345920: ISDN BR0/0: RX INFOc sapi = 0 tei = 64 ns = 15 nr = 12 i = 0x0<br />
801364508028090<br />
06:23:169652894924: ISDN BR0/0: RX INFOc sapi = 0 tei = 64 ns = 16 nr = 13 i = 0x0<br />
801365A<br />
06:23:167503724544: ISDN BR0/0: RX
kissane#debug ppp nego<br />
PPP protocol negotiation debugging is on<br />
kissane#ping 192.168.1.1<br />
Type escape sequence to abort.<br />
Sending 5, 100-<strong>by</strong>te ICMP Echos to 192.168.1.1, timeout is 2 seconds:.....<br />
Success rate is 0 percent (0/5)<br />
kissane#<br />
06:26:48: %LINK-3-UPDOWN: Interface BRI0/0:1, changed state to up<br />
06:26:48: %ISDN-6-CONNECT: Interface BRI0/0:1 is now connected to<br />
5551234<br />
06:26:49: %LINEPROTO-5-UPDOWN: Line protocol on Interface BRI0/0:1,<br />
changed state to up<br />
06:26:54: %ISDN-6-CONNECT: Interface BRI0/0:1 is now connected to<br />
5551234 smarts<br />
06:26:253403070464: %ISDN-6-DISCONNECT: Interface BRI0/0:1<br />
disconnected from 5551234 smarts, call lasted 10 seconds<br />
06:26:59: %LINK-3-UPDOWN: Interface BRI0/0:1, changed state to down<br />
06:27:00: %LINEPROTO-5-UPDOWN: Line protocol on Interface BRI0/0:1,<br />
changed state to down<br />
kissane#<br />
Wow! What happened to our PPP negotiation? Remember our LCP, IPCP, and CDPCP<br />
phases? Yeah…they are not here anymore. Obviously a PPP problem, even though we<br />
can hardly “see” a PPP problem so we need to go back and check our PPP encapsulation.<br />
kissane#sh int bri0/0<br />
BRI0/0 is up, line protocol is up (spoofing)<br />
Hardware is PQUICC BRI with U interface<br />
Internet address is 192.168.1.2/24<br />
MTU 1500 <strong>by</strong>tes, BW 64 Kbit, DLY 20000 usec, rely 255/255, load 1/255<br />
Encapsulation HDLC, loopback not set<br />
Got it! We need to change our encapsulation to PPP to get this thing to work.<br />
Incorrect username/password (layer 2/3):<br />
For this I changed the username but left the password “as-is.”<br />
kissane#sh isdn status<br />
Global ISDN Switchtype = basic-ni<br />
ISDN BRI0/0 interface<br />
dsl 0, interface ISDN Switchtype = basic-ni<br />
441
Layer 1 Status:<br />
ACTIVE<br />
Layer 2 Status:<br />
TEI = 64,Ces = 1,SAPI = 0,State =MULTIPLE_FRAME_ESTABLISHED<br />
Spid Status:<br />
TEI 64, ces = 1, state = 5(init)<br />
spid1 configured, spid1 sent, spid1 valid<br />
Endpoint ID Info: epsf = 0, usid = 70, tid = 1<br />
TEI Not Assigned, ces = 2, state = 1(terminal down)<br />
spid2 configured, spid2 NOT sent, spid2 NOT valid<br />
Layer 3 Status:<br />
0 Active Layer 3 Call(s)<br />
Activated dsl 0 CCBs = 0<br />
The Free Channel Mask: 0x80000003<br />
Total Allocated ISDN CCBs = 0<br />
kissane#<br />
From this we see problems at layer 2 because we only have one TEI and one valid spid.<br />
So we go through our layer 2 commands. I took out a lot of text on this one.<br />
kissane#debug isdn q921<br />
ISDN Q921 packets debugging is on<br />
kissane#ping 192.168.1.1<br />
Type escape sequence to abort.<br />
Sending 5, 100-<strong>by</strong>te ICMP Echos to 192.168.1.1, timeout is 2 seconds:.....<br />
Success rate is 0 percent (0/5)<br />
kissane#<br />
06:36:53: %LINK-3-UPDOWN: Interface BRI0/0:1, changed state to up<br />
06:36:53: %ISDN-6-CONNECT: Interface BRI0/0:1 is now connected to<br />
5551234<br />
06:36:53: %LINK-3-UPDOWN: Interface BRI0/0:1, changed state to down<br />
06:36:55: %LINK-3-UPDOWN: Interface BRI0/0:1, changed state to up<br />
06:36:55: %ISDN-6-CONNECT: Interface BRI0/0:1 is now connected to<br />
5551234<br />
06:36:55: %LINK-3-UPDOWN: Interface BRI0/0:1, changed state to down<br />
06:36:57: %LINK-3-UPDOWN: Interface BRI0/0:1, changed state to up<br />
06:36:57: %ISDN-6-CONNECT: Interface BRI0/0:1 is now connected to<br />
5551234<br />
06:36:57: %LINK-3-UPDOWN: Interface BRI0/0:1, changed state to down<br />
06:36:59: %LINK-3-UPDOWN: Interface BRI0/0:1, changed state to up<br />
06:36:59: %LINK-3-UPDOWN: Interface BRI0/0:1, changed state to down<br />
Here we can see us going up and down a lot again. With no real clues we turn to our<br />
other layer 2 command:<br />
442
kissane#debug ppp nego<br />
PPP protocol negotiation debugging is on<br />
kissane#ping 192.168.1.1<br />
Type escape sequence to abort.<br />
Sending 5, 100-<strong>by</strong>te ICMP Echos to 192.168.1.1, timeout is 2 seconds:.....<br />
Success rate is 0 percent (0/5)<br />
kissane#<br />
06:41:12: %LINK-3-UPDOWN: Interface BRI0/0:1, changed state to up<br />
06:41:13: %ISDN-6-CONNECT: Interface BRI0/0:1 is now connected to<br />
5551234<br />
06:41:13: BR0/0:1 PPP: Treating connection as a callout<br />
06:41:13: BR0/0:1 PPP: Phase is ESTABLISHING, Active Open<br />
06:41:13: BR0/0:1 LCP: O CONFREQ [Closed] id 30 len 10<br />
06:41:13: BR0/0:1 LCP: MagicNumber 0x03063CE1 (0x050603063CE1)<br />
06:41:13: BR0/0:1 LCP: I CONFREQ [REQsent] id 68 len 15<br />
06:41:13: BR0/0:1 LCP: AuthProto CHAP (0x0305C22305)<br />
06:41:13: BR0/0:1 LCP: MagicNumber 0x0552EC62 (0x05060552EC62)<br />
06:41:13: BR0/0:1 LCP: O CONFACK [REQsent] id 68 len 15<br />
06:41:13: BR0/0:1 LCP: AuthProto CHAP (0x0305C22305)<br />
06:41:13: BR0/0:1 LCP: MagicNumber 0x0552EC62 (0x05060552EC62)<br />
06:41:13: BR0/0:1 LCP: I CONFACK [ACKsent] id 30 len 10<br />
06:41:13: BR0/0:1 LCP: MagicNumber 0x03063CE1 (0x050603063CE1)<br />
06:41:13: BR0/0:1 LCP: State is Open<br />
06:41:13: BR0/0:1 PPP: Phase is AUTHENTICATING, <strong>by</strong> the peer<br />
06:41:13: BR0/0:1 CHAP: I CHALLENGE id 32 len 27 from "smarts"<br />
06:41:13: BR0/0:1 CHAP: Username smarts not found<br />
06:41:13: BR0/0:1 CHAP: Unable to authenticate for peer<br />
06:41:13: BR0/0:1 PPP: Phase is TERMINATING<br />
06:41:13: BR0/0:1 LCP: O TERMREQ [Open] id 31 len 4<br />
06:41:13: BR0/0:1 LCP: I TERMACK [TERMsent] id 31 len 4<br />
06:41:13: BR0/0:1 LCP: State is Closed<br />
06:41:13: BR0/0:1 PPP: Phase is DOWN<br />
06:41:13: BR0/0:1 PPP: Phase is ESTABLISHING, Passive Open<br />
06:41:13: BR0/0:1 LCP: State is Listen<br />
06:41:13: %LINK-3-UPDOWN: Interface BRI0/0:1, changed state to down<br />
06:41:13: BR0/0:1 LCP: State is Closed<br />
kissane#<br />
06:41:13: BR0/0:1 PPP: Phase is DOWN<br />
A problem with our username (CHAP: Username smarts not found). We just go back<br />
and fix it.<br />
443
Missing username/password (layer 2/3):<br />
kissane#sh isdn status<br />
Global ISDN Switchtype = basic-ni<br />
ISDN BRI0/0 interface<br />
dsl 0, interface ISDN Switchtype = basic-ni<br />
Layer 1 Status:<br />
ACTIVE<br />
Layer 2 Status:<br />
Layer 2 NOT Activated<br />
Spid Status:<br />
TEI Not Assigned, ces = 1, state = 1(terminal down)<br />
spid1 configured, spid1 NOT sent, spid1 NOT valid<br />
TEI Not Assigned, ces = 2, state = 1(terminal down)<br />
spid2 configured, spid2 NOT sent, spid2 NOT valid<br />
Layer 3 Status:<br />
0 Active Layer 3 Call(s)<br />
Activated dsl 0 CCBs = 0<br />
The Free Channel Mask: 0x80000003<br />
Total Allocated ISDN CCBs = 0<br />
kissane#debug isdn q921<br />
ISDN Q921 packets debugging is on<br />
kissane#ping 192.168.1.1<br />
Type escape sequence to abort.<br />
Sending 5, 100-<strong>by</strong>te ICMP Echos to 192.168.1.1, timeout is 2 seconds:.....<br />
Success rate is 0 percent (0/5)<br />
kissane#<br />
06:46:52: %ISDN-6-LAYER2UP: Layer 2 for Interface BR0/0, TEI 64 changed<br />
to up<br />
06:46:52: %ISDN-6-LAYER2UP: Layer 2 for Interface BR0/0, TEI 65 changed<br />
to up<br />
06:46:52: %LINK-3-UPDOWN: Interface BRI0/0:1, changed state to up<br />
06:46:52: %ISDN-6-CONNECT: Interface BRI0/0:1 is now connected to<br />
5551234<br />
kissane#debug ppp nego<br />
PPP protocol negotiation debugging is on<br />
kissane#ping 192.168.1.1<br />
Type escape sequence to abort.<br />
Sending 5, 100-<strong>by</strong>te ICMP Echos to 192.168.1.1, timeout is 2 seconds:<br />
.....<br />
Success rate is 0 percent (0/5)<br />
444
06:47:25: BR0/0:1 PPP: Treating connection as a callout<br />
06:47:25: BR0/0:1 PPP: Phase is ESTABLISHING, Active Open<br />
06:47:25: BR0/0:1 LCP: O CONFREQ [Closed] id 51 len 10<br />
06:47:25: BR0/0:1 LCP: MagicNumber 0x030BEA68 (0x0506030BEA68)<br />
06:47:25: BR0/0:1 LCP: I CONFREQ [REQsent] id 77 len 15<br />
06:47:25: BR0/0:1 LCP: AuthProto CHAP (0x0305C22305)<br />
06:47:25: BR0/0:1 LCP: MagicNumber 0x055899FC (0x0506055899FC)<br />
06:47:25: BR0/0:1 LCP: O CONFACK [REQsent] id 77 len 15<br />
06:47:25: BR0/0:1 LCP: AuthProto CHAP (0x0305C22305)<br />
06:47:25: BR0/0:1 LCP: MagicNumber 0x055899FC (0x0506055899FC)<br />
06:47:25: BR0/0:1 LCP: I CONFACK [ACKsent] id 51 len 10<br />
06:47:25: BR0/0:1 LCP: MagicNumber 0x030BEA68 (0x0506030BEA68)<br />
06:47:25: BR0/0:1 LCP: State is Open<br />
06:47:25: BR0/0:1 PPP: Phase is AUTHENTICATING, <strong>by</strong> the peer<br />
06:47:25: BR0/0:1 CHAP: I CHALLENGE id 41 len 27 from "smarts"<br />
06:47:25: BR0/0:1 CHAP: Username smarts not found<br />
06:47:29: BR0/0:1 CHAP: Unable to authenticate for peer<br />
06:47:29: BR0/0:1 PPP: Phase is TERMINATING<br />
06:47:29: BR0/0:1 LCP: O TERMREQ [Open] id 56 len 4<br />
06:47:29: BR0/0:1 LCP: I TERMACK [TERMsent] id 56 len 4<br />
06:47:29: BR0/0:1 LCP: State is Closed<br />
06:47:29: BR0/0:1 PPP: Phase is DOWN<br />
Here we are looking for a username that does not exist. So we go in and make a<br />
username “smarts” (like it is asking for) with a password (usually the enable secret<br />
password).<br />
So what have I learned here?<br />
So is your mind fried yet? In this lab we learned how the theory of how ISDN operates<br />
and how to troubleshoot it. Like our other troubleshooting labs we just follow the OSI<br />
model. Please keep in mind that ISDN problems may not always be ISDN-related. In<br />
one of the next labs you will be setting up ISDN between four routers. At first when I<br />
could not get it to work I ran through my IDSN troubleshooting steps. I also used ICMP<br />
debug commands. Still it wouldn’t work. Then I remembered an obscure reference to a<br />
PPP command (MLP-PPP multilink) that made it work. So, what seems to be causing the<br />
problem may not be it at all. Keep your mind open. If something bothers you too much,<br />
just walk away and go shoot some pool for an hour. You would be amazed how easy the<br />
answer comes after that. Plus its fun to go shoot pool too.<br />
445
ISDN Configuration with Multiple Routers (ADTRAN)<br />
Objective:<br />
To learn how to set up a ISDN network with four routers, using BRI interfaces. In this lab<br />
you will be using an ADTRAN box for ISDN emulation.<br />
Tools and Materials:<br />
(2) routers<br />
(2) straight-through cables<br />
(1) workstation<br />
(1) ADTRAN Atlas 550<br />
(2) PC/workstations<br />
(2) console cables<br />
Lab Design:<br />
3 4<br />
1 2<br />
Router Geoffrey Osowski<br />
Loop 0 192.168.110.1/24 192.168.120.1/24<br />
BRI0 192.168.1.1/24 192.168.1.2/24<br />
Adtran Port 1 2<br />
Phone number 555-1234 555-4000<br />
SPID1 51055512340001 51055540000001<br />
SPID2 51055512350001 51055540010001<br />
Router Wilson Tang<br />
Loop 0 192.168.130.1/24 192.168.140.1/24<br />
BRI0 192.168.1.3/24 192.168.1.4/24<br />
Adtran Port 3 4<br />
Phone number 555-7000 555-8000<br />
SPID1 51055570000001 51055580000001<br />
SPID2 51055570010001 51055580010001<br />
446
Step-By-Step Instructions:<br />
1. Configure the basics on each router. Don’t forget the loop back adapters. Set up<br />
and cable the lab as shown. Pick a routing protocol to use and advertise the<br />
networks.<br />
2. Set the ISDN switch type on geoffrey and osowski routers:<br />
geoffrey(config)# isdn switch-type basic-ni<br />
geoffrey(config)#dialer-list 1 protocol ip permit<br />
osowski(config)# isdn switch-type basic-ni<br />
osowski(config)#dialer-list 1 protocol ip permit<br />
3. Configure the ISDN interface on “smarts.” We will start <strong>by</strong> getting two of them<br />
up first. You will be configuring the ip address, the isdn spid (service profile<br />
identifiers), and a dialer map (how to get from here to there).<br />
geoffrey(config)#int bri0/0<br />
geoffrey(config-if)#ip address 192.168.1.1 255.255.255.0<br />
geoffrey(config-if)#no shut<br />
geoffrey(config-if)#dialer-group 1<br />
geoffrey(config-if)#dialer map ip 192.168.1.2 name osowski 5554000<br />
geoffrey(config-if)#isdn spid1 51055512340001 5551234<br />
geoffrey(config-if)#isdn spid2 51055512350001 5551235<br />
geoffrey(config-if)#enc ppp<br />
geoffrey(config-if)#ppp authentication chap<br />
geoffrey(config)#username osowski password cisco<br />
geoffrey(config)#ip host osowski 192.168.1.2<br />
osowski(config)#int bri0/0<br />
osowski(config-if)#ip address 192.168.1.1 255.255.255.0<br />
osowski(config-if)#no shut<br />
osowski(config-if)#dialer-group 1<br />
osowski(config-if)#dialer map ip 192.168.1.2 name geoffrey 5551234<br />
osowski(config-if)#isdn spid1 51055540000001 5554000<br />
osowski(config-if)#isdn spid2 51055540010001 5554001<br />
osowski(config-if)#enc ppp<br />
osowski(config-if)#ppp authentication chap<br />
osowski(config)#username geoffrey password cisco<br />
osowski (config)#ip host geoffrey 192.168.1.2<br />
4. Try to ping the loopback. You should not be able to see it. It should not have<br />
shown up in the ip routing table either. The ISDN line comes up, stays active,<br />
and then shuts off pretty quickly. It’s actually faster than the routing protocol (I<br />
used EIGRP). In order to make this work we need to set up some static routes<br />
between the two.<br />
447
geoffrey(config)#ip route 192.168.120.0 255.255.255.0 192.168.1.2<br />
This route basically is saying. “in order to get to the 192.168.120.0/24 network<br />
use the 192.168.1.2 interface.”<br />
osowski(config)#ip route 192.168.110.0 255.255.255.0 192.168.1.1<br />
This route basically is saying, “in order to get to the 192.168.110.0/24 network<br />
use the 192.168.1.1 interface.” You should be able to ping and see all networks<br />
between geoffrey and osowski.<br />
5. Set the ISDN switch type on each router of the other two routers. We will get the<br />
connection working between the other two and then add them all together:<br />
wilson(config)# isdn switch-type basic-ni<br />
wilson(config)#dialer-list 1 protocol ip permit<br />
tang(config)# isdn switch-type basic-ni<br />
tang(config)#dialer-list 1 protocol ip permit<br />
6. Configure the ISDN interface on “smarts.” We will start <strong>by</strong> getting two of them<br />
up first. You will be configuring the ip address, the isdn spid (service profile<br />
identifiers), and a dialer map (how to get from here to there).<br />
wilson(config)#int bri0/0<br />
wilson(config-if)#ip address 192.168.1.3 255.255.255.0<br />
wilson(config-if)#no shut<br />
wilson(config-if)#dialer-group 1<br />
wilson(config-if)#dialer map ip 192.168.1.4 name tang 5558000<br />
wilson(config-if)#isdn spid1 51055570000001 5557000<br />
wilson(config-if)#isdn spid2 51055570010001 5557001<br />
wilson(config-if)#enc ppp<br />
wilson(config-if)#ppp authentication chap<br />
wilson(config)#username tang password cisco<br />
wilson(config)#ip host tang 192.168.1.4<br />
tang(config)#int bri0/0<br />
tang(config-if)#ip address 192.168.1.4 255.255.255.0<br />
tang(config-if)#no shut<br />
tang(config-if)#dialer-group 1<br />
tang(config-if)#dialer map ip 192.168.1.3 name wilson 5557000<br />
tang(config-if)#isdn spid1 51055580000001 5558000<br />
tang(config-if)#isdn spid2 51055580010001 5558001<br />
tang(config-if)#enc ppp<br />
tang(config-if)#ppp authentication chap<br />
tang(config)#username wilson password cisco<br />
tang(config)#ip host wilson 192.168.1.3<br />
448
7. Try to ping the loopback. You should not be able to see it. It should not have<br />
shown up in the ip routing table either. The ISDN line comes up, stays active,<br />
and then shuts off pretty quickly. It’s actually faster than the routing protocol<br />
(I used EIGRP). In order to make this work we need to set up some static<br />
routes between the two.<br />
wilson (config)#ip route 192.168.140.0 255.255.255.0 192.168.1.4<br />
This route basically is saying. “in order to get to the 192.168.140.0/24<br />
network use the 192.168.1.4 interface.”<br />
tang(config)#ip route 192.168.130.0 255.255.255.0 192.168.1.3<br />
This route basically is saying, “in order to get to the 192.168.130.0/24<br />
network use the 192.168.1.3 interface.” You should be able to ping and see<br />
all networks between wilson and tang.<br />
8. Now we need to get those ISDN routers talking to each other. We must<br />
enable multilinking on the BRI interfaces with PPP. This will allow us to use<br />
the other B-channel for communicating.<br />
geoffrey(config-if)#dialer map ip 192.168.1.3 name wilson 5557000<br />
geoffrey(config-if)#dialer map ip 192.168.1.4 name tang 5558000<br />
geoffrey(config-if)#ppp multilink<br />
geoffrey(config)#username wilson password cisco<br />
geoffrey(config)#username tang password cisco<br />
geoffrey(config)#ip host wilson 192.168.1.3<br />
geoffrey(config)#ip host tang 192.168.1.4<br />
geoffrey(config)#ip route 192.168.300.0 255.255.255.0 192.168.1.3<br />
geoffrey(config)#ip route 192.168.400.0 255.255.255.0 192.168.1.4<br />
osowski(config-if)# dialer map ip 192.168.1.3 name wilson 5557000<br />
osowski(config-if)#dialer map ip 192.168.1.4 name tang 5558000<br />
osowski(config-if)#ppp multilink<br />
osowski(config)# username wilson password cisco<br />
osowski(config)#username tang password cisco<br />
osowski (config)# ip host wilson 192.168.1.3<br />
osowski(config)#ip host tang 192.168.1.4<br />
osowski(config)#ip route 192.168.300.0 255.255.255.0 192.168.1.3<br />
osowski(config)#ip route 192.168.400.0 255.255.255.0 192.168.1.4<br />
wilson(config-if)#dialer map ip 192.168.1.1 name geoffrey 5551234<br />
wilson(config-if)#dialer map ip 192.168.1.2 name osowski 5554000<br />
wilson(config-if)#ppp multilink<br />
wilson(config)#username geoffrey password cisco<br />
wilson(config)#username osowski password cisco<br />
wilson(config)#ip host geoffrey 192.168.1.1<br />
449
wilson(config)#ip host osowski 192.168.1.2<br />
wilson(config)# ip route 192.168.200.0 255.255.255.0 192.168.1.2<br />
wilson(config)# ip route 192.168.100.0 255.255.255.0 192.168.1.1<br />
tang(config-if)#dialer map ip 192.168.1.1 name geoffrey 5551234<br />
tang(config-if)#dialer map ip 192.168.1.2 name osowski 5554000<br />
tang(config-if)#ppp multilink<br />
tang(config)#username geoffrey password cisco<br />
tang(config)#username osowski password cisco<br />
tang(config)#ip host geoffrey 192.168.1.1<br />
tang(config)#ip host osowski 192.168.1.2<br />
tang(config)# ip route 192.168.200.0 255.255.255.0 192.168.1.2<br />
tang(config)# ip route 192.168.100.0 255.255.255.0 192.168.1.1<br />
9. Test <strong>by</strong> pinging each network. Notice how you can only do two routes at a<br />
time. This is because you only have two b-channels. You would need to add<br />
more to do more at once.<br />
Challenge Lab or Supplemental Activities:<br />
1. Repeat the lab using Class “B” addresses.<br />
2. Repeat the lab using Class “A” addresses.<br />
3. Try using PAP as an encapsulation for PPP. Try HDLC.<br />
So what have I learned here?<br />
In this lab you have learned how to set up an ISDN BRI connection using the ADTRAN<br />
between four routers. The key here was the PPP multilink command. You also got some<br />
good training on how to break a large project down into smaller steps.<br />
Guest Router Name Derivation<br />
Geoffrey Osowski and Wilson Tang were accountants who worked for <strong>CISCO</strong><br />
(yes…them!). They were charged with computer-related crimes when, being<br />
accountants, they illegally issued almost $8,000,000 in <strong>CISCO</strong> stock to themselves. They<br />
each received 34 months in prison, 36 months of probation, and restitution of almost<br />
$8,000,000. The moral of the story is don’t try this at home!<br />
450
Frame Relay with ISDN Backup<br />
Objective:<br />
To learn how to configure a network that uses a frame relay connection for its main<br />
network traffic and an ISDN line for redundant backup using floating static routes.<br />
Tools and Materials:<br />
(3) routers<br />
(1) MERGE ISDN emulator<br />
(2) workstations<br />
(2) straight-through cables<br />
(2) DCE-to-DTE cables<br />
Lab Diagram:<br />
Router Patrice Williams<br />
S0/0 192.168.1.1/24 192.168.1.2/24<br />
BRI0/0 10.0.0.1/8 10.0.0.2/8<br />
Loop0 1.1.1.1/8 2.2.2.2/8<br />
Step-By-Step Instructions:<br />
1. Make a router into a frame relay switch.<br />
2. Configure the basics on each router.<br />
3. Configure the loop back networks on each router.<br />
4. Configure the serial interfaces on each router for frame relay.<br />
5. Pick a routing protocol and advertise the networks.<br />
6. Check the frame relay network connectivity. Use ping and trace route.<br />
7. Disconnect/shut-down the frame relay connection.<br />
8. Configure the ISDN BRI0/0 interfaces on each router. Be certain to advertise<br />
the networks.<br />
9. Check the ISDN network connectivity. Use ping and trace route.<br />
10. Set up the ISDN circuit as a back up network using floating static routes. Set<br />
your ISDN connection to time-out after 20 seconds.<br />
451
patrice(config)#int bri0/0<br />
patrice(config-if)#dialer idle-timeout 20<br />
patrice(config-if)#dialer wait-for-carrier-time 10<br />
patrice(config)#ip route 2.0.0.0 255.0.0.0 10.0.0.2 150<br />
williams(config)#int bri0/0<br />
williams(config-if)#dialer idle-timeout 20<br />
williams(config)#ip route 1.0.0.0 255.0.0.0 10.0.0.1 150<br />
11. Reconnect the frame relay network. Trace the route to the loopback on<br />
williams. You should see:<br />
patrice#traceroute 2.2.2.2<br />
Type escape sequence to abort.<br />
Tracing the route to 2.2.2.2<br />
1 williams (192.168.1.2) 32 msec * 28 msec<br />
patrice#<br />
Notice how we are getting to the loopback through the frame relay network. Now<br />
let’s unplug the frame line on patrice (to simulate a network failure) and re-trace<br />
route to our loopback again. We expect to see it route through the ISDN network<br />
(10.0.0.2) after it comes up.<br />
patrice#traceroute 2.2.2.2<br />
Type escape sequence to abort.<br />
Tracing the route to 2.2.2.2<br />
1 10.0.0.2 16 msec 16 msec *<br />
patrice#<br />
Challenge Lab or Supplemental Activities:<br />
1. Add PPP as an encapsulation. Use PAP or CHAP for authentication.<br />
2. Switch address schemes to a pure Class “B” network.<br />
3. There are many ways to perform backups: using dynamic floating routes, static routes<br />
with “backup” commands, etc. Try repeating this lab using different techniques.<br />
4. Which works best and why? Did I use it here or mix it up?<br />
5. Try this lab a bit differently: main ISDN with frame relay backup.<br />
6. Try this lab a bit differently: main ISDN with ISDN backup.<br />
7. Try this lab a bit differently: main frame Relay with frame relay backup.<br />
8. If you have the equipment, then go back and forth between ADTRAN’s and MERGE<br />
boxes for ISDN and back and forth between routers and ADTRAN’s for frame relay.<br />
452
So what have I learned here?<br />
In this lab you have learned how to set up the bare minimum requirements for a Frame<br />
relay main connection with a backup ISDN BRI connection using the ADTRAN ISDN<br />
simulators. This is one of the more common WAN configurations you will see in the<br />
“real-world” in small-to-medium sized businesses.<br />
Guest Router Name Derivation<br />
Patrice Williams was sent to prison in 2002 after she, and a partner (Makeebrah Turner),<br />
hacked into the Chase Financial Corporation. Apparently this dastardly duo stole credit<br />
card numbers and used them to purchase about $600,000 worth of merchandise on 68<br />
different accounts. They also “distributed” some of those numbers to someone else in<br />
Georgia who, in turn, purchased about $100,000. The brain trust plea-bargained down to<br />
a one-year and a day prison term in return for a guilty plea.<br />
453
Part 5 Command Review<br />
Objective:<br />
To list all commands utilized in Part 5 of this textbook.<br />
Step-<strong>by</strong>-Step Instructions:<br />
1. For each of the commands give a description of the command, the prompt for<br />
configuration, and any abbreviations for that command.<br />
Prompt Command Shortcut Description<br />
454
Prompt Command Shortcut Description<br />
455
Whole Enchilada/Crazy Insano Lab #1 (WECIL)<br />
This whole book was designed to get you to use critical thinking skills and apply the<br />
theories with hands-on applications. In this last WECIL I want you to design a network<br />
that will encompass some or all of the material in this book. Just some topics to jumble<br />
around:<br />
Different address classes (public/private)<br />
Different routing protocols: RIP, RIPv2, IGRP (maybe a bit of BGP or EIGRP)<br />
Using IP or IPX or both<br />
Using static or dynamic routing<br />
Using VLAN’s<br />
Using STP<br />
Using DUN<br />
Using Frame Relay with ISDN backup<br />
Using PPP<br />
Using ACL’s<br />
456
Coming In the Next Version of the Textbook in Summer 2003 (sorry….I had lofty<br />
ambitions and the deadline for publication came up quickly):<br />
Part 1:<br />
Writing a resume for computer-related occupations<br />
Writing a cover letter for computer-related occupations<br />
Using <strong>CISCO</strong> Design Software Tutorial<br />
Using <strong>CISCO</strong> Design Software: John’s Brewhouse<br />
UNIX operating system basics<br />
Paper Lab: Token Ring Packet Structure<br />
Small <strong>Network</strong>ing Lab: Token Ring <strong>Network</strong>s<br />
Small <strong>Network</strong>ing Lab: More on Microsoft Windows<br />
Small <strong>Network</strong>ing Lab: Windows 2000<br />
Small <strong>Network</strong>ing Lab: Novell <strong>Network</strong>s<br />
Small <strong>Network</strong>ing Lab: Unix <strong>Network</strong>s<br />
Small <strong>Network</strong>ing Lab: Macintosh <strong>Network</strong>s<br />
DNS servers<br />
SNMP Lab<br />
Part 2:<br />
Larger RIP networks<br />
More subnetting examples<br />
Subnetting examples with <strong>CISCO</strong> Works 2000<br />
Passwords and Recovery<br />
Loading an IOS<br />
Using a web browser with your router<br />
Boot Sequence and Confreg (hacking lab)<br />
IOS 10 vs. 11 vs. 12 commands<br />
Part 3<br />
More subnetting examples<br />
Subnetting examples with <strong>CISCO</strong> Design Software<br />
Using the command line interface with 1900/2900/4000/5000 switches<br />
Bridges<br />
Part 4<br />
More redistribution labs<br />
More subnetting examples<br />
Subnetting examples with <strong>CISCO</strong> Design Software<br />
Dynamic ACL basics<br />
CBAC basics<br />
AAA basics<br />
More ACL labs<br />
Part 5<br />
More on DDR<br />
457
More redistribution labs<br />
More subnetting examples<br />
Programming ADTRAN’s<br />
Programming MERGE boxes<br />
Setting up DSU/CSU’s<br />
Using T-1’s<br />
ISDN PRI’s<br />
Plus I am going to fix any edits or problems within the labs. I have taken every lab and<br />
used them in 2-4 classes and had all of them proof-read several times but things still can<br />
slip <strong>by</strong>. Sorry for any inconvenience. If you send me an email I promise I will change<br />
any errors in the next edition. BashamM@spjc.edu<br />
458
Did you like this book?<br />
There’s more!<br />
Coming Fall 2002<br />
More books in the<br />
“<strong>Learning</strong> <strong>by</strong> <strong>Doing</strong> Series”<br />
Computer Security Fundamentals<br />
General <strong>Network</strong>ing Concepts<br />
Each book will continue the tradition of “<strong>Learning</strong> <strong>by</strong><br />
<strong>Doing</strong>” <strong>by</strong> providing real-world, hands-on labs to<br />
understand various concepts. These two books will<br />
contain both theory and extensive labs that you can use<br />
right in your own school or home. Ask your teacher or<br />
textbook publisher about your copy today!<br />
459