Carter WCFB 4 - Pontiac Custom Safari 55 56 & 57
Carter WCFB 4 - Pontiac Custom Safari 55 56 & 57
Carter WCFB 4 - Pontiac Custom Safari 55 56 & 57

Create successful ePaper yourself
Turn your PDF publications into a flip-book with our unique Google optimized e-Paper software.
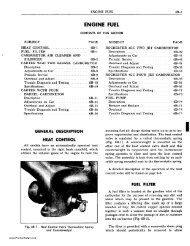
ENGINE FUEL-CARTER FOUR BARREL 6B-27<br />
DISASSEMBLY Of CARBURETOR BODY<br />
1. Remove pump plunger assembly and lower pump<br />
spring.<br />
2. Remove vacumeter spring (Fig. 6B-Sl).<br />
3. Check the fuel in the bowl for contamination by<br />
dirt, water, gum or other foreign matter, then drain<br />
fuel from bowl.<br />
NOTE: Magnet swept around bottom of bowl<br />
while fuel is still present will pick up iron oxide dust<br />
which may have contributed to float needle leaks.<br />
4. Remove pump jet cluster attaching screw, then<br />
remove cluster and gasket.<br />
S. Invert carburetor and remove small brass pump<br />
discharge needle.<br />
6. Remove pump inlet ball retainer and check ball<br />
from bottom of pump cylinder.<br />
NOTE: Use o/!r," six point socket to pry sideways<br />
on dome of retainer to loosen it.<br />
Fig. 68-52<br />
Location of Throttle Flange Attaching Screws<br />
7. Remove pump passage screw plug and gasket.<br />
8. Remove 2 primary metering rod jets (located on<br />
pump cylinder side of carburetor).<br />
9. Remove 2 secondary main jets. NOTE: Primary<br />
metering rod jets have larger openings than the- secondary<br />
main jets. Never mix these jets.<br />
10. Remove two low speed jets (primary side).<br />
NOTE: The anti-percolator vent plugs and bushings,<br />
and main discharge nozzles are pressed in place<br />
and should not be removed.<br />
11. Remove the 6 throttle flange to carburetor body<br />
attaching screws (Fig. 6B-S2).<br />
12. Remove throttle flange.<br />
13. Remove body flange gasket.<br />
DISASSEMBL Y OF THROTTLE FLANGE<br />
1. Remove idle mixture adjusting screws with<br />
springs. NOTE: Under normal service the carburetor<br />
flange may be cleaned without further disassembly.<br />
If complete disassembly is necessary, perform the<br />
remaining operations.<br />
2. Remove fast idle cam screw, fast idle cam assembly,<br />
lockout arm and lockout arm spring.<br />
3. Remove primary to secondary connector rod<br />
pin springs and washers, then remove rod.<br />
4. Remove primary throttle shaft screw and washer.<br />
S. Remove primary throttle levers and spring as an<br />
assembly.<br />
6. Remove primary throttle shaft spring thrust<br />
washer.<br />
7. Remove secondary throttle shaft screw and<br />
washer.<br />
8. Remove secondary throttle lever, and secondary<br />
throttle return spring.<br />
9. File off staked ends of throttle valve attaching<br />
screws and remove screws and throttle valves from<br />
the four bores.<br />
10. Remove primary and secondary throttle shafts.<br />
11. Remove idle speed screw and spring.<br />
CLEANING AND INSPECTION<br />
OF PARTS<br />
Dirt, gum, water or carbon contamination in the<br />
carburetor or on the exterior moving parts of a carburetor<br />
are often responsible for unsatisfactory performance.<br />
For this reason, efficient carburetion depends<br />
upon careful cleaning and inspection while<br />
servicing.<br />
1. Thoroughly clean carburetor castings and all<br />
metal parts in clean carburetor cleaning solution.<br />
CAUTION: Composition and plastic parts such as<br />
thermostatic coil housing and pump plunger should<br />
not be immersed in cleaner.<br />
www.<strong>Pontiac</strong><strong>Safari</strong>.com