ä¸è¼
ä¸è¼
ä¸è¼

You also want an ePaper? Increase the reach of your titles
YUMPU automatically turns print PDFs into web optimized ePapers that Google loves.
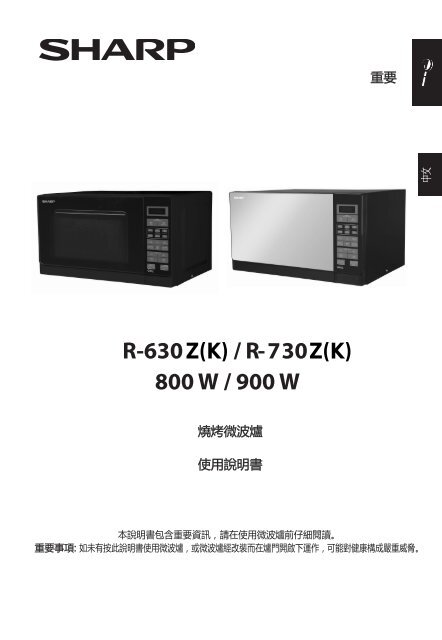
重 要<br />
中 文<br />
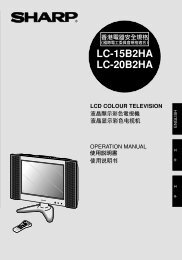
R-630 Z(K) / R- 730Z(K)<br />
800 W / 900 W<br />
燒 烤 微 波 爐<br />
使 用 說 明 書<br />
本 說 明 書 包 含 重 要 資 訊 , 請 在 使 用 微 波 爐 前 仔 細 閱 讀 。<br />
重 要 事 項 : 如 未 有 按 此 說 明 書 使 用 微 波 爐 , 或 微 波 爐 經 改 裝 而 在 爐 門 開 啟 下 運 作 , 可 能 對 健 康 構 成 嚴 重 威 脅 。
目 錄<br />
使 用 說 明 書<br />
目 錄 ........................................................................................................................................................................ 1<br />
規 格 .......................................................................................................................................................................... 1<br />
微 波 爐 及 配 件 ......................................................................................................................................................... 2<br />
控 制 板 ...................................................................................................................................................................3<br />
重 要 安 全 須 知 ........................................................................................................................................................<br />
4-6<br />
安 裝 事 宜 ..................................................................................................................................................................6<br />
使 用 之 前 ..................................................................................................................................................................7<br />
設 定 時 鐘 ..................................................................................................................................................................7<br />
微 波 強 度 … …....................................................................................................................................................... 7<br />
自 選 烹 調 操 作 ......................................................................................................................................................... 8<br />
微 波 烹 調 … ............................................................................................................................................................. 8<br />
燒 烤 及 混 合 烹 調 .................................................................................................................................................... 9<br />
其 他 簡 便 功 能 .........................................................................................................................................................10<br />
翻 熱 建 議 ..............................................................................................................................................................11<br />
解 凍 建 議 ................................................................................................................................................................12<br />
時 間 解 凍 及 重 量 解 凍 操 作 ....................................................................................................................................13<br />
自 動 烹 調 功 能 操 作 ................................................................................................................................................13<br />
自 動 烹 調 功 能 表 .....................................................................................................................................................14<br />
微 波 爐 適 用 的 器 具 .................................................................................................................................................. 15<br />
清 洗 及 注 意 事 項 .....................................................................................................................................................16<br />
問 題 解 決 .................................................................................................................................................................17<br />
中 文<br />
規 格<br />
型 號 名 稱 : R-630Z(K) R-730Z(K)<br />
交 流 電 壓<br />
電 力 消 耗 :<br />
輸 出 功 率 :<br />
微 波 烹 調<br />
微 波 烹 調<br />
燒 烤 烹 調<br />
off 模 式 ( 省 電 模 式 )<br />
微 波 頻 率<br />
外 部 尺 寸 ( 寬 ) x ( 高 ) x ( 深 ) 毫 米<br />
爐 箱 內 尺 寸 ( 寬 ) x ( 高 ) x ( 深 )** 毫 米<br />
容 量<br />
轉 盤 直 徑<br />
重 量<br />
備 註 : 設 計 及 規 格 如 有 更 改 , 恕 不 另 行 通 知 。<br />
C-1<br />
: 220V, 50 Hz<br />
: 1270 瓦<br />
: 800 瓦<br />
: 1000 瓦<br />
: 少 於 1.0 瓦<br />
: 2450 MHz*<br />
: 440 x 258 x 3<br />
: 220V, 50 Hz<br />
: 1450 瓦<br />
: 900 瓦<br />
: 1000 瓦<br />
: 少 於 1.0 瓦<br />
: 2450 MHz*<br />
27 : 513 x 306x<br />
397<br />
: 306 x 205 x 307<br />
: 330 x 208 x 370<br />
: 20 公 升 ***<br />
: 25 公 升 ***<br />
: ø 255 毫 米<br />
: ø 315 毫 米<br />
: 約 . 11.4 公 斤<br />
: 約 15.1 公 斤<br />
* 本 產 品 符 合 歐 洲 標 準 EN55011 要 求 。<br />
根 據 此 標 準 , 本 產 品 被 歸 類 為 第 二 組 乙 類 設 備 。<br />
第 二 組 表 示 此 設 備 有 目 的 地 產 生 電 磁 輻 射 形 式 的 無 線 電 頻 率 能 量 , 以 進 行 食 物 加 熱 。<br />
乙 類 表 示 此 設 備 適 合 家 居 環 境 使 用 。<br />
** 微 波 爐 內 部 容 量 是 根 據 最 大 闊 度 , 深 度 和 高 度 而 計 算 的 。 實 際 存 放 食 品 的 容 量 較<br />
少 。
微 波 爐 及 配 件<br />
1 2 3<br />
13<br />
10 9 8 6 4 7<br />
11<br />
5<br />
14<br />
12<br />
微 波 爐 :<br />
1. 爐 門<br />
2. 門 鉸<br />
3. 照 明 燈<br />
4. 波 導 管 罩 ( 請 不 要 拆 出 )<br />
5. 控 制 板<br />
6. 聯 接 器<br />
7. 門 鎖<br />
8. 爐 箱<br />
9. 爐 門 密 封 襯 墊 和 襯 墊 表 層<br />
10. 門 鎖<br />
11. 通 風 口<br />
12. 外 箱<br />
13. 電 源 線<br />
14 . 開 門 按 鍵<br />
15. 轉 盤 ( 玻 璃 )<br />
中 心 ( 內 部 )<br />
17. 聯 接 器<br />
16. 轉 盤 旋 轉 架<br />
配 件 :<br />
請 檢 查 確 定 以 下 配 件 已 齊 備 :<br />
(15) 轉 盤 (16) 轉 盤 旋 轉 架 (17) 聯 接 器<br />
(18) 烤 架<br />
• 將 轉 盤 旋 轉 架 放 在 爐 底 中 央 , 並 可 在 連 接 器<br />
上 任 意 旋 轉 。 然 後 , 將 轉 盤 放 在 旋 轉 架 上 ,<br />
讓 它 穩 定 在 連 接 器 上 。<br />
• 為 避 免 轉 盤 受 損 , 在 把 食 物 和 容 器 從 爐<br />
內 取 出 時 , 請 確 定 不 會 觸 及 轉 盤 邊 緣 。<br />
關 於 烤 架 的 使 用 方 式 , 請 參 閱 C-9 頁<br />
上 的 燒 烤 章 節 的 內 容 。<br />
• 不 要 觸 摸 已 加 熱 的 烤 架 。<br />
注 意 : 當 訂 購 配 件 時 , 請 向 分 銷 商<br />
或 聲 寶 授 權 服 務 代 理 提 供 兩 項 資<br />
料 : 配 件 名 稱 及 型 號 名 稱 。<br />
18. 烤 架<br />
注 意 :<br />
• 波 導 管 罩 容 易 損 壞 , 當 清 潔 微 波 爐 內 部 時 , 請 小 心 不 要 令 它 受 損 。<br />
• 在 每 次 烹 調 沒 有 加 蓋 的 肥 膩 食 物 後 , 請 徹 底 清 潔 爐 內 部 , 尤 其 是 燒 烤 部 件 , 它 們 都 必 須 乾 淨 和<br />
沒 有 油 脂 的 。 如 油 脂 積 聚 , 可 能 會 引 致 過 熱 、 出 煙 或 起 火 。<br />
• 每 次 使 用 微 波 爐 , 必 須 把 轉 盤 及 旋 轉 架 妥 為 放 好 。 這 樣 烹 調 時 可 更 均 勻 。 未 放 好 的 轉 盤 可 能 會<br />
發 出 聲 響 、 旋 轉 不 良 , 並 可 能 損 壞 微 波 爐 。<br />
• 每 次 烹 調 時 , 所 有 食 物 和 容 器 必 須 放 在 轉 盤 上 。<br />
• 轉 盤 可 順 時 針 或 逆 時 針 旋 轉 。 您 每 次 使 用 微 波 爐 時 , 旋 轉 方 向 都 可 能 不 同 。 這 不 會 影 響 烹 調 效 果 。<br />
警 告 : 此 標 籤 表 示 本 設 備 在 使 用 期 間 , 表 面 可 能 會 熱 燙 。 在 操 作 期 間 , 爐<br />
門 、 外 箱 、 爐 內 部 、 配 件 及 盛 碟 , 都 會 十 分 熱 。 為 免 燙 傷 , 請 使 用 厚 身 微 波 爐 手 套 。<br />
C-2
控 制 板<br />
1. 數 字 顯 示 器<br />
2. 重 量 解 凍 鍵<br />
3. 時 間 解 凍 鍵<br />
4. 自 動 功 能 表 鍵<br />
爆 谷<br />
POPCORN<br />
爆 谷<br />
1<br />
焗 薯<br />
BAKED POTATO<br />
薄 餅<br />
PIZZA<br />
焗 薯<br />
薄 餅<br />
中 文<br />
3<br />
時 間<br />
TIME<br />
自 動 解 凍<br />
AUTO DEFROST<br />
重 量<br />
WEIGHT<br />
2<br />
冷 凍 蔬 菜<br />
FROZEN VEGE<br />
飲 品<br />
BEVERAG<br />
冷 凍 蔬 菜<br />
飲 品<br />
7<br />
6<br />
10<br />
12<br />
爆 谷 焗 薯 薄 餅<br />
POPCORN BAKED POTATO PIZZA<br />
自 動 食 譜<br />
AUTO MENU<br />
冷 凍 蔬 菜 飲 品 餸 菜<br />
FROZEN VEGE BEVERAGE DISHES<br />
分<br />
分<br />
10 MIN 1 MIN 10<br />
微 波 強 度<br />
POWER LEVEL<br />
計 時 器<br />
TIMER<br />
暫 停 / 取 消<br />
STOP/CLEAR<br />
燒 烤<br />
GRILL<br />
重 量 WEIGHT<br />
秒<br />
10 SEC<br />
混 合 烹 調<br />
GRILL MIX<br />
時 鐘<br />
CLOCK<br />
即 時 烹 調 / 開 始<br />
INSTANT COOK/<br />
START<br />
4<br />
5<br />
8<br />
9<br />
11<br />
13<br />
餸 菜<br />
DISHES<br />
餸 菜<br />
5. 時 間 鍵 :<br />
按 此 鍵 以 輸 入 時 間 ;<br />
持 續 按 鍵 以 連 續 增 加 時 間 。<br />
6. 微 波 強 度 鍵 :<br />
按 這 個 鍵 可 選 擇 微 波 強 度<br />
7. 燒 烤 烹 調 鍵<br />
8. 混 合 烹 調 鍵<br />
9. 重 量 選 擇 鍵 ( 增 加 或 減 少 ):<br />
按 此 鍵 以 增 加 / 減 少 重 量 ,<br />
持 續 按 鍵 以 增 加 / 減 少<br />
10. 計 時 器 鍵 :<br />
按 此 鍵 可 設 置 分 鐘 計 時 器<br />
11. 時 鐘 鍵<br />
12. 暫 停 / 取 消 鍵<br />
13. 即 時 烹 調 / 開 始 鍵<br />
C-3
重 要 安 全 須 知<br />
重 要 安 全 須 知 : 請 細 心 閱 讀 , 並 保 留 作 將 來<br />
參 考 之 用 。<br />
為 防 失 火 危 險 :<br />
在 微 波 爐 操 作 期 間 , 應 小 心 看 管 。 如 所 選 微<br />
波 強 度 太 猛 , 或 烹 調 時 間 過 長 , 均 有 可 能<br />
過 熱 而 起 火 。<br />
•<br />
•<br />
•<br />
•<br />
本 微 波 爐 設 計 僅 限 於 在 桌 面 上 使 用 , 而 不<br />
適 合 內 置 於 廚 具 之 中 。 請 勿 把 微 波 爐 放 在<br />
廚 櫃 內 。<br />
電 源 插 口 必 須 隨 時 可 以 觸 及 , 以 備 緊 急 時 易 於 拔 除<br />
插 頭 。 交 流 電 源 必 須 為 220 伏 特 ,50Hz, 並<br />
備 有 最 少 10A 配 電 線 路 熔 斷 器 , 或 最 少<br />
10A 配 電 斷 路 器 。<br />
請 為 此 設 備 提 供 專 用 獨 立 電 源 。<br />
請 勿 將 微 波 爐 放 於 熱 源 位 置 , 如 傳 統 焗 爐<br />
附 近 。<br />
請 勿 將 微 波 爐 安 裝 於 濕 度 高 或 濕 氣 積 聚 的<br />
位 置 。<br />
請 勿 在 戶 外 存 放 或 使 用 本 微 波 爐 。<br />
•<br />
•<br />
•<br />
•<br />
•<br />
如 看 到 有 煙 冒 出 , 請 關 掉 微 波 爐 、 拔 除 電<br />
源 , 並 保 持 爐 門 關 閉 , 以 遏 止 任 何 可 能 出<br />
現 的 火 焰 。<br />
僅 可 使 用 適 用 於 微 波 爐 的 容 器 及 用 具 , 請 參<br />
閱 C-15 頁 。 用 具 應 經 過 檢 查 , 以 確 定 它 們<br />
適 用 於 微 波 爐 。<br />
在 烹 調 以 塑 膠 或 紙 盛 載 的 食 物 時 , 由 於 它 們 屬<br />
易 燃 性 質 , 請 留 意 微 波 爐 的 情 況 。 在 使 用<br />
後 , 請 清 潔 波 導 管 罩 、 爐 壁 、 轉 盤 及 轉 盤 旋<br />
轉 架 。 它 們 必 須 乾 爽 及 沒 有 油 脂 , 如 油 脂 積<br />
累 , 可 能 會 過 熱 , 並 冒 煙 或 起 火 。<br />
請 勿 在 微 波 爐 附 近 或 通 風 口 放 置 易 燃 物 品 。<br />
請 勿 遮 擋 通 風 口 。<br />
請 移 除 食 物 及 其 包 裝 上 的 所 有 金 屬 封 口 及 線 圈<br />
等 。 在 金 屬 表 面 形 成 的 電 弧 可 能 會 起 火 。<br />
請 勿 使 用 微 波 爐 加 熱 食 油 以 作 油 炸 烹<br />
調 。 食 油 的 溫 度 會 不 受 控 制 並 可 能 燃 燒 。<br />
如 欲 烹 調 爆 谷 , 必 須 使 用 供 微 波 爐 專 用 的 爆 谷<br />
專 用 袋 子 。<br />
請 勿 在 微 波 爐 內 儲 存 食 物 或 任 何 其 他 物 品 。<br />
在 啟 動 微 波 爐 後 , 請 檢 查 有 關 設 定 以 確 保 其<br />
操 作 符 合 要 求 。<br />
為 避 免 過 熱 及 起 火 , 在 烹 調 或 加 熱 高 糖 份<br />
或 肥 膩 食 物 , 如 香 腸 卷 、 餡 餅 或 聖 誕 布 甸<br />
時 , 應 特 別 小 心 處 理 。<br />
•<br />
•<br />
•<br />
為 避 免 可 能 導 致 受 傷 的 情 況 :<br />
警 告 :<br />
如 微 波 爐 已 損 毀 或 操 作 異 常 , 請 勿 使 用 。 在 使<br />
用 前 , 請 檢 查 以 下 事 項 :<br />
a) 爐 門 ; 請 確 定 爐 門 已 關 妥 , 並 沒 有<br />
對 位 不 齊 或 變 形 。<br />
b) 門 鉸 及 安 全 門 鎖 ; 檢 查 以 確 定 它 們 沒<br />
有 損 壞 或 鬆 脫 。<br />
c) 爐 門 密 封 襯 墊 和 襯 墊 表 層 ; 確 定 它 們 沒 有<br />
受 損 。<br />
d) 爐 內 壁 或 爐 門 上 ; 確 定 沒 有 損 毀 。<br />
e) 電 源 線 及 插 頭 ; 確 定 沒 有 損 毀 。<br />
如 爐 門 或 密 封 襯 墊 受 損 , 在 由 接 受 過 聲 寶 公 司 訓 練<br />
之 合 格 服 務 技 術 人 員 修 理 妥 當 之 前 , 請 勿 使 用 。<br />
請 勿 自 行 調 校 、 修 理 或 修 改 微 波 爐 。 除 了 接<br />
受 過 聲 寶 公 司 訓 練 之 合 格 服 務 技 術 人 員<br />
外 , 任 何 人 試 圖 拆 除 防 止 微 波 能 量 暴 露 的<br />
外 殼 , 以 進 行 任 何 修 理 或 維 修 , 都 十 分 危<br />
險 。<br />
• 請 勿 在 爐 門 開 啟 的 情 況 下 使 用 微 波<br />
爐 , 或 以 任 何 方 式 修 改 門 鎖 。<br />
• 如 在 爐 門 密 封 襯 墊 和 襯 墊 表 層 之 間 附 有 物<br />
件 , 請 勿 使 用 微 波 爐 。<br />
請 勿 讓 油 脂 或 塵 埃 在 爐 門 密 封 襯 墊 及 其 相<br />
連 部 份 積 聚 。 請 定 時 清 潔 本 微 波 爐 , 並 清 除 任<br />
何 殘 留 食 物 。 請 參 閱 C-16 頁 的 “ 清 洗 及 注<br />
意 事 項 ” 說 明 。 如 未 有 保 持 微 波 爐 處 的 清<br />
潔 , 可 能 會 損 害 其 表 面 , 導 致 設 備 壽 命<br />
縮 短 , 並 可 能 引 起 危 險 。<br />
• 配 有 心 臟 起 搏 器 的 人 士 , 請 諮 詢 醫 生 或 該 器 材<br />
的 製 造 商 , 以 了 解 有 關 使 用 微 波 爐 的 注 意 事 項 。<br />
為 避 免 可 能 導 致 觸 電 的 情 況 :<br />
• 在 任 何 情 況 之 下 , 亦 不 應 拆 除 外 箱 。<br />
請 勿 跌 入 或 插 入 任 何 物 件 於 門 鎖 口<br />
或 通 風 口 。 如 有 不 慎 跌 入 物 件 , 請<br />
立 即 拔 除 電 源 , 並 聯 絡 聲 寶 維 修 中 心 跟 進 。<br />
• 請 勿 把 電 源 線 或 插 頭 浸 在 水 或 任 何<br />
其 他 液 體 中 。<br />
• 請 勿 讓 電 源 線 掛 在 桌 子 或 檯 面 邊 緣 。<br />
C-4
重 要 安 全 須 知<br />
•<br />
•<br />
•<br />
請 保 持 電 源 線 遠 離 熱 燙 表 面 , 包 括 微 波<br />
爐 後 。<br />
請 勿 試 圖 自 行 更 換 爐 燈 , 或 讓 任 何 不 屬 接<br />
受 過 聲 寶 公 司 訓 練 之 合 格 服 務 技 術 人 員 進<br />
行 有 關 工 作 。 如 爐 燈 失 效 , 請 諮 詢 您 的 經<br />
銷 商 或 聲 寶 授 權 維 修 代 理 。<br />
如 本 設 備 的 電 源 線 受 損 , 必 須 以 專 用 電 線 更 換 。<br />
有 關 更 換 工 作 必 須 由 聲 寶 維 修 中 心 進 行 。<br />
•<br />
為 避 免 導 致 爆 炸 及 爆 沸 的 情 況 :<br />
警 告 : 液 體 及 其 他 食 物 絕 不 可 在 密 封 容 器 內<br />
加 熱 , 以 免 有 爆 炸 的 情 況 發 生 。<br />
如 加 熱 飲 品 , 有 可 能 導 致 延 後 爆 沸 , 因 此 在<br />
處 理 有 關 容 器 時 必 須 特 別 小 心 。<br />
• 切 勿 使 用 密 封 容 器 。 在 使 用 前 , 必 須 先<br />
移 除 封 條 及 蓋 子 。 即 使 在 微 波 爐 關 掉<br />
後 , 密 封 容 器 仍 有 可 能 因 為 壓 力 的 累 積 而<br />
爆 炸 。 在 微 波 加 熱 液 體 時 , 必 須 特 別 小<br />
心 。 請 使 用 闊 口 容 器 , 讓 氣 泡 可 排 走 。<br />
切 勿 使 用 窄 口 容 器 加 熱 液 體 , 如 嬰 兒 奶 瓶 ,<br />
因 為 在 加 熱 時 , 容 器 內 的 液 體 可 能 會 噴 出 導<br />
致 燙 傷 。<br />
• 為 免 滾 熱 液 體 爆 沸 及 可 能 導 致 燙 傷 :<br />
1. 請 勿 烹 調 過 長 時 間 。<br />
2. 在 加 熱 / 翻 熱 前 攪 拌 液 體 。<br />
3. 在 翻 熱 時 , 建 議 加 入 玻 璃 棒 或 類 似 工 具 ( 非 金 屬 )。<br />
4. 在 烹 調 完 成 後 , 讓 液 體 靜 止 最 少 20 秒 , 以 防 延 後 爆 沸 。<br />
請 勿 以 微 波 爐 烹 調 連 殼 生 雞 蛋 , 連 殼 熟 雞 蛋<br />
亦 不 應 以 微 波 爐 加 熱 , 因 為 它 們 有 可 能 爆<br />
炸 , 即 使 在 烹 調 完 成 後 。 如 需 烹 調 或 翻 熱 未<br />
經 炒 煮 或 混 合 的 雞 蛋 , 請 刺 穿 蛋 黃 及 蛋 白 ,<br />
否 則 雞 蛋 可 能 會 爆 炸 。 在 以 微 波 爐 翻 熱 熟 雞<br />
蛋 前 , 請 去 殼 並 切 片 。<br />
• 在 烹 調 薯 仔 、 香 腸 及 水 果 時 , 請 刺 穿 其<br />
表 皮 , 否 則 它 們 可 能 會 爆 炸 。<br />
為 避 免 導 致 燙 傷 的 情 況 :<br />
• 使 用 容 器 、 爆 谷 食 材 、 焗 爐 袋 時 , 請<br />
必 須 打 開 , 並 遠 離 面 孔 及 手 部 , 以 免<br />
被 蒸 汽 及 爆 沸 燙 傷 。<br />
為 免 燙 傷 , 在 食 用 前 請 時 常 測 試 食 物 溫 度 ,<br />
並 加 以 攪 拌 ; 如 為 嬰 兒 、 兒 童 及 老 人 提 供 食<br />
物 , 更 要 特 別 小 心 。 可 接 觸 的 爐 身 部 分 在 使<br />
用 時 可 能 會 變 得 熱 燙 , 請 勿 讓 兒 童 接 近 。<br />
• 容 器 的 溫 度 未 必 能 真 正 代 表 食 物 或 飲 品 的 溫<br />
度 , 因 此 每 次 都 必 須 檢 查 食 物 或 飲 品 的 溫 度 。<br />
• 每 次 打 開 爐 門 時 , 都 要 盡 量 遠 離 , 以 免 受<br />
溢 出 的 蒸 氣 和 熱 力 燙 傷 。<br />
• 在 加 熱 填 充 烤 焗 食 物 後 , 請 切 片 以 釋 放<br />
蒸 氣 並 避 免 燙 傷 。<br />
• 此 設 備 不 應 使 用 外 置 計 時 器 或 遙 控 系 統<br />
操 作 。<br />
為 避 免 兒 童 誤 用 :<br />
警 告 : 請 先 為 兒 童 提 供 充 分 指 導 , 讓 他 們 能<br />
夠 安 全 使 用 本 微 波 爐 , 並 明 白 不 當 使 用 的 危<br />
險 後 , 方 可 讓 兒 童 在 沒 有 監 督 下 使 用 。 本 設<br />
備 並 不 是 為 身 體 、 感 官 或 心 理 有 缺 憾 , 或<br />
缺 乏 相 關 經 驗 或 知 識 的 人 士 ( 包 括 兒 童 ) 而 設<br />
計 , 除 非 他 們 在 能 夠 負 責 其 安 全 的 人 監<br />
督 , 或 已 接 受 其 操 作 指 示 的 情 況 下 使 用 。<br />
兒 童 應 受 到 監 管 , 以 免 他 們 玩 弄 此 電 器 。<br />
• 請 勿 靠 倚 在 爐 門 上 或 將 爐 門 來 回 搖 晃 。<br />
• 請 勿 以 本 微 波 爐 嬉 戲 或 視 之 為 玩 具 。<br />
• 請 教 導 兒 童 認 識 所 有 重 要 安 全 說 明 : 使<br />
用 鍋 墊 、 小 心 移 除 食 物 蓋 子 , 特 別 注 意<br />
令 食 物 鬆 脆 的 包 裝 ( 如 : 發 熱 物 料 ), 它<br />
們 可 能 會 特 別 熱 燙 。<br />
其 他 警 告 :<br />
• 切 勿 以 任 何 方 式 改 動 微 波 爐 。<br />
• 當 微 波 爐 正 在 操 作 時 , 請 勿 移 動 。<br />
• 此 微 波 爐 僅 適 用 於 家 居 環 境 , 並 僅 可 作 烹 調<br />
食 物 。 不 適 合 商 業 或 實 驗 室 用 途 。<br />
中 文<br />
警 告 : 嬰 兒 奶 瓶 及 食 物 樽 內 食 物 , 在 進 食 前<br />
必 須 攪 拌 或 搖 晃 , 並 檢 查 其 溫 度 , 以 避 免 燙<br />
傷 。<br />
• 從 微 波 爐 拿 取 食 物 時 , 請 使 用 鍋 墊 或 焗<br />
爐 手 套 , 以 避 免 燙 傷 。<br />
C-5
重 要 安 全 須 知<br />
為 安 心 使 用 本 產 品 並 避 免 損 壞 :<br />
切 勿 在 微 波 爐 內 空 無 一 物 時 進 行 操 作 。 當 使 用<br />
烤 盤 或 發 熱 材 料 時 , 請 經 常 在 它 們 下 面 放 置 耐<br />
熱 隔 層 , 如 陶 瓷 碟 , 以 免 因 熱 壓 而 損 壞 轉 盤 及<br />
旋 轉 架 。 預 熱 時 間 切 勿 超 過 可 超 過 菜 式 的 指<br />
示 。<br />
請 勿 使 用 金 屬 用 具 , 它 們 會 反 射 微 波 , 可 能<br />
會 造 成 電 弧 現 象 。 請 勿 把 罐 頭 放 進 微 波 爐 。<br />
請 使 用 專 為 本 微 波 爐 而 設 計 的 轉 盤 和 旋 轉<br />
架 。 請 勿 在 沒 有 轉 盤 的 情 況 下 使 用 本 微 波<br />
爐 。<br />
為 免 轉 盤 破 裂 :<br />
(a) 在 以 水 清 洗 轉 盤 前 , 請 先 讓 轉 盤 冷 卻 。<br />
(b) 請 勿 放 置 熱 食 物 或 用 具 在 冷 轉 盤 上 。<br />
(c) 請 勿 放 置 冷 食 物 或 用 具 在 熱 轉 盤 上 。<br />
在 微 波 爐 操 作 時 , 請 勿 放 置 任 何 物 件 在 外 箱<br />
上 。<br />
在 使 用 燒 烤 及 混 合 模 式 而 微 波 爐 仍 然 熱<br />
燙 時 , 請 勿 使 用 塑 膠 容 器 作 微 波 加 熱 , 因<br />
為 它 們 可 能 會 融 化 。<br />
在 使 用 以 上 模 式 時 , 除 非 製 造 商 聲 稱 該 塑<br />
膠 容 器 之 物 料 適 用 於 微 波 爐 , 否 則 切 不 可<br />
使 用 塑 膠 容 器 。<br />
注 意 :<br />
如 您 不 肯 定 如 何 連 接 您 的 微 波 爐 , 請 諮 詢 合 格 電 工 。<br />
如 因 未 能 瞭 解 正 確 的 電 力 連 接 程 序 , 而<br />
造 成 微 波 爐 損 壞 或 個 人 損 傷 , 製 造 商 及<br />
經 銷 商 概 不 負 責 。<br />
爐 壁 或 爐 門 密 封 襯 墊 和 襯 墊 表 層 上 , 間<br />
中 可 能 有 水 氣 或 水 點 凝 結 。 這 些 都 屬 正<br />
常 現 象 , 並 不 表 示 有 微 波 洩 漏 或 操 作 異<br />
常 。<br />
此 標 籤 表 示 本 設 備 在 使 用 期<br />
間 , 表 面 可 能 會 熱 燙 。<br />
安 裝 事 宜<br />
1. 從 微 波 爐 內 部 移 除 所 有 包 裝 物 料 。<br />
30 厘 米<br />
2. 仔 細 檢 查 微 波 爐 是 否 有 任 何 損 壞 跡 象 。<br />
20 厘 米<br />
20 厘 米<br />
3. 將 微 波 爐 放 在 穩 固 的 平 面 上 , 讓 位 置 應 可<br />
負 荷 爐 身 加 上 烹 調 最 重 食 物 時 的 總 重 量 。<br />
請 勿 將 微 波 爐 放 在 廚 櫃 中 。<br />
4. 選 擇 一 個 可 提 供 足 夠 空 間 予 進 氣 及 / 或 散<br />
氣 的 平 面 。<br />
設 備 後 方 應 面 向 牆 壁 。<br />
• 微 波 爐 和 鄰 近 牆 壁 之 間 的 空 間 , 最 少<br />
有 20 厘 米 。<br />
• 在 微 波 爐 上 方 留 下 最 少 30 厘 米 的 空 間 。<br />
• 請 勿 除 去 微 波 爐 底 部 的 爐 腳 。<br />
• 如 阻 擋 出 及 / 或 入 的 通 禹 口 , 可 能 會 損 壞 微 波<br />
爐 。<br />
• 請 把 微 波 爐 放 在 遠 離 收 音 機 和 電 視 的 位<br />
置 , 微 波 爐 操 作 期 間 可 能 會 影 響 電 台 或<br />
電 視 的 接 收 。<br />
C-6<br />
5. 在 使 用 期 間 , 爐 門 可 能 會 熱 燙 。<br />
放 置 或 安 裝 微 波 爐 的 時 候 , 爐 底 應<br />
距 離 地 面 85 厘 米 或 以 上 。 不 要 讓 兒<br />
童 接 近 爐 門 , 以 免 他 們 燙 傷 自 己 。<br />
6. 穩 妥 地 連 接 微 波 爐 的 插 頭 到 標 準 接<br />
地 ( 有 地 線 ) 家 居 電 源 插 座 。<br />
警 告 : 請 勿 把 微 波 爐 放 置 在 會 產 生 熱<br />
力 、 潮 濕 或 高 濕 度 的 地 方 ( 例 如 傳 統 焗<br />
爐 附 近 或 上 面 ) 或 接 近 易 燃 物 料 ( 如 布 料<br />
家 具 )。<br />
請 勿 阻 擋 或 阻 塞 散 氣 口 。<br />
請 勿 在 爐 頂 放 置 物 品 。
將 微 波 爐 的 插 頭 連 接 電 源 後 , 會 顯 示 :“0:00”, 並 會 響 一 次 聲 音 訊 號 。<br />
本 型 式 設 有 時 鐘 功 能 , 在 備 用 時 候 耗 用 少 於 1.0 瓦 。 時 鐘 設 定 方 式 請 參 閱 下 面 。<br />
使 用 之 前<br />
設 定 時 鐘<br />
您 的 微 波 爐 設 有 24 小 時 模 式 。<br />
時 鐘<br />
CLOCK<br />
1. 按 一 次 設 定 時 鐘 鍵 , “00:00” 會 閃 動 。<br />
2. 按 時 間 鍵 , 輸 入 當 前 時 間 。 按 10 分 鐘 鍵 輸 入 小 時 , 按 1 分 鐘 及 10 秒 鍵 輸 入 分 鐘 。<br />
3. 按 設 定 時 鐘 時 鐘 以 完 成 時 鐘 設 定 。<br />
CLOCK<br />
注 意 :<br />
• 如 時 鐘 已 設 定 , 當 烹 調 完 成 , 顯 示 屏 會 顯 示 當 日 正 確 時 間 。 如 果 未 設 定 時 鐘 , 則<br />
僅 會 顯 示 “0:00”。<br />
• 如 欲 在 烹 調 期 間 檢 查 時 間 , 請 按 設 定 時 鐘 鍵 ,LED 會 顯 示 當 日 時 間 2-3 秒 。 這 不 會 影<br />
響 烹 調 程 序 。<br />
• 如 在 設 定 時 鐘 期 間 按 暫 停 / 取 消 鍵 , 或 在 1 分 鐘 內 沒 有 操 作 , 微 波 爐 會 回 到 之 前 的 設 定 。<br />
• 如 微 波 爐 的 電 源 供 應 中 斷 , 顯 示 屏 會 在 電 源 恢 復 後 間 歇 顯 示 “0:00”。 如 果 在 烹 調<br />
期 間 遇 到 此 情 況 , 有 關 程 序 將 會 被 清 除 。 當 日 時 間 亦 會 被 刪 除 。<br />
中 文<br />
微 波 強 度 按 微 波 強 度 鍵 顯 示<br />
( 百 分 比 )<br />
微 波 強 度<br />
POWER LEVEL<br />
高<br />
中 高<br />
中<br />
中 低 ( 解 凍 )<br />
低<br />
x1<br />
x2<br />
x3<br />
x4<br />
x5<br />
x6<br />
x7<br />
x8<br />
x9<br />
x10<br />
x11<br />
一 般 來 說 , 可 參 考 以 下 建 議 :<br />
100P<br />
90P<br />
80P<br />
70P<br />
60P<br />
50P<br />
40P<br />
30P<br />
20P<br />
10P<br />
100P/ 90P - ( 高 ) 用 於 快 速 烹 調 , 或 翻 熱 食 物 , 如 砂 鍋<br />
食 物 、 熱 飲 及 蔬 菜 等 。<br />
80P/ 70P - ( 中 高 ) 可 用 於 較 長 時 間 的 烹 調 , 如 烤 肉 、 肉<br />
卷 及 碟 盤 食 物 等 , 亦 可 用 於 對 熱 度 較 敏 感 的 食 物 如 海 綿<br />
蛋 糕 。 在 此 較 低 強 度 的 設 定 下 , 食 物 的 烹 調 會 較 均 勻 ,<br />
不 會 令 邊 緣 位 置 過 熟 。<br />
60P/ 50P - ( 中 ) 可 用 於 密 度 較 高 的 食 物 , 它 們<br />
0P<br />
C-7<br />
微 波 強 度<br />
• 您 的 微 波 爐 有 11 個 微 波 強 度 , 詳<br />
見 列 表 。<br />
• 如 欲 更 改 烹 調 強 度 , 請 按 微 波 強 度 鍵 ,<br />
直 至 顯 示 需 要 的 強 度 , 然 後 按 時 間 鍵 輸 入 所 需<br />
烹 調 時 間 , 再 按 即 時 烹 調 / 開 始 鍵 即 可 啟 動 微<br />
波 爐 。.<br />
• 如 欲 在 烹 調 期 間 檢 查 微 波 強 度 , 可 按 微<br />
波 強 度 鍵 。 雖 然 顯 示 屏 正 顯 示 微 波 強 度 ,<br />
微 波 爐 仍 會 繼 續 運 作 。<br />
• 如 選 擇 “0P”, 微 波 爐 會 啟 動 風 扇 但 沒<br />
有 微 波 強 度 。 您 可 以 此 設 定 來 去 除 異 味 。<br />
在 傳 統 烹 調 時 需 要 較 長 時 間 , 如 砂 牛 肉 鍋 。<br />
如 欲 確 保 肉 質 較 嫩 , 建 議 使 用 此 設 定 。<br />
40P/ 30P - ( 中 低 ) 可 用 於 解 凍 , 選 擇 此 設 定<br />
可 確 保 食 物 解 凍 效 果 均 勻 。 此 設 定 亦 適 用 於 煮<br />
飯 、 意 粉 、 餃 子 及 蛋 撻 。<br />
20P/ 10P - ( 低 ) 用 於 慢 速 解 凍 , 如 忌 廉 蛋 糕 或 麵<br />
糰 。
自 選 烹 調 操 作<br />
打 開 爐 門 :<br />
按 下 開 門 按 鍵 , 即 可 打 開 爐 門 。<br />
啟 動 微 波 爐 :<br />
將 食 物 放 在 合 適 的 容 器 內 , 再 放 在 轉 盤 上 , 或 直 接 放 在 轉 盤 上 。<br />
關 閉 爐 門 , 選 擇 需 要 的 烹 調 模 式 , 再 按 即 時 烹 調 / 開 始 鍵 .。<br />
即 時 烹 調 / 開 始<br />
INSTANT COOK/<br />
START<br />
當 烹 調 程 序 已 選 定 , 但 未 有 在 一 分 鐘 內 按 即 時 烹 調 / 開 始 鍵 , 該 設 定 會 被 取 消 。<br />
如 在 烹 調 中 途 曾 打 開 爐 門 , 必 須 再 按 即 時 烹 調 / 開 始 鍵 才 可 繼 續 烹 調 。 如 按 鍵 有 效 , 聲 音 訊 號 會 響 一<br />
次 , 如 按 鍵 無 效 則 不 會 有 聲 響 。<br />
使 用 暫 停 / 取 消 鍵 :<br />
1. 在 設 定 程 序 時 清 除 錯 誤 。<br />
2. 在 烹 調 期 間 暫 停 微 波 爐 。<br />
3. 在 烹 調 期 間 取 消 程 序 , 按 暫 停 / 取 消 鍵 兩 次 。<br />
4. 設 定 或 取 消 兒 童 鎖 ( 參 閱 C-10 頁 )。<br />
微 波 烹 調<br />
暫 停 / 取 消<br />
STOP/CLEAR<br />
您 的 微 波 爐 可 設 定 最 多 99 分 鐘 50 秒 (99.50)。<br />
自 選 烹 調 / 自 選 解 凍 功 能<br />
• 輸 入 烹 調 時 間 並 使 用 由 100P 到 10P 的 微 波 強 度 , 來 進 行 烹 調 或 解 凍 ( 請 參 閱 GB-9 頁 )。<br />
• 如 有 可 能 , 請 在 烹 調 期 間 攪 拌 或 翻 轉 食 物 兩 至 三 次 。<br />
• 在 烹 調 後 , 請 按 建 議 蓋 好 食 物 並 放 置 一 會 。<br />
• 在 解 凍 後 , 以 錫 紙 蓋 好 食 物 , 並 讓 它 放 置 直 至 完 全 解 凍 。<br />
例 子 :<br />
如 需 烹 調 2 分 鐘 30 秒 , 微 波 強 度 為 70%。<br />
1. 按 微 波 強 度 鍵 四 次 , 設 定 強<br />
度 為 70 P。<br />
微 波 強 度<br />
x4<br />
POWER LEVEL<br />
2. 按 分 鐘 鍵 兩 次 及 10<br />
秒 鍵 三 次 , 以 輸 入 烹<br />
調 時 間 。<br />
3. 按 即 時 烹 調 / 開 始 , 即 可 啟 動<br />
計 時 器 。<br />
( 顯 示 屏 會 按 已 設 定 的 烹 調 /<br />
解 凍 時 間 倒 數 。)<br />
注 意 :<br />
• 當 微 波 爐 啟 動 時 , 爐 燈 會 亮 起 , 轉 盤 亦 會 以 順 時 針 或 逆 時 針 方 向 轉 動 。<br />
• 如 在 烹 調 / 解 凍 期 間 打 開 爐 門 , 以 攪 拌 或 翻 轉 食 物 , 顯 示 屏 上 的 烹 調 時 間 會 自 動 暫 停 。<br />
在 關 上 爐 門 和 按 即 時 烹 調 / 開 始 鍵 後 , 烹 調 / 解 凍 時 間 就 會 繼 續 倒 數 。<br />
• 當 烹 調 / 解 凍 已 完 成 , 打 開 爐 門 或 按 暫 停 / 取 消 鍵 , 如 已 設 定 時 鐘 , 就 會 再 顯 示 當 前 時 間 會 。<br />
• 如 您 想 在 烹 調 期 間 查 看 微 波 強 度 , 請 按 微 波 強 度 鍵 。<br />
重 要 :<br />
• 在 烹 調 / 解 凍 後 關 上 爐 門 。 注 意 當 爐 門 開 啟 時 , 爐 燈 會 一 直 亮 起 , 這 是 提 醒 您 關 上 爐 門<br />
的 安 全 措 施 。<br />
• 如 您 以 相 同 的 烹 調 模 式 , 烹 調 食 物 超 出 標 準 時 間 ( 請 參 閱 下 表 ), 微 波 爐 的 安 全 機 制 就 會<br />
自 行 啟 動 。 微 波 強 度 會 被 調 低 , 或 燒 烤 元 件 會 交 替 開 關 。<br />
烹 調 模 式<br />
標 準 時 間<br />
微 波 100P<br />
30 分 鐘<br />
燒 烤 烹 調<br />
間 歇 操 作 R-630Z(K) 為 溫 度 控 制 ,R-730Z(K) 則<br />
為 99 分 鐘 50 秒<br />
混 合 燒 烤 烹 調 99 分 鐘 50 秒<br />
C-8
1. 燒 烤 烹 調<br />
位 於 爐 內 頂 部 的 燒 烤 管 僅 限 一 種 微 波 強 度 設 定 。 轉 盤 會 同 時 轉 動 幫 助 食 物 平 均 地 烤 至 金 黃 色 。 請 使 用 烤 架 烹 飪<br />
較 細 小 的 食 物 , 例 如 煙 肉 、 火 腿 或 小 蛋 糕 。 您 可 直 接 把 食 物 放 在 烤 架 上 , 或 盛 於 烤 盤 / 耐 熱 碟 中 再 置 於 烤 架 上 。<br />
舉 例 :<br />
要 燒 烤 20 分 鐘 , 使 用 燒 烤 鍵 。<br />
1. 按 燒 烤 鍵 一 次 。 2. 輸 入 所 需 加 熱 時 間 , 按 10 分<br />
鐘 鍵 兩 次 。<br />
燒 烤<br />
GRILL<br />
x1<br />
燒 烤 及 混 合 烹 調<br />
3. 按 即 時 烹 調 / 開 始 鍵 開 始<br />
燒 烤 。<br />
( 顯 示 屏 會 倒 數 已 設 定 的<br />
燒 烤 時 間 。)<br />
G 20:00 20:00<br />
中 文<br />
2. 混 合 烹 調<br />
混 合 烹 調 結 合 微 波 強 度 和 燒 烤 功 能 。 混 合 烹 調 是 指 利 用 微 波 強 度 和 燒 烤 強 度 交 替 進 行 烹 調 。<br />
結 合 微 波 強 度 和 燒 烤 功 能 可 縮 短 烹 調 時 間 , 並 做 出 金 黃 的 脆 皮 效 果 。 共 有 兩 種 組 合 可 供 選 擇 :<br />
組 合 一 ( 顯 示 :C-1)<br />
55% 時 間 使 用 微 波 強 度 ,45% 時 間 燒 烤 烹 調 。 適 合 烹 調 魚 類 或 焗 飯 類 食 物 。<br />
組 合 二 ( 顯 示 :C-2)<br />
36% 時 間 使 用 微 波 強 度 ,64% 時 間 燒 烤 烹 調 。 適 合 烹 調 布 甸 、 奄 列 和 家 禽 。<br />
舉 例 :<br />
要 烹 調 15 分 鐘 , 使 用 混 合 烹 調 , 以 55% 時 間 使 用 微 波 強 度 ,45% 時 間 使 用 燒 烤 強 度 (C-1)。<br />
1. 按 混 合 烹 調 鍵 一<br />
次 。<br />
混 合 烹 調<br />
GRILL MIX<br />
x1<br />
2. 輸 入 所 需 加 熱 時 間 , 按 10 分 鐘<br />
鍵 一 次 和 1 分 鐘 鍵 五 次 。<br />
3. 按 即 時 烹 調 / 開 始 鍵 開 始 燒<br />
烤 。<br />
( 顯 示 屏 會 倒 數 已 設 定 的<br />
燒 烤 時 間 。)<br />
C-1 15:00 15:00<br />
使 用 燒 烤 及 混 合 烹 調 請 注 意 :<br />
• 燒 烤 功 能 毋 須 預 熱 。<br />
• 如 使 用 較 深 的 容 器 而 同 時 需 把 食 物 焗 至 脆 皮 , 請 把 容 器 置 於 轉<br />
盤 上 。<br />
• 首 次 使 用 燒 烤 功 能 可 能 會 出 現 冒 煙 或 輕 微 燒 焦 , 此 為 正 常 情 況 , 並 不 表 示 微 波 爐 損 壞 。 如 欲 避 免 , 首 次 使<br />
用 焗 爐 時 , 請 以 燒 烤 空 爐 烹 調 20 分 鐘 , 不 用 放 置 食 物 於 爐 內 。<br />
重 要 : 過 程 中 , 請 打 開 窗 戶 或 啟 動 廚 房 抽 風 系 統 , 以 消 散 煙 霧 或 氣 味 。<br />
警 告 :<br />
過 程 中 , 爐 門 、 爐 身 、 爐 內 部 以 及 配 件 均 會 非 常 炙 熱 。 為 避 免 燙 傷 , 務 須 戴 上 厚 身 焗 爐<br />
手 套 。<br />
C-9
1. 分 段 式 烹 調 :<br />
這 項 功 能 讓 您 能 以 最 多 兩 個 不 同 步 驟 烹 調 , 包 括 自 選 烹 調 時 間 和 模 式 及 / 或 時 間 解 凍 以 及 重 量<br />
解 凍 功 能 。 一 經 設 定 即 毋 須 干 預 烹 調 程 序 , 微 波 爐 會 自 動 進 行 下 一 步 驟 。 在 第 一 個 步 驟 結 束<br />
後 會 聽 到 響 聲 一 次 。 如 果 其 中 一 個 步 驟 為 解 凍 , 請 設 定 為 第 一 個 步 驟 。<br />
注 意 : 自 動 功 能 不 能 設 定 為 分 段 式 烹 調 的 一 部 份 。<br />
舉 例 : 如 果 您 想 把 食 物 解 凍 5 分 鐘 , 然 後 以 80P 微 波 強 度 烹 調 7 分 鐘 , 可 按 以 下<br />
步 驟 設 定 :<br />
1. 按 時 間 解 凍 鍵 一 次 ,LED 顯 示 屏 會 出 現 dEF2。<br />
2. 輸 入 烹 調 時 間 , 按 1 分 鐘 鍵 5 次 。<br />
3. 輸 入 微 波 強 度 (80P), 按 微 波 強 度 鍵 3 次 。<br />
4. 輸 入 烹 調 時 間 , 按 1 分 鐘 鍵 7 次 。<br />
5. 按 即 時 烹 調 / 開 始 鍵 一 次 開 始 烹 調 。<br />
2. 即 時 烹 調 / 開 始 功 能 :<br />
即 時 烹 調 / 開 始 鍵 讓 您 操 作 以 下 兩 項 功 能 。<br />
a. 直 接 開 始<br />
按 即 時 烹 調 / 開 始 鍵 , 即 可 以 100P 微 波 強 度 直 接 開 始 烹 調 。<br />
b. 延 長 烹 調 時 間<br />
您 可 於 進 行 自 選 烹 調 、 時 間 解 凍 和 自 動 功 能 期 間 , 延 長 烹 調 時 間 。 只 需 於 烹 調 期 間 按 即<br />
時 烹 調 / 開 始 鍵 , 每 按 一 下 即 延 長 一 分 鐘 。 於 進 行 重 量 解 凍 期 間 , 不 能 以 即 時 烹 調 / 開 始<br />
鍵 延 長 操 作 。<br />
注 意 : 烹 調 時 間 可 延 長 至 最 高 99 分 鐘 50 秒 。<br />
3. 計 時 器 功 能 :<br />
當 微 波 爐 並 沒 有 用 於 烹 調 時 , 您 可 使 用 其 計 時 器 作 計 時 用 途 , 例 如 在 煮 食 爐 烚 雞 蛋 時 計 時 ,<br />
或 提 醒 您 已 烹 調 或 解 凍 食 物 可 放 置 的 時 間 。<br />
舉 例 :<br />
要 設 定 計 時 器 為 5 分 鐘 。<br />
1. 按 計 時 器 鍵 一<br />
次 。<br />
計 時 器<br />
TIMER<br />
其 他 簡 便 功 能<br />
2. 輸 入 所 需 時 間 , 按 1<br />
分 鐘 鍵 5 次 。<br />
3. 按 即 時 烹 調 / 開<br />
始 鍵 啟 動 計 時<br />
器 。<br />
4. 檢 查 顯 示 屏 。<br />
( 顯 示 屏 會 倒 數 已 設 定 的<br />
烹 調 / 解 凍 時 間 。)<br />
當 計 時 器 所 設 定 的 時 間 到 達 時 , 響 聲 會 響 起 5 次 , LED 則 會 顯 示 當 天 時 間 。 您 可 輸 入 任 何<br />
時 間 , 最 長 為 99 分 鐘 50 秒 ‧ 要 在 倒 數 期 間 取 消 計 時 器 , 只 需 按 暫 停 / 取 消 鍵 一 次 。<br />
注 意 : 計 時 器 功 能 在 烹 調 期 間 不 能 使 用 。<br />
4. 兒 童 鎖 :<br />
用 於 防 止 兒 童 在 沒 有 看 管 下 操 作 微 波 爐 。<br />
a. 設 定 兒 童 鎖 :<br />
按 暫 停 / 取 消 鍵 3 秒 , 直 至 聽 到 一 聲 長 響 的 嗶 聲 。 顯 示 屏 會 顯 示 :<br />
b. 取 消 兒 童 鎖 :<br />
按 暫 停 / 取 消 鍵 3 秒 , 直 至 聽 到 一 聲 長 響 的 嗶 聲 。<br />
C-10
翻 熱 建 議<br />
翻 熱 食 物 時 , 請 按 以 下 建 議 及 指 引 , 以 確 保 食 物 在 食 用 前 完 全 熱 透 。<br />
碟 盤 食 物 請 先 移 走 家 禽 或 肉 類 , 並 按 以 下 指 引 另 外 翻 熱 。<br />
把 小 件 的 食 物 置 於 碟 子 中 間 , 較 大 和 較 厚 的 置 於<br />
碟 邊 。 以 微 波 爐 紙 覆 蓋 , 並 以 50% 翻 熱 , 中 途 攪<br />
拌 或 調 換 食 物 位 置 。<br />
注 意 : 請 確 保 食 物 在 食 用 前 已 完 全 熱 透 。<br />
中 文<br />
切 片 肉 類 以 透 氣 微 波 爐 紙 覆 蓋 , 並 以 50% 翻 熱 。<br />
最 少 調 換 食 物 位 置 一 次 以 確 保 平 均 翻 熱 。<br />
注 意 : 請 確 保 肉 類 在 食 用 前 已 完 全 熱 透 。<br />
家 禽 類<br />
把 較 厚 的 部 分 置 於 盤 的 外 圍 , 以 透 氣 微 波 爐 紙 覆<br />
蓋 , 並 以 70% 翻 熱 , 中 途 翻 轉 食 物 。<br />
注 意 : 請 確 保 家 禽 肉 在 食 用 前 已 完 全 熱 透 。<br />
砂 鍋 類<br />
以 透 氣 微 波 爐 紙 或 合 適 的 蓋 覆 蓋 , 並 以 50% 翻<br />
熱 。<br />
不 時 攪 拌 以 確 保 平 均 翻 熱 。<br />
注 意 : 請 確 保 食 物 在 食 用 前 已 完 全 熱 透 。<br />
要 達 致 最 佳 翻 熱 效 果 , 請 使 用 合 適 該 種 食 物 的 微 波 強 度 , 例 如 蔬 菜 可 以 100% 翻 熱 , 但<br />
千 層 麵 由 於 不 能 攪 拌 , 所 以 應 以 50% 翻 熱 。<br />
注 意 :<br />
• 翻 熱 前 請 拿 掉 錫 紙 或 金 屬 器 皿 。<br />
• 翻 熱 時 間 會 受 食 物 形 狀 、 深 度 、 份 量 和 溫 度 , 以 及 容 器 大 小 、 形 狀 和 物 料 影 響 。<br />
警 告 :<br />
切 勿 以 窄 頸 容 器 翻 熱 液 體 , 以 防 液 體 從 容 器 噴 出 及 燙 傷 。<br />
• 避 免 過 熱 和 起 火 , 當 翻 熱 高 糖 份 或 脂 肪 的 食 物 如 肉 批 或 聖 誕 布 甸 時 , 必 須 格 外 謹 慎 。<br />
• 切 勿 用 以 加 熱 食 油 或 脂 肪 作 煎 炸 用 途 , 以 防 導 致 過 熱 和 起 火 。<br />
• 罐 裝 薯 仔 不 宜 以 微 波 爐 翻 熱 。 請 參 照 罐 上 的 製 造 商 指 示 。<br />
警 告 :<br />
嬰 兒 奶 樽 及 瓶 裝 嬰 兒 食 物 必 須 攪 拌 或 搖 勻 , 並 在 食 用 前 檢 查 溫 度 以 防 燙 傷 。<br />
C-11
解 凍 建 議<br />
以 微 波 爐 解 凍 食 物 是 最 快 捷 的 方 法 。<br />
解 凍 過 程 簡 單 , 但 請 遵 照 以 下 重 要 指 示 , 以 確 保 食 物 完 全 解 凍 。<br />
調 換 位 置<br />
分 開<br />
遮 蓋<br />
放 置 於 盤 子 外 圍 的 食 物 會 較 放 置 於 中 央 的 食 物 較 快 解 凍 。 因 此 在 凍<br />
解 過 程 中 , 食 物 必 須 調 換 位 置 最 多 4 次 。<br />
把 靠 在 一 起 的 食 物 從 盤 子 的 外 圍 移 到 中 央 , 並 重 新 調 換 重 疊 的 部<br />
分 。 這 將 能 確 保 食 物 的 所 有 部 分 平 均 解 凍 。<br />
食 物 從 凍 箱 取 出 時 或 會 黏 在 一 起 。 在 解 凍 過 程 中 必 須 盡 快 先 把 食 物 分<br />
開 , 例 如 煙 肉 或 雞 柳 。<br />
食 物 的 個 別 部 份 在 解 凍 過 程 中 可 能 變 暖 。 為 防 食 物 變 暖 並 開 始 烹<br />
熟 , 這 些 部 分 可 以 小 塊 能 反 射 微 波 的 錫 紙 遮 蓋 , 例 如 雞 全 隻 上 的 雞<br />
腿 或 雞 翅 膀 。<br />
擺 放 給 食 物 足 夠 時 間 擺 放 可 確 保 食 物 充 分 解 凍 。 當 食 物 從 微 波 爐 取 出 時 ,<br />
解 凍 程 序 並 未 完 成 。 食 物 必 須 再 以 適 當 時 間 擺 放 並 保 持 包 裹 , 以 確 保<br />
食 物 中 心 位 置 亦 完 全 解 凍 。<br />
翻 轉<br />
在 解 凍 過 程 中 , 所 有 食 物 必 須 翻 轉 最 少 3 至 4 次 , 這 對 確 保 完 全<br />
解 凍 非 常 重 要 。<br />
注 意 :<br />
• 解 凍 前 就 先 移 除 所 有 包 裝 及 包 裝 材 料 。<br />
• 要 解 凍 食 物 , 請 使 用 30% 或 10% 微 波 強 度 。<br />
C-12
時 間 解 凍 及 重 量 解 凍 操 作<br />
1. 時 間 解 凍<br />
這 項 功 能 可 快 速 解 凍 食 物 , 並 讓 您 根 據 食 物 種 類 選 擇 適 合 的 解 凍 時 間 。 按 照 以 下 例 子 詳 細 了 解<br />
如 何 操 作 這 項 功 能 。 時 間 可 設 定 為 0:10 – 99:50。<br />
舉 例 : 要 解 凍 食 物 10 分 鐘 。<br />
1. 選 擇 所 需 項 目 , 按 時 間 解 凍 鍵 一 次 。 2. 輸 入 解 凍 時 間 , 按 10 分 鐘 3. 按 即 時 烹 調 /<br />
時 間<br />
鍵 一 次 。<br />
開 始 鍵 開 始 解<br />
x1,<br />
TIME<br />
凍 。<br />
顯 示 屏 會 顯 示 : dEF2<br />
時 間 解 凍 請 注 意 :<br />
• 烹 調 完 成 後 會 聽 到 5 次 響 聲 , 如 果 時 鐘 設 定 正 確 LED 會 顯 示 當 天 時 間 , 如 果 未 有 設<br />
定 時 鐘 則 會 在 烹 調 完 成 後 顯 示 「0:00」。<br />
• 預 設 微 波 強 度 為 30P, 不 可 調 校 。<br />
2. 重 量 解 凍<br />
微 波 爐 預 設 的 時 間 及 微 波 強 度 或 令 以 下 食 物 不 易 解 凍 , 包 括 豬 肉 、 牛 肉 和 雞 肉 。 可 調 校 的 重 量 從 0.1 克 至 2<br />
公 斤 , 每 按 一 次 為 0.1 公 斤 。<br />
按 照 以 下 例 子 詳 細 了 解 如 何 操 作 這 項 功 能 。<br />
舉 例 : 要 使 用 重 量 解 凍 來 解 凍 重 1.2 公 斤 的 肉 類 關 節 。 把 肉<br />
塊 置 於 焗 盤 或 微 波 爐 解 凍 架 並 置 於 轉 盤 上 。<br />
1. 選 擇 所 需 項 目 , 按 重 量 解 凍 鍵 一 次 。 2. 輸 入 解 凍 重 量 , 按 重 量 3. 按 即 時 烹 調 / 開 始<br />
鍵 開 始 解 凍 。<br />
鍵 直 至 顯 示 所 需 重 量 。<br />
重 量<br />
x1,<br />
( 顯 示 屏 會 倒 數<br />
WEIGHT<br />
已 設 定 的 解 凍 時<br />
重 量 WEIGHT<br />
顯 示 屏 會 顯 示 : dEF1 , 顯 示 屏 : 1. 2 間 。)<br />
中 文<br />
冷 藏 食 物 會 由 -18°C 開 始 解 凍 。<br />
重 量 解 凍 請 注 意 :<br />
• 冷 藏 食 物 前 , 就 確 保 食 物 新 鮮 及 質 素 。<br />
• 食 物 重 量 須 取 數 最 近 的 0.1 公 斤 , 例 如 0.65 公 斤 應 取 至 0.7 公 斤 。<br />
• 如 有 需 要 , 請 以 平 坦 的 錫 紙 遮 蓋 肉 類 或 家 禽 的 細 小 部 分 , 以 防 止 這 些 部 分 在 解 凍 過 程 中<br />
變 暖 。 請 確 保 錫 紙 不 會 觸 碰 爐 壁 。<br />
自 動 烹 調 功 能 鍵 會 自 動 計 算 正 常 的 烹 調 模 式 及 烹 調 食 物 ( 詳 情 請 參 閱 C-3 及 C-14 頁 )。 按 照<br />
以 下 例 子 詳 細 了 解 如 何 操 作 這 項 功 能 。<br />
舉 例 : 烹 調 兩 隻 焗 薯 (460 克 ), 使 用 自 動 功 能 键 。<br />
1. 選 擇 所 需 目 錄 , 按 焗 薯 鍵 一<br />
次 。<br />
焗 薯<br />
BAKED POTATO x1,<br />
顯 示 屏 會 顯 示 : 1<br />
2. 按 重 量 上 / 下 鍵 或 連 續 按 焗 薯<br />
鍵 , 以 選 擇 所 需 的 焗 薯 數 量 ( 最<br />
高 為 3)。<br />
重 量 WEIGHT<br />
x1, 顯 示 屏 : 2<br />
3. 按 即 時 烹 調 / 開<br />
始 鍵 開 始 烹<br />
調 。<br />
( 顯 示 屏 會 倒 數<br />
已 設 定 的 烹 調<br />
時 間 。<br />
注 意 :<br />
• 輸 入 食 物 重 量 或 數 量 , 可 按 重 量 上 / 下 鍵 直 至 顯 示 所 需 重 量 / 數 量 。 僅 輸 入 食 物 重 量 ,<br />
不 包 括 容 器 重 量 。<br />
• 如 食 物 重 量 輕 於 或 重 於 C-14 頁 的 自 動 功 能 重 量 / 數 量 列 表 , 請 以 自 選 操 作 烹 調 。<br />
C-13<br />
自 動 烹 調 功 能 操 作
自 動 烹 調 功 能 列 表<br />
自 動 功 能 重 量 / 份 量 / 容 器 程 序<br />
爆 谷 0.05 公 斤 、0.1 公 斤 把 爆 谷 連 袋 直 接 置 於 轉 盤 ( 請 參 閱 以 下<br />
注 意 事 項 :「 微 波 烹 調 爆 谷 功 能 重 要 資 訊 」)<br />
焗 薯<br />
1、2、3 ( 隻 ) 焗 薯<br />
1 隻 焗 薯 = 約 0.23 公 斤<br />
( 原 本 溫 度 20° C)<br />
請 採 用 大 小 約 0.23 公 斤 的 焗 薯 , 並 在 每 個<br />
焗 薯 上 刺 出 多 個 小 洞 , 再 置 於 轉 盤 近 邊 緣<br />
位 置 。 烹 調 途 中 需 翻 轉 及 調 換 位 置 。 食 用<br />
前 先 冷 卻 3 至 5 分 鐘 。<br />
冷 藏 薄 餅 0.1 公 斤 、 0.2 公 斤 、<br />
0.4 公 斤 碟<br />
( 原 本 溫 度 5°C)<br />
冷 凍 蔬 菜<br />
例 如 小 椰 菜 、 青<br />
豆 、 豌 豆 、 雜<br />
菜 、 西 蘭 花<br />
飲 品<br />
(120 毫 升 / 杯 )<br />
0.15 公 斤 、0.35 公 斤 、<br />
0.5 公 斤 碗<br />
( 原 本 溫 度 -18°C)<br />
1、2、3<br />
( 原 本 溫 度 5° C)<br />
把 薄 餅 放 到 碟 上 並 置 於 轉 盤 中 央 , 不 要 覆<br />
蓋 。<br />
把 蔬 菜 放 於 適 當 的 容 器 。 每 0.1 公 斤 蔬 菜<br />
加 1 湯 匙 清 水 , 覆 蓋 容 器 並 置 於 轉 盤 。 烹<br />
調 中 途 及 烹 調 後 均 需 攪 拌 。<br />
杯 把 杯 置 於 轉 盤 並 在 加 熱 後 攪 拌 。<br />
餸 菜 0.25 公 斤 、0.35 公 斤 、<br />
0.5 公 斤 碟<br />
( 原 本 溫 度 5° C)<br />
把 全 碟 晚 餐 ( 例 如 肉 類 、 蔬 菜 和 白 飯 / 薯 仔 )<br />
置 於 轉 盤 中 央 , 並 按 C-13 頁 上 的 指 示 操<br />
作 。 於 烹 調 後 攪 拌 可 助 溫 度 更 平 均 。<br />
注 意 :<br />
• 最 終 溫 度 會 視 乎 原 本 溫 度 而 有 所 不 同 。 烹 調 後 請 檢 查 食 物 是 否 滾 熱 。 如 有 需 要 您 可 手 動<br />
延 長 烹 調 時 間 。<br />
• 利 用 自 動 烹 調 的 效 果 會 受 不 同 因 素 影 響 , 例 如 食 物 的 形 狀 和 大 小 , 以 及 就 烹 調 效 果 的 個<br />
人 口 味 。 如 果 您 認 為 預 設 的 效 果 不 理 想 , 請 調 整 烹 調 時 間 以 配 合 您 的 要 求 。<br />
微 波 烹 調 爆 谷 功 能 重 要 資 訊 :<br />
1. 當 選 用 0.1 公 斤 裝 爆 谷 , 建 議 烹 調 前 先 把 包<br />
裝 袋 的 每 個 袋 角 以 三 角 形 向 下 摺 。<br />
請 參 照 右 圖 。<br />
2. 當 爆 谷 袋 膨 脹 後 不 能 正 常 轉 動 時 , 請 按 暫 停<br />
/ 取 消 鍵 一 次 並 打 開 爐 門 、 調 整 包 裝 袋 位 置<br />
以 確 保 平 均 烹 調 。<br />
C-14
微 波 爐 適 用 的 器 具<br />
以 微 波 爐 烹 調 / 解 凍 食 物 , 必 須 讓 微 波 能 量 穿 過 容 器 滲 透 到 食 物 中 , 所 以 挑 選<br />
適 當 的 器 皿 是 非 常 重 要 的 。<br />
圓 形 / 橢 圓 形 的 碟 盤 比 方 形 / 長 形 較 為 合 適 , 因 為 置 於 角 落 的 食 物 會 較 易 過 熟 。 以 下 一 系 列 均 為<br />
適 用 的 器 皿 。<br />
器 皿<br />
微 波<br />
安 全<br />
燒 烤<br />
備 註<br />
錫 紙<br />
錫 紙 盤<br />
✔ / ✘<br />
✔<br />
小 塊 的 錫 紙 可 用 以 遮 蓋 食 物 防 止 過 熱 。<br />
保 持 錫 紙 離 爐 身 最 少 2 厘 米 , 因 錫 紙<br />
可 能 產 生 電 弧 。<br />
並 不 建 議 使 用 錫 紙 盤 , 除 非 製 造 商 註 明<br />
用 法 , 並 請 小 心 遵 照 指 示 使 用 。<br />
中 文<br />
燒 烤 盤<br />
✔<br />
✘<br />
必 須 遵 照 製 造 商 指 示 。<br />
請 勿 超 過 註 明 的 加 熱 時 間 , 並 請 非 常<br />
小 心 , 因 為 此 類 容 器 可 能 會 非 常 燙 熱 。<br />
瓷 器 及 陶 瓷<br />
✔ / ✘<br />
✘<br />
瓷 器 , 陶 器 , 釉 面 陶 器 和 骨 瓷 器 通 常 比<br />
較 適 用 , 帶 有 金 屬 花 紋 除 外 。<br />
玻 璃 器 皿<br />
✔<br />
✔<br />
使 用 精 巧 的 玻 璃 器 皿 須 特 別 小 心 , 如 突<br />
然 加 熱 可 導 致 碎 裂 。<br />
金 屬<br />
✘<br />
✔<br />
不 建 議 使 用 金 屬 器 具 , 因 可 能 產 生 電 弧 ,<br />
並 導 致 起 火 。<br />
塑 膠 / 聚 苯 乙 烯 :<br />
( 例 如 快 餐 盒 )<br />
✔<br />
✘<br />
必 須 小 心 使 用 , 因 部 分 此 類 容 器 會 在 高<br />
溫 下 變 形 、 溶 化 或 脫 色 。<br />
保 鮮 紙<br />
✔<br />
✘<br />
不 可 接 觸 食 物 , 並 必 須 刺 孔 讓 蒸 汽 排 出 。<br />
冷 藏 / 燒 烤 袋<br />
✔<br />
✘<br />
必 須 刺 孔 讓 蒸 汽 排 出 , 並 請 確 保 它 們 適<br />
合 微 波 使 用 。<br />
紙 碟 、 紙 杯 、 廚 房 紙<br />
✔<br />
✘<br />
請 勿 使 用 塑 膠 或 金 屬 綁 帶 , 因 它 們 可<br />
能 在 金 屬 產 生 電 弧 時 溶 化 或 著 火 。<br />
吸 管 及 木 製 容 器<br />
✔<br />
✘<br />
只 可 於 加 暖 時 使 用 或 用 以 吸 收 水 份 。<br />
必 須 小 時 使 用 , 以 防 過 熱 著 火 。<br />
再 造 紙 及 報 紙<br />
✘<br />
✔<br />
使 用 這 些 物 料 時 必 須 時 刻 留 意 微 波 爐 ,<br />
以 防 過 熱 著 火 。<br />
可 能 含 有 金 屬 物 質 產 生 電 弧 並 著 火 。<br />
警 告 :<br />
當 以 塑 膠 或 紙 類 容 器 加 熱 食 物 , 請 密 切 注 意 微 波 爐 以 防 著 火 。<br />
C-15
清 洗 及 注 意 事 項<br />
小 心 : 請 勿 使 用 現 成 潔 爐 劑 、 蒸 汽 清 潔 機 、<br />
磨 砂 清 潔 劑 、 過 強 的 清 潔 劑 、 或 任 何 含 有<br />
氫 氧 化 鈉 或 磨 擦 表 層 的 潔 具 清 潔 微 波 爐<br />
的 任 何 部 分 。<br />
清 潔 前 , 請 確 保 爐 內 部 、 爐 門 、 爐 身 及 配 件<br />
均 完 全 冷 卻 。 定 期 清 潔 微 波 爐 , 並 清 除 任 何<br />
殘 餘 食 物 。 確 保 微 波 爐 清 潔 , 否 則 微 波 爐 表<br />
面 可 能 損 壞 , 並 會 縮 短 此 電 器 的 壽 命 , 甚 至<br />
導 致 危 險 情 況 。<br />
微 波 爐 外 部<br />
微 波 爐 的 外 部 可 輕 易 以 溫 和 的 梘 液 和 清 水 清 潔 。 請 確<br />
保 梘 液 以 濕 布 抺 淨 , 並 以 柔 軟 的 毛 巾 抺 乾 微 波 爐 外 部 。<br />
控 制 板<br />
清 潔 前 先 打 開 爐 門 , 以 暫 停 控 制 板 操 作 。 清<br />
潔 控 制 板 必 須 格 外 小 心 。 使 用 只 有 清 水 的 濕<br />
布 輕 輕 拭 抹 控 制 板 直 至 潔 淨 。 避 免 使 用 過 量<br />
清 水 。 切 勿 使 用 任 何 化 學 物 或 磨 砂 清 潔 劑 。<br />
微 波 爐 內 部<br />
1. 一 般 清 潔 , 只 需 微 波 爐 仍 微 暖 時 , 以 柔<br />
軟 的 濕 布 或 海 綿 抺 淨 濺 出 的 食 物 。<br />
如 濺 出 的 食 物 較 多 , 使 用 溫 和 的 梘 液 以 濕 布<br />
拭 抺 至 清 除 所 有 食 物 殘 渣 。 累 積 過 量 食 物 殘<br />
渣 或 導 致 過 熱 而 開 始 冒 煙 或 著 火 , 並 可 能 產<br />
生 電 弧 。 切 勿 拆 出 波 導 管 罩 。<br />
2 . 請 確 保 梘 液 或 清 水 沒 有 滲 進 爐 壁 的<br />
小 孔 , 以 免 導 致 微 波 爐 損 壞 。<br />
3. 切 勿 使 用 噴 霧 式 清 潔 劑 清 潔 微 波 爐 內 部 。<br />
4. 定 期 使 用 燒 烤 功 能 在 不 放 置 任 何 食 物 下<br />
加 熱 微 波 爐 20 分 鐘 (C-9 頁 )。 殘 餘 的 食<br />
物 或 濺 出 的 油 脂 可 導 致 冒 煙 或 異 味 。<br />
永 遠 保 持 波 導 管 罩 清 潔 。<br />
波 導 管 罩 是 以 容 易 損 壞 的 物 料 製 造 , 必 須 小<br />
心 清 潔 ( 請 遵 照 以 上 清 潔 指 引 )。<br />
注 意 : 過 份 浸 透 或 導 致 波 導 管 罩 分 解 。<br />
波 導 管 罩 屬 消 耗 部 件 , 如 缺 乏 定 期 清 潔 或<br />
需 更 換 。<br />
配 件<br />
配 件 包 括 轉 盤 、 轉 盤 旋 轉 架 和 烤 架 應<br />
以 溫 和 的 清 潔 液 清 洗 並 抺 乾 , 可 使 用<br />
洗 碗 碟 機 清 洗 。<br />
爐 門<br />
要 清 除 所 有 污 垢 , 請 定 期 以 柔 軟 的 濕 布 清<br />
潔 爐 門 兩 面 、 爐 門 封 邊 及 附 近 部 分 。 切 勿<br />
便 用 磨 砂 清 潔 劑 。<br />
注 意 : 請 勿 使 用 蒸 汽 清 潔 機 。<br />
清 潔 小 秘 訣 – 想 更 輕 易 清 潔 微 波 爐 :<br />
把 半 個 檸 檬 放 進 碗 內 , 加 入 300 毫 升 (1/2 品 脫 ) 清 水 , 並 以 100% 加 熱 10 至 12 分 鐘 。<br />
使 用 柔 軟 的 乾 布 抺 淨 微 波 爐 。<br />
C-16
問 題 解 決<br />
確 保 電 源 線 遠 離 受 熱 表 面 。 如 懷 疑 微 波 爐 並 非 運 作 正<br />
常 , 在 聯 絡 技 術 人 員 前 您 可 先 自 行 進 行 數 項 簡 單 檢 查<br />
按 以 下 步 驟 進 行 簡 單 檢 查 : 把 半 杯 水 置 於 轉 盤<br />
並 關 上 爐 門 。 使 用 100% 微 波 強 度 設 定 微 波 爐<br />
烹 調 1 分 鐘 。<br />
1. 烹 調 期 間 爐 內 照 明 燈 是 否 亮 起 ?<br />
2. 轉 盤 有 否 轉 動 ?<br />
3. 散 熱 風 扇 是 否 運 作 ?( 請 把 手 放 於 通 風 口 上<br />
檢 查 。)<br />
4. 在 1 分 鐘 後 有 否 聽 到 響 聲 ?<br />
5. 杯 中 的 水 是 否 熱 燙 ?<br />
6. 在 3 分 鐘 後 燒 烤 熱 管 有 否 變 紅 ?<br />
如 果 就 以 上 任 何 問 題 您 的 答 案 是 「 否 」, 請 先 檢 查 微 波<br />
爐 是 否 正 確 插 上 電 源 並 且 保 險 絲 正 常 運 作 。 如 果 兩 者 皆<br />
沒 有 問 題 , 請 查 看 以 下 問 題 解 決 列 表 。<br />
警 告 : 切 勿 自 行 調 校 、 修 理 或 改 裝 微 波<br />
爐 。 除 接 受 過 聲 寶 公 司 訓 練 之 合 格 服 務<br />
技 術 人 員 以 外 , 任 何 人 等 進 行 服 務 提 供 或<br />
維 修 均 屬 非 常 危 險 。 這 是 非 常 重 要 , 因<br />
為 過 程 可 能 涉 及 移 除 防 止 微 波 能 量 外 洩<br />
的 保 護 蓋 。<br />
• 爐 門 封 邊 可 在 微 波 爐 操 作 期 間 防 止 微<br />
波 外 洩 , 但 並 非 密 封 式 封 存 。 如 在 爐<br />
門 發 現 水 滴 、 光 線 或 微 暖 均 屬 正 常 現<br />
象 。 水 份 較 高 的 食 物 會 釋 放 蒸 汽 並 在<br />
爐 門 內 導 致 凝 聚 , 因 而 從 微 波 爐 滴 下<br />
水 點 。<br />
• 維 修 及 改 裝 : 當 微 波 爐 不 能 正 常 運<br />
作 , 請 勿 試 圖 進 行 操 作 。<br />
• 外 爐 身 及 照 明 燈 開 蓋 : 切 勿 拆 開 爐 外<br />
箱 。 這 將 非 常 危 險 , 因 為 會 觸 及 爐<br />
內 絕 對 不 能 觸 及 的 高 壓 部 分 , 嚴 重 者<br />
可 致 命 。<br />
您 的 微 波 爐 並 不 具 備 照 明 燈 開 蓋 設<br />
計 。 如 果 照 明 燈 損 壞 , 切 勿 試 圖 自<br />
行 更 換 , 而 應 聯 絡 聲 寶 維 修 中 心 。<br />
中 文<br />
問 題 解 決 列 表<br />
疑 問<br />
空 氣 圍 繞 爐 門 流<br />
動 。<br />
爐 內 有 水 份 凝 聚 , 並<br />
可 能 從 爐 門 滴 下 。<br />
烹 調 期 間 爐 內<br />
出 現 閃 光 或 電 弧<br />
答 案<br />
微 波 爐 在 操 作 時 , 空 氣 會 在 內 部 流 通 。 由 於 爐 門 並 非 密 封 式 設 計 , 所<br />
以 空 氣 或 會 從 爐 門 漏 出 。<br />
微 波 爐 內 部 溫 度 一 般 會 比 正 烹 調 的 食 物 較 低 , 所 以 在 烹 調 過 程 中 可 能 會 出 現 蒸 汽 ,<br />
並 在 較 冷 的 表 面 凝 聚 。 蒸 汽 的 份 量 視 乎 正 烹 調 的 食 物 水 份 含 量 而 定 。 個 別 食 物 如 薯<br />
仔 水 份 含 量 會 較 高 。 積 聚 在 爐 門 玻 璃 的 凝 聚 水 份 在 數 小 時 後 應 會 散 去 。<br />
在 烹 調 期 間 , 當 金 屬 物 體 離 爐 壁 太 近 , 將 可 能 出 現 電 弧 的 情 況 。 這<br />
或 會 刮 到 爐 壁 , 但 不 會 損 壞 微 波 爐 。<br />
薯 仔 產 生 電 弧 請 確 保 薯 仔 上 的 所 有 薯 眼 均 已 切 掉 , 並 且 在 薯 仔 上 刺 洞 。 把 薯 仔 直 接 置 於 轉 盤 或 耐 熱<br />
容 量 。<br />
顯 示 屏 亮 起 但 控 制 板 檢 查 爐 門 是 否 正 常 關 閉 。<br />
按 鍵 沒 有 反 應 。<br />
微 波 爐 烹 調 太 慢 。 確 定 選 用 正 確 微 波 強 度 。<br />
微 波 爐 發 出 噪 音 。 在 烹 調 / 解 凍 期 間 , 微 波 能 量 會 間 歇 脈 動 。<br />
外 爐 身 變 熱 。 觸 碰 外 爐 身 有 機 會 感 覺 燙 熱 , 請 勿 讓 兒 童 靠 近 。<br />
C-17
Important<br />
R-630 Z( K)<br />
/ R- 730Z(K)<br />
800 W / 900 W<br />
MICROWAVE OVEN WITH GRILL<br />
OPERATION MANUAL<br />
ENGLISH<br />
OPERATION MANUAL<br />
This operation manual contains important information which you should read carefully before using your microwave<br />
oven.<br />
IMPORTANT: There may be a serious risk to health if this operation manual is not followed or if the oven is modified<br />
so that it operates with the door open.
CONTENTS<br />
Operation manual<br />
CONTENTS ........................................................................................................................................................................................... 1<br />
SPECIFICATIONS ................................................................................................................................................................................ 1<br />
OVEN AND ACCESSORIES ............................................................................................................................................................... 2<br />
CONTROL PANEL ................................................................................................................................................................................ 3<br />
IMPORTANT SAFETY INSTRUCTIONS ...................................................................................................................................... 4-6<br />
INSTALLATION ..................................................................................................................................................................................... 6<br />
BEFORE OPERATION ......................................................................................................................................................................... 7<br />
SETTING THE CLOCK ......................................................................................................................................................................... 7<br />
MICROWAVE POWER LEVEL ........................................................................................................................................................... 7<br />
MANUAL OPERATION .......................................................................................................................................................................8<br />
MICROWAVE COOKING ....................................................................................................................................................................8<br />
GRILL COOKING/GRILL MIX COOKING ...................................................................................................................................... 9<br />
OTHER CONVENIENT FUNCTIONS .............................................................................................................................................10<br />
REHEATING ADVICE ........................................................................................................................................................................11<br />
DEFROSTING ADVICE .....................................................................................................................................................................12<br />
TIME DEFROST AND WEIGHT DEFROST OPERATION ..........................................................................................................13<br />
AUTO MENU OPERATION ..............................................................................................................................................................13<br />
AUTO MENU CHART .......................................................................................................................................................................14<br />
SUITABLE OVENWARE ....................................................................................................................................................................15<br />
CARE AND CLEANING ....................................................................................................................................................................16<br />
TROUBLESHOOTING .......................................................................................................................................................................17<br />
SPECIFICATIONS<br />
Model name: R-630z<br />
(K)<br />
R-730z(K)<br />
AC Line Voltage : 220V, 50 Hz single phase : 220V, 50 Hz single phase<br />
AC Power required: Microwave : 1270 W : 1450 W<br />
Output power: Microwave : 800 W : 900 W<br />
Grill : 1000 W : 1000 W<br />
Off Mode (Energy Save Mode) : less than 1.0 W : less than 1.0 W<br />
Microwave Frequency : 2450 MHz* : 2450 MHz*<br />
Outside Dimensions (W) x (H) x (D)** mm : 440 x 258 x 327 : 513x 306<br />
x 397<br />
Cavity Dimensions (W) x (H) x (D)*** mm : 306 x 205x 307 : 330 x 208 x 370<br />
Oven Capacity : 20 litres*** : 25 litres***<br />
Turntable : ø 255 mm : ø 315 mm<br />
Weight : approx. 11.4 kg : approx. 15.1 kg<br />
ENGLISH<br />
* This Product fulfils the requirement of the European standard EN55011.<br />
In conformity with this standard, this product is classified as group 2 class B equipment.<br />
Group 2 means that the equipment intentionally generates radio-frequency energy in the form of electromagnetic<br />
radiation for the heat treatment of food.<br />
Class B equipment means that the equipment is suitable to be used in domestic establishments.<br />
** Internal capacity is calculated by measuring maximum width, depth and height. Actual capacity for holding food is less.<br />
AS PART OF A POLICY OF CONTINUOUS IMPROVEMENT, WE RESERVE THE RIGHT TO ALTER DESIGN AND SPECIFICATIONS<br />
WITHOUT NOTICE.<br />
E-1<br />
TENTS
OVEN AND ACCESSORIES<br />
13<br />
15. Turntable<br />
(glass)<br />
1 2 3<br />
10 9 8 6 4 7<br />
Hub (inside)<br />
11<br />
17. Coupling 16. Turntable<br />
support<br />
5<br />
14<br />
12<br />
18. Rack<br />
OVEN<br />
1. Door<br />
2. Door hinges<br />
3. Oven lamp<br />
4. Waveguide cover (DO NOT REMOVE)<br />
5. Control panel<br />
6. Coupling<br />
7. Door latches<br />
8. Oven cavity<br />
9. Door seals and sealing surfaces<br />
10. Door safety latches<br />
11. Ventilation openings<br />
12. Outer cabinet<br />
13. Power supply cord<br />
14. Door opening button<br />
ACCESSORIES:<br />
Check to make sure the following accessories are<br />
provided:<br />
(15) Turntable (16) Turntable support (17) Coupling<br />
(18) Rack<br />
• Place the turntable support in the centre of the<br />
oven floor so that it can freely rotate around the<br />
coupling. Then place the turntable on to the<br />
turntable support so that it locates firmly into the<br />
coupling.<br />
• To avoid turntable damage, ensure dishes and<br />
containers are lifted clear of the turntable rim<br />
when removing them from the oven.<br />
For use of the rack, refer to the grilling sections on<br />
page E-9.<br />
Never touch the grill when it is hot.<br />
NOTE: When you order accessories, please mention<br />
two items: part name and model name to your<br />
dealer or SHARP authorised service agent.<br />
NOTES:<br />
• The waveguide cover is fragile. Care should be taken when cleaning inside the oven to ensure that it is not<br />
damaged.<br />
• After cooking fatty foods without a cover, always clean the cavity and especially the grill heating element<br />
thoroughly, these must be dry and free from grease. Built-up grease may overheat and begin to smoke or<br />
catch fire.<br />
• Always operate the oven with the turntable and turntable support fitted correctly. This promotes thorough,<br />
even cooking. A badly fitted turntable may rattle, may not rotate properly and could cause damage to the<br />
oven.<br />
• All food and containers of food are always placed on the turntable for cooking.<br />
• The turntable rotates clockwise or anti-clockwise. The rotary direction may change each time you start the<br />
oven. This does not affect cooking performance.<br />
WARNING: This symbol means that the surfaces are liable to get hot during use. The door, outer<br />
cabinet, oven cavity, accessories and dishes will become very hot during operation. To prevent burns,<br />
always use thick oven gloves.<br />
E-2
CONTROL PANEL<br />
1. DIGITAL DISPLAY<br />
2. WEIGHT DEFROST key<br />
3. TIME DEFROST key<br />
4. AUTO MENU keys<br />
爆 谷<br />
POPCORN<br />
Popcorn<br />
1<br />
焗 薯<br />
BAKED POTATO<br />
Baked Potato<br />
薄 餅<br />
PIZZA<br />
Pizza<br />
3<br />
時 間<br />
TIME<br />
自 動 解 凍<br />
AUTO DEFROST<br />
重 量<br />
WEIGHT<br />
2<br />
冷 凍 蔬 菜<br />
FROZEN VEGE<br />
飲 品<br />
BEVERAG<br />
Frozen Vegetables<br />
Beverage<br />
7<br />
6<br />
10<br />
12<br />
爆 谷 焗 薯 薄 餅<br />
POPCORN BAKED POTATO PIZZA<br />
自 動 食 譜<br />
AUTO MENU<br />
冷 凍 蔬 菜 飲 品 餸 菜<br />
FROZEN VEGE BEVERAGE DISHES<br />
分<br />
分<br />
10 MIN 1 MIN 10<br />
微 波 強 度<br />
POWER LEVEL<br />
計 時 器<br />
TIMER<br />
暫 停 / 取 消<br />
STOP/CLEAR<br />
燒 烤<br />
GRILL<br />
重 量 WEIGHT<br />
秒<br />
10 SEC<br />
混 合 烹 調<br />
GRILL MIX<br />
時 鐘<br />
CLOCK<br />
即 時 烹 調 / 開 始<br />
INSTANT COOK/<br />
START<br />
4<br />
5<br />
8<br />
9<br />
11<br />
13<br />
餸 菜<br />
DISHES<br />
Dishes<br />
5. TIME keys<br />
Press to enter time,and keep pressing to<br />
continuously increase time.<br />
6. POWER LEVEL key:<br />
Press to select microwave power level.<br />
7. GRILL key<br />
8. GRILL MIX key<br />
9. WEIGHT keys (up and down)<br />
Press to increase/decrease weight,and<br />
keep pressing to continuously increase/decrease<br />
weight.<br />
10. TIMER key<br />
Press to use as a minute timer, or to<br />
programme standing time.<br />
11. SET CLOCK key<br />
12. INSTANT COOK/START<br />
13. STOP/CLEAR key<br />
ENGLISH<br />
E-3
IMPORTANT SAFETY INSTRUCTIONS<br />
IMPORTANT SAFETY INSTRUCTIONS: READ CAREFULLY AND KEEP FOR FUTURE REFERENCE<br />
To avoid the risk of fire.<br />
The microwave oven should not be left unattended<br />
during operation. Power levels that are too high,<br />
or cooking times that are too long, may overheat<br />
foods resulting in a fire.<br />
• This oven is designed to be used on a countertop<br />
only. It is not designed to be built into a kitchen unit.<br />
• Do not place the oven in a cabinet.<br />
The electrical outlet must be readily accessible so that<br />
the unit can be unplugged easily in an emergency.<br />
• The AC power supply must be 220V, 50Hz, with<br />
a minimum 10A distribution line fuse, or a minimum<br />
10A distribution circuit breaker.<br />
• A separate circuit serving only this appliance should<br />
be provided.<br />
• Do not place the oven in areas where heat is generated.<br />
• For example, close to a conventional oven.<br />
• Do not install the oven in an area of high humidity or<br />
where moisture may collect.<br />
• Do not store or use the oven outdoors.<br />
If smoke is observed, switch off or unplug the<br />
oven and keep the door closed in order to stifle<br />
any flames.<br />
Use only microwave-safe containers and utensils.<br />
See Page E15. Utensils should be checked to<br />
ensure that they are suitable for use in microwave<br />
ovens.<br />
When heating food in plastic or paper containers, keep<br />
an eye on the oven for signs of smoke or burning.<br />
Clean the waveguide cover, the oven cavity, the<br />
turntable and turntable support after use. These<br />
must be dry and free from grease. Built-up grease<br />
may overheat and begin to smoke or catch fire.<br />
• Do not place flammable materials near the oven or<br />
ventilation openings.<br />
• Do not block the ventilation openings.<br />
• Remove all metallic seals, wire twists, etc., from food<br />
and food packages. Arcing on metallic surfaces may<br />
cause a fire.<br />
• Do not use the microwave oven to heat oil for deep<br />
frying. The temperature cannot be controlled and the<br />
oil may catch fire.<br />
• To make popcorn, use only special microwave popcorn<br />
makers.<br />
• Do not store food or any other items inside the oven.<br />
• Check the settings after you start the oven to ensure<br />
the oven is operating as desired.<br />
• To avoid overheating and fire, special care must be<br />
taken when cooking or reheating foods with a high<br />
sugar or fat content, for example, Sausage rolls, Pies<br />
or Christmas pudding.<br />
To avoid the risk of injury<br />
WARNING:<br />
Do not operate the oven if it is damaged or<br />
malfunctioning. Check the following before use:<br />
a) The door; make sure the door closes properly<br />
and ensure it is not misaligned or warped.<br />
b) The hinges and safety door latches; check to<br />
make sure they are not broken or loosened.<br />
c) The door seals and sealing surfaces; ensure that<br />
they have not been damaged.<br />
d) Inside the oven cavity or on the door; make<br />
sure there are no dents.<br />
e) The power supply cord and plug; ensure that<br />
they are not damaged.<br />
If the door or door seals are damaged, the oven<br />
must not be operated until it has been repaired by a<br />
qualified service technician trained by SHARP.<br />
Never adjust , repair or modify the oven yourself.<br />
It is hazardous for anyone other than a qualified<br />
service technician trained by SHARP to carry<br />
out any service or repair operation which involves<br />
the removal of a cover which gives protection<br />
against exposure to microwave energy.<br />
• Do not operate the oven with the door open or alter<br />
the door safety latches in any way.<br />
• Do not operate the oven if there is an object between<br />
the door seals and sealing surfaces.<br />
Do not allow grease or dirt to build up on the<br />
door seals and adjacent parts. Clean the oven at<br />
regular intervals and remove any food deposits.<br />
Follow the instructions for “Care and Cleaning”<br />
on page E16. Failure to maintain the oven in a<br />
clean condition could lead to a deterioration of<br />
the surface that could adversely affect the life of<br />
the appliance and possibly result in a hazardous<br />
situation.<br />
• Individuals with PACEMAKERS should check with<br />
their doctor or the manufacturer of the pacemaker for<br />
precautions regarding microwave ovens.<br />
To avoid the risk of electric shock<br />
• Do not you remove the outer cabinet.<br />
• Never spill or insert any objects into the door lock<br />
openings or ventilation openings. In the event of a<br />
spill, turn off and unplug the oven immediately, and<br />
call an authorised SHARP service agent.<br />
• Do not immerse the power supply cord or plug in water<br />
or any other liquid.<br />
• Do not let the power supply cord hang over the edge<br />
of a table or work surface.<br />
E-4
IMPORTANT SAFETY INSTRUCTIONS<br />
• Keep the power supply cord away from heated • Always open containers, popcorn makers, oven<br />
surfaces, including the rear of the oven.<br />
cooking bags, etc., away from the face and hands to<br />
• Do not attempt to replace the oven lamp yourself or avoid steam burns and eruption of boiling.<br />
allow anyone who is not an electrician authorised by<br />
To avoid burns, always test food temperature<br />
SHARP to do so. If the oven lamp fails, please consult<br />
and stir before serving and pay special attention<br />
your dealer or an authorised SHARP service agent.<br />
to the temperature of food and drink given to<br />
• If the power supply cord of this appliance is damaged,<br />
babies, children or the elderly. Accessible parts<br />
it must be replaced with a special cord.<br />
•<br />
may become hot during use. Young children<br />
The exchange must be made by an authorised SHARP<br />
should be kept away.<br />
service agent.<br />
To avoid the risk of explosion and sudden<br />
• The temperature of the container is not always a true<br />
boiling:<br />
indication of the temperature of the food or drink;<br />
always check the food or drink temperature.<br />
WARNING: Liquids and other foods must not be • Always stand back from the oven door when opening<br />
heated in sealed containers to avoid the risk of it to avoid burns from escaping steam and heat.<br />
explosion.<br />
• Slice stuffed baked foods after heating to release<br />
Microwave heating of beverages can result in steam and avoid burns.<br />
delayed eruptive boiling, therefore care must be<br />
• This appliance is not intended to be operated by<br />
taken when handling the container.<br />
means of an external timer or separate remote<br />
• Never use sealed containers. Remove seals and lids control system.<br />
before use. Sealed containers can explode due to a build To avoid misuse by children<br />
up of pressure even after the oven has been turned off.<br />
•<br />
WARNING: Only allow children to use the oven<br />
Pay attention when microwaving liquids. Use a<br />
without supervision when adequate instructions<br />
wide mouthed container to allow bubbles to escape.<br />
have been given so that the child is able to use the<br />
Never heat liquids in narrow necked containers<br />
such as baby bottles, as this may result in of improper use. When the appliance is operated<br />
oven in a safe way and understands the hazards<br />
eruption of the contents from the container in the GRILL, GRILL MIX and AUTO MENU<br />
when heated and cause burns.<br />
operation, children should only use the oven<br />
•<br />
under adult supervision due to the temperature<br />
To prevent sudden eruption of boiling liquid and<br />
generated.<br />
possible scalding:<br />
This appliance is not intended for use by persons<br />
1. Do not use excessive cooking time.<br />
(including children) with reduced physical,<br />
2. Stir liquid prior to heating/reheating.<br />
sensory or mental capabilities, or lack of<br />
3. Insert a glass rod or similar utensil (not metal) into<br />
experience and knowledge, unless they have<br />
the liquid whilst reheating.<br />
been given supervision or instruction concerning<br />
4. Let the liquid stand for at least 20 seconds in the oven<br />
use of the appliance by a person responsible for<br />
at the end of cooking time to prevent delayed eruptive<br />
their safety.<br />
boiling.<br />
Children should be supervised to ensure that<br />
Do not cook eggs in their shells, and whole hard they do not play with the appliance.<br />
boiled eggs should not be heated in microwave • Do not lean or swing on the oven door. Do not play<br />
ovens since they may explode even after<br />
with the oven or use it as a toy.<br />
microwave cooking has ended. To cook or reheat • Children should be taught all important safety<br />
eggs which have not been scrambled or mixed,<br />
instructions: use of pot holders, careful removal of<br />
pierce the yolks and the whites, or the eggs may<br />
food coverings; paying special attention to packaging<br />
explode. Shell and slice hard boiled eggs before<br />
(e.g. self-heating materials) designed to make food<br />
reheating them in the microwave oven.<br />
crisp, as they may be extra hot.<br />
• Pierce the skin of foods such as potatoes, sausages Other warnings<br />
and fruit before cooking, or they may explode. • Never modify the oven in any way.<br />
To avoid the risk of burns<br />
• Do not move the oven while it is in operation.<br />
WARNING: The contents of feeding bottles and • This oven is for home food preparation only and may<br />
baby food jars must be stirred or shaken and the only be used for cooking food. It is not suitable for<br />
temperature checked before consumption, in commercial or laboratory use.<br />
order to avoid burns.<br />
• Use pot holders or oven gloves when removing food<br />
from the oven to prevent burns.<br />
E-5<br />
ENGLISH
IMPORTANT SAFETY INSTRUCTIONS<br />
To ensure trouble-free use of your oven and<br />
avoid damage.<br />
• Never operate the oven when it is empty. When using a<br />
browning dish or self-heating material, always place a<br />
heat-resistant insulator such as a porcelain plate under<br />
it to prevent damage to the turntable and turntable<br />
support due to heat stress. The preheating time specified<br />
in the dishes instructions must not be exceeded.<br />
Do not use metal utensils, which reflect microwaves<br />
and may cause electrical arcing. Do not put cans in<br />
the oven. Use only the turntable and the turntable<br />
support designed for this oven. Do not operate the<br />
oven without the turntable.<br />
• To prevent the turntable from breaking:<br />
(a) Before cleaning the turntable with water, leave<br />
the turntable to cool.<br />
(b) Do not put hot foods or hot utensils on a cold<br />
turntable.<br />
(c) Do not put cold foods or cold utensils on a hot<br />
turntable.<br />
• Do not place anything on the outer cabinet during<br />
operation.<br />
• Do not use plastic containers for microwaving if the oven<br />
is still hot from using the GRILL and GRILL MIX<br />
operation because they may melt.<br />
• Plastic containers must not be used during above modes<br />
unless they are advised to be suitable by the container<br />
manufacturer .<br />
NOTE:<br />
• If you are unsure how to connect your oven, please<br />
consult an authorised, qualified electrician.<br />
• Neither the manufacturer nor the dealer can accept<br />
any liability for damage to the oven or personal injury<br />
resulting from failure to observe the correct electrical<br />
connection procedure.<br />
• Water vapour or drops may occasionally form on<br />
the oven walls or around the door seals and sealing<br />
surfaces. This is a normal occurrence and is not an<br />
indication of microwave leakage or a malfunction.<br />
This symbol means that the surfaces are<br />
liable to get hot during use.<br />
INSTALLATION<br />
1. Remove all packing materials from the inside of<br />
the oven cavity.<br />
2. Check the oven carefully for any signs of damage.<br />
3. Place oven on a secure, level surface, strong<br />
enough to take the oven weight, plus the heaviest<br />
item likely to be cooked in the oven. Do not place<br />
the oven in a cabinet.<br />
4. Select a level surface that provides enough open<br />
space for the intake and/or outlet vents.<br />
The rear surface of appliance shall be placed against<br />
a wall.<br />
• A minimum space of 20 cm is required between<br />
the oven and any adjacent walls.<br />
• Leave a minimum space of 30 cm above the oven.<br />
• Do not remove the feet from the bottom of the<br />
oven.<br />
• Blocking the intake and/or outlet openings can<br />
damage the oven.<br />
• Place the oven as far away from radios and TV's as<br />
possible. Operation of the microwave oven may<br />
cause interference to your radio or TV reception.<br />
20 cm<br />
30 cm<br />
20 cm<br />
5. The oven door may become hot during cooking.<br />
Place or mount the oven so that the bottom of<br />
the oven is 85 cm or more above the floor. Keep<br />
children away from the door to prevent them<br />
burning themselves.<br />
6. Securely connect the plug of the oven to a standard<br />
earthed (grounded) household electrical outlet.<br />
WARNING: Do not place the oven where heat, moisture<br />
or high humidity are generated, (for example, near<br />
or above a conventional oven) or near combustible<br />
materials (for example, soft furnishings).<br />
Do not block or obstruct air vent openings.<br />
Do not place objects on top of the oven.<br />
E-6
BEFORE OPERATION<br />
Plug in the oven. The oven display will display: “0:00”, an audible signal will sound once.<br />
This model has a clock function and the oven uses less than 1.0 W in stand by mode. To set the clock, see below.<br />
SETTING THE CLOCK<br />
Your oven has a 24 hour clock mode.<br />
1. Press the CLOCK key<br />
2. Press the time keys and enter the current time. Enter the hours by pressing the 10 min. key and enter the<br />
minutes by pressing the 1 min. and 10 sec. keys.<br />
3. Press the CLOCK key 時 鐘 to finish clock setting.<br />
NOTES:<br />
• If the clock is set, when cooking is complete, the display will show the correct time of day. If the clock has not<br />
been set, the display will only show “0:00” when cooking is complete.<br />
• To check the time of day during a cooking process, press CLOCK key and the LED will display the time of<br />
day for 2-3 seconds. This does not affect the cooking process.<br />
• In the process of clock setting, if the STOP/CLEAR key is pressed or if there is no operation within 1 minute,<br />
the oven will go back to the former setting.<br />
• If the electrical power supply to your microwave oven is interrupted, the display will intermittently show “0:00”<br />
after the power is reinstated. If this occurs during cooking, the programme will be erased. The time of day<br />
will also be erased.<br />
Power Level<br />
HIGH<br />
MEDIUM HIGH<br />
MEDIUM<br />
MEDIUM LOW<br />
(DEFROST)<br />
LOW<br />
時 鐘<br />
CLOCK<br />
CLOCK<br />
once and “00:00” will flash.<br />
Press the POWER LEVEL<br />
微 波 強 度<br />
key<br />
POWER LEVEL<br />
x1<br />
x2<br />
x3<br />
x4<br />
x5<br />
x6<br />
x7<br />
x8<br />
x9<br />
x10<br />
x11<br />
Display<br />
(Percentage)<br />
100P<br />
90P<br />
80P<br />
70P<br />
60P<br />
50P<br />
40P<br />
30P<br />
20P<br />
10P<br />
Generally the following recommendations apply:<br />
100P/ 90P - (HIGH) used for fast cooking or reheating e.g. for<br />
casseroles, hot beverages, vegetables etc.<br />
80P/ 70P - (MEDIUM HIGH) used for longer cooking of dense<br />
foods such as roast joints, meat loaf and plated meals, also for<br />
sensitive dishes such as sponge cakes. At this reduced setting,<br />
the food will be cooked evenly without over cooking at the sides.<br />
60P/ 50P - (MEDIUM) for dense foods which require a long<br />
cooking time when cooked conventionally, e.g. beef casserole,<br />
0P<br />
MICROWAVE POWER LEVEL<br />
• Your oven has 11 power levels, as shown.<br />
• To change the power level for cooking, press<br />
the POWER LEVEL key until the display<br />
indicates the desired level. Press the time<br />
keys and enter the desired cooking time<br />
Press the START key to start the oven.<br />
• To check the power level during cooking,<br />
press the POWER LEVEL key. The oven<br />
continues to count down although the display<br />
will show the power level.<br />
• If “0P” is selected, the oven will work with the fan<br />
but no power. You can use this level to remove<br />
odor.<br />
it is advisable to use this power setting to ensure the meat will<br />
be tender.<br />
40P/ 30P - (MEDIUM LOW) to defrost, select this power<br />
setting, to ensure that the dish defrosts evenly. This setting is<br />
also ideal for simmering rice, pasta, dumplings and cooking<br />
egg custard.<br />
20P/ 10P - (LOW) For gentle defrosting, e.g. cream gateaux or<br />
pastry.<br />
E-7<br />
ENGLISH
MANUAL OPERATION<br />
Opening the door:<br />
To open the oven door, push the door opening button.<br />
Starting the oven:<br />
Prepare and place food in a suitable container onto the turntable or place directly onto the turntable.<br />
Close the door and press the INSTANT COOK/START key after selecting the desired cooking mode.<br />
Once the cooking programme has been set and the INSTANT COOK/START key is not pressed<br />
in 1 minute, the setting will be cancelled.<br />
The INSTANT COOK/START key must be pressed to continue cooking after the door is opened<br />
during cooking. The audible signal sounds once by efficient press, inefficient press will be no<br />
response.<br />
Use the STOP/CLEAR key to:<br />
1. Erase a mistake during programming.<br />
2. Stop the oven temporarily during cooking.<br />
3. Cancel a programme during cooking, press the STOP/CLEAR key twice.<br />
4. To set and to cancel the child lock (refer to page E-10).<br />
即 時 烹 調 / 開 始<br />
INSTANT COOK/<br />
START<br />
暫 停 / 取 消<br />
STOP/CLEAR<br />
MICROWAVE COOKING<br />
Your oven can be programmed for up 99 minutes 50 seconds (99.50).<br />
MANUAL COOKING/ MANUAL DEFROSTING<br />
• Enter the cooking time and use microwave power levels 100P to 10P to cook or defrost (refer to page E-7).<br />
• Stir or turn the food, where possible, 2 - 3 times during cooking.<br />
• After cooking, cover the food and leave to stand, where recommended.<br />
• After defrosting, cover the food in foil and leave to stand until thoroughly defrosted.<br />
Example:<br />
To cook 2 minutes and 30 seconds on 70% microwave power.<br />
1. Input the power level by pressing<br />
the POWER LEVEL key 4 times<br />
for 70 P.<br />
微 波 強 度<br />
x4<br />
POWER LEVEL<br />
2. Enter the cooking time by<br />
pressing the 1 min. key<br />
twice and then the 10 sec.<br />
key 3 times.<br />
3. Press the START/AUTO MINUTE key<br />
to start the timer.<br />
(The display will count down through<br />
the set cooking/defrosting time.)<br />
NOTE:<br />
• When the oven starts, the oven lamp will light and the turntable will rotate clockwise or anticlockwise.<br />
• If the door is opened during cooking/defrosting to stir or to turn over food, the cooking time on the display<br />
stops automatically. The cooking/ defrosting time starts to count down again when the door is closed and<br />
the INSTANT COOK/START key is pressed.<br />
• When cooking/defrosting is complete, open the door or press STOP/CLEAR key and the time of day will reappear<br />
on the display, if the clock has been set.<br />
• If you wish to know the power level during cooking, press the POWER LEVEL key. As long as your finger is<br />
touching the POWER LEVEL key, the power level will be displayed.<br />
IMPORTANT:<br />
• Close the door after cooking / defrosting. Please note that the light will remain on when the door is open,<br />
this is for safety reasons to remind you to close the door.<br />
• If you cook food for more than the standard time (see chart below) using the same cooking mode, the oven’s safety<br />
mechanisms will automatically activate. The microwave power level will be reduced or the grill heating element<br />
will turn on and off.<br />
Cooking Mode<br />
Standard time<br />
Microwave 100P<br />
30 minutes<br />
Grill cooking<br />
Intermittent operation,<br />
temperature-controlled for R-630Z<br />
99 mins 50 sec for R-730Z<br />
Grill mix cooking 99 mins 50 sec<br />
E-8
GRILL COOKING/GRILL MIX COOKING<br />
1. GRILL ONLY COOKING<br />
The grill at the top of the oven cavity has one power setting only. The grill is assisted by the turntable which<br />
rotates simultaneously to ensure even browning. Use the rack for grilling small items of food such as bacon,<br />
gammon and teacakes. Food can be placed either directly onto the rack, or into a flan dish/heat-resistant plate<br />
on the rack.<br />
Example:<br />
To grill for 20 minutes, using GRILL key.<br />
1. Press GRILL key once. 2. Enter the required heating time 3. Press the INSTANT COOK/START key<br />
by pressing the 10 min. key<br />
x1<br />
twice.<br />
燒 烤<br />
GRILL<br />
to start the grilling.<br />
(The display will count down through<br />
the set grilling time.)<br />
G 20:00 20:00<br />
2. GRILL MIX COOKING<br />
GRILL MIX combines microwave power with the grill. GRILL MIX means to cook by Microwave power<br />
and Grill power alternately.<br />
The combination of microwave power with the grill reduces cooking time and provides a crisp, brown finish.<br />
There are 2 choices for the combination:<br />
COMBINATION 1 (Display: C-1)<br />
55% time for microwave power, 45% time for grill cooking. Use for fish and au gratin.<br />
COMBINATION 2 (Display: C-2)<br />
36% time for microwave cooking, 64% time for grill cooking. Use for pudding omelettes and poultry.<br />
Example:<br />
To cook for 15 minutes, using<br />
1. Press GRILL MIX key<br />
once.<br />
混 合 烹 調<br />
GRILL MIX<br />
x1<br />
GRILL MIX with 55% time microwave power and 45% grill power (C-1).<br />
2. Enter the required heating time by<br />
pressing the 10 min. key once and<br />
the 1 min. key 5 times.<br />
3. Press the INSTANT COOK/START<br />
key to start the cooking.<br />
(The display will count down<br />
through the set cooking time.)<br />
C-1 15:00 15:00<br />
NOTES for GRILL and GRILL MIX COOKING:<br />
• It is not necessary to preheat the grill.<br />
• When browning foods in a deep container, place on the turntable.<br />
• You may detect smoke or a burning smell when using the grill for the first time. This is normal and not a sign<br />
that the oven is out of order. To avoid this problem, when first using the oven, heat the oven without food for 20<br />
minutes on grill.<br />
IMPORTANT: During operation, to allow smoke or smells to disperse open a window or switch the kitchen<br />
ventilation on.<br />
WARNING:<br />
The door, outer cabinet, oven cavity and accessories will become very hot during operation. To<br />
prevent burns, always use thick oven gloves.<br />
ENGLISH<br />
E-9
OTHER CONVENIENT FUNCTIONS<br />
1. SEQUENCE COOKING<br />
This function allows you to cook using up to 2 different stages which can include manual cooking time and<br />
mode and /or time defrost as well as weight defrost function. Once programmed there is no need to interfere<br />
with the cooking operation as the oven will automatically move onto the next stage. The audible signal will<br />
sound once after the first stage. If one stage is defrosting, it should be in the first stage.<br />
Note: Auto menu cannot be set as one of the multiple sequences.<br />
Example: If you want to defrost the food for 5 minutes, then to cook with 80P microwave power for 7<br />
minutes. The steps are as follows:<br />
1. Press the AUTO DEFROST-TIME key once, in the LED display will appear dEF2.<br />
2. Enter the cooking time by pressing the 1 min. key 5 times.<br />
3. Input the power level (80P) by pressing the POWER LEVEL key 3 times.<br />
4. Enter the cooking time by pressing the 1 min. key 7 times.<br />
5. Press the INSTANT COOK/START key once to start cooking.<br />
2. INSTANT COOK/START<br />
The INSTANT COOK/START key allows you to operate the two following functions:<br />
a. Direct start<br />
You can directly start cooking on 100P microwave power level for 1 minute by pressing the INSTANT COOK/START<br />
key.<br />
b. Extend the cooking time<br />
You can extend the cooking time during manual cooking, time defrost and auto menu operation in multiples<br />
of 1 minute if the INSTANT COOK/START key is pressed while the oven is in operation. During the weight<br />
defrost, the cooking time cannot be increased by pressing INSTANT COOK/START key.<br />
NOTE: The cooking time may be extended to a maximum of 99 minutes, 50 seconds.<br />
3. TIMER FUNCTION :<br />
You can use the timer for timing where microwave cooking is not involved for example to time boiled<br />
eggs cooked on conventional hob or to monitor the standing time for cooked/defrosted food.<br />
Example:<br />
To set the timer for 5 minutes.<br />
1. Press the<br />
TIMER key once.<br />
計 時 器<br />
TIMER<br />
2. Enter the desired time<br />
by pressing the 1 min.<br />
key 5 times.<br />
3. Press the INSTANT/<br />
COOK/START key<br />
to start the timer.<br />
Check the display.<br />
(The display will count down<br />
through the set cooking/<br />
defrosting time.)<br />
When the timer time arrives, the audible signal will sound 5 times and the LED will display the time of day.<br />
You can enter any time up to 99 minutes, 50 seconds. To cancel the TIMER whilst counting down,<br />
simply press the STOP/CLEAR key.<br />
NOTE: The TIMER function cannot be used whilst cooking.<br />
4. CHILD LOCK:<br />
Use to prevent unsupervised operation of the oven by children.<br />
a. To set the CHILD LOCK:<br />
Press and hold the STOP/CLEAR key for 3 seconds until a long a beep sounds. The display will show:<br />
b. To cancel the CHILD LOCK:<br />
Press and hold the STOP/CLEAR key for 3 seconds until a long beep sounds.<br />
E-10
REHEATING ADVICE<br />
For the reheating of foods, follow the advice and guidelines below to ensure food is thoroughly reheated before<br />
serving.<br />
Plated meals<br />
Remove any poultry or meat portions, reheat these separately,<br />
see below.<br />
Place smaller items of food to the centre of the plate, larger and<br />
thicker foods to the edge. Cover with vented microwave cling film<br />
and reheat on 50%, stir/rearrange halfway through reheating.<br />
NOTE: Ensure the food is thoroughly reheated before serving.<br />
Sliced meat Cover with vented microwave cling film and reheat on 50%.<br />
Rearrange at least once to ensure even reheating.<br />
NOTE: Ensure the meat is thoroughly reheated before serving.<br />
Poultry portions<br />
Casseroles<br />
Place thickest parts of the portions to the outside of the dish, cover<br />
with vented microwave cling film and reheat on 70%.<br />
Turn over halfway through reheating.<br />
NOTE: Ensure the poultry is thoroughly reheated before serving.<br />
Cover with vented microwave cling film or a suitable lid and reheat<br />
on 50%.<br />
Stir frequently to ensure even reheating.<br />
NOTE: Ensure the food is thoroughly reheated before serving.<br />
To achieve the best results when reheating, select a suitable microwave power level appropriate to the type of<br />
food. e.g. A bowl of vegetables can be reheated using 100%, while a lasagne which contains ingredients that<br />
cannot be stirred, should be reheated using 50%.<br />
NOTES:<br />
• Remove food from foil or metal containers before reheating.<br />
• Reheating times will be affected by the shape, depth, quantity and temperature of food together with the<br />
size, shape and material of the container.<br />
WARNING:<br />
Never heat liquids in narrow-necked containers, as this could result in the contents erupting from<br />
the container and may cause burns.<br />
• To avoid overheating and fire, special care must be taken when reheating foods with a high sugar or fat content,<br />
e.g. mince pies or Christmas pudding.<br />
• Never heat oil or fat for deep frying as this may lead to overheating and fire.<br />
• Canned potatoes should not be heated in the microwave oven, follow the manufacturer's instructions on the<br />
can.<br />
WARNING:<br />
The contents of feeding bottles and baby food jars are to be stirred or shaken and the temperature<br />
is to be checked before consumption to avoid burns.<br />
ENGLISH<br />
E-11
DEFROSTING ADVICE<br />
Defrosting food using your microwave oven is the quickest method of all.<br />
It is a simple proccess but the following instructions are essential to ensure the food is thoroughly defrosted.<br />
Rearrange<br />
Separate<br />
Shield<br />
Stand<br />
Turn over<br />
Foods that are placed towards the outside of the dish will defrost quicker than foods<br />
in the centre. It is therefore essential that the food is rearranged up to 4 times during<br />
defrosting.<br />
Move closely packed pieces from the outside to the centre and rearrange over-lapping<br />
areas.<br />
This will ensure that all parts of the food defrosts evenly.<br />
Foods may be stuck together when removed from the freezer. It is important to separate<br />
foods as soon as possible during defrosting, e.g. bacon rashers, chicken fillets.<br />
Some areas of food being defrosted may become warm. To prevent them becoming<br />
warmer and starting to cook, these areas can be shielded with small pieces of foil, which<br />
reflect microwaves, e.g. legs and wings on a chicken.<br />
Standing time is necessary to ensure food is thoroughly defrosted. Defrosting is not<br />
complete once the food is removed from the microwave oven. Food must stand, covered,<br />
for a length of time to ensure the centre has completly defrosted.<br />
It is essential that all foods are turned over at least 3 - 4 times during defrosting. This is<br />
important to ensure thorough defrosting.<br />
NOTES:<br />
• Remove all packaging and wrapping before defrosting.<br />
• To defrost food, use microwave power levels 30% or 10%.<br />
E-12
TIME DEFROST AND WEIGHT DEFROST OPERATION<br />
1. TIME DEFROST<br />
This function quickly defrosts food while enabling you to choose a suitable defrost period, depending on the<br />
food type. Follow the example below for details on how to operate this function. The time range is 0:10 – 99:50.<br />
Example: To defrost the food for 10 minutes.<br />
1. Select the menu required by pressing the<br />
TIME DEFROST key once.<br />
時 間<br />
TIME<br />
x1,<br />
2. Enter the defrosting time by<br />
pressing the 10 min. key once.<br />
3. Press the INSTANT<br />
COOK/START key to start<br />
defrosting.<br />
the display will show: dEF2<br />
Notes for Time Defrost:<br />
• After cooking the audible signal will sound five times and the LED will display the time of day, if the clock has<br />
been set. If the clock has not been set, the display will only show “0:00” when cooking is complete.<br />
• The preset microwave power level is 30P and can not be changed.<br />
2. WEIGHT DEFROST<br />
The microwave oven is pre-programmed with a time and power level so that the following food is defrosted<br />
easily: Pork, beef and chicken. The weight range for this food is from 0.1kg – 2kg in 0.1kg steps.<br />
Follow the example below for details on how to operate these functions.<br />
Example : To defrost a meat joint weighing 1.2kg using WEIGHT DEFROST.<br />
Place the meat in a flan dish or microwave oven defrost rack on the turntable.<br />
1. Select the menu required by pressing<br />
the WEIGHT DEFROST key once.<br />
重 量<br />
x1,<br />
WEIGHT<br />
the display will show: dEF1<br />
2. Enter the weight by pressing the<br />
WEIGHT keys until the desired weight is<br />
displayed<br />
重 量 WEIGHT<br />
, display: 1. 2<br />
3. Press the INSTANT<br />
COOK/START key to<br />
start defrosting.<br />
(The display will<br />
count down through<br />
defrosting time)<br />
Frozen foods are defrosted from -18°C.<br />
NOTES FOR WEIGHT DEFROST:<br />
• Before freezing foods, ensure food is fresh and of good quality.<br />
• Food weight should be rounded up to the nearest 0.1kg, for example, 0.65kg to 0.7kg.<br />
• If necessary, shield small areas of meat or poultry with flat pieces of aluminium foil. This will prevent areas<br />
from becoming warm during defrosting. Ensure the foil does not touch the oven walls.<br />
AUTO MENU OPERATION<br />
The AUTO MENU keys automatically work out the correct cooking mode and cooking of the foods (details on<br />
pageE-3 and E-14). Follow the example below for details on how to operate this function.<br />
Example: To cook two jacket potatoes (460g) by using the AUTO MENU function.<br />
1. Select the required menu by pressing 2. Press WEIGHT UP/DOWN keys or<br />
the Baked Potato key once.<br />
continue to press the Baked Potato<br />
焗 薯<br />
key to choose the required number of<br />
x1,<br />
BAKED POTATO<br />
potatoes (up to 3).<br />
重 量 WEIGHT<br />
the display will show: 1<br />
x1, display: 2<br />
3. Press the INSTANT<br />
COOK/START key<br />
to start cooking.<br />
(The display will count<br />
down through cooking<br />
time)<br />
NOTES:<br />
• The weight or quantity of the food can be input by pressing the WEIGHT UP/DOWN keys until the desired<br />
weight/quantity is displayed. Enter the weight of the food only. Do not include the weight of the container.<br />
• For food weighting more or less than the weights/quantities given in the AUTO MENU chart on page E-14<br />
cook by manual operation.<br />
ENGLISH<br />
E-13
AUTO MENU CHART<br />
Auto Menu WEIGHT/ PORTION / UTENSILS Procedure<br />
Popcorn<br />
0.05kg, 0.1kg<br />
Place the popcorn bag directly on the turntable<br />
(Please see the note below: ‘Important Information<br />
About Microwave Popcorn Feature’)<br />
Jacket Potato 1, 2, 3 potatoes (pieces)<br />
1 potato = approx. 0.23kg<br />
(initial temp. 20° C)<br />
Please use potatoes with a similar size of approx. 0.23kg.<br />
Pierce each potato in several places and place towards<br />
the edge of the turntable. Turn over and re-arrange<br />
halfway through cooking. Stand for 3 - 5 minutes<br />
before serving.<br />
Pizza 0.1kg, 0.2kg, 0.4kg<br />
(initial temp 5°C)<br />
Plate<br />
Place the pizza on a plate in the centre of the turntable.<br />
Do not cover.<br />
Frozen vegetable<br />
e.g. Brussel sprouts,<br />
green beans, peas,<br />
mixed vegetables,<br />
broccoli<br />
Beverage<br />
(120ml/ cup)<br />
0.15kg, 0.35kg, 0.5kg<br />
(initial temp -18°C)<br />
1, 2, 3 Cup<br />
(initial temp. 5° C)<br />
Bowl<br />
Place vegetables in a suitable container. Add 1tbsp of<br />
water per 0.1kg of vegetables, cover the dish and place<br />
on the turntable. Stir halfway through cooking and<br />
after cooking.<br />
Place the cup(s) on the turntable and stir after heating.<br />
Dishes<br />
0.25kg, 0.35kg, 0.5kg<br />
(initial temp. 5° C)<br />
Plate<br />
Place your dinner plate of food (such as meat, vegetable<br />
and rice/potatoes) in the centre of the turntable and<br />
follow the instructions on page E-13. It is always good<br />
to stir at the end to get an even temperature.<br />
Notes:<br />
• The final temperature will vary according to the initial food temperature. Check if the food is piping hot after cooking.<br />
If necessary, you can extend the cooking manually.<br />
• The results when using auto cook depend on variances such as the shape and size of the food and your<br />
personal preference as regards cooking results. If you are not satisfied with the programmed result, please<br />
adjust the cooking time to match your requirement.<br />
Important Information about Microwave Popcorn Feature:<br />
1. When selecting 0.1kg of popcorn, it is suggested<br />
that you fold down a triangle on each corner of the bag<br />
before cooking.<br />
Refer to the picture on the right.<br />
2. If/When the popcorn bag expands and no longer rotates<br />
properly, please press STOP/CLEAR key once and open<br />
the oven door and adjust the bag position to ensure<br />
even cooking.<br />
E-14
SUITABLE OVENWARE<br />
To cook/defrost food in a microwave oven, the microwave energy must be able to pass through the container to<br />
penetrate the food. Therefore it is important to choose suitable cookware.<br />
Round/oval dishes are preferable to square/oblong ones, as the food in the corners tends to overcook. A variety<br />
of cookware can be used as listed below.<br />
Cookware<br />
Aluminium foil<br />
Foil Containers<br />
Microwave<br />
Safe<br />
Grill<br />
Comments<br />
✔ / ✘ ✔ Small pieces of aluminium foil can be used to shield<br />
food from overheating. Keep foil at least 2cm from the<br />
oven walls, as arcing may occur.<br />
Foil containers are not recommended unless specified<br />
by the manufacturer. Follow instructions carefully.<br />
Browning dishes ✔ ✘ Always follow the manufacturers ' instructions.<br />
Do not exceed heating time given. Be very careful as<br />
these dishes can be very hot.<br />
China clay and ceramics ✔ / ✘ ✘ Porcelain, pottery, glazed earthenware and bone china<br />
are usually suitable, except for those with metallic<br />
decoration.<br />
Glassware ✔ ✔ Care should be taken if using fine glassware as it can<br />
break or crack if heated suddenly.<br />
Metal ✘ ✔ It is not recommended to use metal cookware as it will<br />
arc, which can lead to fire.<br />
Plastic/Polystyrene e.g fast<br />
food containers<br />
✔ ✘ Care must be taken as some containers warp, melt or<br />
discolour at high temperatures.<br />
Cling film ✔ ✘ It should not touch the food and must be pierced to<br />
let the steam escape.<br />
Freezer/Roasting bags ✔ ✘ Must be pierced to let steam escape. Ensure bags are<br />
suitable for microwave use.<br />
Paper - Plates, cups and<br />
kitchen paper<br />
Straw and wooden<br />
Containers<br />
Recycled paper and<br />
newspaper<br />
✔ ✘ Do not use plastic or metal ties, as they may melt or<br />
catch fire due to the metal ‘arcing’.<br />
✔ ✘ Only use for warming or to absorb moisture.<br />
Care must be taken as overheating may cause fire.<br />
✘ ✔ Always attend the oven when using these materials as<br />
overheating may cause fire.<br />
May contain extracts of metal which will cause ‘arcing’<br />
and may lead to fire.<br />
WARNING:<br />
When heating food in plastic or paper containers, monitor the oven due to the risk of<br />
ignition.<br />
ENGLISH<br />
E-15
CARE AND CLEANING<br />
CAUTION: DO NOT USE COMMERCIAL OVEN<br />
CLEANERS, STEAM CLEANERS, ABRASIVE,<br />
HARSH CLEANERS, ANY THAT CONTAIN SODIUM<br />
HYDROXIDE OR SCOURING PADS ON ANY PART OF<br />
YOUR MICROWAVE OVEN.<br />
Before cleaning, make sure the oven cavity, door,<br />
oven cabinet and accessories are completely cool.<br />
CLEAN THE OVEN AT REGULAR INTERVALS AND<br />
REMOVE ANY FOOD DEPOSITS - Keep the oven<br />
clean, or the oven could lead to a deterioration of<br />
the surface. This could adversely affect the life of<br />
the appliance and possibly result in a hazardous<br />
situation.<br />
Oven exterior<br />
The outside of your oven can be cleaned easily with<br />
mild soap and water. Make sure the soap is wiped off<br />
with a moist cloth, and dry the exterior with a soft<br />
towel.<br />
Control panel<br />
Open the door before cleaning to de-activate the<br />
control panel. Care should be taken in cleaning the<br />
control panel. Using a cloth dampened with water<br />
only, gently wipe the panel until it becomes clean.<br />
Avoid using excessive amounts of water. Do not use<br />
any sort of chemical or abrasive cleaner.<br />
Oven Interior<br />
1. For cleaning, wipe any splatters or spills with a soft<br />
damp cloth or sponge after each use while the oven<br />
is still warm. For heavier spills, use a mild soap and<br />
wipe several times with a damp cloth until all residues<br />
are removed. Built-up splashes may overheat and<br />
begin to smoke or catch fire, and cause arcing. Do not<br />
remove the waveguide cover.<br />
2. Make sure that mild soap or water does not<br />
penetrate the small vents in the walls which may<br />
cause damage to the oven.<br />
3. Do not use spray type cleaners on the oven interior.<br />
4. Heat up your oven regularly by using the grill and<br />
heat the oven without food for 20 minutes on grill<br />
(page E-9). Remaining food or fat splashed can<br />
cause smoke or bad smell.<br />
Keep the waveguide cover clean at all times.<br />
The waveguide cover is constructed from a fragile<br />
material and should be cleaned with care (follow the<br />
cleaning instructions above).<br />
NOTE: Excessive soaking may cause disintegration of<br />
the waveguide cover.<br />
The waveguide cover is a consumable part and<br />
without regular cleaning, will need to be replaced.<br />
Accessories<br />
The accessories like turntable, turntable support and<br />
rack should be washed in a mild washing up liquid<br />
solution and dried. They are dishwasher safe.<br />
Door<br />
To remove all trace of dirt, regularly clean both sides<br />
of the door, the door seals and adjacent parts with a<br />
soft, damp cloth. Do not use abrasive cleaner.<br />
NOTE: A steam cleaner should not be used.<br />
Cleaning tip - For easier cleaning of your oven:<br />
Place half a lemon in a bowl, add 300ml (1/2 pint) water and heat on 100% for 10 -12 minutes.<br />
Wipe the oven clean using a soft, dry cloth.<br />
E-16
TROUBLESHOOTING<br />
Keep the power supply cord away from heated<br />
surface. If you think the oven is not working properly<br />
there are some simple checks you can carry out<br />
yourself before calling an engineer.<br />
Follow this simple check below: Place half a cup of<br />
water on the turntable and close the door. Programme<br />
the oven to cook for I minute using 100% microwave<br />
power.<br />
1. Does the oven lamp come on when it is cooking?<br />
2. Does the turntable rotate?<br />
3. Does the cooling fan work? (Check by placing your<br />
hand above the air vent openings.)<br />
4. After I minute does the audible signal sound?<br />
5. Is the water in the cup hot?<br />
6. After 3 minutes, does the grill heating element<br />
become red?<br />
If you answer "NO" to any question, first check that<br />
the oven is plugged in properly and the fuse has not<br />
blown. If there is no fault with either, check against<br />
the troubleshooting chart below.<br />
TROUBLESHOOTING CHART<br />
QUERY<br />
Draught circulates<br />
around the door.<br />
Condensation forms<br />
in the oven, and may<br />
drip from the door.<br />
Flashing or arcing<br />
from within the<br />
cavity when cooking.<br />
Arcing potatoes.<br />
The display is lit but<br />
the control panel<br />
will not work when<br />
pressed.<br />
Oven cooks too<br />
slowly.<br />
Oven makes a noise.<br />
Outer cabinet is hot.<br />
ANSWER<br />
WARNING: Never adjust, repair or modify the<br />
oven yourself. It is hazardous for anyone other<br />
than a SHARP trained engineer to carry out<br />
servicing or repairs. This is important as it may<br />
involve the removal of covers that provide<br />
protection against microwave energy.<br />
• The door seal stops microwave leakage during oven<br />
operation, but does not form an airtight seal. It is<br />
normal to see drops of water, light or feel warm air<br />
around the oven door. Food with a high moisture<br />
content will release steam and cause condensation<br />
inside the door which may drip from the oven.<br />
• Repairs and Modifications: Do not attempt to<br />
operate the oven if it is not working properly.<br />
• Outer Cabinet & Lamp Access: Never remove the<br />
outer cabinet. This is very dangerous due to high<br />
voltage parts inside which must never be touched,<br />
as this could be fatal.<br />
Your oven is not fitted with a lamp access cover. If<br />
the lamp fails, do not attempt to replace the lamp<br />
yourself, contact your nearest service centre approved<br />
by SHARP .<br />
When the oven is working, air circulates within the cavity.<br />
The door does not form an airtight seal so air may escape from the door.<br />
The oven cavity will normally be colder than the food being cooked, and so steam<br />
produced when cooking will condense on the colder surface. The amount of steam<br />
produced depends on the water content of the food being cooked. Some foods, such<br />
as potatoes have a high moisture content. Condensation trapped in the door glass<br />
should clear after a few hours.<br />
Arcing will occur when a metallic object comes into close proximity to the oven cavity<br />
during cooking. This may possibly roughen the surface of the cavity, but would not<br />
otherwise damage the oven.<br />
Ensure all "eyes" are removed from the potatoes and that they have been pierced, place<br />
directly onto the turntable or in a heat resistant flan dish or similar.<br />
Check the door is closed properly.<br />
Ensure correct power level has been selected.<br />
The microwave energy pulses ON and OFF during cooking/defrosting.<br />
The cabinet may become hot to touch - keep children away.<br />
ENGLISH<br />
E-17
PN:261800311803