Landmark Snap In Installation Guide - CertainTeed
Landmark Snap In Installation Guide - CertainTeed
Landmark Snap In Installation Guide - CertainTeed

You also want an ePaper? Increase the reach of your titles
YUMPU automatically turns print PDFs into web optimized ePapers that Google loves.
3. <strong>In</strong>stall the “C” Channels<br />
• <strong>In</strong>stall the first section of “C” Channel by looping the hanging wire around<br />
the channel and twisting.<br />
4. <strong>In</strong>stall <strong>Snap</strong> Bars<br />
• Establish the location of the first <strong>Snap</strong> Bar. (See the Pre-<strong>In</strong>stallation<br />
<strong>In</strong>structions for Room Layout <strong>In</strong>structions).<br />
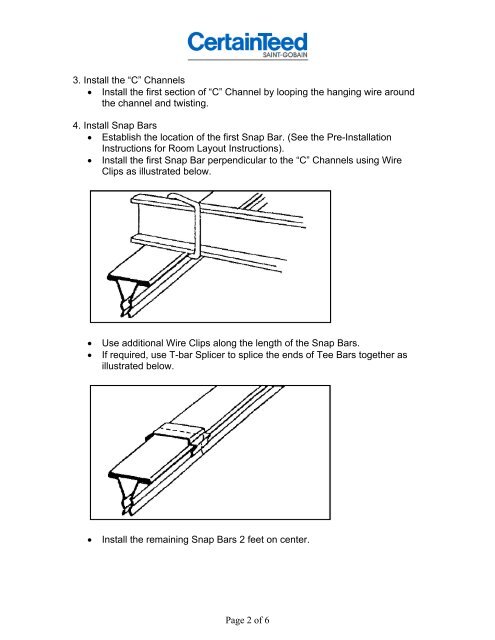
• <strong>In</strong>stall the first <strong>Snap</strong> Bar perpendicular to the “C” Channels using Wire<br />
Clips as illustrated below.<br />
• Use additional Wire Clips along the length of the <strong>Snap</strong> Bars.<br />
• If required, use T-bar Splicer to splice the ends of Tee Bars together as<br />
illustrated below.<br />
• <strong>In</strong>stall the remaining <strong>Snap</strong> Bars 2 feet on center.<br />
Page 2 of 6