Landmark Snap In Installation Guide - CertainTeed
Landmark Snap In Installation Guide - CertainTeed
Landmark Snap In Installation Guide - CertainTeed

You also want an ePaper? Increase the reach of your titles
YUMPU automatically turns print PDFs into web optimized ePapers that Google loves.
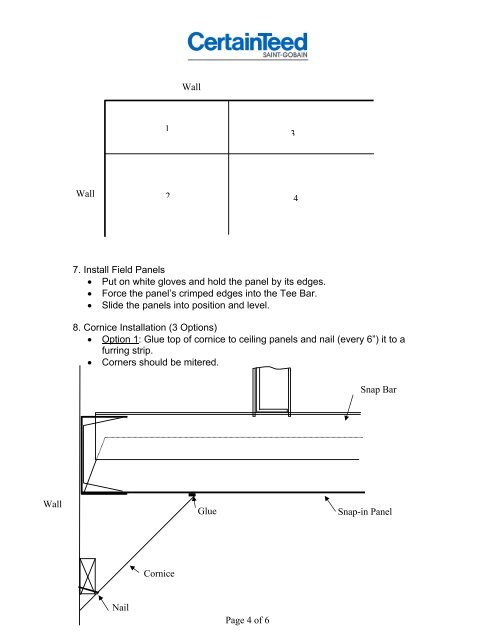
Wall<br />
1<br />
3<br />
Wall 2 4<br />
7. <strong>In</strong>stall Field Panels<br />
• Put on white gloves and hold the panel by its edges.<br />
• Force the panel’s crimped edges into the Tee Bar.<br />
• Slide the panels into position and level.<br />
8. Cornice <strong>In</strong>stallation (3 Options)<br />
• Option 1: Glue top of cornice to ceiling panels and nail (every 6”) it to a<br />
furring strip.<br />
• Corners should be mitered.<br />
<strong>Snap</strong> Bar<br />
Wall<br />
Glue<br />
<strong>Snap</strong>-in Panel<br />
Cornice<br />
Nail<br />
Page 4 of 6