

P216, P218 P220, P224 Performer Series - Cummins Onan
P216, P218 P220, P224 Performer Series - Cummins Onan
P216, P218 P220, P224 Performer Series - Cummins Onan

Create successful ePaper yourself
Turn your PDF publications into a flip-book with our unique Google optimized e-Paper software.
Commutator Inspection: If commutator is dirty or discolored,<br />
clean with number 00 to 000 commutator<br />
paper. Blow grit out of armature after cleaning.<br />
If commutator is scored, rough, or worn, turn it down in a<br />
lathe.<br />
Field Coil: Use an ohmmeter to check for continuity<br />
between brushes. If there is no continuity, the field coil is<br />
open and must be replaced. With field coil mounted in<br />
the frame, check for continuity between the field coil and<br />
frame. Replace frame assembly if there is continuity.<br />
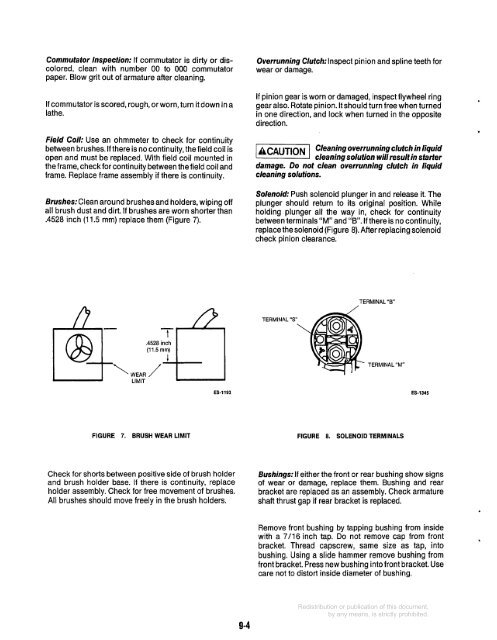
Brushes:Clean around brushes and holders, wiping off<br />
all brush dust and dirt. If brushes are worn shorter than<br />
.4528 inch (1 1.5 mm) replace them (Figure 7).<br />
Overrunning Clutch: Inspect pinion and spline teeth for<br />
wear or damage.<br />
If pinion gear is worn or damaged, inspect flywheel ring<br />
gear also. Rotate pinion. It should turn free when turned<br />
in one direction, and lock when turned in the opposite<br />
direction.<br />
-1 Cleaning overrunning clutch in liquid<br />
cleaning solution will result in starter<br />
damage. Do not clean overrunning clutch in liquid<br />
cleaning solutions.<br />
Solenoid: Push solenoid plunger in and release it. The<br />
plunger should return to its original position. While<br />
holding plunger all the way in, check for continuity<br />
between terminals “M” and “B’. If there is no continuity,<br />
replace the solenoid (Figure 8). After replacing solenoid<br />
check pinion clearance.<br />
TERMINAL “ B<br />
,4528 inch<br />
(11.5 mm)<br />
WEAR /<br />
LIMIT<br />
ES-1193<br />
ES-1345<br />
FIGURE 7. BRUSH WEAR LIMIT FIGURE 8. SOLENOID TERMINALS<br />
Check for shorts between positive side of brush holder<br />
and brush holder base. If there is continuity, replace<br />
holder assembly. Check for free movement of brushes.<br />
All brushes should move freely in the brush holders.<br />
Bushings:If either the front or rear bushing show signs<br />
of wear or damage, replace them. Bushing and rear<br />
bracket are replaced as an assembly. Check armature<br />
shaft thrust gap if rear bracket is replaced.<br />
Remove front bushing by tapping bushing from inside<br />
with a 7/16 inch tap. Do not remove cap from front<br />
bracket. Thread capscrew, same size as tap, into<br />
bushing. Using a slide hammer remove bushing from<br />
front bracket. Press new bushing into front bracket. Use<br />
care not to distort inside diameter of bushing.<br />
9-4


