

PDF Version - Glidewell Dental Labs
PDF Version - Glidewell Dental Labs
PDF Version - Glidewell Dental Labs

Create successful ePaper yourself
Turn your PDF publications into a flip-book with our unique Google optimized e-Paper software.
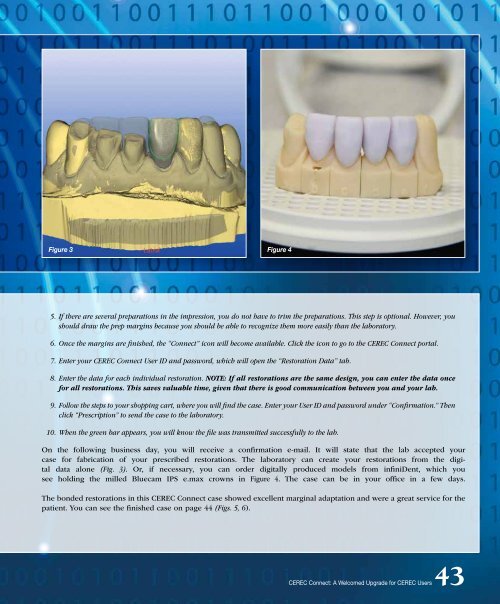
Figure 3 Figure 4<br />
5. If there are several preparations in the impression, you do not have to trim the preparations. This step is optional. However, you<br />
should draw the prep margins because you should be able to recognize them more easily than the laboratory.<br />
6. Once the margins are finished, the “Connect” icon will become available. Click the icon to go to the CEREC Connect portal.<br />
7. Enter your CEREC Connect User ID and password, which will open the “Restoration Data” tab.<br />
8. Enter the data for each individual restoration. NOTE: If all restorations are the same design, you can enter the data once<br />
for all restorations. This saves valuable time, given that there is good communication between you and your lab.<br />
9. Follow the steps to your shopping cart, where you will find the case. Enter your User ID and password under “Confirmation.” Then<br />
click “Prescription” to send the case to the laboratory.<br />
10. When the green bar appears, you will know the file was transmitted successfully to the lab.<br />
On the following business day, you will receive a confirmation e-mail. It will state that the lab accepted your<br />
case for fabrication of your prescribed restorations. The laboratory can create your restorations from the digital<br />
data alone (Fig. 3). Or, if necessary, you can order digitally produced models from infiniDent, which you<br />
see holding the milled Bluecam IPS e.max crowns in Figure 4. The case can be in your office in a few days.<br />
The bonded restorations in this CEREC Connect case showed excellent marginal adaptation and were a great service for the<br />
patient. You can see the finished case on page 44 (Figs. 5, 6).<br />
CEREC Connect: A Welcomed Upgrade for CEREC Users43


