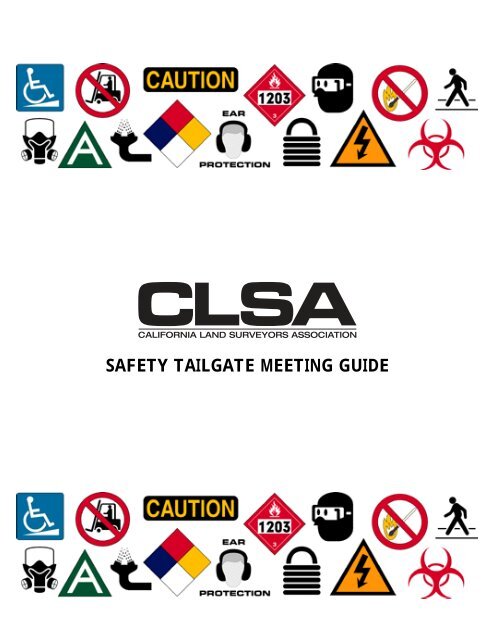
Safety Tailgate meeting guide - CLSA
Safety Tailgate meeting guide - CLSA
Safety Tailgate meeting guide - CLSA

You also want an ePaper? Increase the reach of your titles
YUMPU automatically turns print PDFs into web optimized ePapers that Google loves.
SAFETY TAILGATE MEETING GUIDE
<strong>CLSA</strong> SAFETY TAILGATE MEETING GUIDE<br />
1. Introduction to safety tailgate <strong>meeting</strong>s.<br />
<strong>Safety</strong> <strong>Tailgate</strong> Meeting Guide<br />
A safe and healthy work place is vitally important to land surveyors. Any job related accident can be<br />
costly in many terms to the employee, family, friends, clients and the employer. It is imperative that<br />
work site safety awareness be planned, instructed and implemented in our everyday routines. The<br />
safety tailgate <strong>meeting</strong> is but one example of how to accomplish a safe and healthy work place for all of<br />
us. A successful tailgate <strong>meeting</strong> needs to be well planned, timed and executed. It must engage all the<br />
employees and provide relevant information for the hazards that will be faced.<br />
2. What is a <strong>Safety</strong> <strong>Tailgate</strong> Meeting?<br />
<strong>Safety</strong> tailgate <strong>meeting</strong>s are held to keep employees informed of work-related accidents, illnesses and<br />
workplace hazards. They allow supervisors to draw on the experience of workers, and use the<br />
experience to remind all employees – especially newer ones – on the dangers of particular construction<br />
processes, tools, equipment, and materials.<br />
3. Who requires safety tailgate <strong>meeting</strong>s?<br />
CAL/OSHA <strong>Safety</strong> Orders require safety <strong>meeting</strong>s to be held. Per Title 8, California Code of<br />
Regulations, Construction <strong>Safety</strong> Orders, Section: 1509(e):<br />
Supervisory employees shall conduct “toolbox” or “tailgate” safety <strong>meeting</strong>s, or equivalent,<br />
with their crews at least every 10 working days to emphasize safety.<br />
Cal/OSHA <strong>Safety</strong> Orders (Title 8) can be reviewed at: http://www.dir.ca.gov/samples/search/query.htm<br />
4. How to conduct an effective tailgate safety <strong>meeting</strong>.<br />
1. Hold the <strong>meeting</strong> on the job, preferably where everyone can sit and relax.<br />
2. Hold <strong>meeting</strong>s at the beginning of a shift or after a break.<br />
3. Keep the <strong>meeting</strong> duration to around 10-15 minutes.<br />
4. Choose a topic prior to the <strong>meeting</strong>. Don’t choose a topic which is too broad. Be concise.<br />
5. Complete your research and preparation before the <strong>meeting</strong>.<br />
6. Handout material with topic information.<br />
7. Grab listeners’ attention and maintain their interest.<br />
8. Encourage employee participation, but keep the <strong>meeting</strong> brief.<br />
9. All employees should sign a dated attendance sheet.<br />
5. Documentation<br />
Document attendance and provide relevant information:<br />
1. A copy of handouts on the <strong>meeting</strong> topic.<br />
2. Maintain attendance roster for each <strong>meeting</strong>, have employees sign<br />
3. Create a <strong>meeting</strong> report and submit to the office/headquarters.<br />
4. Keep a log for each employee listing training they received and dates of <strong>meeting</strong>s attended.<br />
1
<strong>CLSA</strong> SAFETY TAILGATE MEETING GUIDE<br />
6. Choosing safety topics<br />
<strong>Safety</strong> tailgate <strong>meeting</strong>s should become know to employees as worthwhile <strong>meeting</strong>s. Therefore,<br />
choose worthwhile topics – those that are immediately relevant to the health, safety and well-being of<br />
workers and the company. Talk about work practices, machinery, tools, equipment, materials, attitudes,<br />
and anything else that may cause or contribute to a work-related accident or illness.<br />
The following are excellent sources for surveying related topics:<br />
- Personal experience.<br />
- Review the findings from safety inspections including corrective actions.<br />
- Equipment manuals and Material <strong>Safety</strong> Data (MSD) sheets.<br />
- Cal/OSHA publications.<br />
- A sample list of surveyor safety related topics from the <strong>CLSA</strong> website.<br />
7. Other safety resources:<br />
The Caltrans <strong>Safety</strong> Manual:<br />
www.dot.ca.gov/hq/row/landsurveys/SurveysManual/Surveys_Chapter_2_2009.pdf<br />
www.dot.ca.gov/hq/row/landsurveys/SurveysManual/Surveys_Chapter_2_Figure_1_Code_of_Safe_Sur<br />
veying_2009.pdf<br />
Publication:<br />
Manual of <strong>Safety</strong> Standards for Land Surveyors by Land Surveyor’s Bookstore, T.S. Madson II, R.L.S.<br />
DISCLAIMER<br />
While the information and recommendations contained within the <strong>Safety</strong> <strong>Tailgate</strong> Meeting Guide is believed to be<br />
reliable, California Land Surveyors Association makes no guarantee as to, and assumes no responsibility for the<br />
correctness, sufficiency, or completeness of such information or recommendations contained within the <strong>Safety</strong><br />
<strong>Tailgate</strong> Meeting Guide. Other or additional safety measures may be required under particular circumstances.<br />
MEDICAL INFORMATION<br />
California Land Surveyors Association provides the <strong>Safety</strong> <strong>Tailgate</strong> Meeting Guide as a resource directory only and<br />
does not diagnose medical conditions or offer medical advice.<br />
2
<strong>CLSA</strong> SAFETY TAILGATE MEETING TABLE OF CONTENTS<br />
Course Titles Page Date Completed<br />
Aggressive Driving ....................................................................................... 5<br />
Air Bag <strong>Safety</strong> .............................................................................................. 8<br />
Are You Prepared for an Emergency? ......................................................... 10<br />
Asphalt ......................................................................................................... 12<br />
Athletes Foot ................................................................................................ 14<br />
Avoid Common Office Injuries ..................................................................... 16<br />
Avoiding Falls .............................................................................................. 18<br />
Avoiding Slips and Falls at the Office ........................................................... 20<br />
Back Injuries – Get Your Crew Back in Control ........................................... 22<br />
Batteries Charging – A Multitude of Hazards! .............................................. 24<br />
Battery Handling <strong>Safety</strong> ............................................................................... 27<br />
Battery Jump Starting .................................................................................. 30<br />
Blind Spots in Mobile Equipment Operations ............................................... 33<br />
Carbon Monoxide ........................................................................................ 36<br />
Construction Equipment ............................................................................... 39<br />
Construction <strong>Safety</strong> – Identifying Construction Hazards .............................. 41<br />
CPR Procedures for Adults .......................................................................... 43<br />
CPR Procedures for Children ...................................................................... 45<br />
CPR Procedures for Infants ......................................................................... 47<br />
Don’t Take Back Problems Sitting Down ..................................................... 49<br />
Driving Distracted? ...................................................................................... 51<br />
Driving in Wet Weather ................................................................................ 53<br />
Driving Tips to Prevent Skidding .................................................................. 55<br />
Driving Vehicles and Moving Equipment Safely ........................................... 57<br />
Earthquake <strong>Safety</strong> ....................................................................................... 59<br />
Emergency Eye Wash & Deluge Showers ................................................... 61<br />
Ergonomics: Breaks, Rest Periods & Stretches ........................................... 63<br />
Excavations ................................................................................................. 65<br />
Eye and Face Protection – Face Shields ..................................................... 68<br />
Fall Protection .............................................................................................. 70<br />
Falling Down on the Job .............................................................................. 72<br />
Falls ............................................................................................................. 74<br />
First Aid for Burns ........................................................................................ 76<br />
First Aid for Choke Saving ........................................................................... 80<br />
First Aid for Eye Injuries ............................................................................... 82<br />
First Aid for Shock ....................................................................................... 84<br />
Flagger <strong>Safety</strong> ............................................................................................. 86<br />
Hand <strong>Safety</strong> – Avoiding Finger, Hand and Wrist Injuries ............................. 88<br />
Foot Care – Blisters ..................................................................................... 90<br />
Foot Care – Calluses ................................................................................... 92<br />
Foot Pain ..................................................................................................... 94<br />
Foot <strong>Safety</strong> – It’s a Shoe in for <strong>Safety</strong> .......................................................... 96<br />
Hearing Protection ....................................................................................... 98<br />
Hearing Protection – Earmuffs ..................................................................... 101<br />
Hearing Protection – Earplugs ..................................................................... 103<br />
________________<br />
________________<br />
________________<br />
________________<br />
________________<br />
________________<br />
________________<br />
________________<br />
________________<br />
________________<br />
________________<br />
________________<br />
________________<br />
________________<br />
________________<br />
________________<br />
________________<br />
________________<br />
________________<br />
________________<br />
________________<br />
________________<br />
________________<br />
________________<br />
________________<br />
________________<br />
________________<br />
________________<br />
________________<br />
________________<br />
________________<br />
________________<br />
________________<br />
________________<br />
________________<br />
________________<br />
________________<br />
________________<br />
________________<br />
________________<br />
________________<br />
________________<br />
________________<br />
________________<br />
________________<br />
3
<strong>CLSA</strong> SAFETY TAILGATE MEETING TABLE OF CONTENTS<br />
Course Titles Page Date Completed<br />
Hearing Protection – How Hearing Works ................................................... 105<br />
Heavy Equipment <strong>Safety</strong> ............................................................................. 107<br />
Housekeeping is an Important Part of Your Job .......................................... 109<br />
Housekeeping on Construction Sites ........................................................... 111<br />
Importance of <strong>Safety</strong> Training ...................................................................... 113<br />
Injury and Illness Prevention Program ......................................................... 115<br />
Insect & Spider Bites.................................................................................... 117<br />
Jacks ........................................................................................................... 119<br />
Keep Your Hat On – Hard Hat <strong>Safety</strong> .......................................................... 121<br />
Lifting ........................................................................................................... 123<br />
New Rules for Preventing Heat Illnesses ..................................................... 126<br />
Rebar <strong>Safety</strong> ................................................................................................ 130<br />
Responding to Vehicle Fires ........................................................................ 132<br />
Road Work <strong>Safety</strong> ........................................................................................ 134<br />
Roadside Equipment Repair ........................................................................ 136<br />
Safe Driving ................................................................................................. 138<br />
Why do We Have <strong>Safety</strong> Meetings? ............................................................ 140<br />
<strong>Safety</strong> Sun Glasses ..................................................................................... 142<br />
<strong>Safety</strong> Goggles ............................................................................................ 144<br />
Shoveling Techniques.................................................................................. 146<br />
Skin Protection ............................................................................................. 148<br />
Spotters – An Important Requirement.......................................................... 150<br />
Standing on Your Own Two Feet ................................................................. 152<br />
Sun <strong>Safety</strong> ................................................................................................... 155<br />
Trenching and Shoring Requirements Summary ......................................... 158<br />
Take a Close Look at Close Calls ................................................................ 160<br />
Utility/Pickup Trucks..................................................................................... 162<br />
Wash Your Hands ........................................................................................ 164<br />
Watch out for Snakes................................................................................... 166<br />
Wear Your Seatbelt ..................................................................................... 169<br />
Why Use a <strong>Safety</strong> Can for Gasoline ............................................................ 171<br />
Wildlife <strong>Safety</strong> Precautions .......................................................................... 173<br />
Appendix: “Save Our Surveyors” by Jack Harrington, PLS, PE ................... 175<br />
________________<br />
________________<br />
________________<br />
________________<br />
________________<br />
________________<br />
________________<br />
________________<br />
________________<br />
________________<br />
________________<br />
________________<br />
________________<br />
________________<br />
________________<br />
________________<br />
________________<br />
________________<br />
________________<br />
________________<br />
________________<br />
________________<br />
________________<br />
________________<br />
________________<br />
________________<br />
________________<br />
________________<br />
________________<br />
________________<br />
________________<br />
________________<br />
________________<br />
4
<strong>CLSA</strong> SAFETY TAILGATE MEETING GUIDE<br />
Aggressive Driving<br />
Every year, the California Highway Patrol (CHP) reports approximately 500,000 collisions with 200,000 injuries and<br />
4,000 fatalities as a result. The most frequent causes of aggressive driving are:<br />
• Unsafe speed<br />
• Improper turning<br />
• Failure to yield the right of way<br />
• Failure to obey traffic signals<br />
The Department of Transportation (DOT) estimates that aggressive driving may cause two-thirds of traffic fatalities.<br />
Aggressive driving can be caused by:<br />
• Longer commutes<br />
• Traffic congestion<br />
• Other drivers’ behaviors<br />
• Your own mood<br />
• Your own reactions<br />
• Your ability to deal with stress on and off the road.<br />
Aggressive driving is triggered by anger – yours or another driver’s. Aggressive drivers are more likely to:<br />
• Speed<br />
• Make unsafe lane changes<br />
• Ignore the right of way<br />
• Violate traffic signals.<br />
Aggressive driving behavior includes:<br />
Tailgating<br />
Unsafe passing<br />
Honking your horn<br />
Making rude gestures<br />
Swearing at other driver<br />
Don’t confuse aggressive driving with road rage -<br />
a criminal act where a driver tries to intentionally<br />
injure or kill another driver, passenger, or<br />
pedestrian. Blaring your horn in traffic or making<br />
rude gestures are not illegal, but they can<br />
escalate and lead to road rage.<br />
Help prevent aggressive driving (and road rage) by:<br />
1. Adjusting your attitude. Forget the idea of “winning” on the road. Driving is not a race; it should not be a<br />
contest to see who finishes first.<br />
2. Leaving plenty of time for a trip so that if traffic or another delay occurs, you can keep your cool. Think of the<br />
highway as a conveyor belt – everyone will get to his or her destination eventually, so there is no need to<br />
speed or act impolite to save a few minutes.<br />
3. Put yourself in the other driver’s shoes. Have you ever made a mistake on the road, been lost, or unsure of<br />
your turn-off point? Instead of being angry with another driver making the same mistakes, give them the<br />
benefit of the doubt. When you make mistakes, acknowledge them and give the drivers around you a<br />
friendly nod or wave. Polite behavior makes driving safer.<br />
5
<strong>CLSA</strong> SAFETY TAILGATE MEETING GUIDE<br />
4. Ignore rude and bad drivers on the road. Unless you are a traffic safety officer, it is not your job to enforce<br />
the rules of the road or punish the bad behavior of others behind the wheel.<br />
5. Whether on Wall Street, in a casino, or on the highway, there will always be bad actors that want to break<br />
the rules. Do not try to teach other drivers “a lesson.” If you encounter an angry or aggressive driver on the<br />
road, don’t engage them.<br />
6. Avoid eye contact and do not make (or return) rude gestures or comments. Give an angry driver a lot of<br />
room by putting distance between you. Slow down or exit the roadway if necessary, but do not pull off to the<br />
side of the road or try to “reason” with an angry driver.<br />
7. Get help by using your cell phone or driving to a public area such as a police station or shopping center.<br />
If you think you have a problem with anger on the road or aggressive driving, get help. Anger management classes or<br />
counseling can help you deal with the stress in your life and in your car that may be contributing to your behavior.<br />
Keep your cool on the road and live to work and play another day.<br />
6
<strong>CLSA</strong> SAFETY TAILGATE MEETING GUIDE<br />
Aggressive Driving<br />
I have been instructed in the basic hazards of this equipment/procedure as listed above. I understand this proper<br />
safe work procedure.<br />
Instructed by:<br />
Date:<br />
Trainee Names:<br />
7
<strong>CLSA</strong> SAFETY TAILGATE GUIDE<br />
Air Bag <strong>Safety</strong><br />
Vehicle air bags (including front, side and head curtains) rapidly inflate to cushion and protect drivers and passengers in<br />
traffic accidents. Air bags have deployed 3.8 million times since first used in the 1980’s and have saved 5,000 lives.<br />
Installed in 56 million vehicles, the air bag is a supplemental vehicle safety device; the first line of defense is the seatbelt.<br />
The risk of death in an accident is reduced by 65% with seat belts alone; seat belt use in combination with an air bag<br />
reduces risk by an additional 15%.<br />
Air bag benefits are proven, but most of us have<br />
seen the safety warnings posted in vehicles and<br />
heard the news that they can kill. To date, air bag<br />
deployment has killed 147 people due to the force<br />
of the airbag itself, not wearing a seatbelt, and<br />
sitting too close to the airbag. Air bags are not soft<br />
pillows; they are balloons of air that inflate with a<br />
blast of energy. Workers that drive on the job<br />
should be aware of the ways to increase air bag<br />
effectiveness for themselves and their passengers.<br />
Drivers should review the vehicle owner’s manual to determine the type and location of the vehicle air bags. Drivers<br />
should wear shoulder and lap belts securely and move the seat back as far as possible and recline it slightly. This helps<br />
maintain at least 10 to 12 inches between the steering wheel air bag and the breastbone. Pedal extenders can help<br />
smaller adults maintain this distance. To reduce the risk of arm and hand injuries, drivers should hold the steering wheel<br />
from the sides (the traditional 10 o’clock and 2 o’clock positions). Tilting the steering wheel down directs the air bag<br />
deployment force away from the head and neck. Passengers should always wear their lap and shoulder belts securely.<br />
Passengers in the front seat should move the seat as far back as possible and slightly recline it. Pregnant women,<br />
children age 13 and up, small stature adults (5 feet, two inches or shorter), adults with medical conditions, and the<br />
elderly may sit in the front seat with an air bag if they are securely belted, move the seat back, recline it slightly, and sit<br />
straight in the seat with feet on the floor. Those with eyeglasses and pacemakers can also sit by an air bag. All vehicle<br />
passengers should keep their arms and feet off of the air bag areas and avoid leaning against side impact air bags.<br />
Drivers that transport children on the job should note the specific safety requirements for children and air bag safety.<br />
Infants and children should ride in the rear seat buckled up or secured in child safety seats appropriate for their age and<br />
weight.<br />
Air bag fatalities are a rare occurrence, but with attention to safety precautions, we can all ensure that they save<br />
more lives than they take.<br />
8
<strong>CLSA</strong> SAFETY TAILGATE GUIDE<br />
Air Bag <strong>Safety</strong><br />
I have been instructed in the basic hazards of this equipment/procedure as listed above. I understand this proper safe<br />
work procedure.<br />
Instructed by:<br />
Date:<br />
Trainee Names:<br />
9
<strong>CLSA</strong> SAFETY TAILGATE GUIDE<br />
Are You Prepared For An Emergency?<br />
Emergencies in the workplace cannot be eliminated, but if you have an emergency action plan in place and have trained<br />
workers to respond quickly and appropriately you can optimize efficiency, relieve anxiety, and in some cases, save lives.<br />
Management commitment and worker involvement are essential to an effective emergency action plan. The action plan<br />
should be explained to workers and reviewed whenever the plan or responsibilities change. How good is your<br />
emergency action plan? Find out by asking yourself and your workers the following questions:<br />
General<br />
• Is there a means of reporting emergencies and accounting for personnel before and after an incident?<br />
• Who is the person responsible for decision-making during emergency conditions?<br />
• Does everyone in the workplace know the procedures to follow in various emergency scenarios (e.g. fire,<br />
explosion, earthquake, chemical spill or workplace violence, etc.)?<br />
• Do workers know the escape routes and evacuations procedures including where to reassemble for a<br />
headcount or for further instruction?<br />
• Do workers know where emergency supplies are located?<br />
Medical<br />
• Do workers know how to respond in the event of a medical emergency?<br />
• Are there workers trained in cardiopulmonary resuscitation (CPR) and first aid?<br />
• Does the worksite have first aid equipment that corresponds to the possible injuries workers may encounter?<br />
(e.g. emergency wash stations, personal protective equipment, oxygen tanks, ice packs, etc.)<br />
• Are emergency response phone numbers (fire department, ambulance, medical facility, etc.) clearly posted<br />
where they can be readily accessed?<br />
Fire<br />
• Does the worksite have fire extinguishers that match the possible fire<br />
hazards?<br />
• Have workers practiced using the fire extinguishers so that they’re<br />
aware of their operation and limitations?<br />
• Have the fire extinguishers been recharged within the last year? (They<br />
must be tagged to indicate the recharge date.<br />
Spills<br />
• Does the worksite have absorbent material that matches the quantity<br />
and type of chemicals that could spill?<br />
• Do you have relevant personal protective equipment that would be<br />
needed to respond to a chemical spill?<br />
• Have workers been properly trained in how to safely respond to a<br />
chemical spill?<br />
Once you have established your emergency action plan, make sure workers are trained and retrained in the possible<br />
emergencies they may encounter, the emergency procedures they should follow, any first aid or rescue procedures, and<br />
in the location of emergency response equipment and phone number. In an emergency an immediate and educated<br />
response can save individual lives, the business operation, and thousands of dollars in potential losses.<br />
I have been instructed in the basic hazards of this equipment/procedure as listed above. I understand this proper safe<br />
work procedure.<br />
10
<strong>CLSA</strong> SAFETY TAILGATE GUIDE<br />
Are You Prepared For An Emergency?<br />
I have been instructed in the basic hazards of this equipment/procedure as listed above. I understand this proper safe<br />
work procedure.<br />
Instructed by:<br />
Date:<br />
Trainee Names:<br />
11
<strong>CLSA</strong> SAFETY TAILGATE GUIDE<br />
Asphalt<br />
Asphalt is a black, sticky material that comes from crude oil. It is used in paving, roofing, waterproofing and some glues.<br />
Asphalt is often confused with coal tar or pitch. Coal tar and pitch come from coal, not oil. Asphalt is a solid or semisolid<br />
substance. It is mixed with solvents to make it more liquid, and easier to work with. Some of the solvents used to mix<br />
with asphalt are naphtha, toluene, and xylene. These solvents are hazardous substances, flammable, very smelly and<br />
increase the potential hazards of working with asphalt. There are many different types and grades of asphalt in current<br />
use.<br />
Who is at risk? It is estimated that 350,000 workers are exposed to asphalt fumes each year. Workers most likely to be<br />
exposed to asphalt fumes are road workers, roofers, employees at hot-mix asphalt facilities and general construction<br />
workers.<br />
Health Dangers<br />
Breathing asphalt fumes is the most common method of exposure. The acute (immediate) health effects of asphalt<br />
fumes include; headache, skin rash, fatigue, eye and throat irritation, and cough. Exposure to asphalt fumes (and the<br />
solvents in them) over long periods of time (chronic exposure) may cause lung and stomach cancer. Long-term contact<br />
of asphalt with your skin can cause pigment change, which is made worse by sunlight exposure. To find out the specific<br />
hazards associated with the type of asphalt you are working with, consult the Material <strong>Safety</strong> Data Sheet from your<br />
employer.<br />
Many forms of asphalt are flammable. This can lead to potential fires and explosions. Sources of ignition (e.g. sparks,<br />
flames, cigarettes, etc.) should be kept away from the area where the hot asphalt is being used. Asphalt is almost always<br />
used hot, so burns are a common form of injuries. Have a fire extinguisher available, of the correct type, for possible<br />
fires. Do not use a fire extinguisher unless you have been fully trained in its use.<br />
Methods of Control<br />
Substitution – there are many types of asphalt. Some are more hazardous than others. If possible, substitute a less<br />
hazardous form of asphalt in your construction project.<br />
Isolation – isolating asphalt operations will minimize worker exposure. Where possible, transfer the asphalt automatically<br />
by pump to minimize exposures.<br />
Enclosure – enclose the mixing and stirring operations. Stirring asphalt in an open kettle exposes you to fumes, solvent<br />
vapors and possible burns.<br />
Prior to starting any job, discuss with your supervisor/employer the appropriate personal protective equipment necessary<br />
for the work being performed.<br />
• Gloves – for the best protection, use thermally insulated gloves.<br />
• Clothes – wear long sleeve shirts and long pants.<br />
• Eye protection – wear indirect vent goggles when working with liquids. If the<br />
liquids are corrosive, highly irritating or toxic, wear a face shield along with<br />
the goggles.<br />
Safe Work Practices<br />
• Do not eat, smoke or drink where asphalt is handled.<br />
• Wash hands carefully before eating, drinking, smoking or using the toilet.<br />
• If you feel ill while working with asphalt, let your supervisor know right away.<br />
12
<strong>CLSA</strong> SAFETY TAILGATE GUIDE<br />
Asphalt<br />
I have been instructed in the basic hazards of this equipment/procedure as listed above. I understand this proper safe<br />
work procedure.<br />
Instructed by:<br />
Date:<br />
Trainee Names:<br />
13
<strong>CLSA</strong> SAFETY TAILGATE GUIDE<br />
Athletes Foot<br />
Athlete’s foot is a skin infection of the foot caused by a fungus. The fungus organism, which is found almost everywhere,<br />
thrives in dark, moist environments. Feet that perspire heavily and shoes with poor ventilation make the foot more<br />
vulnerable to this infection. It is easily passed from one barefooted person to another at public pools, locker rooms, and<br />
bathing areas.<br />
Athlete's foot easily can go unnoticed, especially if there is no itching present. However, there may be peeling, areas of<br />
redness, or deep cracks in between the toes. It is commonly found on the soles of the feet, or hidden discretely between<br />
the toes where it can have a whitish, soggy look. Odor may or may not be present.<br />
The fungal infection can spread to the toenails, and can be transmitted to other household members. Occasionally,<br />
people will develop pronounced symptoms such as painful blisters. Bacteria can enter through these open sores,<br />
producing a more serious infection -- especially for people with diabetes.<br />
Here are some commonsense measures that can be taken to prevent athlete’s foot:<br />
• Wear flip-flops or sandals around swimming pools and<br />
public locker rooms<br />
• Expose shoe gear, insoles, and orthotic devices to sunlight<br />
to assist drying and combat fungus<br />
• Rotate shoes on a daily basis to allow them to dry<br />
completely between use<br />
• Avoid cotton socks since they retain about 60% of the<br />
moisture absorbed<br />
• Use wool or acrylic blended socks that encourage wicking<br />
of moisture away from the foot<br />
• Change socks daily or more frequently if your feet perspire<br />
heavily to ensure dryer feet<br />
Drug stores offer an array of over-the-counter products to treat athlete’s foot. Some are more effective than others. Any<br />
product chosen must be used routinely and as directed, or the infection may not clear completely.<br />
Persons with circulatory problems or diabetes, and children and the elderly should avoid these products. Instead, a<br />
podiatrist or their primary care physician should see them.<br />
To avoid spreading the infection and to prevent re-infection of athlete's foot, shoes and bathing areas also need to be<br />
treated. Ultraviolet light from the sun combined with commercial sprays or powders can help treat shoes. Diluted bleach<br />
or Lysol are great deterrents when used in the tub or shower areas following bathing.<br />
There are many ways prevent and treat athlete’s foot. Take precautions in public areas, keep the feet dry, and rotate<br />
shoes from day to day. Respond to infection at onset to help prevent it from becoming more serious. Treat bathing areas<br />
and shoes whenever feet are infected. Prevention of athlete’s foot is the ideal goal!<br />
14
<strong>CLSA</strong> SAFETY TAILGATE GUIDE<br />
Athletes Foot<br />
I have been instructed in the basic hazards of this equipment/procedure as listed above. I understand this proper safe<br />
work procedure.<br />
Instructed by:<br />
Date:<br />
Trainee Names:<br />
15
<strong>CLSA</strong> SAFETY TAILGATE GUIDE<br />
Avoid Common Office Injuries<br />
It is generally accepted that in heavy industry, you’ll find dangerous work environments that expose employees to<br />
potential injury. But few companies recognize the potential risks found in everyday office environments. Office work, too,<br />
can lead to injuries if appropriate safe work practices are not followed. Learn to avoid these common hazards:<br />
Musculoskeletal strains and sprains associated with material handling:<br />
If you must walk and carry an object, make sure the object is carried in a way that avoids blocking your vision. Never lift<br />
objects that are too heavy to handle comfortably. Get help, or use a hand truck when moving heavy or large objects. Lift<br />
objects from the floor correctly by using proper lifting mechanics--hold the load close to your body. Use a stool or<br />
stepladder when placing or removing items from high shelves.<br />
Stress and strain associated with sitting and computer workstations:<br />
Arrange your desk or work station so that your arms, wrists, legs, back and neck can be maintained in a comfortable<br />
“neutral” position, with proper back support. (Eagle can provide ergonomic checklists for evaluating your work area.)<br />
Those who spend long hours at a computer should consider mastering keyboard moves, instead of relying principally on<br />
the mouse. This helps reduce strain on your arm, elbow and shoulder. And don’t forget to take short, frequent “stretch”<br />
breaks!<br />
Injuries that result from slips, trips, and falls:<br />
Never run in the office. If liquids are spilled on tile or linoleum floors, clean them up<br />
immediately. If a rolling chair pad is cracked or if any part of the pad edge is curled upward,<br />
replace it and eliminate the tripping hazard. Do not lay electrical cords or phone cords where<br />
they could create a tripping hazard. Keep aisles clear of stored items.<br />
Hand injuries from cuts, scrapes, smashes, and punctures:<br />
Use a letter opener when opening envelopes and boxes, and a staple puller when removing staples<br />
from documents. Wear a rubber finger “cot” when fingering through a significant amount of<br />
envelopes or pieces of paper. Store sharp objects neatly in desk drawers or inside closed<br />
containers. Always close desk and file cabinet drawers with your hand firmly gripped on the drawer<br />
handle—and leave repair of office equipment to the maintenance people. Although offices are not considered to be “high<br />
hazard” work environments, injuries happen when risks are not controlled or when people get careless. Practice safe<br />
work habits at all times. Know where the office first aid kit is kept, and who has been trained to administer first aid. Lastly,<br />
make sure you understand the emergency procedures for dealing with fires, earthquakes, tsunamis, and power failures if<br />
any.<br />
16
<strong>CLSA</strong> SAFETY TAILGATE GUIDE<br />
Avoid Common Office Injuries<br />
I have been instructed in the basic hazards of this equipment/procedure as listed above. I understand this proper safe<br />
work procedure.<br />
Instructed by:<br />
Date:<br />
Trainee Names:<br />
17
<strong>CLSA</strong> SAFETY TAILGATE GUIDE<br />
Many serious and fatal injuries are caused by falls.<br />
Avoiding Falls<br />
Everyone working on construction jobs must be alert to the hazards that can cause falls. If hazards are discovered, they<br />
should be reported to the supervisor and immediate action should be taken to eliminate them.<br />
The following are the hazards that cause the majority of falls in the construction industry. Let's look at the ways to<br />
prevent or eliminate these hazards.<br />
• Slippery areas, debris, lumber, and various hard materials and equipment scattered over the floor and<br />
construction site can cause serious falls. Proper housekeeping can eliminate these hazards and reduce falls<br />
caused by slipping, tripping and stumbling. Slippery floors caused by oil or grease spills or ice should be<br />
cleaned up immediately.<br />
• Tools should be stored in a box or rack when not in use. Scrap and debris should be placed in a scrap<br />
container.<br />
• Stairways and stairwells can also be serious hazards. Failure to use the<br />
handrail can result in a serious fall from the top to the bottom of the stairway.<br />
When going down stairs, keep your hand on the handrail so you can grasp it<br />
quickly to prevent a fall.<br />
• Worn or broken treads on stairs are also slipping hazards. Replace any<br />
defective treads. Never place or store materials or tools on stairways.<br />
• Floor openings and pits should always be barricaded or covered with planking<br />
that is securely fastened in place.<br />
• Many serious falls can occur while hurrying. Walk, don't run. Management can do everything possible to provide<br />
safe working conditions. But we need your help.<br />
Report any unsafe condition you discover immediately and follow the helpful suggestions we have discussed.<br />
I have been instructed in the basic hazards of this equipment/procedure as listed above. I understand this proper safe<br />
work procedure.<br />
18
<strong>CLSA</strong> SAFETY TAILGATE GUIDE<br />
Avoiding Falls<br />
I have been instructed in the basic hazards of this equipment/procedure as listed above. I understand this proper safe<br />
work procedure.<br />
Instructed by:<br />
Date:<br />
Trainee Names:<br />
19
<strong>CLSA</strong> SAFETY TAILGATE GUIDE<br />
Avoiding Slips and Falls at the Office<br />
It may come as a surprise that falls are the most common type of office injury. Yet almost all falls can be prevented by using<br />
common safety sense and learning how to recognize and correct typical fall hazards in the office environment.<br />
Understanding Balance<br />
A fall occurs when you lose your balance and your footing. In<br />
short, your center of gravity is and there’s nowhere to go but<br />
down. You may be thrown off balance by a slip (on a wet floor,<br />
for example) or a trip (over an obstacle in your path), but once<br />
you lose your footing and support, a fall is inevitable.<br />
Common Fall Hazards<br />
One of the most common causes of office falls is tripping over an open desk or file drawer.<br />
Bending while seated in an unstable chair and tripping over electrical cords or wires are other<br />
common hazards. Office falls are frequently caused by using makeshift “ladders” (such as a<br />
chair, or a stack of boxes) and by slipping on wet floors (by the water cooler or coffee machine,<br />
for example). Loose carpeting, objects stored in halls or walkways, and inadequate lighting are<br />
other hazards that invite accidental falls. Fortunately, all of these fall hazards are preventable.<br />
The following checklist can help you stop a fall before it happens.<br />
Fall Prevention Checklist<br />
Look before you walk – make sure your pathway is clear.<br />
Close drawers after every use.<br />
Avoid bending, twisting, and leaning backwards while seated.<br />
Secure electrical cords and wires away from walkways.<br />
Always use an appropriate stepladder for overhead reaching.<br />
Clean up spills immediately.<br />
If you see anything on the floor – a pen, a paper clip, etc. – pick<br />
it up.<br />
Report loose carpeting or damaged flooring to appropriate<br />
manager.<br />
Make sure walkways are well-lighted.<br />
Walk, don’t run!<br />
20
<strong>CLSA</strong> SAFETY TAILGATE GUIDE<br />
Avoiding Slips and Falls at the Office<br />
I have been instructed in the basic hazards of this equipment/procedure as listed above. I understand this proper safe<br />
work procedure.<br />
Instructed by:<br />
Date:<br />
Trainee Names:<br />
21
<strong>CLSA</strong> SAFETY TAILGATE GUIDE<br />
Back Injuries - Get Your Crew Back in Control<br />
Jokes about nagging back pain get standup comedians a lot of laughs, but back strains and sprains are not at all funny,<br />
nor should they be an unavoidable curse to anyone.<br />
Back injuries suffered in California’s workplaces last year ran up a bill of millions of<br />
dollars. Those disabling back injuries were no laughing matter for the workers who lost<br />
time from work or from their personal activities. The sad truth is that most of the pain and<br />
lost time could have been prevented if workers had been more aware of how their backs<br />
function and how to safely lift bulky or heavy loads.<br />
About your back- The back is a network of fragile ligaments, discs, and muscles that can<br />
easily be thrown out of order. The back’s complex design breaks down when it is forced to<br />
perform activities it was not designed<br />
to do.<br />
Watch your back- One sure way to risk injuring the back is to lift heavy or bulky loads improperly or unassisted. The<br />
unsupported back cannot operate like a derrick or a crane boom. Lifting with the back twisted or bent just begs for a<br />
pulled muscle or ruptured disc. The back can be damaged quickly but can take a long time to heal. So workers should be<br />
encouraged to do their lifting with good sense and a little extra help from a co-worker or mechanical aid.<br />
How to Lift Properly<br />
• Squat over the item to be lifted, and face it squarely. In<br />
this position, the back gets added lifting strength and<br />
power from the legs and arms. Tilt the item on edge with<br />
its long axis straight up so the center of the weight is as<br />
high as possible above the ground.<br />
• Next, move up close to the item, because the backbone<br />
must act as a supporting column, and it takes the least<br />
strain close in. In this position, it’s OK to lift.<br />
• Still squatting, the feet should be set with legs pointed<br />
right at the load, with the back straightened<br />
• Then grasp the load with both arms and slowly stand up<br />
with it.<br />
You might notice that the correct way to lift is the easiest way to lift the load, with the least strain and awkwardness. To<br />
lift the wrong way will, over time, cause injury and pain and then no one will be laughing.<br />
I have been instructed in the basic hazards of this equipment/procedure as listed above. I understand this proper safe<br />
work procedure.<br />
22
<strong>CLSA</strong> SAFETY TAILGATE GUIDE<br />
Back Injuries – Get Your Crew Back in Control<br />
I have been instructed in the basic hazards of this equipment/procedure as listed above. I understand this proper safe<br />
work procedure.<br />
Instructed by:<br />
Date:<br />
Trainee Names:<br />
23
<strong>CLSA</strong> SAFETY TAILGATE GUIDE<br />
Battery Charging- A Multitude of Hazards!<br />
Explosive hydrogen….Acidic liquids and vapors….Electrical burns….Strains, sprains, hernias and compressed discs. All<br />
of these hazards arise when servicing, charging, or jumping the common lead-acid battery found in cars and trucks.<br />
Following a few common sense safety rules can minimize the hazards.<br />
Eye Protection: First, always wear safety goggles or a face shield when working around a battery. Batteries contain<br />
corrosive acids that are capable of eating away metals. It takes just one droplet to cause serious eye damage. Just<br />
popping open the vent cap may throw out a droplet. A short or faulty regulator can cause the electrolyte to boil, releasing<br />
acid vapors. A fault within the battery could cause it to explode, throwing fragments of the case and acid.<br />
Fire Protection: Lead-acid batteries produce flammable hydrogen gas<br />
while being charged. This highly explosive gas, generated within the cells,<br />
will expand and seep out of the vent caps. A cigarette, tool, or spark from<br />
any source could ignite the gas, causing the battery to explode. Always<br />
charge in a well-ventilated area. Remember too that the battery is<br />
receiving a charge and releasing hydrogen when the car is running, not<br />
just when hooked up to a battery charger.<br />
Jump Starting: Dead batteries in cars and trucks are not uncommonparticularly<br />
in winter. The first thought is to get a jump-start. When jumping<br />
a battery, remember the following safeguards:<br />
• Be sure all electrical equipment is off. If you connect the jumper<br />
battery while a load is being drawn, a spark could occur.<br />
• Check the battery fluid level. If the plates are exposed, add water until they are covered. Never add acid.<br />
• Make sure both batteries are of the same voltage.<br />
• Make sure vent caps are in place to prevent electrolyte splash.<br />
• Use good quality jumper cables-at least 10-gauge wire.<br />
• Always be sure of your polarity when arranging the jumper cables:<br />
1. Connect the first cable to the positive (+) terminal of the good<br />
battery; then attach the other end of that cable to the positive<br />
(+) terminal of the dead battery.<br />
2. Next, attach the second cable to the negative (-) terminal of<br />
the good battery, and make the fourth and last connection to a<br />
clean metal part, such as the engine block of the car being<br />
energized, rather than to its negative battery terminal. This<br />
completes the electrical circuit, as if it was connected to the<br />
dead battery, but if sparks are produced, it serves to keep<br />
them away from any explosive battery gases.<br />
3. Never lay your tools on top of the battery. They could come in<br />
contact with both posts, or the positive post and a ground,<br />
creating a short.<br />
24
<strong>CLSA</strong> SAFETY TAILGATE GUIDE<br />
Protect Your Back: Batteries are heavy. If you must move one, use a battery strap as a handle, keep your back<br />
straight-don't bend at the waist--and tighten your stomach muscles as you lift. Don't twist your spine as you lift or move it.<br />
Remember that these rules apply both on and off the job. The batteries in your own vehicle or on your boat are just as<br />
potentially dangerous. Respect the hazards and take no chances or short cuts!<br />
I have been instructed in the basic hazards of this equipment/procedure as listed above. I understand this proper safe<br />
work procedure.<br />
25
<strong>CLSA</strong> SAFETY TAILGATE GUIDE<br />
Battery Charging – A Multitude of Hazards!<br />
I have been instructed in the basic hazards of this equipment/procedure as listed above. I understand this proper safe<br />
work procedure.<br />
Instructed by:<br />
Date:<br />
Trainee Names:<br />
26
<strong>CLSA</strong> SAFETY TAILGATE GUIDE<br />
Battery Handling <strong>Safety</strong><br />
Batteries are used to power our automobiles, trucks, tractors, and construction or power equipment. There are different<br />
types of batteries such as lead-acid batteries, gel cells, and lead-calcium batteries. Most batteries contain sulfuric acid<br />
and lead. Because batteries contain chemicals, chemical reaction by-products, and an electrical current they can pose a<br />
hazard to workers if not handled properly. Workers that operate, maintain, and recharge batteries should use caution.<br />
Before working with a battery, you should have training in proper handling procedures.<br />
Consult the vehicle and battery owners’ manuals for specific instructions on battery handling and hazard identification.<br />
Do’s and Don’ts<br />
• DO wear personal protective equipment (PPE) such as chemical splash goggles and a face shield to avoid<br />
splashing acid in your face. If acid splashes on your skin or eyes, immediately flood the area with cool running<br />
water for at least 15 minutes and seek medical attention immediately.<br />
• DO wear acid-resistant equipment such as gauntlet style gloves, an apron, and boots.<br />
• DON’T tuck your pant legs into your boots because spilled acid can form a pool in your boots.<br />
• DO be aware of the chemical hazards posed by batteries. The sulfuric acid (electrolyte) in batteries is highly<br />
corrosive. Acid exposure can lead to skin irritation, eye damage, respiratory irritation, and tooth enamel erosion.<br />
• DON’T ever lean over a battery while boosting, testing or charging it.<br />
• DON’T allow the battery solution to mix with salt water in marine environments; it can produce hazardous<br />
chlorine gas.<br />
• DO practice good hygiene and wash your hands after handling a battery and before eating. If you handle the<br />
lead plates in a battery and don’t wash your hands properly, you could be exposed to lead. Signs of lead<br />
exposure include loss of appetite, diarrhea, constipation with cramping, difficulty sleeping, and fatigue.<br />
The chemical reaction by-products from a battery include oxygen and hydrogen gas. These can be explosive at high<br />
levels.<br />
Overcharging batteries can also create flammable gases. For this reason, it is very important to store and maintain<br />
batteries in a well-ventilated work area away from all ignition sources and incompatible materials. Cigarettes, flames or<br />
sparks could cause a battery to explode.<br />
Before working on a battery:<br />
1) Always remove your personal jewelry before working on a battery. A short-circuit current can weld a ring or<br />
bracelet to metal and cause severe burns.<br />
2) Disconnect the battery cables.<br />
3) To avoid sparking, always disconnect the negative battery cable first and reconnect it last.<br />
4) Be careful with flammable fluids when working on a battery-powered engine. The electrical voltage created by<br />
batteries can ignite flammable materials and cause severe burns. Workers have been injured and killed when<br />
loose or sparking battery connections ignited gasoline and solvent fumes during vehicle maintenance.<br />
27
<strong>CLSA</strong> SAFETY TAILGATE GUIDE<br />
Taking care of the battery:<br />
1) Battery maintenance tools should be covered with several layers of electrical tape to avoid sparking.<br />
2) Place protective rubber boots on battery cable connections to prevent sparking on impact if a tool does<br />
accidentally hit a terminal.<br />
3) Clean the battery terminals with a plastic brush because wire brushes could create static and sparks.<br />
4) Batteries can be very dense and heavy, so use proper lifting techniques to avoid back injuries.<br />
5) Battery casings can be brittle and break easily; they should be handled carefully to avoid an acid spill. Make<br />
sure that a battery is properly secured and upright in the vehicle or equipment.<br />
6) If a battery shows signs of damage to the terminals, case or cover, replace it with a new one.<br />
7) Remember to dispose of old batteries properly.<br />
I have been instructed in the basic hazards of this equipment/procedure as listed above. I understand this proper safe<br />
work procedure.<br />
28
<strong>CLSA</strong> SAFETY TAILGATE GUIDE<br />
Battery Handling <strong>Safety</strong><br />
I have been instructed in the basic hazards of this equipment/procedure as listed above. I understand this proper safe<br />
work procedure.<br />
Instructed by:<br />
Date:<br />
Trainee Names:<br />
29
<strong>CLSA</strong> SAFETY TAILGATE GUIDE<br />
Battery Jump Starting<br />
This is primarily a safety check-off sheet to inform the employee of the dangers and hazards of combustible materials.<br />
Each employee must be trained on these hazards to avoid injury.<br />
Minimum <strong>Safety</strong> Equipment Required: <strong>Safety</strong> Glasses<br />
1. Improper procedures or techniques may result in personal injury and/or damage to the electrical system or<br />
computer components. Employees must complete battery training before jump-starting equipment.<br />
2. Is the vehicle in a safe location to be jump-started?<br />
3. If the battery is distorted/deformed, cracked, leaking, or missing a vent cap, DO NOT jump-start, call for<br />
assistance.<br />
4. Wear appropriate personal protective equipment consistent with the hazard. Eye protection is required.<br />
5. When working at night, have adequate lighting available.<br />
6. Avoid leaning over the battery whenever possible.<br />
7. Do not expose the battery to open flames or sparks (NO SMOKING).<br />
8. Be sure any batteries that have filler caps are properly filled with fluid.<br />
9. Do not allow battery acid to contact eyes or skin.<br />
10. Both discharged and charged batteries must be of the same voltage.<br />
11. Do not stand between vehicles.<br />
12. Use proper procedure in accordance with the operator's manual. If no special instructions apply, proceed as<br />
follows for negative grounded batteries:<br />
13. Make the jumper connections:<br />
• Connect one end of the red jumper cable to the positive (+) terminal of the booster battery and<br />
the opposite end to the positive<br />
Make the jumper connections continued:<br />
• (+) terminal of the discharged battery<br />
• Connect one end of the black jumper cable to the negative (-) terminal of the booster battery<br />
and the opposite end to an engine bolthead or good metal contact on the vehicle to be started,<br />
not to the negative battery terminal of the discharged battery<br />
30
<strong>CLSA</strong> SAFETY TAILGATE GUIDE<br />
• Check the cables to make sure they will not be in the way of moving parts when the vehicle is<br />
started<br />
• Start the engine of the vehicle with the good battery and run it at a moderate speed<br />
• Start the engine of the vehicle with the discharged battery<br />
• Remove all cables in reverse sequence. Begin by removing the cable from the engine of the<br />
vehicle that had the discharged battery.<br />
• Keep hands and equipment from all moving parts, belts, machinery, etc.<br />
• Never use external heat to aid in starting equipment when volatiles are present.<br />
I have been instructed in the basic hazards of this equipment/procedure as listed above. I understand this proper safe<br />
work procedure.<br />
31
<strong>CLSA</strong> SAFETY TAILGATE GUIDE<br />
Battery Jump Starting<br />
I have been instructed in the basic hazards of this equipment/procedure as listed above. I understand this proper safe<br />
work procedure.<br />
Instructed by:<br />
Date:<br />
Trainee Names:<br />
32
<strong>CLSA</strong> SAFETY TAILGATE GUIDE<br />
Blind Spots in Mobile Equipment Operations<br />
Two recent incidents in the news involving construction equipment backing over workers have highlighted the need for<br />
employers to review work practices where workers are required to be in the vicinity of moving vehicles and equipment.<br />
One of the accidents resulted in the death of a worker who was hit by a vehicle-mounted aerial device that was being<br />
moved from one location to another. The other incident occurred when a dump truck used on a road repair project was<br />
backing into an unloading area, and ran over a worker involved in road maintenance work. In both cases, the accidents<br />
were caused by a lack of proper signaling and improper work procedures. Poor sight lines and lack of visibility are<br />
inherent in some equipment used on construction projects and in industrial workplaces. This is especially true when the<br />
equipment is backing up, or moving in areas where space is limited and the turning radius is tight.<br />
Warning devices, such as back-up alarms and/or flashing lights are provided on some of the mobile equipment, but this<br />
is not always sufficient to ensure worker protection. This is especially true on projects where there are many pieces of<br />
equipment, constant movement, and high noise levels. Proper site planning, traffic control systems and worker training<br />
are the best ways to reduce accidents where vehicles and Employees must work in the same area. (See pre-job risk<br />
assessment check list.)<br />
When doing your pre-job risk assessment consider these<br />
points:<br />
• Consider the suitability of providing backup alarms on<br />
all mobile equipment.<br />
• Whenever possible, plan the project to allow for drivethrough<br />
operations that will limit the need for vehicles<br />
to back-up.<br />
• Reduce foot traffic in areas where mobile equipment is<br />
to be working.<br />
• Establish designated travel areas, ideally with<br />
barricades or other means to set apart from work<br />
locations.<br />
If you must have workers and mobile equipment working in the same area, establish a traffic control system. Where you<br />
have heavy traffic a signal person or traffic spotter should be designated to control traffic movement at the site. The<br />
signal person must be properly trained, wear reflective fluorescent blaze outerwear, wear safety footwear, headwear,<br />
and other personal protective equipment required on the project and use clearly understood hand signals or standard<br />
traffic control devices (STOP paddle, etc.).<br />
The signal person must know driver ‘blind spots’ and remain at all times visible to the driver and any workers in the travel<br />
area. The signal person must make eye contact with the driver prior to signaling or changing location. The driver must<br />
always obey the signal person and never back up or move in congested areas without the signal person indicating the<br />
path is clear. The driver must be trained to understand all signals used by the signal person. Workers on foot should also<br />
be trained to recognize driver blind spots and avoid entering these areas.<br />
33
<strong>CLSA</strong> SAFETY TAILGATE GUIDE<br />
Driver blind spots (dark areas)<br />
34
<strong>CLSA</strong> SAFETY TAILGATE GUIDE<br />
Blind Spots in Mobile Equipment Operations<br />
I have been instructed in the basic hazards of this equipment/procedure as listed above. I understand this proper safe<br />
work procedure.<br />
Instructed by:<br />
Date:<br />
Trainee Names:<br />
35
<strong>CLSA</strong> SAFETY TAILGATE GUIDE<br />
Carbon Monoxide<br />
What is Carbon Monoxide?<br />
Carbon Monoxide (CO) is a poisonous, colorless, tasteless, odorless gas. CO gas is generated as a waste product of the<br />
incomplete combustion of coal, wood, oil, and other petroleum based fuels (e.g. gasoline, propane, etc). CO gas,<br />
although odorless, usually occurs in a combination of combustion by-products that have distinctive odors. The primary<br />
source of CO gas is the internal combustion engine. CO gas is also generated in industrial operations such as auto<br />
repair, oil refining, steel and chemical manufacturing.<br />
Hazards of Carbon Monoxide<br />
Health Hazards:<br />
CO is a chemical asphyxiate which means that it reduces the blood’s<br />
ability to carry oxygen. Asphyxiation, or suffocation, occurs when the<br />
blood does not deliver enough oxygen to the body.<br />
CO gas is absorbed through the lungs into the bloodstream.<br />
Inhalation of CO gas may cause headaches, nausea, dizziness,<br />
weakness, rapid breathing, unconsciousness and death. High<br />
concentrations of CO may be rapidly fatal without producing<br />
significant warning symptoms.<br />
Exposure to this gas may aggravate preexisting heart and artery<br />
disease. As CO gas is odorless, there may be no odor warning if toxic<br />
concentrations are present.<br />
If you suspect CO poisoning, move the person immediately to the<br />
fresh air away from the source of the CO. Call 911 or your emergency<br />
number for medical assistance. CO poisoning can be reversed if caught in time.<br />
<strong>Safety</strong> Hazards:<br />
CO gas mixes very well with air. CO gas penetrates easily through walls and ceilings. It is an extremely flammable gas.<br />
CO gas may react very strongly with oxygen, acetylene, chlorine, fluorine or nitrous oxide.<br />
Who is at Risk?<br />
Workers most likely to be exposed to carbon monoxide are welders, mechanics, firefighters, long shore workers, diesel<br />
engine operators, forklift drivers, tollbooth or tunnel attendants, police, taxi drivers, shipping and receiving workers and<br />
warehouse personnel.<br />
Methods of Control of Carbon Monoxide<br />
To reduce the chances of CO poisoning in the workplace:<br />
• Install a ventilation system that will effectively remove CO from the work area.<br />
• Properly maintain equipment that may produce CO to enhance safe operation and to reduce CO generation.<br />
• Consider switching from gasoline-powered equipment to battery or electric equipment.<br />
• Prohibit the use of gasoline-powered equipment indoors or in poorly ventilated areas.<br />
• Consider installing CO detectors with audible alarms.<br />
• Educate workers about the sources, hazards, and controls of CO.<br />
36
<strong>CLSA</strong> SAFETY TAILGATE GUIDE<br />
What Can You Do To Help?<br />
• Report any situation to your employer that might cause CO to build up.<br />
• Pay attention to ventilation problems, especially in enclosed areas.<br />
• Avoid the use of gas-powered equipment in enclosed spaces.<br />
37
<strong>CLSA</strong> SAFETY TAILGATE GUIDE<br />
Carbon Monoxide<br />
I have been instructed in the basic hazards of this equipment/procedure as listed above. I understand this proper safe<br />
work procedure.<br />
Instructed by:<br />
Date:<br />
Trainee Names:<br />
38
<strong>CLSA</strong> SAFETY TAILGATE GUIDE<br />
Construction Equipment<br />
Construction equipment, including but not limited to; wheel and track tractors, loaders, and bulldozers, backhoes,<br />
excavation hoes, graders, scrapers, trenchers and ditchdiggers, pavement breakers, boom trucks, cranes and lifts, must<br />
be operated within the <strong>guide</strong>lines established by the manufacturer, and in accordance with safe operating procedures.<br />
All operators must be authorized and trained personnel, who have demonstrated to the unit supervisor, or the<br />
Maintenance Section Supervisor that they are familiar with the safe operation of each type and piece of equipment they<br />
are to operate. Each operator shall have read and understood the operating and maintenance manuals for each piece of<br />
equipment.<br />
All construction equipment shall be equipped with roll-over<br />
protection (ROPS) to ensure operator safety, and be equipped<br />
with a functioning seatbelt sufficient to prevent the ejection of the<br />
operator in event of a roll-over. It is mandatory for all operators to<br />
wear the seatbelt when operating construction equipment<br />
equipped with ROPS.<br />
All equipment shall be equipped with a backup alarm approved by<br />
Cal/OSHA which shall be operational at all times when equipment<br />
is moving in reverse.<br />
The brakes of each piece of construction equipment shall be in operating condition and capable of stopping the<br />
equipment and any load, within limits set by the manufacturer. Brakes shall be inspected annually or every 150 hours of<br />
operation whichever comes first. All safety interlocks, neutral switches and implement travel speed limiting devices shall<br />
be in operating condition at all times.<br />
Every operator shall wear personal protective equipment including, gloves, hard hat, goggles or safety glasses,<br />
and ear protection while operating equipment.<br />
No employee shall operate, or continue to operate, any piece of construction equipment that he/she knows is defective,<br />
or becomes defective or unsafe while being operated. Such equipment shall be shut down and secured, and the Unit<br />
Supervisor notified immediately. The Unit Supervisor shall take appropriate steps to have the equipment repaired before<br />
it is returned to service.<br />
39
<strong>CLSA</strong> SAFETY TAILGATE GUIDE<br />
Construction Equipment<br />
I have been instructed in the basic hazards of this equipment/procedure as listed above. I understand this proper safe<br />
work procedure.<br />
Instructed by:<br />
Date:<br />
Trainee Names:<br />
40
<strong>CLSA</strong> SAFETY TAILGATE GUIDE<br />
Construction <strong>Safety</strong> - Identifying Construction Hazards<br />
The following examples are intended to remind workers of the typical construction hazards we see regularly with hopes<br />
that everyone will put safety first and correct hazards as they find them.<br />
HOUSEKEEPING - Not enough can be said about maintaining a<br />
clean work area! Keeping your area swept and free from debris<br />
not only prevents tripping hazards, but it makes it easier to<br />
perform your work. Make sure stored materials are stacked<br />
neatly and away from work areas.<br />
EXTENSION CORDS - Make sure cord sets have a grounding<br />
plug in place before using. If insulation on cords is damaged,<br />
take the cords out of service. Elevate extension cords to prevent<br />
tripping hazards.<br />
ELECTRICAL PANELS - All panels and boxes must have a<br />
cover in place to prevent electrical shock. Ground Fault Circuit<br />
Interrupters (GFCI) should be required on all circuits that will be<br />
used for portable power tools.<br />
SCAFFOLDING - Elevated working surfaces must be fully planked with toe boards, handrails and mid rails installed.<br />
Scaffolds must be erected with vertical members resting on a solid base with the scaffold level. Never climb the outside<br />
of a scaffold; ladders are required. Never climb a ladder while carrying tools or materials. Instead, use a hoist line.<br />
LADDERS - Stepladders are a major source for construction accidents. Make sure they are used properly and<br />
maintained in good repair. Remove broken or damaged ladders from service immediately. Never lean stepladders<br />
against a wall or work surface. Never separate extension ladders. Always make sure extension ladders are tied off.<br />
SLIPPERY SURFACES - Make sure sand or some other slip resistant material is applied to icy walking surfaces. Clean<br />
up oil and water spills immediately. Another serious cause of slips are "rolly pollys." These are small round objects that<br />
can cause a slip when stepped on. Typical ones include: Welding rod ends, stubs from conduit and small diameter pipe.<br />
LIGHTING - Most construction areas require a minimum of 5 foot candles. If you are having a hard time seeing your<br />
work, then you need to let someone know and get something done about it. Stairways are a common problem area and<br />
require good lighting.<br />
EYE PROTECTION - It is too common to see workers who need eye protection not wearing it. The typical reason is<br />
because they did not have glasses with them. Wearing safety glasses all the time prevents this situation. <strong>Safety</strong> glasses<br />
alone are not adequate for tasks that create flying particulate matter such as grinding or cutting. Wear a face shield as<br />
well.<br />
41
<strong>CLSA</strong> SAFETY TAILGATE GUIDE<br />
Construction <strong>Safety</strong> – Identifying Construction Hazards<br />
I have been instructed in the basic hazards of this equipment/procedure as listed above. I understand this proper safe<br />
work procedure.<br />
Instructed by:<br />
Date:<br />
Trainee Names:<br />
42
<strong>CLSA</strong> SAFETY TAILGATE GUIDE<br />
CPR Procedures for Adults<br />
CALL<br />
CPR - Adult<br />
Check the victim for unresponsiveness. If there is no response call 911.<br />
In most locations the emergency dispatcher can assist you with CPR<br />
instructions.<br />
BLOW<br />
Tilt the head back and listen for breathing. If not breathing normally,<br />
pinch nose and cover the mouth with yours and blow until you see the<br />
chest rise.<br />
Give 2 slow, even breaths. Each breath should take 1 second.<br />
PUMP<br />
If the victim is still not breathing normally, coughing or moving, begin<br />
chest compressions. Push down on the chest 1 ½ to 2 inches 30 times<br />
right between the nipples.<br />
Pump at the rate of 100/minute, faster than once per second.<br />
CONTINUE WITH 2 BREATHS AND 30 PUMPS UNTIL HELP ARRIVES<br />
NOTE: This ratio is the same for one-person & two-person CPR. In two-person CPR the person<br />
pumping the chest stops while the other gives mouth-to-mouth breathing.<br />
43
<strong>CLSA</strong> SAFETY TAILGATE GUIDE<br />
CPR Procedures for Adults<br />
I have been instructed in the basic hazards of this equipment/procedure as listed above. I understand this proper safe<br />
work procedure.<br />
Instructed by:<br />
Date:<br />
Trainee Names:<br />
44
<strong>CLSA</strong> SAFETY TAILGATE GUIDE<br />
CPR Procedures for Children<br />
CALL<br />
CPR - CHILD (1 year to 8 yeas old)<br />
Check the victim for unresponsiveness. If there is no response, give 2 minutes<br />
of CPR before calling 911.<br />
In most locations the emergency dispatcher can assist you with CPR<br />
instructions.<br />
BLOW<br />
Tilt the head back and listen for breathing. If not breathing normally, pinch<br />
nose and cover the mouth with yours and blow until you see the chest rise.<br />
Give 2 slow, even breaths. Each breath should take 1 second.<br />
PUMP<br />
If the victim is still not breathing normally, coughing or moving, begin chest<br />
compressions. Push down on the chest 1 to 1½ inches 30 times right between<br />
the nipples. Use just one hand for child CPR.<br />
Pump at the rate of 100/minute, faster than once per second.<br />
CONTINUE WITH 2 BREATHS AND 30 PUMPS UNTIL HELP ARRIVES<br />
NOTE: This ratio is the same for one-person & two-person CPR. In two-person CPR the person pumping<br />
the chest stops while the other gives mouth-to-mouth breathing.<br />
45
<strong>CLSA</strong> SAFETY TAILGATE GUIDE<br />
CPR Procedures for Children<br />
I have been instructed in the basic hazards of this equipment/procedure as listed above. I understand this proper safe<br />
work procedure.<br />
Instructed by:<br />
Date:<br />
Trainee Names:<br />
46
<strong>CLSA</strong> SAFETY TAILGATE GUIDE<br />
CPR Procedures for Infants<br />
1. Shout and Tap<br />
CPR for Infants (Age younger than 1 year old)<br />
Shout and gently tap the child on the shoulder. If there is no response, position<br />
the infant on his or her back.<br />
Give 2 minutes of CPR before calling 911.<br />
2. Open The Airway<br />
Open the airway using a head tilt lifting of chin. Do not tilt the head too far back<br />
3. Give 2 Gentle Breaths (puffs)<br />
If the baby is NOT breathing give 2 small gentle breaths. Cover the baby's<br />
mouth and nose with your mouth. Each breath should be 1 second long. You<br />
should see the baby's chest rise with each breath.<br />
4. Give 30 Compressions<br />
Give 30 gentle chest compressions at the rate of 100 per minute. Use two or<br />
three fingers in the center of the chest just below the nipples. Press down<br />
approximately one-third the depth of the chest.<br />
5. Repeat<br />
Repeat with 2 breath and 30 compressions. After two minutes of repeated<br />
cycles call 911 and continue giving breaths and compressions.<br />
47
<strong>CLSA</strong> SAFETY TAILGATE GUIDE<br />
CPR Procedures for Infants<br />
I have been instructed in the basic hazards of this equipment/procedure as listed above. I understand this proper safe<br />
work procedure.<br />
Instructed by:<br />
Date:<br />
Trainee Names:<br />
48
<strong>CLSA</strong> SAFETY TAILGATE GUIDE<br />
Don’t Take Back Problems Sitting Down<br />
Why do so many of us have back problems today? In part, it’s the way our work and lifestyle has evolved. As people<br />
grow more sedentary in an increasingly automated world, we’re doing more sitting and adding extra pounds. As a result,<br />
our backs are becoming more vulnerable to injury.<br />
Sitting, especially slouching, is one of the most common positions during our waking hours. It also happens to be one of<br />
the worst positions for our backs, by putting continuous pressure on the lower back muscles and disks.<br />
Low back pain is a warning that something is wrong. Recognize this warning and take steps to prevent a back problem<br />
from getting worse.<br />
Vehicular vibration adds additional stress to the backs of those who drive long distances.<br />
Here’s some back comfort tips for drivers:<br />
• Position the seat forward so that your knees are bent. If the tilt of the<br />
seats can be adjusted, change the angle slightly every so often.<br />
• Placing a cushion at the small of your back and sitting in a slightly<br />
reclining angle may ease pressure on your lower back while driving.<br />
• Change your sitting position frequently or get out of the vehicle every hour and walk around for a few minutes.<br />
• Grip the steering wheel at the nine and three o’clock hand positions. This puts your arms and shoulders in a<br />
more neutral position.<br />
Here are some helpful suggestions if you sit for long periods in an office chair during the course of your<br />
workday:<br />
• Choose the right chair, a chair that supports the length and width of your back with<br />
adjustable armrests and a seat height you can adjust.<br />
• Sit smart. Sit straight and close to your work, don’t slump forward. Your buttocks should<br />
rest against the back of the seat. Your knees should stick out a hand’s width beyond<br />
the edge of the chair with your feet resting comfortable on the floor or footrest.<br />
• Adjust your work height and angle. Your surface work and keyboard should be at elbow<br />
level. If you work at a computer, the top of your screen should be at eye level.<br />
• If possible, get up regularly and stretch or, shift your sitting position at least once every 30 minutes.<br />
There are also some general lifestyle choices, which can reduce stress on your back. Sleep on a firm mattress, control<br />
your weight, getting some exercise, and for men, take that bulging wallet out of your back pocket when you sit. Make<br />
sitting a pleasure not a pain.<br />
49
<strong>CLSA</strong> SAFETY TAILGATE GUIDE<br />
Don’t Take Back Problems Sitting Down<br />
I have been instructed in the basic hazards of this equipment/procedure as listed above. I understand this proper safe<br />
work procedure.<br />
Instructed by:<br />
Date:<br />
Trainee Names:<br />
50
<strong>CLSA</strong> SAFETY TAILGATE GUIDE<br />
Driving Distracted?<br />
Driving down the road is no longer a lonely, quiet experience. With cellular phones, two-way radios, and stereos, the<br />
interior of your vehicle no longer offers a quiet place to focus on driving.<br />
These days with everyone’s life so busy, paying attention while driving can be difficult. Have you ever been driving down<br />
the road and suddenly you notice you don’t remember the last three miles you traveled? Although your attention may<br />
only be diverted for a split second, the ever-changing variables of the road and other vehicles can make you instantly<br />
vulnerable to accidents.<br />
The following rules can help you concentrate on what you should be doing...driving.<br />
• Tie up loose ends before you leave the office.<br />
• If you must travel in heavy traffic areas, plan your travel at<br />
times other then rush hour.<br />
• Know the condition of the roads on which you are traveling<br />
and drive only as fast as those conditions allow.<br />
• Wear your safety belt at all times.<br />
• Set the radio to a station and leave it there until you stop<br />
again.<br />
• Stay alert and drive defensively, with caution.<br />
• Watch out for and anticipate other drivers, pedestrians or<br />
children on or near the road.<br />
• Stay out of the other vehicle’s blind spot<br />
• Keep a safe distance from other drivers by maintaining a<br />
safety cushion around your car.<br />
Safe drivers scan constantly for hazards, predicting how they may be affected by a hazard and pre-determining how to<br />
avoid or reduce them.<br />
51
<strong>CLSA</strong> SAFETY TAILGATE GUIDE<br />
Driving Distracted?<br />
I have been instructed in the basic hazards of this equipment/procedure as listed above. I understand this proper safe<br />
work procedure.<br />
Instructed by:<br />
Date:<br />
Trainee Names:<br />
52
<strong>CLSA</strong> SAFETY TAILGATE GUIDE<br />
Driving In Wet Weather<br />
This is primarily a safety check-off sheet to inform the employee of the dangers and hazards of performing this job duty.<br />
Each employee must complete operator training. .<br />
Minimum <strong>Safety</strong> Equipment Required: NA<br />
General <strong>Safety</strong> Rules:<br />
• Remember that the streets are more slippery during the first rains of the year than later on when oils have been<br />
washed away.<br />
• Check your tires. Worn or damaged tires are dangerous. Check the tire pressure during each gas fill-up.<br />
• Check the windshield wipers. They must be working and not streak the windshield. Replace them prior to the<br />
rainy season if necessary.<br />
• Drive with the headlights on – it’s the law – if your lights are<br />
on your headlights are on. It also makes it easier for other<br />
drivers to see you in the rain.<br />
• Keep two hands on the steering wheel. Do not try to eat or<br />
take notes while driving.<br />
• Drive at a slower speed than usual. Leave extra space<br />
between you and the car in front. Your brakes will not stop<br />
you as quickly as in dry conditions, especially if you are<br />
pulling a trailer.<br />
• Do not apply the brakes hard. Pump the brakes to avoid<br />
skidding as a skidding truck is difficult to control. If you start<br />
to skid, steer in the direction of the skid.<br />
• Be careful when climbing in and out of the truck bed to unload equipment and debris; it is easy to slip and fall on<br />
the wet surfaces.<br />
53
<strong>CLSA</strong> SAFETY TAILGATE GUIDE<br />
Driving in Wet Weather<br />
I have been instructed in the basic hazards of this equipment/procedure as listed above. I understand this proper safe<br />
work procedure.<br />
Instructed by:<br />
Date:<br />
Trainee Names:<br />
54
<strong>CLSA</strong> SAFETY TAILGATE GUIDE<br />
Driving Tips to Prevent Skidding<br />
It doesn’t matter what you drive - if you lose control on a slick road and start to skid it is scary.<br />
Even with better roads, better tires, and anti-lock brakes, a lot of drivers get into accidents because of a skid in bad<br />
weather. You or your crew can loose control of your equipment in any weather or road condition, but bad weather can<br />
increase their chances of skidding as much as 10 times.<br />
The only way you can reduce the chance of skidding is to adjust your driving for bad weather conditions. This means<br />
slowing down and giving yourself more time and distance. Here are some tips:<br />
• Reduce speed. Drive slower in rain, and go well below the posted<br />
speed limit in snow or ice.<br />
• Allow more time to slow down when approaching other vehicles,<br />
intersections, curves, railroad crossings, and the entrance to the job<br />
site.<br />
• Give more distance to the vehicles ahead. In wet weather, double<br />
your normal following distance.<br />
• Make sure to select the proper gear before going up or downhill.<br />
• Think ahead of the vehicle. Remember that ice forms on bridges<br />
before roadways.<br />
• Expect ice beneath underpasses, in the shade, or at higher altitudes.<br />
When the temperature is below freezing, roads that were wet during<br />
the day can become icy after the sun goes down.<br />
• When you do have to stop, do it slowly. Never jam on the brakes. Jamming on the breaks will lock the wheels<br />
and throw you into a skid. Instead, pump the brakes slowly. If you feel the wheels lock, get off the brake<br />
immediately, then pump the pedal again.<br />
Bad weather isn’t the only cause of skid conditions. Gravel or sand roads to and from a job site will also increase<br />
stopping distance. A fast turn off of a paved road onto sand can throw your vehicle into a skid, or make it impossible to<br />
stop in time. Be sure to slow down before driving off the paved roadway.<br />
55
<strong>CLSA</strong> SAFETY TAILGATE GUIDE<br />
Driving Tips to Prevent Skidding<br />
I have been instructed in the basic hazards of this equipment/procedure as listed above. I understand this proper safe<br />
work procedure.<br />
Instructed by:<br />
Date:<br />
Trainee Names:<br />
56
<strong>CLSA</strong> SAFETY TAILGATE GUIDE<br />
Driving Vehicles and Moving Equipment Safely<br />
Many workplace injuries and deaths involve vehicles and moving equipment, but sometimes this equipment is essential<br />
to the work operation. All vehicle and equipment operators should be trained, competent, and safety-minded to avoid<br />
costly accidents and injuries. Before operation, drivers should carefully read the operator's manual and observe<br />
the operating, maintenance, and safety instructions.<br />
Provisions that operators should consider:<br />
• Get enough rest.<br />
• Take occasional breaks, especially on hot days, to reduce fatigue.<br />
• Vehicle operation should be limited or avoided when drivers are ill or taking medications that can affect<br />
alertness.<br />
• Dress appropriately for the weather and work conditions, including head and eye protection. (If the vehicle<br />
doesn't have a protective cab, dust respirator and<br />
acoustic earmuffs or plugs may be required.)<br />
• Before driving, seat belts should be securely<br />
fastened, even if the vehicle has roll over protection<br />
(ROPs).<br />
• No one should ride on any part of a moving vehicle,<br />
except areas intended for transport. If there are no<br />
passenger seats, there should be no riders.<br />
• See to it that everyone is at a safe distance from<br />
the equipment before moving.<br />
• Only those with a driver's license should drive<br />
equipment on public roads.<br />
• Vehicle ground speed should match operating<br />
conditions. Speed should be cut in turns, when near ditches and obstacles, on rough, hilly or muddy ground,<br />
and when visibility is poor.<br />
• All workers should be warned not be approach or get on equipment that is under power.<br />
How Operators Should Shut Down Machinery<br />
When the vehicle is stopped, brakes should be set securely, using park lock, and remove keys to keep unauthorized<br />
persons or children from restarting the machinery. Operators should disengage the power take off, keeping shields and<br />
guards in place, and turn off the engine before unclogging, refueling or working on any power-driven machine.<br />
Other workers can avoid danger from moving equipment by staying alert, out of the way, and by never walking under or<br />
alongside moving equipment. As an added safety precaution, a first-aid kit with emergency numbers should be kept in<br />
the vehicle or close enough for quick access.<br />
57
<strong>CLSA</strong> SAFETY TAILGATE GUIDE<br />
Driving Vehicles and Moving Equipment Safely<br />
I have been instructed in the basic hazards of this equipment/procedure as listed above. I understand this proper safe<br />
work procedure.<br />
Instructed by:<br />
Date:<br />
Trainee Names:<br />
58
<strong>CLSA</strong> SAFETY TAILGATE GUIDE<br />
Earthquake <strong>Safety</strong><br />
According to the US Geological Survey, there is a 60% chance that a 6.7 magnitude or greater earthquake will<br />
occur in California in the next 30 years. An earthquake of this size can pose an immediate hazard to worker safety,<br />
strain public services and disrupt business. The best way to survive an earthquake, or any other emergency, safely is to<br />
prepare, plan, and practice.<br />
First, prepare your workplace for an earthquake. Large equipment such as boilers, tanks, and machines need<br />
to be secured properly so they will not fall over in an earthquake. Furniture such as bookshelves and file cabinets along<br />
with storage racks and shelving should be strapped or attached to the wall to keep it stable and upright. Survey your<br />
workspace to make sure that heavy items are stored at lower heights or secured so they won’t fall. Photos and pictures<br />
should be hung onto the wall with screws or earthquake “j” clips. Keep doors, exits, and aisle ways clear at all times for<br />
quick access evacuations. Keep areas under desks and tables uncluttered to make room to take cover in an<br />
earthquake. Store chemicals properly and in<br />
compatible groups.<br />
Gather emergency supplies for the<br />
workplace. Fire extinguishers should be charged and<br />
inspected monthly so they are always ready to use.<br />
Periodically test fire alarms, sprinklers, and<br />
emergency lighting. Keep flashlights, a radio, extra<br />
batteries, and a first aid kit on hand at all times.<br />
Consider stockpiling food, water, blankets, and<br />
sanitary supplies such as toilet paper and portable<br />
toilets. Keep enough supplies for the number of<br />
workers that may need to shelter or work at your<br />
facility after an earthquake. Prepare personal<br />
emergency supplies for your desk and your car,<br />
including comfortable clothes and shoes, a flashlight<br />
and batteries, first aid kit, food, water, and necessary<br />
medications.<br />
Make an emergency plan at work and at<br />
home. Businesses must have an emergency evacuation plan that details how employees will evacuate from the<br />
building, where they will meet, how to account for everyone, and how to get further instructions to act. Current<br />
emergency contact phone numbers for all employees and management are critical in an emergency. Businesses should<br />
also list and prioritize their functions in a Business Continuity Plan (BCP) that ensures access to the people, materials,<br />
and other supplies needed to continue work after an earthquake.<br />
Workers should have family emergency plans in place at home in case they are stranded at work or required<br />
to work after an earthquake. Keep enough emergency supplies on hand to maintain your family for at least 3 days.<br />
Make lists of emergency contact phone numbers and determine a <strong>meeting</strong> place for the family after an emergency.<br />
Finally, practice and train on your emergency procedures. Practice emergency evacuations. Get training on<br />
first aid and CPR techniques. Train and remember to Duck, Cover and Hold in an earthquake. During an earthquake,<br />
duck or drop down on the floor. Take cover under a sturdy desk or table and hold on to it so that you can move with it<br />
during the shaking. If you cannot take cover, stand against an interior wall and protect your head and neck with your<br />
arms. Practice your business recovery procedures by inspecting and restarting equipment and computers in the proper<br />
and prioritized order.<br />
Earthquakes aren’t planned, but YOU can plan and practice to survive!<br />
59
<strong>CLSA</strong> SAFETY TAILGATE GUIDE<br />
Earthquake <strong>Safety</strong><br />
I have been instructed in the basic hazards of this equipment/procedure as listed above. I understand this proper safe<br />
work procedure.<br />
Instructed by:<br />
Date:<br />
Trainee Names:<br />
60
<strong>CLSA</strong> SAFETY TAILGATE GUIDE<br />
Emergency Eye Wash & Deluge Showers<br />
Let's hope you never need one, but if you do, let's hope it's clean and accessible. If you get foreign particles in your eyes<br />
or a chemical spill on your body, an emergency eyewash station or deluge shower is the most important initial step in<br />
first-aid treatment. Chemical burns to the eye are among the most urgent of emergencies.<br />
An eyewash/shower is required if:<br />
• The Material <strong>Safety</strong> Data Sheet indicates a chemical in use is<br />
caustic, toxic, or corrosive.<br />
• The MSDS informs that serious eye damage may result.<br />
• Warnings such as "causes chemical burns" or "causes<br />
permanent eye damage" are posted on container labels.<br />
Eyewash/showers in addition must have the following:<br />
• Pure clean water<br />
• Hands free operation<br />
• Constant water flow rate for a full 15 minutes<br />
• Highly visible markings and signs<br />
• Unobstructed access<br />
Accessibility:<br />
The single most important treatment for chemically-burned eyes is copious irrigation within seconds of injury. Victims<br />
should not have to climb over or around obstacles to find the eyewash station.<br />
Clean, Functional Equipment:<br />
Deluge showers should be inspected often to insure they function properly with adequate water flow, and are clean and<br />
sanitary. Portable eyewash units are an option in areas where plumbed in water is not accessible or of high enough<br />
quality. Portable units also need an anti-bacterial additive to ensure proper water sanitation. Flushing with any water is<br />
better than none, but purified water reduces potential for secondary eye infections.<br />
Training in Proper Use:<br />
Employees who are exposed to possible chemical splashes must know in advance how to use an eyewash/deluge<br />
station properly:<br />
• Immediately after the accident, flood the eye with water or eyewash solution, using fingers to keep the eye open<br />
as wide as possible.<br />
• Water may be colder than body temperature, which can be uncomfortable, but it is imperative to irrigate for the<br />
recommended period of time.<br />
• Roll the eyeball as much as possible, to remove any loose particles retained under the eyelids. Do not put<br />
anything except water into the eyes to remove particles.<br />
• The eyes should be irrigated for at least 15 minutes, and the victim transported to a medical facility immediately.<br />
• Continue irrigation of eyes during transport. The best way to accomplish this may be to have a portable eyewash<br />
system ready, which can be carried along.<br />
It's easy to forget about eye-wash stations or showers<br />
until they are needed in an emergency.<br />
Don't let yours become buried or covered with dust.<br />
It could save your sight!<br />
61
<strong>CLSA</strong> SAFETY TAILGATE GUIDE<br />
Emergency Eye Wash & Deluge Showers<br />
I have been instructed in the basic hazards of this equipment/procedure as listed above. I understand this proper safe<br />
work procedure.<br />
Instructed by:<br />
Date:<br />
Trainee Names:<br />
62
<strong>CLSA</strong> SAFETY TAILGATE GUIDE<br />
Ergonomics: Breaks, Rest Periods & Stretches<br />
Ergonomic injury risk factors include forceful movements, repetitive motions, awkward postures, and lack of rest. Rest<br />
periods give the body time to recover from work; break time exercises and stretches strengthen the body. Workers<br />
should think of themselves as Industrial Athletes; athletes wouldn’t participate in a sport without proper rest and warmup,<br />
so use the same preparation on the job.<br />
Maintaining overall health reduces your risk of injury. Get a good night’s sleep to rest your body and maintain alertness.<br />
Eat healthy foods and drink fluids to boost energy and stay hydrated. Aerobic exercise and weight training increase<br />
strength and vitality. Stretching, yoga, and pilates improve flexibility and build core body strength.<br />
Pay attention to signs of discomfort and fatigue on the job; these are<br />
warning signs from your body. As muscles tire during a work task, slouching<br />
can lead to poor posture, sloppy, uncontrolled movements, and injuries. Rest<br />
breaks mean recovery for the body. During a job task, take micro-breaks<br />
lasting 10-15 seconds every ten minutes. Take mini-breaks lasting 3-5 minutes<br />
every thirty to sixty minutes. These short breaks give the body a rest, reduce<br />
discomfort, and improve your performance.<br />
Alternate your work activities and postures throughout the day. Rotating tasks<br />
may seem inefficient, but the rest and use of different muscle groups increases<br />
energy and maintains productivity. For example, if you are a landscaper, don’t<br />
trim all of the shrubs, sweep up the trimmings, and then leaf-blow the whole<br />
area; work in sections and trim, sweep, and leaf-blow in alternating tasks. If<br />
you work at a single workstation and job task all day, move into different<br />
postures while you work: first standing, then standing with one foot resting on a<br />
stool, then sitting.<br />
Stretches help you warm-up before work and relax during breaks; they increase flexibility and boost blood flow and<br />
oxygen to muscles. Perform stretches slowly and gently; avoid extreme postures and stop stretching if you feel pain or<br />
discomfort. Physical and Occupational Therapists are the most qualified individuals to generate a specific stretching and<br />
warm-up program.<br />
Overall fitness and flexibility, adequate sleep, task rotation, and rest breaks can help limit the overall risk of injury.<br />
63
<strong>CLSA</strong> SAFETY TAILGATE GUIDE<br />
Ergonomics: Breaks, Rest Periods & Stretches<br />
I have been instructed in the basic hazards of this equipment/procedure as listed above. I understand this proper safe<br />
work procedure.<br />
Instructed by:<br />
Date:<br />
Trainee Names:<br />
64
<strong>CLSA</strong> SAFETY TAILGATE GUIDE<br />
Excavations<br />
This is primarily a safety check-off sheet to inform the employee of the dangers and hazards of combustible materials.<br />
Each employee must be trained on these hazards to avoid injury.<br />
Minimum <strong>Safety</strong> Equipment Required: Hard Hats<br />
Trenching and excavation work presents a serious risk to all employees. The greatest risk is the cave-in of a trench or<br />
excavation. Cave-in accidents are much more likely to result in worker fatalities than any other excavation-related<br />
accidents. Other hazards include contact with buried utilities. Because of the hazards associated with excavation work,<br />
the following safe work practices and procedures must be implemented and enforced at all company construction<br />
projects:<br />
• Remove or support all surface encumbrances whenever their location creates a hazard to employees.<br />
• Identify underground installation (e.g., sewer, utility, fuel) locations<br />
prior to opening an excavation. Contact utility companies or owners<br />
to advise them on the proposed work and ask for the locations of<br />
utility underground installations prior to opening an excavation.<br />
• Protect, support, or remove underground installations, as necessary,<br />
to safeguard employees working in open excavations.<br />
• Structural ramps used by employees as a means of access or a<br />
competent person must design egress from excavations.<br />
• A competent person qualified in structural design must design<br />
structural ramps for access and egress of equipment.<br />
• All excavations or trenches that are 5 ft or more in depth must have<br />
a stairway, ladder, ramp, or other safe means of access and egress<br />
within 25 ft (7.6 m) of travel in any direction.<br />
• The edges of a trench or excavation must be barricaded when the<br />
excavation is not readily seen because of plant growth or some<br />
other visual barrier.<br />
• No employees are permitted underneath loads handled by lifting or digging equipment.<br />
• A warning system (e.g., barricades, signals, or stop logs) must be used when mobile equipment is operated<br />
adjacent to an excavation.<br />
• Testing must be conducted in excavations where oxygen-deficient atmospheres exist or could reasonably be<br />
expected to exist before employees are permitted to enter excavations greater than 5 ft in depth.<br />
65
<strong>CLSA</strong> SAFETY TAILGATE GUIDE<br />
Take adequate precautions, such as proper respiratory protection or ventilation, to prevent employee exposure to<br />
oxygen-deficient and other hazardous atmospheres.<br />
• Emergency rescue equipment must be readily available where hazardous atmospheric conditions exist or may<br />
reasonably be expected to develop during work in an excavation.<br />
• Never work in excavations where water has accumulated or is accumulating, unless adequate precautions have<br />
been taken to protect you against the hazards posed by water accumulation.<br />
• A competent person must:<br />
Classify soil types to determine sloping and shoring needs.<br />
Monitor water removal equipment and operations.<br />
Inspect excavations subject to runoff from heavy rains.<br />
Conduct daily inspections of excavations.<br />
• A competent person must conduct inspections of<br />
excavations prior to the start of work and as necessary<br />
throughout each shift. Inspections must also be made<br />
after every rainstorm. Precautions must be taken before<br />
employees enter a trench of any depth that shows signs<br />
of water accumulation or wall sloughing due to moisture.<br />
Preventive precautions include the use of support or<br />
shield systems to prevent cave-ins, and the use of water<br />
removal pumps.<br />
• Trenches 5 ft or more in depth must be shored or sloped<br />
back to an angle of incline required to prevent cave-ins.<br />
The angle of incline required varies with differences in<br />
the soil type, environmental conditions of exposure, and<br />
the application of surcharge loads. Any excavation in<br />
unstable soil may require shoring or sloping.<br />
• Backfilling and removal of trench boxes or supports shall<br />
progress together from the bottom of the trench. Jacks,<br />
supports, or braces shall be released slowly, and in<br />
unstable soil, ropes shall be used to pull out the jacks<br />
and braces from above and clear of the excavation. All<br />
personnel shall be clear of the trench.<br />
• Materials must be placed 2 ft (0.6 m) or more from the<br />
edge of the excavation. Precautions must be taken to<br />
prevent such materials from falling into the excavation.<br />
66
<strong>CLSA</strong> SAFETY TAILGATE GUIDE<br />
Excavations<br />
I have been instructed in the basic hazards of this equipment/procedure as listed above. I understand this proper safe<br />
work procedure.<br />
Instructed by:<br />
Date:<br />
Trainee Names:<br />
67
<strong>CLSA</strong> SAFETY TAILGATE GUIDE<br />
Eye and Face Protection - Face Shields<br />
For all-purpose face protection, Face shields are hard to beat they protect the face from splashes, heat, flying particles<br />
and other hazards while allowing for plenty of ventilation. They are especially recommended for welding, riveting and<br />
operations that involve extreme heat. But It is important to remember that face shields do not protect your eyes-they<br />
must be used in combination with goggles or safety glasses.<br />
Face shields protect you from splashes, heat, flying particles and other hazards. A welding helmet is a<br />
specialized face shield that protects you from sparks, intense light and splashes of molten metal.<br />
Types of Face shields<br />
Most face shields are constructed of high-strength, flexible plastic such as acetate. Face<br />
shields designed for use in a high-impact environment may be made of polycarbonate, the<br />
material used in many safety glasses. Wire screen face shields are used in extremely humid<br />
environments. Face shields may be equipped with a crown to protect against falling particles<br />
or sparks, or a chin scoop to guard against chemical splashes. Some shields are tinted to<br />
protect from glare, while others feature glass inserts for the best visibility. Specialty<br />
designed face shields can be fitted to hard hats. A variation on the face shield is the welding<br />
helmet; a complete face-and-head covering that protects the wearer from sparks, intense<br />
light and splashes of molten metal.<br />
Care and Fit<br />
Choose a face shield with adjustable straps that fits snugly but not uncomfortably around your head, without sliding<br />
forward or to the side. A face shield should not be uncomfortable to wear. A strap across the top of the head provides<br />
support. The shield should cover your face from the forehead to the base of your neck without obstructing your vision.<br />
Because face shields are easily scratched, store your shield in a protected area. Replace a scratched face shield before<br />
it causes a vision related accident.<br />
Remember, a face shield protects your face, not your eyes. Wearing your safety glasses or goggles along with your face<br />
shield is the best way to protect your eyesight.<br />
68
<strong>CLSA</strong> SAFETY TAILGATE GUIDE<br />
Eye and Face Protection – Face Shields<br />
I have been instructed in the basic hazards of this equipment/procedure as listed above. I understand this proper safe<br />
work procedure.<br />
Instructed by:<br />
Date:<br />
Trainee Names:<br />
69
<strong>CLSA</strong> SAFETY TAILGATE GUIDE<br />
Fall Protection<br />
It may seem that a job can be performed more efficiently without spending the time to protect against falls. However, falls<br />
remain one of the top causes of fatalities in construction. Workers have fallen off edges of every description, especially<br />
floors and roofs, and through openings in floors, roofs, and walls. Fall protection is required whenever a worker faces<br />
serious risk of injury, including:<br />
• On structures where a worker could fall more than 7 feet<br />
• On thrust outs, trusses, beams, purlins, and plates at heights over 15 feet<br />
• On a sloped roof<br />
To prevent accidental falls at worksites, guardrails and toe boards or other effective<br />
barriers to falls should be used. However, there will be areas where guardrails or other<br />
barriers are not feasible. In these cases, workers must use approved personal fall<br />
protection systems or positioning devices.<br />
Two basic types of person fall protection systems that require tie off are 1) fall arrest<br />
and 2) travel restraint.<br />
Fall arrest systems stop a fall within a few feet of the worker’s original position. A full<br />
body harness is required with a fall arrest system. The system typically consists of a full<br />
body harness, a lanyard, a rope grab, a lifeline, and a lifeline anchor. A fall arrest system<br />
must be worn when working on a rolling scaffold that is being moved or when a worker<br />
is getting on, working from or getting off suspended access equipment.<br />
A travel restraint system prevents falls by restraining a worker from getting too close to an unprotected edge. This<br />
system usually consists of a safety belt or full body harness, a lanyard, a rope grab, a lifeline, and a lifeline anchor.<br />
70
<strong>CLSA</strong> SAFETY TAILGATE GUIDE<br />
Fall Protection<br />
I have been instructed in the basic hazards of this equipment/procedure as listed above. I understand this proper safe<br />
work procedure.<br />
Instructed by:<br />
Date:<br />
Trainee Names:<br />
71
<strong>CLSA</strong> SAFETY TAILGATE GUIDE<br />
Falling Down On the Job<br />
According to the National <strong>Safety</strong> Council, falls kill more people on the job than any other kind of accident except those<br />
involving vehicles. In fact, falls cause one of every five-work-related injures. About half of these falls are from a higher to<br />
a lower level. The other half occurs on level ground. Although the statistics are alarming, the truth is, most Ws can be<br />
prevented A# ft takes is learning to recognize fall hazards and taking steps to prevent them.<br />
Watch for Wet Surfaces<br />
It's easy to slip if you walk fast, turn sharp corners or wear inappropriate shoes. If you must walk<br />
on a wet surface, slow down and take short steps to stay balanced. If you work in a hospital,<br />
gas station or industrial plant, the work surface can occasionally become wet. Leaving behind a<br />
spill-even a minor coffee spill can cause a coworker to slip and fall. When you see water, oil or<br />
any type of spill, clean it up right away or mark it with a sign, paper towels or wastebasket;<br />
then report it.<br />
Short Cuts Can Be Costly<br />
Because there's so much to get done every day, it's tempting to take short cuts. However,<br />
taking a short cut - such as carrying a load too big to see over, instead of making two trips<br />
- can be a costly mistake. Make sure you can see where you're going, even if it means an<br />
extra trip.<br />
Keep Work Areas Well-Lit and Clean<br />
Always turn on the lights before entering a dark room, even if you're only going in for a minute. Replace light bulbs as<br />
soon as they bum out. Clutter in the work area is another common hazard. Tools, boxes, boards, pipes or rope left long<br />
around can cause a bad fall. So keep work areas, especially storage rooms and walkways, free of clutter.<br />
Use Ladders Safely<br />
Be sure you have the right ladder for the job. Do you need a small<br />
stepladder or an extension ladder? Don't invent climbing equipment.<br />
Follow these rules for ladder safety:<br />
• Follow the four-to-one rule: Set the base out of the ladder one<br />
foot away from a wall or other support for every four feet of<br />
ladder height.<br />
• Be sure the ladder is standing on stable ground and ask<br />
someone to hold the base or tie off the ladder securely.<br />
• Make sure a ladder extends three feet beyond the roof of a<br />
budding.<br />
• When using a ladder, never climb on the top two rungs.<br />
• Always use nonconductive ladders around electrical hazards.<br />
Makeshift Ladders Are Shifty<br />
It's tempting to use whatever is handy as a makeshift ladder. Standing on top of a trash can to reach something or<br />
making a ladder taller by putting a box on top are common fall hazards. Because makeshift ladders are never quite right<br />
for the job, you may find yourself overreaching or making other unsafe movements, which can result in a fall.<br />
72
<strong>CLSA</strong> SAFETY TAILGATE GUIDE<br />
Falling Down on the Job<br />
I have been instructed in the basic hazards of this equipment/procedure as listed above. I understand this proper safe<br />
work procedure.<br />
Instructed by:<br />
Date:<br />
Trainee Names:<br />
73
<strong>CLSA</strong> SAFETY TAILGATE GUIDE<br />
Falls<br />
With predictable regularity, falls continue to be a leading cause of accidents and deaths on the job. Falls include those<br />
on the same level (floor, ground), as well as from one level to another (stairs, ladders, roofs). Falls are usually caused by<br />
two situations - an unsafe action of an individual (hurrying, overreaching, and improper use of equipment) or unsafe<br />
condition (poor housekeeping, unguarded opening, and surface conditions).<br />
Good footing is the best way to avoid falls and good<br />
housekeeping is the best way to ensure good footing. Trash,<br />
wires, and slippery areas caused by water, grease, or oil can<br />
cause falls. Watch footing when working on slick flooring and<br />
poorly lit areas; where floors are uneven from room to room; and<br />
where surfaces are uneven from broken concrete, cracked<br />
asphalt or curled rugs.<br />
Always look in the direction you are walking. Avoid carrying large<br />
objects that may block your view of a safe walking path. Walk<br />
slowly on stairs and use handrails to secure your step.<br />
Cover, guard, or mark spills, potholes, and floor openings. Protect them with warning cones,<br />
guardrails, or toe boards.<br />
Makeshift ladders or incorrect ladder selection can cause falls. Choose the ladder that’s made<br />
for the job. Be sure it’s in good condition and placed securely. Face the ladder and keep both<br />
hands free while climbing.<br />
Preventing falls is a matter of common sense - Watch where you’re walking.<br />
Take careful steps when you walk and choose and use equipment properly.<br />
74
<strong>CLSA</strong> SAFETY TAILGATE GUIDE<br />
Falls<br />
I have been instructed in the basic hazards of this equipment/procedure as listed above. I understand this proper safe<br />
work procedure.<br />
Instructed by:<br />
Date:<br />
Trainee Names:<br />
75
<strong>CLSA</strong> SAFETY TAILGATE GUIDE<br />
For First Degree Burns (Sun Burn, Redness):<br />
First Aid for Burns<br />
• Cool the area right away. Place the affected area in a container of cold water or<br />
under cold running water. Do this for at least 15 minutes or until the pain is relieved.<br />
This will also reduce the amount of skin damage. (If the affected area is dirty, gently<br />
wash it with soapy water first.)<br />
• Do not apply ice or cold water for too long a time. This may result in complete<br />
numbness leading to frostbite.<br />
• Keep the area uncovered and elevated, if possible. Apply a dry dressing, if necessary.<br />
• Do not use butter or other ointments (Example: Vaseline).<br />
• Avoid using local anesthetic sprays and creams. They can slow healing and may lead to allergic reactions in<br />
some people.<br />
• Call your doctor if after 2 days you show signs of infection (fever of 101 degrees F or higher, chills, increased<br />
redness, swelling, or pus in the infected area) or if the affected area is still painful.<br />
• Take aspirin, acetaminophen, ibuprofen, naproxen sodium to relieve pain. (Note: Do not give aspirin or any<br />
medication containing salicylates to anyone 19 years of age or younger, unless a doctor tells you to.)<br />
For Second Degree Burns (that are not extensive and less than 3" in diameter):<br />
• Immerse the affected area in cold (not ice) water until the pain subsides.<br />
• Dip clean cloths in cold water, wring them out and apply them over and over<br />
again to the burned area for as long as an hour. Blot the area dry. Do not rub.<br />
• Do not break any blisters that have formed.<br />
• Avoid applying antiseptic sprays, ointments, and creams.<br />
• Once dried, dress the area with a single layer of loose gauze that does not stick<br />
to the skin. Hold in place with bandage tape that is placed well away from the burned area.<br />
• Change the dressing the next day and every two days after that.<br />
• Prop the burnt area higher than the rest of the body, if possible.<br />
Call your doctor if there are signs of infection (fever of 101 degrees F or higher, chills, increased redness and swelling,<br />
and pus) or if the burn shows no sign of improvement after 2 days.<br />
76
<strong>CLSA</strong> SAFETY TAILGATE GUIDE<br />
All third-degree burns require medical treatment.<br />
• Minor third-degree burns can be treated in a doctor’s office, but all<br />
others should be considered a medical emergency that requires<br />
hospital treatment, usually in a burn unit.<br />
• Call 911, or get the person to an emergency room as soon as possible.<br />
• If the person is on fire, do not let him or her run. Smother any flames<br />
with a blanket, jacket, or water, if available, or have the victim use the<br />
“stop, drop, and roll” method.<br />
• Remove any clothing or jewelry from the injured area, but DO NOT remove clothing if it is stuck to the burn.<br />
• Very briefly immerse the burned area in cold water or use a clean towel or wash cloth moistened with cold water<br />
to stop the burning process.<br />
• Don’t hold the burned area in cold water for too long or you will cool down the body too much.<br />
• Don’t use ice or ice water because they will further damage the tissue.<br />
• Do not break open any blisters, or there will be a greater risk of infection. If the blisters are open, don’t remove<br />
any clothing that might be stuck to the burn, and don’t run water over the burn. This will increase the risk of<br />
shock.<br />
• Whether the blisters are broken or not, you can place a dry, sterile gauze pad over the burn, but do not use any<br />
bandages with adhesive. If the burned area is larger, lightly drape a clean sheet over it to protect it until you get<br />
medical treatment. It is important for the bandage to be loose so the burn gets air.<br />
• Never apply butter, oils, or burn ointments. They make it more difficult for the burn to heal and can actually<br />
make the burn worse because the heat can’t escape.<br />
• Arms or legs that are burned should be kept raised to reduce the amount of swelling. If the face or neck is<br />
burned, raise the person’s head slightly. This will also help if he or she is having trouble breathing.<br />
• If the person appears to be going into shock, lay him or her flat on the ground, raise the feet around 12 inches<br />
(30 cm), and call for medical help. You can cover the patient with a blanket to keep him or her warm.<br />
• Do not give a person who is in shock anything to drink. Otherwise, you can provide the patient with small sips of<br />
clear liquid, such as water or juice.<br />
Chemical burns are treated a little differently.<br />
For liquid chemicals:<br />
• First remove any clothing or other items that the chemicals have spilled on.<br />
• Thoroughly wash any chemicals off the skin under running water for 15 to 30 minutes.<br />
77
<strong>CLSA</strong> SAFETY TAILGATE GUIDE<br />
For dry chemicals:<br />
• Use large amounts of water to flush the chemicals from the skin. Never use small amounts of water because<br />
they may actually activate the chemicals.<br />
• If no water is available, use a clean cloth to brush any dry chemicals off the skin. Loosely cover the burn with a<br />
dry, sterile bandage, and see a doctor for further treatment.<br />
• Different chemicals have different effects, so you should always check the chemical label, if possible, for<br />
additional directions.<br />
• Always see a doctor if the chemicals have gotten into the eyes or mouth.<br />
Moderate and critical third-degree burns require hospitalization. The body loses a great deal of fluid through the burned<br />
area, so replacement fluids are given through an intravenous (IV) line, which is a tube placed into a vein. If the lungs are<br />
damaged, or breathing is difficult, a tube is inserted into the throat to help with breathing. The patient will need to take<br />
antibiotics to protect the burned area from infection, as well as a prescription pain medication.<br />
78
<strong>CLSA</strong> SAFETY TAILGATE GUIDE<br />
First Aid for Burns<br />
I have been instructed in the basic hazards of this equipment/procedure as listed above. I understand this proper safe<br />
work procedure.<br />
Instructed by:<br />
Date:<br />
Trainee Names:<br />
79
<strong>CLSA</strong> SAFETY TAILGATE GUIDE<br />
First Aid for Choke Saving<br />
Anyone who cannot talk, cough or breath may have an airway obstruction. First aid for choking:<br />
• Ask the victim "Are you choking? Can you talk?" If they are choking (can't talk):<br />
• Tell the victim you are trained to help them.<br />
• Go behind the victim and place your fist of one hand, one finger above the naval<br />
(belly button) grab your fist with the other hand, pull towards the abdomen with<br />
quick upward thrusts until the object is removed or the victim goes unconscious.<br />
• Try to keep your elbows out as you perform the thrusts as if you squeeze too hard,<br />
you may damage or break a rib. (It’s most important that you do not perform this<br />
function anywhere near the bottom of the sternum, as this may break the Xiphoid<br />
process and lacerate the liver)<br />
• If the victim is pregnant or you are unable to get your arms around their belly, your need to perform chest<br />
thrusts. This is done by putting your arms under the victim’s armpits, bringing your fist to the center of the chest,<br />
covering your fist with the other hand and quickly pulling straight back. The above maneuver is performed on<br />
anyone over the age of one.<br />
If the victim becomes unconscious from choking: CALL 911<br />
• Lay the victim on their back, then straddle the victim's thighs and place your hands on top of each other at the<br />
naval and complete five upward thrusts.<br />
• When completed, go up to the victim's mouth and perform a finger sweep. This is accomplished by using the<br />
index finger and sweeping from one cheek, down the throat, to the other cheek in a hooking motion. This will<br />
enable you to grasp the object and pull it out.<br />
If the victim becomes unconscious from choking and the victim is under eight years of age:<br />
• Do not do a finger sweep, as our fingers are so big that this may push the object further into the throat. Instead,<br />
use a pinching motion to grasp the object.<br />
• If you are unable to dislodge the object, tilt the head back using the head tilt, chin lift and attempt to give a<br />
breath.<br />
• If the air will not go in, reposition the head and try again.<br />
• If the air still will not go in, continue with the abdominal thrusts until the object is dislodged or medical help<br />
arrives.<br />
80
<strong>CLSA</strong> SAFETY TAILGATE GUIDE<br />
First Aid for Choke Saving<br />
I have been instructed in the basic hazards of this equipment/procedure as listed above. I understand this proper safe<br />
work procedure.<br />
Instructed by:<br />
Date:<br />
Trainee Names:<br />
81
<strong>CLSA</strong> SAFETY TAILGATE GUIDE<br />
Foreign Body in the Eye<br />
First Aid for Eye Injuries<br />
Particles of dust or grit or loose lashes are the most common foreign bodies found in the eye. In most cases, these can<br />
be easily removed. DO NOT ATTEMPT to remove a foreign body if it is on the colored part of the eye or embedded in<br />
the eyeball. In these cases, SEEK MEDICAL AID.<br />
Treatment:<br />
• Advise the patient not to rub the eye.<br />
• Open the eye, ask the victim to look right, left, up and down<br />
so that you can examine the eye in detail.<br />
• If you can see the foreign body, wash it out by pouring water<br />
from a jug into the affected eye, draining away from the<br />
good eye.<br />
• If this is unsuccessful, if there is no water available, and the<br />
foreign body is NOT STICKING to the eyeball, lift it out,<br />
using the damp corner of a clean handkerchief.<br />
• If you cannot remove the foreign body, cover the eye with an<br />
eye pad, secured lightly in position, and seek medical aid.<br />
Chemicals in the Eye<br />
Treatment:<br />
• Wash away the chemical as quickly as possible by holding the affected side of the face under cold water, so<br />
that the water drains away from the face. Continue this for 10 minutes.<br />
• If washing is not possible, lay the casualty down, protect the uninjured eye, and gently pour water into the open<br />
affected eye to drain away the chemical.<br />
• Lightly dress the eye with sterile eye pad or clean cloth.<br />
• Remove to hospital immediately.<br />
Blow to the Eye<br />
Treatment:<br />
• If severe, if there is loss of vision, seek medical assistance.<br />
• While waiting, cover the eye with clean dressing or clean folded handkerchief and keep the patient lying flat and<br />
quiet.<br />
82
<strong>CLSA</strong> SAFETY TAILGATE GUIDE<br />
First Aid for Eye Injuries<br />
I have been instructed in the basic hazards of this equipment/procedure as listed above. I understand this proper safe<br />
work procedure.<br />
Instructed by:<br />
Date:<br />
Trainee Names:<br />
83
<strong>CLSA</strong> SAFETY TAILGATE GUIDE<br />
First Aid for Shock<br />
Anytime someone has an injury; you must treat them for shock. Shock is the failure of the cardiovascular system to<br />
circulate enough blood to the vital organs. When a victim goes into shock, the body tries to heal itself by slowing<br />
circulation.<br />
To help a victim who is in shock:<br />
• Place them in a lying down position with the legs elevated 8-12 inches, as this will increase the circulation<br />
• If the victim has a head, neck or back injury, leave them lying flat. (If you elevate the legs, you may do more<br />
damage to the spine)<br />
• Cover them with a blanket to conserve body heat.<br />
• If the victim has any difficulty in breathing, place them in a reclining position; this may improve their breathing.<br />
• Monitor the vital signs closely and make sure that professional medical help are on the way.<br />
84
<strong>CLSA</strong> SAFETY TAILGATE GUIDE<br />
First Aid for Shock<br />
I have been instructed in the basic hazards of this equipment/procedure as listed above. I understand this proper safe<br />
work procedure.<br />
Instructed by:<br />
Date:<br />
Trainee Names:<br />
85
<strong>CLSA</strong> SAFETY TAILGATE GUIDE<br />
Flagger <strong>Safety</strong><br />
According to the CalOSHA Construction <strong>Safety</strong> Orders, flaggers are required at locations on a road construction or<br />
maintenance site where barricades and warning signs can’t control the moving traffic. In these required situations,<br />
flaggers must be placed in relation to the equipment or operation so they can give effective warning.<br />
What should a flagger wear?<br />
A flagger must wear warning clothes in specific, highly visible colors. They<br />
can wear a vest, jacket or shirt in colors of orange, strong yellow-green or<br />
fluorescent versions of these. These garments must be worn rain or shine. If<br />
it’s dark, the flagger should be wearing reflectorized garments, visible from a<br />
minimum distance of 1,000 feet. The flagger’s station should be lit by<br />
portable lighting so the flagger will be clearly visible to approaching traffic.<br />
What training is required for a flagger?<br />
Before being assigned as a flagger, the individual must be trained in the proper fundamentals of flagging moving traffic.<br />
Training, instruction, and signaling directions used by flaggers should conform to the “Manual of Traffic Controls for<br />
Construction and Maintenance Work Zones,” published by the State Department of Transportation.<br />
Training should take into account the particular worksite condition and include the following:<br />
• The Flagger equipment which must be used<br />
• The layout of the work zone and flagging station<br />
• Methods to signal traffic to stop, proceed or slow down<br />
• Methods of communicating with workers in the work zone<br />
• Methods of communicating with another flagger<br />
• Trainee demonstration of proper flagging methods<br />
• How to handle emergency situations<br />
• Methods of dealing with hostile drivers<br />
• Flagging procedures when only a single flagger is used<br />
86
<strong>CLSA</strong> SAFETY TAILGATE GUIDE<br />
Flagger <strong>Safety</strong><br />
I have been instructed in the basic hazards of this equipment/procedure as listed above. I understand this proper safe<br />
work procedure.<br />
Instructed by:<br />
Date:<br />
Trainee Names:<br />
87
<strong>CLSA</strong> SAFETY TAILGATE GUIDE<br />
Hand <strong>Safety</strong> – Avoiding Finger, Hand and Wrist Injuries<br />
Whether you’re a machine operator, a lab technician, an office worker – and kind of worker, for that matter – your hands<br />
are one of your most important “instruments.” Yet, over a quarter of a million people suffer serious (and often disabling)<br />
hand injuries each year. By recognizing hand hazards, following established safety <strong>guide</strong>lines and using protective<br />
guards, shields, gloves and other personal protective devices as needed, you can save your hands from injury and<br />
yourself from unnecessary disability.<br />
Recognizing Hand Hazards<br />
One of the most serious yet common causes of hand injury is the use of<br />
unprotected or faulty machinery or equipment. Failure to use push-sticks,<br />
guards, kill-switches, or to<br />
follow appropriate lock-out<br />
procedures are among the<br />
leading industrial hand<br />
hazards. Wearing jewelry,<br />
gloves, or loose-fitting clothing<br />
around moving parts can also<br />
lead to injury. Chemicals,<br />
corrosives, and other irritating<br />
substances can cause burns<br />
and skin inflammation unless appropriate hand protection is used.<br />
Temperature extremes and electrical hazards are other common causes of<br />
hand injuries. In addition, constant, repetitive motion (as in assembly-line work<br />
or painting) can cause undue stress on the wrists and hands unless protective<br />
measures are taken. The following list provides a <strong>guide</strong>line for hand safety<br />
that can help you protect your hands from injury and disability.<br />
Hand Protection Checklist:<br />
Be alert to potential hand hazards before an accident can happen.<br />
Be alert to possible unguarded pinch points.<br />
Always use push-sticks, guards, shields, and other protective<br />
devices when appropriate. Do not remove guards.<br />
Use brushes to wipe away debris.<br />
Inspect equipment and machinery before and after tasks to make<br />
sure that it is in good operating condition.<br />
Disconnect power and follow established lock-out procedures before<br />
repairing or cleaning machinery.<br />
Never wear gloves, jewelry, or loose clothing when working with<br />
moving machine parts.<br />
Use the appropriate personal protective equipment – gloves, guards,<br />
forearm cuffs, barrier creams – for the specific tasks you are<br />
performing.<br />
When wearing gloves, be sure they fit properly and are rated for the<br />
specific task you are performing.<br />
Select tools designed to keep wrists straight to help avoid repetitive<br />
motion/overuse problems.<br />
88
<strong>CLSA</strong> SAFETY TAILGATE GUIDE<br />
Hand <strong>Safety</strong> – Avoiding Finger, Hand and Wrist Injuries<br />
I have been instructed in the basic hazards of this equipment/procedure as listed above. I understand this proper safe<br />
work procedure.<br />
Instructed by:<br />
Date:<br />
Trainee Names:<br />
89
<strong>CLSA</strong> SAFETY TAILGATE GUIDE<br />
Foot Care - Blisters<br />
Three factors cause blisters to form: heat, moisture, and friction. Blisters occur when feet get hot & sweaty, making the<br />
sock stick to the foot. The sock, foot, and shoe rub against each other causing fluid to form between layers of skin. Even<br />
though the fluid-filled cushioning helps to protect the area, blisters can be quite painful.<br />
Prevention of blisters is ideal. Here are some helpful tips:<br />
• Walk during the cooler times of the day to keep feet from getting too hot<br />
• Reduce foot moisture by changing socks mid-walk or use double-layer<br />
socks<br />
• Switch to an acrylic blend or wool sock to help wick away perspiration<br />
• Check the inside of shoes for rough or worn areas ahead of time<br />
• Use “mole skin” on known friction points before the walk begins<br />
• Replace worn shoes, shopping later in the day<br />
• Get your feet fit properly with a “stability” running or cross-trainer shoe<br />
• Break in new shoes on shorter walks to ensure good fit<br />
If a blister forms, leave it alone. The body will gradually reabsorb the fluid. If a blister forms on a walk and becomes<br />
painful, protect it from getting worse by using a non-medicated gel “donut” around the blister to help take pressure off the<br />
area. Do NOT intentionally puncture or drain the blister. Some will pop spontaneously, but either can become infected.<br />
Signs of infection include: generalized redness, streaks of red going up into the foot or leg, warmth in the surrounding<br />
area, pus, or yellowish fluid draining from the blister. These are symptoms that require medical attention.<br />
Diabetics need to see their podiatrist or primary doctor whenever a blister appears and not try to treat the problem at<br />
home. If you have diabetes and a blister, call the doctor’s office, identify yourself as a diabetic, and describe the problem.<br />
Most often, the doctor will see you within 24 hours. If not, be assertive. If it looks infected, and you can't be seen that day<br />
or next, then go to the emergency room. It not worth the risk to wait for an appointment or until the next day the office is<br />
open. Blisters in diabetics become infected quickly and can lead to amputation in some situations.<br />
Use the tips listed above on a regular basis. If blisters continue to reoccur, then seek the help of a professional.<br />
90
<strong>CLSA</strong> SAFETY TAILGATE GUIDE<br />
Foot Care - Blisters<br />
I have been instructed in the basic hazards of this equipment/procedure as listed above. I understand this proper safe<br />
work procedure.<br />
Instructed by:<br />
Date:<br />
Trainee Names:<br />
91
<strong>CLSA</strong> SAFETY TAILGATE GUIDE<br />
Foot Care - Calluses<br />
Many people wonder what causes the development of skin calluses along the bottom edge of the heels. The normally<br />
soft, smooth texture can become roughened with increased friction. This may be due to going barefoot, wearing sandals,<br />
and even improper shoe fit. Sometimes, it has more to do with an unusual motion of the foot, due to abnormal bony foot<br />
structure, or the way in which a person walks (the gait).<br />
A callus is a thickening of the skin. It may appear to be yellowed, layered or even scaly<br />
due to excessive dryness. Peeling can also be present and may indicate an athlete's foot<br />
infection. Occasionally the skin becomes so thickened it cracks and forms a fissure. Heel<br />
fissures can become infected and may even bleed, causing tenderness or pain, requiring<br />
the help of a podiatrist.<br />
Heel calluses that occur primarily during the summer months can usually be managed by<br />
using a moisturizing cream such as "Eucerin" to help soften the callus, followed with<br />
gentle use of a pumice stone after bathing. "Bag Balm" is another product that helps with<br />
softening. Neither of these products should be applied in areas when cracking is deep or when bleeding is present. The<br />
use of medicated over-the-counter products containing salicylic acid is discouraged. The acid does not know where the<br />
callus stops and the healthy tissue begins.<br />
If heel callus occurs after a purchase of shoes, it probably is due to the shoe or the fit of the shoe itself. This can be<br />
determined by not wearing the new shoes for a week or so to see if the callus begins to go away. When buying shoes<br />
check the return policy beforehand since some stores will allow you to exchange them for a different size or style.<br />
Heel calluses that remain year round are more likely to be related to the foot structure and its motion. This can be<br />
addressed by seeing a podiatrist or DPM so that the origin of the cause can be determined. This is often treated with a<br />
customized orthotic (a device worn in your shoes) which helps restore foot position and control abnormal foot motion. A<br />
podiatrist can also use sterilized tools to reduce the callus without pain -- something that should NEVER be attempted at<br />
home due to the risk of infection and injury.<br />
Whether your heel calluses are more of a cosmetic issue or that of pain, they can be easily treated. Try to determine why<br />
it developed, then take the right steps to restoring the bottom of your heel to the smooth, soft skin it should be!<br />
92
<strong>CLSA</strong> SAFETY TAILGATE GUIDE<br />
Foot Care - Calluses<br />
I have been instructed in the basic hazards of this equipment/procedure as listed above. I understand this proper safe<br />
work procedure.<br />
Instructed by:<br />
Date:<br />
Trainee Names:<br />
93
<strong>CLSA</strong> SAFETY TAILGATE GUIDE<br />
Foot Pain<br />
Several things contribute to foot pain: inherited predisposition to foot problems, the type of ground or flooring you are on,<br />
the amount of time spent on your feet, and the style of the shoe worn.<br />
Though you may not be able to control the hours spent on your feet, the flooring,<br />
or your foot structure, you can pay attention to your shoe style and add in comfort<br />
measures. A flat shoe will allow your body weight to be evenly distributed across<br />
the entire sole of the foot. Women's high heeled shoes and men's Western boots<br />
have heels that force more body weight onto the ball of the foot, producing fatigue<br />
and possible pain in already existing foot problems. Try to keep the heel height<br />
under one to one and a half inches whenever possible.<br />
Soft leather shoes and sandals offer little to no support, so look for a shoe that<br />
resists twisting when grasped at the toe and heel (you should not be able to wring<br />
it out like a sponge). If you need ankle support, go for the high topped athletic shoes over the lower cut ones. If you will<br />
be on your feet -- at a wedding -- for a short time, wear what you like, but if you are planning a trip to Europe this<br />
summer, you will appreciate having a good pair of cross trainers or walking shoes along.<br />
There are many over-the-counter products available in drug stores for added support and cushioning. Be cautious when<br />
using medicated ones, since they contain an acid and may eat into healthy tissue. Look for those made of silicon for<br />
protection of prominent bony areas to prevent tender spots and blisters. Insoles and silicon heel cups can also aide in<br />
comfort, but be sure to have them with you when trying on new shoes, or the shoes will feel too tight when you add them<br />
in afterwards.<br />
Buy shoes towards the end of the day, when your feet are at their largest, or after participating in activities. Keep in mind<br />
that our feet can swell a half size later in the day. On hot days, they can swell even more.<br />
Selecting the right footwear vs. style is not always an easy choice, but when you look at the amount of time you'll be on<br />
your feet, the how hot the climate is, and what type of flooring you'll be walking on, you may want to consider comfort<br />
instead of style. If you already have foot concerns or foot conditions, you will stand a better chance of not aggravating<br />
them further.<br />
The choice is up to you!<br />
94
<strong>CLSA</strong> SAFETY TAILGATE GUIDE<br />
Foot Pain<br />
I have been instructed in the basic hazards of this equipment/procedure as listed above. I understand this proper safe<br />
work procedure.<br />
Instructed by:<br />
Date:<br />
Trainee Names:<br />
95
<strong>CLSA</strong> SAFETY TAILGATE GUIDE<br />
Foot <strong>Safety</strong> - It's a Shoe in for <strong>Safety</strong><br />
Employees seldom complain about their feet -- they just keep trudging along in silent discomfort. Foot health is the<br />
responsibility of both management and employees. Even though foot injuries are not as prevalent as other types of<br />
injury, there is a definite correlation between the feet and symptoms in the knees, hips, and low back. In fact, neglecting<br />
the feet can result in overall body fatigue and create the potential for other types of fatigue-related injury.<br />
A 2001 survey of 360 manufacturing and public works employees showed:<br />
~ 45% do have foot pain on a regular basis<br />
~ 23% have a tendency to twist their ankles<br />
~ 51% have knee pain from time to time<br />
~ 56% claim to feel it in their back when they've been on their feet all day.<br />
Workers may be exposed to various hazardous conditions on the job, including<br />
slippery surfaces, climbing hazards, handling or working around heavy<br />
equipment and machinery and working around electricity. These different<br />
working conditions may require different safety footwear to protect the foot, and<br />
the worker, from injury.<br />
Choose the Right Shoe<br />
When choosing safety footwear, you must select the legally approved shoe or boot required for the job activity,<br />
equipment, and situation. Some situations may require safety toed, or steel toed boots to protect the top part of the foot.<br />
These safety toed shoes provide extra protection over the top of the foot and can make a difference in preventing an<br />
injury in an accident. The best way to buy work shoes is to get fit at a safety shoe store.<br />
No Shoes, No Work!<br />
<strong>Safety</strong> shoes or boots with impact protection should be worn when workers carry or handle materials such as heavy<br />
packages, objects, parts or tools and for other activities where objects may fall onto the foot. Workers should be<br />
required to wear safety shoes or boots with impact protection when their work involves wheeling carts that carry heavy<br />
materials; handling heavy, bulky tools (paper, fabric, carpet, lumber etc.); working around heavy pipes or in situations<br />
where a heavy object may roll over a worker's foot.<br />
<strong>Safety</strong> shoes or boots with puncture protection should be required where a worker could step on sharp objects such as<br />
nails, wires, tacks, screws, large staples, scrap metal, etc. And special types of insulating shoes or conductive shoes<br />
may be necessary for certain types of electrical work.<br />
96
<strong>CLSA</strong> SAFETY TAILGATE GUIDE<br />
Foot <strong>Safety</strong> – It’s a Shoe in for <strong>Safety</strong><br />
I have been instructed in the basic hazards of this equipment/procedure as listed above. I understand this proper safe<br />
work procedure.<br />
Instructed by:<br />
Date:<br />
Trainee Names:<br />
97
<strong>CLSA</strong> SAFETY TAILGATE GUIDE<br />
Hearing Protection<br />
Noise is unwanted sound that can effect job performance, safety, and your health. Psychological effects of noise include<br />
annoyance and disruption of concentration. Physical effects include loss of hearing, pain, nausea, and interference with<br />
communications when the exposure is severe.<br />
Hearing protection is essential when noise exposures can't be<br />
controlled at their source. Both earplugs and earmuffs provide a<br />
physical barrier that reduces inner ear noise levels inner ear and<br />
prevent hearing loss from occurring. However, people often resist<br />
wearing these or use them incorrectly.<br />
Employees resist wearing hearing protection more than any other<br />
type of personal protective equipment. One reason is they don't think<br />
they really need it. But hearing loss occurs so gradually (even in<br />
intense exposures) that by the time you notice it, irreversible<br />
damage has already occurred.<br />
Another reason for not wearing hearing protection is that it can feel<br />
uncomfortable. Sometimes workers "spring" the muffs so they don't<br />
seal properly against the head, or snip off the inner portion of ear<br />
plugs leaving only the outer end to fool their supervisor. If you feel<br />
the need to do this, see your supervisor about obtaining a different<br />
type or style that fits you correctly and comfortably.<br />
Slight initial discomfort may be expected when a good seal between the surface of the skin and the surface of the ear<br />
protector is made. The amount of protection you obtain depends on obtaining a good seal and even a small leak can<br />
substantially reduce the effectiveness of the protector. Remember to check the seal several times each day.<br />
Protectors - especially ear plugs - have a tendency to work loose as a result of talking or chewing, and must be resealed<br />
occasionally.<br />
Properly designed, fitted, and clean ear protectors will cause no more discomfort to most workers than wearing a pair of<br />
safety glasses. Earplugs are made of soft material such a neoprene to prevent injury to the ear canal. Skin irritations,<br />
injured eardrums, or other adverse reactions from using ear plugs are very rare if they are kept reasonably clean.<br />
There are many different styles, types, and brands of ear protectors available, but when correctly fitted, they all provide<br />
similar levels of protection. The best hearing protector for you is one that fits correctly so that you can wear it properly.<br />
Some signs that you should be wearing hearing protection include:<br />
• If it is necessary for you to speak in a very loud voice, or shout directly into the ear of a person to be<br />
understood, it is likely that the noise level is high enough to require hearing protection.<br />
• If you have roaring or ringing noises in your ears at the end of the workday, you are probably being exposed to<br />
too much noise.<br />
• If speech or music sounds muffled to you after you leave work, but it sounds fairly clear in the morning when<br />
you return to work, you are being exposed to noise levels that are causing a temporary hearing loss. In time,<br />
this can become permanent if you do not take care.<br />
HOW LOUD IS LOUD?<br />
98
<strong>CLSA</strong> SAFETY TAILGATE GUIDE<br />
Most of us take our sense of hearing for granted-we assume that we hear what<br />
everyone else hears. Loss of hearing may not be realized until a friend or spouse<br />
screams in frustration, "Why don't you ever listen to me!!" This is because hearing<br />
loss is usually gradual. Normally, it doesn't hurt, so we don't know it's happening. It<br />
doesn't annoy us like losing our eyesight. In fact, it is sometimes a blessing to tune<br />
out all the clatter and noise of the city and workplace.<br />
Yet our ability to hear when we want to is precious and must be protected.<br />
Employers often reduce the amount of noise in the workplace by enclosing or<br />
muffling loud machinery, but they usually can't eliminate it entirely. Employers may also rotate workers out of an area so<br />
they needn't experience a full work day of excessive noise exposure. Whatever the length of time you work in an area<br />
with high noise levels, you are probably required to wear a type of hearing protection. Some people consider this a<br />
nuisance. The more you know about those ears of yours, however, the more likely you will take responsibility for<br />
protecting them.<br />
Do you realize that noise exposure off the job can also damage your hearing? The critical sound level when hearing<br />
protection should be worn is 85 decibels (dBA), established for an 8-hour time weighted average.<br />
20<br />
30-40<br />
40-50<br />
50-60<br />
70-90<br />
100-120<br />
140+<br />
A faint whisper<br />
Quiet pleasant sounds, a bird chirping<br />
Quiet to normal office sounds<br />
Normal conversation<br />
Heavy machinery, electric motors, garbage disposal, city traffic<br />
Jack hammer, power saw, motorcycle, lawn mower, rock music<br />
Nearly jet engine, gun shot (this level causes pain)<br />
The louder and longer your exposure, whether at work, at home, or during recreation, the more likely your hearing will be<br />
damaged. If you want to have a sense of "how loud is loud," the following examples, along with their decibel rating, will<br />
give you an idea:<br />
Many disposable or reusable plugs are available and most of these reduce noise by about 20-30 decibels. The noise<br />
reduction rating (NRR) is usually marked on the package or on the box if they come in bulk. However, since the NRR is<br />
established in a laboratory with perfectly fitted plugs, experts recommend that the true rating is generally about 7<br />
decibels less than indicated. Hearing protectors of the ear muff type are usually closer to the actual NRR.<br />
Some degree of hearing loss is part of the normal aging process, but young people should also be warned about the<br />
dangers of a rock concert, boom box, lawn mower or loud car engine. Of course they may not listen to you-but if they<br />
have permanent hearing loss, they won't be able to listen to anyone, will they? Hearing Protection - Use it!<br />
99
<strong>CLSA</strong> SAFETY TAILGATE GUIDE<br />
Hearing Protection<br />
I have been instructed in the basic hazards of this equipment/procedure as listed above. I understand this proper safe<br />
work procedure.<br />
Instructed by:<br />
Date:<br />
Trainee Names:<br />
100
<strong>CLSA</strong> SAFETY TAILGATE GUIDE<br />
Hearing Protection - Earmuffs<br />
"What did you say? Let me get my earmuffs on, so I can hear you." This remark may seem strange if you're not in the<br />
habit of wearing hearing protection. But in a noisy workplace where you have to strain to hear someone two feet away,<br />
hearing protection is not only necessary to protect your hearing, it can also help you hear the sounds you want to hear<br />
Earmuffs and other protective devices enable you to pick out sounds from a background of noise in much the same way<br />
that sunglasses help you see objects in glaring light.<br />
Earmuffs - Who Needs Them?<br />
If your employer has made earmuffs or earplugs available to you, the usual noise level<br />
in your workplace probably exceeds 85 decibels – that’s loud enough to damage your<br />
heating over time. When there is a choice of hearing protectors, the choice you make<br />
depends on several factors, such as comfort, loudness of noise, and whether the noise<br />
is consistently loud. Earmuffs are easier to put on and take off than earplugs, and so<br />
are the best choice if you do need them all the time. However they are bulky and<br />
relatively expensive, and may not fit well with other protective equipment such as hard<br />
hats, respirators and eyeglasses. If you work in a very noisy environment, you may<br />
need to use earmuffs and earplugs together for added protection.<br />
The Typical Earmuff<br />
Earmuffs consist of cushioned cups attached to a headband that may be worn over the head, behind the neck or under<br />
the chin. They should adjust up and down, in and out, for a good fit. Specialized models are available: cap-mounted<br />
earmuffs can be attached to safety hats; dielectric earmuffs (for workers exposed to high voltage) do not have metal<br />
parts; and electronic earmuffs reduce hazardous noises while magnifying sounds you need, to hear. Earmuffs reduce<br />
noise about 20 to 30 decibels; the Noise Reduction Rating (NRR) on your earmuffs indicates their effectiveness.<br />
Effectiveness Depends on Fit<br />
Your earmuffs should fit comfortably, the headband neither too tight nor too slack. To work right, earmuffs must form a<br />
seal around the ears, complete~ enclosing them, without pinching the earlobes. No hair or clothing should stick out from<br />
under the cups. Your eyeglasses may need to be modified to fit with earmuffs. Follow manufacturer's instructions for<br />
cleaning and storage, and replace hardened, cracked or worn cushions.<br />
When properly used, alone or in combination with earplugs, earmuffs can be an effective way to protect your hearing.<br />
For the best protection, have your hearing tested at least once a year and compared to previous tests, understand the<br />
effects of noise on your hearing, and wear your earmuffs whenever your job requires them.<br />
101
<strong>CLSA</strong> SAFETY TAILGATE GUIDE<br />
Hearing Protection - Earmuffs<br />
I have been instructed in the basic hazards of this equipment/procedure as listed above. I understand this proper safe<br />
work procedure.<br />
Instructed by:<br />
Date:<br />
Trainee Names:<br />
102
<strong>CLSA</strong> SAFETY TAILGATE GUIDE<br />
Hearing Protection - Earplugs<br />
Does your company provide you with earplugs or other hearing protection? If so, you may be wondering if they are<br />
necessary or if you will be able to communicate when wearing them. The good news is that earplugs do not lessen your<br />
ability to hear your coworkers; if you need earplugs, your workplace is so noisy you can't hear them anyway Earplugs<br />
can screen out background noise (in much the same way that sunglasses screen out background glare) actually making<br />
it easier for you to hear sounds such as the human voice.<br />
Types of Earplugs<br />
There are three types of earplugs:<br />
1. Formable earplugs made of waxed cotton or acoustical fibers can be molded to fit<br />
your own ear. They are disposable. Semi-disposal plugs of molded foam are used for<br />
up to a week.<br />
2. Pre-molded inserts of soft silicone rubber or plastic are reusable, some come in<br />
different sizes.<br />
3. Custom-molded earplugs are molded to fit the individual; silicone rubber or plastic<br />
molding compound is placed in each ear and allowed to set. The set compound may<br />
be used as earplugs or as molds for ear-plugs.<br />
Effectiveness<br />
Earplugs may reduce noise levels by up to 30 decibels. That is, ff the noise in your environment is 100 decibels, your<br />
earplugs could effectively reduce it to 70 decibels. When choosing earplugs, check the Noise Reduction Rating (NRR) on<br />
the package. The higher the number, the better the protection.<br />
Fit and Maintenance<br />
To work property, earplugs must completely fill the ear canal. When inserting earplugs, grasp your ear from behind your<br />
head with your opposite hand, and pull up to straighten the ear canal. Insert the earplug until it blocks sound; then hold it<br />
in place for a moment while it expands.<br />
Make sure your hands are clean when inserting plugs, and keep reusable plugs clean by washing them after each use in<br />
warm soapy water, to avoid ear infection.<br />
Properly fitting earplugs need not interfere with your comfort or ability to hew important sounds. And they can protect you<br />
from gradual loss of hearing that you may not notice until too late!<br />
103
<strong>CLSA</strong> SAFETY TAILGATE GUIDE<br />
Hearing Protection - Earplugs<br />
I have been instructed in the basic hazards of this equipment/procedure as listed above. I understand this proper safe<br />
work procedure.<br />
Instructed by:<br />
Date:<br />
Trainee Names:<br />
104
<strong>CLSA</strong> SAFETY TAILGATE GUIDE<br />
Hearing Protection - How Hearing Works<br />
Are you one of the 20 million people who are exposed to hazardous noise on the job? If so, you'll want to protect yourself<br />
from hearing loss by learning how hearing works, how your own hewing is measured, and how high levels of noise can<br />
cause hearing loss over time.<br />
Now the Ear Hears<br />
Sound waves travel through the ear canal to the<br />
eardrum. This membrane vibrates when the sound<br />
waves hit it, much the same way a drum vibrates when<br />
you hit it. The vibrations are transferred through tiny,<br />
sensitive bones in the middle ear to the cochlea, a<br />
coiled, hollow structure in the inner ear that is filled<br />
with fluid and lined inside with thousands of tiny hair<br />
like structures called hair cells. When the sound<br />
vibrations transfer to the cochlea, they cause waves in<br />
the fluid to move the hair cells, which convert the<br />
vibrations into nerve impulses. The auditory nerve<br />
carries these impulses to the brain, where you interpret<br />
them as sound.<br />
How Damage Occurs<br />
The hair cells lining the cochlea of your ear are extremely fragile. Such things as infections, head injuries, and certain<br />
drugs can damage them, but the most common source of damage to hair cells is noise. Loud noise over a period of time<br />
causes these nerve cells to die off, usually so gradually that you are not aware that it's happening until your hearing is<br />
permanently damaged.<br />
Audiometric Tests<br />
Fortunately, we can measure hearing loss with a sensitive test that will keep track of your hearing ability and alert you<br />
and your company to hearing loss, long before it becomes severe enough to affect you. In this test, which measures your<br />
ability to hear sounds of different frequencies (pitches), you will be asked to listen to sounds and indicate when you hear<br />
them. The results are shown on an audiogram, a graph that shows the quietest sound you can hear at each frequency.<br />
This audiogram shows how hearing changes as we age: At lower pitches there isn't much difference, but as we get older<br />
we experience greater difficulty in hearing high pitches. The same changes take place when there is hearing loss from<br />
excessive noise. If you compare audiograms taken at one-year intervals and find that the line has dipped significantly,<br />
you are experiencing hearing loss, even though you may not yet notice it.<br />
What Does "Too Loud" Mean?<br />
Decibels, used for measuring hearing thresholds, are also used for measuring the loudness of noise. You are exposed to<br />
about 20 decibels in a quiet bedroom, 110 decibels when you are using a power saw. OSHA regulations require hearing<br />
protection to be made available if you are exposed to noise levels above 85 decibels for eight hours at a time. Always<br />
wear hearing protection when the noise level is over 90 decibels. You can tell you need hearing protection K you have<br />
trouble hearing someone talking two feet away, if you hear ringing or other sounds in your ears after you leave work, or if<br />
you have trouble hearing for a while after you leave work. You don't get used to noise. You may learn to ignore it, but<br />
your ears can't tune it out. You can help protect your precious hearing by wearing proper hearing protection, having your<br />
hearing tested yearly.<br />
105
<strong>CLSA</strong> SAFETY TAILGATE GUIDE<br />
Hearing Protection – How Hearing Works<br />
I have been instructed in the basic hazards of this equipment/procedure as listed above. I understand this proper safe<br />
work procedure.<br />
Instructed by:<br />
Date:<br />
Trainee Names:<br />
106
<strong>CLSA</strong> SAFETY TAILGATE GUIDE<br />
Heavy Equipment <strong>Safety</strong><br />
Operation of heavy equipment such as excavators, loaders, graders, rollers, and bulldozers, should always be done by<br />
highly skilled operators who have demonstrated the ability and necessary skills to operate safely. Ground-based workers<br />
should be trained in how to work safely around the equipment, and how to stay clear. Unsafe practices by either the<br />
operator or those around the equipment can create very dangerous situations. Serious injuries can occur if the<br />
equipment strikes a worker, or if the equipment is rolled over.<br />
Here are a few common safety rules for operators and ground based workers to consider:<br />
Good communication is essential. A standardized set of hand<br />
signals should be used by the operator and signal person.<br />
Operators should always know exactly where all ground based<br />
workers are located, and the wearing of high visibility vests will<br />
help the operator to locate them quickly. The equipment should<br />
have a back up warning alarm that can be heard by all nearby<br />
workers. Two-way radios are also valuable communication<br />
tools.<br />
Heavy equipment must have a rollover protective structure<br />
(ROPS) <strong>meeting</strong> OSHA requirements. The ROPS is designed to<br />
protect the operator if the machine tips over. A seat belt must be<br />
worn so that the operator will not be thrown out of the seat<br />
during a rollover or upset situation. If working on slopes, try to<br />
avoid moving across the face of the slope. Try to operate up<br />
and down the slope face if possible. Use extreme caution when<br />
operating near open excavations.<br />
Wear hearing protection when required. If it has been determined that noise levels around the equipment could<br />
potentially cause hearing loss, always use protective plugs or muffs when working on or around the equipment.<br />
Never jump onto or off the equipment. Operators should always use the three-point contact rule when climbing onto or<br />
off heavy equipment. The three-point rule means having both feet and one hand, or one foot and both hands in contact<br />
with the ladder access at all times.<br />
Inspect and service the equipment regularly. Complete equipment service in accordance with the manufacturer's<br />
recommendation. Periodic safety inspections on all components of the equipment should be done regularly by qualified<br />
personnel. Inspect the steering system and brake systems carefully. A pre-shift walk around inspection by the operator is<br />
highly recommended.<br />
Injury accidents involving heavy equipment on construction sites have a higher probability of resulting in a fatality than<br />
many other types of accidents. It is critical to follow all safety rules and procedures when operating or working around<br />
heavy equipment.<br />
107
<strong>CLSA</strong> SAFETY TAILGATE GUIDE<br />
Heavy Equipment <strong>Safety</strong><br />
I have been instructed in the basic hazards of this equipment/procedure as listed above. I understand this proper safe<br />
work procedure.<br />
Instructed by:<br />
Date:<br />
Trainee Names:<br />
108
<strong>CLSA</strong> SAFETY TAILGATE GUIDE<br />
Housekeeping is an Important Part of Your Job<br />
Your employer is not your mother! What do I mean by that, you ask? I mean, just like when you were young, your mother<br />
had to remind you to pick up after yourself. Now that you are on your own, you still need to be told sometimes.<br />
Housekeeping is a very important part of your job. Not only does it improve the overall appearance of your shop or work<br />
area, it shows that you take pride in where you work. The best way that you can help keep your work place clean is to<br />
pick up after yourself! Don't leave it for the next shift or another craft to worry about.<br />
Here are some reasons to keep your work area clean:<br />
• You reduce trip and fall hazards.<br />
• Increased production. You won't have to waste time looking for a misplaced<br />
tool. You will always know where your tools are when you put them where<br />
they belong after you use them.<br />
• If someone falls because of materials you left on the floor, you will feel guilty<br />
because you were a causal factor in the accident. Also, the injured worker<br />
may want to remind you of that!<br />
• You reduce a potential fire hazard by removing unneeded combustibles from<br />
the work area.<br />
Here are some tips to maintain a clean work area:<br />
• Plan the job. Make a list of the needed tools/materials. This will help to minimize unnecessary clutter around your<br />
work area.<br />
• Develop a routine for cleaning up at the end of the shift or periodically during the shift.<br />
• Do not allow employees to eat, drink or smoke in the work area, not only because of litter problems, but also because<br />
of hygiene concerns.<br />
• This is not, by all means, all-inclusive. Take responsibility for yourself and<br />
your work area! Remember, a clean work area is a productive work area and<br />
also enhances safety!<br />
109
<strong>CLSA</strong> SAFETY TAILGATE GUIDE<br />
Housekeeping is an Important Part of Your Job<br />
I have been instructed in the basic hazards of this equipment/procedure as listed above. I understand this proper safe<br />
work procedure.<br />
Instructed by:<br />
Date:<br />
Trainee Names:<br />
110
<strong>CLSA</strong> SAFETY TAILGATE GUIDE<br />
Housekeeping on Construction Sites<br />
Picture your construction site in your mind. Construction sites can be busy and<br />
hectic with many workers and multiple contractors carrying on different yet<br />
simultaneous operations. What would happen if these groups never cleaned<br />
up after themselves? Trash and debris would pile up to become one large<br />
hazardous obstacle course. Imagine how difficult it would be to maneuver<br />
around such a site. How would you dodge the falling materials thrown or<br />
accidentally pushed over the sides of the building? How would you find your<br />
tools and supplies if they were covered by debris from other workers? A<br />
construction site with poor housekeeping is not productive nor is it a safe<br />
working environment.<br />
Although, the overall safety of a construction site is the ultimate responsibility<br />
of the general contractor who maintains the site safety plan and communicates its information to all of the subcontractors<br />
on site, every worker on the site is responsible for safety. It’s every worker’s responsibility to know and following the site<br />
safety plan, practice good housekeeping, follow recommended work practices, and promptly report and/or correct<br />
hazards at the worksite.<br />
If you’re a construction site worker, you must…<br />
• Do your part to keep the worksite free of unnecessary clutter and debris that could cause an injury or accident;<br />
• Try to limit the amount of materials and chemicals onsite to the quantities that you will need;<br />
• Place trash and debris in the proper receptacles located; conveniently throughout the job site as you go about<br />
your daily work;<br />
• Remove combustible materials such as wood and paper from the site promptly;<br />
• Keep form and scrap lumber with protruding nails cleared away from<br />
work areas, passageways, and stairs;<br />
• Remove or bend over protruding nails prior to disposal and storage;<br />
• Keep storage, staging, and work areas, along with all stairs and<br />
walkways on the construction site, free of obstructions, and debris;<br />
• Store tools and materials neatly and out of the way in storage bins or<br />
lockers and keep flammable or hazardous wastes in covered,<br />
segregated waste containers;<br />
• Ensure that materials stored on roofs or at heights are secured;<br />
• Never throw waste, materials, or tools from a building or structure.<br />
Debris chutes are a safe means of removing this material from an<br />
elevated work site;<br />
• Guard the area where the material could fall and post signs around the<br />
workplace to wear hard hats and watch for falling debris;<br />
• Place protective guards across areas where workers may could fall or<br />
could face an impalement hazard;<br />
• Control muddy areas using fill, gravel, boards and plywood, or other means.<br />
You can do your part to keep the worksite a safer place for yourself and your coworkers, if you just remember to clean up<br />
as you go and at the end of each shift.<br />
111
<strong>CLSA</strong> SAFETY TAILGATE GUIDE<br />
Housekeeping on Construction Sites<br />
I have been instructed in the basic hazards of this equipment/procedure as listed above. I understand this proper safe<br />
work procedure.<br />
Instructed by:<br />
Date:<br />
Trainee Names:<br />
112
<strong>CLSA</strong> SAFETY TAILGATE GUIDE<br />
Importance of <strong>Safety</strong> Training<br />
Routine work can dull alertness and a relaxed attitude can replace the caution that existed when the job was new and<br />
interesting. In many jobs the same route is traveled daily over the same roads or the same tasks are repeated with little<br />
conscious thought. Without some periodic reawakening to the ever-present hazards, lethargy deepens and the odds of<br />
an accident occurring can increase.<br />
Workers may not always recognize the importance of safety training or<br />
think of it as unnecessary because they’ve "been doing it for years." But<br />
an important benefit of periodic safety training is the reminder that a<br />
danger can exist and the no one is immune to accidents. Therefore, it is<br />
important for workers to understand the purpose of the training session,<br />
why it will be useful to them, and what can result from not following<br />
safety rules and procedures.<br />
The safety training should be organized so that the order in which the material is presented will match the steps that<br />
should be taken on the job. Make sure every worker understands the training material; not just that they were present or<br />
a test was given. Insist on questions from trainees after a session to tell you what did or didn't sink in. This will let you<br />
know what has to be reviewed again. If there's a general lack of understanding of hazards or safety rules and practices,<br />
schedule another safety <strong>meeting</strong> or plan a refresher course for a later date.<br />
Employees should be able to immediately practice and apply new knowledge and skills. If workers don't understand<br />
safety training information well enough to use it on the job, the training has not been effective. There should be<br />
immediate feedback if workers are doing their job safely or not. Supervisors should watch employees do their jobs and<br />
question them to identify what they do, or don't, know.<br />
Most of these tips are relatively simple and inexpensive solutions, but the safety payoff can be enormous. Remember,<br />
training is only effective when workers understand, and use, what they've learned. It takes less than a second to lose the<br />
rest of your life.<br />
113
<strong>CLSA</strong> SAFETY TAILGATE GUIDE<br />
Importance of <strong>Safety</strong> Training<br />
I have been instructed in the basic hazards of this equipment/procedure as listed above. I understand this proper safe<br />
work procedure.<br />
Instructed by:<br />
Date:<br />
Trainee Names:<br />
114
<strong>CLSA</strong> SAFETY TAILGATE GUIDE<br />
Injury and Illness Prevention Program<br />
In California, every employer is required by law to provide a safe and healthful workplace to his/her employees. In<br />
accordance with the California Code of Regulations, the County is required to have an effective Injury and Illness Prevention<br />
Program (IIPP) in writing. The DPW IIPP is located in a binder in your shop or on the DPW <strong>Safety</strong> Web Page.<br />
What should you expect to see in the IIPP? It is our written safety plan that has the following elements:<br />
• San Mateo County <strong>Safety</strong> Policy<br />
• The Department Of Public Works <strong>Safety</strong> Policy<br />
• <strong>Safety</strong> Goals<br />
• Responsibility For Administration Of The Program<br />
• Systems For Ensuring That Employees Comply<br />
With <strong>Safety</strong> And Health Work Practices<br />
• Systems For Communicating With Employees<br />
About <strong>Safety</strong><br />
• Identification And Evaluation Of Workplace<br />
Hazards<br />
• Procedures For Investigation Of Occupational<br />
Injury Or Illnesses<br />
• Methods And Procedures For Correcting Unsafe<br />
Or Unhealthy Conditions And Work Practices<br />
• <strong>Safety</strong> Training Programs<br />
• Roles And Responsibilities<br />
o All Employees<br />
o Supervisors<br />
o Deputy Directors/Department Head<br />
o Departmental <strong>Safety</strong> Manager<br />
Part of Public Works’ responsibility is to control potential workplace hazards and correct hazardous conditions or<br />
practices as they occur or are recognized.<br />
The program includes a system for the department to communicate with you on matters relating to occupational safety<br />
and health, including provisions designed to encourage employees to inform the employer of hazards at the worksite<br />
without fear of reprisal.<br />
The Public Works IIPP requires that supervisors conduct “toolbox” or “tailgate” safety <strong>meeting</strong>s with their crews at least<br />
every ten working days to emphasize safety. Supervisors also need to hold periodic <strong>meeting</strong>s to discuss safety problems<br />
and accidents that have occurred.<br />
You should never undertake a job that appears to be unsafe, and you should not perform a job until you have received<br />
instructions on how to do it properly and safely. The goal of the IIPP is to ensure that worker safety and health are not<br />
compromised.<br />
115
<strong>CLSA</strong> SAFETY TAILGATE GUIDE<br />
Injury and Illness Prevention Program<br />
I have been instructed in the basic hazards of this equipment/procedure as listed above. I understand this proper safe<br />
work procedure.<br />
Instructed by:<br />
Date:<br />
Trainee Names:<br />
116
<strong>CLSA</strong> SAFETY TAILGATE GUIDE<br />
Insect and Spider Bites<br />
Each year many workers experience insect and spider bites serious enough to make them lose time off the job.<br />
If you are stung by a bee:<br />
• Remove the stinger gently (with tweezers or a credit card if possible) and avoid squeezing the poison sac.<br />
Apply an ice pack or a cloth dipped in cold water to reduce swelling and itching.<br />
• (A sting from a yellow jacket can be deadly. These insects feed on dead animals and can cause blood<br />
poisoning.)<br />
• If you have an allergic reaction to a bite, get medical help immediately.<br />
Of spiders causing serious medical problems only the black widow and brown recluse are considered serious threats.<br />
The black widow spider has a shiny black body, about the size of a pea. With<br />
legs extended, it’s about an inch long. Females have a red or yellow hourglass<br />
mark on their underside. The black widow spider is partial to outdoor latrines<br />
and other places that attract flies. The black widow spider will attack with even<br />
the slightest provocation. Its bite is less painful than a pinprick, and does not<br />
cause a hole in the skin, but soon, intense pain and stiffness set in. Symptoms<br />
also may include fever, nausea, abdominal pain and chills. For children and<br />
the elderly, black widow bites can be lethal.<br />
Also beware of the brown recluse spider.<br />
When it comes to insect bites, the bite of<br />
the brown recluse spider is one of the<br />
most feared. This yellowish-tan to dark<br />
brown spider is 1/4-1/2 inch long. It has a<br />
characteristic fiddle-shaped mark on its<br />
upper body. Its bite can have painful,<br />
disfiguring, and even deadly results.<br />
Within hours of a bite, victims may suffer<br />
severe pain and stiffness, fever,<br />
weakness, vomiting or a rash. The recluse’s venom destroys cells and clots<br />
blood, blocking blood vessels and leading to gangrene. Within 24 hours, the<br />
wound erupts into an open sore ranging from the size of a thumbnail to that of<br />
an adult’s hand. Anyone bitten by either spider should seek medical help<br />
immediately.<br />
So basically, the first line of treatment, if you suspect a bite is to apply a cold compress. However, if you have a bite and<br />
experience other side effects, get medical treatment immediately.<br />
Experts say, spiders typically don’t go looking for human prey. Spiders are generally shy and try to avoid contact with<br />
humans. Leave them to their dark, secluded spaces – under rocks, in debris piles, sheds, closets and attics, and there’s<br />
no worry. Invade their space, though, and risk a bite. Spiders will attack if trapped or if pressed against the skin.<br />
Not all people react the same way to these spider bites. The variation may be due to the amount of venom injected or<br />
the person’s physiology or immune system.<br />
117
<strong>CLSA</strong> SAFETY TAILGATE GUIDE<br />
Insects and Spider Bites<br />
I have been instructed in the basic hazards of this equipment/procedure as listed above. I understand this proper safe<br />
work procedure.<br />
Instructed by:<br />
Date:<br />
Trainee Names:<br />
118
<strong>CLSA</strong> SAFETY TAILGATE GUIDE<br />
Jacks<br />
This is primarily a safety check-off sheet to inform the employee of the dangers and hazards of combustible materials.<br />
Each employee must be trained on these hazards to avoid injury.<br />
Minimum <strong>Safety</strong> Equipment Required: <strong>Safety</strong> glasses, Respirator (see below)<br />
Many people think there is nothing more to operating a jack than to putting it under the load, inserting the handle and<br />
jacking away. But every year there are lots of workers who are seriously hurt because they didn't use the jack correctly.<br />
To avoid having an accident of your own follow these simple, basic rules:<br />
1. Use a jack with a rated capacity that equals or exceeds the load you're lifting.<br />
2. Always set the jack on a firm and level foundation.<br />
3. To prevent slipping, use a wooden block softener between the head of the jack & the load.<br />
4. Set the jack perpendicular, at a right angle, to the load.<br />
5. If there is a chance the load will swing to the side, install props or guys before doing any lifting.<br />
6. Have enough help when you install or move a jack.<br />
7. When you're working on a floor of any kind, make sure the load limit of the floor isn't exceeded.<br />
8. Before working under a raised load install blocking to keep the load from accidentally falling.<br />
9. Keep jacks in good shape and well lubricated, but only lubricate at the points where lubrication is specified.<br />
Check for broken teeth and other defects. Never throw or drop jacks.<br />
10. When a jack develops any defect whatever, turn it in for repair and be sure to test it under load before putting it<br />
back in service.<br />
119
<strong>CLSA</strong> SAFETY TAILGATE GUIDE<br />
Jacks<br />
I have been instructed in the basic hazards of this equipment/procedure as listed above. I understand this proper safe<br />
work procedure.<br />
Instructed by:<br />
Date:<br />
Trainee Names:<br />
120
<strong>CLSA</strong> SAFETY TAILGATE GUIDE<br />
Keep Your Hat On – Hard Hat <strong>Safety</strong><br />
When it comes to personal protection, your best friend on the job is your hard hat. And you’ve earned the right to wear it<br />
proudly because the work you do is demanding and dangerous. Over the years we’ve all known someone whose life<br />
was save by a hard hat. Lets talk about how your hard hat does its job, and how you can make sure it keeps on<br />
protecting you.<br />
No matter what your hard hat is made of<br />
fiberglass or thermoplastics, it is specifically<br />
designed and certified by the American<br />
National Standards Institute to protect you from<br />
high impact. How much impact? Well, how<br />
about a hammer dropped onto your head from<br />
two stories above? A hard hat is able to do this because the shell is flexible enough to absorb some of the impact and<br />
transfer the rest of the impact to the special system of webbing inside the hat. The webbing in turn stretches and<br />
spreads the remaining stock throughout he head and body. And a hard hat does more than protect you from impact.<br />
The space in the hat combines the reflective surface to help you keep a cool head – 5 to 7 degrees cooler than the<br />
average baseball cap, for instance. In addition to protecting from impact and heat, Class A and B hats also protect from<br />
certain types of electrical shock.<br />
Because a hard hat is carefully designed, it will only work well when you use it right. This means keeping that space<br />
between the webbing and the shell open – it wasn’t meant as a place to store your cigarettes or your gum. Avoid<br />
wearing headgear under your hard hat, except for cold-weather liners specifically designed for it. The straps should be<br />
adjusted to fit you and only you: snug but not tight. Use only your own hat.<br />
Check your hat for scratched, cracks, dents or brittleness. Wash the webbing in detergent at least every 30 days,<br />
replacing it when it gets frayed. Avoid getting creative with the shell. Drilling ventilation holes or painting the hat with<br />
solvent-based paints can weaken the shell. Incidentally, before you go out and test your hats by dropping hammers on<br />
them from a second story window, let me point out that a hard hat is designed to protect you from this impact – but only<br />
once. In fact, any time your hat receives a heavy blow you should replace it. By the same token, avoid dropping or<br />
throwing your hat. Some companies automatically replace hats at regular intervals even when there’s no visible<br />
damage.<br />
Some 70,000 workers are disabled by head injuries each year. Keep your hard hat on, and your chances of staying<br />
ahead of those injury statistics are excellent.<br />
121
<strong>CLSA</strong> SAFETY TAILGATE GUIDE<br />
Keep Your Hat On – Hard Hat <strong>Safety</strong><br />
I have been instructed in the basic hazards of this equipment/procedure as listed above. I understand this proper safe<br />
work procedure.<br />
Instructed by:<br />
Date:<br />
Trainee Names:<br />
122
<strong>CLSA</strong> SAFETY TAILGATE GUIDE<br />
Lifting<br />
This is primarily a safety check-off sheet to inform the employee of the dangers and hazards of improper lifting<br />
techniques. Each employee must be trained to know when to get assistance by using a mechanical advantage, or<br />
another employee, to avoid injury.<br />
Minimum <strong>Safety</strong> Equipment Required: NA<br />
Plan your move:<br />
1. Size up the load and make sure your path is clear.<br />
2. Get help as needed.<br />
3. Use a dolly or other materials handling equipment if possible.<br />
4. Use a wide, balanced stance with one foot slightly ahead of the other.<br />
5. Get as close to the load as possible.<br />
6. To ensure solid contact when lifting heavy objects, use your entire palm, not just your fingertips.<br />
7. Tighten your stomach muscles as the lift begins.<br />
8. When lifting, keep your lower back in its normal arched position, bend at the hips (stick your bottom out) and lift.<br />
9. Pick up your feet and pivot to turn. Don’t twist your back.<br />
10. Lower the load slowly, maintaining the curve in your lower back.<br />
Lifting heavy bags:<br />
1. Put one knee down against the bag and pull the bag up your leg.<br />
2. Rest the bag on the edge of the knee and stand upright.<br />
3. Pull bag to your waist height.<br />
Lifting over Barriers:<br />
Use the “golfer’s” lift for lighter objects in containers or behind barriers. Place one hand on a support, swing one leg<br />
behind as you reach, then push up on your hand and straighten up.<br />
When heavier objects require two hands for an over-barrier lift, move close to the object, then bend at the hips while<br />
keeping your back in the normal arched position. Get a sure grip, then lift, allowing the muscles at the back of your legs<br />
to do the work.<br />
Lifting Sheet Materials:<br />
1. Where possible, store sheets at a convenient height and above<br />
ground on trestles.<br />
2. Grasp sheet on long side at the mid-point.<br />
3. Tip sheet up, then slide sheet partway off pile.<br />
4. Bend at the hips first, then the knees, maintaining the normal<br />
curve in your lower back. Grasp sheet above and below at the<br />
mid-point.<br />
5. Carry Sheet, keeping your back erect. Avoid leaning to one side.<br />
123
<strong>CLSA</strong> SAFETY TAILGATE GUIDE<br />
Lifting Sheet Materials from the Floor:<br />
Method #1<br />
1. Bend at the hips, then the knees, keeping body as upright as possible, and grasp sheet at midpoint.<br />
2. Tip sheet up to horizontal position.<br />
3. Stand sheet to vertical position.<br />
4. With back to the sheet, bend your knees and place hands on either side of the sheet.<br />
5. Carry the sheet, keeping back as upright as possible.<br />
Method #2<br />
1. Bend at the hips, then the knees, keeping your back as upright as possible, and grasp sheet at mid-point.<br />
2. Tip sheet up to horizontal position.<br />
3. Lift sheet slightly and put toe under mid-point.<br />
4. Bend at the knees, keeping upright. Slip free hand under sheet.<br />
5. Stand and lift, maintaining the normal curve in your low back.<br />
For long carries of sheet material, use a carrying handle. Better yet, if walking surface is smooth and hard, use<br />
drywall cart.<br />
124
<strong>CLSA</strong> SAFETY TAILGATE GUIDE<br />
Lifting<br />
I have been instructed in the basic hazards of this equipment/procedure as listed above. I understand this proper safe<br />
work procedure.<br />
Instructed by:<br />
Date:<br />
Trainee Names:<br />
125
<strong>CLSA</strong> SAFETY TAILGATE GUIDE<br />
Purpose<br />
New Rules for Preventing Heat Illnesses<br />
To comply with CalOSHA Title 8, §3395 which requires employers to control the risk of occurrence of heat illness among<br />
employees who work outdoors. In Public Works, this would include the Road Services employees, Facility Services<br />
employees and some Engineering and Resource Protection employees.<br />
Heat Illness<br />
Heat Illness means a serious medical condition resulting from the<br />
body's inability to cope with a particular heat load, and includes heat<br />
cramps, heat exhaustion, and heat stroke.<br />
Program Components<br />
• Calculation of Heat Index for outdoor worksite<br />
• Water<br />
• Shade (Recovery Time)<br />
• Prompt Medical Attention<br />
Calculation of Heat Index<br />
In general, employers should assume that there is a significant risk of heat illness for employees working in the sun if<br />
the Heat Index for the day is 80 or above. If employees will be working in shade, a heat index of 90 or above is the<br />
equivalent point of risk. This adjustment for work in the sun is critically important because the Heat Index you calculate<br />
from the chart assumes a person will be working in the shade.<br />
The Heat Index can be calculated by checking the temperature and humidity at http://www.weather.com/ - just put in the<br />
zip code for the area where the crew will be working and have the crew Supervisor use the temperature and humidity<br />
numbers to apply to the heat index chart.<br />
It is also necessary to account for the clothing workers are wearing. The Heat Index assumes people are wearing light<br />
summer clothing. When workers use heavier clothing, or use some types of personal protective equipment, the risk of<br />
heat illness becomes significant at a lower Heat Index.<br />
Water<br />
In conditions of high heat and strenuous work, the human body can lose over a quart of fluid per hour just by sweating.<br />
Continuous replacement of this lost fluid is critical to preventing heat illness, and this means assuring the presence of,<br />
ready access to, and consumption of potable drinking water.<br />
Public Works will do it’s best to provide the full-shift quantity of drinking water at the beginning of the work shift - 2<br />
Gallons + 2 liters Water – Per Employee Per 10 Hour shift. The OSHA standard requires effective procedures for<br />
drinking water replenishment to allow employees to drink one quart or more per hour.<br />
2 Gallons + 2 liters Water – Per Employee<br />
Per 10 Hour shift<br />
126
<strong>CLSA</strong> SAFETY TAILGATE GUIDE<br />
At all times there must be a sufficient quantity of water present and readily accessible to allow every employee to<br />
consume at least one quart of water per hour. Any water supply procedure that depends on replenishment during the<br />
work shift will be out of compliance if it is not reliable.<br />
If employees cannot count on reliable replenishment of the water supply, they may feel pressured to reduce their water<br />
consumption in order to conserve the supply. Employers will also be out of compliance if at any time no drinking water is<br />
available to employees, or if their practice is to wait until the water vessel is empty to replenish it. It is similarly<br />
impermissible for an employer to replenish the drinking water supply only when requested by employees.<br />
Shade<br />
Public Works will provide shade for employees to take a rest break or “recovery period”. "Shade" means blockage of<br />
direct sunlight. Canopies, umbrellas and other temporary structures or devices may be used to provide shade. One<br />
indicator that blockage is sufficient is when objects do not cast a shadow in the area of blocked sunlight. Shade is not<br />
adequate when heat in the area of shade defeats the purpose of shade, which is to allow the body to cool. For example,<br />
a car sitting in the sun does not provide acceptable shade to a person inside it, unless the car is running with air<br />
conditioning. Trees can be used for shade as long as the cover provided by the trees blocks the direct sunlight.<br />
The shaded area must also allow the employee to assume a comfortable posture and must not cause exposure to<br />
another hazard. Therefore, the shade requirement cannot be met by using areas underneath mobile equipment, like a<br />
tractor.<br />
The employee must be permitted to remain in the shade for a period of at least five minutes. The importance of<br />
prevention cannot be overstated. When employees wait until actual symptoms appear before seeking shade and<br />
recovery, they are at significant risk of developing serious heat illness and the purpose of the standard is defeated.<br />
Medical Treatment<br />
The preventive recovery period, a break in the shade, is not a substitute for medical treatment. If an employee has any<br />
symptoms of heat illness, first aid procedures should be initiated.<br />
Heat Cramps<br />
• If alert, give the person beverages to sip (such as Gatorade), or make a salted drink by adding a teaspoon<br />
of salt per quart of water. Give a half cup every 15 minutes. Cool water will do if salt beverages are not<br />
available.<br />
• Massage affected muscles gently, but firmly, until they relax.<br />
Heat Exhaustion - Are two or more of these signs of heat exhaustion present?<br />
• Skin that is pale, cool and clammy<br />
• Sweating<br />
• Dry mouth<br />
• Dizziness<br />
• Fatigue and weakness<br />
• Headache<br />
• Nausea, vomiting<br />
• Weak and rapid pulse<br />
• Muscle cramps<br />
127
<strong>CLSA</strong> SAFETY TAILGATE GUIDE<br />
Heat Stroke<br />
Signs of heat stroke:<br />
• Body temperature 104 degrees F or higher<br />
• Skin that is red, dry and/or hot<br />
• Pulse that is rapid and then gets weak<br />
• No sweating<br />
• Confusion, hallucinations or loss of consciousness or convulsions<br />
Treatment for Heat Stroke:<br />
• CALL 911<br />
• Move the person to a cool place indoors or under a shady tree. Place the feet higher than the head.<br />
• Remove the clothing and either wrap the person in a cold, wet sheet; sponge the person with towels or<br />
sheets that are soaked in cold water; or spray the person with cool water. Fan the person.<br />
• Put ice packs or cold compresses to the neck, under the armpits and to the groin area.<br />
128
<strong>CLSA</strong> SAFETY TAILGATE GUIDE<br />
New Rules for Preventing Heat Illness<br />
I have been instructed in the basic hazards of this equipment/procedure as listed above. I understand this proper safe<br />
work procedure.<br />
Instructed by:<br />
Date:<br />
Trainee Names:<br />
129
<strong>CLSA</strong> SAFETY TAILGATE GUIDE<br />
Rebar <strong>Safety</strong><br />
Anyone working around or with concrete should be aware of the hazards and safety precautions related to this operation.<br />
• Employees working more than 6 feet above any adjacent working surface, placing and tying reinforcing steel in<br />
walls, piers, columns, etc., must use a safety belt, harness or equivalent device.<br />
• Employees should not be permitted to work above vertically protruding REBAR unless it has been protected to<br />
eliminate the hazard of impalement. The top of the rebar must be covered with a rebar cap, wood board or<br />
similar device (as shown below).<br />
• Handles on bull floats must be of non-conductive<br />
materials or insulated with a non-conductive sheath<br />
when used around energized electrical conductors to<br />
prevent electrical shock.<br />
• When using a powered or rotating type troweling<br />
machine, the control switch will automatically<br />
shut off the power when the operator removes<br />
his hands from the handle<br />
• DO NOT USE "TIE-DOWNS" on the control<br />
switches.<br />
130
<strong>CLSA</strong> SAFETY TAILGATE GUIDE<br />
Rebar <strong>Safety</strong><br />
I have been instructed in the basic hazards of this equipment/procedure as listed above. I understand this proper safe<br />
work procedure.<br />
Instructed by:<br />
Date:<br />
Trainee Names:<br />
131
<strong>CLSA</strong> SAFETY TAILGATE GUIDE<br />
Responding To Vehicle Fires<br />
A vehicle fire can be a frightening and dangerous experience. Vehicle fires claim hundreds of lives and cause thousands<br />
of dollars in property damage each year. Being prepared for such an emergency can save your life and helps prevent<br />
damage to property.<br />
When you are faced with a vehicle fire, what should you do? The ultimate rule to keep in mind in fighting a fire is not to<br />
endanger yourself or others unnecessarily. Do your best to get the fire under control, but do not take foolish risks. The<br />
following tips will help you determine your course of action:<br />
• Do not panic. Quickly take stock of the situation, and then<br />
take appropriate action.<br />
• Turn off the ignition and immediately check for leaking fuel.<br />
• First decision to make: Do you believe the fire is small<br />
enough to successfully fight yourself, or do you need<br />
professional assistance?<br />
• If you need the fire department, have the first available<br />
person call them for you, and move away from the burning<br />
vehicle.<br />
• If you open the hood, use a glove, and do not open it any<br />
more than necessary to fight an engine fire--air will intensify<br />
the fire.<br />
• Do not use water on an oil fire--this will only make the<br />
problem worse.<br />
• Make the most of your ABC or BC fire extinguisher's<br />
capacity--use only enough at a time to suppress flames.<br />
• When using a fire extinguisher keep the wind behind you, if possible, to avoid inhaling fumes and smoke.<br />
• If fire extinguishers are empty and the fire is still not under control, try using sand or dirt to smother the flames.<br />
• In an electrical fire, which commonly erupts under the dashboard and has a distinct odor, disconnect the battery<br />
cables from their terminals if at all possible.<br />
• Once the fire is out, do not leave the vehicle, assuming all is well. Fires often flare up again. Keep checking the<br />
fire area.<br />
If you stop to help another driver whose vehicle or cargo is on fire, be sure your own vehicle is parked well away from the<br />
fire scene. Park on an upgrade if possible, to avoid the possibility that leaking flammable liquids will run down to your<br />
vehicle and involve it in the blaze.<br />
Prevent vehicle fires by periodically checking the fuel and electrical systems for signs of wear. Signs include<br />
cracked or leaking fuel lines, leaks around the carburetor or leaks from the fuel injection system (injectors, pressure<br />
lines, etc.). Usually a strong odor of fuel indicates a possible leak and the potential hazard of fuel igniting on a hot source<br />
(e.g., exhaust manifold). Be alert to broken or bare electrical wires and report these to your mechanic. A defective wire<br />
can ground out, heat up and possibly start a fire in your vehicle's electrical system. Also keep your engine free of oil<br />
build-up to help reduce the chance of an engine fire.<br />
132
<strong>CLSA</strong> SAFETY TAILGATE GUIDE<br />
Responding To Vehicle Fires<br />
I have been instructed in the basic hazards of this equipment/procedure as listed above. I understand this proper safe<br />
work procedure.<br />
Instructed by:<br />
Date:<br />
Trainee Names:<br />
133
<strong>CLSA</strong> SAFETY TAILGATE GUIDE<br />
Road Work <strong>Safety</strong><br />
Road workers install, maintain, and improve our roads to keep them safe, but over 100 California road workers<br />
are killed each year while doing this work. Road work hazards such as moving vehicles and construction equipment<br />
require workers to stay alert and follow safety procedures.<br />
Before conducting roadwork jobs, review the required tasks, location, and time of day to determine the necessary<br />
equipment, personnel, and materials. Plan how you will control traffic along the road and within the construction zone.<br />
Have enough trained flaggers to complete your work. Gather the signs, cones, flags, drums, and/or message boards<br />
that you will need for the job. Inspect your signage to make sure it is in good repair and highly visible. Clean or discard<br />
dirty equipment with limited visibility.<br />
Get training on traffic control and safe work practices. Set up<br />
and maintain your roadside work zone properly. Get training on the<br />
equipment that you will use and drive, from the smallest tool to the<br />
largest moving vehicle. Operate tools and equipment according to the<br />
manufacturer’s recommendations. Know the hazards of the chemicals<br />
and materials that you use.<br />
Get training on the personal protective equipment (PPE) that<br />
you are required to wear, including its uses and limitations. Wear high<br />
visibility garments on your legs and chest. Wear your assigned PPE,<br />
including a hardhat, safety shoes, and work gloves. Consider earplugs<br />
or muffs, safety glasses, and fall protection depending on the job task.<br />
In the work zone, watch for fast-moving motorists and large construction equipment. Set up parking zones that<br />
have safe entrances and exits. Group your vehicles on the same side of the road for visibility. Set up the job site and<br />
tasks to minimize the need to cross the active road. Set up traffic lanes within the jobsite for clear access and visibility.<br />
Work facing traffic and stay alert, or station a lookout to watch oncoming traffic. Have an escape route and/or<br />
plan of action in place. Watch for backing vehicles because the driver often has a limited view. Practice good<br />
communication and make sure all vehicles have backup alarms. If you are flagging, acting as a lookout, or traffic<br />
director, remain alert. Do not drink, smoke, or have a conversation while performing these duties.<br />
Road work is a physical job requiring strength and endurance. Stay fit so your body can do the work. Keep your<br />
back straight and use proper lift techniques. Use anti-vibration gloves when working with vibrating equipment. Take<br />
frequent micro-breaks every 30 minutes to stretch and relax your muscles. Rotate your tasks during the day to use<br />
different muscle groups.<br />
Road work occurs in all types of weather and throughout the year. Wear appropriate clothing for the climate.<br />
Light colored layers and sunscreen protect you during the hot months while layers of moisture-wicking clothing protect<br />
you in the cold. Get plenty of rest, eat right, and drink enough to stay healthy and alert on the job. Take safety on the<br />
road!<br />
134
<strong>CLSA</strong> SAFETY TAILGATE GUIDE<br />
Road Work <strong>Safety</strong><br />
I have been instructed in the basic hazards of this equipment/procedure as listed above. I understand this proper safe<br />
work procedure.<br />
Instructed by:<br />
Date:<br />
Trainee Names:<br />
135
<strong>CLSA</strong> SAFETY TAILGATE GUIDE<br />
Roadside Equipment Repair<br />
This is primarily a safety check-off sheet to inform the employee of the dangers and hazards of combustible materials.<br />
Each employee must be trained on these hazards to avoid injury.<br />
Minimum <strong>Safety</strong> Equipment Required: <strong>Safety</strong> Glasses, Reflective <strong>Safety</strong> Vest Wear appropriate personal protective<br />
equipment consistent with the hazard<br />
• Use safe driving techniques when pulling off the road, parking off the road and pulling back onto the road.<br />
• Use proper warning markers appropriate for daylight or darkness when parked to work on vehicles or<br />
equipment.<br />
• Proper lifting techniques should be used. Get help or use equipment if necessary.<br />
• Always park as far as possible away from traffic.<br />
• Be certain jacks and hoisting equipment are rated for the loads being lifted.<br />
• Use proper jacking and hoisting procedures.<br />
• Take caution to avoid hot surfaces, liquids and materials.<br />
• Use proper precautions when working with equipment subject to high pressure such as radiators, tires,<br />
hydraulic systems and batteries.<br />
• Use proper safety precautions to avoid explosive, chemical injuries when working with or near batteries. Wear<br />
eye protection.<br />
• Ascertain the stability of equipment being repaired and the service vehicles when stopped on the road or off the<br />
road, particularly on uneven terrain.<br />
• Clean up gasoline, oils or detergents that may present fire or other safety hazards.<br />
• Ensure that first aid kits and fire extinguishers are readily available and in good condition.<br />
• Disable starting circuits or procedures systems when working around engines or other equipment moving parts<br />
to prevent inadvertent equipment or accessory movement.<br />
136
<strong>CLSA</strong> SAFETY TAILGATE GUIDE<br />
Roadside Equipment Repair<br />
I have been instructed in the basic hazards of this equipment/procedure as listed above. I understand this proper safe<br />
work procedure.<br />
Instructed by:<br />
Date:<br />
Trainee Names:<br />
137
<strong>CLSA</strong> SAFETY TAILGATE GUIDE<br />
Safe Driving<br />
Emergencies, by definition, happen suddenly with little time for evaluation and decision-making. You have to be<br />
prepared to act quickly to avoid a crash. A review of nearly 12,000 collisions found that more than 37 percent of drivers<br />
involved took no action to prevent or avoid the incident.<br />
Think caution.<br />
Get in the right frame of mind before you get behind the wheel.<br />
Never drive when you're emotionally upset or rushed. Your<br />
alertness level automatically drops around your regular bedtime.<br />
If you must drive at that time, stop each hour and walk around or<br />
wash your face with cold water. According to traffic safety<br />
authorities, lack of attention is a major contributing factor to auto<br />
crashes.<br />
In the driver's seat.<br />
Correct seat adjustment puts you in position to perform the gentle, smooth, precise movement necessary for safe<br />
motoring in inclement weather. Adjust your seat so you sit no closer than 10 inches to the steering wheel and can see<br />
the road ahead. This distance allows room to move your arms and reduces the chance of injury to the fingers, hands,<br />
and forearms if the air bag deploys. Shorter drivers may need pedal extensions to be able to keep this distance. Check<br />
mirrors and environmental controls before you start. Don't forget to buckle up and have all your passengers buckle up<br />
too.<br />
Suit up.<br />
Select clothing that provides comfort and freedom of<br />
movement. While heavy garments may be necessary<br />
outside the vehicle, they can restrict movement behind the<br />
wheel. Always come to a complete stop in a safe spot<br />
before removing a coat or gloves.<br />
Skills for Driving With Reduced Traction<br />
Wet roads mean poor traction. Conditions are most dangerous during the first 10 minutes of a heavy downpour as oil<br />
and debris wash away. Knowing how to handle poor traction reduces the potential for hydroplaning, skidding or getting<br />
stuck in the mud.<br />
138
<strong>CLSA</strong> SAFETY TAILGATE GUIDE<br />
Safe Driving<br />
I have been instructed in the basic hazards of this equipment/procedure as listed above. I understand this proper safe<br />
work procedure.<br />
Instructed by:<br />
Date:<br />
Trainee Names:<br />
139
<strong>CLSA</strong> SAFETY TAILGATE GUIDE<br />
Why Do We Have <strong>Safety</strong> Meetings?<br />
Why do we have safety <strong>meeting</strong>s? <strong>Safety</strong> <strong>meeting</strong>s are an opportunity for employees<br />
to get together and figure out how to do their jobs safer. Topics discussed in safety<br />
<strong>meeting</strong>s may be topics that you are familiar with, or topics that you have limited<br />
knowledge about. If the topic is something that you are familiar with, it may be easy to<br />
tune-out and not listen to the safety information presented. If you are an expert in the<br />
current topic, speak up and share your experiences.<br />
Information passed on in a safety <strong>meeting</strong> has a purpose - To stop you or your coworker<br />
from being injured. <strong>Safety</strong> <strong>meeting</strong>s also allow employees an opportunity to<br />
relay safety / health concerns or improvement ideas to their supervisors.<br />
Injuries result from unsafe acts or unsafe conditions. For a variety of reasons,<br />
unsafe acts typically account for 90% of all injuries, according to some experts.<br />
If you're still not sold, let's look at the potential cost of injuries. More specifically, how can injuries directly affect you?!<br />
• DEATH - The ultimate unwanted<br />
result. Where does this leave your<br />
loved ones?<br />
• FINANCIAL COST- Lost pay or<br />
reduction in pay. Who pays the<br />
bills? Are you the sole income<br />
producer in your household?<br />
• PAIN & SUFFERING- An<br />
obvious detriment that no one<br />
desires.<br />
• DISABILITY- A life changing<br />
experience. Now you're not able<br />
to do what you use to do. Maybe<br />
now you can't cast that fishing<br />
rod, ride that bike, hug your wife,<br />
lift your child, or simply see? Or<br />
perhaps you're confined to a<br />
wheelchair – Good-bye career.<br />
• YOUR CO-WORKERS SAFETY-<br />
Perhaps you and your co-worker<br />
have been working together for<br />
sometime now. Chances are you<br />
may spend as much time with<br />
your co-workers than possibly<br />
your own family. Thus, you<br />
obviously do not want something<br />
bad to happen to them. Watch<br />
out for their safety too.<br />
<strong>Safety</strong> <strong>meeting</strong>s are a perfect opportunity for you to communicate any safety ideas or concerns that you may have.<br />
Participate in your safety <strong>meeting</strong>s. If you don't participate then your ideas will not be heard. Who knows, the idea that<br />
you have may very well save your co-worker's life or even your own!<br />
140
<strong>CLSA</strong> SAFETY TAILGATE GUIDE<br />
Why Do We Have <strong>Safety</strong> Meetings?<br />
I have been instructed in the basic hazards of this equipment/procedure as listed above. I understand this proper safe<br />
work procedure.<br />
Instructed by:<br />
Date:<br />
Trainee Names:<br />
141
<strong>CLSA</strong> SAFETY TAILGATE GUIDE<br />
<strong>Safety</strong> Sun Glasses<br />
Spring is here! Now is the time many people working outdoors break out the sunglasses. While conventional sunglasses<br />
may protect the eyes from glare, they do a poor job of protecting your eyes from the industrial hazards of splashes, flying<br />
objects, and dust. In fact, conventional glasses can present their own hazards in the workplace.<br />
It is a fact that the frame and lenses used in safety glasses are stronger than the frame and lenses used in conventional<br />
glasses. When an object strikes the lens of safety glasses it is very unlikely that the lens would dislodge. This is not true<br />
of conventional eyewear, especially those types with wire frames. When an object strikes the lens of conventional<br />
glasses, the lens can shatter, showering the wearer's eye with shards of glass. This can happen, and it has happened.<br />
But, with a pair of approved safety glasses, the lens may break, but it will not shatter back into the eye.<br />
Because sunglasses have a darkened lens, some people mistakenly believe these<br />
glasses will provide the needed protection when welding, brazing, or cutting. This<br />
is far from the truth. A darkened lens will not protect your eyes from the infrared<br />
(IR) and ultra-violet (UV) radiation. Wearing glasses with darkened lenses, which<br />
are not made for industrial applications, can actually be more dangerous than<br />
wearing no glasses at all. This is because the eye attempts to compensate for less<br />
light by opening the pupil wider. In turn, this allows more of the damaging radiation<br />
in. For adequate protection from the visible light produced by welding, the lens<br />
must be of a specified shade. Sunglasses are not welding/cutting goggles.<br />
What should you look for when selecting safety sunglasses? First, be sure the glasses are indeed safety eye wear, by<br />
checking to see if they comply with American National Standards Institute (ANSI) standards, the organization which sets<br />
the criteria for safety eyewear. This will be stated on the packaging and on the frame of the glasses. Look for "Z87.1."<br />
This is the ANSI designation identifying the glasses as approved safety eyewear.<br />
Although not a necessity, consider glasses providing IR and UV protection. Look for glasses that are lightweight and<br />
adjustable. If the glasses don't fit properly, they won't be comfortable and thus they many not be worn. Try them on and<br />
adjust them before starting work. A good pair of safety sunglasses can be purchased for less than $10. This is certainly a<br />
deal when you consider you are protecting your priceless eyes.<br />
142
<strong>CLSA</strong> SAFETY TAILGATE GUIDE<br />
<strong>Safety</strong> Sun Glasses<br />
I have been instructed in the basic hazards of this equipment/procedure as listed above. I understand this proper safe<br />
work procedure.<br />
Instructed by:<br />
Date:<br />
Trainee Names:<br />
143
<strong>CLSA</strong> SAFETY TAILGATE GUIDE<br />
<strong>Safety</strong> Goggles<br />
144
<strong>CLSA</strong> SAFETY TAILGATE GUIDE<br />
<strong>Safety</strong> Goggles<br />
I have been instructed in the basic hazards of this equipment/procedure as listed above. I understand this proper safe<br />
work procedure.<br />
Instructed by:<br />
Date:<br />
Trainee Names:<br />
145
<strong>CLSA</strong> SAFETY TAILGATE GUIDE<br />
Shoveling Techniques<br />
This is primarily a safety check-off sheet to inform the employee of the dangers and hazards of improper shoveling<br />
techniques to avoid injury.<br />
Minimum <strong>Safety</strong> Equipment Required: <strong>Safety</strong> glasses and Hardhat.<br />
1. Keep feet wide apart with foot close to the shovel.<br />
2. Keep bottom hand low and toward the shovel blade when picking up load.<br />
3. Shift weight to rear foot keeping the load close to your body.<br />
4. Turn feet in the direction of the throw. DO NOT TWIST YOUR LOWER BACK!<br />
5. Bend at the hips, not at the waste – this keeps your back in a neutral position.<br />
6. Keep the load close to your body<br />
Lifting a ten pound object puts 100<br />
pounds of pressure on your lower back<br />
When you add in the 105 pounds of the average human<br />
upper torso, you see that lifting a ten-pound object actually<br />
puts 1,150 pounds of pressure on the lower back.<br />
146
<strong>CLSA</strong> SAFETY TAILGATE GUIDE<br />
Shoveling Techniques<br />
I have been instructed in the basic hazards of this equipment/procedure as listed above. I understand this proper safe<br />
work procedure.<br />
Instructed by:<br />
Date:<br />
Trainee Names:<br />
147
<strong>CLSA</strong> SAFETY TAILGATE GUIDE<br />
Skin Protection<br />
The skin is the single largest organ of the body. The skin, when healthy, protects us from chemical, physical, and<br />
biological hazards. Skin weighs about 10% of our total body weight and is approximately one eighth of an inch thick. The<br />
skin is made up of two layers, the epidermis (outer layer) and the dermis (inner layer). The outer layer of skin is only<br />
1/250th of an inch thick, and is the part of our skin that forms the protective barrier.<br />
There are many skin irritants that employees may be exposed to in the workplace. One out of every four workers may be<br />
exposed to something that will irritate the skin. Many different things may cause skin damage. When something<br />
penetrates through the outer layer, the inner layer of skin reacts to it. Strong, or regularly repeated irritations of the skin<br />
may lead to skin diseases.<br />
The skin contains oil glands, hair follicles, and sweat glands. These are like tiny holes. So the skin can be like a sponge<br />
when it contacts something. Skin also contains blood vessels, and some chemicals can penetrate the outer layer and<br />
enter the blood stream.<br />
The type of environment you are in can cause skin problems directly or they can work with other factors to increase skin<br />
problems. These factors include:<br />
• Heat – causes sweating. Sweating may dissolve<br />
chemicals and bring them into closer contact with the<br />
skin. Heat increases the blood flow at the skin surface<br />
and may increase the absorption of substances into the<br />
body.<br />
• Cold – dries the skin and causes microscopic cracking.<br />
This cracking allows substances to cross the outer layer<br />
of the skin, thus entering the body.<br />
• Sun – burns and damages the skin. Sun can increase<br />
absorption of chemicals. Sun reacts with some chemicals<br />
to enhance their negative affects on the body.<br />
How to Protect Your Skin<br />
• Wear long sleeve shirts and pants, to minimize the amount of skin exposed.<br />
• When working outdoors, wear a hat with a brim.<br />
• Use a high sun protection factor (SPF) sunscreen.<br />
• Wash your hands regularly during and after work.<br />
• Wear gloves when handling chemicals.<br />
• Where possible, use tools to handle hazardous substances instead of your hands.<br />
When using gloves or clothing to protect yourself and your skin, you should be careful when removing contaminated<br />
clothing, so as not to contaminate yourself.<br />
If a worker is exposed, or thinks he/she may have been exposed to a hazardous substance, the area should be rinsed<br />
for at least 15 minutes. If a worker is accidentally contaminated, he or she should get under a shower immediately and<br />
remove the clothing while showering. Certain substances can be absorbed quickly across the skin. Time is critical.<br />
Medical help should be obtained immediately.<br />
148
<strong>CLSA</strong> SAFETY TAILGATE GUIDE<br />
Skin Protection<br />
I have been instructed in the basic hazards of this equipment/procedure as listed above. I understand this proper safe<br />
work procedure.<br />
Instructed by:<br />
Date:<br />
Trainee Names:<br />
149
<strong>CLSA</strong> SAFETY TAILGATE GUIDE<br />
Spotters – An Important Requirement<br />
The first requirement for safe backing is to have a spotter, someone to direct the driver. A spotter is necessary when the<br />
driver or operator does not have a full view of the backing path. This holds true for any vehicle or piece of equipment,<br />
whether it's a batch truck backing up to a paver, a mixer truck backing into a hopper or hoist bucket, or a materials truck<br />
making a delivery. This is the important rule for drivers and operators: "Don't back up unless you have a spotter directing<br />
your movement." It's an easy rule to remember. The important thing is to obey it.<br />
THE SPOTTER'S RESPONSIBILITIES<br />
The spotter has to watch out for others as well as for<br />
himself, and make sure the vehicle doesn't damage<br />
property. This may appear easy. It seems that all the<br />
spotter has to do is to direct a vehicle to back up when<br />
the path is clear of persons and objects. But there are<br />
dangers involved.<br />
Sometimes when you're a spotter, you may have to<br />
pass behind a vehicle. If so, stop the vehicle first. As<br />
you're passing behind it, extend your hand at arm's<br />
length and place it against the back of the vehicle. Then<br />
if the vehicle starts to move because the driver's foot<br />
slips off the brake or clutch pedal, you'll be able to feel<br />
the movement and get out of the way.<br />
When directing the driver, stand at the rear but well to<br />
the driver's side of the vehicle. This gives you an<br />
unobstructed view of the entire backing path. And the<br />
driver can see you clearly. It's important that the driver<br />
understands your signals. So get together with the<br />
driver before any backing and explain the signals you<br />
will use. In this way you can be reasonably sure there<br />
will be no misunderstanding. Always be sure to use the<br />
same signals for the same moves. Hand signals are<br />
much better than vocal signals. Because of noise, a<br />
shouted signal may not be heard or may be<br />
misunderstood.<br />
BE SURE YOU'RE SEEN<br />
Always be sure that you can be seen. In addition to standing well to the driver's side of the vehicle, wear a fluorescent<br />
vest. At night, don't blind the driver by shining your flashlight in the rearview mirror. And, day or night, when you walk<br />
backwards, be careful not to trip.<br />
SPOTTERS AND DRIVERS WORK TOGETHER<br />
Togetherness was never so important as when it comes to spotters and drivers of heavy equipment. Working as a team,<br />
they not only protect property but the lives of their fellow workers as well.<br />
150
<strong>CLSA</strong> SAFETY TAILGATE GUIDE<br />
Spotters - An Important Requirement<br />
I have been instructed in the basic hazards of this equipment/procedure as listed above. I understand this proper safe<br />
work procedure.<br />
Instructed by:<br />
Date:<br />
Trainee Names:<br />
151
<strong>CLSA</strong> SAFETY TAILGATE GUIDE<br />
Standing on Your Own Two Feet<br />
And Other Reasons to Use Foot Protection<br />
Do you wear safety shoes on the job? If you think you don't need them, consider that about one in five work-related<br />
accidents involves the foot and leg. Falling objects cause most of these, but compression, puncture, burns and<br />
slipping on wet surfaces are also common. Wearing the proper safety shoes easily prevents all these accidents.<br />
Style and Comfort<br />
When you get ready to choose a pair of safety shoes, you are going to be surprised at the options available to you.<br />
Today's safety shoes come in a wide variety of types, styles, materials and weights. Many safety shoes look just like<br />
street shoes and cost very little more. And they are comfortable the average safety shoe weighs only 11/2 ounces<br />
more than street shoes. Let's look at some of the kinds of workplace hazards that you may encounter and the types<br />
of shoes designed for them.<br />
Mechanical Hazards<br />
Failing objects, compression from rolling objects, and punctures are easily the top three sources of foot injury, and<br />
the ones the standard safety shoe protects against. Typically, your safety shoe will have steel toecaps to guard<br />
against injuries from falling objects and compression, and instep protection of aluminum, steel, fiber or plastic to protect<br />
the top of the foot. Steel insoles or reinforced metal soles protect from puncture. To protect against slipping on<br />
wet or oily surfaces, use wooden soles or cleated, non-slip rubber or neoprene soles. Icy surfaces may require<br />
strap-on cleats.<br />
Electrical Hazards<br />
The buildup of static electricity on your body can be dangerous when you are working near explosive or highly flammable<br />
substances. Workers in such environments wear safety shoes with leather, cork or other conductive soles and<br />
no exposed metal, which could cause sparking. For protection from live electrical current, shoes, including metal<br />
parts must be thoroughly insulated with rubber soles. For high-voltage hazards, use conductive shoes, insulated<br />
shoes with a connector from calf to heel to pass electricity to the floor or ground. Electrical-hazard shoes must be<br />
kept dry.<br />
Extreme Heat or Cold<br />
In extreme cold wear shoes with moisture-proof insulation and insulated socks. Wooden-soled shoes or slip on<br />
sandals protect against heat; surfaces too hot for wood soles require aluminized heat-protective shoes or boots,<br />
When working around molten metal and sparks, use foundry boots with elastic gores for quick removal in case hot<br />
metal or sparks get inside.<br />
Chemical Hazards<br />
Many chemicals and solvents can bum or sat away ordinary shoe materials. For protection from these hazards wear<br />
rubber, neoprene or plastic footwear, depending on the type of chemical you are exposed to and your company's<br />
policy.<br />
Other Protection<br />
Your job may require additional protection, such as metatarsal guards, which cover the top of the shoe for greater<br />
protection from failing objects; puncture-proof inserts; shin guards; or metal foot guards, which strap over the shoe.<br />
Disposable plastic overshoes protect against Infection and contamination from sanitation hazards.<br />
Your Shoes<br />
Be sure your safety shoes are approved by the American National Standards Institute (ANSI & ASTM) -the rating<br />
should be stamped inside your shoe. Choose shoes that you can wear comfortably for hours. For the best protection,<br />
keep your shoes clean and dry, and inspect them regularly for cuts, cracks and embedded metal. Replace them<br />
when they get worn.<br />
152
<strong>CLSA</strong> SAFETY TAILGATE GUIDE<br />
If you follow company rules for safety and protective equipment, stay on the lookout for hazardous conditions and<br />
equipment, and wear protective footwear appropriate for your job, you can be sure that you are doing everything.<br />
Preventing workplace injuries is a matter of life and limb. Protect yourself by wearing the right protective footwear for<br />
your job.<br />
153
<strong>CLSA</strong> SAFETY TAILGATE GUIDE<br />
Standing on Your Own Two Feet<br />
I have been instructed in the basic hazards of this equipment/procedure as listed above. I understand this proper safe<br />
work procedure.<br />
Instructed by:<br />
Date:<br />
Trainee Names:<br />
154
<strong>CLSA</strong> SAFETY TAILGATE GUIDE<br />
Sun <strong>Safety</strong><br />
QUIZ: What do you know about the skin you’re in?<br />
1. Skin cancer is the most common form of cancer in the United States.<br />
True - Skin Cancer is the most common form of cancer in the United States,<br />
with about 1 million new cases expected every year.<br />
2. The development of a new mole or a change in an existing one may<br />
be a sign of skin cancer.<br />
True - The development of a new mole or any changes in size, shape, color<br />
or texture in a mole may be the sign of skin cancer and should be reported<br />
to a dermatologist or your own doctor right away.<br />
3. People with dark skin can't get skin cancer.<br />
False - Anyone can get skin cancer. Darker-skinned people have more<br />
melanin in their skin, a brownish pigment in their skin that serves as a buffer<br />
by absorbing ultra violet ray, there by lowering but not eliminating the risk of<br />
skin cancer.<br />
4. You can't die from skin cancer.<br />
False - This year 7,500 Americans will die from malignant melanoma, which is responsible for six out of seven skin<br />
cancer deaths.<br />
5. You have an increased risk of malignant melanoma if a parent, sibling, or child has had it.<br />
True - Your risk is increase if an immediate family member has or has had a melanoma.<br />
6. If you stay out of the sun, you'll never get skin cancer.<br />
False - Even though there is a strong correlation between ultra violet exposure to the sun and all types of skin<br />
cancer, you can still get skin cancer if you stay out of the sun. It is important to regularly stay of out of the sun. It is<br />
important to regularly examine your skin for signs of cancer no matter how much sun you get.<br />
7. Malignant melanoma cannot be cured.<br />
False - When treated in its earliest stages, melanoma can be cured.<br />
8. Melanoma can occur anywhere on your body.<br />
True - Melanoma can develop any where on the body, even places that are not exposed to the sun, such as the<br />
bottom of your feet.<br />
9. Redheads and blonds are more likely to get melanoma.<br />
True - Redheads and blondes have a two-to-four-fold greater risk of developing skin cancer.<br />
10. If you were born with one or more moles, you are more likely to develop malignant melanoma.<br />
True - Most moles develop sometime after birth, but some people are born with them. “Birth moles” increase a<br />
person’s risk of melanoma.<br />
155
<strong>CLSA</strong> SAFETY TAILGATE GUIDE<br />
Self Exams<br />
Research shows that regular skin self-exams could save 4,500 lives annually. How often you should perform skin<br />
self-exams depends on how high your risk is. Here's how to do one:<br />
After showering, check yourself in a well-lighted room using a full-length mirror and a hand-held mirror.<br />
Start by checking moles and birthmarks you've had since birth. Look for changes, especially a new mole or<br />
skin discoloration, a sore that does not heal, or any change in the size, shape, texture, or color of an existing<br />
mole.<br />
Look at the front and back of your body in the mirror. Then raise your arms and look at your left and right<br />
sides.<br />
Bend your elbows and look carefully at your fingernails, palms, forearms, and upper arms.<br />
Examine the back, front and sides of your legs. Look between the buttocks and around the genital area.<br />
Sit and closely examine your feet, including the toenails, soles, and spaces between the toes.<br />
Look at your face, neck, ears, and scalp. Use a comb or hair dryer to move your hair so that you can see<br />
better. Or get someone else to check your scalp for you.<br />
If you find anything suspicious, visit a dermatologist right away and ask for a full-body exam.<br />
156
<strong>CLSA</strong> SAFETY TAILGATE GUIDE<br />
Sun <strong>Safety</strong><br />
I have been instructed in the basic hazards of this equipment/procedure as listed above. I understand this proper safe<br />
work procedure.<br />
Instructed by:<br />
Date:<br />
Trainee Names:<br />
157
<strong>CLSA</strong> SAFETY TAILGATE GUIDE<br />
Trenching/Shoring Requirements Summary<br />
• Before excavation, underground utilities shall be<br />
located and marked. Adjacent structures shall be<br />
stabilized.<br />
• Appropriate barricades, fences, protected walkways<br />
and signs shall be provided to protect the public.<br />
• A competent person shall be in charge of each<br />
excavation who is trained to identify hazardous<br />
conditions and who has the authority to take<br />
corrective action. The competent person shall<br />
inspect excavations on a daily basis and after every<br />
rain and fill out the trench inspection form.<br />
• Workers shall be protected from cave-ins by either<br />
an adequate sloping system or an adequate support<br />
or protective system.<br />
• Stairs or ladders shall be provided when workers<br />
enter excavations over 4 feet deep.<br />
• A means of exiting the trench shall be provided<br />
every 25 feet.<br />
• Workers shall stay away from any equipment loading<br />
or unloading material.<br />
• Excavated or other material shall be retained 2 feet<br />
or more from the edge of the excavation.<br />
• Workers shall not enter or work in trenches with<br />
hazardous atmospheres without adequate controls.<br />
Use an air monitor to test the atmosphere.<br />
• Workers shall wear all required personal protective<br />
equipment including hardhats, safety footwear,<br />
gloves, eye protection, hearing protection and fall<br />
protection devices as needed.<br />
• Shoring shall be placed so that shoring is 18 inches<br />
above the soil level.<br />
• You must use plywood with the hydraulic shoring<br />
Type A Soil:<br />
• Hard soil or clay<br />
• ¾ : 1 (53 degrees) Example - ¾ feet of slope for<br />
every vertical foot<br />
Type B Soil<br />
• Silt – clumps & crumbles<br />
• 1 : 1 (45 degrees) Example - One foot of slope for<br />
every one vertical foot<br />
Type C Soil<br />
• Sand – 1 ½: 1 (34 degrees) Example – 1 ½ feet of<br />
slope for every one vertical foot. Previously<br />
excavated trenches must be treated like type C soil<br />
– so this would be anywhere there is an existing<br />
pipe or underground utility.<br />
158
<strong>CLSA</strong> SAFETY TAILGATE GUIDE<br />
Trenching/Shoring Requirements Summary<br />
I have been instructed in the basic hazards of this equipment/procedure as listed above. I understand this proper safe<br />
work procedure.<br />
Instructed by:<br />
Date:<br />
Trainee Names:<br />
159
<strong>CLSA</strong> SAFETY TAILGATE GUIDE<br />
Take a Close Look at Close Calls<br />
A “close call” or a near-miss without injury is easy to shrug off and forget. But, there is a danger in brushing off<br />
injuries that don’t hurt, harm or damage. When a “close call” happens, it should immediately send up a red warning flag<br />
that something was wrong, unplanned, unexpected, and could happen again. The next time it happens, it could result in<br />
serious damage, injury or death.<br />
For every near-miss there are usually several contributing factors, most of which can be controlled. The best<br />
way to prevent the reoccurrence of an incident is by looking at those close calls. By investigating the root causes of an<br />
incident, steps can be taken to eliminate the hazard and improve the work system.<br />
Sometimes there are multiple causes for an injury involving: equipment (unguarded machinery), environment<br />
(poor lighting or noise level), people (procedures not understood or not followed) or management (allowed shortcuts).<br />
Don’t rush to judge. Examine the facts and find what’s missing. Look for immediate and underlying causes. An<br />
immediate cause may be an unsafe condition like a mechanical failure or it could be an unsafe action by an employee.<br />
The underlying cause could be poor machine maintenance, a missing guard, a crowded work area or a lack of training.<br />
All incidents should be reported to the supervisor so that injury report forms can be completed. Once an<br />
investigation is completed, solutions should be sought to prevent the injury from occurring again. Solutions may involve<br />
engineering controls, administrative controls, additional training, or increased communication between management and<br />
workers.<br />
Workers should daily inspect the work area for unsafe conditions or unsafe actions and, if found, report them to<br />
the supervisor. Hazard awareness is key to preventing accidents before they happen. Take steps to eliminate hazards<br />
as soon as they are discovered. Learn the real lesson from close calls. They can happen again and again until they<br />
cause injury, so tell your supervisor about every accident, no matter how minor it may seem at the time. You never know<br />
when an incident may be repeated and result in an injury or even death.<br />
160
<strong>CLSA</strong> SAFETY TAILGATE GUIDE<br />
Take a Close Look at Close Calls<br />
I have been instructed in the basic hazards of this equipment/procedure as listed above. I understand this proper safe<br />
work procedure.<br />
Instructed by:<br />
Date:<br />
Trainee Names:<br />
161
<strong>CLSA</strong> SAFETY TAILGATE GUIDE<br />
Utility/Pickup Trucks<br />
This is primarily a safety check-off sheet to inform the employee of the dangers and hazards of operating this equipment.<br />
Each employee must complete operator training to qualify for this piece of equipment.<br />
Minimum <strong>Safety</strong> Equipment Required: Seat Belts<br />
• Check out the vehicle using the “Inspection and Trouble Report Form”, following all policies and procedures in<br />
using it.<br />
• Make sure that at least one wheel chock is on board.<br />
• Always curb the wheels and place the wheel chocks when parked on a grade.<br />
• Operate the vehicle in compliance with all California Vehicle Codes.<br />
• When stopping the vehicle in an<br />
area other than a regulated<br />
parking stall (to perform work),<br />
turn on the amber beacon.<br />
• Make sure that the engine runs<br />
continuously, so as not to drain<br />
the battery.<br />
• Never put any part of your body<br />
near the fan blades or other<br />
moving parts within the engine<br />
compartment while the engine is<br />
running.<br />
• In the event of an accident with the vehicle, call your supervisor and the police department immediately. Fill out<br />
the accident packet located in the glove compartment.<br />
162
<strong>CLSA</strong> SAFETY TAILGATE GUIDE<br />
Utility/Pickup Trucks<br />
I have been instructed in the basic hazards of this equipment/procedure as listed above. I understand this proper safe<br />
work procedure.<br />
Instructed by:<br />
Date:<br />
Trainee Names:<br />
163
<strong>CLSA</strong> SAFETY TAILGATE GUIDE<br />
Wash Your Hands<br />
We assume everyone knows how to wash their hands, but many workers don't realize how important hand washing and<br />
skin care can be in the prevention of disease. Proper skin care and hand protection help keep workers productive and on<br />
the job.<br />
The best defense against the spread of illness or skin ailments is to prevent them where possible by washing them often,<br />
using barrier creams and wearing gloves designed to protect skin from contact with a variety of harmful agents and<br />
irritants. If gloves are worn, clean or replace them frequently to make sure they don’t collect or absorb irritants. Check<br />
gloves often for wear, cuts or pinholes. Be sure the gloves you choose are the proper type and material to protect<br />
against the specific chemical or situation you’ll encounter.<br />
Wearing gloves and practicing personal hygiene, especially regular hand washing,<br />
helps prevent:<br />
• Ingestion and absorption of harmful substances<br />
• Spread of infection and diseases<br />
• Occupational skin disease<br />
• Absenteeism due to illness<br />
• Lost work time<br />
There are things employers can do to help workers improve attention to skin care and understand the importance of<br />
regular hand washing. For example:<br />
• Include personal hygiene and skin care in the employee orientation program and in regular safety training.<br />
• Maintain an ongoing awareness program to remind workers of the importance of proper skin care. Posters and<br />
pamphlets are excellent vehicles for generating awareness about personal hygiene throughout the year.<br />
• Help workers understand that regular hand washing protects against the spread of illness to their family<br />
members.<br />
• Conduct a site survey to ensure that proper hand washing/cleaning products are provided in all suitable places<br />
throughout the work environment. Washing facilities and skin care products must be accessible to encourage<br />
regular hand washing.<br />
Education and awareness set the pace for good hygiene practices for everyone. It’s a simple matter to use plenty of<br />
soap and water, appropriate creams and/or gloves to protect the health and safety of your hands.<br />
164
<strong>CLSA</strong> SAFETY TAILGATE GUIDE<br />
Wash Your Hands<br />
I have been instructed in the basic hazards of this equipment/procedure as listed above. I understand this proper safe<br />
work procedure.<br />
Instructed by:<br />
Date:<br />
Trainee Names:<br />
165
<strong>CLSA</strong> SAFETY TAILGATE GUIDE<br />
Watch Out For Snakes<br />
Snakes are found in many parts of California and may pose a hazard for those who work outdoors. Although snakes<br />
generally avoid humans or animals, they can attack, particularly if they're surprised or are protecting their young or territory.<br />
Some snakes are considered “harmless,” but others release a poisonous venom when they bite. If you'll be working or<br />
walking where snakes are found, be aware of their habits, dress for protection, and know what to do or not to do if you<br />
encounter or are bitten by a snake.<br />
Poisonous snakes commonly found in California include coral snakes and pit vipers:<br />
Copperhead Snake Rattlesnake Cottonmouth<br />
A bite from one of these snakes should always be considered a medical emergency. Although deaths from snakebites are<br />
relatively rare, people who are bitten can't always positively identify the snake, so should get prompt medical care. Even a<br />
bite from a so-called “harmless” snake can cause an infection or allergic reaction in some people.<br />
The key to avoiding snakebites is understanding their habits and staying alert. Snake seasons are spring, summer, and<br />
early fall. They're usually found where food (rodents), water, and protection are available such as abandoned structures,<br />
irrigation ditches, water holes, and in rock piles. They like places that offer both a place to sun and a place to hide. At night<br />
when it's cool, snakes become active hunting their prey.<br />
If you'll be working or walking in snake infested areas…<br />
Wear protective clothing such as long pants, leather boots, and gloves.<br />
Be aware of your surroundings.<br />
Be cautious in tall grass and watch where you step.<br />
Walk in areas where the ground is clear so you can see where you step.<br />
Watch where you put your hands.<br />
Don't reach blindly into rock cracks, wood piles, animal burrows or under bushes.<br />
When you sit, look first, especially in shady areas.<br />
Most snakebites happen when a snake is accidentally stepped on, handled or harassed. Many people are bitten because<br />
they try to get a closer look or try to kill it. So, leave snakes alone! If you encounter a snake, stay calm and freeze in place.<br />
The snake will often move away. If it doesn't move then you should slowly walk around it, keeping as far away as possible.<br />
Usually snakes are not aggressive and will not “chase” a person. They'd rather escape from noise and commotion or remain<br />
quiet and hidden.<br />
166
<strong>CLSA</strong> SAFETY TAILGATE GUIDE<br />
The symptoms of a poisonous snake bite vary depending on the snake's size and species, the amount of poison in its<br />
venom, the bite's location, and the victim's age and underlying medical problems. Specific treatment for a snake bite should<br />
be left to the emergency medical personnel. Most medical professionals recommend against incisions in the wound,<br />
tourniquets, ice or any other type of cooling on the bite and against electric shock. However, if someone is bitten, the<br />
American Red Cross suggests a few basic first-aid steps:<br />
1. Keep the victim calm and still.<br />
2. Have the victim lie down, with the affected limb<br />
immobilized and placed lower than the heart.<br />
3. Remove rings, bracelets, boots or other restricting items<br />
from the bitten extremity.<br />
4. Get medical care. Responding quickly is crucial.<br />
Use common sense when you're in areas where there may be snakes. Keep in mind that an unprovoked snake doesn't want<br />
trouble any more than you do. Caution and respect are your best weapons against snake bites.<br />
167
<strong>CLSA</strong> SAFETY TAILGATE GUIDE<br />
Watch Out for Snakes<br />
I have been instructed in the basic hazards of this equipment/procedure as listed above. I understand this proper safe<br />
work procedure.<br />
Instructed by:<br />
Date:<br />
Trainee Names:<br />
168
<strong>CLSA</strong> SAFETY TAILGATE GUIDE<br />
Wear Your Seatbelt<br />
Thousands of people, apparently believing themselves immune to the laws of physics, die each day as a result of vehicle<br />
accidents because they were not wearing seatbelts. According to the laws of physics, if a vehicle is traveling at 30 miles<br />
per hour, its contents and passengers are also moving at 30 miles per hour. The vehicle's sudden stop at 30 miles per<br />
hour can mean the difference of life or death to the passengers wearing seatbelts.<br />
People are a vehicle's most valuable content and seatbelts keep people in place. In a crash, unbelted passengers will fly<br />
toward the point of impact, colliding with anything in their path, like dashboards, windshield or steering wheels with<br />
several pounds of moving force. While it's dangerous to smash into a dashboard or windshield, it can be deadly to be<br />
"thrown clear." Thrown clear of what? Telephone poles, trees, or oncoming traffic? Thrown through what? The<br />
windshield or door? Airborne objects maintain momentum as they sail, without the option of where or how they land. In a<br />
collision, passengers launched from a vehicle are 25 times more likely to die.<br />
In a vehicle accident, the safest place to be is<br />
inside the vehicle, attached to the vehicle's seat. It's<br />
the seatbelt that keeps passengers in place. In a<br />
collision, the one part of the vehicle that stays<br />
reasonable intact, no matter how battered its<br />
outsides might be, is the vehicle's seats.<br />
For high speeds, nighttime driving, and bad weather many passengers do buckle up, but the fact is that most fatalities<br />
occur in dry, sunny weather, at speeds under 40 miles per hour and within 25 miles of work or home. Perhaps you are a<br />
safe driver in control of your vehicle, but there are a lot of other drivers not in control of their vehicles, drivers who've<br />
drunk too much, not had enough sleep, didn't see the light change. You can't control them. Seatbelts are your best<br />
protection against those drivers. In California, wearing seatbelts is the law. Buckle up and protect yourself so you don't<br />
become another statistic in the accident and fatality records.<br />
169
<strong>CLSA</strong> SAFETY TAILGATE GUIDE<br />
Wear Your Seatbelt<br />
I have been instructed in the basic hazards of this equipment/procedure as listed above. I understand this proper safe<br />
work procedure.<br />
Instructed by:<br />
Date:<br />
Trainee Names:<br />
170
<strong>CLSA</strong> SAFETY TAILGATE GUIDE<br />
Why Use A <strong>Safety</strong> Can For Gasoline?<br />
Gasoline is an extremely flammable liquid fuel. It should always be handled and stored properly in order to reduce the<br />
likelihood of fires and explosions. Personal injuries ranging from first degree burns to fatalities can result from improper<br />
handling and storage practices. <strong>Safety</strong> cans are designed to control the flammable vapors of gasoline and to provide a<br />
safe and convenient means for storage and transfer. Underwriters Laboratories (UL) approved safety cans should be<br />
used to carry, dispense, and store gasoline in quantities up to five gallons.<br />
Failure to use approved metal containers for flammable or combustible liquids has often been cited by compliance<br />
officers. However, earlier this year, OSHA revised the rule on safety cans (1926.152(a)(1), allowing D.O.T. approved<br />
plastic safety cans. It was further determined that these plastic containers need not be equipped with a spring closing lid,<br />
spout cover and flash arresting screen.<br />
Nevertheless, many state safety codes and jurisdictions will allow only metal safety cans on the worksite, at least until<br />
local codes are changed. Construction managers may feel that plastic will not hold up as well under heavy use and<br />
handling. Whatever standards must be followed, it is important to understand the features and benefits of a safety<br />
container so that you and your co-workers can best guard against fire or explosion.<br />
Approved safety cans have several basic design qualities:<br />
1. They have a spring loaded cap that closes the spout automatically<br />
when released. Tension in the spring forces the cap closed and<br />
provides a leak proof seal.<br />
2. The spring tension is also designed to lift the cap slightly in the<br />
event of excessive internal vapor pressure inside the can. This<br />
automatically vents off vapors at approximately five psi internal<br />
pressure, to prevent the can from rupturing or exploding if it is<br />
exposed to excessive outside heat.<br />
3. The spout is also equipped with a flame arrester screen designed<br />
to prevent outside fire from reaching the gasoline inside the can.<br />
This is the same type of screen that is found in marine gasoline<br />
engine carburetors. With the screen in place, if the can is involved<br />
in a fire, the vapors will burn around the spout, but will not permit<br />
an internal fire or explosion. This screen must not be removed or<br />
damaged. Sometimes safety cans are also used to hold thick<br />
liquids such as lubrication oil, which is not recommended. Since<br />
the heavy liquid will not pass through the screen, the screen is often<br />
removed, defeating an important safety feature of the container.<br />
Finally, it is extremely dangerous to carry gasoline--even in a safety can--in the trunk of a vehicle. If the trunk heats up<br />
from the sun, the contents of the can will expand and pressure will raise the springed cap. This permits vapors to<br />
accumulate in the trunk, and an explosion may result.<br />
Do your part to prevent fires that can lead to serious burns, loss of life and significant property damage. Whether it is<br />
required or just good sense, always use approved safety cans when handling gasoline or other flammable liquids.<br />
Periodically inspect the cap, spring and flame arrester screen as well, to be sure it will provide the safety you expect.<br />
Why take chances?<br />
171
<strong>CLSA</strong> SAFETY TAILGATE GUIDE<br />
Why to Use a <strong>Safety</strong> Can for Gasoline?<br />
I have been instructed in the basic hazards of this equipment/procedure as listed above. I understand this proper safe<br />
work procedure.<br />
Instructed by:<br />
Date:<br />
Trainee Names:<br />
172
<strong>CLSA</strong> SAFETY TAILGATE GUIDE<br />
Wildlife <strong>Safety</strong> Precautions<br />
California workers in field assignments and/or remote locations sometimes encounter deer, mountain lions, coyotes,<br />
raccoons or bears while on the job. To protect yourself and stay safe in the event of a wildlife encounter, understand<br />
animal behavior and learn how to respond appropriately.<br />
Wild animals generally avoid human contact, but if you do see an animal in the wild, maintain your distance. Don’t<br />
attempt to feed, catch or pet a wild animal. Never approach wildlife babies or animal mothers with their babies; the<br />
mother’s protective response can be very fierce. Report injured or aggressive animals to authorities; don’t attempt to<br />
give aid to injured wildlife. If an injured animal approaches you, move slowly away.<br />
Mountain lion sightings are rare, but they have been known to attack humans. If you do<br />
encounter a mountain lion, don’t run. Stay calm and hold your position or back away<br />
slowly. Convince the animal that you’re not prey and that you might be dangerous.<br />
Face the lion and try to appear as large as possible by standing upright and raising your<br />
arms. If the lion acts aggressively, wave your arms and shout. Grab a stick or throw<br />
objects at the lion. If you are attacked, fight back.<br />
Bears try to avoid people, but if you do see one, make as much noise as possible. Do not corner a bear. If the bear<br />
feels trapped, it may act aggressively. To avoid attracting hungry animals don’t carry food products, don’t keep food<br />
near you, and don’t leave food in your opened vehicle.<br />
Normally, coyotes and deer are not a threat to humans. When driving, watch for<br />
deer crossing signs. Adjust your speed according to the distance you can see up<br />
the road. If you see one deer cross the road, wait for others because they often<br />
travel together.<br />
If you cannot avoid a deer or other animal on the road, it’s better to hit it rather<br />
than risk skidding off of the road and into a ditch or swerving into another vehicle<br />
or tree.<br />
Wildlife encounters can expose you to rabies, a disease that causes brain swelling and death. Because the virus that<br />
causes the disease is present in animal saliva, a bite or even a lick from an infected animal can be serious. Infected<br />
animals may not show the symptoms of rabies such as frothing at the mouth. They may act aggressive or out of<br />
character, such as a nocturnal animal being active during the day. Avoiding animals is the best prevention for rabies, but<br />
if you are bitten, scratched, or licked by a wild animal, wash the area with soap and water immediately. If it is possible<br />
and safe to do so, try to trap the animal for testing. Seek medical treatment right away. If you are in frequent contact<br />
with wild animals, there are vaccines available to prevent rabies.<br />
For safety, keep your distance and keep your cool when encountering wild animals.<br />
173
<strong>CLSA</strong> SAFETY TAILGATE GUIDE<br />
Wildlife <strong>Safety</strong> Precautions<br />
I have been instructed in the basic hazards of this equipment/procedure as listed above. I understand this proper safe<br />
work procedure.<br />
Instructed by:<br />
Date:<br />
Trainee Names:<br />
174
S.O.S.<br />
“SAVE OUR SURVEYORS”<br />
GENERAL SAFETY INSTRUCTIONS<br />
FOR SURVEYORS (CREWS) ON<br />
CONSTRUCTION JOBSITES<br />
BY JACK HARRINGTON PLS, PE<br />
S - SAFE<br />
A - ALERT<br />
F - FROM<br />
E - ENGINEER<br />
T - TO<br />
Y - YOU<br />
175
PERSONAL PROTECTIVE EQUIPMENT<br />
Personal protection equipment is provided for your safety. Accidents, which dismember<br />
or disfigure are needlessly costly to you and to us. We will make you a deal – we<br />
provide, you use.<br />
Head<br />
(1) When working in designated “Hardhats Areas”, Hardhats must be worn at all<br />
times. When working under or near other people, a danger of falling or flying<br />
objects always exists. Therefore, Hardhats must be worn.<br />
(2) When there is risk of hair entanglement in machinery, combustibles or toxic<br />
contaminants, confinement of the hair by such means as hairnets may be<br />
necessary.<br />
Eyes & Face<br />
(1) You must wear proper eye or face protection when you are exposed to flying<br />
particles, dust, objects, chemicals or harmful light rays. Welding, grinding, use of<br />
radial arm saw and concrete chipping are examples of operations requiring the<br />
use of appropriate eye protection. If none has been provided, do not proceed<br />
with the operation until it is provided.<br />
(2) Eye or face protection equipment must be kept clean and in good repair. Such<br />
equipment with structural or optical defects is prohibited from use.<br />
(3) Wash chemicals from the eyes with large quantities of clean running water,<br />
blinking the eyes repeatedly, then get a doctor immediately.<br />
(4) If dust or small particles get into your eyes, do not rub them. Get prompt first aid,<br />
or call a doctor.<br />
(5) Allow only a doctor or qualified nurse to remove anything from your eyes.<br />
A. Must know location of and driving time to the nearest Medical Facility and<br />
Fire Station.<br />
(6) When eye protection is required and you need vision correction, one of the<br />
following must be worn:<br />
A. <strong>Safety</strong> spectacles with suitable corrected lenses.<br />
B. <strong>Safety</strong> goggles designed to fit over glasses.<br />
C. Protective goggles with corrective lenses mounted behind the protective<br />
lenses.<br />
D. An acceptable First Aid Kit must be in all field vehicles. Also a “Fanny<br />
Pack” First Aid Kit must be worn while working quite a distance from the<br />
vehicles.<br />
176
Ears<br />
Nose<br />
Body<br />
(1) Hearing protection is available upon request. Designated areas and or specific<br />
job tasks may require their use, such as breaking concrete or working in<br />
enclosed areas. Plain cotton is not an acceptable protective device. If you are<br />
working in an area you feel the noise level warrants hearing protection, request<br />
such protection, from your supervisor.<br />
(1) Contaminated air shall be controlled as far as it is feasible by accepted<br />
engineering control measures. When effective engineering controls are not<br />
feasible, respiratory equipment may be required in areas where health hazards<br />
exists due to accumulations of harmful dust, fumes, mists, vapors or gases.<br />
(1) You must wear clothing suitable for the work you are doing. The minimum attire<br />
is long pants and a shirt. No shorts are allowed. No bare torsos are allowed,<br />
even in hot weather.<br />
(2) Shirt-tails must be tucked in and jackets must be buttoned or zippered to prevent<br />
snagging or being caught in machinery.<br />
(3) Clothing saturated or impregnated with flammable liquids, corrosive substances<br />
or oxidizing agents must be removed promptly, and shall not be moved until<br />
properly cleaned.<br />
(4) <strong>Safety</strong> vests must be worn at all times.<br />
Hands<br />
(1) You must wear gloves when handling material or substances, which could cut,<br />
scratch, tear or burn the hands.<br />
(2) Gloves must be in good condition. Worn or tattered gloves are more dangerous<br />
than no gloves at all.<br />
(3) Electricians using insulated gloves must test their gloves daily for defects.<br />
(4) When using a knife, wear steel mesh gloves.<br />
(5) Wear heavy canvas or leather gloves or hand pads when handling rough<br />
materials. Never wear gloves around power saws or other moving machinery.<br />
(6) Wear rubber gloves when working with acids and caustic solutions.<br />
177
Feet<br />
(1) You must wear sturdy work shoes. Shoes must have thick soles to prevent<br />
punctures – thin soles, sneakers or sandals are not permitted.<br />
(2) Shoes should be laced up high enough to give ankle support.<br />
(3) Shoes should be steel – capped to prevent toe injuries.<br />
(4) Rubber boots must be worn working in concrete, mud or water.<br />
(5) Steel foot – guards are to be used when operating a tamper or concrete breaker.<br />
(6) Footwear which is defective or inappropriate to the extent that its ordinary use<br />
creates the possibility of foot injuries shall not be worn at the construction site<br />
area.<br />
Ladders<br />
(1) Must be tied off.<br />
(2) Must be secured.<br />
(3) Must extend 3 feet above landing (floor).<br />
Scaffolding<br />
(1) Must have fall protection.<br />
(2) Must have toe boards.<br />
(3) Must be properly secured to building or structure.<br />
Grading Area<br />
(1) Equipment/operator must know where you are.<br />
(2) You must know where equipment/operator is.<br />
(3) Be aware of unattended tripods<br />
(4) Be aware of tapes which cross traveled areas near equipment.<br />
(5) Watch for equipment moving or hauling materials.<br />
(6) Watch out for “Swing” of cranes<br />
A. Counterweight<br />
B. Extension of outriggers<br />
(7) Watch out for overhead loads or temp wires.<br />
(8) Watch out for unprotected openings in floors and on roof.<br />
(9) Watch out for elevators shafts or windows.<br />
(10) Treat all exposed wires as energized (“hot”).<br />
(11) Do not look directly at “welding operations” (sand in eyes).<br />
(12) Observe special procedures for entering existing manholes.<br />
(13) Entering open trenches greater than 4 feet deep, observe the following:<br />
A. That they are shored properly.<br />
B. That they are sloped properly.<br />
178
C. That no material is stored next to the top of trench.<br />
D. That you can walk along the top of the trench.<br />
E. That ladders placed in trench for ingress and egress are at 50 ft. integrals.<br />
(14) Attend the contractor’s toolbox or safely <strong>meeting</strong>s on site if possible during your<br />
shift.<br />
(15) Be sure that “flaggers” have proper paddles (when needed) and 2-way radios.<br />
Note from Author:<br />
Remember, OSHA is not an approval agency. OSHA does write equipment standards<br />
and borrows other from various sources, most of the time from ANSI (American National<br />
Standards Institute). Under no circumstances will OSHA approve a product. It is,<br />
however, correct to say that equipment “meets OSHA standards.”<br />
179