

1250 lb. capacity mechanical wheel dolly - Harbor Freight Tools
1250 lb. capacity mechanical wheel dolly - Harbor Freight Tools
1250 lb. capacity mechanical wheel dolly - Harbor Freight Tools

You also want an ePaper? Increase the reach of your titles
YUMPU automatically turns print PDFs into web optimized ePapers that Google loves.
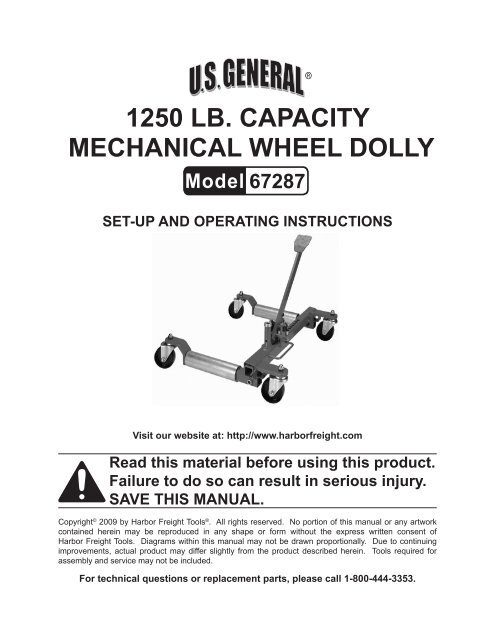
<strong>1250</strong> LB. CAPACITY<br />
MECHANICAL WHEEL DOLLY<br />
67287<br />
SET-UP AND OPERATING INSTRUCTIONS<br />
Visit our website at: http://www.harborfreight.com<br />
Read this material before using this product.<br />
Failure to do so can result in serious injury.<br />
Save this manual.<br />
Copyright © 2009 by <strong>Harbor</strong> <strong>Freight</strong> <strong>Tools</strong> ® . All rights reserved. No portion of this manual or any artwork<br />
contained herein may be reproduced in any shape or form without the express written consent of<br />
<strong>Harbor</strong> <strong>Freight</strong> <strong>Tools</strong>. Diagrams within this manual may not be drawn proportionally. Due to continuing<br />
improvements, actual product may differ slightly from the product described herein. <strong>Tools</strong> required for<br />
assembly and service may not be included.<br />
For technical questions or replacement parts, please call 1-800-444-3353.
Save This Manual<br />
Keep this manual for the safety warnings<br />
and precautions, assembly, operating,<br />
inspection, maintenance and cleaning<br />
procedures. Write the product’s serial<br />
number in the back of the manual near the<br />
assembly diagram (or month and year of<br />
purchase if product has no number). Keep<br />
this manual and the receipt in a safe and<br />
dry place for future reference.<br />
Important SAFETY<br />
Information<br />
In this manual, on the labeling,<br />
and all other information provided<br />
with this product:<br />
This is the safety alert<br />
symbol. It is used to alert<br />
you to potential personal<br />
injury hazards. Obey all<br />
safety messages that<br />
follow this symbol to avoid<br />
possible injury or death.<br />
DANGER indicates<br />
a hazardous<br />
situation which, if not<br />
avoided, will result in death or<br />
serious injury.<br />
WARNING<br />
indicates a<br />
hazardous situation which, if<br />
not avoided, could result in<br />
death or serious injury.<br />
CAUTION, used<br />
with the safety<br />
alert symbol, indicates a<br />
hazardous situation which, if<br />
not avoided, could result in<br />
minor or moderate injury.<br />
1.<br />
2.<br />
3.<br />
4.<br />
5.<br />
6.<br />
7.<br />
8.<br />
9.<br />
10.<br />
NOTICE is used to<br />
address practices<br />
not related to personal injury.<br />
CAUTION, without<br />
the safety alert<br />
symbol, is used to address<br />
practices not related to<br />
personal injury.<br />
Safety Warnings<br />
WARNING Read all safety<br />
warnings and instructions.<br />
Failure to heed these markings<br />
may result in personal injury and/or<br />
property damage.<br />
Save all warnings and<br />
instructions for future reference.<br />
Do not exceed the <strong>1250</strong> <strong>lb</strong>. rated<br />
<strong>capacity</strong>.<br />
Use only on hard, level surfaces.<br />
Lifting device only. Immediately after<br />
lifting, support the vehicle with appropriate<br />
means.<br />
Do not work under vehicle while on<br />
Dollies.<br />
Wear ANSI-approved safety goggles<br />
and heavy-duty work gloves during<br />
use.<br />
Keep clear of load while lifting and<br />
lowering.<br />
Lower load slowly.<br />
Do not use for aircraft purposes.<br />
Apply parking brake and chock tires<br />
before lifting vehicle.<br />
Inspect before every use; do not use<br />
if parts are loose or damaged.<br />
Page 2 For technical questions, please call 1-800-444-3353. SKU 67287
11.<br />
Keep your work area clean and well<br />
lit. Cluttered work areas invite accidents.<br />
18.<br />
Before use, read manufacturer’s<br />
instruction manual for the vehicle (or<br />
object) you will lift.<br />
12.<br />
13.<br />
14.<br />
15.<br />
16.<br />
Keep bystanders, children, and<br />
visitors away while operating Wheel<br />
Dolly. Distractions can cause you to<br />
lose control.<br />
Stay alert. Watch what you are doing,<br />
and use common sense when<br />
operating Wheel Dollies. Do not use<br />
while tired or under the influence of<br />
drugs, alcohol, or medication. A moment<br />
of inattention while operating<br />
Wheel Dollies may result in serious<br />
personal injury.<br />
Store idle Wheel Dolly out of reach of<br />
children and other untrained persons.<br />
Jacks are dangerous in the hands of<br />
untrained users.<br />
Wheel Dolly service must be performed<br />
only by qualified repair personnel.<br />
Service or maintenance<br />
performed by unqualified personnel<br />
could result in a risk of injury.<br />
When servicing, use only identical<br />
replacement parts - refer to attached,<br />
product-specific parts list and<br />
diagram. Follow instructions in the<br />
“Inspection, Maintenance, And Cleaning”<br />
section of this manual. Use of<br />
unauthorized parts or failure to follow<br />
maintenance instructions may create<br />
a risk of injury and may void any applicable<br />
warranty.<br />
19.<br />
20.<br />
21.<br />
22.<br />
Industrial applications must follow<br />
OSHA requirements.<br />
Do not allow anyone in the vehicle<br />
while using the Wheel Dolly. Do not<br />
start the vehicle while it is on Wheel<br />
Dollies. Keep all bystanders a safe<br />
distance away from the vehicle.<br />
Before lowering vehicle, remove all<br />
tools and equipment from under the<br />
vehicle.<br />
The warnings, precautions, and<br />
instructions discussed in this manual<br />
cannot cover all possible conditions<br />
and situations that may occur. The<br />
operator must understand that common<br />
sense and caution are factors,<br />
which cannot be built into this product,<br />
but must be supplied by the<br />
operator.<br />
Save these<br />
instructions.<br />
17.<br />
Maintain labels and nameplates on<br />
the Wheel Dolly. These carry important<br />
information. If unreadable or<br />
missing, contact <strong>Harbor</strong> <strong>Freight</strong> <strong>Tools</strong><br />
for a replacement.<br />
SKU 67287<br />
For technical questions, please call 1-800-444-3353.<br />
Page 3
Weight Capacity<br />
Specifications<br />
Maximum Tire Width<br />
Capacity<br />
Distance Between<br />
Rollers (Center to<br />
Center)<br />
Weight<br />
<strong>1250</strong> <strong>lb</strong>.<br />
10"<br />
13-1/2” (Minimum)<br />
28-3/4” (Maximum)<br />
38.8 <strong>lb</strong>.<br />
UNPACKING<br />
When unpacking, make sure the<br />
product is intact and undamaged. If any<br />
parts are missing or broken, call <strong>Harbor</strong><br />
<strong>Freight</strong> <strong>Tools</strong> at 1-800-444-3353.<br />
Note: Use four Wheel Dollies to efficiently<br />
maneuver a parked vehicle in tight<br />
spaces. It is designed to fit most cars and<br />
lightweight trucks. A vehicle resting on<br />
four of the Vehicle Dollies can be pushed<br />
forward, backward and even sideways.<br />
4.<br />
Repeat Step 3, on with the Inner<br />
Body Axle Assembly (10), making<br />
sure all connections are tightened<br />
firmly.<br />
OPERATION<br />
IMPORTANT! Before first use:<br />
1.<br />
• Thoroughly lubricate and test the<br />
Wheel Dolly for proper operation.<br />
Position Dolly in front of tire and slide<br />
Latch (24) to right. Lift Lock Pin (17)<br />
and rotate counterclockwise until tab<br />
faces away from Pedal Arm (19). See<br />
Figure 1.<br />
Tab<br />
Lock<br />
Pin (17)<br />
Pedal Arm<br />
(19)<br />
ASSEMBLY<br />
1.<br />
2.<br />
Use Nut (1) and Spring Washer (2) to<br />
fasten a Caster (3) to each of the Rod<br />
Assemblies (4), the Outer Body Axle<br />
Assembly (9) and the Inner Body Axle<br />
Assembly (10). See the Parts Diagram<br />
on Page 9 for reference.<br />
Slide each Roller (8) over each Rod<br />
Assembly. See the Parts Diagram on<br />
at back of manual for reference.<br />
2.<br />
3.<br />
Figure 1 Latch (24)<br />
Place hands on Rollers (8) and<br />
spread apart to tire width required.<br />
Roll Dolly forward, centering Rollers<br />
against tire.<br />
3.<br />
Remove Lock Nut (5) and Bolt (6)<br />
from each Rod Assembly. Slide<br />
Roller (8) and Washer (7) onto Rod<br />
Assembly. Slide Rod Assembly into<br />
square tube on Outer Body Axle Assembly<br />
(9). Fasten together using<br />
Lock Nut and Bolt, making sure all<br />
connections are tightened firmly.<br />
1.<br />
Lifting Wheel<br />
Slide Latch to left. Then turn Lock Pin<br />
clockwise until it retracts into ratchet.<br />
Turn tab counterclockwise, keeping<br />
it away from end of Pedal Arm. See<br />
Figure 2.<br />
Rev 09j; 09k<br />
Page 4 For technical questions, please call 1-800-444-3353. SKU 67287
Tab<br />
Pedal Arm<br />
(19)<br />
Tab<br />
Figure 3<br />
Channel<br />
Figure 2<br />
Latch (24)<br />
2.<br />
3.<br />
4.<br />
Place foot on Pedal and pump in full<br />
strokes, forcing the Rollers to come in<br />
(closer together).<br />
Continue raising the tire until it is approximately<br />
3/4” off the ground.<br />
If needed, raise every other <strong>wheel</strong><br />
with its own separate Wheel Dolly.<br />
WARNING! Be ready for any movement<br />
the vehicle may make when<br />
next <strong>wheel</strong> comes off the ground.<br />
5. WARNING! Before the vehicle has<br />
been placed on all four Wheel Dollies,<br />
ensure that you have sufficient<br />
assistance and manpower to safely<br />
guide and control the vehicle.<br />
6.<br />
1.<br />
Stay clear of any sloping areas or<br />
entry ramps, however shallow they<br />
may appear. Sufficient space should<br />
be allowed between the side of the<br />
vehicle and an adjacent wall for the<br />
vehicle to be withdrawn from its location<br />
in a sideways manner.<br />
SKU 67287<br />
Lowering Wheels<br />
To lower the Wheel Dolly, slide the<br />
Latch counterclockwise (to the right).<br />
Turn Tab clockwise, making sure it<br />
aligns with the channel at the end of<br />
the Pedal Arm. See Figure 3.<br />
Push Pedal down and release.<br />
Continue until tire fully rests on the<br />
ground.<br />
For technical questions, please call 1-800-444-3353.<br />
2.<br />
1.<br />
2.<br />
3.<br />
4.<br />
Latch (24)<br />
Removing Dolly<br />
Keep Latch in right position.<br />
Lift Lock Pin (17) and turn right<br />
(counterclockwise) until Tab faces<br />
away from Pedal Arm.<br />
Place hands on Rollers and spread<br />
them apart to clear tire.<br />
Pull Dolly away from tire, retract<br />
Rollers, and turn Pin right to engage<br />
ratchet. While keeping Tab away from<br />
Pedal arm, push Pedal down and<br />
lock in place with wire latch.<br />
INSPECTION, MAINTENANCE,<br />
AND CLEANING<br />
Procedures not specifically<br />
explained in this manual<br />
must be performed only by a<br />
qualified technician.<br />
Rev 09j; 09k<br />
Page 5
To prevent<br />
serious injury<br />
from tool failure:<br />
Do not use damaged<br />
equipment. If abnormal noise<br />
or vibration occurs, have the<br />
problem corrected before<br />
further use.<br />
1. Before each use, inspect the general<br />
condition of the Wheel Dolly.<br />
Check for broken, cracked, or bent<br />
parts, loose or missing parts, and any<br />
condition that may affect the proper<br />
operation of the product. If a problem<br />
occurs, have the problem corrected<br />
before further use.<br />
Do not use damaged equipment.<br />
2.<br />
3.<br />
4.<br />
Before each use, thoroughly test<br />
the Wheel Dolly for proper operation<br />
prior to its actual use.<br />
Periodically lubricate the Wheels,<br />
roller pivots and Foot Pedal pivot with<br />
oil. Lightly grease the four sides of<br />
the main square tube section, making<br />
sure to fully extend Wheel Dolly for<br />
complete greasing.<br />
After every use, wipe dry with a clean<br />
cloth. Then, store the Jack in a safe,<br />
dry location out of reach of children<br />
and other non-authorized people.<br />
Record Product’s Serial Number Here:<br />
Note: If product has no serial number, record month and year of purchase instead.<br />
Note: Some parts are listed and shown for illustration purposes only, and are not available<br />
individually as replacement parts.<br />
PLEASE READ THE FOLLOWING CAREFULLY<br />
THE MANUFACTURER AND/OR DISTRIBUTOR HAS PROVIDED THE PARTS DIAGRAM IN THIS<br />
MANUAL AS A REFERENCE TOOL ONLY. NEITHER THE MANUFACTURER NOR DISTRIBUTOR MAKES ANY<br />
REPRESENTATION OR WARRANTY OF ANY KIND TO THE BUYER THAT HE OR SHE IS QUALIFIED TO MAKE ANY<br />
REPAIRS TO THE PRODUCT OR THAT HE OR SHE IS QUALIFIED TO REPLACE ANY PARTS OF THE PRODUCT.<br />
IN FACT, THE MANUFACTURER AND/OR DISTRIBUTOR EXPRESSLY STATES THAT ALL REPAIRS AND PARTS<br />
REPLACEMENTS SHOULD BE UNDERTAKEN BY CERTIFIED AND LICENSED TECHNICIANS AND NOT BY THE<br />
BUYER. THE BUYER ASSUMES ALL RISK AND LIABILITY ARISING OUT OF HIS OR HER REPAIRS TO THE<br />
ORIGINAL PRODUCT OR REPLACEMENT PARTS THERETO, OR ARISING OUT OF HIS OR HER INSTALLATION<br />
OF REPLACEMENT PARTS THERETO.<br />
Rev 09j<br />
Page 6 For technical questions, please call 1-800-444-3353. SKU 67287
Parts List AND ASSEMBLY DIAGRAM<br />
Part Description Q’ty<br />
1 Nut M12 4<br />
2 Spring Washer 12 4<br />
3 Caster Assembly 4<br />
4 Rod Assembly 2<br />
5 Lock Nut M12 3<br />
6 Bolt M12*55 2<br />
7 Washer 4<br />
8 Roller Assembly 2<br />
9 Outer Body Axle Assembly 1<br />
10 Inner Body Axle Assembly 1<br />
11 Screw M6*10 1<br />
12 Big Washer 6 2<br />
13 Carry Head Assembly 1<br />
Part Description Q’ty<br />
14 Spring Ring 1<br />
15 Bushing 1<br />
16 Spring 1<br />
17 Lock Pin 1<br />
18 Spring Pin 4*16 1<br />
19 Pedal Arm 1<br />
20 Support Plate 1<br />
21 Retaining Ring 8 2<br />
22 Axis 1<br />
23 Lock Nut M6 1<br />
24 Latch 1<br />
25 Retaining Spring 1<br />
26 Bolt M12*80 1<br />
Note: Some parts are listed and shown for illustration purposes only and are not available<br />
individually as replacement parts.<br />
Rev 09j<br />
SKU 67287<br />
For technical questions, please call 1-800-444-3353.<br />
Page 7
LIMITED 90 DAY WARRANTY<br />
<strong>Harbor</strong> <strong>Freight</strong> <strong>Tools</strong> Co. makes every<br />
effort to assure that its products meet<br />
high quality and durability standards, and<br />
warrants to the original purchaser that this<br />
product is free from defects in materials<br />
and workmanship for the period of 90 days<br />
from the date of purchase. This warranty<br />
does not apply to damage due directly or<br />
indirectly, to misuse, abuse, negligence or<br />
accidents, repairs or alterations outside<br />
our facilities, criminal activity, improper installation,<br />
normal wear and tear, or to lack<br />
of maintenance. We shall in no event be<br />
liable for death, injuries to persons or property,<br />
or for incidental, contingent, special<br />
or consequential damages arising from the<br />
use of our product. Some states do not allow<br />
the exclusion or limitation of incidental<br />
or consequential damages, so the above<br />
limitation of exclusion may not apply to<br />
you. This warranty is expressly in<br />
lieu of all other warranties, express<br />
or implied, including the<br />
warranties of merchantability<br />
and fitness.<br />
To take advantage of this warranty,<br />
the product or part must be returned to us<br />
with transportation charges prepaid. Proof<br />
of purchase date and an explanation of the<br />
complaint must accompany the merchandise.<br />
If our inspection verifies the defect,<br />
we will either repair or replace the product<br />
at our election or we may elect to refund<br />
the purchase price if we cannot readily<br />
and quickly provide you with a replacement.<br />
We will return repaired products at<br />
our expense, but if we determine there is<br />
no defect, or that the defect resulted from<br />
causes not within the scope of our warranty,<br />
then you must bear the cost of returning<br />
the product.<br />
This warranty gives you specific legal<br />
rights and you may also have other rights<br />
which vary from state to state.<br />
3491 Mission Oaks Blvd.<br />
PO Box 6009 • Camarillo, CA 93011<br />
(800) 444-3353<br />
Page 8 For technical questions, please call 1-800-444-3353. SKU 67287


