

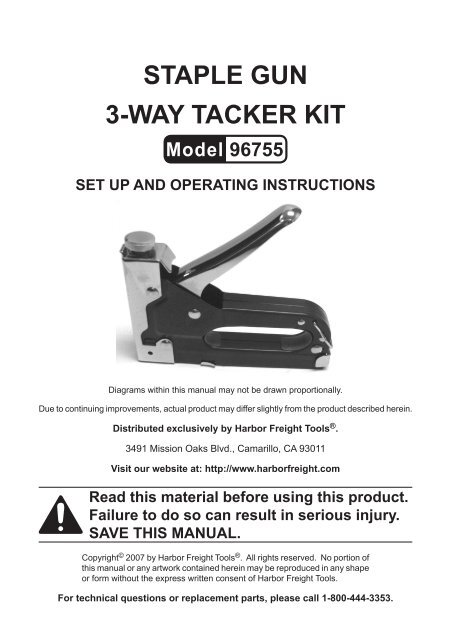
staple gun 3-way tacker kit - Harbor Freight Tools
staple gun 3-way tacker kit - Harbor Freight Tools
staple gun 3-way tacker kit - Harbor Freight Tools

Create successful ePaper yourself
Turn your PDF publications into a flip-book with our unique Google optimized e-Paper software.
<strong>staple</strong> <strong>gun</strong><br />
3-<strong>way</strong> <strong>tacker</strong> <strong>kit</strong><br />
Model 96755<br />
Set up And Operating Instructions<br />
Diagrams within this manual may not be drawn proportionally.<br />
Due to continuing improvements, actual product may differ slightly from the product described herein.<br />
Distributed exclusively by <strong>Harbor</strong> <strong>Freight</strong> <strong>Tools</strong> ® .<br />
3491 Mission Oaks Blvd., Camarillo, CA 93011<br />
Visit our website at: http://www.harborfreight.com<br />
Read this material before using this product.<br />
Failure to do so can result in serious injury.<br />
Save this manual.<br />
Copyright © 2007 by <strong>Harbor</strong> <strong>Freight</strong> <strong>Tools</strong> ® . All rights reserved. No portion of<br />
this manual or any artwork contained herein may be reproduced in any shape<br />
or form without the express written consent of <strong>Harbor</strong> <strong>Freight</strong> <strong>Tools</strong>.<br />
For technical questions or replacement parts, please call 1-800-444-3353.
Save This Manual<br />
Keep this manual for the safety warnings and precautions, assembly, operating,<br />
inspection, maintenance and cleaning procedures. Write the product’s serial number<br />
in the back of the manual near the assembly diagram (or month and year of purchase if<br />
product has no number). Keep this manual and the receipt in a safe and dry place for<br />
future reference.<br />
Important SAFETY Information<br />
In this manual, on the labeling, and all other<br />
information provided with this product:<br />
This is the safety alert symbol. It is used to alert you to potential<br />
personal injury hazards. Obey all safety messages that follow this<br />
symbol to avoid possible injury or death.<br />
Danger<br />
WARNING<br />
Caution<br />
Notice<br />
Caution<br />
DANGER indicates a hazardous situation<br />
which, if not avoided, will result in death or<br />
serious injury.<br />
WARNING indicates a hazardous situation<br />
which, if not avoided, could result in death<br />
or serious injury.<br />
CAUTION, used with the safety alert<br />
symbol, indicates a hazardous situation<br />
which, if not avoided, could result in minor<br />
or moderate injury.<br />
NOTICE is used to address practices not<br />
related to personal injury.<br />
CAUTION, without the safety alert symbol,<br />
is used to address practices not related to<br />
personal injury.<br />
SKU 96755 For technical questions, please call 1-800-444-3353.<br />
Page
1.<br />
2.<br />
3.<br />
4.<br />
5.<br />
6.<br />
7.<br />
8.<br />
9.<br />
10.<br />
11.<br />
12.<br />
General Safety Rules<br />
WARNING! Read all instructions<br />
Failure to follow all instructions listed below may result in electric shock,<br />
fire, and/or serious injury.<br />
SAVE THESE INSTRUCTIONS<br />
Keep your work area clean and well lit. Cluttered benches and dark areas<br />
invite accidents.<br />
Keep bystanders, children, and visitors a<strong>way</strong> while using this product.<br />
Distractions can cause you to lose control. Protect others in the work area from<br />
debris such as <strong>staple</strong>s. Provide barriers or shields as needed. Keep children<br />
out of the work area.<br />
Stay alert. Watch what you are doing, and use common sense when<br />
operating the Staple Gun. Do not use this product while tired or under the<br />
influence of drugs, alcohol, or medication. A moment of inattention while<br />
operating this product may result in serious personal injury.<br />
Dress properly. Do not wear loose clothing or jewelry. Contain long hair.<br />
Keep your hair, clothing, and gloves out of the <strong>way</strong> of the jaws. Loose<br />
clothes, jewelry, or long hair can be caught in moving parts.<br />
Do not overreach. Keep proper footing and balance at all times. Proper<br />
footing and balance enables better control of this product in unexpected situations.<br />
Use safety equipment. Al<strong>way</strong>s wear eye protection. Al<strong>way</strong>s wear ANSI-approved<br />
safety goggles when working with this tool.<br />
Use clamps (not included) or other practical <strong>way</strong>s to secure and support<br />
the workpiece to a stable platform. Holding the work by hand or against your<br />
body is unstable and may lead to loss of control.<br />
Do not force the product. Use the correct product for your application.<br />
The correct product will do the job better and safer at the rate for which it is<br />
designed. Do not force the product and do not use the product for a purpose for<br />
which it is not intended.<br />
Store idle products out of reach of children and other untrained persons.<br />
This product is dangerous in the hands of untrained users.<br />
Never aim the Staple Gun at any person, child or animal.<br />
Maintain this product with care. Do not use a damaged product. Tag damaged<br />
products “Do not use” until repaired.<br />
Check for misalignment or binding of moving parts, breakage of parts, and<br />
any other condition that may affect the product’s operation. If damaged,<br />
have the product serviced before using. Many accidents are caused by<br />
poorly maintained products.<br />
SKU 96755 For technical questions, please call 1-800-444-3353.<br />
Page
13.<br />
14.<br />
15.<br />
16.<br />
17.<br />
Use only accessories that are recommended by the manufacturer for your<br />
model. Accessories that may be suitable for one product may become hazardous<br />
when used on another product.<br />
When servicing a product, use only identical replacement parts. Follow<br />
instructions in the “Inspection, Maintenance, And Cleaning” section of this<br />
manual. Use of unauthorized parts or failure to follow maintenance instructions<br />
may create a risk of electric shock or injury.<br />
Maintain labels and nameplates on the product. These carry important information.<br />
If unreadable or missing, contact <strong>Harbor</strong> <strong>Freight</strong> <strong>Tools</strong> for a replacement.<br />
Maintain a safe working environment. Make sure there is adequate surrounding<br />
workspace. Do not use this product in a damp or wet location.<br />
Al<strong>way</strong>s keep hands a<strong>way</strong> from work piece. This Staple Gun has enough<br />
power to force a <strong>staple</strong> through skin causing serious injury.<br />
Specifications<br />
Stapler Dimensions<br />
Trigger<br />
Fastener Types Included<br />
Magazine<br />
6-5/16” x 5-1/2” W x 1-3/16” diameter<br />
Palm Squeeze type<br />
Standard <strong>staple</strong>s, brad nails and U-shaped <strong>staple</strong>s<br />
Spring loaded slide strip<br />
Unpacking<br />
When unpacking, check to make sure that the item is intact and undamaged. If<br />
any parts are missing or broken, please call <strong>Harbor</strong> <strong>Freight</strong> <strong>Tools</strong> at the number shown<br />
on the cover of this manual as soon as possible.<br />
List of contents<br />
Part(s) Description Q’ty<br />
Staple Gun 1<br />
Standard<br />
Staples<br />
(500) T50, 3/8” crown x 5/16” L 500<br />
Brad Nails (500) 3/8” 500<br />
U-Shaped<br />
Staples<br />
(500) 1/4” crown x 1/2” L 500<br />
SKU 96755 For technical questions, please call 1-800-444-3353.<br />
Page
Set Up Instructions<br />
Read the entire Important Safety Information section at the<br />
beginning of this manual including all text under subheadings therein<br />
before set up or use of this product.<br />
Note: For additional information regarding the parts listed in the following pages, refer<br />
to the Assembly Diagram near the end of this manual.<br />
Loading the Staples<br />
Figure 1<br />
Push in and down to release the<br />
Staple Channel Latch.<br />
1.<br />
Push the End Clip forward and down to release the Staple Channel Latch. Pull<br />
out the Staple Channel-see Figure 1.<br />
Figure 2<br />
Standard<br />
<strong>staple</strong><br />
U-Shaped<br />
<strong>staple</strong><br />
Brad<br />
2.<br />
Load the <strong>staple</strong>s or brad nails into the Staple Channel. Each of the fasteners is<br />
to be loaded into the Staple Channel with its sharp end facing the base of the<br />
Staple Channel-see Figure 2.<br />
Staples are to be inserted into the center of the Staple Channel as shown in<br />
Figure 2. Brad nails are to be inserted on either side of the Staple Channel, as<br />
in Figure 2, but not placed in the center of the Staple Channel.<br />
SKU 96755 For technical questions, please call 1-800-444-3353.<br />
Page
Figure 3<br />
Depth Adjustment<br />
Knob (1)<br />
3.<br />
To adjust force that will be exerted on the fastener to drive it deeper into the<br />
work piece, use the Depth Adjustment Knob located at the top of the Staple<br />
Gun-see Figure 3. Turn the Depth Adjustment Knob clockwise to increase<br />
the force to drive the fastener, and counterclockwise for less force driving the<br />
fastener.<br />
Operating Instructions<br />
Read the entire Important Safety Information section at the<br />
beginning of this manual including all text under subheadings therein<br />
before set up or use of this product.<br />
1.<br />
2.<br />
3.<br />
4.<br />
5.<br />
6.<br />
7.<br />
General operating instructions<br />
Push the End Clip forward and down to release the Staple Channel latch. Pull<br />
out the Staple Channel-see Figure 1.<br />
Insert a full strip of fasteners into the Staple Channel. Push the Staple Channel<br />
back into the Staple Gun Body (1). Make certain that it is pushed all the <strong>way</strong><br />
back into place before operating the Staple Gun.<br />
Determine whether or not the object being <strong>staple</strong>d will necessitate extra force<br />
from the Staple Gun. This will depend primarily on the thickness of the item being<br />
<strong>staple</strong>d. For instance, a large pad of papers will need more force than one<br />
or two sheets being <strong>staple</strong>d together.<br />
Set the Depth Adjustment Knob (1) accordingly.<br />
Place the item to be <strong>staple</strong>d below the Driver located on the front of the Staple<br />
Gun.<br />
Grasp the Staple Gun with your fingers inserted into the opening in the Housing<br />
(8) and your palm resting on the Handle (2). Squeeze and pull down on the<br />
Handle (2) to fire a fastener.<br />
Test the Staple Gun using a scrap work piece. Make certain that you have the<br />
Depth Adjustment Knob (1) set correctly, and that the fasteners are placed as<br />
you desire.<br />
SKU 96755 For technical questions, please call 1-800-444-3353.<br />
Page
Maintenance And Servicing<br />
Cleaning and Removing the Staple Channel<br />
1.<br />
2.<br />
Push the Retaining Clip at the front of the Staple Gun forward to release the<br />
Staple Channel. Pull the two tabs (located midpoint on the bottom of the Staple<br />
Gun) toward the back of the Staple Gun.<br />
The Staple Channel is now free of the Staple Gun and can be cleared of any<br />
jammed fasteners and debris.<br />
Cleaning, maintenance, and lubrication<br />
1.<br />
2.<br />
BEFORE EACH USE, inspect the general condition of this product. Check for<br />
loose screws, cracked or broken parts and any other condition that may affect its<br />
safe operation.<br />
Remove dirt and debris from the Staple Gun using a clean, soft cloth. Do not<br />
use flammable corrosive or abrasive solvents to clean the Staple Gun.<br />
Troubleshooting<br />
Problem Possible Causes Probable Solutions<br />
Staple Gun does not <strong>staple</strong><br />
1.<br />
2.<br />
3.<br />
Staples not loaded<br />
correctly.<br />
Magazine Unit not fully<br />
and properly inserted into<br />
Staple Gun.<br />
Lever not pulled<br />
completely up and then<br />
fully pressed down.<br />
1.<br />
2.<br />
Verify that <strong>staple</strong>s are loaded into<br />
the Magazine Unit flat and with<br />
prongs facing upward.<br />
Check that Magazine Unit is fully<br />
inserted.<br />
Stapler jams during operation<br />
1. Staples jammed in<br />
channel.<br />
1. Pull out the Staple Channel.<br />
2. Remove jammed fasteners<br />
from the channel. You may<br />
need to use long-nosed pliers<br />
(not included).<br />
3.<br />
4.<br />
Make certain that you are<br />
using correct size fasteners.<br />
Replace Staple Channel.<br />
SKU 96755 For technical questions, please call 1-800-444-3353.<br />
Page
PLEASE READ THE FOLLOWING CAREFULLY<br />
The manufacturer and/or distributor has provided the parts<br />
list and assembly diagram in this manual as a reference tool<br />
only. Neither the manufacturer or distributor makes any<br />
representation or warranty of any kind to the buyer that he<br />
or she is qualified to make any repairs to the product, or that<br />
he or she is qualified to replace any parts of the product. In<br />
fact, the manufacturer and/or distributor expressly states<br />
that all repairs and parts replacements should be undertaken<br />
by certified and licensed technicians, and not by the buyer. The<br />
buyer assumes all risk and liability arising out of his or her<br />
repairs to the original product or replacement parts thereto,<br />
or arising out of his or her installation of replacement parts<br />
thereto.<br />
PARTS LIST<br />
Part Description Q’ty<br />
1 Depth Adjustment Knob 1<br />
2 Handle 1<br />
3 Handle Ring 1<br />
4 Staple Channel 1<br />
Part Description Q’ty<br />
5 Staple Tab 1<br />
6 Staple Channel Latch 1<br />
7 Retaining Clip 1<br />
8 Housing<br />
Parts diagram<br />
1<br />
2<br />
8<br />
7<br />
5<br />
4<br />
3<br />
6<br />
SKU 96755 For technical questions, please call 1-800-444-3353.<br />
Page


