Uway MB500 Owner's Manual - Trail Camera
Uway MB500 Owner's Manual - Trail Camera
Uway MB500 Owner's Manual - Trail Camera

You also want an ePaper? Increase the reach of your titles
YUMPU automatically turns print PDFs into web optimized ePapers that Google loves.
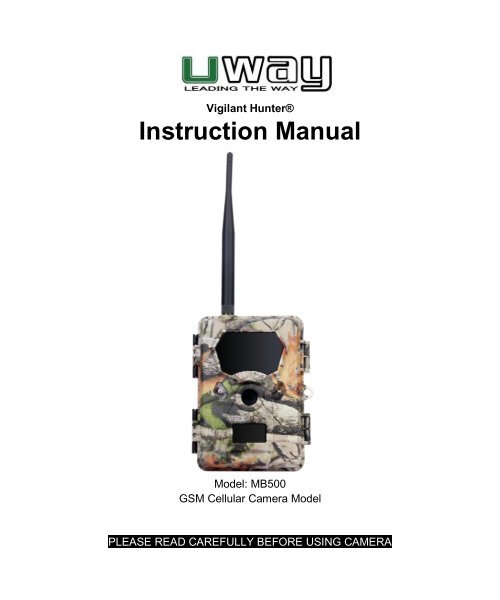
Vigilant Hunter®<br />
Instruction <strong>Manual</strong><br />
Model: <strong>MB500</strong><br />
GSM Cellular <strong>Camera</strong> Model<br />
PLEASE READ CAREFULLY BEFORE USING CAMERA
Thank you for Purchasing your UWAY <strong>Camera</strong><br />
The UWAY Vigilant Hunter is a high quality digital surveillance camera. It has been<br />
precisely engineered and tuned to provide you with optimal and consistent performance.<br />
This camera will provide high quality digital pictures and sound recording video for<br />
applications such as home, cabin, and business surveillance and animal monitoring for<br />
hunting and research. It features a highly sensitive Passive Infra-Red (PIR) motion<br />
sensor and numerous setting options to tailor the camera to your particular needs.<br />
Item Check List <strong>Camera</strong><br />
Needed for<br />
Operation<br />
Page | 1<br />
<br />
<br />
<br />
USB cable<br />
Nylon mounting strap<br />
Warranty Card<br />
Twelve (12) AA Lithium/Alkaline or NiMH<br />
Rechargeable Batteries<br />
SD or SDHC Card (up to 32G)<br />
GSM Cellular SIM Card (for cellular mode)<br />
*It is recommended to use Lithium or High Quality NiMH in <strong>MB500</strong> camera to maximize<br />
camera performance and battery life.<br />
SPECIAL HANDLING PRECAUTIONS<br />
CAMERA:<br />
The camera has been finely tuned. Avoid dropping and physical shock.<br />
The camera is designed for typical weather conditions. It is not waterproof for use<br />
underwater.<br />
Carefully clean debris from camera lens, PIR, and LED platform. Avoid use of cleaning<br />
solvents.<br />
The camera contains precise electronic equipment. Do not attempt to open camera case<br />
yourself.<br />
Condensation may form on lens and electrical components when bringing into warm<br />
room from cold. To avoid this, first place camera inside a sealed plastic bag before<br />
bringing into warm room temperature. If condensation forms, remove SD card and<br />
batteries until camera is dry.<br />
Remove batteries when storing camera. Removing batteries from the camera during<br />
storage reduces the risk of battery acid leakage and battery drain.<br />
Do not mix old and new batteries together in the camera.<br />
LCD SCREEN: Avoid exposing screen to direct sunlight or at high temperatures as LCD<br />
damage may occur.
SD Card Slot<br />
SIM Slot<br />
Snap<br />
Lock<br />
Padlock<br />
Hole<br />
Snap<br />
Lock<br />
Antennae<br />
Color Display<br />
Battery Compartment<br />
Padlock<br />
Hole<br />
Ports & Slots:<br />
DC 6V Port<br />
USB Port<br />
Control Buttons:<br />
Up, Down, Left, Right<br />
Menu, OK<br />
ON/OFF/SETUP<br />
CELLULAR INFORMATION:<br />
This camera contains a GSM cellular module to transmit pictures directly from the<br />
camera to your cellular phone and/or email address. It supports MMS/SMS/E-mail via<br />
GSM network. It supports four network bands: 850MHz, 900MHz, 1800MHz, and<br />
1900MHz.<br />
A SIM card from a GSM provider is required to transmit photos. Photos are transmitted<br />
via MMS or GPRS. Cellular charges will apply for sending photos and potentially<br />
receiving photos/emails.<br />
Photos are compressed to 640 x 480 resolution to transmit over the network, while the<br />
full mega-pixel photo is saved to the SD card for future viewing.<br />
Page | 2
MOUNTING CAMERA:<br />
This camera is designed to use the UWAY Bracket (sold separately) to obtain maximal<br />
mounting versatility. <strong>Camera</strong> can be securely locked with cable lock (through camera,<br />
bracket, or both) or security box (with or without bracket).<br />
<strong>Camera</strong> can be mounted with nylon strap (included) or security box (sold separately).<br />
It is recommended to mount the camera 3 feet high overlooking desired area and ~30<br />
feet away from target area for maximum sensitivity in most situations. Adjustments may<br />
be required depending on animal size and environment. PIR motion detection distance<br />
changes based on ambient temperature and setup. Higher ambient temperatures will<br />
reduce PIR motion detection range thereby requiring camera to be closer to desired<br />
location. Mounting camera too high or angling camera may result in animal or humans<br />
going under or above the PIR motion detection range.<br />
Angle the camera perpendicular to the ground to maximize the IR lighting potential.<br />
Mount at 45º degree angle to trails to maximize detection angle. Using UWAY Bracket<br />
(sold separately) provides optimal versatility when mounting the camera. UWAY XtendIR<br />
(sold separately) will significantly increase night IR lighting distances out to 60-100 feet.<br />
GETTING STARTED<br />
SD MEMORY CARD<br />
The camera supports both SD and SDHC memory cards up to 32 GB. The camera does<br />
not have any internal memory and will not turn ON without SD card inserted.<br />
1. Open camera<br />
2. Insert SD card with marked side facing front of camera<br />
3. Push gently until card clicks into place<br />
4. Push card again to remove<br />
Note 1: Ensure SD card is NOT in locked position.<br />
Note 2: Format SD card in camera before using each time. This will create a file on the<br />
SD card where the camera will save images to.<br />
Note 3: It is always recommended to test the SD card by taking some pictures to ensure<br />
SD card works properly before leaving camera for extended periods of time.<br />
WARNING: Make sure camera is OFF when adding or removing SD memory card.<br />
Page | 3
BATTERIES<br />
This camera is designed for Lithium/Alkaline or Nickel Metal-Hydride (NiMH) batteries.<br />
An AC to DC power cord (sold separately) can be attached to the bottom port of the<br />
camera.<br />
Insert 12 AA batteries while ensuring polarity (+ -) is correctly orientated.<br />
Note: 6V or 9V DC power can be used with or without batteries inserted. External power<br />
bypasses the batteries when 6V or 9V power is connected. Solar panels DO NOT charge<br />
batteries directly located in the camera.<br />
WARNING: Do not use 12V external battery power as camera damage will occur.<br />
CHECKING BATTERY LEVEL<br />
Battery level can be seen in bottom left corner of viewer screen<br />
TESTING AND WORKING MODES<br />
The camera has two modes: Set Mode and Work Mode.<br />
1. Turn switch to middle position to access SET mode. The camera will enter Live<br />
Preview Mode automatically. If the camera beeps, it means either no SD card is<br />
inserted or the SD card is not inserted properly. The SD card needs to be inserted<br />
or reinserted to continue.<br />
2. Turn switch to far right to access WORKING mode. A blue LED light will blink for 5-<br />
10 seconds before the camera is capable of being triggered by motion.<br />
Note: The LCD screen has a built in sleep mode to save power. If LCD screen turns off,<br />
you must turn camera OFF and back to SET mode to reset.<br />
MENU OPERATIONS AND SETTINGS<br />
MAIN MENU<br />
The Main Menu has 4 menu options: I. <strong>Camera</strong> Settings, II. GSM Setup, III. GPS Input<br />
and VI. <strong>Camera</strong> Information. <strong>Camera</strong> Settings will allow you to setup parameters on how<br />
you want the camera to function. GSM Setup will assist you in setting up the camera on<br />
the network, GPS Input will allow you to tag GPS coordinates to the pictures, and<br />
<strong>Camera</strong> Information will provide a summary of firmware version, photos, and video.<br />
Page | 4
LIVE PREVIEW<br />
This option allows the user to view in real time what the camera is capturing.<br />
Pictures/videos can be captured using the “OK” button while in this mode. This camera is<br />
equipped with a Day Color Mode and Night IR Mode while in Live Preview. It is<br />
recommended to minimize the use of Night IR Mode to avoid battery depletion.<br />
1. Turn camera to SET mode and LIVE PREVIEW mode is displayed automatically.<br />
If you are already in main menu, push MENU button to enter LIVE PREVIEW<br />
mode.<br />
PHOTO MODE<br />
a. Push ‘Right arrow’ button (you will see photo icon)<br />
b. Push UP Arrow to switch between Day Color and Night IR Mode<br />
c. Push OK button to capture pictures<br />
VIDEO MODE<br />
a. Push LEFT Arrow button (you will see video icon)<br />
b. Push UP Arrow to switch between Day Color and Night IR Mode<br />
c. Push OK button to start and stop video capture<br />
2. Push MENU button to return to menu<br />
PHOTO / VIDEO PLAYBACK<br />
This feature allows the user to view pictures and video stored on the SD card. User can<br />
pause, stop, rewind, and fast forward video during playback.<br />
1. During LIVE PREVIEW mode push the DOWN arrow to access PLAYBACK or<br />
select PLAYBACK from CAMERA MODE in <strong>Camera</strong> Settings Menu<br />
2. Use LEFT and RIGHT arrow to select video or picture and push OK to select<br />
3. Pictures display JPG in top right corner while Videos display a film strip icon in<br />
top right corner.<br />
4. Follow prompts on bottom of LCD screen while in PLAYBACK mode<br />
VIDEOS<br />
a. Push OK to PLAY and PAUSE<br />
b. Push UP arrow to delete<br />
PICTURES<br />
a. Push OK to SEND photo over network<br />
b. Push UP arrow to delete<br />
5. DOWN arrow returns you to LIVE PREVIEW mode<br />
6. Push MENU button to return to menu when in LIVE PREVIEW mode<br />
Page | 5
I. CAMERA SETTINGS MENU<br />
CAMERA MODE<br />
This camera can be set to capture still pictures OR video.<br />
1. Select CAMERA MODE<br />
2. Select Capture Image for PHOTO mode, Video Record for VIDEO mode, or<br />
Playback using UP or DOWN arrow and push OK to set<br />
PHOTO FORMAT<br />
Picture formatting can be either Normal 4:3 or Wide Screen 16:9.<br />
1. Select PHOTO FORMAT<br />
2. Select NORMAL or WIDE VISION and push OK to set<br />
PHOTO RESOLUTION<br />
Photo resolution can be set at 8MP, 5MP or 3MP.<br />
1. Select PHOTO RESOLUTION<br />
2. Select desired photo resolution and push OK to set<br />
PHOTO BURST<br />
This feature allows the camera to take from 1-3 photos in rapid succession following each<br />
trigger.<br />
1. Select PHOTO BURST<br />
2. Push OK<br />
3. Select desired number of photos per trigger and push OK to set<br />
VIDEO RESOLUTION<br />
Video mode includes High Definition HD 1280 x 720 or VGA 640 x 480.<br />
1. Select VIDEO RESOLUTION<br />
2. Select HD or VGA mode and push OK to set<br />
VIDEO LENGTH<br />
Video length can be set in 1 sec increments from (5s – 60s). Longer video lengths will<br />
deplete battery power and memory more quickly than lower lengths.<br />
1. Select VIDEO LENGTH<br />
2. Select desired video length and push OK to set<br />
VIDEO SOUND<br />
Video sound recording can be turned ON or OFF.<br />
1. Select VIDEO SOUND<br />
2. Select ON or OFF and push OK to set<br />
Page | 6
QUIET TIME<br />
Also known as, “Time Interval or Delay Time”, this feature puts the camera to sleep after<br />
capturing an image for the selected period of time before it can be re-activated by motion.<br />
Times vary from 5 seconds to 60 minutes.<br />
1. Select QUIET TIME<br />
2. Select desired ‘quiet time’ and push OK to set<br />
ILLUMINATION<br />
This feature allows the user to use external lighting (XtendIR-B) or turn off IR lights if no<br />
lights are required in the night. User selects Internal when they want the IR lights of<br />
camera to work normally; select External if connecting XtendIR-B (sold separately) to the<br />
camera OR to turn IR lights OFF at night, and Int + Ext if both the XtendIR-B and camera<br />
IR lights are desired.<br />
1. Select ILLUMINATION<br />
2. Select Internal, External, or Internal + External and push OK to set<br />
DATE / TIME STAMP<br />
This allows the user to have the date, time, and temperature stamped onto each photo or<br />
video.<br />
1. Select TIME STAMP<br />
2. Select NO or YES and push OK to set<br />
SET DATE / TIME<br />
This feature allows the user to set the display format for date and time, as well as set the<br />
current date and time.<br />
1. Select SET DATE / TIME<br />
2. Select one of the three menu options:<br />
3. Push LEFT arrow button to return to menu when finished<br />
DATE FORMAT<br />
Select the desired Date Format and push OK to set<br />
TIME FORMAT<br />
Select desired Time Format and push OK to set<br />
SET DATE / TIME<br />
Set date and time using UP, DOWN, RIGHT and LEFT arrow and push OK to set<br />
Page | 7
ACCESS CONTROL<br />
This feature allows the user to set a 4-digit password to deter theft and render the<br />
camera unusable without the password.<br />
Select ACCESS CONTROL<br />
SET PASSWORD<br />
Select desired password using ARROWS and push OK to set<br />
DISABLE PASSWORD<br />
Select and push OK to disable password<br />
POWER TYPE<br />
This camera is a precisely tuned instrument. It is recommended to use high quality<br />
Alkaline, Lithium or high quality NiMH batteries. Programming which batteries are present<br />
increases accuracy of battery level meter. This camera can also be connected to a 6V or<br />
9V external battery pack (sold separately).<br />
1. Select POWER TYPE<br />
2. Select Lithium/Alkaline, NiMH batteries, DC 6V or DC 9V and push OK to set<br />
FORMATTING SD CARD<br />
Formatting the SD card removes all files on the memory card and prepares it for use in<br />
the camera. It is recommended that the SD card is formatted in the camera prior to each<br />
use.<br />
1. Select FORMAT<br />
2. Select YES to format SD card<br />
3. Push OK to proceed with formatting SD card<br />
TEMPERATURE<br />
Allows the user to select either Fahrenheit or Celsius temperature settings.<br />
1. Select TEMPERATURE<br />
2. Select Fahrenheit or Celsius and push OK to set<br />
DUTY TIME<br />
This feature allows the user to program the camera to turn ON and OFF at a specified<br />
time.<br />
1. Select DUTY TIME<br />
SET START TIME<br />
Set camera START time using arrows and push OK to set<br />
SET STOP TIME<br />
Page | 8
Set camera STOP time using arrows and push OK to set<br />
2. Push LEFT arrow button to return to menu<br />
Note: For 24 hour activity: START: 00:00 and STOP 23:59<br />
TIME LAPSE<br />
This feature allows the camera to take pictures at a pre-set time interval (10 seconds to<br />
60 minutes) and record or send them over the network.<br />
1. Select TIME LAPSE<br />
2. Select ENABLE to set up time lapse or DISABLE to cancel time lapse<br />
3. Set START TIME and push OK to set<br />
4. Set END TIME and push OK to set<br />
5. Set DELAY TIME and push OK to set<br />
6. Push LEFT arrow button to return to menu<br />
DEFAULT SET<br />
This feature resets the camera to factory default settings.<br />
II. GSM SETUP<br />
This menu is for setting up the cellular network. GSM setup can be accomplished either<br />
by using the Download Tool on a computer (for comprehensive settings) or by direct<br />
setup on camera (for quick and basic settings).<br />
Using Download Tool to set up GSM<br />
1. Insert a SD card and a SIM card into camera<br />
2. Access GSM SETUP from Main Menu and select DOWNLOAD TOOL<br />
3. Press OK to download the "<strong>Uway</strong>_GSM_SETUP.zip" onto the SD card<br />
4. Use a computer to unzip the ZIP file, and then edit the "GSM_SETUP.exe" file<br />
Page | 9
See the graphics below for reference<br />
A. Send Mode:<br />
OFF: turns off the GSM cellular function; camera functions without cellular<br />
functionality.<br />
<br />
INSTANT: to send a picture instantly when the camera captures a picture.<br />
Page | 10
When this option is selected, you need to set a Max Num. Max Number defines<br />
the maximum pictures that will be sent within 24 hours. For instance, 20 means<br />
the camera will only send the first 20 pictures within 24 hours regardless of the<br />
actual number of pictures captured that day.<br />
Note: The Max Num. cannot exceed 199 in Instant mode.<br />
<br />
CUSTOM: to send the pictures at a user-defined time in one day.<br />
When this option is selected, you need to set Max Num. (same as above in<br />
'Instant') and Send Time. For example, Max Num. 10 and Send Time 18:30,<br />
the camera will send the first 10 pictures taken in that day at 18:30.<br />
Note: The Max Num. cannot exceed 50 in Custom mode.<br />
<br />
DAILY REPORT: to send a SMS (text message) report at a user-defined<br />
time. The report includes total picture/video number captured during the<br />
past 24 hours, the battery level and remaining storage space.<br />
Page | 11
B. Send Via:<br />
The camera provides two solutions, i.e. MMS or GPRS, to send the pictures to the<br />
desired phone numbers and email addresses.<br />
MMS: uses MMS cellular plan<br />
If MMS is selected, pictures will be sent to the preset phone numbers<br />
(maximum 4 numbers allowed) and email addresses (maximum 4 addresses<br />
allowed) or both phone number and email address (use semicolon ";" between<br />
each phone number and email address).<br />
GPRS: uses Data cellular plan<br />
If GPRS is selected, pictures will be sent from one preset sending email<br />
address to one or multiple email addresses via GPRS network using the SIM<br />
card data plan.<br />
Page | 12
When GPRS is chosen, there is a reminder to ask the user to set the Sending<br />
Email. Click the "Sending Email" button; there would be another pop-up dialog<br />
box as shown below:<br />
Page | 13<br />
Complete the above information and click "OK" to save. This email address will<br />
be the "Sender" email.<br />
Note 1: the "Email" needs to be the full email address, "Account" only needs<br />
the account name, domain name is not needed.<br />
Note 2: DO NOT use email addresses that have SSL or TSL restriction in<br />
order to send emails, this kind of email server will block the camera GPRS<br />
function from sending pictures through their server.<br />
C. Send To:<br />
This is to set the destination where the MMS/GPRS goes to.<br />
Phone: pictures to phone numbers (maximum 4 numbers)<br />
Email: pictures to email addresses (maximum 4 numbers)<br />
Both: pictures to both phone numbers and email addresses.<br />
NOTE: the ‘Both’ and ‘Phone’ options are only possible for MMS, not for GPRS.<br />
GPRS pictures can only be sent to email addresses (not phone numbers).
D. Operator Parameter:<br />
The manufacturer has pre-set the parameters of some operators worldwide into the<br />
camera; user needs to select one of the operators as shown below:<br />
For instance, if the user uses an USA AT&T SIM card, choose "USA" in the "Country"<br />
drop down dialog, then choose "AT&T" in the "Operator" drop down dialog.<br />
If user cannot find the country or operator information in the preset software, the user<br />
needs to do custom settings and contact local operators to fill in the operator information.<br />
Choose "Other" in the "Country" drop down dialog; choose "Other" in the "Operator" drop<br />
down dialog, then click the "Custom" button to access a pop-up dialog box.<br />
Page | 14
Complete the following information (please confirm the accurate information with your<br />
local operator), and click OK to save the settings. Take Germany T-Mobile for example<br />
as shown below.<br />
E. Recipients:<br />
Recipients are where the pictures are transmitted to: phone number or email address.<br />
The recipients allow 4 phone numbers and 4 email addresses, use semicolon ";" between<br />
each phone number and email address.<br />
Page | 15
F. Remote Control:<br />
This feature allows the user to send a text message command to change the Send Mode.<br />
Once this function is enabled, user needs to input a Receive Time as shown below.<br />
The camera GSM module will boot up automatically every day at the ‘Receive Time’ to<br />
check if there is any text message commands. After processing the text message<br />
command, the camera will send a confirmation text message to the sender phone<br />
number. If multiple commands are received, the camera will only process the last text<br />
message command.<br />
Note: Avoid sending multiple text message commands to camera in one day.<br />
The camera will accept text message commands in the following protocols shown in the<br />
table:<br />
Send Mode Text Message Command Protocol Example<br />
Off C#00#E C#00#E<br />
Instant C#01#NNN#E C#01#008#E<br />
Customized C#02#HHMM#NN#E C#02#0930#05#E<br />
Daily Report C#03#HHMM#E C#03#1230#E<br />
HH means hour, MM means minute, NN or NNN mean Max Number. Taking<br />
"C#02#0930#05#E" for example, this command will change the Send Mode to "Custom"<br />
with receiving time at 9:30 and Max Num. 5.<br />
Page | 16
Note 1: The command protocol must be followed accurately; otherwise, the camera will<br />
not accept the command.<br />
Note 2: Once the Send Mode is changed to OFF, the GSM module will be turned off and<br />
will not receive any further text message commands; you will need to retrieve the camera<br />
to turn cellular mode back ON.<br />
G. <strong>Camera</strong> Name:<br />
User can input a camera name; the camera name will be shown on the top-right corner of<br />
each picture taken.<br />
Note: only "A-Z, 0~9, /, _, -, #" are allowed, DO NOT use Space between words. For<br />
example, "<strong>Camera</strong> 01" is not eligible, "<strong>Camera</strong>_01" is eligible.<br />
H. GPS Input:<br />
User can input a GPS coordinate read from a third-party device such as a cellphone or a<br />
GPS device. Once a GPS coordinate is input, the GPS information will be written in the<br />
exif data of each picture taken. User can organize pictures using a third-party software to<br />
track the picture locations.<br />
I. PATH<br />
Save the edited "GSM_SETUP.exe" after completing all information above. Click the<br />
"Save" button and a file named "GSM.bin" will be generated in the designated location.<br />
Copy the "GSM.bin" file onto the ROOT directory of a SD card (not in DCIM) and insert<br />
the SD card into the camera.<br />
NOTE: Switch the camera to "SETUP" and after a few seconds, the camera will display<br />
"GSM update success".<br />
Testing the GSM network using “manually send mode”:<br />
1. Switch camera to "SET UP"<br />
Page | 17
2. After the camera boots up into Live Preview, it will search for the GSM network if a<br />
SIM card is inserted and the GSM module is NOT turned Off in "Send Mode". The<br />
user will see "Searching network....." on the screen. Once the camera is connected<br />
to the network, the ISP name will show on the bottom right corner of the screen. If<br />
the connection fails, it will show "Login fail". Press the "Right" key to search for<br />
network again.<br />
Note: continuously Login fail generally means the network signal is poor or the SIM card<br />
is not compatible (DO NOT use CDMA or 3G SIM card plan for this GSM camera)<br />
3. While in Live Preview, press 'Down' arrow to switch to Playback mode, choose a<br />
picture using the "Right" or "Left" arrows and press OK. The camera will send the<br />
selected picture to the preset phone number(s) and email addresse(s). After<br />
sending successfully, the LCD screen will show ‘Send over’. If reception is poor or<br />
network is busy, it will show ‘Send Fail’.<br />
Sending a picture takes 20s-60s depending on the network signal strength. GPRS<br />
generally takes longer time than MMS.<br />
Using camera only to setup GSM network<br />
1. Select GSM SETUP from Main Menu<br />
2. Set SEND MODE: Off, Instant, Customized, or Daily Report<br />
3. Set SEND VIA: MMS or GPRS<br />
4. Set SEND TO: Phone, Email, or Both<br />
5. Set NETWORK SETUP:<br />
NOTE: Push the OK button to select each letter/number. The disk icon is for saving<br />
settings; the large left arrow button is for deleting, and the small right arrow is to<br />
return to previous menu.<br />
a. Phone: enter phone number using arrows<br />
Page | 18
. Email: enter email address using arrows<br />
c. Cellular Provider: select your provider from the menu. If your provider is<br />
not present, you will need to use the ‘Download Tool’ explained<br />
previously.<br />
6. Set REMOTE CONTROL: Enable (set receiving time) or Disable<br />
NOTE: Explanations of the above settings are explained in greater detail previously in<br />
manual (pg. 9 – 18).<br />
Additional Notes:<br />
Be sure your SIM card works on the GSM GPRS service. This device supports four<br />
bands: 850MHz, 900MHz, 1800MHz and 1900MHz.<br />
If sending photos by MMS, you will want an MMS picture messaging plan. If<br />
sending photos by GPRS account, you will want a Data plan on the SIM card.<br />
There is a max limit on the number of pictures sent daily to your phone. Please<br />
check the MAX number in "Instant" and "Custom" modes to set the desired number<br />
of pictures.<br />
The signal strength of the mobile network may vary with location and time of day,<br />
which may lead to failures in sending pictures. Rain, rainstorms or bad weather may<br />
cause poor signal reception. Be sure to set up camera at a location with strong GSM<br />
network coverage.<br />
III. GPS INPUT<br />
User can input a GPS coordinate read from a third-party device such as a cellphone or a<br />
GPS device. Once a GPS coordinate is input, the GPS information will be written in the<br />
exif data of each picture taken. User can organize pictures using a third-party software to<br />
track the picture locations.<br />
1. Select GPS Input from Main Menu<br />
2. Select YES (input proper coordinates) or NO<br />
Page | 19
IV. CAMERA INFORMATION<br />
Select CAMERA INFORMATION from main menu<br />
FILES COUNT<br />
Displays PICTURE and VIDEO number<br />
STORAGE<br />
Displays SD memory card USED SPACE and FREE SPACE<br />
FIRMWARE VERSION<br />
Displays the current camera firmware version<br />
CAMERA NAME<br />
Allows you to display a name on the photo. From left to right the icons are as<br />
follows: numbers, letters and symbols, save, backspace, back to menu arrow.<br />
1. Select ENABLE to set up name<br />
2. Create your personalized name using arrows<br />
3. Push SAVE icon when finished<br />
4. Push LEFT arrow button to return to menu<br />
ADDITIONAL INFORMATION<br />
TRANSFERRING PICTURES AND VIDEO TO A COMPUTER:<br />
Pictures and video can be removed in one of two ways:<br />
1. SD memory card can be removed (ALWAYS ensure camera is OFF before<br />
removing) and transferred to computer or SD card reader.<br />
2. Connect camera to computer using USB cable.<br />
i. Turn camera ON (may not be required)<br />
ii. Computer will recognize camera and prompt you to open file or save pictures<br />
FIRMWARE UPDATES<br />
This camera is designed to accommodate future firmware updates if required.<br />
1. Copy the firmware update file (eg. Main.elf and SPEC.bin) onto the SD card root<br />
directory (do not place in any file)<br />
2. Insert SD card into the camera<br />
3. Push and hold UP arrow while turning camera to SETUP mode<br />
4. The blue LED on camera front will blink until the update is finished.<br />
Page | 20
5. The camera should automatically re-boot. If it does not re-boot within 10<br />
seconds of the blue LED turning off, turn camera OFF and remove batteries to<br />
break power connection.<br />
6. Replace batteries and turn camera to SETUP mode<br />
7. Confirm new firmware version by checking ‘<strong>Camera</strong> Information” (see<br />
instructions)<br />
TROUBLESHOOTING<br />
1. I get more pictures saved to the SD card than transmitted to my phone<br />
number and/or email address<br />
i. After capturing a photo, the camera will attempt to transmit the photo a few times<br />
before aborting and prepare to capture another photo.<br />
ii. Poor reception or busy network signals may result in poor connectivity at certain<br />
times and places.<br />
iii. Increase Quiet Time to 2 – 3 min as the camera may not be able to transmit as<br />
faster in certain network areas.<br />
iv. Move camera to different location and test connection strength.<br />
2. I get pictures transmitted periodically / not consistent<br />
i. The cellular network reception strength will change throughout the day; when the<br />
network is busy, the range and strength of reception will decrease.<br />
3. I cannot get the camera to transmit pictures properly<br />
i. Ensure your SIM card is GMS compatible<br />
ii. Ensure the SIM card is active and not locked; you may need to confirm with your<br />
provider<br />
iii. Ensure you have the proper plan on your SIM card: MMS requires an MMS<br />
picture messaging plan, while GPRS requires data (may be slight variations with<br />
your provider).<br />
iv. Make sure you follow carefully the Download Tool instructions or menu on the<br />
camera in setting up the network.<br />
4. The camera shows full or partial reception bars and I get login failure or no<br />
pictures transmitted<br />
i. Although the camera may show full or partial cellular power, the network may be<br />
busy at the time of transmission and login; keep trying or move to another<br />
location.<br />
Page | 21
ii. In some instances the camera may show good reception but the cellular<br />
bandwidth is too small to transmit pictures at that time; trying at a later time or<br />
moving to a different location may help.<br />
5. The camera does not turn ON<br />
i. Ensure batteries are inserted properly with correct polarity and fully charged. If<br />
possible test each battery with battery tester. Approximately 1.7V for Lithium and<br />
1.3V for NiMH is full power.<br />
ii. Ensure SD card is properly inserted and not in locked position<br />
iii. Reset camera by removing batteries and SD card for 10 minutes<br />
iv. Cold temperature may decrease battery output sufficiently to prevent camera<br />
from turning ON; check batteries and ensure they are rated for cold temperature<br />
6. Beeping Noise when camera turns ON<br />
i. Insert SD card<br />
ii. Ensure SD card is not locked<br />
iii. Format SD card in camera<br />
iv. SD card may not be compatible<br />
7. <strong>Camera</strong> will not take pictures or stops part way even with full batteries<br />
i. SD card is not formatted correctly; format SD card in camera<br />
ii. Ensure SD card is not locked<br />
iii. SD card is faulty or incompatible; try different SD card and/or brand. Faulty or<br />
incompatible SD cards may cause system conflict, system crash, and battery<br />
drain. Always format SD card in camera and try different SD cards if problem<br />
persists.<br />
iv. Batteries do not have enough power to activate picture/video sequence<br />
8. Batteries run down quickly<br />
i. Avoid poor quality alkaline and rechargeable batteries, avoid mixing different<br />
brands and ages of batteries as battery life will be adversely affected. Different<br />
brands of batteries will perform differently than others; try other battery brands to<br />
find what works best for your environment.<br />
ii. Reduce number of picture burst and/or reduce video length.<br />
iii. Ensure batteries are fully charged; test batteries with tester if possible<br />
iv. In cold temperatures, the battery life becomes shorter<br />
v. SD card may have jammed causing battery to drain; use different SD card and/or<br />
brand<br />
9. Pictures count in burst mode does not equal what I programmed<br />
Page | 22
i. <strong>Camera</strong> has sophisticated power meter; when weak or low current is detected,<br />
camera will automatically reduce the number of pictures in burst mode.<br />
ii. Ensure batteries are fully charged<br />
iii. Cold temperatures may decrease battery output resulting in reduction in picture<br />
count. Lithium batteries will help in colder weather.<br />
10. Video time is cut shorter than what I programmed<br />
i. <strong>Camera</strong> has sophisticated power meter; when weak or low current is detected,<br />
camera will automatically reduce the length of video.<br />
ii. Ensure batteries are fully charged<br />
iii. Cold temperatures may decrease battery output resulting in reduction in video<br />
length. Lithium batteries will help in colder weather.<br />
11. SD card is not recognized in camera<br />
i. If the SD card is formatted on a computer or other camera, it may not be<br />
recognized by this unit. Use this camera to format the SD card<br />
ii. Ensure that SD card is not greater than 32 GB in size<br />
iii. Ensure SD card is not locked<br />
iv. Try different brand of SD card for compatibility<br />
12. SD card is inserted into another device (i.e. camera) and is not recognized<br />
SD card may be formatted differently than the other device (i.e. camera) can<br />
recognize. The camera file system is generally compatible with other digital cameras;<br />
however, it is recommended not to use the same SD card in different cameras to<br />
avoid possible file system conflicts.<br />
13. Color or brightness is different between pictures at same time of day and<br />
during burst mode<br />
i. <strong>Camera</strong> has sophisticated light metering calculations to optimize pictures in all<br />
settings; light intensity may change between pictures causing differences in color<br />
and contrast.<br />
ii. During burst mode, the first picture is taken quickly for fast trigger speed;<br />
increased light metering occurs between first and second picture resulting in<br />
different color or brightness.<br />
14. Battery level on display is low despite using new batteries<br />
i. Ensure battery type is selected correctly in camera menu.<br />
ii. Rechargeable batteries run on lower voltage than lithium resulting in display<br />
variation. Some rechargeable batteries will display low power even though they<br />
are fully charged; this does not affect camera performance.<br />
iii. Cold weather will reduce battery output<br />
Page | 23
15. Low Power problems<br />
When the camera power is low the system will not be stable, you may observe<br />
abnormal screen displays or automatic camera reboot. Change your batteries.<br />
16. <strong>Camera</strong> fails to detect motion.<br />
i. Ensure batteries test full; replace batteries if necessary<br />
ii. Ensure SD card is NOT locked and compatible with camera; take test pictures in<br />
‘Live Preview’ mode.<br />
iii. Ensure ‘Quiet Time’ is set correctly<br />
iv. Ensure camera is mounted correctly. Note: hot weather, humidity, and rain will<br />
reduce PIR sensing distance; move camera closer if required.<br />
v. Typically mounting the camera at a height of 3-4 feet will maximize detection<br />
distance, this will depend slightly on the size of game you are trying to observe.<br />
vi. <strong>Camera</strong> may be angled up too high or too low thereby allowing subjects to walk<br />
under or over the PIR motion detection window; adjust camera position and try<br />
again.<br />
17. Images are blurry (stills or motion)<br />
i. UWAY offers some of the best picture quality. Although we try to cover every<br />
scenario, it is important to realize that different environments and conditions will<br />
affect the picture quality.<br />
ii. Blurry still images may result from interference with focal points; for example<br />
distance from camera, trees, brush, may affect focus point.<br />
iii. Fog, condensation, water drops, snow, dust, direct sunlight, etc can all reduce<br />
picture quality.<br />
iv. Motion blur may result when object moves too quickly. Blur will be compounded<br />
during night and low light situations. The UWAY camera has been finely tuned to<br />
maximize picture quality while balancing other interactions such as battery life,<br />
trigger speed, and IR lighting distance.<br />
18. Night images are dark<br />
i. Ensure batteries are fully charged. Use Lithium or high quality NiMH<br />
rechargeable batteries.<br />
ii. Cold temperature will reduce battery output to IR lights.<br />
iii. Remove brush, grass, and other debris that may prevent IR light from reaching<br />
its potential.<br />
19. Too many empty pictures/video or false triggers<br />
i. Ensure camera is mounted on a solid surface; trees and surface may move in<br />
wind causing camera to trigger falsely.<br />
Page | 24
ii. Adjust camera height and angle.<br />
iii. Remove brush and branches from detection zone that may be triggering camera.<br />
iv. A close running animal/human may make it across detection zone before<br />
triggering the camera<br />
v. Sunlight and heat waves may result in certain scenarios of false triggers; position<br />
camera in different location.<br />
SPECIFICATIONS<br />
GSM Cellular Module<br />
MMS resolution: 640 x 480<br />
Lens: FOV = 52<br />
Photo resolution: 8MP, 5MP, 3MP (programmable)<br />
Photo burst: 1-3 photos per trigger (programmable)<br />
Video resolution: HD 1280 x 720 or 640 x 480 VGA<br />
Video length: 5-60 sec<br />
Very compact (4 x 5.9 x 2.2 inches)<br />
Fast trigger time (1 sec)<br />
60 No Glow Black Flash infrared LEDs<br />
Multi-zone PIR detection range: up to 50 feet<br />
Color daytime and black & white nighttime pictures<br />
Date, Time, Temperature & Moon Phase image stamp<br />
Low power consumption, standby battery lifetime up to 12 months<br />
External memory : SD/SDHC card up to 32 GB<br />
Video sound recording<br />
6V / 9V-volt port & USB port<br />
12 x 1.5 volt AA batteries (not included)<br />
Low battery indicator<br />
Mount with mounting strap, security box, & cable lock<br />
4-digit password protection<br />
Playback pictures and videos<br />
2.0” true color TFT display<br />
User-friendly interface, 6 buttons control<br />
Time Lapse<br />
Duty Time<br />
Page | 25
WARRANTY INFORMATION<br />
This UWAY camera is warranted to be free from defects in material and workmanship for<br />
1 year from the original date of purchase when purchased through an authorized dealer.<br />
UWAY will, at its option, repair or replace your camera with the same or comparable<br />
model, free of charge (shipping charges may apply) for a period of (1) one year from the<br />
original date of purchase in the event of a defect in materials or workmanship occurring<br />
with normal use. This warranty only extends to the original retail purchaser. Purchase<br />
receipt or other proof of date of original purchase is required before warranty<br />
performance. The warranty on any replacement product provided under this warranty<br />
shall be for the unexpired portion of the warranty period applicable to the original product.<br />
This warranty extends solely to failures due to defects in materials or workmanship<br />
occurring during normal use. It does not cover normal wear of the product. This warranty<br />
is void if: the product housing has been removed, if the product's label, logo or serial<br />
number have been removed, or if the product fails to function properly as a result of<br />
accident, misuse, abuse, neglect, mishandling, misapplication, non-compatible batteries,<br />
faulty installation, setup, adjustments, improper maintenance, alteration, maladjustment<br />
of controls, modification, power surges, service by anyone other than UWAY or UWAY<br />
authorized service center or acts beyond the manufacturer's control. Should your product<br />
prove defective during this warranty period, please contact us to obtain a RMA number<br />
prior to returning the defective unit.<br />
*RMA number is required for all returns.<br />
If the product is beyond the warranty period, the price for repairing or replacing may vary.<br />
International customers pay different amount of shipping & insurance. We will send<br />
detailed shipping information along with the RMA number. Include with your camera the<br />
RMA form and a copy of your dated cash register receipt or other proof of purchase.<br />
*Please contact us if you have any questions or problem while using the camera before<br />
you request a RMA number and send the camera back for repair.<br />
Some problems may be solved easily with help from customer service.<br />
CAMERA REPAIR<br />
Repairs for damages not covered by the warranty will be subject to a charge. Please<br />
contact UWAY to discuss repair options not covered under warranty.<br />
Page | 26
CUSTOMER SERVICE CONTACT:<br />
U.S.A & International<br />
Email: sales@hcooutdoors.com<br />
Website: www.uwayoutdoors.com<br />
Phone: 1-770-582-0004<br />
UWAY Outdoor Products<br />
3120 Medlock Bridge Rd.<br />
Suite H400<br />
Norcross, GA 30071<br />
CANADA Only<br />
Email: sales@uwaycanada.ca<br />
Website: www.uwaycanada.ca<br />
Phone: 1-403-942-6800<br />
UWAY Outdoors Canada Inc.<br />
210A 12A St. N. Suite 410<br />
Lethbridge, AB T1H 2J1