RapidFire Instruction Manual - Trail Camera
RapidFire Instruction Manual - Trail Camera
RapidFire Instruction Manual - Trail Camera

You also want an ePaper? Increase the reach of your titles
YUMPU automatically turns print PDFs into web optimized ePapers that Google loves.
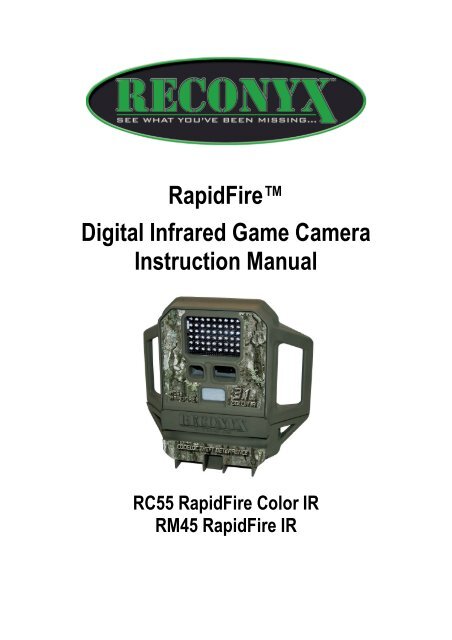
<strong>RapidFire</strong><br />
Digital Infrared Game <strong>Camera</strong><br />
<strong>Instruction</strong> <strong>Manual</strong><br />
RC55 <strong>RapidFire</strong> Color IR<br />
RM45 <strong>RapidFire</strong> IR
Table of Contents<br />
I. <strong>Camera</strong> Overview ................................................................... 1<br />
II. Battery & Memory Card Installation ..................................... 3<br />
III. Initial Setup & Programming................................................. 6<br />
IV. Mounting & Aiming the <strong>Camera</strong>.......................................... 10<br />
V. General Information ............................................................. 12<br />
VI. Troubleshooting................................................................... 13<br />
VII. Warranty & Safety Information............................................ 14<br />
VIII. Copyright & Trademark Information................................... 17
<strong>Camera</strong> Overview<br />
Contents<br />
1. Reconyx <strong>RapidFire</strong> Game <strong>Camera</strong> (RC55 or RM45).<br />
2. Adjustable Bungee mounting strap.<br />
3. BuckView mapping and image management software.<br />
4. This instruction manual.<br />
www.reconyx.com 1
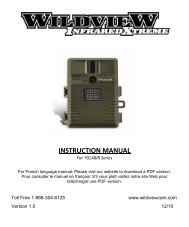
Your RECONYX RC55 <strong>RapidFire</strong> Color IR or RM45 <strong>RapidFire</strong> IR camera is<br />
a digital camera with night time infrared illuminator and Passive InfraRed<br />
(PIR) motion detector, all contained within a secure, rugged, and weatherresistant<br />
case.<br />
<strong>Camera</strong><br />
Specifications<br />
Images<br />
InstaOn<br />
Trigger Speed<br />
<strong>RapidFire</strong><br />
NearVideo<br />
Capacity with<br />
2 GB card<br />
RECONYX RC55<br />
<strong>RapidFire</strong> Color IR<br />
Day: 3.1 megapixel<br />
color images<br />
Night: 3.1 megapixel<br />
monochrome images<br />
RECONYX RM45<br />
<strong>RapidFire</strong> IR<br />
Day and Night:<br />
1.3 megapixel<br />
monochrome images<br />
1/5 second 1/10 second<br />
Up to 1 frame per<br />
second<br />
Up to 5,000 images<br />
Up to 2 frames per<br />
second<br />
Up to 15,000 images<br />
BUCKVIEW<br />
Also included with your camera is BuckView mapping and image<br />
management software. BuckView offers you the ability to geographically<br />
organize and access your images, helping you to pattern and better<br />
understand animal movements and behaviors. Refer to the BuckView User<br />
Guide, accessible within the software, for more information.<br />
2 © RECONYX, LLP
Battery & Memory Card Installation<br />
Removing and Replacing the <strong>Camera</strong>’s Cover<br />
Before installing batteries or a memory card, you need to remove the<br />
camera’s cover. To do this, open the clasp at the bottom of the camera using<br />
the thumb grip in the middle of the bottom edge. Then, lift the cover from the<br />
bottom, rotating it upward until you can remove it from the camera.<br />
To replace the camera’s cover, insert the cover along the bottom edge of the<br />
camera’s faceplate and rotate it downward until it’s flush with the camera.<br />
Snap the clasp, pressing firmly in the middle of the clasp, to secure the<br />
cover.<br />
It’s good practice to make sure the gasket and camera lenses are clean<br />
each time you open and close your camera.<br />
www.reconyx.com 3
Battery Specifications and Installation<br />
Your RECONYX <strong>RapidFire</strong> camera runs on six C-cell batteries (either<br />
Alkaline or Nickel Metal Hydride). Batteries load vertically (three on each<br />
side) into the two battery trays. Note: Be sure to load batteries in the proper<br />
orientation (positive end in first).<br />
Warning! Do not mix battery types! You may run your camera on disposable<br />
Alkaline or rechargeable Nickel Metal Hydride (NiMH), but you should never<br />
mix battery types! Damage to the camera can result and your warranty will<br />
be voided if you do so.<br />
Alkaline batteries work well at temperatures above freezing. If you want to<br />
use your camera when the weather turns cold, you should get a set or two of<br />
NiMH rechargeable batteries. They will run your camera at temperatures<br />
down to -20°F or colder. You can buy C-Cell NiMH batteries from<br />
RECONYX at www.reconyx.com.<br />
CompactFlash ® (CF) Card Specifications and Installation<br />
The CompactFlash (CF) card is used to store the pictures your camera<br />
captures. These images may be transferred to your computer using standard<br />
4 © RECONYX, LLP
image viewing software or RECONYX BuckView mapping and image<br />
management software.<br />
CompactFlash cards have various speeds and capacities. Larger capacity<br />
cards are capable of storing more images. In general, a 2 GB card will hold<br />
up to 5,000 images when used with the RECONYX RC55 <strong>RapidFire</strong> Color IR<br />
camera and up to 15,000 images when used with the RECONYX RM45<br />
<strong>RapidFire</strong> IR camera.<br />
We recommend that you purchase two CF cards per camera so that you can<br />
swap cards in the field. SanDisk cards have worked well for us. You can<br />
purchase RECONYX certified CF cards from us at www.reconyx.com.<br />
Cards with higher speed ratings are capable of reading and writing images<br />
faster. This is advantageous when taking <strong>RapidFire</strong> NearVideo sequences of<br />
images.<br />
Inserting and Removing the CompactFlash Card<br />
Insert the CompactFlash card into the receiver slot under the control buttons<br />
as shown. The card must be inserted face up with the connecting ports in<br />
first. Remove the card by pulling it straight out of the receiver port.<br />
Note: Always disarm and turn the power off before removing or inserting the<br />
CompactFlash card.<br />
www.reconyx.com 5
Initial Setup & Programming<br />
Turn your camera on using the On/Off switch. If this is the first time you’ve<br />
used your camera, it will automatically display the Date/Time setup change<br />
option, beginning with Enter Year.<br />
Press the > buttons to set the date (year, month, and day) and time<br />
(hour and minute); press the OK button after each part of the date and time<br />
are correct.<br />
Your RECONYX <strong>RapidFire</strong> camera comes pre-programmed with factory<br />
default settings. By default the camera will take 3 pictures per trigger with a<br />
1 second pause between pictures and no delay between triggers.<br />
If you wish to change your camera’s settings you can do so easily in the field<br />
at any time. Changes are made using the control buttons and display that<br />
are located under the Removable Cover. Once you make selections, they<br />
are retained by the camera – even when the camera is off – so that you don’t<br />
need to make selections again unless you want to change something.<br />
6 © RECONYX, LLP
RAPIDFIRE PROGRAMMING MENU<br />
ON/OFF<br />
ARM<br />
CAMERA<br />
WALKTEST<br />
ERASE<br />
CARD<br />
CHECK<br />
STATUS<br />
CHANGE<br />
SETUP<br />
CAMERA<br />
INFO<br />
PRESS “OK”<br />
TO ARM OR<br />
DISARM CAMERA<br />
PRESS “OK” TO<br />
BEGIN AND END<br />
WALKTEST<br />
PRESS “OK” TO<br />
ERASE ALL<br />
IMAGES FROM<br />
CF CARD<br />
DISPLAYS<br />
QTY OF PICS<br />
% MEMORY LEFT<br />
% BATTERY LEFT<br />
DISPLAYS<br />
CAMERA INFO<br />
TRIGGER<br />
TIME LAPSE<br />
SET<br />
DATE/TIME<br />
CODELOC<br />
PASSCODE<br />
USER LABEL<br />
ENTRY<br />
ADJUST<br />
IMAGE<br />
RESOLUTION<br />
USE<br />
DEFAULT<br />
SETTINGS<br />
RETURN TO<br />
MAIN MENU<br />
Your camera includes three major levels of options: Main menus, Change<br />
Setup menus, and selection options. As with the date and time, you can<br />
move through any of these menus and options by pressing the ><br />
buttons; the >> button displays menus and options in order, and the
Main Menu<br />
Arm <strong>Camera</strong> – When you select this option, your camera arms in ten<br />
seconds, unless you cancel it before the countdown is complete.<br />
WalkTest – When you select this option, your camera flashes an indicator<br />
light so that you can test its aim by walking in front of it. The WalkTest mode<br />
shows you exactly where the camera’s active motion detection zones are<br />
located. The tilt of the camera is critical, as slight changes are magnified at<br />
greater distances from the camera.<br />
Erase Card – When you select this option, your camera wipes your entire<br />
CF card clean, removing all images and other information from the card. You<br />
should not select Erase Card unless you are absolutely certain you want to<br />
remove everything from the card.<br />
Check Status – When you select this option, your camera displays the<br />
number of pictures it has taken, the percent of space remaining on your CF<br />
card, and the percent of battery power remaining.<br />
Change Setup – This option includes additional settings; see the following<br />
page for more information.<br />
<strong>Camera</strong> Info – When you select this option, your camera displays its<br />
firmware version number (V) and serial number (S). You may need this<br />
information when contacting RECONYX with questions about your camera.<br />
8 © RECONYX, LLP
Change Setup Menu<br />
Trigger – Use this option to turn your camera’s motion sensor ON or off, and<br />
select the sensitivity level of the sensor (low, medium, or HIGH), how many<br />
photos you want your camera to take per trigger (1, 2, 3, 5, 10), the interval<br />
between pictures (1, 3, 5, or 10 seconds, or <strong>RapidFire</strong>), and the quiet period<br />
(the time period after a trigger during which the camera will not respond to<br />
motion events: NO DELAY, 15 or 30 seconds, or 1 or 5 minutes).<br />
Time Lapse – Use this option to turn your camera’s time lapse photography<br />
on or OFF for morning and/or evening, and select the starting and ending<br />
times (in one hour increments), and the interval between pictures taken (1, 5,<br />
15, or 30 minutes, or 1 hour).<br />
Date/Time – Use this option to select the date (year, month, and day), time<br />
(hour and minute), and temperature scale (Fahrenheit or Celsius).<br />
CodeLoc – Use this option to add a four-digit security code to prevent<br />
unauthorized use of your camera, or change or remove an existing code.<br />
User Label – Use this option to add a label (up to 16 characters) that will be<br />
included with all photos taken by your camera. You can also view, change,<br />
or clear an existing label.<br />
Resolution – This option allows you to change the image resolution from<br />
HIGH to low. Low resolution allows faster frames per second and lets you<br />
save more images on your CompactFlash card.<br />
Note: <strong>Camera</strong> specifications for trigger speed and storage are based on the<br />
default (HIGH) resolution setting.<br />
Use Defaults – Use this option to remove any changes you’ve made to your<br />
camera’s settings and restore the factory default settings (shown above in<br />
CAPITAL letters).<br />
Main Menu – Use this option to switch back to the Main menu options; see<br />
preceding page for more information.<br />
www.reconyx.com 9
Mounting & Aiming the <strong>Camera</strong><br />
Mounting the <strong>Camera</strong><br />
Your RECONYX <strong>RapidFire</strong> camera can be mounted to a RECONYX<br />
VersaMount (see www.reconyx.com for more information) or a camera<br />
tripod by utilizing the threaded insert on the back of the camera housing.<br />
It may also be mounted to a tree by using the included adjustable bungee<br />
cord (as shown in the following photo). It is highly recommended that you<br />
use a theft deterrent device such as a cable and lock to help secure your<br />
camera against possible theft when it is in the field. Theft deterrent cables<br />
and locks are available from RECONYX (see www.reconyx.com to order).<br />
Mounting <strong>Camera</strong> with Adjustable Bungee Cord (included)<br />
10 © RECONYX, LLP
Optional Locking Methods (not included)<br />
Python style lock<br />
Aiming the <strong>Camera</strong><br />
Standard cable and lock<br />
The WalkTest mode is very useful for making sure that your camera’s active<br />
detection zones are located in the area where you would like to capture<br />
images that are triggered by animal movement.<br />
www.reconyx.com 11
General Information<br />
Image Data<br />
Your RECONYX <strong>RapidFire</strong> camera stores Image Data along with every<br />
picture it takes. Some of this information (date, time, trigger and sequence<br />
information, the infrared illuminator “flash” indicator, moon phase,<br />
temperature, and camera label) is displayed in Image Data bands above and<br />
below the image.<br />
Phases of the moon displayed in the image bands include: (new moon),<br />
(waxing crescent), (first quarter), (waxing gibbous), (full moon),<br />
(waning gibbous), (last quarter), and (waning crescent). Any time<br />
the infrared illuminator is used, (the infrared illuminator “flash” indicator)<br />
appears in the Image Data bands.<br />
12 © RECONYX, LLP
Troubleshooting<br />
For answers to questions about your RECONYX <strong>RapidFire</strong> camera for which<br />
you cannot find answers in this <strong>Instruction</strong> <strong>Manual</strong>, please check the<br />
“Frequently Asked Questions” (FAQ) section of our web site<br />
(www.reconyx.com). If you need additional assistance, please contact us at<br />
866-493-6064 or e-mail at support@reconyx.com.<br />
Troubleshooting your camera<br />
Focus Problems<br />
If your images appear cloudy or out of focus, first consider whether there<br />
was snow or frost on the camera lens; you may wish to check your camera<br />
after a fresh snowfall to be sure the lenses are not covered with snow. Next,<br />
check the lenses for dirt and water spots, and gently clean your lenses with a<br />
clean soft cloth and lens cleaner.<br />
False Triggers<br />
If you are getting false triggers, check your camera setup: the sun should not<br />
be shining directly on the face of the camera, and the camera’s field of view<br />
should be cleared of as much moving vegetation as possible. Careful<br />
placement and setup of your camera helps prevent false triggers. Turn down<br />
your camera’s motion sensitivity as a last resort; this reduces your ability to<br />
detect movement of warm-blooded animals, especially during the summer.<br />
Startup Problems<br />
If your camera won’t start up properly, try a different CF card. Be sure to<br />
erase the card before inserting it into the camera, and then try rebooting.<br />
Note: SanDisk ® CF cards are the RECONYX recommended brand for use<br />
with your camera.<br />
www.reconyx.com 13
Warranty & Safety Information<br />
Limited Warranty<br />
RECONYX hardware products are warranted for one (1) year. If during this period,<br />
through normal use, a hardware product becomes defective due to defects in<br />
materials or workmanship, RECONYX will either repair or replace the product. This<br />
warranty is void if a product failure results from accident, abuse, improper use by<br />
Buyer, disassembly, or unauthorized maintenance and repair.<br />
Software products are licensed to Buyer under the terms of the applicable RECONYX<br />
software license (contained within installation programs). If Buyer wishes to review the<br />
software license agreement before purchasing products from RECONYX, a copy of<br />
the software license may be obtained by request.<br />
Buyer must obtain a Return Material Authorization (RMA) number from RECONYX<br />
before returning any product(s) for repair or replacement. If RECONYX concludes that<br />
a returned product is not defective, Buyer will be notified, the product will be returned<br />
to Buyer at Buyer’s expense, and Buyer may be charged for RECONYX’s examination<br />
and testing of the product.<br />
This limited warranty is the sole warranty for hardware and software products offered<br />
by RECONYX and RECONYX shall not be liable for any amounts for said products<br />
except in compliance with this warranty.<br />
Safety Precautions<br />
Before using the camera, please ensure that you read and understand the following<br />
safety precautions. Always ensure that the camera is operated correctly.<br />
The safety precautions noted in this guide are intended to instruct you in the safe and<br />
correct operation of the camera and its accessories to prevent injuries or damage to<br />
yourself, other persons, and equipment.<br />
Preventing Malfunction<br />
Avoid Strong Magnetic Fields<br />
Never place the camera in close proximity to electric motors or other equipment<br />
generating strong electromagnetic fields. Exposure to strong magnetic fields may<br />
cause malfunctions or corrupt image data.<br />
14 © RECONYX, LLP
Avoid Condensation<br />
Moving the camera rapidly between hot and cold temperatures may cause<br />
condensation (water droplets) to form on its external and internal surfaces. You can<br />
avoid this by placing the camera in an airtight, resealable plastic bag and letting it<br />
adjust to temperature changes slowly before removing it from the bag.<br />
If Condensation Forms Inside the <strong>Camera</strong><br />
Stop using the camera immediately if you detect condensation inside the camera.<br />
Continued use may damage the camera. Remove the CF card and batteries from the<br />
camera and wait until the moisture evaporates completely before resuming use.<br />
Warnings<br />
• Store this equipment out of the reach of children and infants. Accidental damage to<br />
the camera or batteries by a child could result in serious injury.<br />
• Be particularly careful to keep the date (coin) battery used in the camera away from<br />
children. Seek medical assistance immediately if a child swallows a battery.<br />
• Do not allow water or other liquids to enter the interior of the camera. The interior<br />
has not been waterproofed. If the exterior comes into contact with liquids or salt air,<br />
wipe it dry with a soft, absorbent cloth. In the event that water or other foreign<br />
substances enter the interior, immediately turn the camera’s power off and remove<br />
the camera batteries. Continued use of the equipment may result in fire or electrical<br />
shock. Please consult your camera distributor or the closest RECONYX Customer<br />
Support Help Desk.<br />
• Use of power sources not expressly recommended for this equipment may lead to<br />
overheating, distortion of the equipment, fire, electrical shock, or other hazards. Use<br />
only the recommended power accessories. Any use of non-RECONYX power<br />
sources will void the warranty on your camera.<br />
• Do not mix battery types. You may run your camera on Alkaline or Nickel Metal<br />
Hydride (NiMH), but you should NEVER MIX BATTERY TYPES! Damage to the<br />
camera can result and your warranty will be voided if you do so.<br />
• Do not place the batteries near a heat source, expose them to direct flame or heat,<br />
or immerse them in water. Such exposure may damage the batteries and lead to<br />
the leakage of corrosive liquids, fire, electrical shock, explosion, or serious injury.<br />
• Do not attempt to disassemble, alter, or apply heat to the batteries. There is serious<br />
risk of injury due to an explosion. Immediately flush with water any area of the body<br />
or clothing that comes into contact with the inner contents of a battery. If the eyes or<br />
www.reconyx.com 15
mouth contact these substances, immediately flush with water and seek medical<br />
assistance.<br />
• Avoid dropping or subjecting the batteries to severe impacts that could damage the<br />
casings. It could lead to leakage and injury.<br />
• Do not short-circuit the battery terminals with metallic objects, such as key holders.<br />
It could lead to overheating, burns, and other injuries.<br />
• Use of batteries not expressly recommended for this equipment may cause<br />
explosions or leaks, resulting in fire, injury, and damage to the surroundings. Use<br />
only recommended batteries and accessories.<br />
• Avoid using, placing, or storing the equipment in places subject to strong sunlight or<br />
high temperatures, such as the dashboard or trunk (boot) of a car. Exposure to<br />
intense sunlight and heat may cause the batteries to leak, overheat or explode,<br />
resulting in fire, burns or other injuries. High temperatures may also cause<br />
deformation of the casing.<br />
• Be careful not to bang the camera or subject it to strong impacts or shocks that<br />
could lead to injury or damage the equipment.<br />
• When using desiccant, the following precautions should be followed: Keep out of<br />
reach of children, do not eat, and do not inhale desiccant dust. If the desiccant<br />
packet tears or breaks, wash your hands if they come in direct contact with the<br />
desiccant. Desiccant may cause eye, skin, and mucous membrane irritation.<br />
Prolonged inhalation may cause lung damage. Asthma can be aggravated by<br />
exposure to desiccant.<br />
• If you know or suspect desiccant has been ingested, seek medical assistance for<br />
further treatment, observation, and support if necessary. For eye contact, flush with<br />
water for at least 15 minutes. For skin contact, wash affected area with soap and<br />
water. For inhalation of desiccant dust, move affected person into an environment<br />
with fresh air. For accidental ingestion, drink at least two glasses of water.<br />
16 © RECONYX, LLP
Copyright & Trademark Information<br />
<strong>RapidFire</strong> <strong>Instruction</strong> <strong>Manual</strong>, June 2007<br />
© 2007 by RECONYX<br />
3828 Creekside Lane, Suite 2, Holmen, WI 54636<br />
This manual provides detailed instructions for getting started with the<br />
RECONYX RC55 <strong>RapidFire</strong> Color IR or RM45 <strong>RapidFire</strong> IR camera,<br />
changing the camera settings, and troubleshooting common problems.<br />
<strong>RapidFire</strong> is a trademark of RECONYX.<br />
Other trademarks and registered trademarks referred to in this document:<br />
• BuckView, CodeLoc, InstaOn, NearVideo and VersaMount are trademarks<br />
of RECONYX.<br />
• CompactFlash is a registered trademark of the CompactFlash Association.<br />
• SanDisk is a registered trademark of SanDisk Corporation.<br />
All other trademarks and copyrights referred to are the property of their<br />
respective owners.<br />
www.reconyx.com 17
RECONYX, LLP<br />
3828 Creekside Lane, Suite 2<br />
Holmen, WI 54636<br />
866-493-6064<br />
www.reconyx.com