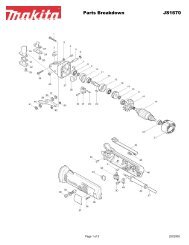
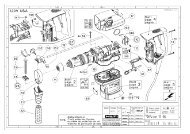
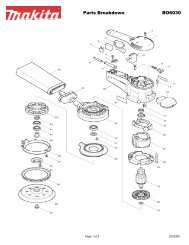
Makita - HM1303 - Rotary Hammer Drill - GGH Hire Ltd
Makita - HM1303 - Rotary Hammer Drill - GGH Hire Ltd
Makita - HM1303 - Rotary Hammer Drill - GGH Hire Ltd

You also want an ePaper? Increase the reach of your titles
YUMPU automatically turns print PDFs into web optimized ePapers that Google loves.
FUNCTIONAL<br />
DESCRIPTION<br />
CAUTION:<br />
• Always be sure that the tool is switched off and<br />
unplugged before adjusting or checking function on the<br />
tool.<br />
1<br />
2<br />
002890<br />
Switch action<br />
CAUTION:<br />
• Before plugging in the tool, always check to see that the<br />
switch trigger actuates properly and returns to the “OFF”<br />
position when released.<br />
• Switch can be locked in “ON” position for ease of<br />
operator comfort during extended use. Apply caution<br />
when locking tool in “ON” position and maintain firm<br />
grasp on tool.<br />
To start the tool, simply pull the switch trigger. Release the<br />
switch trigger to stop.<br />
For continuous operation, pull the switch trigger and then<br />
slide down the lock button.<br />
To stop the tool from the locked position, pull the switch trigger<br />
fully, then release it.<br />
1. Lock button<br />
2. Switch trigger<br />
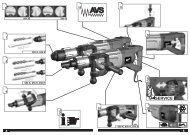
ASSEMBLY<br />
CAUTION:<br />
• Always be sure that the tool is switched off and<br />
unplugged before carrying out any work on the tool.<br />
5<br />
1<br />
2<br />
002908<br />
3<br />
4<br />
1. Nut<br />
2. Set bolt<br />
3. Projecting portion of side handle<br />
4. Notch in set bolt<br />
5. Side handle<br />
Side handle (auxiliary handle)<br />
The side handle can be either freely swiveled or secured at<br />
one position for use during tool operation. Just loosen the nut<br />
to swivel the handle freely.<br />
To secure the handle at a fixed position, first loosen the nut<br />
and swing the handle to the desired position for use. Then<br />
tighten the nut firmly. If the set bolt turns together with the nut<br />
when you secure the nut, see that the projecting portion of<br />
the side handle fits into the notch on the head of the set bolt.<br />
6