

INSTALLATION INSTRUCTIONS HS25 SERIES UNITS - Lennox
INSTALLATION INSTRUCTIONS HS25 SERIES UNITS - Lennox
INSTALLATION INSTRUCTIONS HS25 SERIES UNITS - Lennox

Create successful ePaper yourself
Turn your PDF publications into a flip-book with our unique Google optimized e-Paper software.
PRODUCT LITERATURE<br />
¤1995 <strong>Lennox</strong> Industries Inc.<br />
Dallas, Texas<br />
£<br />
<strong>INSTALLATION</strong><br />
<strong>INSTRUCTIONS</strong><br />
+6 6(5,(6 81,76<br />
&21'(16,1* 81,76<br />
0<br />
<br />
6XSHUVHGHV 0<br />
/LWKR 86$<br />
TABLE OF CONTENTS<br />
<strong>HS25</strong> CONDENSING UNIT ......................... 1<br />
SHIPPING AND PACKING LIST ...................... 1<br />
GENERAL INFORMATION .......................... 1<br />
<strong>HS25</strong> UNIT DIMENSIONS .......................... 2<br />
<strong>HS25</strong> PARTS ARRANGEMENT ...................... 3<br />
SETTING THE UNIT ................................ 3<br />
ELECTRICAL ...................................... 3<br />
PLUMBING ....................................... 5<br />
REFRIGERATION .................................. 5<br />
LEAK TESTING .................................... 5<br />
EVACUATION ..................................... 5<br />
START--UP ........................................ 6<br />
CHARGING ....................................... 7<br />
SYSTEM OPERATION .............................. 7<br />
MAINTENANCE ................................... 7<br />
<strong>HS25</strong> CHECK POINTS .............................. 8<br />
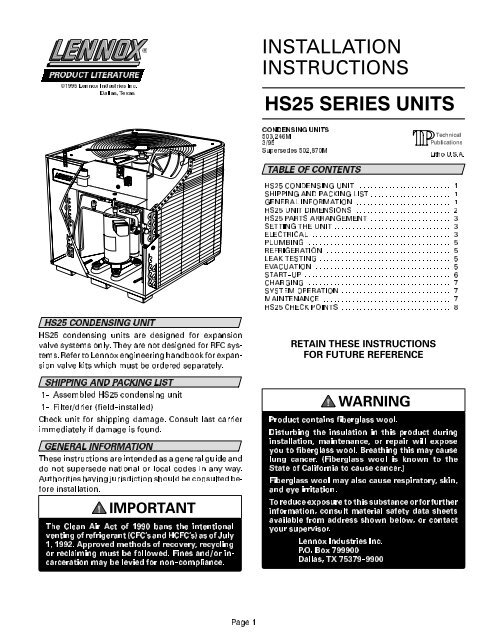
<strong>HS25</strong> CONDENSING UNIT<br />
<strong>HS25</strong> condensing units are designed for expansion<br />
valve systems only. They are not designed for RFC systems.<br />
Refer to <strong>Lennox</strong> engineering handbook for expansion<br />
valve kits which must be ordered separately.<br />
SHIPPING AND PACKING LIST<br />
1-- Assembled <strong>HS25</strong> condensing unit<br />
1-- Filter/drier (field--installed)<br />
Check unit for shipping damage. Consult last carrier<br />
immediately if damage is found.<br />
GENERAL INFORMATION<br />
These instructions are intended as a general guide and<br />
do not supersede national or local codes in any way.<br />
Authorities having jurisdiction should be consulted before<br />
installation.<br />
IMPORTANT<br />
The Clean Air Act of 1990 bans the intentional<br />
venting of refrigerant (CFC’s and HCFC’s) as of July<br />
1, 1992. Approved methods of recovery, recycling<br />
or reclaiming must be followed. Fines and/or incarceration<br />
may be levied for non--compliance.<br />
RETAIN THESE <strong>INSTRUCTIONS</strong><br />
FOR FUTURE REFERENCE<br />
WARNING<br />
Product contains fiberglass wool.<br />
Disturbing the insulation in this product during<br />
installation, maintenance, or repair will expose<br />
you to fiberglass wool. Breathing this may cause<br />
lung cancer. (Fiberglass wool is known to the<br />
State of California to cause cancer.)<br />
Fiberglass wool may also cause respiratory, skin,<br />
and eye irritation.<br />
To reduce exposure to this substance or for further<br />
information, consult material safety data sheets<br />
available from address shown below, or contact<br />
your supervisor.<br />
<strong>Lennox</strong> Industries Inc.<br />
P.O. Box 799900<br />
Dallas, TX 75379--9900<br />
3DJH
<strong>HS25</strong> UNIT DIMENSIONS--INCHES (MM)<br />
INLET AIR<br />
<strong>HS25</strong><br />
CONDENSING<br />
UNIT<br />
COMPRESSOR<br />
INLET<br />
AIR<br />
B<br />
SUCTION LINE<br />
INLET<br />
(<strong>HS25</strong>-211-460)<br />
LIQUID<br />
LINE INLET<br />
(<strong>HS25</strong>-510-650)<br />
ELECTRICAL<br />
INLETS<br />
INLET AIR<br />
TOP VIEW<br />
C<br />
DISCHARGE AIR<br />
A<br />
LIQUID<br />
LINE INLET<br />
(<strong>HS25</strong>-211-460)<br />
SUCTION<br />
LINE INLET<br />
(<strong>HS25</strong>-510-650)<br />
L<br />
D<br />
2-9/16<br />
(65)<br />
H<br />
J<br />
K<br />
K<br />
J<br />
2-3/4 (70)<br />
F<br />
4-7/8 (22) 4<br />
4<br />
(102)<br />
(102)<br />
E<br />
G<br />
FRONT VIEW<br />
H<br />
1-3/8<br />
(35)<br />
SIDE VIEW<br />
6-1/16<br />
(154)<br />
Model No. A B C D E F G H J K L<br />
<strong>HS25</strong>-211<br />
in. 27-7/8 25-7/8 29-7/8 7-1/4 22-7/16 14-7/16 22-1/8 1-7/8 2-7/8 5-1/2 4-1/2<br />
<strong>HS25</strong>-261 mm 708 657 759 184 570 367 562 48 73 140 114<br />
<strong>HS25</strong>-311 in. 30-7/8 32-1/8 34-1/16 8-1/4 26-5/8 18-5/8 28-1/8 2 3-7/8 7-1/2 4-1/2<br />
<strong>HS25</strong>-411-413<br />
413<br />
<strong>HS25</strong>-461-463 mm 784 816 865 210 676 473 714 51 98 191 114<br />
<strong>HS25</strong>-511-513<br />
<strong>HS25</strong>-651-653<br />
in. 40-7/8 32-1/8 34-1/16 15-1/4 26-5/8 18-5/8 28-1/8 2 3-7/8 7-1/2 8-1/2<br />
mm 1038 816 865 387 676 473 714 51 98 191 216<br />
3DJH
<strong>HS25</strong> PARTS ARRANGEMENT<br />
CONDENSER FAN<br />
(NOT SHOWN)<br />
TOP OF CABINET<br />
DUAL CAPACITOR<br />
(Single--Phase Units)<br />
<strong>HS25</strong> UNIT COMPONENTS<br />
TD1--1<br />
TIME DELAY<br />
FAN CAPACITOR<br />
(Three--Phase Units)<br />
CONTACTOR<br />
THERMOMETER<br />
WELL<br />
LIQUID LINE<br />
SERVICE VALVE<br />
AND GAUGE PORT<br />
HIGH PRESSURE<br />
SWITCH<br />
COMPRESSOR<br />
SUCTION<br />
SERVICE<br />
VALVE<br />
AND GAUGE PORT<br />
(LIVE)<br />
SUCTION<br />
GAUGE<br />
PORT<br />
COMPRESSOR<br />
TERMINAL BOX<br />
ACCUMULATOR<br />
(<strong>HS25</strong>--511/651 ONLY)<br />
SETTING THE UNIT<br />
Refer to unit dimensions on page 1 for sizing mounting<br />
slab, platforms or supports. Refer to figure 2 for installation<br />
clearances.<br />
<strong>INSTALLATION</strong> CLEARANCES<br />
NOTE-- 48” (1219mm) CLEARANCE REQUIRED<br />
ON TOP OF UNIT.<br />
*36”<br />
(914mm)<br />
),*85( <br />
A--Slab Mounting<br />
When installing unit at grade level, install on a level<br />
slab high enough above grade to allow adequate drainage<br />
of water. Top of slab should be located so run--off<br />
water from higher ground will not collect around unit.<br />
B--Roof Mounting<br />
Install unit at a minimum of 4 inches above surface of the<br />
roof. Care must be taken to ensure weight of unit is properly<br />
distributed over roof joists and rafters. Either redwood<br />
or steel supports are recommended.<br />
36”<br />
(914mm)<br />
*36”<br />
(914mm)<br />
FIGURE 2<br />
36”<br />
(914mm)<br />
*One dimension may be 12” (305 mm).<br />
ELECTRICAL<br />
Wiring must conform to current standards of the National<br />
Electric Code (NEC), Canadian Electrical Code<br />
(CEC) and local codes. Refer to the furnace or blower<br />
coil installation instructions for additional wiring application<br />
diagrams and refer to unit rating plate for<br />
minimum circuit ampacity and maximum overcurrent<br />
protection size.<br />
WARNING<br />
Unit must be grounded in accordance with<br />
national and local codes.<br />
Electric Shock Hazard.<br />
Can cause injury or death.<br />
3DJH
A--Line Voltage<br />
To facilitate conduit, knockouts are provided in cabinet<br />
panel. Route conduit through knockout in cabinet and<br />
connect to side of control panel. Refer to figure 3 for<br />
thermostat, furnace and condensing unit wire connections<br />
and figure 4 for field wiring diagram.<br />
Note--Units are approved for use with copper conductors<br />
only.<br />
B--24V, Class II Circuit<br />
24V, Class II Circuit connections are made up below control<br />
box.<br />
Note--A complete unit wiring diagram is located inside<br />
the unit access panel.<br />
<strong>HS25</strong> and FURNACE (GAS OR ELECTRIC)<br />
THERMOSTAT CONNECTIONS<br />
(Some connections may not apply.<br />
Refer to specific thermostat and furnace.)<br />
Furnace Thermostat <strong>HS25</strong><br />
R<br />
W1<br />
W2<br />
Y<br />
G<br />
C<br />
POWER<br />
1ST STAGE AUX. HEAT<br />
2ND STAGE AUX. HEAT<br />
W2<br />
INDOOR BLOWER<br />
COMMON<br />
R<br />
W1<br />
Y<br />
G<br />
C<br />
COMPRESSOR<br />
COMMON<br />
Condensing<br />
Unit<br />
<strong>HS25</strong><br />
COMPRESSOR<br />
<strong>HS25</strong><br />
COMMON<br />
FIGURE 3<br />
<strong>HS25</strong> CONDENSING UNIT<br />
FIELD WIRING DIAGRAM<br />
CONDENSING UNIT<br />
ROOM THERMOSTAT<br />
TYPICAL<br />
INDOOR UNIT<br />
C<br />
Y1<br />
G<br />
W<br />
RC<br />
RH<br />
TB1<br />
TRANSFORMER<br />
R<br />
W1<br />
G<br />
TO<br />
HEATING<br />
CONTROLS<br />
TO<br />
COOLING SPEED<br />
24v<br />
T1<br />
YELLOW<br />
BLACK OR BLUE<br />
NOTE--SEE UNIT WIRING DIAGRAM<br />
FOR POWER SUPPLY CONNECTIONS.<br />
TO 24V CLASS II POWER SOURCE<br />
-- 20 VA MINIMUM<br />
W2<br />
W3<br />
C<br />
24V,<br />
CLASS II<br />
JUNCTION<br />
BOX<br />
TO<br />
HEATING<br />
SPEED<br />
POWER<br />
YELLOW<br />
GROUND<br />
PER NATIONAL<br />
AND LOCAL<br />
CODES<br />
K3 INDOOR BLOWER RELAY<br />
NOTE--IF INDOOR UNIT IS NOT EQUIPPED WITH BLOWER RELAY, IT MUST BE<br />
FIELD PROVIDED AND INSTALLED (P--8--3251 OR EQUIVALENT)<br />
24V, CLASS II VOLTAGE INSTALLED AT FACTORY<br />
24V, CLASS II VOLTAGE FIELD INSTALLED<br />
FIGURE 4<br />
3DJH
PLUMBING<br />
Field refrigerant piping consists of liquid and suction<br />
lines from the condensing unit (sweat connections) to<br />
the indoor evaporator coil. Use <strong>Lennox</strong> L10 (flare) or L15<br />
(sweat) series line sets as shown in table 1 or use field--<br />
fabricated refrigerant lines. Refer to the piping section of<br />
the <strong>Lennox</strong> Unit Information Service Manual for proper<br />
size, type and application of field--fabricated lines.<br />
Sweat Connection Procedure<br />
1-- End of refrigerant line must be cut square, kept<br />
round, free from nicks or dents and deburred (I.D.<br />
and O.D.)<br />
2-- Wrap a wet cloth around the valve body and copper<br />
tube stub; braze the line set tubing to the valve.<br />
3-- Quench joint with water or a wet cloth to prevent<br />
possible heat damage to the valve core and opening<br />
port.<br />
IMPORTANT--Tube end must stay bottomed in the<br />
fitting during final assembly to ensure proper seating,<br />
sealing and rigidity.<br />
4-- Install filter drier, provided with unit, in the liquid<br />
line as close as possible to the expansion device.<br />
If refrigerant tubes are routed through a wall, seal and<br />
isolate the opening so vibration is not transmitted to<br />
the building.<br />
NOTE-Line length should be no greater than 50 feet<br />
(15.2 m). Select line set diameters from table 1 to ensure<br />
oil return to compressor.<br />
+6<br />
81,7<br />
<br />
<br />
<br />
<br />
<br />
<br />
<br />
/,48,'<br />
/,1(<br />
LQ<br />
PP<br />
LQ<br />
PP<br />
LQ<br />
PP<br />
LQ<br />
PP<br />
7$%/( <br />
5()5,*(5$17 /,1( .,76<br />
68&7,21<br />
/,1(<br />
LQ<br />
PP<br />
LQ<br />
PP<br />
LQ<br />
PP<br />
LQ<br />
PP<br />
/<br />
/,1( 6(76<br />
/ <br />
IW IW<br />
PP<br />
/ <br />
IW IW<br />
PP<br />
/ <br />
IW IW<br />
PP<br />
),(/'<br />
)$%5,&$7('<br />
/<br />
/,1( 6(76<br />
/ <br />
IW IW<br />
PP<br />
/ <br />
IW IW<br />
PP<br />
/ <br />
IW IW<br />
PP<br />
),(/'<br />
)$%5,&$7('<br />
REFRIGERATION<br />
Service Valves and Gauge Manifold Attachment<br />
The liquid line and suction line service valves and<br />
gauge ports are accessible on inside of unit. These<br />
gauge ports are used for leak testing, evacuating,<br />
charging and checking charge.<br />
IMPORTANT--Services valves are closed to line set connections.<br />
Do not open until refrigerant lines and indoor<br />
coil have been leak tested and evacuated. All precautions<br />
should be exercised to keep the system free from<br />
dirt, moisture and air.<br />
/($. 7(67,1*<br />
After the line set has been connected to the indoor and<br />
outdoor units, the line set connections and indoor unit<br />
must be checked for leaks.<br />
WARNING<br />
Never use oxygen to pressurize refrigeration or air<br />
conditioning system. Oxygen will explode on contact<br />
with oil and could cause personal injury.<br />
When using high pressure gas such as nitrogen or<br />
CO 2 for this purpose, be sure to use a regulator<br />
that can control the pressure down to 1 or 2 psig<br />
(6.9 to 13.8 kPa).<br />
Using an Electronic Leak Detector or Halide<br />
1-- Connect a cylinder of nitrogen with a pressure regulating<br />
valve to the center port of the manifold<br />
gauge set.<br />
2-- Connect the high pressure hose of the manifold<br />
gauge set to the service port of the suction valve.<br />
(Normally, the high pressure hose is connected to<br />
the liquid line port, however, connecting it to the<br />
suction port better protects the manifold gauge set<br />
from high pressure damage.)<br />
3-- With both manifold valves closed, open the valve<br />
on the R22 bottle (vapor only).<br />
4-- Open the high pressure side of the manifold to allow<br />
R22 into the line set and indoor unit. Weigh in a<br />
trace amount of R22. [A trace amount is a maximum<br />
of 2 ounces (57g) refrigerant or 3 pounds (31<br />
kPa) pressure]. Close the valve on the R22 bottle<br />
and the valve on the high pressure side of the manifold<br />
gauge set. Disconnect R22 bottle.<br />
5-- Adjust nitrogen pressure to 150 psig (1034 kPa). Open<br />
the valve on the high side of the manifold gauge set<br />
which will pressurize line set and indoor unit.<br />
6-- After a short period of time, open a refrigerant port<br />
to make sure the refrigerant added is adequate to be<br />
detected. (Amounts of refrigerant will vary with line<br />
lengths.) Check all joints for leaks. Purge nitrogen<br />
and R22 mixture. Correct any leaks and recheck.<br />
(9$&8$7,1*<br />
Evacuating the system of non--condensables is critical<br />
for proper operation of the unit. Non--condensables are<br />
defined as any gas that will not condense under temperatures<br />
and pressures present during operation of an air<br />
conditioning system. Non--condensables and water vapor<br />
combine with refrigerant to produce substances<br />
that corrode copper piping and compressor parts.<br />
1-- Connect manifold gauge set to the service valve<br />
ports as follows: low pressure gauge to suction<br />
line service valve; high pressure gauge to liquid<br />
line service valve.<br />
3DJH
2-- Connect the vacuum pump (with vacuum gauge)<br />
to the center port of the manifold gauge set.<br />
3-- Open both manifold valves and start vacuum pump.<br />
4-- Evacuate the line set and indoor unit to anabsolute<br />
pressure of 23mm of mercury or approximately 1<br />
inch of mercury. During the early stages of evacuation,<br />
it is desirable to close the manifold gauge<br />
valve at least once to determine if there is a rapid<br />
rise in absolute pressure. A rapid rise in pressure<br />
indicates a relatively large leak. If this occurs, the<br />
leak testing procedure must be repeated.<br />
NOTE -- The term absolute pressure means the total<br />
actual pressure within a given volume or system,<br />
above the absolute zero of pressure. Absolute<br />
pressure in a vacuum is equal to atmospheric pressure<br />
minus vacuum pressure.<br />
5-- When the absolute pressure reaches 23mm of mercury,<br />
close the manifold gauge valves, turn off the<br />
vacuum pump and disconnect the manifold gauge<br />
center port hose from vacuum pump. Attach the<br />
manifold center port hose to a nitrogen cylinder<br />
with pressure regulator set to 150 psig (1034 kPa)<br />
and purge the hose. Open the manifold gauge<br />
valves to break the vacuum in the line set and indoor<br />
unit. Close the manifold gauge valves.<br />
&$87,21<br />
Danger of Equipment Damage.<br />
Avoid deep vacuum operation. Do not use compressors<br />
to evacuate a system.<br />
Extremely low vacuums can cause internal arcing<br />
and compressor failure.<br />
Damage caused by deep vacuum operation will<br />
void warranty.<br />
6-- Shut off the nitrogen cylinder and remove the manifold<br />
gauge hose from the cylinder. Open the manifold<br />
gauge valves to release the nitrogen from the<br />
line set and indoor unit.<br />
7-- Reconnect the manifold gauge to the vacuum<br />
pump, turn the pump on and continue to evacuate<br />
the line set and indoor unit until the absolute pressure<br />
does not rise above .5mm of mercury within a<br />
20 minute period after shutting off the vacuum<br />
pump and closing the manifold gauge valves.<br />
8-- Depending on the equipment used to determine<br />
the vacuum level, absolute pressure of .5mm of<br />
mercury is equal to 500 microns.<br />
9-- When the absolute pressure requirement above has<br />
been met, disconnect the manifold hose from the<br />
vacuum pump and connect it to an upright bottle of<br />
R22 refrigerant. Open the manifold gauge valves to<br />
break the vacuum in the line set and indoor unit.<br />
Close manifold gauge valves and shut off R22 bottle<br />
and remove manifold gauge set.<br />
START--UP<br />
Cooling Start--up<br />
1-- Rotate the fan to check for frozen bearings or binding.<br />
2-- Inspect all factory and field--installed wiring for<br />
loose connections.<br />
3-- Open liquid line and suction line service valves to<br />
release refrigerant charge (contained in condensing<br />
unit) into system. Replace and tighten caps.<br />
Use a back--up wrench on the suction and liquid<br />
valves when removing or replacing valve caps.<br />
4-- To open suction valve, remove hex cap and turn<br />
valve stem fully open using an Allen (hex) wrench.<br />
To open liquid valve, remove cap and turn valve<br />
stem until it is fully open and back--seated.<br />
NOTE--When replacing valve caps, the caps should<br />
be made finger tight and then tightened an additional<br />
1/6th of a turn.<br />
5-- Check voltage supply at the disconnect switch. The<br />
voltage must be within range listed on unit nameplate.<br />
If not, do not start equipment until the power<br />
company has been consulted and the voltage<br />
condition corrected.<br />
6-- Set thermostat for a cooling demand, turn on power<br />
to blower and close condensing unit disconnect<br />
switch to start.<br />
7-- Recheck unit voltage with unit running. Power<br />
must be within range shown on unit nameplate.<br />
Check amperage draw of unit. Refer to unit nameplate<br />
for correct running amps.<br />
Three--Phase Compressor Rotation<br />
Three--phase scroll compressors must be phased sequentially<br />
to ensure correct compressor rotation and<br />
operation. At compressor start--up, a rise in discharge<br />
and drop in suction pressures indicate proper compressor<br />
phasing and operation. If discharge and suctions<br />
pressures do not perform normally, follow the<br />
steps below to correctly phase in the unit.<br />
1-- Disconnect power to the unit.<br />
2-- Reverse any two field power leads to the unit.<br />
3-- Reapply power to the unit.<br />
Discharge and suction pressures should operate at<br />
their normal start--up ranges.<br />
3DJH
NOTE--Compressor noise level will be significantly<br />
higher when phasing is incorrect and the unit will not<br />
provide cooling when compressor is operating backwards.<br />
Continued backward operation will cause the<br />
compressor to cycle on internal protector.<br />
3DJH
CHARGING<br />
Units are factory charged with the amount of R--22 refrigerant<br />
indicated on the unit rating plate. This charge<br />
is based on a matching indoor coil and outdoor coil<br />
with 20 ft. (6.1m) line set. For varying lengths of line set,<br />
refer to table 2 for refrigerant charge adjustment.<br />
/LTXLG /LQH<br />
6HW 'LDPHWHU<br />
LQ<br />
PP<br />
7$%/( <br />
2]V SHU IW J SHU P DGMXVW<br />
IURP IW P OLQH VHW<br />
RXQFHV SHU IW<br />
J SHU P<br />
,I OLQH OHQJWK LV JUHDWHU WKDQ IW P DGG WKLV DPRXQW ,I OLQH OHQJWK<br />
LV OHVV WKDQ IW P VXEWUDFW WKLV DPRXQW<br />
If the system is void of refrigerant, the recommended<br />
and most accurate method of charging is to weigh<br />
the refrigerant according to the total amount shown<br />
on the unit nameplate. If weighing facilities are not<br />
available or if unit is just low on charge, use the following<br />
procedure:<br />
([SDQVLRQ 9DOYH 6\VWHPV<br />
The following procedure is intended as a general<br />
guide and is for use on expansion valve systems only.<br />
For best results, indoor temperature should be 70E F<br />
(21EC) to 80E F (26EC). Be sure to monitor system<br />
pressures while charging.<br />
1-- Record outdoor ambient temperature.<br />
2-- Operate unit to allow system to stabilize both before<br />
and after each charge adjustment.<br />
3-- Check to make sure thermometer well is filled<br />
with mineral oil before checking liquid line temperature.<br />
4-- Outdoor temperature should be 60E F(16EC) or<br />
above. Place thermometer in well and read liquid<br />
line temperature. Difference between ambient<br />
and liquid temperatures should match values<br />
given in table 3. Refrigerant must be added to<br />
lower approach temperature and removed to increase<br />
approach temperature. Loss of charge results<br />
in low capacity and efficiency.<br />
02'(/ 12<br />
+6 <br />
+6 <br />
+6 <br />
+6 <br />
+6 <br />
+6 <br />
+6 <br />
7$%/( <br />
$3352$&+ 0(7+2'<br />
/,48,' 7(03 0,186 $0%,(17 7(03 E) E&<br />
<br />
<br />
<br />
<br />
<br />
<br />
<br />
1RWH )RU EHVW UHVXOWV WKH VDPH WKHUPRPHWHU VKRXOG EH XVHG WR FKHFN<br />
ERWK RXWGRRU DPELHQW DQG OLTXLG WHPSHUDWXUHV<br />
SYSTEM OPERATION<br />
Condensing unit and indoor blower cycle on demand<br />
from room thermostat. When thermostat blower<br />
switch is moved to ON position, indoor blower operates<br />
continuously.<br />
Compressor Time Delay (TD1)<br />
A compressor time delay is used to prevent compressor<br />
short cycling and to prevent the compressor from<br />
running backwards. When there is demand for a cooling<br />
cycle, the control delays the compressor from starting<br />
for a minimum of 8.5 seconds. Do not bypass the<br />
control.<br />
Discharge Thermostat<br />
The Copeland Scroll compressor is equipped with a<br />
discharge line thermostat that removes power from<br />
the compressor when discharge temperatures reach<br />
approximately 280E F (138EC). The thermostat resets<br />
automatically at 130E F (54EC).<br />
CAUTION<br />
Danger of equipment damage. Do not bypass the<br />
discharge thermostat.<br />
High Pressure Switch<br />
<strong>HS25</strong> units are equipped with a high pressure switch<br />
that is located in the discharge line of the compressor.<br />
The switch (SPST, manual reset, normally closed) removes<br />
power from the compressor when discharge<br />
pressure rises above factory setting at 410 + 10 psi<br />
(2827 + 69 kPa).<br />
Low Pressure Switch<br />
<strong>HS25</strong> units are also equipped with a low pressure<br />
switch that is located in the suction line of the compressor.<br />
The switch (SPST, auto--reset, normally closed) removes<br />
power from the compressor when suction line<br />
pressure drops below factory setting at 25 +5 psi (172 +<br />
34 kPa).<br />
MAINTENANCE<br />
WARNING<br />
Electric shock hazard. Can cause injury<br />
or death. Before attempting to perform<br />
any service or maintenance, turn<br />
the electrical power to unit OFF at disconnect<br />
switch(es). Unit may have<br />
multiple power supplies.<br />
At the beginning of each cooling season, the system<br />
should be checked as follows:<br />
1-- Clean and inspect condenser coil. Coil may be<br />
flushed with a water hose.<br />
2-- Condenser fan motor is prelubricated and sealed.<br />
No further lubrication is needed.<br />
3DJH
3-- Visually inspect connecting lines and coils for evidence<br />
of oil leaks.<br />
4-- Check wiring for loose connections.<br />
5-- Check for correct voltage at unit (unit operating).<br />
6-- Check amp--draw condenser fan motor.<br />
Unit nameplate _________ Actual ____________ .<br />
NOTE--If owner complains of insufficient cooling, the unit<br />
should be gauged and refrigerant charge checked. Refer<br />
to section on refrigerant charging in this instruction.<br />
Evaporator Coil<br />
1-- Clean coil, if necessary.<br />
2-- Check connecting lines and coils for evidence of oil<br />
leaks.<br />
3-- Check condensate line and clean, if necessary.<br />
Indoor Unit<br />
1-- Clean or change filters.<br />
2-- Adjust blower speed for cooling. The pressure<br />
drop over the coil should be measured to determine<br />
the correct blower CFM. Refer to the unit information<br />
service manual for pressure drop tables<br />
and procedure.<br />
3-- On belt drive blowers, check belt for wear and<br />
proper tension.<br />
4-- Check all wiring for loose connections<br />
5-- Check for correct voltage at unit (blower operating).<br />
6-- Check amp--draw on blower motor<br />
Unit nameplate_________ Actual ____________.<br />
<strong>HS25</strong> CHECK POINTS<br />
67$57 83 $1' 3(5)250$1&( &+(&. /,67<br />
-RE 1DPH<br />
-RE /RFDWLRQ<br />
,QVWDOOHU<br />
8QLW 0RGHO 1R<br />
1DPHSODWH 9ROWDJH<br />
-RE 1R<br />
&LW\<br />
&LW\<br />
6HULDO 1R<br />
$PSV<br />
'DWH<br />
6WDWH<br />
6WDWH<br />
6HUYLFHPDQ<br />
0LQLPXP &LUFXLW $PSDFLW\<br />
0D[LPXP 2YHUFXUUHQW 3URWHFWLRQ 6L]H<br />
6XSSO\<br />
&RPSUHVVRU<br />
&RQGHQVHU )DQ<br />
(OHFWULFDO &RQQHFWLRQV 7LJKW"<br />
6XSSO\ 9ROWDJH 8QLW 2II<br />
&22/,1* 6(&7,21<br />
5HIULJHUDQW /LQHV<br />
/HDN &KHFNHG"<br />
6HUYLFH 9DOYHV %DFNVHDWHG"<br />
3URSHUO\ ,QVXODWHG"<br />
&RQGHQVHU )DQ &KHFNHG"<br />
6HUYLFH 9DOYH &DSV 7LJKW"<br />
6HUYLFH 9DOYH &DSV 7LJKW"<br />
9ROWDJH :LWK &RPSUHVVRU 2SHUDWLQJ<br />
,QGRRU )LOWHU &OHDQ"<br />
,QGRRU %ORZHU 530<br />
63 'URS 2YHU (YDSRUDWRU 'U\<br />
&RQGHQVHU (QWHULQJ $LU 7HPSHUDWXUH<br />
'LVFKDUJH 3UHVVXUH<br />
6XFWLRQ 3UHVVXUH<br />
5HIULJHUDQW &KDUJH &KHFNHG"<br />
7+(50267$7<br />
&DOLEUDWHG" 3URSHUO\ 6HW"<br />
/HYHO"<br />
3DJH


