

ComfortSense 7000 Thermostat Homeowners Manual - Lennox
ComfortSense 7000 Thermostat Homeowners Manual - Lennox
ComfortSense 7000 Thermostat Homeowners Manual - Lennox

You also want an ePaper? Increase the reach of your titles
YUMPU automatically turns print PDFs into web optimized ePapers that Google loves.
2009 <strong>Lennox</strong> Industries Inc.<br />
Dallas, Texas, USA<br />
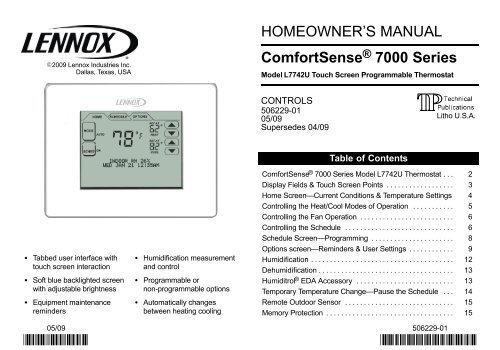
HOMEOWNER’S MANUAL<br />
<strong>ComfortSense</strong> ® <strong>7000</strong> Series<br />
Model L7742U Touch Screen Programmable <strong>Thermostat</strong><br />
CONTROLS<br />
506229−01<br />
05/09<br />
Supersedes 04/09<br />
Litho U.S.A.<br />
Tabbed user interface with<br />
touch screen interaction<br />
Soft blue backlighted screen<br />
with adjustable brightness<br />
Equipment maintenance<br />
reminders<br />
Humidification measurement<br />
and control<br />
Programmable or<br />
non−programmable options<br />
Automatically changes<br />
between heating cooling<br />
Table of Contents<br />
<strong>ComfortSense</strong> ® <strong>7000</strong> Series Model L7742U <strong>Thermostat</strong> . . . 2<br />
Display Fields & Touch Screen Points . . . . . . . . . . . . . . . . . . 3<br />
Home ScreenCurrent Conditions & Temperature Settings 4<br />
Controlling the Heat/Cool Modes of Operation . . . . . . . . . . . 5<br />
Controlling the Fan Operation . . . . . . . . . . . . . . . . . . . . . . . . . 6<br />
Controlling the Schedule . . . . . . . . . . . . . . . . . . . . . . . . . . . . . 6<br />
Schedule ScreenProgramming . . . . . . . . . . . . . . . . . . . . . . 8<br />
Options screenReminders & User Settings . . . . . . . . . . . . 9<br />
Humidification . . . . . . . . . . . . . . . . . . . . . . . . . . . . . . . . . . . . . . 12<br />
Dehumidification . . . . . . . . . . . . . . . . . . . . . . . . . . . . . . . . . . . . 13<br />
Humiditrol ® EDA Accessory . . . . . . . . . . . . . . . . . . . . . . . . . . 13<br />
Temporary Temperature ChangePause the Schedule . . . 14<br />
Remote Outdoor Sensor . . . . . . . . . . . . . . . . . . . . . . . . . . . . . 15<br />
Memory Protection . . . . . . . . . . . . . . . . . . . . . . . . . . . . . . . . . . 15<br />
05/09 506229−01
<strong>ComfortSense</strong> ® <strong>7000</strong> Series Model L7742U <strong>Thermostat</strong><br />
The <strong>ComfortSense</strong> ® <strong>7000</strong> Series Model L7742U thermostat is an electronic<br />
7−day, universal, multi−stage, programmable, touch screen thermostat.<br />
It also offers enhanced capabilities including humidification /<br />
dehumidification / dewpoint measurement and control, Humiditrol ®<br />
EDA (Enhanced Dehumidification Accessory) control, and equipment<br />
maintenance reminders.<br />
Large, clear display with soft blue backlight shows the current and<br />
set temperature, day/date/time, indoor relative humidity and outdoor<br />
temperature (if optional outdoor sensor is used).<br />
Dehumidification measurement and control<br />
Humiditrol ® EDA capability<br />
Dew point adjustment control<br />
Menu−driven programming guides user through the scheduling<br />
process showing only necessary information on each screen.<br />
Ergonomic design.<br />
Smooth Setback Recovery starts system early to achieve setpoint<br />
at start of program period.<br />
<br />
<br />
<br />
<br />
<br />
<br />
<br />
Compressor short−cycle protection (5 minutes).<br />
Real−time clock keeps time during power failures and automatically<br />
adjusts for daylight savings time and leap year.<br />
Maintenance reminders let user know when to service or replace<br />
filters, humidifier pads, ultraviolet lamps, plus two user or installer<br />
defined custom reminders.<br />
Program Hold options allow user to override the program schedule<br />
as desired by time and date.<br />
Select individual days or groups of days to set programming.<br />
Programmable fan offers increased performance when combined<br />
with whole home indoor air quality products.<br />
Outdoor temperature display (with optional outdoor sensor)<br />
shows current outdoor temperature.<br />
Your installer has set up your thermostat based on the type of heating<br />
and cooling system and accessories that your thermostat connects to.<br />
This booklet details user settings available to you that will give you as<br />
much functionality and control as you want.<br />
506229−01 05/09 Page 2
Touch Screen Display<br />
B<br />
C<br />
A<br />
D<br />
G<br />
Figure 1. Touchscreen display<br />
Press the screen anywhere − the first press turns on the backlight.<br />
A Selection Tabs − Press to select: HOME (normal display),<br />
SCHEDULE (for programming), OPTIONS (to set fan operation,<br />
alerts, service reminders, and other user and installer settings).<br />
B MODE − press to cycle through HEAT, COOL, AUTO<br />
(autochangeover), OFF, EM HEAT (emergency heat).<br />
E<br />
E<br />
I<br />
F<br />
H<br />
C SCHED (schedule) − press to change between ON and OFF.<br />
D Displays room temperature.<br />
E Displays the current operation SET AT point(s). If MODE is set to<br />
AUTO (autochangeover), both HEAT and COOL setpoints are<br />
displayed.<br />
F Up/down arrows used for adjusting temperature up or down; if in<br />
AUTO (autochangeover) mode, two sets of up/down arrows appear.<br />
G Information display area, displays different information depending<br />
on the tab selected:<br />
HOME tab: displays outdoor temperature (if outdoor sensor<br />
X2658 is installed), indoor relative humidity (RH),<br />
which mode is calling, hold settings information, service<br />
reminders.<br />
SCHEDULE tab: displays the event being programmed;<br />
OPTIONS tab: displays a scrolling list of installer- and<br />
user−adjustable parameters, including filter and service<br />
reminder periods, etc.<br />
H Schedule time adjustment, User/Installer Settings up/down arrows:<br />
HOME screen: not visible except when executing a HOLD<br />
SETTING)<br />
SCHEDULE and OPTION screens: used to adjust schedule<br />
and option settings.<br />
I Dynamic keys − not visible in HOME screen unless executing a<br />
HOLD SETTING. For SCHEDULE and OPTIONS settings, these<br />
keys appear and change depending on the selection. See the<br />
schedule and options sections for details.<br />
Page 3<br />
<strong>ComfortSense</strong> Model L7742U Touch Screen 7−Day Programmable <strong>Thermostat</strong>
Home ScreenCurrent Conditions & Temperature Settings<br />
COOLING<br />
TUE OCT 23 1:15PM<br />
The HOME screen (figure 2) displays indoor temperature and outdoor<br />
temperature if the outdoor sensor is installed. Other system operational<br />
information, such as indoor relative humidity (if turned on in user settings),<br />
dehumidifying, cooling or heating, will alternately be displayed in<br />
the information display.<br />
Equipment operation information appears in the boxes along the left<br />
side of the home screen to indicate cooling or heating equipment operation<br />
setting, and whether scheduled programming is ON or OFF. From<br />
these boxes, users can change the unit’s mode to HEAT, COOL, AUTO<br />
(autochangeover − default), EM HEAT (emergency heat for heat pump<br />
applications including dual fuel and HP with Electric Heat), or OFF.<br />
The user can also decide whether to operate the unit per the programmable<br />
schedule, or in a non−programmable mode using the SCHED<br />
box.<br />
Figure 2. Home Screen<br />
INFORMATION<br />
DISPLAY AREA<br />
506229−01 05/09 Page 4
Controlling the Heat/Cool Modes of Operation<br />
On initial power up or after an a power loss over 2<br />
hours, the thermostat powers up at the HOME<br />
screen in the AUTO position. If it powers up after a<br />
power loss of less than 2 hours, it assumes the last<br />
mode set. Pressing MODE repeatedly scrolls<br />
through all the modesAUTO, EM HEAT, COOL,<br />
HEAT, then back to OFF.<br />
HEAT, COOL and OFF modes are as each name implies. AUTO<br />
(autochangeover) allows the thermostat to switch between Heating<br />
and Cooling, whichever mode is dictated by the indoor temperature.<br />
EM HEAT (emergency heat) bypasses the first stage of heating (any<br />
stage[s] of heat pump heating) and goes directly to the heat stage used<br />
for maximum heating to more quickly warm a very cold house.<br />
When the indoor temperature decreases or increases, the HEATING or<br />
COOLING cycle will turn on based on the displayed mode. When the<br />
HVAC system is on, the INFORMATION DISPLAY AREA (shown in figure<br />
3) will display one or several operational messages (listed in the<br />
table below). If the outdoor sensor is connected, and is turned on in both<br />
installer and user settings, outdoor temperature will be included in the<br />
displays. The table below summarizes the information messages.<br />
Faults, Errors, and Service Information<br />
TEMP SENSOR ERROR, MEMORY ERROR<br />
CALL FOR SERVICE<br />
NO OUTDOOR SENSOR<br />
CALL DEALER INFO<br />
REPLACE: MEDIA FILTER; UV LAMP; HUM PAD; METAL INSERT<br />
REMIND<br />
RESET<br />
ROUTINE SYS CHECK−UP<br />
REMIND<br />
RESET<br />
NO OUTDOOR SENSOR, HUM SENSOR ERROR, HVAC ERROR DETECTED<br />
REMIND<br />
SERVICE<br />
DEALER INFORMATION (Edited to show dealer contact information<br />
[2 lines])<br />
When the faults, errors, and service information displays appear, dynamic<br />
keys will appear under the second line entries, REMIND,<br />
CLEAR, SERVICE, or RESET. Press the box to perform the action.<br />
INFORMATION DISPLAY AREA<br />
Figure 3. Selecting Mode of Operation<br />
Information Display Area table<br />
Top line: fault/error<br />
Bot. line: action<br />
Top line: fault/error<br />
Bot. line: action<br />
Top line: serv. req’d<br />
Bot. line: action<br />
Top line: serv. req’d<br />
Bot. line: action<br />
Top line: fault/error<br />
Bot. line: action<br />
Contact<br />
Installing Dealer<br />
Operating Information<br />
SET DATE/TIME<br />
Default DATE/TIME (MON JAN 1 12:00 PM)<br />
HEATING, COOLING, HUMIDIFYING, DEHUMIDIFYING,<br />
SYSTEM OFF, OUTDOOR TEMP xxF, INDOOR RH xx%,<br />
MON SEP 24 3:OO PM<br />
SCHEDULE ON, SCHEDULE OFF, WAIT, FAN ON, FAN CIRC<br />
MON SEP 24 3:OO PM<br />
HOLD SETTING UNTIL PRESS SCHED TO<br />
MON SEP 24 3:OO PM RESUME PROGRAM<br />
[First time start up msg]<br />
Top line: operation msgs<br />
Bottom line: date & time<br />
Top line: operation msgs<br />
Bottom line: date & time<br />
[Alternating msgs during<br />
a held schedule]<br />
Page 5<br />
<strong>ComfortSense</strong> Model L7742U Touch Screen 7−Day Programmable <strong>Thermostat</strong>
Controlling the Fan Operation<br />
Fan Modes<br />
<br />
<br />
<br />
If backlight is not on continuous, press the screen<br />
anywhere to turn on the backlight. Press the<br />
OPTIONS tab to access the FAN mode control.<br />
Press FAN button; repeated presses scroll through<br />
all the modes, AUTO, ON, and CIRC (circulate).<br />
AUTOthe fan is following schedule.<br />
ONthe fan is NOT following the schedule and runs continuously<br />
until it is changed from the OPTIONS screen.<br />
CIRCthe fan is following schedule and cycles during periods of<br />
equipment inactivity. Cycle time is dependent on user settings<br />
FAN CIRCULATE (Page 10).<br />
If FAN mode displays AUTO and ON or CIRC was selected during<br />
scheduling for the current period, the thermostat will indicate the current<br />
fan mode in the information display (FAN ON or FAN CIRC).<br />
In the CIRC mode, the user can cycle the fan for a programmed<br />
percentage of active time per hour, during periods of equipment<br />
inactivity (i.e., heating or cooling equipment not running). The fan is ON<br />
for 5 minutes at a time. The user may change the percentage of ON time<br />
that the fan is on (see FAN CIRCULATE [Page 10]):<br />
Fan Program<br />
The user can program the fan to be ON, AUTO, or CIRC during a<br />
program event period. While scheduling the event, if the fan is set to<br />
ON, it will remain on during the entire event. If it is set to CIRC, it will<br />
circulate during equipment inactivity per user programmable cycles<br />
(see FAN CIRCULATE, Page 10). If set to AUTO, the fan will come on<br />
with the equipment to serve the heating/cooling demand and go off<br />
accordingly.<br />
NOTE − When the OPTIONS screen FAN mode is changed to ON or<br />
CIRC, whatever was scheduled is ignored − the fan will either be ON or<br />
it will CIRCULATE per the user−programmed intervals (USER<br />
SETTINGS − FAN CIRCULATE (Page 10). When FAN − AUTO is<br />
selected in the OPTIONS screen, the schedule IS followed.<br />
In the CIRC mode, the user can cycle the fan for a programmed<br />
percentage of active time per hour, during periods of equipment<br />
inactivity (i.e., heating or cooling equipment not running). The fan is ON<br />
for 5 minutes at a time. The user may change the percentage of ON time<br />
that the fan is on (see FAN CIRCULATE [Page 10]):<br />
Controlling the Schedule<br />
If backlight is not on continuous, press the screen<br />
anywhere to turn on the backlight.<br />
From the HOME screen press SCHED; repeated<br />
presses toggle the schedule ON and OFF. If ON, the<br />
system follows the program developed by the user<br />
(Page 7).<br />
If OFF, the system operates as a non−programmable thermostatthe<br />
user must make changes when desired. The autochangeover feature<br />
continues to operate based on the manual user inputs.<br />
The fan mode is displayed on the SCHEDULE screen when programming<br />
the thermostat and can be changed only during schedule editing<br />
(after EDIT is pressed). Fan settings in OPTIONS screen will OVER-<br />
RIDE the scheduled fan operation.<br />
506229−01 05/09 Page 6
Schedule tabProgramming<br />
If backlight is not on continuous, press the screen anywhere to turn on<br />
the backlight. Press the SCHEDULE tab along the top of the screen.<br />
The display changes to programming mode (figure 4) and shows the<br />
current settings.<br />
EVENTS DAILY 2 OR 4The thermostat may be programmed for two<br />
or four (default) events per day. The names for the events are: WAKE,<br />
LEAVE, RETURN, and SLEEP. The selected time for an event to occur<br />
is based on when you want the event to begin. Four events (default) are<br />
common for working households. To change to two events per day, see<br />
page 10. When set for two events per day, the display would appear as:<br />
WAKE (or SLEEP) PERIOD BEGINS".<br />
Programming may be performed in groups of days or individual days,<br />
as follows:<br />
A MON TO SUN − allows every day to be set the same.<br />
B MON TO FRI (weekday programming) and<br />
SAT TO SUN (weekend programming).<br />
C MONDAY through SUNDAY allows individual days of the<br />
week to be programmed separately.<br />
NOTE − After using one of the groups of days described above, the<br />
program allows you to subsequently change individual days to suit your<br />
needs.<br />
To get to the different groupings of days, press EDIT, then press NEXT<br />
repeatedly to scroll to the desired grouping.<br />
Programming Complexity<br />
The programming process for groups of days or individual days is the<br />
same, except in the amount of times required to go through the process.<br />
WAKE PERIOD BEGINS<br />
5:OOAM<br />
Figure 4. Schedule Screen<br />
Full WeekThe least complex program is the full week MON TO<br />
SUN" program, wherein the events for every day of the week are the<br />
same. This requires one time through the event programming process.<br />
Work WeekNext in complexity to the full week program is the work<br />
week program wherein the events are set for a typical work week (MON<br />
TO FRI) and different events are set for the weekend (SAT TO SUN).<br />
This requires two times through the events.<br />
Day by DayMost complex because this requires going through the<br />
programming process 7 times.<br />
Page 7<br />
<strong>ComfortSense</strong> Model L7742U Touch Screen 7−Day Programmable <strong>Thermostat</strong>
Schedule ScreenProgramming<br />
Days & Events Programming process<br />
Action<br />
Display shows...<br />
1 Press SCHEDULE tab SCHEDULE screen<br />
2 Press EDIT UP/DOWN arrows on right−hand<br />
side of screen; EDIT changes to<br />
CANCEL<br />
3 Press NEXT to highlight the desired<br />
grouping of days<br />
4 Press an event: WAKE (default),<br />
LEAVE, RETURN, & SLEEP to<br />
select for programming<br />
5 Press UP/DOWN arrows to<br />
select desired temperature<br />
6 Press FAN repeatedly to select<br />
desired fan mode<br />
7 Press UP/DOWN arrows to<br />
adjust start time for<br />
selected event<br />
Days change to match selected<br />
group, e.g. MON TUE WED THU FRI<br />
Filled triangle above event<br />
indicates which event is selected<br />
for change<br />
After change is made, SAVE<br />
appears in the bottom right−hand<br />
of the screen<br />
Fan indicator displays selection<br />
(ON, AUTO, or CIRC)<br />
Information area displays start<br />
time<br />
8 Repeat steps 4 − 7 for all remaining events.<br />
(If you selected other than MON TUE WED THU FRI SAT SUN), continue;<br />
otherwise, skip to step 11.<br />
9 Press NEXT for the next group<br />
or the next day<br />
Days change to match selected<br />
group, e.g. SAT SUN<br />
10 Repeat steps 3 through 8 for the remaining days, if necessary.<br />
11 Press SAVE when all events and<br />
days are programmed as desired<br />
The changes are made and the<br />
schedule screen reappears.<br />
2<br />
6<br />
4<br />
1<br />
WAKE PERIOD BEGINS<br />
5:OOAM<br />
Figure 5. Programming days and events<br />
3<br />
7<br />
5<br />
9 11<br />
506229−01 05/09 Page 8
Options ScreenReminders & User Settings<br />
CLEAN button [OPTIONS TAB > [CLEAN] ]<br />
When you select the OPTIONS tab, two buttons appear near the bottom<br />
of the screen labeled CLEAN and ENTER. Press the CLEAN button<br />
to deactivate the touch" zones for 30 seconds. Clean the screen<br />
with a soft cloth and a mild glass cleaning solution.<br />
The Options screen provides user and installer access to the various<br />
features for setup and access to the reminders.<br />
User Settings [OPTIONS TAB > USER SETTINGS > [ENTER] ]<br />
12 OR 24 HOUR Page 9<br />
BACKLIGHT INTENSITY Page 11<br />
BACKLIGHT SETTING Page 11<br />
COOLING LIMIT Page 11<br />
DATE/TIME Page 9<br />
DISPLAY INFO Page 10<br />
EVENTS DAILY 2 OR 4 Page 10<br />
F/C Page 9<br />
FAN CIRCULATE Page 10<br />
HEATING LIMIT Page 11<br />
HUMIDITROL ADJUST Page 11<br />
HUMIDITY SETTING Pages 11, 12, 13<br />
SECURITY LOCK Page 11<br />
VIEW CONTACT INFO Page 10<br />
Press the OPTIONS tab; use the arrows to select USER SETTINGS.<br />
Press ENTER.<br />
USER SETTINGS<br />
INSTALLER SETTINGS<br />
REMINDERS<br />
USER SETTINGS<br />
Reminders [OPTIONS TAB > REMINDERS > [ENTER] ]<br />
Set timers from 1 to 24 months in either calendar time or system run<br />
time. Reminders appear when it is time to service the following (for<br />
more details on REMINDERS, see Page 15):<br />
REPLACE MEDIA FILTER<br />
DUE FRI JUN 12 O9<br />
ROUTINE SYS CHECK−UP<br />
DUE IN 216O HOURS<br />
REPLACE HUM PAD<br />
DUE FRI JUN 12 O9<br />
REPLACE UV LAMP<br />
DUE FRI SEP 11 O9<br />
PURE AIR MAINTENANCE<br />
DUE FRI SEP 11 O9<br />
(CUSTOM REMINDER 1)<br />
DUE WED OCT 21 09<br />
The following items are available for modifying. Follow the instructions<br />
for each parameter.<br />
DATE/TIMESet month, day, year, hour, and minute using DATE/<br />
TIME option. Select DATE/TIME; press ENTER. Small, filled up-arrow<br />
indicates selected column; use up/down arrows to adjust; press box<br />
below each small up-arrow to select each column. Adjust; press SAVE.<br />
FEB 11 2OO8 12PM 49<br />
MON DAY YR HR MIN<br />
CANCEL | | | | | | SAVE|<br />
F/Cdefault is Fahrenheit; to change to Celsius, scroll to F/C; press<br />
ENTER. Use arrows to change to C; press SAVE.<br />
F OR C<br />
DEFAULT(F)<br />
F<br />
12 OR 24 HOUR clockdefault is 12H; to change, scroll to 12 OR 24<br />
HOUR; press ENTER. Use arrows to change to 24H; press SAVE.<br />
12 OR 24 HOUR<br />
DEFAULT(12HR) 12H<br />
Page 9<br />
<strong>ComfortSense</strong> Model L7742U Touch Screen 7−Day Programmable <strong>Thermostat</strong>
Options tabUser Settings (continued)<br />
EVENTS DAILY 2 OR 4default is 4; to change, scroll to EVENTS<br />
DAILY 2 OR 4; press ENTER. Use arrows to change to 2; press SAVE.<br />
EVENTS DAILY 2 OR 4<br />
DEFAULT(4) 2<br />
VIEW CONTACT INFOscroll to VIEW CONTACT INFO from the<br />
user settings menu; press ENTER. Use BACK to return to menu. (To<br />
set this to display on the home screen, see DISPLAY INFO.)<br />
DISPLAY INFOcontrols what is displayed in the field below the temperature<br />
and above the time on the HOME screen; it may display OUT-<br />
DOOR TEMP, INDOOR RH (relative humidity), and CONTACT INFO<br />
or any combination of the three, or none if all three are set to OFF.<br />
Scroll to DISPLAY INFO; press ENTER. Use arrows to select OUT-<br />
DOOR TEMP. INDOOR RH or CONTACT INFO; press ENTER.<br />
DISPLAY INFO<br />
OUTDOOR TEMP<br />
INDOOR RH<br />
CONTACT INFO<br />
NOTE − When turning ON the OUTDOOR TEMP option OUT-<br />
DOOR SENSOR REQUIRED" will display if the physical sensor<br />
is not installed.<br />
NOTE − If outdoor sensor is not present and if user tries to select the<br />
options DISPLAY INFO −> OUTDOOR TEMP or HUMIDITROL a message<br />
is displayed OUTDOOR SENSOR REQUIRED" instead of scroll<br />
options for these menus. Information about installing the sensor is described<br />
on Page 15.<br />
For INDOOR RH, use arrows to select ON or OFF; then press SAVE.<br />
INDOOR RH<br />
DEFAULT(OFF)<br />
ON<br />
For OUTDOOR TEMP, select ON or OFF; then press SAVE.<br />
OUTDOOR TEMP<br />
DEFAULT(OFF)<br />
ON<br />
For CONTACT INFO, select ON or OFF; then press SAVE.<br />
CONTACT INFO<br />
DEFAULT(OFF)<br />
ON<br />
FAN CIRCULATEAs an option to running the fan all the time, fan circulate<br />
allows the user to decide how much the fan will run during periods<br />
of equipment inactivity. The fan ON time is always set to 5 minutes.<br />
This option will cause the fan to come on more or less frequently. The<br />
default is 35%; to change, scroll to FAN CIRCULATE; press ENTER.<br />
Use arrows to change to 15, 25, or 45%; press SAVE.<br />
FAN CIRCULATE<br />
DEFAULT(35%) 25%<br />
15% (9 minutes fan run time per hour)<br />
25% (15 minutes fan run time per hour)<br />
35% (21 minutes fan run time per hour)<br />
45% (27 minutes fan run time per hour).<br />
506229−01 05/09 Page 10
Options tabUser Settings (continued)<br />
COOLING LIMITThis limits the temperature at which the thermostat<br />
may be set for cooling (default is 50º); to change to any degree between<br />
45ºF and 90ºF, scroll to COOLING LIMIT; press ENTER. Use arrows to<br />
change to desired temperature; press SAVE.<br />
COOLING LIMIT<br />
DEFAULT(5O°F) 55°F<br />
HEATING LIMITThis limits the temperature at which the thermostat<br />
may be set for heating (default is 85º); to change to any degree between<br />
45ºF and 90ºF, scroll to HEATING LIMIT; press ENTER. Use arrows to<br />
change to desired temperature; press SAVE.<br />
HEATING LIMIT<br />
DEFAULT(85°F) 80°F<br />
HUMIDITY SETTINGSee separate sections − Humidify (Page 12)<br />
and Dehumidify (Page 13).<br />
HUMIDITROL ADJUSTIf Humiditrol ® is enabled in the installer settings,<br />
then this adjustment affects overcooling operation. Overcooling<br />
ranges from 2ºF below the cooling setpoint (MIN setting) down to 2ºF<br />
above the heating setpoint (MAX setting). Halfway between the two<br />
settings is the MID setting. The default setting is MAX; to change to MID<br />
or MIN, scroll to HUMIDITROL ADJUST; press ENTER. Use arrows to<br />
scroll to MID or MIN; then press SAVE.<br />
HUMIDITROL ADJUST<br />
DEFAULT (MAX) MIN<br />
NOTE − Humiditrol ® does not function if the outdoor temperature is 95ºF<br />
or greater nor when the indoor temperature is 65ºF or less.<br />
BACKLIGHT SETTINGdefault is POWER SAVE; scroll to BACK-<br />
LIGHT SETTING; press ENTER. Use arrows to change to CONTINU-<br />
OUS; press SAVE.<br />
BACKLIGHT SETTING<br />
DEF(SAVE) POWER SAVE<br />
BACKLIGHT INTENSITYdefault is 100%; scroll to BACKLIGHT IN-<br />
TENSITY; press ENTER. Use arrows to change to 20 to 100% in 20%<br />
increments; press SAVE.<br />
BACKLIGHT INTENSITY<br />
DEFAULT(1OO%) 8O%<br />
SECURITY LOCKdefault − no locks at all − this provides two methods<br />
of locking the thermostat:<br />
Answer YES to ALLOW TEMP ADJUSTanyone can make temperature<br />
setpoint changes without entering a 3−digit code.<br />
Answer NO to ALLOW TEMP ADJUSTprevents making any<br />
changes at all until the 3−digit code is entered.<br />
Scroll to SECURITY LOCK and press ENTER; ALLOW TEMP AD-<br />
JUST screen appears; press box below YES or NO.<br />
ALLOW TEMP ADJUST<br />
YES<br />
NO<br />
CANCEL | | |<br />
The ENTER LOCK CODE screen appears.<br />
ENTER LOCK CODE<br />
O O O<br />
CANCEL | | | | SAVE|<br />
To enter the lock code, press box below each small up-arrow to select<br />
each column. Use up/down arrows to enter a number, then press the<br />
box below the next number and repeat to enter a 3-digit lock code; write<br />
down the number for future reference; press SAVE.<br />
NOTE − If the security code is forgotten or misplaced, use the universal<br />
code 864" to unlock.<br />
Page 11<br />
<strong>ComfortSense</strong> Model L7742U Touch Screen 7−Day Programmable <strong>Thermostat</strong>
Humidification<br />
BASIC & PRECISIONif set up by the installer settings for BASIC or<br />
PRECISION, this adjustment controls the relative humidity (RH) between<br />
15 and 45%.<br />
Scroll to HUMIDITY SETTINGS; press ENTER. Press the box below<br />
HUMIDIFY.<br />
HUMIDITY MODE<br />
HUMIDIFY DEHUMIDIFY<br />
| |<br />
Use up/down arrows to change the humidity setpoint (between 15 and<br />
45%); press SAVE.<br />
HUM SETPOINT<br />
DEFAULT (45%) 4O%<br />
DEWPOINTif set up by the installer settings for DEWPOINT, this adjustment<br />
(only when in heating mode) will change the humidification<br />
setpoint based on the outdoor temperature and a user−defined dew<br />
point adjustment setting. When humidifying, if condensation forms on<br />
the windows, the dewpoint should be adjusted in the range of −15 to<br />
−5%; if the home feels dry, set dewpoint upward in the range of +5 to<br />
+15%.<br />
Scroll to HUMIDITY SETTINGS; press ENTER. Press the box below<br />
HUMIDIFY.<br />
HUMIDITY MODE<br />
HUMIDIFY DEHUMIDIFY<br />
| |<br />
Use up/down arrows to change the dewpoint (between +15 and −15%);<br />
press SAVE.<br />
DEW POINT ADJ<br />
DEFAULT (O%) −5%<br />
NOTE − Dewpoint adj available only when outdoor sensor is attached.<br />
OFFif OFF selected in installer settings for both humidify and dehumidify,<br />
this message appears when HUMIDITY SETTING is pressed:<br />
HUMIDITY MODES OFF<br />
If OFF is selected by the installer settings for HUMIDIFY but DE-<br />
HUMIDIFY is on, the dehumidification menu appears (this setpoint adjust<br />
has NO effect on humidification):<br />
DEHUM SETPOINT<br />
DEFAULT (5O%) 45%<br />
506229−01 05/09 Page 12
Dehumidification<br />
If your system is set up to control dehumidification, this adjustment controls<br />
the relative humidity (RH) between 45 and 60%. Scroll to HUMID-<br />
ITY SETTINGS; press ENTER. Press the box below DEHUMIDIFY.<br />
HUMIDITY MODE<br />
HUMIDIFY DEHUMIDIFY<br />
| |<br />
Use up/down arrows to change the humidity setpoint (between 45 and<br />
60%); press SAVE.<br />
DEHUM SETPOINT<br />
DEFAULT(5O%) 45%<br />
OFFIf your system is set up for neither humidifying or dehumidifying<br />
the air, this message appears when HUMIDITY SETTING is pressed:<br />
HUMIDITY MODES OFF<br />
If your system is set up for humidifying but not dehumidifying, the humidification<br />
menu appears when HUMIDITY SETTING is pressed (this<br />
setpoint adjust has NO effect on dehumidification):<br />
HUM SETPOINT<br />
DEFAULT(45%) 45%<br />
Humiditrol ® Enhanced Dehumidification<br />
Accessory (EDA)<br />
If your system includes a Humiditrol ® Enhanced Dehumidification Accessory,<br />
if an outdoor sensor is installed, and if Humiditrol mode is selected<br />
in the installer settings, the following setting is available:<br />
Scroll to HUMIDITY SETTINGS in user settings to confirm that you can<br />
control the DEHUMIDIFY setting.<br />
HUMIDITY MODE<br />
HUMIDIFY DEHUMIDIFY<br />
| |<br />
HUMIDITROL ADJUST is available in the user settings. The default<br />
setting is MAX dehumidification but can be changed to MID or MIN. Use<br />
arrows to scroll to MID or MIN; then press SAVE.<br />
HUMIDITROL ADJUST<br />
DEFAULT (MAX)<br />
MIN<br />
Page 13<br />
<strong>ComfortSense</strong> Model L7742U Touch Screen 7−Day Programmable <strong>Thermostat</strong>
Temporary Temperature ChangePause the Schedule<br />
Two types of temperature changes may be made: temporary (while in<br />
the SCHEDule ON mode) or permanent (while in SCHEDule OFF).<br />
NOTE − If autochangeover is enabled at the time a temperature hold is<br />
invoked, the thermostat MAY CHANGE OVER from heating to cooling<br />
and vice versa, to maintain the temperature hold setpoint. The autochangeover<br />
deadband (minimum separation between the heat and<br />
cool set points) is still used to determine whether changeover occurs.<br />
This applies to all of the following hold modes.<br />
Temporary Temperature Changes (schedule ON)<br />
While the system is running with the schedule ON, any change to the<br />
temperature settings may be made for the default time (approximately 3<br />
hours) or for as long or short a time as you wish. Therefore, following the<br />
procedure will set a HOLD on the schedule for a few hours or for up to<br />
45 days. Figure 6 shows a typical screen set in the AUTOchangeover<br />
mode. If the SYSTEM were set in HEAT, COOL, or EM HEAT mode,<br />
only the top set of arrows appear.<br />
1. On the home screen, press the UP or DOWN arrow to adjust to<br />
the desired temperature.<br />
2. A set of arrows appears to the right of the information display; use<br />
these arrows to adjust the hold period for as long as desired, or,<br />
if not changed, this setting will hold for approximately 3 hours.<br />
3. Press SAVE.<br />
4. After saving, ON" next to the SCHED button flashes slowly, and<br />
the information display alternates between the following:<br />
HOLD SETTING UNTIL<br />
WKD MMM DD HH:MMMM<br />
and<br />
PRESS SCHED TO<br />
RESUME PROGRAM<br />
5. After the 3 hours expires, the scheduled programming will resume,<br />
OR, press SCHED to cancel the hold.<br />
Permanent Temperature Changes (schedule OFF − non−<br />
programmable operation)<br />
To make a change for an undefined time span, the schedule must be<br />
turned OFF. The setpoint is maintained indefinitely.<br />
1. From the home screen, press SCHED to turn the scheduled programming<br />
OFF.<br />
2. Press the UP or DOWN arrow to set the temperature to the<br />
desired temperature.<br />
The information display field continues to display the active mode, outdoor<br />
temperature, indoor relative humidity. Turning the schedule back<br />
ON (press SCHED box on home screen) will cancel a permanent hold<br />
and return to the event-programmed mode.<br />
HOLD SETTING UNTIL<br />
10:49AM OCT 10<br />
Figure 6. Setting a Hold on the Schedule<br />
506229−01 05/09 Page 14
Optional Remote Outdoor Sensor<br />
The outdoor sensor (X2658) may be required, especially when using<br />
Humiditrol® EDA applications. In addition to measuring and displaying<br />
outdoor temperature, the outdoor sensor provides dew point adjustment<br />
and control for all models. If used with this thermostat, the sensor<br />
enables optimal heating equipment operation via programmable balance<br />
points. The screen will display NO OUTDOOR SENSOR until the<br />
outdoor sensor is installed, the feature is turned on in the USER SET-<br />
TINGS, in the DISPLAY INFO option. The outdoor temperature is displayed<br />
in the information display (lower center of the screen).<br />
NOTE − For proper operation of Humiditrol® EDA applications, the<br />
outdoor sensor MUST be installed.<br />
In many applications, the <strong>ComfortSense</strong> ® Model L7742U thermostat<br />
displays the temperature sensed by the remote outdoor sensor. With<br />
the heat pump system, the remote outdoor sensor helps determine<br />
when to turn on the second stage of heating for optimal comfort.<br />
When the outdoor sensor is connected, the temperature displays in the<br />
information display area (below the indoor temperature display).<br />
Memory Protection<br />
The thermostat stores all the information concerning its programming<br />
(state, mode, program information, last temperature measured) in a<br />
nonvolatile memory.<br />
This function avoids the loss of the state of the thermostat when a power−down<br />
occurs. The only thing that might be lost is the clock, however,<br />
a lithium battery will remember clock information for as long as it has<br />
charge (approximately 30 days). When power down occurs (due to a<br />
power outage) the thermostat is able to switch off all relays. The O and<br />
B relay will maintain their last state.<br />
Service Reminders<br />
The user may turn on and turn off the following service reminders (all of<br />
which default to OFF) in either chronological time and/or run time and<br />
may be reset (to default) or delayed (snooze) at any time:<br />
Replace Media Filter<br />
Routine Sys (System) Check−up<br />
Replace Hum (Humidifier) Pad<br />
Replace UV Lamp<br />
PureAir Maintenance<br />
NOTE − When chronological time is selected, the timer runs based on<br />
the calendar. When time is selected in run time, the timer runs based<br />
on the time the specific output is ON (e.g. Fan output for Media Filter).<br />
When the reminder time (either calendar time or run time) has elapsed,<br />
the system displays a screen from which the user can either RESET or<br />
DELAY the reminder.<br />
The user can reset the timer either before it has expired (i.e. reminder is<br />
set to 6 months and user decides to reset it to 6 months or change it to<br />
different value at the end of 4th month) or when the time has expired and<br />
a reminder message has been displayed.<br />
When a reminder is turned off, the indicator will not be activated even if<br />
the timer is expired. Note that setting filter reminder to 0 (OFF) will not<br />
reset the timers, but will deactivate the filter indicator.<br />
In the case of a power interruption:<br />
<br />
<br />
lithium battery has chargethe total accumulated time is maintained<br />
(i.e. the counter does not recycle to zero).<br />
lithium battery has NO chargethe due date of reminders is maintained.<br />
Page 15<br />
<strong>ComfortSense</strong> Model L7742U Touch Screen 7−Day Programmable <strong>Thermostat</strong>


