Download - United Kingdom Hydrographic Office
Download - United Kingdom Hydrographic Office
Download - United Kingdom Hydrographic Office
You also want an ePaper? Increase the reach of your titles
YUMPU automatically turns print PDFs into web optimized ePapers that Google loves.
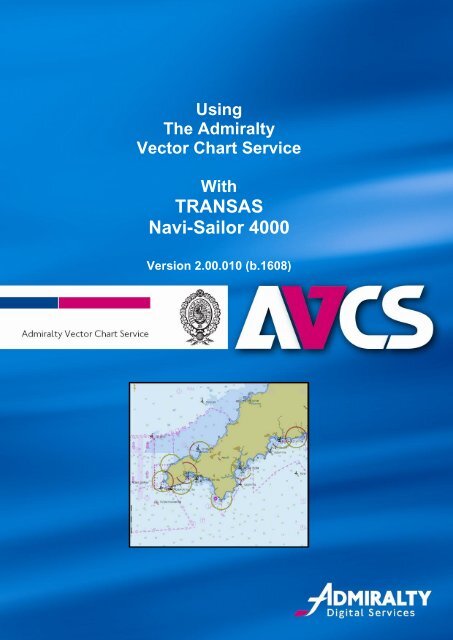
Using<br />
The Admiralty<br />
Vector Chart Service<br />
With<br />
TRANSAS<br />
Navi-Sailor 4000<br />
Version 2.00.010 (b.1608)<br />
Version 4.5.1.6
TRANSAS User Guide Version 1<br />
The <strong>United</strong> <strong>Kingdom</strong> <strong>Hydrographic</strong> <strong>Office</strong><br />
Admiralty Way, Taunton, Somerset, TA1 2DN, <strong>United</strong> <strong>Kingdom</strong><br />
Tel: +44 (0)1823 723366<br />
E-mail: customerservices@ukho.gov.uk<br />
www.ukho.gov.uk<br />
UKHO 2013 All Rights Reserved<br />
The copyright in this document, which contains information of a proprietary nature, is vested in<br />
UKHO. The content of this document may not be used for purposes other than that for which it<br />
has been supplied and may not be reproduced, either wholly or in part, in any way whatsoever.<br />
2
TRANSAS User Guide Version 1<br />
TABLE OF CONTENTS<br />
1 Introduction .................................................................................... 4<br />
2 Data Management ........................................................................... 5<br />
3 The User Permit .............................................................................. 7<br />
4 Deleting ENC Data .......................................................................... 8<br />
5 Deleting ENC Permits ..................................................................... 9<br />
6 The Public Key .............................................................................. 12<br />
7 Installing ENC Permits ................................................................. 15<br />
8 Installing AVCS Base CDs ........................................................... 16<br />
9 Installing AVCS Update CD .......................................................... 23<br />
10 Systems Checks ........................................................................... 26<br />
11 Troubleshooting ........................................................................... 27<br />
3
TRANSAS User Guide Version 1<br />
1 Introduction<br />
<br />
The purpose of this guide is to provide equipment-specific information to assist users in<br />
managing their AVCS ENC holdings.<br />
<br />
This guide should be used in conjunction with the AVCS User Guide, as well as the<br />
ECDIS Operators Manual or other documentation as supplied by the equipment<br />
manufacturer.<br />
<br />
The actual instructions and screenshots in this guide are based on the version of the<br />
TRANSAS ECDIS installed in the UKHO as detailed on the front cover. There may be<br />
minor differences between certain models and these will be highlighted in this guide<br />
where known (i.e. screen layouts may vary).<br />
4
TRANSAS User Guide Version 1<br />
2 Data Management<br />
The Transas ECDIS system makes a clear distinction between Data Management and<br />
ECDIS Navigation and Planning. The ‘Chart Assistant’ utility is accessed by selecting<br />
“Charts” for the “Task List” menu within on the Navi-Sailor 4000 and then selecting “Chart<br />
Assistant”.<br />
Navi-Sailor 4000: Task List→ Charts → Chart Assistant<br />
1. Select the ‘Chart’ option from the ‘Task List’ menu.<br />
2. Select ‘Chart Assistant’<br />
2.<br />
1.<br />
The ‘Chart Assistant’ will then launch.<br />
Note: All electronic chart licensing and data management operations are carried out<br />
through the “Chart Assistant” module.<br />
When the Chart Assistant start the default data format is set to TX97. Using the dropdown<br />
tab change the format to “S57/SENC”. The “S57/SENC” format is required to install any<br />
AVCS ENC data.<br />
5
TRANSAS User Guide Version 1<br />
1. Open the dropdown menu ‘Format: TX97’.<br />
2. Select ‘S57/SENC’.<br />
1.<br />
2.<br />
A list will be populated on the left hand side of the screen under the heading “S57/SENC<br />
Internal Collection:”. Displayed here are all the ENC Charts currently installed on the<br />
ECDIS.<br />
6
TRANSAS User Guide Version 1<br />
3 The User Permit<br />
The User Permit is a 28 character alphanumeric string that is unique to each ECDIS<br />
installation or group of ECDIS, e.g. multiple bridge installations. The User Permit should<br />
have been supplied at the time of delivery and must be used when ordering an AVCS<br />
licence and ENC permits.<br />
If the User Permit is mislaid it can be retrieved from within the Navi Sailor ECDIS. It is not<br />
possible to retrieve the User Permit from within the Chart Assistant.<br />
The User needs to start the Navi Sailor ECDIS program using the “Navi-Sailor” icon. Once<br />
opened the User must select “Config” from the Tasks List menu in the bottom right hand<br />
corner of the screen. The User should then select the “License Info” tab from the pop up<br />
window. “S63 ENC USER PERMIT”.<br />
Navi-Sailor 4000: Task List → Config → “Licence Info” tab<br />
1. Whilst in the NaviSailor 4000 open the ‘Task List’ and select the ‘Config’ option.<br />
2. Select the ‘License Info’ Tab.<br />
3. The User Permit number is displayed as the ‘S63 ENC User Permit’.<br />
2.<br />
3.<br />
1.<br />
7
TRANSAS User Guide Version 1<br />
4 Deleting ENC Data<br />
New AVCS customers who had previously subscribed to other ENC services are strongly<br />
recommended to remove (purge) all ENC Permits and ENCs from the system before<br />
installing AVCS. For more information please refer to the pre-installation checks within the<br />
generic AVCS manual.<br />
When there are installed charts in the ECDIS the user can choose to remove (delete)<br />
some or all of the installed ENCs from the system database (SENC).<br />
Chart Assistant: Select appropriate charts → Delete → OK<br />
Note: Do not remove the charts with the AA prefix as they are IHO produced ENC cells<br />
and are used as references by the TRANSAS 4000 ECDIS system. If these cells are<br />
removed a TRANSAS Engineer will be required to re-install these cells.<br />
1. Select charts to be deleted (N.B. Hold Ctrl to highlight multiple cells)<br />
2. Select “Delete”<br />
3. Select “OK”<br />
2.<br />
3.<br />
1.<br />
Note: Ctrl + A will select all cells. If this is done make sure to de-select the cells with an AA<br />
prefix as mentioned above.<br />
8
TRANSAS User Guide Version 1<br />
5 Deleting ENC Permits<br />
If the user has previously subscribed to another ENC service it is advised to remove these<br />
ENC permits from the ECDIS system before use.<br />
Select “Licence” from the top menu, within the S57/SENC dialogue box that appears tick<br />
“Remove old permits” and click “OK”.<br />
Chart Assistant: License → Remove old permits → OK<br />
1. Select the ‘License’ button<br />
1.<br />
2. Tick the ‘Remove old permits’ tick box.<br />
3. Click ‘OK’.<br />
2.<br />
3.<br />
To completely purge the system of all permits including old GB permits the user must<br />
change the data supplier from PM to GB. This is achieved by loading an AVCS base CD<br />
into the ECDIS so the contents can be scanned by the Chart Assistant.<br />
9
TRANSAS User Guide Version 1<br />
To scan the CD contents in the Navi-Sailor 4000 select “Update” from the top menu to<br />
display the “Scan Disk” dialog.<br />
Chart Assistant: Update → CD (D:\) → Show S57/SENC Disk Content → OK<br />
1. Select ‘Update’ from the top menu.<br />
1.<br />
2. Click on ‘CD (D:\)’<br />
2.<br />
3. In the ‘Actions available for D:\’ window, select the ‘Show S57/SENC Disk Content’<br />
4. ’then click “OK”.<br />
3.<br />
4.<br />
The Chart Assistant will scan the CD for importable ENCs and display these in the<br />
“External Storage” column on the right.<br />
Repeat the initial process above by selecting the ‘Licence’ button from the top menu to<br />
display the “S57/SENC” dialog box.<br />
10
TRANSAS User Guide Version 1<br />
Chart Assistant: Licence → Remove old permits → OK<br />
1. Within the S57/SENC window the ‘Organisation of origin code’ will have changed to<br />
‘GB’.<br />
2. Tick ‘Remove old permits’.<br />
3. Click ‘OK’. This will remove all the remaining permits from the ECDIS.<br />
2.<br />
1.<br />
3.<br />
11
TRANSAS User Guide Version 1<br />
6 The Public Key<br />
The Admiralty Vector Chart Service currently uses the PRIMAR.CRT, issued by Primar<br />
Stavanger, to authenticate its AVCS ENCs.<br />
Before installing AVCS ENCs, the user must check that the correct Public Key is installed<br />
on the system. This can be viewed in the Navi-Sailor following the steps below.<br />
If the PRIMAR Public Key is not present on the system then it will have to be installed<br />
before AVCS ENCs can be loaded.<br />
The Primar public key is included on all AVCS CDs.<br />
Select “Licence” from the top menu bar and “Install new SA certificate”.<br />
Chart Assistant: Licence → View installed SA certificate<br />
1. Select “Licence” from the chart assistant menu.<br />
2. Select ‘View installed SA certificate’.<br />
1.<br />
2.<br />
3. The currently installed public key will be displayed in the next window. In this case the<br />
“PRIMAR.CRT” is installed.<br />
12
TRANSAS User Guide Version 1<br />
If the Public Key currently installed is not the PRIMAR.CRT it will need to be installed prior<br />
to AVCS being installed. To do this insert any AVCS Base or Update CD into your ECDIS<br />
and follow the steps below.<br />
Chart Assistant: Licence → Install new SA certificate<br />
1. Select “Licence” from the chart assistant menu.<br />
2. Select ‘Installed new SA certificate’.<br />
1.<br />
2.<br />
3. This will bring up a dialogue box which lists the contents of the AVCS CD, pick the<br />
PRIMAR.CRT file and click “Open”.<br />
13
TRANSAS User Guide Version 1<br />
3.<br />
4. Click “OK” and the new Primar certificate will be loaded in to the ECDIS.<br />
4.<br />
14
TRANSAS User Guide Version 1<br />
7 Installing ENC Permits<br />
To install ENC Permits into the ECDIS use the ‘Chart Assistant’.<br />
Cha Chart Assistant: → Licence → Install from file → Browse<br />
1. Select the ‘Licence’ button to display the following dialog box.<br />
2. Select the ‘Install from file’ radio button and click ‘Browse’.<br />
1.<br />
2.<br />
2.<br />
3. Using the tree structure navigate to the appropriate media and highlight the folder that<br />
the PERMIT.TXT file is stored within.<br />
4. Click ‘OK’.<br />
3.<br />
4.<br />
The Navi-Sailor 4000 will then load the permit file displaying a progress bar during<br />
installation. On completion an ‘Operation log’ will be displayed.<br />
15
TRANSAS User Guide Version 1<br />
8 Installing AVCS Base CDs<br />
There are currently 9 AVCS Base CDs. This number will grow as more ENCs become<br />
available for distribution within AVCS. It is unlikely that users will need to install all of the<br />
CDs in order to load all licensed ENCs. Reference to the ‘Schedule A’ can avoid the<br />
unnecessary loading of some CDs and save the user time.<br />
The process described here should be used in almost all circumstances as it will<br />
automatically select data to be loaded according to the permit file installed by the user.<br />
Chart Assistant: → Update → CD (D:\) → Show S57/SENC Disk Content → OK<br />
1. Insert the first AVCS base CD select ‘Update’ from the top menu.<br />
1.<br />
2. Select ‘CD (D:\)’.<br />
2.<br />
3. This will bring up the dialogue box, tick ‘Show S57/SENC Disk Content’ and click<br />
‘OK’<br />
3.<br />
3.<br />
16
TRANSAS User Guide Version 1<br />
This will read the CD and populate the ‘External storage’ panel of the Chart Assistant<br />
located on the right hand side of the screen.<br />
Chart Assistant: → Update → CD (D:\) → Install S57/SENC Charts → Install<br />
S57/SENC Updates → View Report → Close<br />
4. To install the licensed ENC’s click ‘Update’ from the top menu.<br />
4.<br />
5. Select ‘CD (D:\)’<br />
5.<br />
6. Select ‘OK’ and each of the charts that have a valid permit within the ECDIS will be<br />
installed.<br />
6.<br />
17
TRANSAS User Guide Version 1<br />
During installation the User may encounter a “Cell cancellation update” message advising<br />
the User that cancellation updates have been found. The message will ask the user to<br />
confirm that they wish to apply the update. The user should select “Yes for all”. This will<br />
apply all cancellation updates for that week that are available on the AVCS Base CD.<br />
Users may also encounter a message relating to the installation of Cell Editions that are<br />
Older or Equal to the one already installed. When using an AVCS Base CD the user<br />
should select ‘No for all’.<br />
On completion, the installation process displays the ‘Chart Assistant last operation log’.<br />
This will provide information relating to whether the installation has been successful or<br />
whether errors have been encountered.<br />
Repeat the process above for all AVCS Base CD’s<br />
18
TRANSAS User Guide Version 1<br />
The Navi-Sailor 4000 then needs to “Synchronize charts collection”. To do this the user<br />
must:<br />
1. Select “Network*” tab from the top of the Chart Assistant, the asterisk is used to<br />
denote to the that there are system changes to the ECDIS data base that need to be<br />
synchronized before the ENCs are available for use in the ECDIS.<br />
1.<br />
2. Clicking the “Synchronize charts collection” button will bring up a progress bar as the<br />
application makes all the ENCs loaded in the Chart Assistant available in the ECDIS.<br />
2.<br />
Note: Make sure that ALL the AVCS Base CDs have been inserted and the import<br />
operations completed before installing the latest Update CD. Updates cannot be applied<br />
unless the ENC base file is present in the system database.<br />
19
TRANSAS User Guide Version 1<br />
Installing selected charts (use with care)<br />
In the majority of cases when installing new data from CD the user will use the option<br />
described above. However there may on occasion be a requirement to manually select<br />
individual cells for installation. In this instance the process below can be used.<br />
Chart Assistant: Update → CD (D:\) → Show S57/SENC Disk Content → OK<br />
1. Insert an AVCS Base CD into the CD Drive and Open “Chart Assistant”<br />
2. Select “Update”<br />
2.<br />
3. Select “CD (D:\)”<br />
3.<br />
4. Select “Show S57/SENC Disk Content”<br />
5. Select “OK”. This will populate the External storage panel of the Chart Assistant<br />
located on the right of the screen.<br />
4.<br />
5.<br />
20
TRANSAS User Guide Version 1<br />
6. Select (Highlight) the individual cells that are required for installation on the ‘External<br />
storage’ panel.<br />
6.<br />
7. Select “Install”. The selected cells will then install.<br />
7.<br />
During installation the User may encounter a “Cell cancellation update” message<br />
advising the User that cancellation updates have been found. The message will ask the<br />
user to confirm that they wish to apply the update. The user should select “Yes for all”.<br />
This will apply all cancellation updates for that week that are available on the AVCS Base<br />
CD.<br />
21
TRANSAS User Guide Version 1<br />
Users may also encounter a message relating to the installation of Cell Editions that are<br />
Older or Equal to the one already installed. When using an AVCS Base CD the user<br />
should select ‘No for all’.<br />
Note: The order of the two messages mentioned above can vary as one message refers<br />
to the cancellation of charts and the other refers to the installation of edition numbers.<br />
The system may encounter this is a variety of orders during updating.<br />
The Navi-Sailor 4000 then needs to “Synchronize charts collection”. To do this the user<br />
must:<br />
1. Select “Network*” tab from the top of the Chart Assistant, the asterisk is used to<br />
denote to the that there are system changes to the ECDIS data base that need to be<br />
synchronized before the ENCs are available for use in the ECDIS.<br />
1.<br />
2. Clicking the “Synchronize charts collection” button will bring up a progress bar as the<br />
application makes all the ENCs loaded in the Chart Assistant available in the ECDIS.<br />
2.<br />
22
TRANSAS User Guide Version 1<br />
9 Installing AVCS Update CD<br />
Insert the Weekly AVCS Update CD into the CD Drive.<br />
Note<br />
Base CDs are re-issued about every 6 to 8 weeks. The AVCS Update CD indicates which<br />
Base CD must have been installed before the update disc can be applied. (see above<br />
image)<br />
It is important that users do not attempt to load an Update CD that is not consistent with<br />
the Base CDs.<br />
Chart Assistant: → Update → CD (D:\) → Show S57/SENC Disk Content →OK<br />
1. Using the Navi-Sailor 4000 you must select “Update” from the top menu, then select<br />
“CD (D:\)”.<br />
1.<br />
23
TRANSAS User Guide Version 1<br />
2. This will bring up the dialogue box below, tick “show S57/SENC Disk Content” and<br />
select ‘OK’.<br />
2.<br />
2.<br />
This will populate the External storage panel of the Chart Assistant located on the right of<br />
the screen.<br />
Chart Assistant: → Update → CD (D:\) → Install S57/SENC charts → Install<br />
S57/SENC updates →View report →OK<br />
Select ‘Update’ from the top menu, then select ‘CD (D:\).<br />
The Navi-Sailor 4000 will automatically detect that you have loaded an update CD and pre<br />
populate the tick boxes “Install S57/SENC charts”, “Install S57/SENC updates” and “View<br />
report”. Select ‘OK’.<br />
During installation the User may encounter a “Cell cancellation update” message<br />
advising the User that cancellation updates have been found. The message will ask the<br />
user to confirm that they wish to apply the update. The user should select “Yes for all”.<br />
This will apply all cancellation updates for that week that are available on the AVCS<br />
Update CD.<br />
Users may also encounter a message relating to the installation of Cell Editions that are<br />
Older or Equal to the one already installed. When using an AVCS Update CD the user<br />
can select ‘No for all’.<br />
24
TRANSAS User Guide Version 1<br />
Note: The order of the two messages mentioned above can vary as one message refers<br />
to the cancellation of charts and the other refers to the installation of edition numbers.<br />
The system may encounter this is a variety of orders during updating.<br />
The Navi-Sailor 4000 then needs to “Synchronize charts collection”. To do this the user<br />
must:<br />
1. Select “Network*” tab from the top of the Chart Assistant, the asterisk is used to<br />
denote to the that there are system changes to the ECDIS data base that need to be<br />
synchronized before the ENCs are available for use in the ECDIS.<br />
1.<br />
2. Clicking the “Synchronize charts collection” button will bring up a progress bar as the<br />
application makes all the ENCs loaded in the Chart Assistant available in the ECDIS.<br />
2.<br />
25
TRANSAS User Guide Version 1<br />
10 System Checks<br />
The Transas Navi-Sailor 4000 will provide a report at the end of every install action whilst<br />
in the Chart Assistant. This report log provides the User with information about the process<br />
that has just completed, within this report details can be obtained relating to any issues<br />
encountered during the install or update of ENC’s. This can be extremely useful to identify<br />
why cells have failed to install. Reports can be reviewed at any point by selecting the<br />
“Reports” option from the Chart Assistant menu.<br />
Chart Assistant: → Reports<br />
1. Select “Reports”. This will provide the user with various options. These options allow<br />
the user to view the latest report or historical reports.<br />
2. To view the latest report select ‘Last Operation’<br />
1.<br />
2.<br />
This will display the latest report produced by the Chart Assistant.<br />
26
TRANSAS User Guide Version 1<br />
11 Troubleshooting<br />
Many of the difficulties that could be experienced when using the Admiralty Vector Chart<br />
Service with this system can be avoided by carefully following the instructions in this guide.<br />
However, issues that are known to have caused confusion in the past are detailed in the<br />
Frequently Answered Questions (FAQ) section which can be found at:<br />
http://www.ukho.gov.uk/Support<br />
If you encounter problems that are not solved by referring to the FAQs, you may wish to<br />
seek Technical Support. Please see the section below for contact details.<br />
Who should you contact?<br />
You will receive the most effective support if you address your initial query to either the<br />
Manufacturer of your ECDIS equipment or the Chart Agent you obtain your AVCS charts<br />
from, but in certain circumstances you may need to contact the UKHO Customer Services.<br />
Problem<br />
Hardware problems: difficulties with the keyboard, mouse,<br />
display or main system console, failure of a floppy disk or CD<br />
drive.<br />
Software problems: difficulties with configuring or using the<br />
ECDIS system software, interfacing problems.<br />
Chart installation problems: problems with installing<br />
certificates, permits and AVCS ENCs, standard error codes<br />
displayed (see AVCS User Guide).<br />
Chart content problems: display anomalies or mismatched data<br />
displays.<br />
Problems that have not been resolved by your Admiralty Chart<br />
Agent.<br />
Contact<br />
ECDIS<br />
Manufacturer<br />
Admiralty<br />
Chart Agent<br />
UKHO<br />
Customer Services<br />
When reporting a chart related problem it is useful if you can provide the following<br />
details:<br />
- Licence Number<br />
- Vessel Name<br />
- ECDIS/Software Manufacturer<br />
- Details of error message – Including ‘SSE’ error code<br />
- Screen shot(s) of error<br />
- Details of Base Discs used (date)<br />
- Details of Update CD used (date)<br />
- Details of Permits used (date)<br />
- Details of Cell number(s) errors apply to<br />
- Have there been any configuration changes to computers<br />
- Details of User Permit(s) and PIN Number(s)<br />
Emergency Chart Permit Generation<br />
In certain circumstances it may be necessary for a vessel to get access to an AVCS chart<br />
at very short notice, for instance if a route needs to be diverted due to a medical or<br />
27
TRANSAS User Guide Version 1<br />
safety emergency. In these emergency circumstances only, individual AVCS ENC<br />
Permits can be obtained from the UKHO 24 hours a day, 365 days a year. These permits<br />
can be transmitted direct to the vessel by email wherever possible, by fax, or simply by<br />
reading the characters out over the telephone or radio.<br />
To obtain an AVCS emergency permit please contact UKHO Customer Services during UK<br />
normal office hours using the contact details at the end of this guide. Outside of office<br />
hours please contact the UKHO Watchkeeper by emailing navwarnings@btconnect.com,<br />
phoning +44 (0) 1823 353289 or faxing +44 (0) 1823 322352. Please quote your Vessel<br />
name, the User Permit Number of your ECDIS system and the required ENCs.<br />
Support Hours: 24/7 Telephone: +44 (0)1823 723366<br />
Facsimile: +44 (0)1823 251816<br />
Email: customerservices@ukho.gov.uk<br />
Contact: UKHO Customer Services<br />
Web: http://www.ukho.gov.uk/Support<br />
Feedback<br />
We hope this User Guide assists you in using the Admiralty Vector Chart Service with this<br />
system. If you have any feedback on the content of this particular guide, or the online<br />
FAQs, please forward your comments to your Admiralty Chart Agent or directly to UKHO<br />
Customer Services.<br />
28


