UK DMUs-EMUs-Trams #1 - UKTrainSim
UK DMUs-EMUs-Trams #1 - UKTrainSim
UK DMUs-EMUs-Trams #1 - UKTrainSim

You also want an ePaper? Increase the reach of your titles
YUMPU automatically turns print PDFs into web optimized ePapers that Google loves.
Freeware Packs<br />
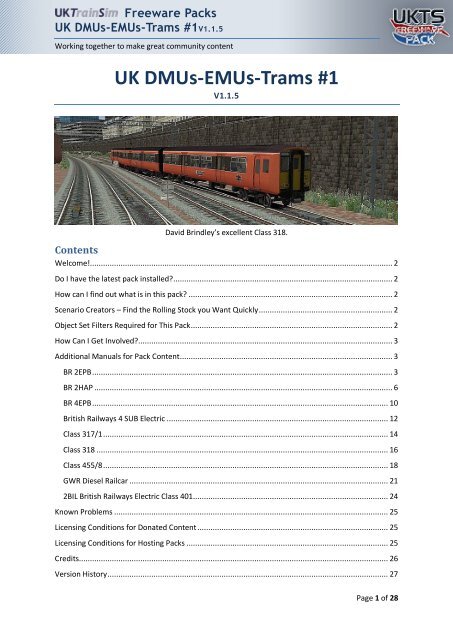
<strong>UK</strong> <strong>DMUs</strong>-<strong>EMUs</strong>-<strong>Trams</strong> <strong>#1</strong>V1.1.5<br />
Working together to make great community content<br />
<strong>UK</strong> <strong>DMUs</strong>-<strong>EMUs</strong>-<strong>Trams</strong> <strong>#1</strong><br />
V1.1.5<br />
David Brindley’s excellent Class 318.<br />
Contents<br />
Welcome!.......................................................................................................................................... 2<br />
Do I have the latest pack installed? .................................................................................................... 2<br />
How can I find out what is in this pack? ............................................................................................. 2<br />
Scenario Creators – Find the Rolling Stock you Want Quickly ............................................................. 2<br />
Object Set Filters Required for This Pack ............................................................................................ 2<br />
How Can I Get Involved?.................................................................................................................... 3<br />
Additional Manuals for Pack Content ................................................................................................. 3<br />
BR 2EPB ......................................................................................................................................... 3<br />
BR 2HAP ........................................................................................................................................ 6<br />
BR 4EPB ....................................................................................................................................... 10<br />
British Railways 4 SUB Electric ..................................................................................................... 12<br />
Class 317/1 .................................................................................................................................. 14<br />
Class 318 ..................................................................................................................................... 16<br />
Class 455/8 .................................................................................................................................. 18<br />
GWR Diesel Railcar ...................................................................................................................... 21<br />
2BIL British Railways Electric Class 401......................................................................................... 24<br />
Known Problems ............................................................................................................................. 25<br />
Licensing Conditions for Donated Content ....................................................................................... 25<br />
Licensing Conditions for Hosting Packs ............................................................................................ 25<br />
Credits ............................................................................................................................................. 26<br />
Version History ................................................................................................................................ 27<br />
Page 1 of 28
Freeware Packs<br />
<strong>UK</strong> <strong>DMUs</strong>-<strong>EMUs</strong>-<strong>Trams</strong> <strong>#1</strong>V1.1.5<br />
Working together to make great community content<br />
Welcome!<br />
This pack is part of a community project started by members of the <strong>UK</strong>TrainSim community. Our<br />
aims are simple:<br />
Build up a bank of resources for the community by combining skills and working together<br />
<br />
Make the packs simple and straight forward to use<br />
Do I have the latest pack installed?<br />
Every time you install a <strong>UK</strong>TS Freeware Pack it will automatically check to see if a more up-to-date<br />
version is available and warn you if you are trying to install an obsolete pack.<br />
A small utility called “<strong>UK</strong>TrainSim Freeware Pack Updater” is also installed with every pack. This<br />
utility will allow you to quickly and easily check if updates for any of your packs are available. It also<br />
lists packs that you do not have with straight forward links to click and download them<br />
How can I find out what is in this pack?<br />
A gallery of images showing the items available in each pack can be accessed by visiting:<br />
uktrainsim.com/FreewarePacks/galleries<br />
A Google Documents spread sheet is available which gives further details of all the rolling stock<br />
included in each pack.<br />
View Google Documents Spread sheet<br />
Scenario Creators – Find the Rolling Stock you Want Quickly<br />
All items in the <strong>UK</strong>TS Freeware Rolling Stock packs have standardised names. Due to the limited<br />
space available to display asset names in game a system of short hand codes is used. A “Quick<br />
Reference” of the codes is installed in the same folder as this manual and is also available online.<br />
There is also a YouTube video which shows how to enable and find the content in each pack.<br />
Object Set Filters Required for This Pack<br />
The following Developer and Product Filters must be enabled to use the content of this pack when<br />
creating scenarios:<br />
DRB_SimStuff <strong>UK</strong><br />
<br />
<br />
<br />
Kuju RailSimulator<br />
RailVision Addon<br />
RScott Addon<br />
Page 2 of 28
Freeware Packs<br />
<strong>UK</strong> <strong>DMUs</strong>-<strong>EMUs</strong>-<strong>Trams</strong> <strong>#1</strong>V1.1.5<br />
Working together to make great community content<br />
How Can I Get Involved?<br />
There are many ways members can take part in the project:<br />
<br />
<br />
<br />
<br />
<br />
Donate a new asset to the pack<br />
Donate a re-skin to the pack<br />
Research buildings, objects etc. to assist object creators<br />
Take pictures that can be used as texture resources<br />
Assist with the organisation of the packs<br />
Create tutorials to assist other members<br />
If you have questions or want more information please visit the Get Involved page on the<br />
<strong>UK</strong>TrainSim Freeware Packs web site.<br />
Additional Manuals for Pack Content<br />
This section contains the manuals that came with certain items of rolling stock. You are strongly<br />
advised to read it if you want to get the most out of the pack. They contain background information<br />
and instructions for use.<br />
BR 2EPB<br />
Usage<br />
The supplied files will not overwrite any existing stock. To use this train you will need to create your<br />
own consists in a scenario or free-roam session. See the Railworks documentation for how to do this.<br />
Page 3 of 28
Freeware Packs<br />
<strong>UK</strong> <strong>DMUs</strong>-<strong>EMUs</strong>-<strong>Trams</strong> <strong>#1</strong>V1.1.5<br />
Working together to make great community content<br />
The object filters DRB_SimStuff - <strong>UK</strong> and Kuju – Railsimulator must be ticked in any scenario these<br />
are used in.<br />
The EPB units appear in the selection menus with the following names:<br />
locomotive menu:<br />
FP DRB EPB DMBS 2car blue grey<br />
FP DRB EPB DMBS 2car blue<br />
FP DRB EPB DMBS 2car half blue grey<br />
FP DRB EPB DMBS 2car half blue<br />
FP DRB EPB DTSO blue grey<br />
FP DRB EPB DTSO blue<br />
FP DRB EPB DTSO half blue grey<br />
FP DRB EPB DTSO half blue<br />
wagon menu:<br />
FP DRB EPB DMBS 2car blue grey<br />
FP DRB EPB DMBS 2car blue<br />
FP DRB EPB DTSO blue grey<br />
FP DRB EPB DTSO blue<br />
A two car unit is made up of DMBS-DTSO (see consist makeup below).<br />
Note the two wagons of a unit are permanently connected and cannot be uncoupled when driving.<br />
Headcode numbers can be changed using the last two digits of the DMBS unit number. # gives a red<br />
box, % a white box, and * a blank. 0-9 for numbers.<br />
Consist makeup<br />
If you want appropriate performance with different train configurations you need to follow the<br />
following consist makeup instructions carefully.<br />
To make a 2 car train, or multiples of 2 car trains (e.g 2EPB+2EPB+2EPB) then use the engine items<br />
FP DRB EPB DMBS 2car half<br />
FP DRB EPB DTSO 2car half<br />
This creates a train which can be driven from either end.<br />
If you want to make a train which combines 2 and 4 car units (e.g 2EPB+4EPB) then use<br />
the engine item:<br />
FP DRB EPB DMBS 2car<br />
plus the wagon item:<br />
FP DRB EPB DTSO 2car<br />
Page 4 of 28
Freeware Packs<br />
<strong>UK</strong> <strong>DMUs</strong>-<strong>EMUs</strong>-<strong>Trams</strong> <strong>#1</strong>V1.1.5<br />
Working together to make great community content<br />
OR<br />
the engine item:<br />
FP DRB EPB DTSO 2car<br />
plus the wagon item:<br />
FP DRB EPB DMBS 2car<br />
In this configuration the 2 car unit can only be driven from the one end.<br />
Driving this train<br />
Power control<br />
The driver's power controller has 5 discrete positions - OFF, SHUNT, SERIES, PARALLEL and<br />
WEAKFIELD. Off should be clear. SHUNT provides a low power position where acceleration notching<br />
is suppressed. It is for use in shunting movements. The train will "balance" to a speed of about 5mph<br />
on level track in this position. SERIES will allow the power to notch up to half power. PARALLEL<br />
allows the power to advance to full power. To get full train speed the WEAKFIELD position should be<br />
selected. Field weakening occurs at about 38mph.<br />
Although the top speed of this train is 75mph it will struggle to reach this speed on level track.<br />
Note that classic camshaft power control systems like this do not allow "graduated" power release,<br />
ie you can't reduce power by moving the controller direct from PARALLEL to SERIES. To reduce<br />
power first move the controller to OFF, then advance it to SERIES.<br />
Initial starting acceleration from stationary is the same whatever power position is selected, about<br />
1.1 mph/sec.<br />
It is common driving practice to move the controller direct to the WEAKFIELD position when pulling<br />
away.<br />
Brake control<br />
The driver's brake handle provides control of two integrated braking systems - an electro-pneumatic<br />
(EP) system for normal use, and a classic automatic air brake for reversionary use. Either can be used<br />
at any time.<br />
The EP brake is operated between the release position (handle fully to the left) and the first ridge<br />
that can be seen on the brake handle plate. It is a simple proportional, self lapping brake that<br />
provides graduated release. Level of brake application can be determined from the position of the<br />
handle, or the brake cylinder gauge (the middle one, full application is about 56psi). Note the brake<br />
pipe gauge pressure (red needle on the left gauge) does not vary with EP brake applications.<br />
The auto air brake is operated by quickly moving the brake handle to the second ridge on the brake<br />
plate, without pausing. If you pause between the release and second ridge positions this will cause<br />
an EP application to occur. The second ridge is the brake LAP notch. There are two other notched<br />
Page 5 of 28
Freeware Packs<br />
<strong>UK</strong> <strong>DMUs</strong>-<strong>EMUs</strong>-<strong>Trams</strong> <strong>#1</strong>V1.1.5<br />
Working together to make great community content<br />
ridges to the right of this, APPLY and EMERGENCY. The LAP and APPLY notches can be used in a<br />
similar manner to the brakes on the default stock steam locos. Placing the handle in the APPLY<br />
position causes the brake pipe pressure to be reduced at a continuous rate, returning it to the LAP<br />
position will maintain the current brake pipe pressure, and thus brake application. There is no<br />
graduated release for the auto air brake - the handle must be returned to the RELEASE position and<br />
the brakes will be completely released. The EMERGENCY position causes the brake pipe to be<br />
reduced to zero and the brakes fully applied.<br />
Drivers are encouraged to use both braking systems in a run, to ensure they are both working.<br />
Use of Keyboard<br />
This train uses custom key mapping. This will not affect the default key mapping of the simulator,<br />
including any customisations you may have made. The key mapping differs from default by:<br />
A reduce power ><br />
D increase power > ie MSTS style.<br />
keypad +/enter sound horn<br />
Railworks2 "F4 HUD"<br />
The driving controls on the HUD will not work with this train.<br />
BR 2HAP<br />
Usage<br />
Page 6 of 28
Freeware Packs<br />
<strong>UK</strong> <strong>DMUs</strong>-<strong>EMUs</strong>-<strong>Trams</strong> <strong>#1</strong>V1.1.5<br />
Working together to make great community content<br />
The supplied files will not overwrite any existing stock. To use this train you will need to create your<br />
own consists in a scenario or free-roam session. See the Railworks documentation for how to do this.<br />
The object filters DRB_SimStuff - <strong>UK</strong> and Kuju – Railsimulator must be ticked in any scenario these<br />
are used in.<br />
The HAP units appear in the selection menus with the following names:<br />
locomotive menu:<br />
FP DRB HAP DMBS blue grey<br />
FP DRB HAP DMBS blue<br />
FP DRB HAP DMBS half blue grey<br />
FP DRB HAP DMBS half blue<br />
FP DRB HAP DTCL blue grey<br />
FP DRB HAP DTCL blue<br />
FP DRB HAP DTCL half blue grey<br />
FP DRB HAP DTCL half blue<br />
wagon menu:<br />
FP DRB EPB DMBS 2car blue grey<br />
FP DRB EPB DMBS 2car blue<br />
FP DRB HAP DTCL blue grey<br />
FP DRB HAP DTCL blue<br />
A two car unit is made up of DMBS-DTCL (see consist makeup below).<br />
Note the two wagons of a unit are permanently connected and cannot be uncoupled when driving.<br />
Headcode numbers can be changed using the last two digits of the DMBS/DTCL unit number. # gives<br />
a red box, % a white box, and * a blank. 0-9 for numbers.<br />
Consist makeup<br />
If you want appropriate performance with different train configurations you need to follow the<br />
following consist makeup instructions carefully.<br />
To make a 2 car train, or multiples of 2 car trains (e.g 2HAP+2HAP+2HAP) then use the engine items<br />
FP DRB HAP DMBS half<br />
FP DRB HAP DTCL 2car half<br />
This creates a train which can be driven from either end.<br />
If you want to make a train which combines 2 and 4 car units (e.g 2HAP+4EPB) then use<br />
the engine item:<br />
FP DRB HAP DMBS<br />
plus the wagon item:<br />
FP DRB HAP DTCL<br />
Page 7 of 28
Freeware Packs<br />
<strong>UK</strong> <strong>DMUs</strong>-<strong>EMUs</strong>-<strong>Trams</strong> <strong>#1</strong>V1.1.5<br />
Working together to make great community content<br />
OR<br />
the engine item:<br />
FP DRB HAP DTCL<br />
plus the wagon item:<br />
FP DRB EPB DMBS 2car<br />
In this configuration the 2 car unit can only be driven from the one end.<br />
Note that HAPs have "express" gearing. When making consists with a mix of HAP and EPB units the<br />
acceleration behaviour will vary if you are actually driving a "HAP" or "EPB" driving car.<br />
Driving this train<br />
Power control<br />
The driver's power controller has 5 discrete positions - OFF, SHUNT, SERIES, PARALLEL and<br />
WEAKFIELD. Off should be clear. SHUNT provides a low power position where acceleration notching<br />
is suppressed. It is for use in shunting movements. The train will "balance" to a speed of about 5mph<br />
on level track in this position. SERIES will allow the power to notch up to half power. PARALLEL<br />
allows the power to advance to full power. To get full train speed the WEAKFIELD position should be<br />
selected. First stage of field weakening occurs at about 40mph.<br />
Although the top speed of this train is 90mph it will struggle to reach this speed on level track.<br />
Note that classic camshaft power control systems like this do not allow "graduated" power release,<br />
ie you can't reduce power by moving the controller direct from PARALLEL to SERIES. To reduce<br />
power first move the controller to OFF, then advance it to SERIES.<br />
Initial starting acceleration from stationary is the same whatever power position is selected, about<br />
0.75 mph/sec.<br />
It is common driving practice to move the controller direct to the WEAKFIELD position when pulling<br />
away.<br />
Brake control<br />
The driver's brake handle provides control of two integrated braking systems - an electro-pneumatic<br />
(EP) system for normal use, and a classic automatic air brake for reversionary use. Either can be used<br />
at any time.<br />
The EP brake is operated between the release position (handle fully to the left) and the first ridge<br />
that can be seen on the brake handle plate. It is a simple proportional, self lapping brake that<br />
provides graduated release. Level of brake application can be determined from the position of the<br />
handle, or the brake cylinder gauge (the middle one, full application is about 56psi). Note the brake<br />
pipe gauge pressure (red needle on the left gauge) does not vary with EP brake applications.<br />
Page 8 of 28
Freeware Packs<br />
<strong>UK</strong> <strong>DMUs</strong>-<strong>EMUs</strong>-<strong>Trams</strong> <strong>#1</strong>V1.1.5<br />
Working together to make great community content<br />
The auto air brake is operated by quickly moving the brake handle to the second ridge on the brake<br />
plate, without pausing. If you pause between the release and second ridge positions this will cause<br />
an EP application to occur. The second ridge is the brake LAP notch. There are two other notched<br />
ridges to the right of this, APPLY and EMERGENCY. The LAP and APPLY notches can be used in a<br />
similar manner to the brakes on the default stock steam locos. Placing the handle in the APPLY<br />
position causes the brake pipe pressure to be reduced at a continuous rate, returning it to the LAP<br />
position will maintain the current brake pipe pressure, and thus brake application. There is no<br />
graduated release for the auto air brake - the handle must be returned to the RELEASE position and<br />
the brakes will be completely released. The EMERGENCY position causes the brake pipe to be<br />
reduced to zero and the brakes fully applied.<br />
Drivers are encouraged to use both braking systems in a run, to ensure they are both working.<br />
Use of Keyboard<br />
This train uses custom key mapping. This will not affect the default key mapping of the simulator,<br />
including any customisations you may have made. The key mapping differs from the default by:<br />
A reduce power ><br />
D increase power > ie MSTS style.<br />
keypad +/enter sound horn<br />
Railworks2 "F4 HUD"<br />
The driving controls on the HUD will not work with this train.<br />
Page 9 of 28
Freeware Packs<br />
<strong>UK</strong> <strong>DMUs</strong>-<strong>EMUs</strong>-<strong>Trams</strong> <strong>#1</strong>V1.1.5<br />
Working together to make great community content<br />
BR 4EPB<br />
Usage<br />
The supplied files will not overwrite any existing stock. To use this train you will need to create your<br />
own consists in a scenario or free-roam session. See the Railworks documentation for how to do this.<br />
The object filters DRB_SimStuff - <strong>UK</strong> and Kuju – Railsimulator must be ticked in any scenario these<br />
are used in.<br />
The EPB units appear in the selection menus with the following names:<br />
locomotive menu:<br />
FP DRB EPB DMBS blue grey<br />
FP DRB EPB DMBS blue<br />
wagon menu:<br />
FP DRB EPB TSO1 blue grey<br />
FP DRB EPB TSO1 blue<br />
FP DRB EPB TSO2 blue grey<br />
FP DRB EPB TSO2 blue<br />
A four car unit is made up of DMBS-TSO1-TSO2-DMBS. Ensure the TSO2 unit is oriented with the<br />
single central buffer pointing towards the adjacent driving car.<br />
Page 10 of 28
Freeware Packs<br />
<strong>UK</strong> <strong>DMUs</strong>-<strong>EMUs</strong>-<strong>Trams</strong> <strong>#1</strong>V1.1.5<br />
Working together to make great community content<br />
Note the four wagons of a unit are permanently connected and cannot be uncoupled when driving.<br />
Headcode numbers can be changed using the last two digits of the DMBS unit number. # gives a red<br />
box, % a white box, and * a blank. 0-9 for numbers.<br />
Driving this train<br />
Power control<br />
The driver's power controller has 5 discrete positions - OFF, SHUNT, SERIES, PARALLEL and<br />
WEAKFIELD. Off should be clear. SHUNT provides a low power position where acceleration notching<br />
is suppressed. It is for use in shunting movements. The train will "balance" to a speed of about 5mph<br />
on level track in this position. SERIES will allow the power to notch up to half power. PARALLEL<br />
allows the power to advance to full power. To get full train speed the WEAKFIELD position should be<br />
selected. Field weakening occurs at about 38mph.<br />
Although the top speed of this train is 75mph it will struggle to reach this speed on level track.<br />
Note that classic camshaft power control systems like this do not allow "graduated" power release,<br />
ie you can't reduce power by moving the controller direct from PARALLEL to SERIES. To reduce<br />
power first move the controller to OFF, then advance it to SERIES.<br />
Initial starting acceleration from stationary is the same whatever power position is selected, about<br />
1.1 mph/sec.<br />
It is common driving practice to move the controller direct to the WEAKFIELD position when pulling<br />
away.<br />
Brake control<br />
The driver's brake handle provides control of two integrated braking systems - an electro-pneumatic<br />
(EP) system for normal use, and a classic automatic air brake for reversionary use. Either can be used<br />
at any time.<br />
The EP brake is operated between the release position (handle fully to the left) and the first ridge<br />
that can be seen on the brake handle plate. It is a simple proportional, self lapping brake that<br />
provides graduated release. Level of brake application can be determined from the position of the<br />
handle, or the brake cylinder gauge (the middle one, full application is about 56psi). Note the brake<br />
pipe gauge pressure (red needle on the left gauge) does not vary with EP brake applications.<br />
The auto air brake is operated by quickly moving the brake handle to the second ridge on the brake<br />
plate, without pausing. If you pause between the release and second ridge positions this will cause<br />
an EP application to occur. The second ridge is the brake LAP notch. There are two other notched<br />
ridges to the right of this, APPLY and EMERGENCY. The LAP and APPLY notches can be used in a<br />
similar manner to the brakes on the default stock steam locos. Placing the handle in the APPLY<br />
position causes the brake pipe pressure to be reduced at a continuous rate, returning it to the LAP<br />
position will maintain the current brake pipe pressure, and thus brake application. There is no<br />
graduated release for the auto air brake - the handle must be returned to the RELEASE position and<br />
Page 11 of 28
Freeware Packs<br />
<strong>UK</strong> <strong>DMUs</strong>-<strong>EMUs</strong>-<strong>Trams</strong> <strong>#1</strong>V1.1.5<br />
Working together to make great community content<br />
the brakes will be completely released. The EMERGENCY position causes the brake pipe to be<br />
reduced to zero and the brakes fully applied.<br />
Drivers are encouraged to use both braking systems in a run, to ensure they are both working.<br />
Use of Keyboard<br />
This train uses custom key mapping. This will not affect the default key mapping of the simulator,<br />
including any customisations you may have made. The key mapping differs from the default by:<br />
A reduce power ><br />
D increase power > ie MSTS style.<br />
keypad +/enter sound horn<br />
Railworks2 "F4 HUD"<br />
The driving controls on the HUD will not work with this train.<br />
British Railways 4 SUB Electric<br />
The 4SUB<br />
The 4SUB Electric Multiple Units were originally built for the Southern Railway in their traditional<br />
square front design, with a wooden roof. However, Oliver Bulleid stamped his design ideas on<br />
newer, all metal bodied units. The Units had Driving Motor Brakes (DMBT, the T stands for Third<br />
Class) at either end and two trailers (TT0 - Trailer Thirds Open). Initially the trains had<br />
compartments in combination of classes. However, over the years open versions became the norm<br />
and many units were rebuilt as open units.<br />
Page 12 of 28
Freeware Packs<br />
<strong>UK</strong> <strong>DMUs</strong>-<strong>EMUs</strong>-<strong>Trams</strong> <strong>#1</strong>V1.1.5<br />
Working together to make great community content<br />
Metal 4-SUB units started appearing in numbers in 1946, continuing to 1951 The eventual layout of<br />
seating provided for 386 passengers in a 4 coach train. Although anyone who ever travelled on these<br />
will know that many more spent their journeys standing! They travelled across virtually all the<br />
Southern suburban network (not the narrow loading gauge of the South Eastern though) on local,<br />
stopping trains.<br />
The units started to be withdrawn towards the end of the seventies although one unit was repainted<br />
in a variant of the original Southern green around 1983 and used for specials as well as normal<br />
services. This unit has been kept for preservation by the Southern Electric Group. The 4Subs were<br />
painted in Southern Malachite Green initially. Then repainted in BR EMU Green until the sixties<br />
when they were repainted Rail Blue. These units never received blue and grey livery.<br />
Installation<br />
Please note that, as far as we know, this train will only work in Expert Mode and you will have<br />
to untick simple mode in the Gameplay Options.<br />
The Model<br />
The train and cab models were made by me in 3DCanvas. Physics, sounds and cab control blueprints<br />
were by Darren Carter.<br />
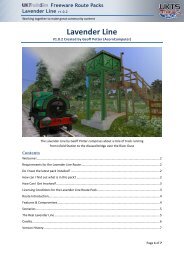
Note that there are two DM models, one an open version (DMBTO) and one a compartment version<br />
(DMBT). There are also two trailers (TTOA) and (TTOB). These trains were not fitted with<br />
conventional buffers apart from at the driver end of the DMs. The trailers however, did have one<br />
central buffer. This rested against a buffer plate at the end of the coach that had no buffers. The A<br />
trailer had a buffer at one end, whilst the B Trailer had a buffer at either end. You need to ensure<br />
that the trailers are facing the right way round. See this diagram:<br />
By the time the Heritage train was ‘preserved’ compartments had been phased out, so this train was<br />
made up of two DMBTO vehicles.<br />
Driving the 4SUB<br />
Most controls are the same as usual for Railworks. However, there are a few things to keep in mind<br />
when driving this train. The 4 Subs did not have a speedometer in the cab. It was thought that, as<br />
stations on the Southern suburban network are so close together, trains would never get to full<br />
speed. The dials in front of you are the ammeter and duplex. The handbrake to your right should be<br />
off already. In the real train, the power handle operates as a ‘deadman’s handle’, which if released<br />
would bring the train to a halt. This feature is not implemented, but you will see the handle depress<br />
before moving round to increase power. You need to depress the power handle (press A once)<br />
before you can set the direction with the reverser or release the air brake. In addition, when you<br />
stop, the power handle will not return to the completely off position until the reverser is set to<br />
‘neutral’. The switch for the wiper is in front of you to the left of the windscreen. If you are using the<br />
RailWorks ‘HUD’ Driver display then you will notice a gradually decaying throttle on the HUD. This is<br />
Page 13 of 28
Freeware Packs<br />
<strong>UK</strong> <strong>DMUs</strong>-<strong>EMUs</strong>-<strong>Trams</strong> <strong>#1</strong>V1.1.5<br />
Working together to make great community content<br />
a feature of the scripting to limit the speed to a maximum value in each throttle position. When<br />
reapplying power, if your speed has passed the maximum for that particular throttle position, the<br />
HUD will stay at zero until you move to a position that requires more power. ie If re-motoring at 30<br />
mph, the HUD throttle will stay at zero until you get to the parallel position on the handle.<br />
The Southern units originally had whistles and these remained until the locos were refurbished in BR<br />
Blue. This is operated by the spacebar as usual. The later trains had two tone horns and these are<br />
operated by the J key. The Heritage train had both, although the horn would be operated as a<br />
default and the whistle just for effect. Although a seat was provided in the cab, my memory of them<br />
is that the drivers more often than not stood to drive. If you press H a driver will appear in the front<br />
cab and a lamp on the rear of the train. Press H again to swap these around. The BR Green and Blue<br />
versions share the original cab. The Heritage train has the later cab with more modern windscreen<br />
wiper.<br />
Note: If your train is brought to an emergency stop by a red light, there is only one way to get it<br />
going again. First set the reverser to neutral, then move the throttle right around to zero and back in<br />
the ‘up’ position. Then press Shift R and you will be able to start again.<br />
Class 317/1<br />
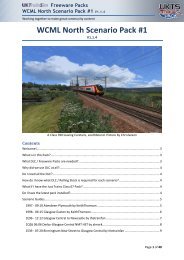
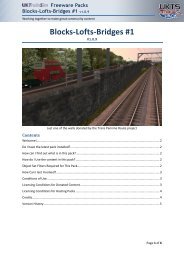
This is a version of the BREL class 317/1 electric multiple unit, in original<br />
blue/grey "BedPan" livery.<br />
Page 14 of 28
Freeware Packs<br />
<strong>UK</strong> <strong>DMUs</strong>-<strong>EMUs</strong>-<strong>Trams</strong> <strong>#1</strong>V1.1.5<br />
Working together to make great community content<br />
This is for RailWorks only.<br />
Usage<br />
The supplied files will not overwrite any existing stock. To use this train you will need to create your<br />
own consists in a scenario or free-roam session. See the railsim documentation for how to do this.<br />
The object classes DRB_SimStuff/<strong>UK</strong> and Kuju/Railsimulator must be ticked in the scenario.<br />
The class 317 units appear in the selection menus with the following names:<br />
locomotive menu:<br />
FP DRB Class 317/1 DTSO BR blue grey<br />
wagon menu:<br />
FP DRB Class 317/1 TCO BR blue grey<br />
FP DRB Class 317/1 MSO BR blue grey<br />
FP DRB Class 317/1 MSO hi BR blue grey - pantograph at the "high" position of the default catenary.<br />
A four car unit is made up of DTSO-MSO-TCO-DTSO. The pantograph end of the MSO should be<br />
arranged towards the center of the unit. The toilet end (small window) of the TCO should be<br />
arranged towards the center of the unit.<br />
Note the four wagons of a unit are permanently connected and cannot be uncoupled when driving.<br />
The tightlock couplers of the unit ends will not couple with any other type of RailWorks wagons.<br />
Driving this train<br />
Power control<br />
The driver's power controller has 5 discrete positions - OFF, SHUNT, HALF, FULL and WEAKFIELD. Off<br />
should be clear. SHUNT provides a low power position where acceleration thyristor advance is<br />
suppressed. It is for use in shunting movements. The train will "balance" to a speed of about 5mph<br />
on level track in this position. HALF will allow the power to notch up to half power. Level balancing<br />
speed should be about 60mph. FULL allows the power to advance to full power. To get full train<br />
speed (about 100mph) the WEAKFIELD position should be selected. Field weakening occurs at about<br />
65mph.<br />
Unlike classic camshaft power control systems power can be reduced by selecting a lower notch.<br />
Selecting the SHUNT notch when moving at any speed will cause no change to the power setting.<br />
Note that initial starting acceleration from stationary is the same whatever power position is<br />
selected, about 1.5 mph/sec.<br />
It is common driving practice to move the controller direct to the WEAKFIELD position when pulling<br />
away.<br />
The brake handle consists of 3 "service" notches and an emergency position.<br />
Page 15 of 28
Freeware Packs<br />
<strong>UK</strong> <strong>DMUs</strong>-<strong>EMUs</strong>-<strong>Trams</strong> <strong>#1</strong>V1.1.5<br />
Working together to make great community content<br />
The emergency position provides basically the same level of retardation as the full service position.<br />
Brakes have graduated release.<br />
Use of Keyboard<br />
This train uses custom key mapping. This will not affect the default key mapping of the simulator,<br />
including any customisations you may have made. The key mapping differs from the default by:<br />
keypad +/enter sound horn<br />
P to raise pantograph, shift P to lower it.<br />
F4 HUD<br />
This train can be operated with the main F4 HUD controls. Do not use the HUD pantograph control<br />
as this may result in you being unable to move the train.<br />
Destinations<br />
Destinations are defined via the DTSO number first character:<br />
- <br />
A london euston<br />
B northampton<br />
C st pancras<br />
D bedford<br />
E cambridge<br />
F liverpool street<br />
G moorgate<br />
H royston<br />
I kings cross<br />
Class 318<br />
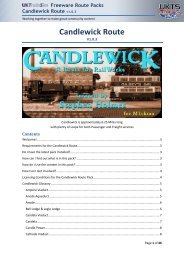
This is a version of the BREL class 318 electric multiple unit, in original SPTE "Strathclyde Red" &<br />
Black.<br />
Usage<br />
The supplied files will not overwrite any existing stock. To use this train you will need to create your<br />
own consists in a scenario or free-roam session. See the railworks documentation for how to do this.<br />
The object classes DRB_SimStuff/<strong>UK</strong> and Kuju/Railsimulator must be ticked in the scenario.<br />
The class 318 units appear in the selection menus with the following names:<br />
locomotive menu:<br />
FP DRB Class 318 DTSO Orange SPTE<br />
FP DRB Class 318 DTSOL Orange SPTE<br />
wagon menu:<br />
Page 16 of 28
Freeware Packs<br />
<strong>UK</strong> <strong>DMUs</strong>-<strong>EMUs</strong>-<strong>Trams</strong> <strong>#1</strong>V1.1.5<br />
Working together to make great community content<br />
FP DRB Class 318 MSO Orange SPTE<br />
FP DRB Class 318 MSO hi Orange SPTE - pantograph at the "high" position of the default catenary.<br />
A three car unit is made up of DTSO-MSO-DTSOL. The pantograph end of the MSO should be<br />
arranged towards the DTSO.<br />
Note the three wagons of a unit are permanently connected and cannot be uncoupled when driving.<br />
The tightlock couplers of the unit ends will not couple with any other type of RailWorks wagons.<br />
Driving this train<br />
Power control<br />
The driver's power controller has 5 discrete positions - OFF, SHUNT, HALF, FULL and WEAKFIELD. Off<br />
should be clear. SHUNT provides a low power position where acceleration thyristor advance is<br />
suppressed. It is for use in shunting movements. The train will "balance" to a speed of about 5mph<br />
on level track in this position. HALF will allow the power to notch up to half power. Level balancing<br />
speed should be about 50mph. FULL allows the power to advance to full power. To get full train<br />
speed (about 90mph) the WEAKFIELD position should be selected. Field weakening occurs at about<br />
60mph.<br />
Unlike classic camshaft power control systems power can be reduced by selecting a lower notch.<br />
Selecting the SHUNT notch when moving at any speed will cause no change to the power setting.<br />
Note that initial starting acceleration from stationary is the same whatever power position is<br />
selected, about 1.5 mph/sec.<br />
It is common driving practice to move the controller direct to the WEAKFIELD position when pulling<br />
away.<br />
The brake handle consists of 3 "service" notches and an emergency position. The emergency<br />
position provides basically the same level of retardation as the full service position. Brakes have<br />
graduated release.<br />
Use of Keyboard<br />
This train uses custom key mapping. This will not affect the default key mapping of the simulator,<br />
including any customisations you may have made. The key mapping differs from the default by:<br />
keypad +/enter sound horn<br />
P to raise pantograph, shift P to lower it.<br />
F4 HUD<br />
This train can be operated with the main F4 HUD controls. Do not use the HUD pantograph control<br />
as this may result in you being unable to move the train.<br />
Destinations<br />
Page 17 of 28
Freeware Packs<br />
<strong>UK</strong> <strong>DMUs</strong>-<strong>EMUs</strong>-<strong>Trams</strong> <strong>#1</strong>V1.1.5<br />
Working together to make great community content<br />
Destinations are defined via the DTSO number first character:<br />
- <br />
A Glasgow Central<br />
B Dalmuir<br />
C Gourock<br />
D Ayr<br />
E Milngavie<br />
F Via Glasgow Central & Singer<br />
G Lanark<br />
H Largs<br />
I Via Glasgow Central & Blantyre<br />
J Wemyss Bay<br />
e.g BF318255 will give unit 318255 with "Via Glasgow Central & Singer" and "Dalmuir" on the<br />
destinations.<br />
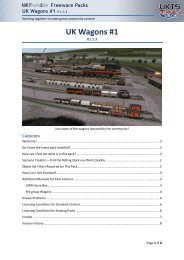
Class 455/8<br />
This is a version of the BREL class 455/8 electric multiple unit, in original blue/grey and NSE colours.<br />
This is for RailWorks only.<br />
Page 18 of 28
Freeware Packs<br />
<strong>UK</strong> <strong>DMUs</strong>-<strong>EMUs</strong>-<strong>Trams</strong> <strong>#1</strong>V1.1.5<br />
Working together to make great community content<br />
Usage<br />
The supplied files will not overwrite any existing stock. To use this train you will need to create your<br />
own consists in a scenario or free-roam session. See the railsim documentation for how to do this.<br />
The object classes DRB_SimStuff/<strong>UK</strong> and Kuju/Railsimulator must be ticked in the scenario.<br />
The class 455 units appear in the selection menus with the following names:<br />
locomotive menu:<br />
FP DRB Class 455/8 DTSO BR blue grey<br />
FP DRB Class 455/8 DTSO NSE<br />
wagon menu:<br />
FP DRB Class 455/8 TSO BR blue grey<br />
FP DRB Class 455/8 TSO NSE<br />
FP DRB Class 455/8 MSO BR blue grey<br />
FP DRB Class 455/8 MSO NSE<br />
A four car unit is made up of DTSO-MSO-TSO-DTSO.<br />
Note the four wagons of a unit are permanently connected and cannot be uncoupled when driving.<br />
The tightlock couplers of the unit ends will not couple with any other type of RailWorks wagons.<br />
Driving this train<br />
Power control<br />
The driver's power controller has 5 discrete positions - OFF, SHUNT, SERIES, PARALLEL and<br />
WEAKFIELD. Off should be clear. SHUNT provides a low power position where acceleration notching<br />
is suppressed. It is for use in shunting movements. The train will "balance" to a speed of about 5mph<br />
on level track in this position. SERIES will allow the power to notch up to half power. PARALLEL<br />
allows the power to advance to full power. To get full train speed the WEAKFIELD position should be<br />
selected. Field weakening occurs at about 38mph.<br />
Note that classic camshaft power control systems like this do not allow "graduated" power release,<br />
ie you can't reduce power by moving the controller direct from PARALLEL to SERIES. To reduce<br />
power first move the controller to OFF, then advance it to SERIES.<br />
Initial starting acceleration from stationary is the same whatever power position is selected, about<br />
1.3 mph/sec.<br />
It is common driving practice to move the controller direct to the WEAKFIELD position when pulling<br />
away.<br />
Brakes<br />
Page 19 of 28
Freeware Packs<br />
<strong>UK</strong> <strong>DMUs</strong>-<strong>EMUs</strong>-<strong>Trams</strong> <strong>#1</strong>V1.1.5<br />
Working together to make great community content<br />
The brake handle consists of 3 "service" notches and an emergency position. The emergency<br />
position provides basically the same level of retardation as the full service position. Brakes have<br />
graduated release.<br />
Use of Keyboard<br />
This train uses custom key mapping. This will not affect the default key mapping of the simulator,<br />
including any customisations you may have made. The key mapping differs from the default by:<br />
keypad +/enter<br />
sound horn<br />
F4 HUD<br />
This train can be operated with the main F4 HUD controls.<br />
Destinations<br />
Destinations are defined via the DTSO number first two characters:<br />
- <br />
A Chessington Sth<br />
B Epsom<br />
C Guildford<br />
D Kingston<br />
E Richmond<br />
F Staines<br />
G Via Epsom<br />
H Via Richmond<br />
I Via Surbiton<br />
J Waterloo<br />
K Weybridge<br />
L Woking<br />
e.g number CG5801 will define unit 455801 with left destination of "Guildford" and right "Via<br />
Epsom".<br />
Page 20 of 28
Freeware Packs<br />
<strong>UK</strong> <strong>DMUs</strong>-<strong>EMUs</strong>-<strong>Trams</strong> <strong>#1</strong>V1.1.5<br />
Working together to make great community content<br />
GWR Diesel Railcar<br />
The Prototype<br />
The GWR experimented with diesel railcars as a means of providing, not only economical traction on<br />
rural branch lines, but also a fast vehicle for suburban mainlines. The first vehicles came out in 1933<br />
and had a smooth, streamlined body built by Park Royal, with AEC providing the mechanicals.<br />
Because of their smooth look and GWR colours, they acquired the nickname ‘Flying Bananas’.<br />
The vehicle represented here, however, is from a later batch designed and built by the GWR<br />
Numbered from 19 to 32. It was first announced in 1939. They had a more angular body than their<br />
predecessors and were very successful, lasting into the 1960s. They were also adapted into a parcels<br />
only vehicle (no 34) and a two car DMU (33, 35, 36, 37, 38). However, extra coaches could be added<br />
to single and double versions to increase capacity.<br />
Power was from two AEC 105 hp diesel engines, mounted in a staggered formation (the earlier cars<br />
engines were parallel). Mounted low under the bodywork and driving the bogie wheels through a<br />
drive shaft. The Railcar had a 5 speed gearbox, with a pre-selector gear box. They could reach a top<br />
speed of about 60 - 65 mph (the double unit a little more). They were about 62 feet long (over<br />
headstocks). They were fitted with the GWR ATC (Automatic Train Control) system, a forerunner of<br />
AWS. This sounded a bell in the cab when the train passed over a ramp. I have implemented this in a<br />
simplified form. The bell sounds and you can acknowledge it by pressing Q (again, a bell sounds), but<br />
your train shouldn’t come to a stop if you don’t press Q.<br />
Page 21 of 28
Freeware Packs<br />
<strong>UK</strong> <strong>DMUs</strong>-<strong>EMUs</strong>-<strong>Trams</strong> <strong>#1</strong>V1.1.5<br />
Working together to make great community content<br />
What are the different models?<br />
4 different versions will appear on your scenario list:<br />
GWR Railcar<br />
This is the basic railcar as it first appeared in GWR colours with the late version totem. Automatic<br />
numbering is in place for this version.<br />
GWR Railcar No 22<br />
The same as above, but number fixed as No 22. At Didcot now it has no outer drive shaft on the<br />
bogies, but I have left it in its GWR condition (saves an extra model!).<br />
BR RailcarBC<br />
This is the Railcar as it would have appeared after nationalisation. The BC refers to the BR red<br />
and cream livery, known usually as ‘blood and custard’. The drive shaft to the outer axle was<br />
removed in BR days.<br />
BR Railcar Green<br />
The Railcar as it would have appeared till the end of its life in DMU green with the yellow stripe.<br />
Features<br />
You can switch directions when driving this railcar. Press Ctrl = to switch to the rear cab. At a station,<br />
pressing T will open the door to the passenger compartment and open the doors of the luggage<br />
area. You will see that someone has left their bike here. A quick look at the passengers in the<br />
passenger view will soon tell you who! At night, if you press H the front lights will come on and a red<br />
light come on at the back. Press H again and the rear headlights come on for travel in that direction.<br />
Shift H reverses this process.<br />
Driving the Railcar<br />
The cab is slightly simplified from the real thing. For example, the odd looking speedometer would<br />
return information on how each engine was performing. I have implemented it as a simple indicator<br />
of speed.<br />
The actual Railcar is a Diesel engined vehicle with 5 manual gears. Some vehicles were equipped<br />
with dual ratio gear boxes (which would have a third lever on the left hand side). Due to limitations<br />
in the implementation of the Diesel Mechanical Blueprints in RailWorks at present, it has not been<br />
possible to re-produce this accurately in this model. So, for the moment, gear changes are<br />
automatic. In fact, in the real thing, gear changes were controlled by a pre-selector gearbox. The<br />
driver would select the gear required, release the clutch and brake and accelerate, the gear would<br />
then engage. I have animated the Gear lever (and the clutch moves with it), so you can simulate this<br />
operation if you wish, but it will have no effect on the driving. The Railcars also had levers at either<br />
side called shunting throttles. These enabled the driver to sit by the side window and operate the<br />
train. These are non operational in this model.<br />
To operate use the basic controls as follows<br />
Press W to engage forward gear.<br />
Page 22 of 28
Freeware Packs<br />
<strong>UK</strong> <strong>DMUs</strong>-<strong>EMUs</strong>-<strong>Trams</strong> <strong>#1</strong>V1.1.5<br />
Working together to make great community content<br />
Press S to engage reverse gear.<br />
There is also a central neutral position.<br />
Press A to accelerate.<br />
Press D to slow down.<br />
Press ; to release vacuum brake and ‘ to apply.<br />
Press / to release handbrake (on by default) press again to apply..<br />
Press the Spacebar to operate horn.<br />
Press X to operate sander.<br />
Press V to operate windscreen wipers<br />
As noted above E will operate the Gear lever, but gears are non operational at the moment. Shift<br />
E to return the gear lever.<br />
T opens the doors and H operates the headlights.<br />
A note on the accuracy of this model<br />
I have done my best to make the model as accurate as I can, within my limitations and those of the<br />
sim. There are a couple of areas that I should ‘fess up’ to being not totally correct. I have already<br />
mentioned the lack of a true diesel mechanical, geared blueprint for this loco. Overall, I believe the<br />
model itself and its liveries is reasonably close to the prototype. The cab is based on No 22 at Didcot,<br />
with certain functions simplified (and brake gauges are non functioning). Even if all the controls are<br />
not quite as they should be, it should give you some idea of the cab experience of one of these<br />
trains. I have also modelled the passenger interior on No 22. According to Colin Judge’s book, in<br />
GWR times the upholstery and walls were green. Unfortunately, I have not seen any visual<br />
representation of this, so I have used the colour scheme found on Didcot’s vehicle. Chances are that<br />
they have had to compromise on materials and what they inherited from BR. I think that Didcot’s<br />
version has a true GWR feel and the seat colours look good compared to the rest of the vehicle. So<br />
rather than guess at what the original was like, I am sticking with their version. This also saves having<br />
different versions of the passenger view! Note, by the way, that the passenger view will change if<br />
you change ends.<br />
The least satisfactory part of the model will be the audio. I am no expert at this aspect of railway<br />
simulation, but have done my best. Almost all the custom sounds you hear are actually from a GWR<br />
Railcar. I videoed No 22 at Didcot, made this into a Windows Media file and took sound files from<br />
this. I used the Audacity sound program to edit and modify these. Through mainly trial and error<br />
(and a lot of help from Darren Carter), I have come up with something that sounds something like<br />
the original. If you think it sounds thin, remember we are talking about something that is, in effect,<br />
powered by two big bus engines. It is not going to sound (or perform) like a Class 47. I did not have<br />
access to the cab, so the sounds you hear in there are either recorded from the passenger area,<br />
through a partition or adapted from other sounds. They are therefore, not true representations of<br />
the cab. I hope though, that they will provide some atmosphere to improve the experience<br />
Page 23 of 28
Freeware Packs<br />
<strong>UK</strong> <strong>DMUs</strong>-<strong>EMUs</strong>-<strong>Trams</strong> <strong>#1</strong>V1.1.5<br />
Working together to make great community content<br />
2BIL British Railways Electric Class 401<br />
The 2BIL<br />
The 2 BIL Southern Electrics, were originally introduced in 1935 to be used mainly as semi fast trains<br />
on the Portsmouth route from London. The designation 2 BIL stands for Bi Lavatory, as there were<br />
two lavatories, one in each coach. They would later be used on the Brighton line and also semi fast<br />
services on the South West London routes.<br />
They were made in two batches, with slight differences in design. The model here represents the<br />
later batch. In service, they would be used in multiples up to 8, or could be coupled to other unit<br />
types such as 4SUB and 2HAL. The 2 car unit was made up of a Driving Motor Brake Third (DMBT)<br />
and a Driving Trailer Composite Lav (DTCL), which had some First Class seating.<br />
A number of units survived into the TOPS era, when they were out shopped in rail blue and<br />
designated Class 401.<br />
The Model<br />
The train and cab models were made by me in 3DCanvas. Physics and cab controls blueprints were<br />
based on original work by by Darren Carter and Jimi Ibbets. Press H to see a driver in external view<br />
and a tail lamp at the rear of the train. The model features rain effect on the cab windows and also<br />
in the passenger view.<br />
Driving the 2BIL<br />
Most controls are the same as usual for Railworks. However, there are a few things to keep in mind<br />
when driving this train. The handbrake to your right should be off already. In the real train, the<br />
power handle operates as a ‘deadman’s handle’, which if released would bring the train to a halt.<br />
This feature is not implemented, but you will see the handle depress before moving round to<br />
increase power. The switch for the wiper is in front of you to the left of the windscreen.<br />
Acknowledgements<br />
Thanks to Darren Carter for all his help with the cab controls and train sounds and squeals..<br />
Acknowledgement also to Jimi Ibbets, whose original scripting was used by Darren. Both of these are<br />
my colleagues in the Virtual District project and it is their skills that make the train far more realistic<br />
to operate.<br />
I originally received a lot of help for my 4SUB models from Graeme Gleave of the Southern Electric<br />
Group. And also from Michael Traves, who made MSTS models of these trains. I used a lot of their<br />
reference in these models as well.<br />
See:<br />
http://www.emus.co.uk/sub.htm<br />
Also a big thank you to Joe Pearce, creator of the Coalburn Trench route. He tested these models<br />
exhaustively and ensured that I didn’t release them with a number of schoolboy errors! Any<br />
mistakes left are firmly my fault however.<br />
Page 24 of 28
Freeware Packs<br />
<strong>UK</strong> <strong>DMUs</strong>-<strong>EMUs</strong>-<strong>Trams</strong> <strong>#1</strong>V1.1.5<br />
Working together to make great community content<br />
Known Problems<br />
Duplicate Loco Numbers SBHH<br />
This is a known issue with Railworks2 where it will quite happily allow duplicate loco numbers<br />
that are specified in the loco .bin files within the editor, but then throws a SBHH error once<br />
you click the play button or exit out of the editor and then try to launch a scenario via the<br />
main route window.<br />
Work Around<br />
Scenario creators should be careful not to place more than one item of any locomotive which<br />
is a singled numbered or named type.<br />
Licensing Conditions for Donated Content<br />
To ensure that assets remain permanently available to route builders once donated contributors<br />
must agree to the following conditions:<br />
Content may NOT be withdrawn from the pack after it has been donated<br />
<br />
All content may be used, distributed, re-skinned and re-packaged with any freeware route.<br />
The complete pack may be hosted on any website providing no profit is made by offering the<br />
download<br />
The content may be edited by a Freeware Pack administrator so that it fits in with the<br />
standardised pack structure<br />
The content may be edited by a Freeware Pack administrator to improve the realism of the<br />
item. This is primarily used for rolling stock donations and their physics (braking, loading etc<br />
parameters).<br />
You may opt out of this condition if you do not want any improvements to be made to<br />
your donations by informing a Freeware Pack administrator<br />
Freeware Packs may be distributed on <strong>UK</strong>TS CD's to provide an alternative to those without<br />
broadband Internet access and so they may be given away at <strong>UK</strong>TS Live events<br />
These conditions will allow us to create a reliable, simple and completely free resource for the<br />
community. For the latest conditions visit http://www.uktrainsim.com/FreewarePacks.<br />
Licensing Conditions for Hosting Packs<br />
The following conditions apply to anyone wishing to host the packs on a site other than <strong>UK</strong>TS:<br />
Permission must be granted by <strong>UK</strong>TS before packs may be hosted on alternative sites<br />
<br />
<br />
<br />
<br />
<br />
<br />
The download must be available for free<br />
No profit may be made by offering the download<br />
A link to the original <strong>UK</strong>TS download must be provided on the download page<br />
The date and version number of the pack must be clearly given on the download page<br />
You must email FreewarePacks@rwdecal.co.uk supplying a valid email address and link to<br />
the download - This ensure we can contact you (the host) when a new version is released<br />
making it easy for you to update your download<br />
You must remove the download at the request of a <strong>UK</strong>TS Freeware Pack administrator<br />
Page 25 of 28
Freeware Packs<br />
<strong>UK</strong> <strong>DMUs</strong>-<strong>EMUs</strong>-<strong>Trams</strong> <strong>#1</strong>V1.1.5<br />
Working together to make great community content<br />
These conditions ensure users can obtain free and consistent packs. For the latest conditions visit<br />
http://www.uktrainsim.com/FreewarePacks.<br />
Credits<br />
These packs would have been impossible without members of the community generously donating<br />
their time, energy, skill and expertise to the project.<br />
My thanks go to Mike Simpson for his indispensable RWTools, David Richardson for his design skills<br />
and Matt Peddlesden for his support. Kariban and Kromaatikse have done incredible work with<br />
rolling stock physics and many others have offered help and assistance along the way. Without you<br />
all this would not have been possible.<br />
Donations for this pack were received from (alphabetical order):<br />
adburgess1992<br />
<br />
<br />
<br />
<br />
<br />
<br />
<br />
<br />
cowey2511<br />
danny3<br />
davveb<br />
DavidHossack<br />
MichaelDono<br />
RichardScott<br />
Traveller54<br />
Will<br />
Page 26 of 28
Freeware Packs<br />
<strong>UK</strong> <strong>DMUs</strong>-<strong>EMUs</strong>-<strong>Trams</strong> <strong>#1</strong>V1.1.5<br />
Working together to make great community content<br />
Version History<br />
1.0.2 – 17 th August 2011<br />
1 st public release.<br />
1.0.3 – 30 th August 2011<br />
Added version history to manuals<br />
Fixes to registry utility button<br />
<br />
<br />
<br />
<br />
Improved version detection script to prevent installer crashing<br />
Tweaks to updater program<br />
Warning popup added to uninstall routine informing users that removal of rolling stock may<br />
prevent scenarios which use them from working<br />
Name changed from “<strong>UK</strong> <strong>DMUs</strong>, <strong>EMUs</strong>, Railcars and <strong>Trams</strong> <strong>#1</strong>” to “<strong>UK</strong> <strong>DMUs</strong>-<strong>EMUs</strong>-<strong>Trams</strong><br />
<strong>#1</strong>” due to Firefox not liking long filenames when downloading<br />
1.0.4 – 29 th September 2011<br />
Added new version of updater program<br />
<br />
<br />
Modified installer to allow packs to contain the same asset if needed<br />
Additional Content Added:<br />
o Class 166 as a Class 175 by MichaelDono<br />
o Updated all Class 166’s donated by danny3 to use the new Railworks 3 / Train<br />
Simulator 2012 version of the 166<br />
1.0.6 – 10 th November 2011<br />
Additional Content Added:<br />
o <strong>UK</strong>TS 24323: Class 317 NXEA Blue by Cowey2511<br />
o <strong>UK</strong>TS 23591: Class 317 National Express by adburgess1992<br />
o Updated MichaleDono’s Class 166 as a Class 175 reskin to use the new Railworks 3 /<br />
Train Simulator 2012 version of the 166<br />
o Added Class 166 as a Trans Pennine Express Class 185 reskin by Traveller54<br />
1.1.0 – 23 rd December 2011<br />
Renamed all items using the new naming system<br />
<br />
<br />
<br />
Reduced uninstall footprint significantly by storing data separate to installer code<br />
Content Updated:<br />
o DRB units with ambient glow error corrected<br />
o DRB units with door open and close error corrected<br />
o DRB units with shadow error corrected<br />
Additional Content Added:<br />
o <strong>UK</strong>TS 26889: Class 142 v2 by RailVision / Simon Coop<br />
o <strong>UK</strong>TS 26959: Class 142 Early livery Pacer pack by nattydredd<br />
o <strong>UK</strong>TS 27475: Class 142 Headlight Mod by thetrainfan<br />
Page 27 of 28
Freeware Packs<br />
<strong>UK</strong> <strong>DMUs</strong>-<strong>EMUs</strong>-<strong>Trams</strong> <strong>#1</strong>V1.1.5<br />
Working together to make great community content<br />
1.1.1 – 1 st May 2012<br />
Added missing developer filter to the documentation for the RailVision class 142<br />
<br />
Additional content added:<br />
o <strong>UK</strong>TS 23590: Class 317 NSE Unbranded by adburgess1992<br />
1.1.2 – 25 th May 2012<br />
Content Updated:<br />
o <strong>UK</strong>TS 26609: 4 SUB Southern Electric by RichardScott (TS2012 lights and rain added)<br />
<br />
Additional Content Added:<br />
o <strong>UK</strong>TS 29044: BR SR Electric 2BIL by RichardScott<br />
1.1.4 – 6 th November 2012<br />
Fixed cab audio for various DRB_SimStuff items broken by recent TS2013 release<br />
<br />
Added improved 166 reskin textures by danny3<br />
1.1.5 – 25 th February 2013<br />
Fixed various issues with the Class 317’s (thanks to Traveller54 for reporting / helping fix)<br />
<br />
Added installer dependency for the European Asset Pack<br />
Page 28 of 28