Water Handling Equipment Guide - National Wildfire Coordinating ...
Water Handling Equipment Guide - National Wildfire Coordinating ...
Water Handling Equipment Guide - National Wildfire Coordinating ...
You also want an ePaper? Increase the reach of your titles
YUMPU automatically turns print PDFs into web optimized ePapers that Google loves.
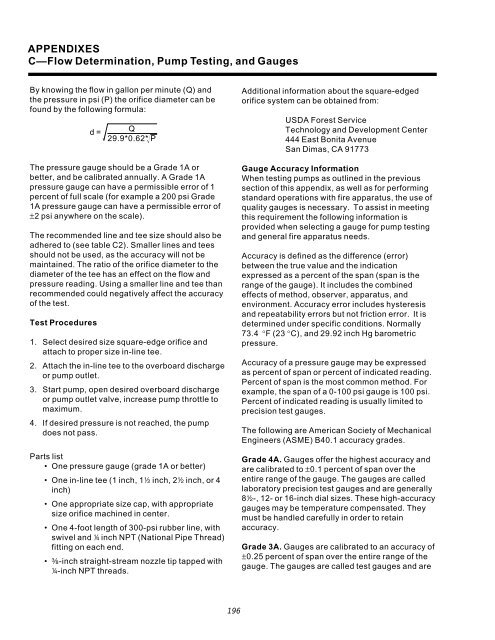
APPENDIXES<br />
C—Flow Determination, Pump Testing, and Gauges<br />
By knowing the flow in gallon per minute (Q) and<br />
the pressure in psi (P) the orifice diameter can be<br />
found by the following formula:<br />
d =<br />
Q<br />
29.9*0.62* P<br />
The pressure gauge should be a Grade 1A or<br />
better, and be calibrated annually. A Grade 1A<br />
pressure gauge can have a permissible error of 1<br />
percent of full scale (for example a 200 psi Grade<br />
1A pressure gauge can have a permissible error of<br />
±2 psi anywhere on the scale).<br />
The recommended line and tee size should also be<br />
adhered to (see table C2). Smaller lines and tees<br />
should not be used, as the accuracy will not be<br />
maintained. The ratio of the orifice diameter to the<br />
diameter of the tee has an effect on the flow and<br />
pressure reading. Using a smaller line and tee than<br />
recommended could negatively affect the accuracy<br />
of the test.<br />
Test Procedures<br />
1. Select desired size square-edge orifice and<br />
attach to proper size in-line tee.<br />
2. Attach the in-line tee to the overboard discharge<br />
or pump outlet.<br />
3. Start pump, open desired overboard discharge<br />
or pump outlet valve, increase pump throttle to<br />
maximum.<br />
4. If desired pressure is not reached, the pump<br />
does not pass.<br />
Parts list<br />
• One pressure gauge (grade 1A or better)<br />
• One in-line tee (1 inch, 12 inch, 22 inch, or 4<br />
inch)<br />
• One appropriate size cap, with appropriate<br />
size orifice machined in center.<br />
• One 4-foot length of 300-psi rubber line, with<br />
swivel and 4 inch NPT (<strong>National</strong> Pipe Thread)<br />
fitting on each end.<br />
• a-inch straight-stream nozzle tip tapped with<br />
4-inch NPT threads.<br />
Additional information about the square-edged<br />
orifice system can be obtained from:<br />
USDA Forest Service<br />
Technology and Development Center<br />
444 East Bonita Avenue<br />
San Dimas, CA 91773<br />
Gauge Accuracy Information<br />
When testing pumps as outlined in the previous<br />
section of this appendix, as well as for performing<br />
standard operations with fire apparatus, the use of<br />
quality gauges is necessary. To assist in meeting<br />
this requirement the following information is<br />
provided when selecting a gauge for pump testing<br />
and general fire apparatus needs.<br />
Accuracy is defined as the difference (error)<br />
between the true value and the indication<br />
expressed as a percent of the span (span is the<br />
range of the gauge). It includes the combined<br />
effects of method, observer, apparatus, and<br />
environment. Accuracy error includes hysteresis<br />
and repeatability errors but not friction error. It is<br />
determined under specific conditions. Normally<br />
73.4 °F (23 °C), and 29.92 inch Hg barometric<br />
pressure.<br />
Accuracy of a pressure gauge may be expressed<br />
as percent of span or percent of indicated reading.<br />
Percent of span is the most common method. For<br />
example, the span of a 0-100 psi gauge is 100 psi.<br />
Percent of indicated reading is usually limited to<br />
precision test gauges.<br />
The following are American Society of Mechanical<br />
Engineers (ASME) B40.1 accuracy grades.<br />
Grade 4A. Gauges offer the highest accuracy and<br />
are calibrated to ±0.1 percent of span over the<br />
entire range of the gauge. The gauges are called<br />
laboratory precision test gauges and are generally<br />
82-, 12- or 16-inch dial sizes. These high-accuracy<br />
gauges may be temperature compensated. They<br />
must be handled carefully in order to retain<br />
accuracy.<br />
Grade 3A. Gauges are calibrated to an accuracy of<br />
±0.25 percent of span over the entire range of the<br />
gauge. The gauges are called test gauges and are<br />
196


