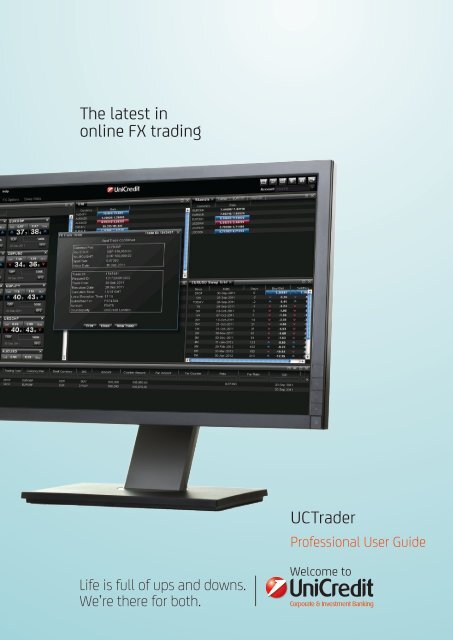
UCTrader The latest in online FX trading - Unicredit Bank
UCTrader The latest in online FX trading - Unicredit Bank
UCTrader The latest in online FX trading - Unicredit Bank

Create successful ePaper yourself
Turn your PDF publications into a flip-book with our unique Google optimized e-Paper software.
<strong>The</strong> <strong>latest</strong> <strong>in</strong><br />
onl<strong>in</strong>e <strong>FX</strong> trad<strong>in</strong>g<br />
<strong>UCTrader</strong><br />
Professional User Guide
<strong>UCTrader</strong><br />
Gett<strong>in</strong>g started<br />
1<br />
2<br />
3<br />
4<br />
5<br />
Visit https://quantus.unicreditgroup.eu<br />
Enter your Log<strong>in</strong> Name and Passcode<br />
<strong>The</strong> PIN field should rema<strong>in</strong> empty the first<br />
time you log <strong>in</strong><br />
You will then be asked to set a new PIN<br />
Next time you log <strong>in</strong>, you can use the 4 digit<br />
PIN <strong>in</strong>stead of the Passcode<br />
What do I do if:<br />
I need to set a new PIN?<br />
If you have not yet set a PIN, please enter your username and passcode (from your token) <strong>in</strong> the<br />
boxes provided and leave the PIN field blank. You will be taken through the steps to create a PIN<br />
the first time you log <strong>in</strong>.<br />
My token gets out of synch?<br />
Sometimes your token may become out of synch with the system. In this case the token needs<br />
to be re-synchronized. After you attempt to log <strong>in</strong> a new screen will appear request<strong>in</strong>g a new<br />
token code. Use the “_next_” code on the token and follow the <strong>in</strong>structions on screen.<br />
I’m locked out of the system?<br />
If you are hav<strong>in</strong>g problems logg<strong>in</strong>g <strong>in</strong>, this may be because your account has been locked. This<br />
can happen if you enter an <strong>in</strong>correct PIN/passcode comb<strong>in</strong>ation three times. Please contact the<br />
helpdesk on the numbers provided and they can reactivate your account.<br />
My username is no longer recognised?<br />
Please check your username (usernames are not case-sensitive) and try aga<strong>in</strong>. If you cont<strong>in</strong>ue<br />
to have problems, or are unsure of your username, please contact the helpdesk on the numbers<br />
provided.<br />
<strong>UCTrader</strong> Client Support<br />
+44 (0) 20 7826 1200 ecommerce_support@unicreditgroup.eu<br />
2
How to use <strong>UCTrader</strong><br />
Logg<strong>in</strong>g on<br />
Go to the URL supplied, enter your Name, PIN and Password and<br />
click Log<strong>in</strong>. You will need to confirm that you have read the User<br />
Agreement and then click Cont<strong>in</strong>ue. For more <strong>in</strong>formation on<br />
gett<strong>in</strong>g started see the back page.<br />
<strong>The</strong> <strong>UCTrader</strong> desktop<br />
1<br />
4<br />
2<br />
3<br />
5<br />
1. Ma<strong>in</strong> menu<br />
Options for customiz<strong>in</strong>g your desktop and<br />
general help on how to use <strong>UCTrader</strong>.<br />
2. Trade Panel<br />
Live streamed prices for all your chosen currency<br />
pairs, with One-Click and RFS trad<strong>in</strong>g. Pairs can<br />
be manually created, edited and deleted to suit<br />
your requirements [page 7].<br />
4. <strong>UCTrader</strong> Tools<br />
Search, sort, save, export and pr<strong>in</strong>t all your data<br />
with quick-access buttons.<br />
5. Blotter<br />
<strong>The</strong> Blotter displays your trad<strong>in</strong>g history on<br />
the ma<strong>in</strong> screen for quick reference. It shows a<br />
comprehensive range of trade details and can be<br />
pr<strong>in</strong>ted at the click of a button [p11].<br />
3. Product Grid<br />
Group together currency pairs <strong>in</strong>to product types<br />
and categories for easier reference [page 10].<br />
3
Trade panel<br />
One-Click Trad<strong>in</strong>g<br />
<strong>UCTrader</strong>’s One-Click Trad<strong>in</strong>g feature enables you to<br />
trade across any of your pre-def<strong>in</strong>ed currency pairs,<br />
with just one button click (up to agreed account<br />
limits). To f<strong>in</strong>d out how to edit your pre-def<strong>in</strong>ed<br />
currency pairs, see page 7.<br />
1<br />
2<br />
3<br />
1. Select an Account<br />
Click the drop down to select the account <strong>in</strong><br />
which you wish to trade.<br />
2. One Click Trade<br />
Once you’ve selected an account, the default<br />
purchase currency and amount will appear for<br />
each currency pair. To trade <strong>in</strong>stantly, simply<br />
click on the Buy or Sell price.<br />
3. Switch<strong>in</strong>g currency<br />
You can switch the ‘dealt currency’ of the trade<br />
by click<strong>in</strong>g on the ‘switch currency’ button - this<br />
will swap from one currency to the other (e.g.<br />
from GBP to CHF).<br />
Once you press the Buy or Sell button, a<br />
pop-up deal confirmation will appear.<br />
4
How to use <strong>UCTrader</strong><br />
Trade panel<br />
Request-for-Stream (RFS) Trad<strong>in</strong>g<br />
RFS Trad<strong>in</strong>g enables you to construct a trade with<br />
more options than One-Click Trad<strong>in</strong>g. Us<strong>in</strong>g RFS you<br />
can set up Spot, Forward or Swap trades through the<br />
Trade Ticket system.<br />
3<br />
1<br />
2<br />
4<br />
5<br />
1. RFS Trade<br />
Once you’ve selected an account, you can enter an<br />
amount* <strong>in</strong>to the chosen Currency Pair. <strong>The</strong>n click<br />
RFS to br<strong>in</strong>g up a deal ticket (or click on a rate <strong>in</strong><br />
the Product Grid).<br />
2. Select a Currency Pair and type of trade<br />
Even if you have opened a Trade Ticket directly<br />
from a currency pair, you can change the pair here.<br />
Next you can select either Spot/Forward or Swap.<br />
See page 6 for details on a Swap trade.<br />
3. Select the account on which to trade<br />
This will be prepopulated if you accessed the Trade<br />
Ticket via an RFS request. But you can still change<br />
to another account if you wish.<br />
4. Choose a settlement type and date<br />
Select Spot settlement or a Forward date<br />
up to 1 year ahead. You can use a def<strong>in</strong>ed<br />
period (e.g. 1 month) or select a specific<br />
date us<strong>in</strong>g the calendar.<br />
5. Get a Quote<br />
Once you’re happy with the Trade<br />
Ticket’s details, press “Get Quote” to<br />
receive a price. <strong>The</strong>n click “Buy” or “Sell”<br />
to confirm the trade.<br />
5
How to use <strong>UCTrader</strong><br />
Trade panel<br />
Swap Trade<br />
<strong>The</strong> process of construct<strong>in</strong>g a Swap trade is similar<br />
to the Spot/Forward process on page 5 with some<br />
additional <strong>in</strong>formation required.<br />
1<br />
2<br />
3<br />
4<br />
5<br />
1. Select a Currency Pair<br />
Even if you have opened a Trade Ticket directly<br />
from a currency pair, you can change the pair here.<br />
2. Select the type of trade<br />
Select Swap (if it’s not already selected) and the<br />
Trade Ticket will display the Near and Far leg fields.<br />
You then enter the amount <strong>in</strong> to the Near Leg.<br />
5. Get a Quote<br />
Once you’re happy with the Trade Ticket’s<br />
details, press Get Quote to receive a price. <strong>The</strong>n<br />
click Buy/Sell or Sell/Buy to confirm the trade.<br />
3. Select the Settlement date<br />
You can select a specific date from the Calendar<br />
button or enter your own date <strong>in</strong> the field. <strong>The</strong><br />
Settlement type will switch to ‘Broken’.<br />
4. Chang<strong>in</strong>g the Far Leg amount<br />
If you want a Swap to be uneven, click the l<strong>in</strong>k<br />
button to enable a different Far Leg amount to be<br />
entered.<br />
6
Trade panel<br />
Edit<strong>in</strong>g Currency Pairs<br />
<strong>UCTrader</strong>’s Trade Panel is highly flexible - you can<br />
create, edit and delete currency pairs to suit the<br />
requirements of each of your trad<strong>in</strong>g accounts.<br />
3<br />
1<br />
4<br />
2<br />
1. Scroll to see full range of pairs<br />
It’s likely that you will have a large number of<br />
currency pairs available at any one time. To view<br />
all of these, you can scroll up and down with<strong>in</strong><br />
the trade panel.<br />
4. Edit a currency pair<br />
<strong>The</strong> same process applies to edit<strong>in</strong>g a currency<br />
pair - click on the pair’s symbol and type <strong>in</strong><br />
the new symbols. Press Enter and the edited<br />
currency pair will refresh.<br />
2. Delete a currency pair<br />
Click on the pair’s top right X button to delete<br />
it from the list<strong>in</strong>g. You can recreate the pair if<br />
required via the “Add Currency Pair” field.<br />
3. Create a new currency pair<br />
In the “Add Currency Pair” field, type the symbol<br />
for the first currency. <strong>UCTrader</strong> will automatically<br />
f<strong>in</strong>ish the symbol for you. <strong>The</strong>n type <strong>in</strong> the second<br />
symbol to complete the pair. Press Enter and the<br />
new pair will appear at the end of the list.<br />
7
How to use <strong>UCTrader</strong><br />
Customiz<strong>in</strong>g the layout<br />
Manag<strong>in</strong>g layouts<br />
<strong>The</strong> flexible nature of <strong>UCTrader</strong> means you can create<br />
as many different layouts as you wish. <strong>The</strong>se can be<br />
saved, renamed and opened when you require.<br />
1<br />
3<br />
2<br />
1. Create a new layout<br />
Click on the <strong>FX</strong> Portal menu item and then<br />
New Layout to create a new template. This will<br />
generate a blank tab called ‘New Layout’.<br />
2. Edit the layout<br />
You can now edit the new layout by mov<strong>in</strong>g or<br />
delet<strong>in</strong>g items and <strong>in</strong>sert<strong>in</strong>g new ones. For more<br />
<strong>in</strong>formation see page 9.<br />
4. Open<strong>in</strong>g a layout<br />
Click on the “Open Layout”. menu option and<br />
select from a list of all saved layouts.<br />
3. Save and delete a layout<br />
At any po<strong>in</strong>t, you can click on the Save Layout<br />
As... option to create a name for the new layout.<br />
This will be reflected <strong>in</strong> the tab.<br />
You can delete the new layout, by click<strong>in</strong>g on<br />
the X next to the tab name.<br />
8
Customiz<strong>in</strong>g the layout<br />
Chang<strong>in</strong>g the layout<br />
<strong>UCTrader</strong> is a drag-and-drop <strong>in</strong>terface, allow<strong>in</strong>g you<br />
to <strong>in</strong>sert/delete, move and resize panels to create the<br />
ideal screen layout. You can even m<strong>in</strong>imise panels<br />
<strong>in</strong>to tabs to free up valuable work space.<br />
4<br />
1<br />
2<br />
3<br />
1. Delet<strong>in</strong>g and mov<strong>in</strong>g panels<br />
You can delete any of the visible panels by click<strong>in</strong>g<br />
on the panel’s X icon <strong>in</strong> the top right hand corner.<br />
To move a panel, click on the panel name and drag<br />
it to the new location. <strong>UCTrader</strong> will automatically<br />
move the other panels to accomodate the move.<br />
2. M<strong>in</strong>imiz<strong>in</strong>g a panel to a tab<br />
If you want to free up some screen space, you can<br />
also m<strong>in</strong>imize a panel to a tab. Simply select the<br />
panel as before by click<strong>in</strong>g on the title and drag the<br />
panel to the tab bar of your preferred parent panel.<br />
You can perform the opposite by dragg<strong>in</strong>g a tab<br />
title <strong>in</strong>to a new panel position.<br />
3. Alter<strong>in</strong>g column/panel widths<br />
Drag borders vertically or horizontally to adapt<br />
the screen layout.<br />
4. Insert<strong>in</strong>g a new panel<br />
Us<strong>in</strong>g the Insert menu option, select an item<br />
from the Add Product Grid list [page 10] and<br />
then position the new panel by dragg<strong>in</strong>g and<br />
dropp<strong>in</strong>g with<strong>in</strong> the screen layout.<br />
9
How to use <strong>UCTrader</strong><br />
Product grid<br />
Tailor pric<strong>in</strong>g <strong>in</strong>formation<br />
<strong>The</strong> product grid conta<strong>in</strong>s pric<strong>in</strong>g <strong>in</strong>formation that<br />
can be tailored to suit your requirements. From<br />
simple currency pairs to def<strong>in</strong>ed swap grids, you can<br />
specify exactly what you need.<br />
2<br />
1<br />
1. Add<strong>in</strong>g currency pairs to a panel<br />
Once you’ve created a new panel [page 9], you<br />
can add currency <strong>in</strong>formation us<strong>in</strong>g the Insert<br />
> <strong>FX</strong> > Currency Pair menu option. Choose a<br />
currency pair and it will be added to the new<br />
panel.<br />
2. Add<strong>in</strong>g a Swap grid<br />
You can create a new Swap Grid panel by rightclick<strong>in</strong>g<br />
on a rate and select<strong>in</strong>g to Add a Swap<br />
Grid. <strong>The</strong>n drag the new panel to your chosen<br />
location. <strong>The</strong> new panel will now display live<br />
Swap pric<strong>in</strong>g for that currency pair.<br />
10
Blotter<br />
Search<strong>in</strong>g and Pr<strong>in</strong>t<strong>in</strong>g<br />
<strong>The</strong> Blotter is a complete history of your trad<strong>in</strong>g<br />
activity. <strong>UCTrader</strong> allows you to search for a specific<br />
trade us<strong>in</strong>g various parameters, and to pr<strong>in</strong>t out lists<br />
of trades.<br />
1<br />
1. Search<strong>in</strong>g for a trade<br />
Click on the Insert > <strong>FX</strong> > Trade Search<br />
menu item, or the <strong>UCTrader</strong> Tools quick l<strong>in</strong>k<br />
(magnify<strong>in</strong>g glass). This will br<strong>in</strong>g up the trade<br />
search panel. You can search for a s<strong>in</strong>gle trade<br />
by specify<strong>in</strong>g the currencies, trade type and<br />
direction, account, dates and trade status.<br />
2. Pr<strong>in</strong>t<strong>in</strong>g trades<br />
Click on the pr<strong>in</strong>t icon to generate a pr<strong>in</strong>table<br />
list of trades. This will <strong>in</strong>clude all completed and<br />
cancelled trades.<br />
After submitt<strong>in</strong>g the search you will then need<br />
to place the search results panel on your screen<br />
- this uses the same process as mov<strong>in</strong>g panels<br />
(see page 9 for more <strong>in</strong>formation).<br />
11
12<br />
<strong>UCTrader</strong> Client Support<br />
+44 (0) 20 7826 1200 ecommerce_support@unicreditgroup.eu