
Create successful ePaper yourself
Turn your PDF publications into a flip-book with our unique Google optimized e-Paper software.
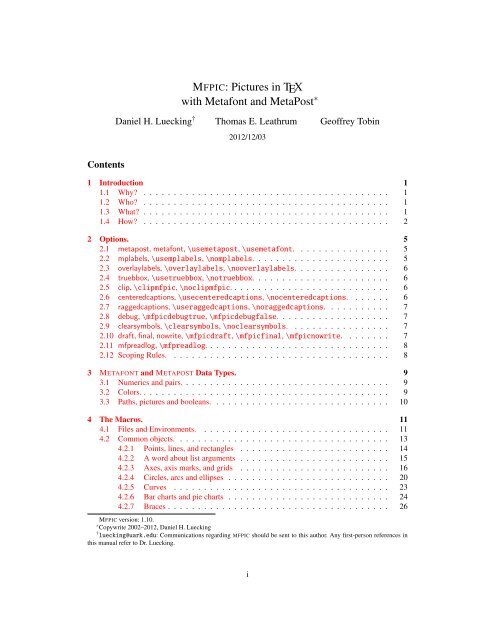
MFPIC: Pictures in TEX<br />
with Metafont and MetaPost ∗<br />
Daniel H. Luecking † Thomas E. Leathrum Geoffrey Tobin<br />
2012/12/03<br />
Contents<br />
1 Introduction 1<br />
1.1 Why? . . . . . . . . . . . . . . . . . . . . . . . . . . . . . . . . . . . . . . . . . 1<br />
1.2 Who? . . . . . . . . . . . . . . . . . . . . . . . . . . . . . . . . . . . . . . . . . 1<br />
1.3 What? . . . . . . . . . . . . . . . . . . . . . . . . . . . . . . . . . . . . . . . . . 1<br />
1.4 How? . . . . . . . . . . . . . . . . . . . . . . . . . . . . . . . . . . . . . . . . . 2<br />
2 Options. 5<br />
2.1 metapost, metafont, \usemetapost, \usemetafont. . . . . . . . . . . . . . . . 5<br />
2.2 mplabels, \usemplabels, \nomplabels. . . . . . . . . . . . . . . . . . . . . . . 5<br />
2.3 overlaylabels, \overlaylabels, \nooverlaylabels. . . . . . . . . . . . . . . . 6<br />
2.4 truebbox, \usetruebbox, \notruebbox. . . . . . . . . . . . . . . . . . . . . . . 6<br />
2.5 clip, \clip<strong>mfpic</strong>, \noclip<strong>mfpic</strong>. . . . . . . . . . . . . . . . . . . . . . . . . . . 6<br />
2.6 centeredcaptions, \usecenteredcaptions, \nocenteredcaptions. . . . . . . 6<br />
2.7 raggedcaptions, \useraggedcaptions, \noraggedcaptions. . . . . . . . . . . 7<br />
2.8 debug, \<strong>mfpic</strong>debugtrue, \<strong>mfpic</strong>debugfalse. . . . . . . . . . . . . . . . . . . 7<br />
2.9 clearsymbols, \clearsymbols, \noclearsymbols. . . . . . . . . . . . . . . . . 7<br />
2.10 draft, final, nowrite, \<strong>mfpic</strong>draft, \<strong>mfpic</strong>final, \<strong>mfpic</strong>nowrite. . . . . . . . 7<br />
2.11 mfpreadlog, \mfpreadlog. . . . . . . . . . . . . . . . . . . . . . . . . . . . . . . 8<br />
2.12 Scoping Rules. . . . . . . . . . . . . . . . . . . . . . . . . . . . . . . . . . . . . 8<br />
3 METAFONT and METAPOST Data Types. 9<br />
3.1 Numerics and pairs. . . . . . . . . . . . . . . . . . . . . . . . . . . . . . . . . . . 9<br />
3.2 Colors. . . . . . . . . . . . . . . . . . . . . . . . . . . . . . . . . . . . . . . . . . 9<br />
3.3 Paths, pictures and booleans. . . . . . . . . . . . . . . . . . . . . . . . . . . . . . 10<br />
4 The Macros. 11<br />
4.1 Files and Environments. . . . . . . . . . . . . . . . . . . . . . . . . . . . . . . . 11<br />
4.2 Common objects. . . . . . . . . . . . . . . . . . . . . . . . . . . . . . . . . . . . 13<br />
4.2.1 Points, lines, and rectangles . . . . . . . . . . . . . . . . . . . . . . . . . 14<br />
4.2.2 A word about list arguments . . . . . . . . . . . . . . . . . . . . . . . . . 15<br />
4.2.3 Axes, axis marks, and grids . . . . . . . . . . . . . . . . . . . . . . . . . 16<br />
4.2.4 Circles, arcs and ellipses . . . . . . . . . . . . . . . . . . . . . . . . . . . 20<br />
4.2.5 Curves . . . . . . . . . . . . . . . . . . . . . . . . . . . . . . . . . . . . 23<br />
4.2.6 Bar charts and pie charts . . . . . . . . . . . . . . . . . . . . . . . . . . . 24<br />
4.2.7 Braces . . . . . . . . . . . . . . . . . . . . . . . . . . . . . . . . . . . . . 26<br />
MFPIC version: 1.10.<br />
∗ Copywrite 2002–2012, Daniel H. Luecking<br />
† luecking@uark.edu: Communications regarding MFPIC should be sent to this author. Any first-person references in<br />
this manual refer to Dr. Luecking.<br />
i
CONTENTS<br />
ii<br />
4.3 Colors in MFPIC. . . . . . . . . . . . . . . . . . . . . . . . . . . . . . . . . . . . 26<br />
4.3.1 METAPOST color functions . . . . . . . . . . . . . . . . . . . . . . . . . . 26<br />
4.3.2 Establishing MFPIC default colors . . . . . . . . . . . . . . . . . . . . . . 28<br />
4.3.3 Defining a color name . . . . . . . . . . . . . . . . . . . . . . . . . . . . 29<br />
4.3.4 METAFONT colors . . . . . . . . . . . . . . . . . . . . . . . . . . . . . . 29<br />
4.4 Modifying the figures. . . . . . . . . . . . . . . . . . . . . . . . . . . . . . . . . 29<br />
4.4.1 Closure of paths . . . . . . . . . . . . . . . . . . . . . . . . . . . . . . . 30<br />
4.4.2 Reversal, connection and other path modifications . . . . . . . . . . . . . 31<br />
4.4.3 Arrows . . . . . . . . . . . . . . . . . . . . . . . . . . . . . . . . . . . . 33<br />
4.5 Rendering figures. . . . . . . . . . . . . . . . . . . . . . . . . . . . . . . . . . . . 35<br />
4.5.1 Drawing . . . . . . . . . . . . . . . . . . . . . . . . . . . . . . . . . . . . 35<br />
4.5.2 Shading, filling, erasing, clipping, hatching . . . . . . . . . . . . . . . . . 37<br />
4.5.3 Changing the default rendering . . . . . . . . . . . . . . . . . . . . . . . . 41<br />
4.5.4 Examples . . . . . . . . . . . . . . . . . . . . . . . . . . . . . . . . . . . 41<br />
4.6 Functions and Plotting. . . . . . . . . . . . . . . . . . . . . . . . . . . . . . . . . 41<br />
4.6.1 Defining functions . . . . . . . . . . . . . . . . . . . . . . . . . . . . . . 41<br />
4.6.2 Plotting functions . . . . . . . . . . . . . . . . . . . . . . . . . . . . . . . 42<br />
4.6.3 Plotting external data files . . . . . . . . . . . . . . . . . . . . . . . . . . 46<br />
4.7 Labels and Captions. . . . . . . . . . . . . . . . . . . . . . . . . . . . . . . . . . 49<br />
4.7.1 Setting text . . . . . . . . . . . . . . . . . . . . . . . . . . . . . . . . . . 49<br />
4.7.2 Curves surrounding text . . . . . . . . . . . . . . . . . . . . . . . . . . . 53<br />
4.8 Saving and Reusing an MFPIC Picture. . . . . . . . . . . . . . . . . . . . . . . . . 54<br />
4.9 Picture Frames. . . . . . . . . . . . . . . . . . . . . . . . . . . . . . . . . . . . . 55<br />
4.10 Affine Transforms. . . . . . . . . . . . . . . . . . . . . . . . . . . . . . . . . . . 55<br />
4.10.1 Transforming the METAFONT coordinate system . . . . . . . . . . . . . . 55<br />
4.10.2 Transforming paths . . . . . . . . . . . . . . . . . . . . . . . . . . . . . . 56<br />
4.11 Parameters. . . . . . . . . . . . . . . . . . . . . . . . . . . . . . . . . . . . . . . 59<br />
4.12 For Advanced Users. . . . . . . . . . . . . . . . . . . . . . . . . . . . . . . . . . 63<br />
4.12.1 Splines . . . . . . . . . . . . . . . . . . . . . . . . . . . . . . . . . . . . 63<br />
4.12.2 Béziers . . . . . . . . . . . . . . . . . . . . . . . . . . . . . . . . . . . . 64<br />
4.12.3 Raw METAFONT code . . . . . . . . . . . . . . . . . . . . . . . . . . . . 65<br />
4.12.4 Creating METAFONT variables . . . . . . . . . . . . . . . . . . . . . . . . 65<br />
4.12.5 Miscelaneous pair expressions . . . . . . . . . . . . . . . . . . . . . . . . 68<br />
4.12.6 Manipulating METAFONT picture variables . . . . . . . . . . . . . . . . . 69<br />
4.12.7 METAFONT loops . . . . . . . . . . . . . . . . . . . . . . . . . . . . . . 71<br />
4.12.8 Miscellaneous . . . . . . . . . . . . . . . . . . . . . . . . . . . . . . . . 73<br />
5 Appendices 79<br />
5.1 Acknowledgements. . . . . . . . . . . . . . . . . . . . . . . . . . . . . . . . . . . 79<br />
5.2 Changes History. . . . . . . . . . . . . . . . . . . . . . . . . . . . . . . . . . . . 79<br />
5.3 Summary of Options. . . . . . . . . . . . . . . . . . . . . . . . . . . . . . . . . . 79<br />
5.4 Plotting Styles for \plotdata. . . . . . . . . . . . . . . . . . . . . . . . . . . . . 80<br />
5.5 Special Considerations When Using METAFONT. . . . . . . . . . . . . . . . . . . 81<br />
5.6 Special Considerations When Using METAPOST. . . . . . . . . . . . . . . . . . . 81<br />
5.6.1 Required support . . . . . . . . . . . . . . . . . . . . . . . . . . . . . . . 81<br />
5.6.2 METAPOST is not METAFONT . . . . . . . . . . . . . . . . . . . . . . . . 82<br />
5.6.3 Graphic inclusion . . . . . . . . . . . . . . . . . . . . . . . . . . . . . . . 83<br />
5.7 MFPIC and the Rest of the World. . . . . . . . . . . . . . . . . . . . . . . . . . . 84
CONTENTS<br />
iii<br />
5.7.1 The literature . . . . . . . . . . . . . . . . . . . . . . . . . . . . . . . . . 84<br />
5.7.2 Other programs . . . . . . . . . . . . . . . . . . . . . . . . . . . . . . . . 85<br />
5.8 Index of commands, options and parameters. . . . . . . . . . . . . . . . . . . . . 86<br />
5.9 List of commands by type. . . . . . . . . . . . . . . . . . . . . . . . . . . . . . . 91<br />
5.9.1 Figures . . . . . . . . . . . . . . . . . . . . . . . . . . . . . . . . . . . . 91<br />
5.9.2 Renderings . . . . . . . . . . . . . . . . . . . . . . . . . . . . . . . . . . 91<br />
5.9.3 Arrows . . . . . . . . . . . . . . . . . . . . . . . . . . . . . . . . . . . . 91<br />
5.9.4 Modifying figures . . . . . . . . . . . . . . . . . . . . . . . . . . . . . . 92<br />
5.9.5 Lengths . . . . . . . . . . . . . . . . . . . . . . . . . . . . . . . . . . . . 92<br />
5.9.6 Coordinate transformation . . . . . . . . . . . . . . . . . . . . . . . . . . 92<br />
5.9.7 Symbols, axes, grids, marks . . . . . . . . . . . . . . . . . . . . . . . . . 92<br />
5.9.8 Symbol names . . . . . . . . . . . . . . . . . . . . . . . . . . . . . . . . 93<br />
5.9.9 Setting options . . . . . . . . . . . . . . . . . . . . . . . . . . . . . . . . 93<br />
5.9.10 Setting values . . . . . . . . . . . . . . . . . . . . . . . . . . . . . . . . . 93<br />
5.9.11 Setting colors . . . . . . . . . . . . . . . . . . . . . . . . . . . . . . . . . 93<br />
5.9.12 Defining arrays . . . . . . . . . . . . . . . . . . . . . . . . . . . . . . . . 93<br />
5.9.13 Changing behavior . . . . . . . . . . . . . . . . . . . . . . . . . . . . . . 94<br />
5.9.14 Files and environments . . . . . . . . . . . . . . . . . . . . . . . . . . . . 94<br />
5.9.15 Text . . . . . . . . . . . . . . . . . . . . . . . . . . . . . . . . . . . . . . 94<br />
5.9.16 Miscellaneous . . . . . . . . . . . . . . . . . . . . . . . . . . . . . . . . 94
1 Introduction<br />
1.1 Why?<br />
Tom got the idea for MFPIC 1 mostly out of a feeling of frustration. Different output mechanisms for<br />
printing or viewing TEX DVI files each have their own ways to include pictures. More often than not,<br />
there are provisions for including graphic objects into a DVI file using TEX \special’s. However,<br />
this technique seemed far from TEX’s ideal of device independence because different TEX output<br />
drivers recognize different \special’s, and handle them in different ways.<br />
LATEX’s picture environment has a hopelessly limited supply of available objects to draw—if<br />
you want to draw a graph of a polynomial curve, you’re out of luck.<br />
There was, of course, PICTEX, which was wonderfully flexible and general, but its most obvious<br />
feature was its speed—or rather lack of it. Processing a single picture in PICTEX (in those days)<br />
could often take several seconds.<br />
It occurred to Tom that it might be possible to take advantage of the fact that METAFONT is<br />
designed for drawing things. The result of pursuing this idea was MFPIC, a set of macros for TEX<br />
and METAFONT which incorporate METAFONT-drawn pictures into a TEX file.<br />
With the creation of METAPOST by John Hobby, and the almost universal availability of free<br />
POSTSCRIPT interpreters like GHOSTSCRIPT, some MFPIC users wanted to run their MFPIC output<br />
through METAPOST, to produce POSTSCRIPT pictures. Moreover, users wanted to be able to use<br />
<strong>pdf</strong>TEX, which did not get along well with PK fonts, but was quite happy with METAPOST pictures.<br />
So METAPOST support was added to MFPIC. This got us a little bit away from device independence,<br />
but many users were not much concerned with that: they just wanted a convenient way to have text<br />
and pictures described in the same <strong>doc</strong>ument file.<br />
With the extra capabilities of POSTSCRIPT (e.g., color) and the corresponding abilities of META-<br />
POST, there was a demand for some MFPIC interface to access them. Consequently, switches (options)<br />
have been added to access some of them. When these are used, output files may no longer be<br />
compatible with METAFONT.<br />
1.2 Who?<br />
The original MFPIC (and still the core of the current version) was written primarily by Tom Leathrum<br />
during the late (northern hemisphere) spring and summer of 1992, while at Dartmouth College.<br />
Different versions were being written and tested for nearly two years after that, during which time<br />
Tom finished his Ph.D. and took a job at Berry College, in Rome, GA. Between fall of 1992 and fall<br />
of 1993, much of the development was carried out by others. Those who helped most in this process<br />
are credited in the Acknowledgements.<br />
Somewhere in the mid 1990’s the development passed to Geoffrey Tobin who kept things going<br />
for several years.<br />
The addition of METAPOST support was carried out by Dan Luecking around 1997–99. He is<br />
also responsible for all other additions and changes since then, with help from Geoffrey and a few<br />
others mentioned in the Acknowledgements.<br />
1.3 What?<br />
See the README file for a list of files in the distribution and a brief explanation of each. Only three are<br />
actually needed for full access to MFPIC’s capabilities: <strong>mfpic</strong>.dtx, <strong>mfpic</strong>.ins and grafbase.dtx.<br />
Running LATEX on <strong>mfpic</strong>.ins creates the only required files:<br />
<strong>mfpic</strong>.tex and <strong>mfpic</strong>.sty, the latter required only for LATEX.<br />
grafbase.mf, required only if METAFONT will be processing figures.<br />
1 ‘MFPIC’ is pronounced by spelling the first two letters: ‘em-eff-pick’.<br />
1
1.4 HOW? 2<br />
grafbase.mp, dvipsnam.mp and <strong>mfpic</strong>def.tex, needed only if METAPOST will be the processor.<br />
The README file also gives some guidence on the proper location for the installation of these files.<br />
1.4 How?<br />
Some guidance on writing files that contain MFPIC figures can be found in the accompanying file<br />
mfpguide.<strong>pdf</strong>. If you use MFPIC to produce METAPOST figures the process is straightforward: run<br />
TEX (or LATEX), then METAPOST, then TEX again. If there are no errors, then DVIPS or other DVIto-PS<br />
converter can be run to produce viewable/printable output. You can also run DVIPDFM(X) to<br />
obtain PDF output, or even use <strong>pdf</strong>TEX instead of TEX (or <strong>pdf</strong>LATEX instead of LATEX) to get PDF<br />
output directly.<br />
Here is an example of the process: for the sample file pictures.tex, first run TEX on it (or run<br />
LATEX on lapictures.tex). You may see a message from MFPIC that there is no file pics.1, but<br />
TEX will continue processing the file anyway. When TEX is finished, you will now have a file called<br />
pics.mp. This is the METAPOST file containing the descriptions of the pictures for pictures.tex.<br />
You need to run METAPOST on pics.mp (Read your METAPOST manual to see how to do this. 2 )<br />
Typically, you just type<br />
mpost pics.mp<br />
This usually produces files named 3 pics.1, pics.2, etc., the number of files depending on the<br />
version of pictures.tex. You then reprocess pictures.tex with TEX to produce a DVI file. This<br />
file can then be processed with DVIPS (for example) to produce POSTSCRIPT output which can be<br />
printed or viewed. One can also process the DVI with DVIPDFM(X) to produce a PDF file.<br />
If <strong>pdf</strong>TEX is used instead of TEX on the second run, you should be able to view the resulting PDF<br />
file immediately, without any further processing.<br />
If instead you use MFPIC to produce METAFONT figures, things are a little less straightforward.<br />
The process is TEX, then METAFONT, then GFTOPK, then TEX again. After this, TEX’s DVI output<br />
ought to be viewable and printable by most DVI viewers or printer drivers. For a few TEX systems<br />
there may be some prior setup needed. One needs to convince TEX and its output drivers to find<br />
METAFONT’s output files. You should do whatever is necessary (perhaps nothing!) to insure that<br />
TEX looks in the current directory for .tfm files, and that your DVI drivers look in the current<br />
directory for .pk files. There may also be some setup needed to ensure that the .pk files are created<br />
at a resolution that matches that of your printer and of your DVI viewer. See the discussion in<br />
mfpguide.<strong>pdf</strong>.<br />
If you want to test this process on the supplied sample files, edit pictures.tex removing the<br />
\usemetapost command (or edit lapictures.tex, removing the metapost option). After that,<br />
run TEX on pictures.tex (or run LATEX on lapictures.tex). You may see a message from MF-<br />
PIC that there is no file pics.tfm, but TEX will continue processing the file. When TEX is finished,<br />
you will now have a file called pics.mf. This is the METAFONT file containing the descriptions of<br />
the pictures for pictures.tex. You need to run METAFONT on pics.mf, with mode:=localfont<br />
set up. (Read your METAFONT manual to see how to do this. 4 ) Typically, you just type<br />
mf pics.mf<br />
2 The <strong>doc</strong>ument Some experiences on running Metafont and MetaPost, by Peter Wilson, can be useful for beginners. Fetch<br />
CTAN/info/metafp.<strong>pdf</strong>. ‘CTAN’ means the Comprehensive TEX Archive Network. You can find the mirror nearest you by<br />
pointing your browser at http://www.ctan.org/ .<br />
3 Recent METAPOST allows one to change the default names of the output files. Current MFPIC provides an interface to<br />
that capability: see \setfilenametemplate on page 77.<br />
4 If you are new to running METAFONT, the <strong>doc</strong>ument Metafont for Beginners, by Geoffrey Tobin, is a good start. Fetch<br />
CTAN/info/metafont-for-beginners.tex.
1.4 HOW? 3<br />
or, to use a particular printer mode such as ljfour, possibly something like<br />
mf ’\mode:=ljfour; input pics.mf’<br />
This produces a pics.tfm file and a GF file with a name something like pics.600gf. The actual<br />
number may be different and the extension may get truncated on some file systems. Then you run<br />
GFTOPK on the GF file to produce a PK font file. (Read your GFTOPK manual on how to do this.)<br />
Typically, you just run<br />
gftopk pics.600gf<br />
(or possibly “gftopk pics.600gf pics.600pk” or “gftopk pics.600gf pics.pk”).<br />
Now that you have the font (the .pk file) and font metric file (the .tfm) generated by METAFONT,<br />
reprocess the file pictures.tex with TEX. The resulting DVI file should now be complete, and you<br />
should be able to print and view it at your computer (assuming your viewer and print driver have<br />
been set up to be able to find the PK font generated from pics.mf).<br />
It is not advisable to rely on automatic font generation to create the .tfm and .pk files. (Different<br />
systems do this in different ways, so here I will try to give a generic explanation.) The reason: later<br />
editing of a figure will require new files to be built, and most automatic systems will not remake<br />
the files once they have been created. This is not so much a problem with the .tfm, because MFPIC<br />
never tries to load the font if the .tfm is absent and therefore no automatic .tfm-making should ever<br />
be triggered. However, if you forget to run GFTOPK, then try to view your resulting file, you may<br />
have to search your system and delete some automatically generated .pk file (they can turn up in<br />
far-away places) before you can see any later changes. It might be wise to write a shell script (batch<br />
file) that runs both METAFONT and GFTOPK. It should also do some error checking and delete the<br />
.tfm if the .pk file is not produced. That way, if anything goes wrong, the .dvi will not contain the<br />
font (MFPIC will draw a rectangle and the figure number in place of the figure).<br />
These processing steps—processing with TEX, processing with METAFONT/GFTOPK or META-<br />
POST, and reprocessing with TEX—may not always be necessary. In particular, if you change the<br />
TEX <strong>doc</strong>ument without making any changes at all to the pictures, then there will be no need to repeat<br />
the METAFONT or METAPOST steps.<br />
There are also somewhat subtle circumstance under which you can skip the second TEX step<br />
after editing a figure if the file has already gone through the above process. Delineating the exact<br />
cirumstances is rather involved, so it is recommended that you always repeat the TEX step if you<br />
have made changes that affect any figure.<br />
What makes MFPIC work? When you run TEX on the file pictures.tex, the MFPIC macros<br />
issue TEX \write commands, writing METAFONT (or METAPOST) commands to a file pics.mf<br />
(or pics.mp). The user should never have to read or change the file pics.mf directly—the MFPIC<br />
macros take care of it.<br />
The enterprising user can determine by examining the MFPIC source and the resulting .mf or<br />
.mp file, that MFPIC drawing macros translate almost directly into similar METAFONT/METAPOST<br />
commands, defined in one of the files grafbase.mf or grafbase.mp. The labels and captions,<br />
however, are placed on the graph by TEX using box placement techniques similar to those used in<br />
LATEX’s picture environment (except when option mplabels is in effect, in which case the labels<br />
are written to the .mp file and handled by METAPOST).<br />
Note: In this manual, when describing MFPIC operations, we will often refer to ‘METAFONT’<br />
when we really mean “METAFONT or METAPOST”. This will especially be the case whenever we<br />
need to refer to commands in the two languages which are substantially the same, but occasionally<br />
we will even talk about “running METAFONT” when we mean running one or the other program mf<br />
or mpost to process the figures. If we need to discriminate between the two processors, (for example<br />
when they have different behavior) we will make the difference explicit.
1.4 HOW? 4<br />
A similar shorthand is used when referring to ‘TEX’. It should not be taken to mean “plain TEX”,<br />
but rather whatever version of TEX is used to process the source file: plain TEX, LATEX, <strong>pdf</strong>TEX, or<br />
<strong>pdf</strong>LATEX. Also AMS-TEX, EPLAIN and some other variants. When last tried, MFPIC didn’t work<br />
with ConTEXt.
2 Options.<br />
There are several options to the MFPIC package. These options can be turned on with certain provided<br />
commands, but under LATEX they can also be used in the standard LATEX \usepackage optional<br />
argument. Some options can be switched off and on throughout the <strong>doc</strong>ument. Here we merely list<br />
them and provide a general description of their purpose. More details may be found later in the<br />
discussion of the features affected. The headings below give the option name, the alternative macro<br />
and, if available, the command for turning off the option. Any option in the \usepackage command<br />
not among those given below will be passed on to the GRAPHICS package, provided the metapost<br />
option has been used.<br />
If the file <strong>mfpic</strong>.cfg exists, it will be input just before all options are processed. You can create<br />
such a file containing an \ExecuteOptions command to execute any options you would like to<br />
have as default. Actual options to \usepackage will override these defaults, of course. And so will<br />
any of the commands below.<br />
Finally, if a file named <strong>mfpic</strong>.usr can be found, it will be input at the end of the loading of<br />
MFPIC. The user can create such a file containing any of the commands of this section that he would<br />
like to have as default, plus any other TEX code.<br />
2.1 metapost, metafont, \usemetapost, \usemetafont.<br />
The option metapost or the command \usemetapost selects METAPOST as the figure processor and<br />
makes specific features available. It changes the extension used on the output file to ‘.mp’ to signal<br />
that it can no longer be processed with METAFONT. There is also a metafont option (command<br />
\usemetafont), but it is redundant, as METAFONT is the default (for backward compatibility of<br />
files written before METAPOST existed). Either command must come before the \opengraphsfile<br />
command (see section 4.1). They should not be used together in the same <strong>doc</strong>ument. (Actually they<br />
can, but one needs to close one output file and open another. Moreover, it hasn’t ever been seriously<br />
tested, and it wasn’t taken into consideration in writing most of the macros.) If the command form<br />
\usemetapost is used in a LATEX 2ε <strong>doc</strong>ument, it must come in the preamble. Because of the timing<br />
of actions by the BABEL package and by older versions of supp-<strong>pdf</strong>.tex (input by <strong>pdf</strong>tex.def<br />
in the GRAPHICS package), when <strong>pdf</strong>LATEX is used, MFPIC should be loaded and \usemetapost (if<br />
used) declared before BABEL is loaded.<br />
2.2 mplabels, \usemplabels, \nomplabels.<br />
Causes all label creation commands to write their contents to the output file. It effects only labels on<br />
the figure, not a caption added by the \tcaption command (see section 4.7.1). In this case labels are<br />
handled by METAPOST and can be rotated. It requires METAPOST, and will be be ignored without it<br />
(METAFONT cannot handle labels). Using this option without the metapost option may also produce<br />
an error message either from TEX or METAFONT. The command forms can be placed anywhere. If<br />
used outside an <strong>mfpic</strong> environment, they affect all subsequent \tlabel commands; inside an <strong>mfpic</strong><br />
environment they affect all \tlabel commands in that figure.<br />
When this is in effect, the labels become part of the figure and, in the default handling, they may<br />
be clipped off or covered up by later drawing elements. But see the next section on the overlaylabels<br />
option. Labels added to a picture contribute to the bounding box even if truebbox is not in effect.<br />
The user is responsible for adding the appropriate verbatimtex header to the output file if<br />
necessary. For this purpose, there is the \mfpverbtex command, see section 4.7. If the label text<br />
contains only valid plain TEX macros, there is generally no need for a verbatimtex preamble at all.<br />
If you add a verbatimtex preamble of LATEX code take care to make sure METAPOST calls LATEX<br />
(for example, the mpost command may take an option for this purpose, or an environmental variable<br />
named TEX may be set equal to latex in the command shell of your operating system.).<br />
5
2.3 overlaylabels, \overlaylabels, \nooverlaylabels. 6<br />
2.3 overlaylabels, \overlaylabels, \nooverlaylabels.<br />
In the past, under mplabels all text labels created by \tlabel and its relatives were added to the<br />
picture by METAPOST as they occurred. This made them subject to later drawing commands: they<br />
could be covered up, erased, or clipped. With this option (or after the command \overlaylabels)<br />
text labels are saved in a separate place from the rest of a picture. When a picture is completed,<br />
the labels that were saved are added on top of it. This is the way labels always behave under the<br />
metafont option, because then TEX must add the labels and there is no possibility for special effects<br />
involving clipping or erasing (at the METAFONT level).<br />
With the metapost option, but without mplabels it has been decided to keep the same behavior<br />
(and the same code) as under the metafont option. However, when mplabels is used, there is the<br />
possibility for special effects with text, and it has always been the behavior before version 0.7 to<br />
simply place the labels as they occurred. It turns out that placing the labels at the end is cleaner and<br />
simpler to code, so I experimented with it and rejected it as a default, but now offer it as an option.<br />
With this option, MFPIC labels have almost the same behavior with or without mplabels.<br />
The commands may be used anywhere. Outside a figure they affect all subsequent figures, inside<br />
a figure they affect all subsequent text in that figure. The commands and option are ignored under<br />
the metafont option.<br />
2.4 truebbox, \usetruebbox, \notruebbox.<br />
Normally METAPOST outputs an EPS file with the actual bounding box of the figure. By default,<br />
MFPIC overrides this and sets the bounding box to the dimensions specified by the \<strong>mfpic</strong> command<br />
that produced it. (This used to be needed for TEX is to handle \tlabel commands correctly.<br />
Now, it is just for backward compatability, and for compatability with METAFONT’s behavior.) It is<br />
reasonable to let METAPOST have its way, and that is what this option does. If one of the command<br />
forms is used in an <strong>mfpic</strong> environment, it affects only that environment, otherwise it affects all<br />
subsequent figures. This option currently has no effect with METAFONT, but should cause no errors.<br />
This option is almost mandatory if you wish to use DVIPDFM(X) to convert TEX’s DVI output<br />
to PDF. Both DVIPDFM and DVIPDFMX have a tendency to clip METAPOST figures to the stated<br />
bounding box. Thus, anything running outside those bounds is lost.<br />
2.5 clip, \clip<strong>mfpic</strong>, \noclip<strong>mfpic</strong>.<br />
The clip option causes all parts of the figure outside the rectangle specified by the \<strong>mfpic</strong> command<br />
to be removed. The commands can come anywhere. If issued inside an <strong>mfpic</strong> environment they<br />
affect the current figure only. Otherwise all subsequent figures are affected. Note: this is a rather<br />
rudimentary option. It has an often unexpected interaction with truebbox. When both are in effect,<br />
METAPOST will produce a bounding box that is the intersection of two rectangles: the true one<br />
without clipping, and the clipping rectangle (i.e., the one specified in the \<strong>mfpic</strong> command). It is<br />
possible for the actual figure to be much smaller than this bounding box (even empty!). This is a<br />
property of the METAPOST clip command and we know of no way to avoid it.<br />
2.6 centeredcaptions, \usecenteredcaptions, \nocenteredcaptions.<br />
The centeredcaptions option causes multiline captions created by \tcaption to have all lines centered.<br />
This has no effect on the normal LATEX \caption command. 5<br />
The commands can be issued anywhere. If inside an <strong>mfpic</strong> environment they should come before<br />
the \tcaption command and affect only it, otherwise they affect all subsequent figures. They<br />
should not be used in the argument of a \tcaption command.<br />
5 This writer [DHL] feels that \tcaption is too limited and users ought to apply the caption by other means, such as<br />
LATEX’s \caption command, outside the <strong>mfpic</strong> environment.
2.7 raggedcaptions, \useraggedcaptions, \noraggedcaptions. 7<br />
2.7 raggedcaptions, \useraggedcaptions, \noraggedcaptions.<br />
The raggedcaptions option causes multiline captions created by \tcaption to have all lines raggedright.<br />
If centeredcaptions is on, both sides will be ragged. This option can be turned off with the<br />
command \noraggedcaptions. This is the default: to have all lines except the last justified. The<br />
last line is either centered or flush left according to whether centeredcaptions is on or off.<br />
The commands can be issued anywhere. If inside an <strong>mfpic</strong> environment they should come before<br />
the \tcaption command and affect only it, otherwise they affect all subsequent figures. They<br />
should not be used in the argument of a \tcaption command.<br />
2.8 debug, \<strong>mfpic</strong>debugtrue, \<strong>mfpic</strong>debugfalse.<br />
The debug option causes MFPIC to write a rather large amount of information to the .log file and<br />
sometimes to the terminal. Debug information generated by <strong>mfpic</strong>.tex while loading is probably of<br />
interest only to developers, but can be turned on by giving a definition to the command \<strong>mfpic</strong>debug<br />
prior to loading. Any definition will work because MFPIC only checks whether it is defined.<br />
2.9 clearsymbols, \clearsymbols, \noclearsymbols.<br />
MFPIC has two commands, \point and \plotsymbol that place a small symbol at each of a list of<br />
points. The first can place either a small filled disk or an open disk, the choice being dictated by the<br />
setting of the boolean \pointfilltrue or \pointfillfalse. The behavior of \point in the case<br />
of \pointfillfalse is to erase the interior of the disk in addition to drawing its circumference.<br />
The second command \plotsymbol can place a variety of shapes, some open, some not. Its<br />
behavior before version 0.7 was to always draw the shape without erasing the interior. Two other<br />
commands that placed these symbols, \plotnodes and \plot, had the same behavior. With this option,<br />
two of these, \plotsymbol and \plotnodes, will erase the interior of the open symbols before<br />
drawing them. Thus \plotsymbol{SolidCircle} still works just like \pointfilltrue\point,<br />
and now with this option \plotsymbol{Circle} behaves the same as \pointfillfalse\point.<br />
The \plot command is unaffected by this option.<br />
2.10 draft, final, nowrite, \<strong>mfpic</strong>draft, \<strong>mfpic</strong>final, \<strong>mfpic</strong>nowrite.<br />
Under the metapost option, the various macros that include the EPS files emit rather large amounts<br />
of confusing error messages when the files don’t exist (especially in LATEX). For this reason, before<br />
each picture is placed, MFPIC checks for the existence of the graphic before trying to include it.<br />
However, on some systems checking for the existence of a nonexistent file can be very slow because<br />
the entire TEX search path will need to be checked. Therefore, MFPIC doesn’t even attempt any<br />
inclusion on the first run. The first run is detected by the non-existence of 〈file〉.1, where 〈file〉 is<br />
the name given in the \opengraphsfile command (but see also section 4.1). These options can<br />
be used to override this automatic detection. All the command versions should come before the<br />
\opengraphsfile command. The \<strong>mfpic</strong>nowrite command must come before it.<br />
These options might be used if, for example, the first figure has an error and is not created by<br />
METAPOST, but you would like MFPIC to go ahead and include the remaining figures. Then use final.<br />
It can also be used to override a LATEX global draft option. Or if 〈file〉.1 exists, but other figures still<br />
have errors and you would like several runs to be treated as first runs until METAPOST has stopped<br />
issuing error messages, then use draft. These commands also work under the metafont option, but<br />
time and error messages are less of an issue then. If all the figures have been created and debugged,<br />
some time might be saved (with either metafont or metapost) by not writing the output file again,<br />
then nowrite can be used.
2.11 mfpreadlog, \mfpreadlog. 8<br />
2.11 mfpreadlog, \mfpreadlog.<br />
From version 0.8, there exists a scheme to allow METAFONT or METAPOST to pass information<br />
back to the .tex file. This is done by writing code to the figure file requesting METAFONT to<br />
place that information in the .log file it produces. This option instructs MFPIC to read through<br />
that log file line-by-line looking for such information. Since such log files can be potentially quite<br />
lengthy, this is made an option. If the command form \mfpreadlog is used, it must come before<br />
the \opengraphsfile command, since that is when the file will be examined. At the present time,<br />
the only MFPIC facility that requires this two-way communication is \assignmfvalue (see subsection<br />
4.12.8). If this is used, the filename given to \opengraphsfile should not be the same as the<br />
TEX source file in which this occurs, as then the wrong .log may be read.<br />
2.12 Scoping Rules.<br />
Some of these options merely change TEX behavior, others write information to the output file for<br />
METAFONT or METAPOST. Changes in TEX behavior obey the normal TEX grouping rules, the information<br />
written to the output file obeys METAFONT grouping rules. Since each <strong>mfpic</strong> environment is<br />
both a TEX group and (corresponds to) a METAFONT group, the following always holds: use of one<br />
of the command forms inside of an <strong>mfpic</strong> environment makes the change local to that environment.<br />
An effort has been made (as of version 0.7) to make this universal. That is, any of the commands<br />
listed above for turning options on and off will be global when issued outside an <strong>mfpic</strong> environment.<br />
The debug commands are exceptions; they obey all TEX scoping rules.<br />
We have also tried to make all other MFPIC commands for changing the various parameters<br />
follow this rule: local inside <strong>mfpic</strong> environment, global outside. If this is ever untrue, and I don’t<br />
<strong>doc</strong>ument that fact, please let me know.<br />
The following are special:<br />
\usemetapost, \usemetafont, \<strong>mfpic</strong>draft, \<strong>mfpic</strong>final, \<strong>mfpic</strong>nowrite,<br />
and \mfpreadlog.<br />
Their effects are always global, partly because they should occur prior to the initialization command<br />
\opengraphsfile (described in section 4.1). Note that \usemetapost may cause a file of graphic<br />
inclusion macros to be input. If this command is issued inside a group, some definitions in that file<br />
may be lost, breaking the graphic inclusion code.
3 METAFONT and METAPOST Data Types.<br />
Since the arguments of most MFPIC drawing commands are sent to METAFONT to be interpreted, it’s<br />
useful to know something about METAFONT concepts. In this chapter we will discuss some of the<br />
data types METAFONT supports. Even the casual user should know how coordinates and colors are<br />
treated and so should at least skim the next two sections. The last section can be read when the user<br />
wants to manipulate more complex objects.<br />
METAFONT permits several different data types, and we will mainly be concerned with six of<br />
these: numeric, pair, color (METAPOST only), path, picture and boolean. 6 In METAPOST version<br />
1.000, a tenth data type was added, cmykcolor, and the color data type can be referred to as ‘rgbcolor’<br />
if one wants to emphasize the distinction.<br />
A variable is a symbolic name, which can be a single letter such as A, or a descriptive name like<br />
origin. Any sequence of letters and underscores is permitted as a variable name. Numeric indexes<br />
are also allowed, provided all variables that differ only in the index have the same type. Thus A1, A2,<br />
etc., might be variables which are all of type pair. Quite a lot more is permited for variable names,<br />
but the rules are rather complex and easy to violate. MFPIC has commands for creating both simple<br />
variables and indexed variables (called arrays) but the casual user can get quite a lot of use out of<br />
MFPIC without ever creating or using a METAFONT variable.<br />
METAFONT also has something akin to functions. For example, sin(1.57) might represent<br />
a function named sin receiving the parameter 1.57 as input and returning the appropriate value.<br />
Functions can take any number of parameters and return any of the data types that METAFONT<br />
supports. 7<br />
3.1 Numerics and pairs.<br />
METAFONT has numeric quantities. These include lengths, such as the radius of a circle, as well as<br />
dimension units such as in (inches) and pt (points). In fact it understands all the same units that TEX<br />
does. These numeric quantities can be constants (explicit numbers) or variables (symbolic names).<br />
In fact, in and pt are symbolic names for numeric quantities.<br />
METAFONT also has pair objects, which may be constants or variables. Constants of type pair<br />
have the form (x,y) where x and y are numbers, for example (0,0). Pairs are two-dimensional<br />
quantities used for representing either points or vectors in a rectangular (Cartesian) coordinate system.<br />
In this manual we often represent each pair by a brief name, such as 〈p〉 or 〈v〉, the meanings of<br />
which are usually obvious in the context of the macro. These are intended to be replaced in actual use<br />
by either a pair constant or variable. The succinctness of this notation helps us to think geometrically<br />
rather than only of coordinates.<br />
3.2 Colors.<br />
METAPOST has the same concepts as METAFONT, but also has color objects, which may also be<br />
constants or variables. In recent MP, colors come in two flavors: rgbcolor and cmykcolor. Constants<br />
of type rgbcolor have the form (r,g,b) where r, g, and b are numbers between 0 and 1 determining<br />
the relative proportions of red, green and blue in the color (the ‘rgb’ model). Constants of type<br />
cmykcolor have the form (c,m,y,k) where c, m, y and k are numbers between 0 and 1 determining<br />
the relative proportions of cyan, magenta, yellow and black in the color (the ‘cmyk’ model).<br />
6 For the curious, there are a total of eight types (nine or ten for METAPOST). The other three are string, transform and<br />
pen. METAFONT also permits expressions that produce nothing, which is sometimes called the vacuous type, but doesn’t<br />
allow (or need) variables of this type.<br />
7 Including the vacuous type.<br />
9
3.3 PATHS, PICTURES AND BOOLEANS. 10<br />
A color variable is a name, like red, blue (both predefined rgb colors in METAPOST) or magenta<br />
(predefined by MFPIC to be an rgb color if METAPOST has version < 1.000, a cmyk color if the<br />
version is at least 1.000).<br />
3.3 Paths, pictures and booleans.<br />
Most of the things that MFPIC is designed to draw are paths. Examples of paths are circles, rectangles,<br />
other polygons, graphs of functions and splines. Because we tend to want to draw these (or fill<br />
them, or render them in other ways) we call the MFPIC commands that produce them figure macros.<br />
Although they are much more complex than numerics, pairs, or colors, they can still be stored in<br />
symbolic names.<br />
Normally in MFPIC we want to create a picture, usually by rendering one or more paths. It is<br />
possible in METAFONT to store a picture in a symbolic name without actually drawing it. However,<br />
because of their complexity, objects of type picture require somewhat more care than paths or other<br />
data types. Do not expect to use stored pictures in the same way as stored paths. In fact, one should<br />
use picture variables only in those command that are explicitly designed for them. In MFPIC to date<br />
these are only \tile...\endtile and \mfpimage to store pictures, and \putmfpimage to draw<br />
copies of one. There is also \tess, but it is used only to fill a region with copies of a picture created<br />
by \tile.<br />
The boolean data type is one of the values true or false. Variables of type boolean are symbolic<br />
names that can take either of these two values. Usually these are used to influence the behavior<br />
of some command by setting a relevant boolean variable to one or the other value.
4 The Macros.<br />
Many of the commands of MFPIC have optional arguments. These are denoted just as in LATEX, with<br />
square brackets. Thus, the command for drawing a circle can be given<br />
\circle{(0,0),1}<br />
having only the mandatory argument, or<br />
\circle[p]{(0,0),1}<br />
Whenever an optional argument is omitted, the behavior is equivalent to some choice of the optional<br />
argument. In this example, the two forms have exactly the same behavior, drawing a circle<br />
centered at (0,0) with radius 1. In this case we will say “[p] is the default”. Another example is<br />
\point{(1,0)} versus \point[3pt]{(1,0)}. They both place a dot at the point (1,0). The second<br />
one explicitly requests that it have diameter 3pt; the first will examine the length command<br />
\pointsize, which the user can change, but it is initialized to 2pt. In this case we will say “the<br />
default is the value of \pointsize, initially 2pt”.<br />
If an MFPIC command that takes an optional argument finds only empty brackets (completely<br />
empty, no spaces), then it will use the default value. This is useful for commands that have two<br />
optional arguments and one wants the default value in the first one and some nondefault value in<br />
the second. An optional argument should normally not contain any spaces. Even when the argument<br />
contains more than one piece of data, spaces should not separate the parts. In some cases this will<br />
cause no harm, but it would be better to avoid doing it altogether, because there are cases where it<br />
will cause wrong results or error messages.<br />
4.1 Files and Environments.<br />
\opengraphsfile{〈file〉}<br />
...<br />
\closegraphsfile<br />
These macros open and close the METAFONT or METAPOST file which will contain the pictures<br />
to be included in this <strong>doc</strong>ument. The name of the file will be 〈file〉.mf (or 〈file〉.mp). Do not specify<br />
the extension, which is added automatically.<br />
Note: This command may cause 〈file〉.mf or 〈file〉.mp to be overwritten if it already exists, so<br />
be sure to consider that when selecting the name. Repeating the running of TEX will overwrite the<br />
file created on previous runs, but that should be harmless. For if no changes are made to <strong>mfpic</strong><br />
environments, the identical file will be recreated, and if changes have been made, then you want the<br />
file to be replaced with the new version.<br />
It is possible (but has not been seriously tested) to close one file and open another, and even to<br />
change between metapost and metafont in between. If anything goes wrong with this, contact the<br />
maintainer and it might be fixed in some later version.<br />
There may be limitations on what can be used as a filename. As of MFPIC version 1.00, we have<br />
tried to permit \jobname as part of 〈file〉. Thus we permit TEX macros, but they should expand<br />
to non-special characters. Permitting macros makes it essentially impossible for the filename to<br />
contain the backslash and brace characters. Also spaces are problematic. However other special TEX<br />
characters (for example: tilde, underscore and percent) can be used, though that is not recommended.<br />
11
4.1 FILES AND ENVIRONMENTS. 12<br />
\<strong>mfpic</strong>[〈xfactor〉][〈yfactor〉]{〈xmin〉}{〈xmax〉}{〈ymin〉}{〈ymax〉}<br />
...<br />
\end<strong>mfpic</strong><br />
These macros open and close the <strong>mfpic</strong> environment 8 in which the drawing macros make sense.<br />
While many MFPIC commands can be used inside or outside this environment, those that actually<br />
produce visible output are required to be inside. The \<strong>mfpic</strong> macro also sets up the local coordinate<br />
system for the picture. The 〈xfactor〉 and 〈yfactor〉 parameters establish the length of a coordinate<br />
system unit, as a multiple of the TEX dimension \<strong>mfpic</strong>unit. If neither is specified, both are taken<br />
to be 1 and each coordinate system unit is 1 \<strong>mfpic</strong>unit. If only one is specified, then they are<br />
assumed to be equal. Note that some drawing commands require equal scales to work as expected:<br />
if you try to draw a circle with different scales you will get an ellipse.<br />
The 〈xmin〉 and 〈xmax〉 parameters establish the lower and upper bounds for the x-axis coordinates;<br />
similarly, 〈ymin〉 and 〈ymax〉 establish the bounds for the y-axis. These bounds are expressed<br />
in local units—in other words, the actual width of the picture will be (〈xmax〉 − 〈xmin〉) · 〈xfactor〉<br />
times \<strong>mfpic</strong>unit, its height (〈ymax〉 − 〈ymin〉) · 〈yfactor〉 times \<strong>mfpic</strong>unit, and its depth zero.<br />
Most of MFPIC’s drawing macros accept parameters which are coordinate pairs. A coordinate<br />
pair is a pair of numbers (x,y) enclosed in parentheses, with 〈xmin〉 ≤ x ≤ 〈xmax〉 and 〈ymin〉 ≤ y ≤<br />
〈ymax〉. 9 We will call these graph coordinates and refer to the numbers x and y as being in graph<br />
units. Things like the thickness of lines and the lengths of arrowheads are required to be expressed<br />
in actual lengths such as 1pt or 3mm. These will be referred to as absolute units.<br />
One can scale all pictures uniformly by changing \<strong>mfpic</strong>unit, and scale an individual picture<br />
by changing 〈xfactor〉 and 〈yfactor〉. After loading MFPIC, \<strong>mfpic</strong>unit has the value 1pt. One pt<br />
is a printer’s point, which equals 1/72.27 inches or 0.35146 millimeters.<br />
Note: Changing \<strong>mfpic</strong>unit or the optional parameters will scale the coordinate system, but<br />
not the values of parameters that are defined in absolute units. If you wish, you can set these to<br />
multiples of \<strong>mfpic</strong>unit, but it is difficult (and almost certainly unwise) to get the thickness of<br />
lines (for example) to scale along with the scale parameters.<br />
In addition to establishing the coordinate system, these scales and bounds are used to establish<br />
the metric for the METAFONT character or bounding box for the METAPOST figure described within<br />
the environment. If any of these parameters are changed, the .tfm file (METAFONT) or the bounding<br />
box (METAPOST) will be affected, so you will have to be sure to reprocess the TEX file after<br />
processing the .mf or .mp file, even if no other changes are made in the figure.<br />
The value of these 6 parameters to \<strong>mfpic</strong> are available within the environment as macros:<br />
\xfactor, \yfactor, \xmin, \xmax, \ymin and \ymax.<br />
\<strong>mfpic</strong>number{〈num〉}<br />
Normally, \<strong>mfpic</strong> assigns the number 1 to the first <strong>mfpic</strong> environment, after which the number<br />
is increased by one for each new <strong>mfpic</strong> environment. This number is used internally to include the<br />
picture. It is also transmitted to the output file where it is used as the argument to a begin<strong>mfpic</strong><br />
command. In METAFONT this number becomes the position of the character in the font file, while in<br />
METAPOST it is part of the name of the graphic file that is output. The above command tells MFPIC to<br />
ignore this sequence and number the next <strong>mfpic</strong> figure with 〈num〉 (and the one after that 〈num〉+1,<br />
etc.). It is up to the user to make sure no number is repeated, as no checking is done. Numbers greater<br />
than 255 may cause errors, as TEX assumes that characters are represented by numbers no larger than<br />
that. If the first figure is to be numbered something other than 1, then, under the metapost option,<br />
8 We use the term ‘environment’ loosely. However, in LATEX one may use an actual <strong>mfpic</strong> environment. See page 13.<br />
9 These inequalities can be violated, usually causing something to be drawn outside the designated borders of the figure.
4.2 COMMON OBJECTS. 13<br />
this command should come before \opengraphsfile, as that command checks for the existence of<br />
the first numbered figure to determine if there are figures to be included.<br />
\every<strong>mfpic</strong>{〈commands〉}<br />
\everyend<strong>mfpic</strong>{〈commands〉}<br />
These commands store the 〈commands〉. The first arranges for these commands to be issued<br />
at the start of every <strong>mfpic</strong> environment and the second arranges for its commands to be issued<br />
at the end of every such environment. These could be any commands that make sense inside that<br />
environment. The purpose of these commands is to save typing if there is identical setup being<br />
performed in every picture.<br />
\begin{<strong>mfpic</strong>}...\end{<strong>mfpic</strong>}<br />
In LATEX you may prefer to use \begin{<strong>mfpic</strong>} and \end{<strong>mfpic</strong>} (instead of \<strong>mfpic</strong> and<br />
\end<strong>mfpic</strong>). This is by no means required. The sample file lapictures.tex provided with MFPIC<br />
illustrates this use of an <strong>mfpic</strong> environment in LATEX.<br />
One should be careful using TEX groups inside <strong>mfpic</strong> environments. These can be useful to limit<br />
the scope of declarations or of changes to some variables. However, they do not limit the scope of<br />
changes to the figure file that is being written, so there is a danger that TEX and METAFONT will<br />
have different values. There are also some MFPIC commands that need to be at the outermost level.<br />
Thus, grouping should generally be avoided except for those groups provided by MFPIC commands.<br />
For the remainder of the macros, the numerical parameters are expressed in graph units, the units<br />
of the local coordinate system specified by \<strong>mfpic</strong>, unless otherwise indicated.<br />
4.2 Common objects.<br />
The MFPIC macros that draw things can be roughly divided into two classes.<br />
1. Those that simply cause something to be drawn. Examples of these are the \point command,<br />
which places a dot at a list of coordinates, and \gridlines, which draw coordinate lines with<br />
specified separation.<br />
2. Those that both define and draw a path. The macros \circle, \rect, and \polyline are<br />
examples of these.<br />
Macros of type 2 are referred to hereafter as figure macros, for lack of a better term. With them<br />
one can use prefix macros to modify various aspects of the path and how it is drawn. For example,<br />
\polyline{(1,2),(3,4)}<br />
draws a line from (1,2) to (3,4), but<br />
\dotted\polyline{(1,2),(3,4)}<br />
produces a dotted version, and<br />
\arrow\polyline{(1,2),(3,4)}<br />
draws it with an arrowhead at the tip. This is not possible with \gridlines, for example. As MFPIC<br />
and the accompanying METAFONT package GRAFBASE are currently written, prefix macros can only<br />
be applied to single paths, and \gridlines produces a whole set of lines. In this manual, as each<br />
macro is introduced, if it is a figure macro, this will be explicitly stated.<br />
Some commands depend on the value of separately defined parameters. all these parameters<br />
are initialized when MFPIC is loaded. In the following descriptions we give the initial value of<br />
all the relevant parameters. MFPIC provides commands to change any of these parameters. When<br />
METAPOST output is selected, figures can be drawn in any color and several of the above mentioned<br />
parameters are colors. For example, drawcolor is the name of the default color used to draw curves,<br />
headcolor is used when drawing arrowheads, etc. To save repetition: all special colors for figures<br />
are initialized to black except background, which is white.
4.2 COMMON OBJECTS. 14<br />
4.2.1 POINTS, LINES, AND RECTANGLES<br />
\point[〈size〉]{〈p 0 〉,〈p 1 〉,...}<br />
Draws small disks centered at the points specified in the list of ordered pairs. The optional<br />
argument 〈size〉 is an absolute dimension that determines the diameter of the disks. The default<br />
is the TEX dimension \pointsize, initially 2pt. The disks have a filled interior if the command<br />
\pointfilltrue has been issued (the initial behavior). After the command \pointfillfalse,<br />
\point commands will produce outlined circles with the interiors erased. The color of the circles<br />
is the value of the predefined variable pointcolor, and the color inside of the open circles is the<br />
value of the variable background. 10<br />
\plotsymbol[〈size〉]{〈symbol〉}{〈p 0 〉,〈p 1 〉,...}<br />
Draws small symbols centered at the points 〈p 0 〉, 〈p 1 〉, and so on. The symbols must be given<br />
by name, and the available symbols are:<br />
Asterisk, Circle, Diamond, Square, Triangle, Star, SolidCircle,<br />
SolidDiamond, SolidSquare, SolidTriangle, SolidStar, Cross, and Plus.<br />
The names should be self-explanatory, the ‘Solid’ ones are filled in, the others are outlines. Under<br />
metapost, symbols are drawn in pointcolor. The 〈size〉 defaults to \pointsize as in \point<br />
above. Asterisk consists of six line segments while Star is the standard five-pointed star formed<br />
from ten straight line segments. Cross is a × shape. The name ‘\plotsymbol’ comes from the fact<br />
that the \plot command (see subsection 4.5.1), which was written first, utilizes these same symbols.<br />
The command \symbol was already taken (standard LATEX).<br />
While one would rarely want to use them for this purpose, the following symbols are also available:<br />
Arrowhead, Crossbar, Leftbar, Rightbar, Lefthook, Righthook, Leftharpoon,<br />
Rightharpoon.<br />
These are mainly intended for making arrows. See subsection 4.4.3 for a further description.<br />
The difference between \pointfillfalse\point and \plotsymbol{Circle} is that the inside<br />
of the circle will not be erased in the second version, so whatever else has already been drawn<br />
in that area will remain visible. This is the default (for backward compatibility), but that can be<br />
changed with the commands below.<br />
\clearsymbols<br />
\noclearsymbols<br />
After the first of these two commands, subsequent \plotsymbol commands will draw the open<br />
symbols with their interiors erased. After the second, the default behavior (described above) will<br />
be restored. These commands have no effect on \point. \plotnodes (see subsection 4.5.1) also<br />
responds to the settings made by these commands. The \plot command (also in subsection 4.5.1)<br />
does not.<br />
You can design your own ‘symbols’. See the discussion of arrowheads in subsection 4.4.3, and<br />
of storing paths in subsection 4.10.2.<br />
\pointdef{〈name〉}(〈xcoord〉,〈ycoord〉)<br />
Defines a symbolic name for an ordered pair and the coordinates it contains. 〈name〉 is any legal<br />
TEX command name without the backslash; 〈xcoord〉 and 〈ycoord〉 are any numbers. For example,<br />
10 METAPOST cannot actually erase. The illusion of erasing is created by painting over with background.
4.2 COMMON OBJECTS. 15<br />
after the command \pointdef{A}(1,3), \A expands to (1,3), while \Ax and \Ay expand to 1 and<br />
3, respectively. If mplabels is in effect one can use \A to specify where to place a text label, but if<br />
TEX is placing labels one must use (\Ax,\Ay). In most other cases, one can use \A where a pair or<br />
point is required.<br />
\polyline{〈p 0 〉,〈p 1 〉,...}<br />
\lines{〈p 0 〉,〈p 1 〉,...}<br />
The figure macro \polyline produces connected line segments from 〈p 0 〉 to 〈p 1 〉, and from<br />
there to 〈p 2 〉, etc. The result is an open polygonal path through the specified points, in the specified<br />
order. The macro \lines is an alias for \polyline.<br />
\polygon{〈p 0 〉,〈p 1 〉,...}<br />
\closedpolyline{〈p 0 〉,〈p 1 〉,...}<br />
The figure macro \polygon produces a closed polygon with vertices at the specified points in<br />
the specified order. It works exactly like \polyline except the last point in the list is also joined to<br />
the first. The macro \closedpolyline is an alias for \polygon.<br />
\rect{〈p 0 〉,〈p 1 〉}<br />
This figure macro produces the closed rectangle with horizontal and vertical sides, having the<br />
points 〈p 0 〉 and 〈p 1 〉 as diagonally opposite corners. The same rectangle can be specified in four<br />
different ways: either pair of opposite corners in either order.<br />
It is occasionally helpful to know that connected paths like those produced by \polyline or<br />
\rect have a start and a finish as well as sense (or direction). The path produced by \polyline<br />
starts at the first listed point and ends at last, having the direction determined by the order of the<br />
points. For \rect the sense may be clockwise or anticlockwise depending on the corners used:<br />
it starts by moving horizontally from the first listed point. Several MFPIC macros (such as those<br />
that add arrowheads) treat the beginning and the end of a path differently, or adjust their behavior<br />
according to the sense of the curve.<br />
\regpolygon{〈num〉}{〈name〉}{〈eqn 1 〉}{〈eqn 2 〉}<br />
This figure macro produces a closed regular polygon with 〈num〉 sides. The second argument,<br />
〈name〉 is a symbolic name. It can be used to refer to the vertices later. The last two arguments should<br />
be equations that position two of the vertices or one vertex and the center. The center is referred to<br />
by 〈name〉0 and the vertices by 〈name〉1 〈name〉2, etc., going anticlockwise around the polygon.<br />
The 〈name〉 itself (without a number suffixed) will be a METAFONT variable assigned the value of<br />
〈num〉. For example,<br />
\regpolygon{5}{Kay}{Kay0=(0,1)}{Kay1=(2,0)}<br />
will produce a regular pentagon with its center at (0,1) and its first vertex at (2,0). One could later<br />
draw a star inside it with<br />
\polygon{Kay1,Kay3,Kay5,Kay2,Kay4}<br />
Moreover, Kay will equal 5. The name given becomes a METAFONT variable and care should be<br />
taken to make the name distinctive so as not to redefine some internal variable.<br />
4.2.2 A WORD ABOUT LIST ARGUMENTS<br />
We have seen already four MFPIC macros that take a mandatory argument consisting of an arbitrary<br />
number of coordinate pairs, separated by commas. There are many more, and some that take a<br />
comma-separated list of items of other types. If the lists are long, especially if they are generated by
4.2 COMMON OBJECTS. 16<br />
a program, it might be more convenient if one could simply refer to an external file for the data. This<br />
is possible, and one does it the following way: instead of \polyline{〈list〉}, one can write<br />
\polyline\datafile{〈filename〉}<br />
where 〈filename〉 is the full name of the file containing the data. The required format of this file<br />
and the details of this usage can be found in subsection 4.6.3. This method is available for any<br />
command that takes a comma-separated list of data (of arbitrary length) as its last argument, with<br />
the exception of those commands that add text to the picture. Examples of the latter are \plottext<br />
and \axislabels (subsection 4.7.1).<br />
4.2.3 AXES, AXIS MARKS, AND GRIDS<br />
\axes[〈hlen〉]<br />
\xaxis[〈hlen〉]<br />
\yaxis[〈hlen〉]<br />
These are retained for backward compatibility, but there are more flexible alternatives below.<br />
They draw x- and y-axes for the coordinate system. The command \axes is equivalent to \xaxis<br />
followed by \yaxis which produce the obvious. The x- and y-axes extend the full width and height<br />
of the <strong>mfpic</strong> environment. The optional 〈hlen〉 sets the length of the arrowhead on each axis. The<br />
default is the value of the TEX dimension \axisheadlen, initially 5pt. The shape of the arrowhead<br />
is determined as in the \arrow macro (section 4.4). The color of the head is the value of headcolor,<br />
the shaft is drawcolor.<br />
Unlike other commands that produce lines or curves, these do not respond to prefix macros. They<br />
always draw a solid line (with an arrowhead unless \axisheadlen is 0pt). They do respond to<br />
changes in the pen thickness (see \penwd in section 4.11) but that is pretty much the only possibility<br />
for variation.<br />
\axis[〈hlen〉]{〈one-axis〉}<br />
\doaxes[〈hlen〉]{〈axis-list〉}<br />
These produce any of 6 different axes. The parameter 〈one-axis〉 can be x or y, to produce<br />
(almost) the equivalent of \xaxis and \yaxis; or it can be l, b, r, or t to produce an axis on the<br />
border of the picture (left, bottom, right or top, respectively). \doaxes takes a list of any or all of the<br />
six letters (with either spaces or nothing in between) and produces the appropriate axes. Example:<br />
\doaxes{lbrt}. The optional argument sets the length of the arrowhead. In the case of axes on<br />
the edges, the default is the value of \sideheadlen, which MFPIC initializes to 0pt. For the x- and<br />
y-axis the default is \axisheadlen as in \xaxis and \yaxis above.<br />
The commands \axis{x}, \axis{y}, and \doaxes{xy} differ from the old \xaxis, \yaxis<br />
and \axes in that these new versions respond to prefix macros. The \arrow prefix previously mentioned<br />
is an exception: these macros add an arrowhead automatically. For example, the sequence<br />
\dotted\axis{x} draws a dotted x-axis, but \dotted\xaxis produces a METAFONT error. A prefix<br />
macro applied to \doaxes generates no error, but only the first axis in the list will be affected.<br />
\axisline{〈one-axis〉}<br />
\border<br />
These are figure macros that draw the line or lines that an \axis command would draw. An<br />
\axis command is almost the equivalent of<br />
\arrow[l〈hlen〉]\axisline{〈one-axis〉}.
4.2 COMMON OBJECTS. 17<br />
The \axisline command is provided as a figure macro for maximum flexibility. For example, one<br />
can use the star-form of the \arrow command if desired or decorate it with ones own choice of<br />
arrowhead (see subsection 4.4.3).<br />
Also a figure macro, \border produces the rectangle which, if drawn, is visibly the same as the<br />
four border \axisline s (without heads). It is a closed path and could easily be drawn with a \rect<br />
command, but the \border command automatically adjusts for the margins set by the commands<br />
below.<br />
The side axes are drawn by default with a pen stroke along the very edge of the picture (as<br />
determined by the parameters to \<strong>mfpic</strong>). This can be changed with the command \axismargin<br />
described below.<br />
Axes on the edges are drawn so that they don’t cross each other. \doaxes{lbrt}, for example,<br />
produces a perfect rectangle. If the x- and y-axis are drawn with \axis or \doaxes, then they will<br />
not cross the side axes. For this to work properly, all the following margin settings have to be done<br />
before the axes are drawn.<br />
\axismargin{〈one-axis〉}{〈num〉}<br />
\setaxismargins{〈num〉}{〈num〉}{〈num〉}{〈num〉}<br />
\setallaxismargins{〈num〉}<br />
The parameter 〈one-axis〉 is one of the letters l, b, r, or t, and \axismargin causes the<br />
given axis to be shifted inward by the 〈num〉 specified (in graph units). The second command<br />
\setaxismargins takes 4 arguments, using them to set the margins starting with the left and proceeding<br />
anticlockwise. The last command sets all the axis margins to the same value.<br />
A change to an axis margin affects not only the axis at that edge but also the three axes perpendicular<br />
to it. For example, if the margins are M lft , M bot , M rt and M top , then \axis{b} draws a line<br />
starting M lft graph units from the left edge and ending M rt units from the right edge. Of course, the<br />
entire line is M bot units above the bottom edge. The margins are also respected by the x- and y-axis,<br />
but only when drawn with \axis. The old \xaxis, \yaxis and \axes ignore them.<br />
Special effects can be achieved by lying to one axis about the other margins. That is, axes can be<br />
draw in separate commands with changes to the declared margins in between. Be aware that various<br />
other commands are affected by the margin values. Examples are the already mentioned \border,<br />
as well as \grid and \gridlines (page 18 in this subsection).<br />
\xmarks[〈len〉]{〈numberlist〉}<br />
\ymarks[〈len〉]{〈numberlist〉}<br />
\lmarks[〈len〉]{〈numberlist〉}<br />
\bmarks[〈len〉]{〈numberlist〉}<br />
\rmarks[〈len〉]{〈numberlist〉}<br />
\tmarks[〈len〉]{〈numberlist〉}<br />
\axismarks{〈axis〉}[〈len〉]{〈numberlist〉}<br />
These macros place hash marks on the appropriate axes at the places indicated by the values<br />
in the list. The optional 〈len〉 gives the length of the hash marks. If 〈len〉 is not specified, the TEX<br />
dimension \hashlen, initially 4pt, is used. The marks on the x- and y-axes are centered on the<br />
respective axis; the marks on the border axes are drawn to the inside. Both these behaviors can be<br />
changed (see below). The commands may be repeated as often as desired. (The timing of drawing<br />
commands can make a difference as outlined in appendix 5.6.) The command \axismarks{x} is<br />
equivalent to \xmarks and so on for each of the six axes. (I would have used the shorter name<br />
\marks, but that name was already taken by eTEX.)<br />
The 〈numberlist〉 is normally a comma-separated list of numbers. In place of this, one can give<br />
a starting number, an increment and an ending number as in the following example:
4.2 COMMON OBJECTS. 18<br />
\xmarks{-2 step 1 until 2}<br />
is the equivalent of<br />
\xmarks{-2,-1,0,1,2}<br />
One must use exactly the words step and until. Spaces are not needed unless a variable name<br />
is used in place of one of the numbers (see subsection 4.12.4). The number of spaces is not significant.<br />
11 Users of this syntax should be aware that if any of the numbers is not an integer then,<br />
because of natural round-off effects, the last value might be overshot and a mark not printed there.<br />
For example, to ensure that a mark is printed at the point 1.0 on the x-axis, the second line below is<br />
better than the first.<br />
\xmarks{0 step .2 until 1.0}<br />
\xmarks{0 step .2 until 1.1}<br />
\setaxismarks{〈axis〉}{〈pos〉}<br />
\setbordermarks{〈lpos〉}{〈bpos〉}{〈rpos〉}{〈tpos〉}<br />
\setallbordermarks{〈pos〉}<br />
\setxmarks{〈pos〉}<br />
\setymarks{〈pos〉}<br />
These set the placement of the hash marks relative to the axis. The parameter 〈axis〉 is one of the<br />
letters x, y, l, b, r, or t, and 〈pos〉 must be one of the literal words inside, outside, centered,<br />
onleft, onright, ontop or onbottom. The second command takes four arguments and sets the<br />
position of the marks on each border. The third command sets the position on all four border axis<br />
to the same value. The last two commands are abbreviations for \setaxismarks{x}{〈pos〉} and<br />
\setaxismarks{y}{〈pos〉}, respectively.<br />
Not all combinations make sense (for example, ontop for the right side axis). In these cases, no<br />
error message is produced. These words are actually METAFONT numeric variables and the variables<br />
ontop and onleft, for example, have the same value. Thus, using ontop for the right axis will have<br />
the same effect as onleft. Similarly, onright and onbottom are the same. The parameters inside<br />
and outside usually make no sense for the x- and y-axes, but if they are used then inside means<br />
ontop for the x-axis and onright for the y-axis.<br />
\grid[〈size〉]{〈xsep〉,〈ysep〉}<br />
\gridpoints[〈size〉]{〈xsep〉,〈ysep〉}<br />
\lattice[〈size〉]{〈xsep〉,〈ysep〉}<br />
\hgridlines{〈ysep〉}<br />
\vgridlines{〈xsep〉}<br />
\gridlines{〈xsep〉,〈ysep〉}<br />
\grid draws a dot at every point for which the first coordinate is an integer multiple of the 〈xsep〉<br />
and the second coordinate is an integer multiple of 〈ysep〉. The diameter of the dot is determined by<br />
〈size〉. The default is the value of \griddotsize, initially 0.5pt. Under the metapost option, the<br />
color of the dot is pointcolor. The commands \gridpoints and \lattice are synonyms for<br />
\grid.<br />
\hgridlines draws the horizontal and \vgridlines the vertical lines through these same<br />
points. \gridlines draws both sets of lines. The thickness of the lines is set by \penwd. Authors<br />
are recommended to either reduce the pen width or change drawcolor to a lighter color for grid<br />
11 Experienced METAFONT programmers may recognize that anything can be used that is permitted in METAFONT’s<br />
〈forloop〉 syntax. Thus the given example can also be reworded \xmarks{-2 upto 2}, or even \xmarks{2 downto -2}.<br />
See subsection 4.12.7 for more on for-loops in MFPIC.
4.2 COMMON OBJECTS. 19<br />
lines. Or omit them entirely: well-designed graphs usually don’t need them and almost never should<br />
both horizontals and verticals be used.<br />
The above commands draw their dots and lines within the margins set by the axis margin commands<br />
on page 17.<br />
\plrgrid{〈rsep〉,〈anglesep〉}<br />
\gridarcs{〈rsep〉}<br />
\gridrays{〈anglesep〉}<br />
\plrpatch{〈rmin〉,〈rmax〉,〈rsep〉,〈tmin〉,〈tmax〉,〈tsep〉}<br />
\plrgridpoints[〈size〉]{〈rsep〉,〈anglesep〉}<br />
\plrgrid fills the graph with circular arcs and radial lines. \gridarcs draws only the arcs,<br />
\gridrays only the radial lines. \plrgridpoints places a dot (diameter 〈size〉) at all the places<br />
the rays and arcs would intersect. It takes an optional argument for the size of the dots, the default<br />
being \griddotsize, the same as the \grid command.<br />
The arcs lie on circles centered at (0,0) and the rays would all meet at (0,0) if extended. The<br />
corresponding METAFONT commands actually draw just enough to cover the graph area and then<br />
clip them to the graph boundaries. If you don’t want them clipped, use \plrpatch. Unlike the<br />
rectangular coordinate grid commands, these do not respect the axis margins (rectangular margins<br />
don’t really belong with polar coordinates).<br />
\plrpatch draws arcs with radii starting at 〈rmin〉, stepping by 〈rsep〉 and ending with 〈rmax〉.<br />
Each arc goes from angle 〈tmin〉 to 〈tmax〉. It also draws radial lines with angles starting at 〈tmin〉,<br />
stepping by 〈tsep〉 and ending with 〈tmax〉. Each line goes from radius 〈rmin〉 to 〈rmax〉. If 〈rmax〉−<br />
〈rmin〉 doesn’t happen to be a multiple of 〈rsep〉, the arc with radius 〈rmax〉 is drawn anyway. The<br />
same is true of the line at angle 〈tmax〉, so that the entire boundary is always drawn.<br />
If 〈tsep〉 is larger than 〈tmax〉 − 〈tmin〉, then only the boundary rays will be drawn. If 〈rsep〉 is<br />
larger than 〈rmax〉 − 〈rmin〉, then only the boundary arcs will be drawn.<br />
The color used for rays and arcs is drawcolor, and for dots pointcolor. The advice about<br />
color and use of \gridlines holds for \plrgrid and its relatives as well.<br />
\vectorfield[〈hlen〉]{〈xsp〉,〈ysp〉}{〈formula〉}{〈restriction〉}<br />
\plrvectorfield[〈hlen〉]{〈rsp〉,〈tsp〉}{〈formula〉}{〈restriction〉}<br />
These commande draw a field of vectors (arrows). The optional argument is the length of the<br />
arrowhead, the default being the dimension \headlen, initially 3pt.<br />
For \vectorfield, an arrow is drawn starting from each point (x,y) where x is an integer<br />
multiple of 〈xsp〉 and y is an integer multiple of 〈ysp〉. The vector field is given by 〈formula〉, which<br />
should be a pair-valued expression in the literal variables x and y. Typically that would be a pair<br />
of numeric expressions enclosed in parentheses and separated by a comma. The last argument is<br />
a boolean expression in the literal variables x and y, used to restrict the domain. That is, if the<br />
expression is false for some (x,y), no arrow is drawn at that point. If you do not wish to restrict the<br />
domain, type true for the restriction.<br />
For \plrvectorfield, an arrow is drawn starting from each point with polar coordinates (r,θ)<br />
if r is an integer multiple of 〈rsp〉 and θ is an integer multiple of 〈tsp〉. In this case, the 〈formula〉<br />
must be a pair-valued expression in the literal variables r and t. This should be (or produce) a pair<br />
of x and y coorinates, not a polar coordinate pair. If you have formulas R(r,θ) for the length of each<br />
vector and T (r,θ) for the angle, then the following will convert to (x,y) pairs:<br />
{polar (R(r,t),T(r,t))}<br />
The last argument is as in \vectorfield, except it should depend on the literal variables r and t.
4.2 COMMON OBJECTS. 20<br />
In either case, the arrow is not drawn if the starting point would lie outside the borders set with<br />
\axismargins and its relatives.<br />
The following draws a rotational field, omitting the inside of the circle of radius 1, where the<br />
arrows would be excessively long, and especially avoiding (0,0) where the vector field is undefined.<br />
\vectorfield[2.5pt]{.25,.25}{.5*(-y,x)/(x**2+y**2)}{x**2+y**2 >= 1}<br />
The following is the same field, represented by arrows whose locations are regularly spaced in polar<br />
coordinates.<br />
\plrvectorfield[2.5pt]{.25,20}{polar(.5/r,t+90)}{r >= 1}<br />
4.2.4 CIRCLES, ARCS AND ELLIPSES<br />
\circle[〈format〉]{〈specification〉}<br />
This figure macro produces a circle. Starting with MFPIC version 0.7, there are more than one<br />
way to specify a circle. In version 0.8 and later there are six ways, and one selects which one by<br />
giving \circle an optional argument that signals what data will be specified in the mandatory<br />
argument.<br />
\circle[p]{〈c〉,〈r〉}<br />
\circle[c]{〈c〉,〈p〉}<br />
\circle[t]{〈p 1 〉,〈p 2 〉,〈p 3 〉}<br />
\circle[s]{〈p 1 〉,〈p 2 〉,〈θ〉}<br />
\circle[r]{〈p 1 〉,〈p 2 〉,〈r〉}<br />
\circle[q]{〈p 1 〉,〈p 2 〉,〈r〉}<br />
The optional arguments produce circles according to the following descriptions.<br />
[p] The Polar form is the default. The data in the mandatory argument should then be the center<br />
〈c〉 and radius 〈r〉 of the circle. A negative radius is a mathematical error, but it is accepted. It<br />
produces the same circle, with the same sense, but the starting point (normally 〈r〉 units to the<br />
right of the center) is 〈r〉 units left of the center.<br />
[c] The center-point form. In this case the data should be the center and one point on the circumference.<br />
The circle starts at the point and has an anticlockwise sense.<br />
[t] The three-point form. The data are three points that do not lie in a straight line. The circle starts<br />
at the first point and has the sense determined by the order of the points.<br />
[s] The point-sweep form. The data are two points on the circle, followed by the angle of arc<br />
between them. This circle starts at the first point and has a sense determined by the angle:<br />
anticlockwise for positive angles, clockwise for negative.<br />
[r] The point-radius form. The data are two points on the circle, followed by the radius. There are<br />
two circles with this data. The one that makes the angle from the first to the second point positive<br />
and less than 180 degrees is produced. The sense of the circle is normally anticlockwise<br />
starting at the first point. Using a negative radius is a mathematical error, but this command<br />
just produces the other circle with the opposite sense.<br />
[q] The alternative point-radius form. The data are the same as for the [r] case, except the other<br />
circle is produced. That is, a circle starting at the first point, proceeding anticlockwise through<br />
an angle greater than 180 degrees to the second point, then along the shorter arc to the first<br />
point. Again, a negative radius produces the other circle with clockwise sense.<br />
These optional arguments are also used in the \arc command (see below). The \circle command<br />
draws the whole circle of which the corresponding \arc command draws only a part.
4.2 COMMON OBJECTS. 21<br />
\arc[〈format〉]{〈specification〉}<br />
\arc*[〈format〉]{〈specification〉}<br />
This figure macro produces a circular arc specified as determined by the 〈format〉 optional parameter.<br />
As with \circle, the optional 〈format〉 parameter determines the format of the other parameter,<br />
as indicated below. The user is responsible for ensuring that the parameter values make<br />
geometric sense. The starting point of each arc is at the first specified angle or point and the ending<br />
point is at the last one.<br />
The star-form produces the complementary arc. That is, instead of the arc described below, it<br />
produces the rest of the circle from the ending point to the starting point of the arc described.<br />
\arc[s]{〈p 0 〉,〈p 1 〉,〈θ〉}<br />
\arc[p]{〈c〉,〈θ 1 〉,〈θ 2 〉,〈r〉}<br />
\arc[a]{〈c〉,〈r〉,〈θ 1 〉,〈θ 2 〉}<br />
\arc[c]{〈c〉,〈p 1 〉,〈θ〉}<br />
\arc[t]{〈p 0 〉,〈p 1 〉,〈p 2 〉}<br />
\arc[r]{〈p 0 〉,〈p 1 〉,〈r〉}<br />
\arc[q]{〈p 0 〉,〈p 1 〉,〈r〉}<br />
The optional arguments produce arcs according to the following descriptions.<br />
[s] The point-sweep form is the default format. It draws the circular arc starting from the point 〈p 0 〉,<br />
ending at the point 〈p 1 〉, and covering an arc angle of 〈θ〉 degrees, measured anticlockwise<br />
around the center of the circle. If, for example, the points 〈p 0 〉 and 〈p 1 〉 lie on a horizontal line<br />
with 〈p 0 〉 to the left, and 〈θ〉 is between 0 and 360 (degrees), then the arc will sweep below<br />
the horizontal line (in order for the arc to be anticlockwise). A negative value of 〈θ〉 gives a<br />
clockwise arc from 〈p 0 〉 to 〈p 1 〉.<br />
[p] The polar form draws the arc of a circle with center 〈c〉 starting at the angle 〈θ 1 〉 and ending<br />
at the angle 〈θ 2 〉, with radius 〈r〉. Both angles are measured anticlockwise from the positive<br />
x axis. If the first angle is less than the second, the arc has an anticlockwise sense, otherwise<br />
clockwise. A negative radius is a mathematical error, but the result is the arc on the opposite<br />
side of the circle, as if both angles were increased by 180 degrees<br />
[a] The alternative polar form differs from the polar form above only in the order of the arguments.<br />
This seems (to me) a more reasonable order, and matches the order \sector requires (see<br />
below). The [p] option is retained for backward compatibility.<br />
[c] The center-point-angle form draws the circular arc with center 〈c〉, starting at the point 〈p 1 〉,<br />
and sweeping an angle of 〈θ〉 around the center from that point. This is the fundamental method<br />
for drawing arcs. All other methods are converted to this or the point-sweep method. Even the<br />
point sweep form is converted to this one for angles greater than 90 degrees.<br />
[t] The three-point form draws the circular arc which passes through all three points given, in the<br />
order given. Internally, this is converted to two applications of the point-sweep form.<br />
[r] The point-radius form draws an arc on the circle that \circle[r] would produce. The arc<br />
starts at the point 〈p 0 〉 and ends at 〈p 1 〉. Of the two possible arcs on that circle, it produces the<br />
shorter one: the one with an angle θ less than 180 degrees measured anticlockwise around the<br />
center of the circle. A negative radius is a mathematical error, but the result is the short arc on<br />
the other circle with a clockwise sense.<br />
[q] The alternative point-radius form is the same as [r] except it produces the longer arc: the one<br />
with angle θ larger than 180 degrees measured anticlockwise around the center of the circle. A<br />
negative radius is a mathematical error, but the result is the longer arc on the other circle with<br />
a clockwise sense.
4.2 COMMON OBJECTS. 22<br />
For both options [r] and [q] the angle is computed and then the point-sweep method is used.<br />
If the absolute value of the radius is less than half the distance between the points, then no such arc<br />
exists. In this case, the angle is just set equal to ±180 degrees (as if the radius were changed to half<br />
the distance).<br />
\sector{〈c〉,〈r〉,〈θ 1 〉,〈θ 2 〉}<br />
This figure macro produces the sector of the circle with center at the point 〈c〉 and radius 〈r〉,<br />
from the angle 〈θ 1 〉 to the angle 〈θ 2 〉. Both angles are measured in degrees anticlockwise from the<br />
direction parallel to the x axis. The sector forms a closed path. Note: \sector and \arc[p] have<br />
the same parameters, but in a different order. 12<br />
\ellipse[〈θ〉]{〈c〉,〈r x 〉,〈r y 〉}<br />
This figure macro produces an ellipse with the x radius 〈r x 〉 and y radius 〈r y 〉, centered at the point<br />
〈c〉. The optional parameter 〈θ〉 provides a way of rotating the ellipse by 〈θ〉 degrees anticlockwise<br />
around its center. Ellipses may also be created by differentially scaling a circle and perhaps rotating<br />
the result. See subsection 4.10.2.<br />
\fullellipse{〈C〉,〈M 1 〉,〈M 2 〉}<br />
\halfellipse{〈M 1 〉,〈M 2 〉,〈M 3 〉}<br />
\quarterellipse{〈M 1 〉,〈A〉,〈M 2 〉}<br />
For any parallelogram there is a unique ellipse incribed in it which is tangent to the sides at their<br />
midpoints. The above allows one to obtain that ellipse and parts of it. The input to \fullellipse<br />
is the center 〈C〉 of that parallelogram and the midpoints 〈M 1 〉 and 〈M 2 〉 of two adjacent sides. For<br />
\halfellipse, one supplies the midpoints 〈M 1 〉, 〈M 2 〉, and 〈M 3 〉 of three successive sides. Lastly,<br />
\quarterellipse requires the midpoints of two adjacents sides and the corner 〈A〉 between them.<br />
Internally, a quarter-circle is transformed to produce the quarter-ellipse and the other two are built<br />
up out of two or four such quarter-ellipses.<br />
The reasoning behind my choice of parameters is based on the anticipated use of these commands.<br />
For example, I wanted \quarterellipse to be used to round a corner represented by the<br />
three points M 1 , A and M 2 . In order for the quarter-ellipse to have the same direction at M 1 and M 2<br />
as the polygon M 1 AM 2 , the associated parallelogram has to have midpoints at M 1 and M 2 .<br />
\plr{(〈r 0 〉,〈θ 0 〉),(〈r 1 〉,〈θ 1 〉), ...}<br />
When dealing with arcs and circles, it is useful to work in polar coordinates. The macro \plr<br />
causes METAFONT to replace the specified list of polar coordinate pairs by the equivalent list of<br />
rectangular (cartesian) coordinate pairs. Through \plr, commands designed for rectangular coordinates<br />
can be applied to data represented in polar coordinates. It must be cautioned that this wholesale<br />
conversion of a list applies only to commands that take a list consisting of an arbitrary number of<br />
points, such as \polyline.<br />
The effect of \plr is to apply a METAFONT command, polar, to each point in the list, producing<br />
a new list. This METAFONT command can also be used separately in any situation where a<br />
single METAFONT point is required. For example, to connect the point (2,3) to the point with polar<br />
coordinates (1,135) write<br />
\polyline{(2,3),polar(1,135)}<br />
This last circle-producing macro I wrote for my own use. It produces a circle associated with the<br />
hyperbolic geometry of a disk or a half-plane.<br />
12 This apparently was unintended, but we now have to live with it so as not to break existing .tex files.
4.2 COMMON OBJECTS. 23<br />
\pshcircle{〈center〉,〈radius〉}<br />
\pshcircle*{〈center〉,〈radius〉}<br />
This produces the circle whose hyperbolic center is at 〈center〉 and whose pseudohyperbolic<br />
radius is 〈radius〉. This all takes place inside the circle with center (0,0) and radius 1 (the unit<br />
circle). The 〈center〉 is required to be inside the unit circle and the 〈radius〉 is required to be less<br />
than 1.<br />
The star-form is for the upper half-plane, which is the set of points with positive y-coordinate In<br />
this case, the 〈center〉 must be in the upper half-plane and the 〈radius〉 must still be less than 1. If<br />
you are not versed in hyperbolic geometry, be warned that the actual diameter of the resulting circle<br />
is on the order of 2y/(1 − R), where R is the 〈radius〉 and y is the y-coordinate of 〈center〉. This can<br />
be quite large even for modest values of R and y.<br />
Finally, an arc-producing macro. This is also related to the hyperbolic geometry of a disk or<br />
a half-plane. The hyperbolic geometry includes a notion of distance that allow one to determine<br />
‘shortest’ path between two points. This shortest path is called a ‘geodesic’ and it turns out (in the<br />
case of the upper half-plane or a disk) to be an arc of a circle: the unique circle that passes through<br />
both points and meets the boundary (of the half-plane or disk) at right angles.<br />
\hypergeodesic{z 1 ,z 2 }<br />
\hypergeodesic*{z 1 ,z 2 }<br />
This produces the hyperbolic geodesic from z 1 = (x 1 ,y 1 ) to z 2 = (x 2 ,y 2 ). For guaranteed results<br />
both points should be in the unit disk (i.e., |z 1 | < 1 and |z 2 | < 1) or, for the star form, both in the upper<br />
half-plane (i.e., y 1 > 0 and y 2 > 0). However, if these are not satisfied an arc of the circle described<br />
above will be drawn whenever not prevented by a numeric overflow. The star form produces the<br />
geodesic for points in the upper half-plane. The normal form produces the geodesic for points in the<br />
unit disk (inside of the circle of radius 1 and center (0,0)). One can use transforms of these to get<br />
geodesics suitable for other disks and other half-planes.<br />
4.2.5 CURVES<br />
\curve[〈tension〉]{〈p 0 〉,〈p 1 〉,...}<br />
\cyclic[〈tension〉]{〈p 0 〉,〈p 1 〉,...}<br />
\closedcurve[〈tension〉]{〈p 0 〉,〈p 1 〉,...}<br />
These figure macros produce a smooth path through the specified points, in the specified order.<br />
It is ‘smooth’ in two ways: it never changes direction abruptly (no ‘corners’ or ‘cusps’ on the<br />
curve), and it tries to make turns that are not too sharp. This latter property is acheived by specifying<br />
(to METAFONT) that the tangent to the curve at each listed point is to be parallel to the line<br />
from that point’s predecessor to its successor. The \cyclic variant arranges for the last point to be<br />
connected (smoothly) to the first, and produces a closed METAFONT Bézier curve. The command<br />
\closedcurve is an alias for \cyclic.<br />
The optional 〈tension〉 influences how smooth the curve is. The special value infinity (in<br />
fact, usually anything greater than about 10), makes the curve not visibly different from a polyline.<br />
The higher the value of tension, the sharper the corners on the curve and the flatter the portions in<br />
between. METAFONT requires the tension to be larger than 0.75. The default value of the tension is<br />
1 when MFPIC is loaded, but that can be changed with the following command.<br />
\settension{〈num〉}<br />
This sets the default tension for all commands that take an optional tension parameter.<br />
Sometimes one would like a convex set of points to produce a convex curve. This will not always
4.2 COMMON OBJECTS. 24<br />
be the case with \curve or \cyclic. You can verify this with the following example, where the list<br />
of points traces a rectangle:<br />
\cyclic{(0,0),(0,1),(1,1),(2,1),(2,0),(0,0)}<br />
To produce a convex curve, use one of the following:<br />
\convexcurve[〈tension〉]{〈p 0 〉,〈p 1 〉,...}<br />
\convexcyclic[〈tension〉]{〈p 0 〉,〈p 1 〉,...}<br />
\closedconvexcurve[〈tension〉]{〈p 0 〉,〈p 1 〉,...}<br />
These figure macros can be used even if the list of points is not convex, and the result will be<br />
convex where possible. The third one is an alias for for the second one.<br />
Occasionally it is necessary to specify a sequence of points with increasing x-coordinates and<br />
draw a curve through them. One would then like the resulting curve both to be smooth and to<br />
represent a function (that is, the curve always has increasing x coordinate, never turning leftward).<br />
This cannot be guaranteed with the \curve command unless the tension is infinity.<br />
\fcncurve[〈tension〉]{(x 0 ,y 0 ),(x 1 ,y 1 ),...}<br />
This figure macro produces a curve through the points specified. If the points are listed with<br />
increasing (or decreasing) x coordinates, the curve will also have increasing (resp., decreasing) x<br />
coordinates. The 〈tension〉 is a number greater than 1/3 which controls how tightly the curve is<br />
drawn. Generally, the larger it is, the closer the curve is to the polyline through the points. The<br />
default tension is that set with \settension, initially 1. For those who know something about<br />
METAFONT, this ‘tension’ is not the same as the METAFONT notion of tension (the tension in the<br />
\curve command), but it functions in a similar fashion. In this case it can actually be any positive<br />
number, but only values greater than 1/3 guarantee the property of never doubling back.<br />
\turtle{〈p 0 〉,〈v 1 〉,〈v 2 〉,...}<br />
This figure macro produces a a sequence of line segments starting from the point 〈p 0 〉, and<br />
extending along the (2-dimensional vector) displacement 〈v 1 〉. The next segment is from the previous<br />
segment’s endpoint, along displacement 〈v 2 〉. This continues for all listed displacements, a process<br />
similar to ‘turtle graphics’.<br />
4.2.6 BAR CHARTS AND PIE CHARTS<br />
\barchart[〈start〉,〈sep〉,〈r〉]{〈h-or-v〉}{〈list〉}<br />
\bargraph. . .<br />
\gantt. . .<br />
\histogram. . .<br />
\mfpbarchart. . .<br />
\mfpbargraph. . .<br />
\mfpgantt. . .<br />
\mfphistogram. . .<br />
The macro \barchart computes a bar chart or a Gantt chart. It does not draw the bars, but only<br />
defines their rectangular paths which the user may then draw or fill or both using the \chartbar<br />
macros (see below). Since bar charts have many names, \bargraph and \histogram are provided<br />
as synonyms. The macro \gantt is also a synonym; whether a Gantt chart or bar chart is created<br />
depends on the data.<br />
Since \barchart never draws anything, there is no particular reason it needs to be inside an<br />
<strong>mfpic</strong> environment. Starting with version 0.9 of MFPIC this is no longer required, but the command
4.2 COMMON OBJECTS. 25<br />
name \mfpbarchart must be used outside (in case some other package also defines \barchart).<br />
One can use any of the four synonyms listed that start with ‘\mfp’. The commands to draw the bars<br />
are still required to be inside an <strong>mfpic</strong> environment.<br />
〈h-or-v〉 should be v if you want the ends of the bars to be measured vertically from the x-axis,<br />
or h if they should be measured horizontally from the y-axis. 〈list〉 should be a comma-separated<br />
list of numbers and ordered pairs giving the end(s) of each bar. A number c is interpreted as the pair<br />
(0,c); a pair (a,b) is interpreted as an interval giving the ends of the bar (for Gantt diagrams). The<br />
rest of this description refers to the h case; the v case is analogous.<br />
By default the bars are 1 graph unit high (thickness), from y = n − 1 to y = n. Their width and<br />
location are determined by the data. The optional parameter consists of three numeric parameters<br />
separated by commas. 〈start〉 is the y-coordinate of the bottom edge of the first bar, 〈sep〉 is the<br />
distance between the bottom edges of successive bars, and 〈r〉 is the fraction of 〈sep〉 occupied<br />
by each bar. The default behavior corresponds to [0,1,1]. In general, bar number n will be from<br />
y = 〈start〉 + (n − 1) ∗ 〈sep〉 to y = 〈start〉 + (n − 1 + 〈r〉) ∗ 〈sep〉<br />
Notice the bars are numbered in order from bottom to top. You can reverse them by making 〈sep〉<br />
negative, and making 〈start〉 the top edge of the first bar.<br />
The fraction 〈r〉 should be between −1 and 1. A negative value reverses the direction from the<br />
“leading edge” of the bar to the ‘trailing edge’. For example, if one bar chart is created with<br />
\barchart[1,1,-.4]{h}{...}<br />
and another with<br />
\barchart[1,1,.4]{h}{...}<br />
both having the same number of bars, then the first will have its first bar from y = 1 to y = 1−.4 = .6,<br />
while the second will have its first bar on top of that one, from 1 to 1+.4. Similarly the next bars will<br />
be above and below y = 2, etc. This makes it easy to draw bars next to one another for comparison.<br />
\chartbar{〈num〉}<br />
\graphbar{〈num〉}<br />
\histobar{〈num〉}<br />
\ganttbar{〈num〉}<br />
The figure macro \chartbar (synonyms \graphbar, \ganttbar, and \histobar) takes a<br />
number from 1 to the number of elements in the list of data of the most recent \barchart command<br />
and produces the corresponding rectangular path computed by that command. This behaves just like<br />
any other figure macro, and the prefix macros from section 4.5 may be used to give adjacent bars<br />
contrasting colors, fills, etc.<br />
\piechart[〈dir〉〈angle〉]{〈c〉,〈r〉}{〈list〉}<br />
\mfppiechart. . .<br />
The macro \piechart also does not draw anything, but computes the \piewedge regions described<br />
below. The first part of the optional parameter, 〈dir〉, is a single letter to indicate a direction:<br />
‘c’ for clockwise or ‘a’ for anticlockwise. The 〈angle〉 is the angle in degrees of the starting edge of<br />
the first wedge. The defaults correspond to [c90], which means the first wedge starts at 12 o’clock<br />
and proceeds clockwise.<br />
The first required argument contains the center 〈c〉 and radius 〈r〉 of the chart. The second required<br />
argument is the list of data: positive numbers separated by commas.<br />
Since this command never actually draws anything, only defining the wedges, it makes sense to<br />
heave it available outside the drawing environment. Starting with version 0.9 of MFPIC that is the<br />
case, but the command name is \mfppiechart (to avoid a name clash with some other package’s
4.3 COLORS IN MFPIC. 26<br />
\piechart command). The command to draw wedges (\piewedge, see below) is still required to<br />
be inside an <strong>mfpic</strong> environment.<br />
\piewedge[〈spec〉〈trans〉]{〈num〉}<br />
This figure macro takes a number from 1 to the number of elements in the list of data of the most<br />
recent \piechart command and produces the corresponding wedge-shaped path computed by that<br />
command. By default, the path is positioned as computed by that \piechart command, but The<br />
optional argument to \piewedge can override this. The parameter 〈spec〉 is a single letter, which<br />
can be x, s or m. The x stands for exploded and it means the wedge is moved directly out from the<br />
center of the pie a distance 〈trans〉. 〈trans〉 should then be a pure number and is interpreted as a<br />
distance in graph units. The s stands for shifted and in this case 〈trans〉 should be a pair of the form<br />
(〈dx〉,〈dy〉) indicating the wedge should be shifted 〈dx〉 horizontally and 〈dy〉 vertically (in graph<br />
units). The m stands for move to, and 〈trans〉 is then the absolute coordinates (〈x〉,〈y〉) in the graph<br />
where the point of the wedge should be placed.<br />
4.2.7 BRACES<br />
This figure is intended to group some graphical objects and label them.<br />
\gbrace{〈z 1 〉,〈C〉,〈z 2 〉}<br />
This figure macro creates the shape of a brace (i.e., a ‘}’) with its ends at 〈z 1 〉 and 〈z 2 〉 and<br />
its ‘center’ cusp at 〈C〉. The three points must be expressed as ordered pairs or as METAFONT pair<br />
expressions, and must be separated by commas. The ‘width’ of the brace (the distance from 〈C〉 to<br />
the line through the other two points) is computed automatically and should not be 0. The cusp of<br />
the brace will not necessarily be in the center of the brace. Users position it with their choice of 〈C〉.<br />
The cusp should not be positioned too close to one of the endpoints as this can distort the brace.<br />
4.3 Colors in MFPIC.<br />
4.3.1 METAPOST COLOR FUNCTIONS<br />
Because of changes to color handling with METAPOST 1.000, we will have to give two descriptions<br />
of some operations. For brevity, we will refer to METAPOST versions before the addition of the<br />
cmykcolor data type as ‘early’ METAPOST and the versions afterward as ‘recent’ METAPOST. Early<br />
METAPOST actually ended with version 0.642. When development resumed, beta test versions began<br />
with 0.900. Any version 0.900 or later qualifies as ‘recent’.<br />
In early METAPOST, the only color data type is a triple of numbers like (1,.5,.5), with the<br />
components between 0 and 1, representing red, green and blue levels, respectively. White is given<br />
by (1,1,1) and black by (0,0,0). Recent METAPOST has the color data type (refered to as either<br />
color or rgbcolor) as well as the cmykcolor type. A cmykcolor is a quadruple of numbers like<br />
(1,.2,0,.3), with components between 0 and 1 representing levels of cyan, magenta, yellow and<br />
black. White is represented by (0,0,0,0). While black can be obtained in several ways,(0,0,0,1)<br />
is the simplest.<br />
METAPOST also has color variables (and cmykcolor variables) and several have been predefined.<br />
The colors red, green, blue, white and black are built in to METAPOST and are of type rgbcolor.<br />
Colors cyan, magenta and yellow are defined by MFPIC’s METAPOST support macros to be cmykcolor.<br />
In addition, MFPIC defines grayscaleblack, grayscalewhite, cmykblack, cmykwhite,<br />
rgbblack and rgbwhite. These give black and white in the indicated data type (grayscale being a<br />
numeric: 0 for black, 1 for white).<br />
All the names in the LATEX COLOR package’s dvipsnam.def have also been predefined by<br />
MFPIC as color variable names. Since METAPOST allows color expressions, colors may be added
4.3 COLORS IN MFPIC. 27<br />
together (as long as they are the same type) and multiplied by numerics. Multiplication by a number<br />
between 0 and 1 darkens a rgbcolor, but lightens a cmykcolor.<br />
Moreover, several METAPOST color functions have been defined in grafbase.mp. These have<br />
the same names as the color models. Strictly speaking, it is never necessary to use these in recent<br />
METAPOST. However, since METAFONT and early METAPOST don’t have a data type consisting of<br />
quadruples, and METAFONT doesn’t have one for triples, these functions allow the same MFPIC code<br />
to be used for all three figure processors. These functions are defined to convert to a usable data type,<br />
(which may be ignored in METAFONT).<br />
cmyk(c,m,y,k)<br />
In early METAPOST, this converts a cmyk color specification to METAPOST’s native rgb. For<br />
example, the command cmyk(1,0,0,0) yields (0,1,1), which is the rgb equivalent of cyan. In<br />
recent METAPOST this produces the cmykcolor with the given components. That is, cmyk(1,0,0,0)<br />
simply produces (1,0,0,0), the cmyk coding for cyan.<br />
gray(g)<br />
In early METAPOST, this converts a numeric g (designating a level of gray) to the corresponding<br />
multiple of white: (g,g,g). In recent METAPOST, commands to draw paths or pictures in a particular<br />
color will accept a numeric parameter instead of color or cmykcolor, so in recent METAPOST this<br />
command simply returns the given numeric g.<br />
named(〈name〉), rgb(r,g,b)<br />
These are essentially no-ops. However; rgb() will truncate the arguments to the 0–1 range, and<br />
set an unknown argument to 0. An unknown 〈name〉 is converted to black (in the appropriate color<br />
model if 〈name〉 is an unknown color variable, otherwise rgb black).<br />
RGB(R,G,B)<br />
Converts an RGB color specification to rgb. It divides each component by 255, and performs<br />
the same truncations as rgb(). The RGB model consists of a triple of numbers between 0 and<br />
255. Originally, the model required they be integers. However, since they are converted to fractions<br />
anyway, it doesn’t matter in this command.<br />
As an example of the use of these functions, in early METAPOST one could conceivable write:<br />
\draw[0.5*RGB(255,0,0)+0.5*cmyk(1,0,0,0)]\circle{(0,0),1}<br />
to have a circle drawn in a color halfway between red and cyan (which turns out to be the same as<br />
gray(0.5)). In recent METAPOST, however, this would be an error, as one cannot add two different<br />
data types (rgbcolor and cmykcolor). So MFPIC supplies conversion functions.<br />
makecmyk 〈clr〉<br />
makergb 〈clr〉<br />
makegray 〈clr〉<br />
In recent METAPOST, the 〈clr〉 can be a known color name, a constant of type numeric, rgbcolor,<br />
or cmykcolor, or the result of a color function. Then makecmyk returns the cmykcolor equivalent,<br />
and makergb returns the rgbcolor equivalent (a numeric 〈clr〉 is interpreted as a grayscale color).<br />
Unknown colors produce a black in the appropriate model. Then one can use<br />
\draw{.5*RGB(255,0,0) + .5*makergb cmyk(1,0,0,0)}\circle{(0,0),1}<br />
If one has forgotton whether RGB returns an rgbcolor, one could write makergb RGB(255,0,0) to<br />
be sure to get an rgbcolor.
4.3 COLORS IN MFPIC. 28<br />
The first two commands are never necessary in early METAPOST, but they are still defined: they<br />
simply return the given color if it is a known argument of type color, or apply the function gray()<br />
is it is numeric, and return black for an unknown name.<br />
The last one makegray converts any color to a numeric, and then returns either that number<br />
(recent METAPOST) or that multiple of white (early METAPOST). In METAFONT, all three pass the<br />
(presumably numeric) argument 〈clr〉 unchanged.<br />
All three functions return some version of black if 〈clr〉 is not a color of some type, or has an<br />
unknown value.<br />
4.3.2 ESTABLISHING MFPIC DEFAULT COLORS<br />
\drawcolor[〈model〉]{〈colorspec〉}<br />
\fillcolor[〈model〉]{〈colorspec〉}<br />
\hatchcolor[〈model〉]{〈colorspec〉}<br />
\pointcolor[〈model〉]{〈colorspec〉}<br />
\headcolor[〈model〉]{〈colorspec〉}<br />
\tlabelcolor[〈model〉]{〈colorspec〉}<br />
\backgroundcolor[〈model〉]{〈colorspec〉}<br />
These macros set the default color for various drawing elements. Any curve (with one exception,<br />
those drawn by \plotdata), whether solid, dashed, dotted, or plotted in symbols, will be in the color<br />
set by \drawcolor. Set the color used by \gfill with \fillcolor. For all the hatching commands<br />
use \hatchcolor. For the \point, and \plotsymbol commands, as well as \gridpoints and<br />
\plrgridpoints, use \pointcolor, and for arrowheads, \headcolor. One can set the color used<br />
by \gclear with \backgroundcolor (the same color will also be used in the interior of unfilled<br />
points that are drawn with \point) and, when mplabels is in effect, the color of labels can be set<br />
with \tlabelcolor.<br />
The optional 〈model〉 may be one of rgb, RGB, cmyk, gray, and named. The 〈colorspec〉 depends<br />
on the model, as outlined below. Each of these commands sets a corresponding METAPOST color<br />
variable with the same name (except \backgroundcolor sets the color named background). Thus,<br />
after drawcolor has been set, one can issue the command \fillcolor{drawcolor} to fill with<br />
the same color.<br />
As previously discussed, all these colors are initially set to black except background is set to<br />
white.<br />
If the optional 〈model〉 argument is omitted, the color specification may be any expression recognized<br />
as a color by METAPOST. It is highly recommended (for portability) that one use either a<br />
predefined name or one of the color functions of the previous section.<br />
When the optional 〈model〉 is specified in the color setting commands, it determines the format<br />
of the color specification as in figure 1.<br />
Model:<br />
rgb<br />
RGB<br />
cmyk<br />
gray<br />
named<br />
Specification:<br />
Three numbers in the range 0 to 1 separated by commas.<br />
Three numbers in the range 0 to 255 separated by commas.<br />
Four numbers in the range 0 to 1 separated by commas.<br />
One number in the range 0 to 1, with 0 indicating black, 1 white.<br />
A METAPOST color variable name either predefined by MFPIC or by the user.<br />
Figure 1: Color specifications
4.4 MODIFYING THE FIGURES. 29<br />
MFPIC translates the command:<br />
\fillcolor[cmyk]{1,.3,0,.2}<br />
into the equivalent of:<br />
\fillcolor{cmyk(1,.3,0,.2)}.<br />
Note that when the optional model is specified, the color specification must not be enclosed in<br />
parentheses. Note also that each model name is the name of a color function described in the previous<br />
subsection. That is how the models are implemented internally. One sees from this that the optional<br />
argument is never necessary. It’s there only to make the LATEX user comfortable.<br />
4.3.3 DEFINING A COLOR NAME<br />
\mfpdefinecolor{〈name〉}{〈model〉}{〈colorspec〉}<br />
This defines a color variable 〈name〉 for later use, either in the commands \drawcolor, etc., or<br />
in the optional parameters to \draw, etc. The name can be used alone or in the named model. The<br />
mandatory 〈model〉 and 〈colorspec〉 are as above.<br />
A final caution, the colors of an MFPIC figure are stored in the .mp output file, and are not<br />
related to colors used or defined by any LATEX package (such as COLOR or XCOLOR). In particular a<br />
color defined only by LATEX’s \definecolor command will remain unknown to MFPIC. Conversely,<br />
LATEX commands will not recognize any color defined only by \mfpdefinecolor.<br />
4.3.4 METAFONT COLORS<br />
METAFONT was never meant to understand colors, but it certainly can be taught the difference<br />
between black and white and, to a limited extent, various grays. Starting with version 0.7, MFPIC will<br />
not generate an error when a color-changing command is used under the metafont option. Instead,<br />
when possible, the variables that represent colors in METAPOST will be converted to a numeric value<br />
between 0 and 1 in METAFONT. When possible (for example, when a region is filled) the numeric<br />
will be interpreted as a gray level and shading (see subsection 4.5.2) will be used to approximate<br />
the gray. In other cases (drawing or dashing of curves, placing of points or symbols, filling with a<br />
pattern of hatch lines) the number will be interpreted as black or white: a value less than 1 will cause<br />
the figure to be rendered in black, while a value equal to 1 (white) will cause pixels corresponding<br />
to the figure to be erased.<br />
This depends on adhering to certain restrictions. METAFONT’s syntax does not recognize a triple<br />
of numbers as any sort of data structure, but it does allow commands to have any number of parameters<br />
in parentheses. So colors must be specified using the color commands such as rgb(1,1,0) or<br />
color names such as yellow, and never as a bare triple. Also, as currently written, the color names<br />
defined in dvipsnam.mp are not defined in METAFONT. With these provisions the same MFPIC code<br />
can often produce either gray scale METAFONT pictures or METAPOST color pictures depending only<br />
on the metapost option.<br />
The commands \shade and \gfill[gray(.75)] (see subsection 4.5.2 for their meaning) will<br />
produce a similar shade of gray, but there is a difference. The first simply adds small dots on top of<br />
whatever is already drawn. The second, however, tries to simulate the METAPOST effect, which is to<br />
cover up whatever is previously drawn. Therefore, it first erases all affected pixels before adding the<br />
dots to simulate gray. In particular, \gfill[white] should have the same effect as \gclear.<br />
4.4 Modifying the figures.<br />
Some MFPIC macros operate by modifying a figure macro: if you want to turn an open arc into a<br />
closed figure by adding a straight line, you can write:
4.4 MODIFYING THE FIGURES. 30<br />
\lclosed\arc{(0,0),(1,0),45}.<br />
These are always prefixed to some figure drawing command, and apply only to the next following<br />
figure macro provided that only other prefix commands intervene. This is a rather long section, but<br />
even more modification prefixes are <strong>doc</strong>umented in subsection 4.10.2.<br />
The combination of a modifying macro, followed by a figure macro, can usually be thought of<br />
as a new figure macro, to which further prefixes might be prepended.<br />
More precisely: all prefix macros have an input path, an output path, and a side effect. The input<br />
is the path that is output by the following prefix or figure macro. The output is either the same as the<br />
input or a modification of it. The side effect might be a drawing or filling of the path or the addition<br />
of an arrowhead.<br />
We list here a classifications of prefix and figure macros that is useful for understanding the<br />
MFPIC system.<br />
Figure macros. These take no input path; they must come last in a sequence. They output the path<br />
they were designed to produce. Examples are \circle, \rect and \polygon. If they have no<br />
prefixes, or are preceded only by appending macros (see next), they invoke a default rendering<br />
of the path (usually a drawing as a solid stroke) as the side effect.<br />
Appending macros These pass their input unchanged as their output. Their side effect is the appending<br />
of some object such as an arrow head or tail. Currently only the various prefix macros<br />
whose names begin with arrow are appending macros (see subsection 4.4.3). But \reverse,<br />
which technically modifies a path and has no side effect, is coded as an appending macro so<br />
that it will work correctly with arrows. Think of it as ‘appending’ a new direction.<br />
Rendering macros These pass their input unchanged as their output. They have the side effect of<br />
adding or subtracting ink from a picture in the shape of the input path. Examples are \draw,<br />
\dotted, \gfill and \gclip.<br />
Modifying macros These output the result of applying their intended modification to the input path.<br />
Examples are macros that close the path if it was open, macros that apply a transformation<br />
such as a rotation, and macros that return only a part of a path. If they have no prefixes, or are<br />
preceded only by appending macros (see above), they also invoke a default rendering of the<br />
output path (usually a drawing as a solid stroke of the modified path) as the side effect.<br />
4.4.1 CLOSURE OF PATHS<br />
It should be pointed out that the closure macros will leave already closed paths unchanged, so it<br />
is always safe to add one when uncertain. Moreover, if the path is not closed but the endpoints are<br />
identical, \lclosed and \bclosed will close it without adding any path segment.<br />
\lclosed...<br />
\bclosed[〈tens〉]...<br />
\sclosed[〈tens〉]...<br />
These modifying macros all turn an open path into a closed one. If the path is already closed,<br />
they do nothing.<br />
\lclosed makes an open path into a closed path by adding a line segment between the endpoints<br />
of the path. In the special case where the path ends exactly where it begins, all \lclosed does is<br />
change the type of the path from open to closed.<br />
The \bclosed macro is similar to \lclosed, except that it closes an open path smoothly by<br />
drawing a Bézier curve. A Bézier is METAFONT’s natural way of connecting points into a curve, and<br />
\bclosed is the simplest and most efficient closure next to \lclosed. Moreover it usually gives a<br />
reasonably aesthetic result. Sometimes, however, one might wish a tighter connection. If that is the
4.4 MODIFYING THE FIGURES. 31<br />
case, use the optional argument with a value of the tension 〈tens〉 greater than 1, the default. The<br />
command \settension (see subsection 4.2.5) can be used to change the default.<br />
\sclosed closes the curve by mimicking the definition of the \curve command. That command<br />
tries to force the curve to pass through the nth point in a direction parallel to the line from point<br />
(n − 1) to point (n + 1). In order to close a curve in this way, the direction at the two endpoints<br />
often has to be changed, and this changes the shape of the first and last segments of the curve. Use<br />
\bclosed if you don’t wish this to happen. However, \sclosed\curve produces a result almost<br />
identical to \cyclic given the same points and tension values. The optional tension argument is as<br />
in the \bclosed command.<br />
There are two other closure commands but, because they are associated with particular types of<br />
paths (splines), we delay their discussion until those are discussed (subsection 4.12.1).<br />
\makesector\arc[〈fmt〉]{〈spec〉}<br />
The modifying macro \makesector can be applied to any path, but its name makes sense (and<br />
its action is predictable) only if that path is an arc. It appends line segments from the center of the<br />
arc’s circle to the ends of the arc, producing a closed path. It is useful if one doesn’t know where the<br />
center of the arc is (a required parameter of \sector). It works by selecting the first point, a middle<br />
point, and the last point of the following path, then calculates the center of the circle through those<br />
three points.<br />
4.4.2 REVERSAL, CONNECTION AND OTHER PATH MODIFICATIONS<br />
\reverse...<br />
\reversepath. . .<br />
This modifies the following path by reversing its sense. This will affect the direction of arrows:<br />
bi-directional arrows can be coded with \arrow\reverse\arrow..., where the leftmost \arrow<br />
prefix applies to the reversed path. The order of endpoints for a connect environment will also be<br />
affected. The command \reversepath is exactly the same. It has been added (in vresion 1.10) to<br />
more closely match the names of other modification macros (see subsection 4.10.2).<br />
\connect ... \endconnect<br />
The macro \connect produces a connected path by joining all the paths following it up to the<br />
matching \endconnect command. Line segments are added from the end of one path to the start of<br />
the next. The whole group acts as one figure macro, permitting any prefix macros to come before.<br />
In LATEX, instead of this pair of macros, an environment named connect may be used. For<br />
example<br />
\lclosed<br />
\begin{connect}<br />
\curve{(2,1),(1,2),(0,1)}<br />
\polyline{(0,0),(2,0)}<br />
\end{connect}<br />
produces a closed figure consisting of one smooth curve and three line segments: the segment produced<br />
by \polyline, the segment added by the connect environment, and the segment added by<br />
\lclosed.
4.4 MODIFYING THE FIGURES. 32<br />
\partpath{〈frac1〉,〈frac2〉}. . .<br />
\subpath{〈num1〉,〈num2〉}. . .<br />
\trimpath{〈dim 1 〉,〈dim 2 〉}. . .<br />
\trimpath{〈dim〉}. . .<br />
These macros modify the following path by producing only a part of it. In \partpath the parameters<br />
〈frac1〉 and 〈frac2〉 should be numbers between 0 and 1. The path produced travels the<br />
same course as the path that follows, but starts at the point that is the fraction 〈frac1〉 of the original<br />
length along it, and ends at the point 〈frac2〉 of its original length. If 〈frac1〉 is greater than 〈frac2〉,<br />
the sense of the path is reversed. In \subpath, the two numbers should be between 0 and the number<br />
of Bézier segments in the path. This is mainly for experienced METAFONTers and provides an<br />
MFPIC interface to METAFONT’s ‘subpath’ operation.<br />
The \trimpath macro takes two dimensions separated by commas and trims those lengths off<br />
the initial and terminal ends of the following path. Alternatively, it takes one dimension and and<br />
trims that length off of both ends. If any of 〈dim 1 〉, 〈dim 2 〉 or 〈dim〉 is missing, it is taken to be 0pt.<br />
This works by finding the points of intersection between the path and circles around the endpoints<br />
with the given dimensions as radii. If the path is shorter than either dimension, it will not intersect<br />
either circle and nothing will be trimmed. Similar problems can occur, at one end or the other, if the<br />
path is shorter than the sum of the dimensions.<br />
\parallelpath{〈dist〉}...<br />
This modifying macro takes the following path and returns a path that follows beside it, keeping<br />
a fixed distance 〈dist〉 to the left. If 〈dist〉 is negative, it keeps to the right. Left or right is from the<br />
point of view of a traveller following the given path from start to finish. The distance is a pure number<br />
in graph coordinates. Note: this should be compared to the first optional argument of \doubledraw<br />
(see subsection 4.5.1), which requires an absolute dimension like 2pt, even though it is implemented<br />
using the internal code of \parallelpath.<br />
The calculation of the parallel path is approximate and rather inefficient. It is likely to produce<br />
inexplicable small loops where it tries to follow the inside of tight turns (radius less than 〈dist〉).<br />
Actual corners, (which might be thought of as turns of radius 0) are usually detected and dealt with<br />
in a reasonable manner. However, if the path is made up of segments of length 〈dist〉 or less, this is<br />
unlikely to work correctly at all.<br />
\arccomplement. . .<br />
This macro, to work properly, must be followed by an arc of a circle. It produces the complementary<br />
arc. That is, it produces the circular arc, which would, if appended to the following arc,<br />
complete the circle. The complementary arc will have the same direction, clockwise or anticlockwise,<br />
as the original. The arc that follows doesn’t have to be produced by \arc, as in the following<br />
example:<br />
\draw[blue]\arccomplement<br />
\draw[red]\partpath{0,.333}<br />
\circle{(0,0),1}<br />
This will draw 1/3 of this circle in red and the rest of it in blue.<br />
METAFONT cannot check if a path is really a circular arc. The METAFONT code, like that of<br />
\makesector (see subsection 4.4.1), selects three key points on the arc, then it produces the rest<br />
of the circle much the same way as the internal code of \arc[t] (the three point option for \arc).<br />
Thus, it will produce some arc from the end of any following path to its beginning (or a straight<br />
line if the three chosen points happen to lie in a straight line). However, the result needn’t bear any<br />
significant relation to the original path.
4.4 MODIFYING THE FIGURES. 33<br />
\interpolatepath{〈frac〉,〈path1〉}. . .<br />
This modifying macro takes the following path (call it 〈path0〉) and computes a new path that is<br />
〈frac〉 of the way “between” it and the argument 〈path1〉. The argument 〈path1〉 would usually be<br />
the name of a METAFONT path variable used to store a figure (see \store from subsection 4.10.2).<br />
However it can actually be any legal METAFONT path expression. The argument 〈frac〉 is a number.<br />
If 〈frac〉 is 0, nothing is done and the following path 〈path0〉 is produced; if 〈frac〉 is 1, then the<br />
argument 〈path1〉 is produced. For values of 〈frac〉 between 0 and 1 the resulting path is somewhere<br />
between the two. Numbers larger than 1 or less than 0 produce an extrapolated path. An ordered pair<br />
can be supplied instead of the argumant 〈path1〉: it will be interpreted as a trivial path. If 〈path0〉<br />
(the following figure) is closed and if 〈path1〉 is an ordered pair or a closed path, then the resulting<br />
path will also be closed. Otherwise it will not be.<br />
What this command actually interpolates are the key points of the paths and the directions of<br />
travel at those key points. Therefore, if the two paths are visually very similar but have very different<br />
node structure, then the interpolated path can be quite unexpectedly different from both of them. For<br />
example<br />
\store{ABC}\circle{(0,0),1}<br />
\interpolatepath{.5,ABC}\reverse\circle{(0,0),1}<br />
produces a straight line from (1,0) to (−1,0) (and back again).<br />
4.4.3 ARROWS<br />
\arrow[l〈headlen〉][r〈rotate〉][b〈backset〉][c〈color〉]...<br />
\arrow*[l〈headlen〉][r〈rotate〉][b〈backset〉][c〈color〉]...<br />
This macro adds an arrowhead at the endpoint of the open path (or at the last key point of the<br />
closed path) that follows. The optional parameter 〈headlen〉 determines the length of the arrowhead.<br />
The default is the value of the TEX dimension \headlen, initially 3pt. The optional parameter<br />
〈rotate〉 allows the arrowhead to be rotated anticlockwise around its point an angle of 〈rotate〉 degrees.<br />
The default is 0. The optional parameter 〈backset〉 allows the arrowhead to be “set back” from<br />
its original point, thus allowing (for example) double arrowheads. This parameter is in the form of a<br />
TEX dimension—its default value is 0pt. If an arrowhead is both rotated and set back, it is set back<br />
in the direction after the rotation. The optional 〈color〉 defaults to headcolor, initially black. The<br />
optional parameters may appear in any order, the indicated key character determining the meaning<br />
of a parameter. The key letter l for ‘length’ can be replaced by s for ‘size’.<br />
There is also a star-form: If \arrow is called as \arrow*, then any part of the tip of the following<br />
curve that lies outside the arrowhead shape is clipped off. Imagine a rectangle with one side<br />
connecting the ends of the barbs and the opposite side passing through the tip. Everything in that<br />
rectangle outside the arrowhead is erased, so be careful using this (also see comments about META-<br />
POST’s method of ‘erasing’ in the description of \gclear in \subsection 4.5.2). One use of this is<br />
adding an arrowhead to a figure rendered with \doubledraw (see the next section) or with a rather<br />
large pen diameter (see section 4.11).<br />
For the star-form to work, the head has to be added after the path is drawn. What this means<br />
in practice is that the \arrow* command must come before any drawing command in the list of<br />
prefixes. This is because prefix macros add their elements to the result of everything that follows. If<br />
you \store a curve in a path variable (see subsection 4.10.2), and draw the path and the arrowhead<br />
in separate commands, then the arrow command must come after the drawing command.
4.4 MODIFYING THE FIGURES. 34<br />
\arrowhead{〈symbol〉}[l〈length〉][r〈rotate〉][b〈backset〉][c〈color〉]...<br />
\arrowmid{〈symbol〉}[l〈length〉][r〈rotate〉][f〈fraction〉][c〈color〉]...<br />
\arrowtail{〈symbol〉}[l〈length〉][r〈rotate〉][f〈forward〉][c〈color〉]...<br />
These macros add some sort of symbol at different locations along a path. The first adds an<br />
arrowhead, but the head can be any appropriately designed symbol. It has been arranged that any of<br />
the symbols usable in \plotsymbol (see subsection 4.2.1) can be used: you can have Diamond- or<br />
Asterisk-tipped arrows. The special symbol Arrowhead produces the same shape as the head in<br />
the \arrow command. In total eight special 〈symbols〉 have been made available, intended for use<br />
with \arrowhead, \arrowmid and \arrowtail. Here is a list and description of all these symbols.<br />
Arrowhead The shape that would be drawn at the end of a path by \arrow.<br />
Leftharpoon The left half of Arrowhead.<br />
Rightharpoon The right half of Arrowhead.<br />
Crossbar A short line crossing the path perpendicularly unless rotated.<br />
Leftbar Essentially the left half of Crossbar.<br />
Rightbar The right half.<br />
Lefthook An open semicircle with its open face in the direction of the path, added to the left side<br />
of the path.<br />
Righthook Like Lefthook but on the right side.<br />
Here ‘left’ and ‘right’ are from the point of view of an observer facing in the direction of the path.<br />
If the symbol is a closed path (see subsection 4.4.1 for the difference between a closed path<br />
and one that merely looks closed), the head will be filled, otherwise its outline will be drawn. Thus<br />
\arrowhead{Diamond} draws an outline, and \arrowhead{SolidDiamond} draws a filled shape<br />
because Diamond has been left open, while SolidDiamond has been defined to be closed.<br />
It is possible, to get an outline drawn with the inside erased: just place the solid version with color<br />
background (usually the same as white) and then the outline version. This can produce a pleasing<br />
result. But recall that the prefix macro nearest the figure macro is executed first. For example:<br />
\arrowmid{Circle}\arrowmid{SolidCircle}[cwhite]\polyline{(0,0),(1,1)}<br />
The symbol is always rotated so that it points in the direction of the path (for this purpose, all<br />
symbols are initially assumed to point straight upward) before the [r〈rotate〉] parameter is applied.<br />
There is a star-form \arrowhead* that behaves like \arrow* (when possible). The optional<br />
arguments are exactly as in \arrow, with the same defaults for all of them.<br />
The second command, \arrowmid, places the symbol somewhere between the start and the end<br />
of the path. In this case the optional parameter [f〈fraction〉] gives the location of the symbol as a<br />
fraction of the length of the path. The default is [f0.5], which places it approximately in the middle.<br />
The other optional arguments have the same meaning as for \arrowhead. As with \arrowhead, the<br />
symbol is rotated to ‘point’ in the direction of the path before the [r〈rotate〉] is applied.<br />
The third command \arrowtail places the symbol at the start of the path. Otherwise it behaves<br />
as the other two commands, except the option [f〈forward〉] is an amount to shift the symbol forward<br />
from that first point.<br />
One might be tempted to use \arrowmid with the 〈fraction〉 equal to 1 or 0 to get arrowheads<br />
or tails. This will work sometimes. However, some shapes have a ‘tip’, that is, a particular point<br />
designated as the tip of the arrowhead. The \arrowhead and \arrowtail commands pay attention<br />
to this, while \arrowmid does not. Also, \arrowmid has no star-form.<br />
You can design your own 〈symbol〉 for these commands: use \store to store a path in a path variable<br />
(see subsection 4.10.2). These commands assume that the length is 1, that the symbol ‘points’<br />
up and that the ‘tip’ (the ‘pointy end’) is at (0,0) (unless the pair variable 〈symbol〉.tip is defined,<br />
in which case that is taken to be the tip). So draw your symbol pointing up with its tip at (0,0) and
4.5 RENDERING FIGURES. 35<br />
its length equal to 1 (graph unit). For example the following produces a solid head with a common<br />
shape:<br />
\store{myAH}\polygon{(-.5,-1)(0,0),(0.5,-1),(0,-.7)}<br />
\arrowhead{myAH}\arc{(-10,0),(10,0),90}<br />
If you replace the \polygon above with \polyline:<br />
\store{myAH}\polyline{(-.5,-1)(0,0),(0.5,-1),(0,-.7),(-.5,-1)}<br />
the path will not be closed and so the arrowhead will not be filled in.<br />
To make the star-form work with such self-defined symbols, one must also define a closed path<br />
myAH.clear that gives the region to be erased. In the above example:<br />
\store{myAH.clear}\polygon{(-.5,-1),(-.5,0),(.5,0),(.5,-1),(0,-.7)}<br />
4.5 Rendering figures.<br />
When MFPIC is loaded, the initial way in which figures are drawn is with a solid outline. That is,<br />
\polyline{(1,0),(1,1),(0,0)} will draw two solid lines connecting the points. It is possible<br />
to establish a different default (see \setrender in subsection 4.5.3), however that default is used<br />
only when no explicit rendering prefix is present. That is, when the macros in this section are used,<br />
any previously established default is overridden.<br />
\norender...<br />
This causes the following path not to be rendered at all. This can be used to override MFPIC’s<br />
automatic rendering rules. See section 4.10.2, page 59 for an example where one might need to do<br />
this.<br />
4.5.1 DRAWING<br />
\draw[〈color〉]...<br />
Draws the subsequent path using a solid outline. For an example: to both draw a curve and hatch<br />
its interior, \draw\hatch must be used. The default for 〈color〉 is drawcolor.<br />
To save repetition, the color used for the following commands is also drawcolor:<br />
\dashed, \dotted, \doubledraw, \plot, \plotnodes, and \gendashed,<br />
\doubledraw[〈sep〉][〈color〉]...<br />
This rendering macro draws the path with a double line. The default separation (distance between<br />
centers of the two penstrokes) is twice the pen diameter. This normally leaves one line thickness<br />
of white space between. You can change this with the [〈sep〉] argument. In order to make the<br />
space between the lines transparent, this command is implemented by calculating two curves that<br />
are parallel to the given curve and drawing those. For technical reasons, that calculation is rather<br />
lengthy so this is somewhat inefficient and users of slow machines might want to avoid it. See also<br />
comments at \parallelpath in subsection 4.4.2.<br />
\dashed[〈length〉,〈space〉]...<br />
This rendering macro draws dashed segments along the path specified. The default length of the<br />
dashes is the value of the TEX dimension \dashlen, initially 4pt. The default space between the<br />
dashes is the value of the TEX dimension \dashspace, initially 4pt. The dashes and the spaces<br />
between may be increased or decreased by as much as 1/n of their value, where n is the number of<br />
spaces appearing in the curve, in order to have the proper dashes at the ends. The dashes at the ends<br />
are half of \dashlen long.
4.5 RENDERING FIGURES. 36<br />
\dotted[〈size〉,〈space〉]...<br />
This rendering macro draws dots along the specified path. The default size of the dots is the<br />
value of the TEX dimension \dotsize, initially 0.5pt. The default space between the dots is the<br />
value of the TEX dimension \dotspace, initially 3pt. The size of the spaces may be adjusted as in<br />
\dashed.<br />
\plot[〈size〉,〈space〉]{〈symbol〉}...<br />
Similar to \dotted, this rendering macro draws copies of 〈symbol〉 along the path. Possible<br />
symbols are those listed under \plotsymbol in subsection 4.2.1. The default 〈size〉 is \pointsize<br />
(initially 2pt) and the default 〈space〉 is \symbolspace (initially 5pt).<br />
\plotnodes[〈size〉]{〈symbol〉}...<br />
This rendering macro places a symbol at each node of the path that follows. Possible symbols<br />
are those listed under \plotsymbol in subsection 4.2.1. A node is one of the points through which<br />
METAFONT draws its curve. If one of the macros \polyline{...} or \curve{...} follows, each of<br />
the points listed is a node. In the \datafile command (subsection 4.6.3), each of the data points in<br />
the file is a node. In the function macros (subsection 4.6.2) the points corresponding to 〈min〉, 〈max〉<br />
and each step in between are nodes. The optional 〈size〉 defaults to \pointsize. If the command<br />
\clearsymbols has been issued then the interiors of the open symbols are erased. The effect of<br />
something like the following is rather nice:<br />
\clearsymbols<br />
\plotnodes{Circle}\draw\polyline{...}<br />
This will first draw the polyline with solid lines, and then the points listed will be plotted as open circles<br />
with the portion of the lines inside the circles erased. One sees a series of open circles connected<br />
one to the next by line segments<br />
\dashpattern{〈name〉}{〈len1〉,〈len2〉,...,〈len2k〉}<br />
For more general dash patterns than \dashed and \dotted provide, MFPIC offers a generalized<br />
dashing command. Before using it, one must first establish a named dashing pattern with the above<br />
command. The 〈name〉 can be any sequence of letters and underscores. Try to make it distinctive to<br />
avoid undoing some internal variable. 〈len1〉 through 〈len2k〉 are an even number of lengths. The<br />
odd ones determine the lengths of dashes, the even ones the lengths of spaces. A dash of length 0pt<br />
means a dot. An alternating dot-dash pattern can be specified with<br />
\dashpattern{dotdash}{0pt,4pt,3pt,4pt}<br />
Note: Since pens have some thickness, dashes look a little longer, and spaces a little shorter, than the<br />
numbers suggest. If one wants dashes and spaces with the same length, one needs to take the size<br />
desired and increase the spaces by the thickness of the drawing pen (normally) 0.5pt) and decrease<br />
the dashes by the same amount. 13<br />
If \dashpattern is used with an odd number of entries, a space of length 0pt is appended. This<br />
makes the last dash in one copy of the pattern abut the first dash in the next copy.<br />
\gendashed{〈name〉}...<br />
Once a dashing pattern name has been defined, it can be used in this figure macro to draw the<br />
curve that follows it. Using a name not previously defined will cause the curve to be drawn with a<br />
solid line, and generate a METAFONT warning, but TEX will not complain. If all the dimensions in a<br />
13 Experienced METAPOST users could also set the linecap variable to butt.
4.5 RENDERING FIGURES. 37<br />
dash pattern are 0, \gendashed responds by drawing a solid curve. The same is true if the pattern<br />
has only one entry.<br />
\zigzag{〈start〉,〈end〉,〈wl〉,〈amp〉}. . .<br />
\sinewave[〈tens〉]{〈start〉,〈end〉,〈wl〉,〈amp〉}. . .<br />
These figure macros both draw a solid line that crosses from one side of the path to the other. The<br />
\zigzag makes a jagged result while the \sinewave makes a smooth one. The optional argument<br />
of \sinewave is a ‘tension’ and controls how smooth the result is. The default tension is 1. Higher<br />
values make a less smooth path, and values of 10 or so produce a result almost indistinguishable<br />
from \zigzag. Tension is required to be greater than 3/4.<br />
The mandatory arguments consists of four dimensions separated by a comma. The rendering<br />
produced by these macros actually follow the path a little way at the start and end of the path. This<br />
is controlled by the dimensions 〈start〉 and 〈end〉.<br />
The third dimension, 〈wl〉, is the distance from one ‘peak’ to the next (the ‘wavelength’). The<br />
second, 〈amp〉, is the maximum distance to either side of the true path (the ‘amplitude’). Reasonable<br />
values of 〈wl〉 and 〈amp〉 are 8pt and 2pt, respectively. These proportions (4 to 1) causes the zigzag<br />
and the sinewave to cross the path at an angle of about 45 degrees, a rather pleasant result. Those<br />
sizes are close to optimal: too much smaller and the rendering just looks like a fuzzy line, too much<br />
larger, and bends in the path will distort the zigzagging.<br />
The zigzags zig to the left first if 〈amp〉 is positive, to the right if it is negative. For closed curves,<br />
the beginning and end are constructed to meet smoothly. It is always arranged that there are an equal<br />
number of left zigs and right zags, so the 〈wl〉 is only approximate.<br />
\corkscrew[〈tens〉]{〈start〉,〈end〉,〈wl〉,〈amp〉}. . .<br />
\coil[〈tens〉]{〈start〉,〈end〉,〈wl〉,〈amp〉}. . .<br />
This rendering macro draws a coil or corkscrew that coils around a given path, something like<br />
this: (the red dots show the actual path). The 〈tens〉 is a tension option that controls how<br />
‘loopy’ the result will be (the higher the number the more jagged). The mandatory argument contains<br />
four explicit dimensions. The first two, 〈start〉 and 〈end〉 are as in \zigzag. The 〈wl〉 is the distance<br />
from one loop to the next, and 〈amp〉 is the distance from the true path to the tops (or bottoms) of<br />
the loops. If 〈amp〉 is positive, the tip of the loop is to the left of the path, if negative it is to the right.<br />
The example at the start of this paragraph was drawn using the following code:<br />
\<strong>mfpic</strong>{0}{33}{0}{6.4}<br />
\dotsize=1pt<br />
\drawcolor{red}<br />
\dotted\polyline{(0,3.2),(33,3.2)}<br />
\drawcolor{black}<br />
\coil[1.5]{3pt,3pt,4.8pt,3.2pt}\polyline{(0,3.2),(33,3.2)}<br />
\end<strong>mfpic</strong><br />
4.5.2 SHADING, FILLING, ERASING, CLIPPING, HATCHING<br />
For the purposes of this section, a distinction must be made in the figure macros between ‘open’<br />
and ‘closed’ paths. A path that merely returns to its starting point is not automatically closed; such a<br />
path might be open and may need to be explicitly closed, for example by \lclosed. The (already)<br />
closed paths are those that have ‘closed’ or ‘cyclic’ in their name plus:<br />
\belowfcn, \border, \btwnfcn, \btwnplrfcn, \chartbar (and its aliases),<br />
\circle, \ellipse, \fullellipse, \levelcurve, \makesector,\piewedge,<br />
\plrregion, \polygon, \pshcircle. \rect, \regpolygon, \sector, \tlabelcircle,<br />
\tlabelellipse, \tlabeloval, and \tlabelrect.
4.5 RENDERING FIGURES. 38<br />
The macros of this section can all be used to fill (or unfill) the interior of closed paths, even if<br />
the paths cross themselves. Filling an open curve is technically an error, but the METAFONT code<br />
responds by drawing the path and not doing any filling. Note that these macros override the default<br />
rendering, so if you want some sort of fill pattern and an outline drawn, you need an explicit prefix<br />
for both.<br />
\gfill[〈color〉]...<br />
This rendering macro fills in the subsequent closed path. Under METAPOST it fills with 〈color〉,<br />
which defaults to fillcolor. Under METAFONT it approximates the color with a shade of gray,<br />
clears the interior, and then fills with a pattern of black and white pixels simulating gray.<br />
\gclear...<br />
This rendering macro erases everything inside the subsequent closed path (except text labels<br />
under some circumstances, see section 2.2 and 2.3). Under METAPOST it actually fills with the<br />
predefined color named background. Since background is normally white, and so are most actual<br />
backgrounds, this is usually indistinguishable from clearing. However, if an <strong>mfpic</strong> environment<br />
utilzes background text (see subsection 4.7.1), part of the background text may appear to be ‘erased’.<br />
Unfortunately, there is little that can be done about this.<br />
\gclip...<br />
This rendering macro erases everything outside the subsequent closed path from the picture<br />
(except text labels under some circumstances, see section 2.2 and 2.3). Note that this is a true erasing,<br />
even in METAPOST.<br />
\shade[〈shadesp〉]...<br />
This rendering macro shades the interior of the subsequent closed path with dots. The diameter<br />
of the dots is the METAFONT variable shadewd, set by the macro \shadewd{〈size〉}. Normally<br />
this is 0.5bp. The optional argument specifies the spacing between (the centers of) the dots, which<br />
defaults to the TEX dimension \shadespace, initially 1pt. If shadewd is larger than \shadespace,<br />
the closed path is filled with black, as if with \gfill. Under METAPOST this macro actually fills<br />
the path’s interior with a shade of gray. The shade to use is computed based on \shadespace and<br />
shadewd. The default values of these parameters correspond to a gray level of about 78% of white. 14<br />
The METAFONT version attempts to optimize the dots to the pixel grid corresponding to the printers<br />
resolution (to avoid generating dither lines). Because this involves rounding, it will happen that<br />
values of \shadespace that are relatively close and at the same time close to shadewd produce<br />
exactly the same shade. Most of the time, however, values of \shadespace that differ by at least<br />
20% will produce different patterns. The actual behavior for particular values of the parameters and<br />
particular printer resolutions cannot be predicted, and we even make no guarantee it will not change<br />
from one version of MFPIC to another.<br />
\polkadot[〈space〉]...<br />
This rendering macro fills the interior of a closed path with large dots. This is almost what<br />
\shade does, but there are several differences. \shade is intended solely to simulate a gray fill in<br />
METAFONT where the only color is black. So it is optimized for small dots aligned to the pixel grid<br />
(in METAFONT). In METAPOST \shade only fills with gray and is intended merely for compatibility.<br />
The macro \polkadot is intended for large dots in any color, and so it optimizes spacing (a nice<br />
hexagonal array) and makes no attempt to align at the pixel level. The 〈space〉 defaults to the TEX<br />
14 If \shadewd is w and \shadespace is s, then the level of gray is 1 − (.88w/s) 2 , where 0 denotes black and 1 white.
4.5 RENDERING FIGURES. 39<br />
dimension \polkadotspace, initially 10pt. The diameter of the dots is the value of the METAFONT<br />
variable polkadotwd, which can be set with \polkadotwd{〈size〉}, and is initially 5bp. The dots<br />
are colored with fillcolor. In METAFONT, nonblack values of fillcolor will produce shaded<br />
dots.<br />
\thatch[〈hatchsp〉,〈angle〉][〈color〉]...<br />
This rendering macro fills a closed path with equally spaced parallel lines at the specified angle.<br />
The thickness of the lines is set by the macro \hatchwd. In the optional argument, 〈hatchsp〉<br />
specifies the space between lines, which defaults to the TEX dimension \hatchspace, initially 3pt.<br />
The 〈angle〉 defaults to 0. The 〈color〉 defaults to hatchcolor. If \hatchspace is less than the<br />
line thickness, the closed path is filled with 〈color〉, as if with \gfill. If the first optional argument<br />
appears, both parts must be present, separated by a comma. For the color argument to be present, the<br />
other optional argument must also be present. However, if one wishes only to override the default<br />
color one can use an empty first optional argument (completely empty, no spaces or comma).<br />
An angle of 0 yields horizontal lines, nonzero angles indicate rotations from horizontal where,<br />
as usual, positive angles indicate anticlockwise rotation.<br />
\lhatch[〈hatchsp〉][〈color〉]...<br />
\rhatch[〈hatchsp〉][〈color〉]...<br />
\hatch[〈hatchsp〉][〈color〉]...<br />
\xhatch[〈hatchsp〉][〈color〉]...<br />
These rendering macros are just \thatch with predefined values of the angle. \lhatch fills the<br />
region with left slanted lines (from upper left to lower right). It is exactly the same as<br />
\thatch[〈hatchsp〉,-45][〈color〉]...<br />
\rhatch draws right slanted lines (lower left to upper right). It is exactly the same as<br />
\thatch[〈hatchsp〉,45][〈color〉]...<br />
\hatch (\xhatch is a synonym) draws lines in a cross-hatched pattern. It is exactly the same as<br />
\rhatch followed by \lhatch using the same 〈hatchsp〉 and 〈color〉.<br />
Hatching should normally be used very sparingly, or never if alternatives are available (color,<br />
shading). However, hatching on top of another filling macro is a common way to fill in two regions<br />
in such a way that the overlap area is clearly evident. Hatching is at least less garish than polkadots.<br />
\gradient{〈clrfcn〉,〈width〉,〈angle〉}...<br />
Neither METAPOST nor METAFONT can do true gradients, but this rendering macro obtains a<br />
good approximation by filling adjacent narrow strips in a range of colors. The argument 〈width〉 is<br />
the width of those strips, and it should be specified in absolute units, 〈angle〉 is the angle of these<br />
strips (horizontal being 0 degrees). The first argument takes a little explanation.<br />
The 〈clrfcn〉 should be the name of a function, say gr, such that gr(t) returns a color 15 for any<br />
value of t from 0 to 1 (inclusive). Such a function can be defined with \fdef (see subsection 4.6.1).<br />
The first strip will have the color returned for t = 0 and the last will have the color returned for<br />
t = 1. One kind of gradient fill is obtained by a simple interpolation between two colors in the same<br />
model:<br />
\fdef{gr}{t}{(1-t)*red + t*blue}<br />
\gradient{gr,3pt,45}\circle{(0,0),1}<br />
15 It can also return a number between 0 and 1, which will result in shades of gray.
4.5 RENDERING FIGURES. 40<br />
This example will start the gradient with red and end it with blue. For an angle of 0 the starting color<br />
is at the bottom and the ending color at the top, for other angles simply rotate that description. The<br />
above circle will be red at the lower right and blue at the upper left.<br />
This type of gradient is called an axial gradient. The following is another kind, based on a color<br />
function of two variables over an area.<br />
\areagradient{〈clrfcn〉,〈h-dim〉,〈v-dim〉}...<br />
Instead of filling with strips of different colors, \areagradient fills with “pixels” of different<br />
colors. These are rectangles that have size 〈h-dim〉 by 〈v-dim〉, which values must be specified in<br />
absolute units. These rectangles are filled with the color determined by 〈clrfcn〉. This must be a<br />
function of two parameters that returns a color for values of these parameters from 0 to 1 (inclusive).<br />
For example,<br />
\fdef{agr}{t,u}%<br />
{(1-t)(1-u)*white + (1-t)*u*red + t*(1-u)*green + t*u*blue}<br />
\gradient{agr,3pt,4pt}\rect{(0,0),(1,2)}<br />
The color returned for (0,0) is at the lower left and the color returned for (1,1) is at the upper right.<br />
In the above example, the rectangle will be white at the lower left, red at the upper left, green at the<br />
lower right and blue at the upper right.<br />
Our last gradient is something like the first, but in polar coordinates. The colors vary with the<br />
distance from a center point.<br />
\radialgradient{〈clrfcn〉,〈width〉,〈center〉}...<br />
This gradient fills with concentric circular strips whose center is 〈center〉 and whose thickness<br />
is 〈width〉. The 〈clrfcn〉 is as in \gradient. The circle of radius 〈width〉 and center 〈center〉 is filled<br />
with the color returned for parameter value 0. The largest concentric circular strip is filled with the<br />
color returned for parameter value 1.<br />
These commands all initially compute a bounding figure for the curve. In the first case it is a<br />
rotated rectangle, in the second case an upright rectangle, and in the third case a circle centered at<br />
the given point. The interiors of the rectangles are considered to have coordinates (t,u) that vary<br />
from (0,0) at the lower left to (1,1) at the upper right. The inside of the circle is considered to have<br />
the polar coordinate r ranging from 0 at the center to 1 at the boundary. The relevant coordinate(s)<br />
are fed to the specified 〈clrfcn〉 and the returned color is used to fill the relevant portion of the<br />
rectangle or circle. The whole picture is then clipped to the boundaries of the given closed curve and<br />
the result added to the picture.<br />
The process is somewhat wasteful of memory in METAPOST, as each strip or pixel’s path is<br />
kept in memory and written to the output file. This can be quite large for \areagradient if the<br />
pixel dimensions are too small. For example, covering a one inch square with pixels 1 point on each<br />
side takes over 5000 paths and the resulting EPS is over 100,000 bytes in size. I would recommend<br />
dimensions on the order of 2 to 3 points. Larger dimensions are not as visually appealing, and smaller<br />
dimensions waste memory with little improvement in appearence.<br />
This command works in METAFONT using a 〈clrfcn〉 that returns numeric values in the range 0 to<br />
1. The result is much like \gfill[〈clr〉] (see the beginning of this section) except the dots simulating<br />
a gray fill will vary in size corresponding to the 〈clrfcn〉. The result will be disappointing unless<br />
there is considerable contrast between the lightest and darkest grays of the gradient. Therefore, it is<br />
recommended that the color function cover the entire range from 0 to 1 (black to white). There are<br />
no particular memory problems with gradients in METAFONT, at least no more so than gray fills.
4.6 FUNCTIONS AND PLOTTING. 41<br />
4.5.3 CHANGING THE DEFAULT RENDERING<br />
Rendering is the process of converting a geometric description into a drawing. In METAFONT, this<br />
means producing a bitmap (METAFONT stores these in picture variables), either by stroking (drawing)<br />
a path using a particular pen), or by filling a closed path. In METAPOST it means producing a<br />
POSTSCRIPT description of penstrokes and fills (with possible clipping).<br />
\setrender{〈TEX commands〉}<br />
Initially, MFPIC uses the \draw command (stroking) as the default operation when a figure is<br />
to be rendered. However, this can be changed to any combination of MFPIC rendering commands<br />
or indeed any TEX commands, by using the \setrender command. This redefinition is local when<br />
it occurs inside an <strong>mfpic</strong> environment, so there it can be enclosed in braces to restrict its range.<br />
Outside an <strong>mfpic</strong> environment it is a global redefinition.<br />
For example, suppose one uses \setrender{\dashed\shade} in a <strong>mfpic</strong> environment. If the<br />
command \circle{(0,0),1} occurs later in that environment, it will produce a shaded circle with<br />
a dashed outline. If an explicit rendering prefix is given in a drawing command, it will override this<br />
default.<br />
4.5.4 EXAMPLES<br />
It may be instructive, for the purpose of understanding the syntax of shape-modifier and rendering<br />
prefixes, to consider two examples:<br />
\draw\gfill[red]\lclosed\polyline{...}<br />
which fills inside a polygon and draws its outline; and<br />
\gfill[red]\lclosed\draw\polyline{...}<br />
which draws all of the outline except the line segment supplied by \lclosed, then fills the interior.<br />
Thus, in the first case the path is first defined (by \polyline), then closed, then the resulting closed<br />
path is filled, and finally drawn. In the second case the order is: defined, drawn, closed, filled. In<br />
particular, what is drawn in the second case is the path not yet closed. It should also be pointed out<br />
that in the last case, the fill is placed last and will cover half the thickness of the previously drawn<br />
outline.<br />
4.6 Functions and Plotting.<br />
In the following macros, expressions like f (x) or g(t) stand for any legal METAFONT expression, in<br />
which the only unknown variables are those indicated (x in the first case, and t in the second).<br />
4.6.1 DEFINING FUNCTIONS<br />
\fdef{〈fcn〉}{〈param1〉,〈param2〉,...}{〈mf-expr〉}<br />
Defines a METAFONT function 〈fcn〉 of the parameters 〈param1〉, 〈param2〉, ..., by the META-<br />
FONT expression 〈mf-expr〉 in which the only free parameters are those named. The return type of<br />
the function is the same as the type of the expression. What is allowed for the function name 〈fcn〉 is<br />
more restrictive than METAFONT’s rule for variable names. Roughly speaking, it should consist of<br />
letters and underscore characters only. (In particular, for those who know what this means, the name<br />
should have no suffixes.) Try to make the name distinctive to avoid redefining internal METAFONT<br />
commands.<br />
The expression 〈mf-expr〉 is passed directly into the corresponding METAFONT macro and interpreted<br />
there, so METAFONT’s rules for algebraic expressions apply. If \fdef occurs inside an
4.6 FUNCTIONS AND PLOTTING. 42<br />
<strong>mfpic</strong> environment, it is local to that environment, otherwise it is available to all subsequent <strong>mfpic</strong><br />
environments.<br />
As an example, after \fdef{myfcn}{s,t}{s*t-t}, any place below where a METAFONT expression<br />
is required, you can use myfcn(2,3) to mean 2*3-3 and myfcn(x,x) to mean x*x-x.<br />
Operations available include +, -, * , /, and ** (x**y= x y ), with ‘(’ and ‘)’ for grouping. Functions<br />
already available include the standard METAFONT functions round, floor, ceiling, abs,<br />
sqrt, sind, cosd, mlog, and mexp. Note that in METAFONT the operations * and ** have the same<br />
level of precedence, so x*y**z means (xy) z . Use parentheses liberally!<br />
(Notes: The METAFONT trigonometric functions sind and cosd take arguments in degrees;<br />
mlog(x)= 256lnx, and mexp is its inverse.) You can also define the function 〈fcn〉 by cases, using<br />
the METAFONT conditional expression<br />
if 〈boolean〉: 〈expr〉 elseif 〈boolean〉: ... else: 〈expr〉 fi.<br />
Relations available for the 〈boolean〉 part of the expression include =, , =.<br />
Complicated functions can be defined by a compound expression, which is a series of META-<br />
FONT statements, followed by an expression, all enclosed between begingroup and endgroup.<br />
The \fdef command automatically supplies these grouping commands around the definition so if<br />
the entire 〈mf-expr〉 is one such compound expression the user need not type them. METAFONT<br />
functions can call METAFONT functions, even recursively.<br />
Many common functions have been predefined in grafbase, which is a package of METAFONT<br />
macros that implement MFPIC’s drawing. These include the rest of the trig functions tand, cotd,<br />
secd, cscd, which take angles in degrees, plus variants sin, cos, tan, cot, sec, and csc, which<br />
take angles in radians. Some inverse trig functions are also available, the following produce angles<br />
in degrees: asin, acos, and atan, and the following in radians: invsin, invcos, invtan. The<br />
exponential and hyperbolic functions: exp, sinh, cosh, tanh, coth, sech, and csch; and some of<br />
their inverses: ln (or log), asinh, acosh, and atanh are also defined.<br />
There are also two conversion functions: radians(t) produces the number of radians in t<br />
degrees and degrees(t) produces the number of degrees in t radians. In these expressions the<br />
special variable pi produces π, accurate to roughly 5 decimals. (METAFONT and METAPOST provide<br />
accuracy only to ±2 −17 = ±.76 × 10 −5 .)<br />
The integer functions gcd(m,n) and lcm(m,n) produce the greatest common divisor and least<br />
common multiple of two integers m and n.<br />
4.6.2 PLOTTING FUNCTIONS<br />
The plotting macros take two or more arguments. They have an optional first argument, 〈spec〉,<br />
which determines whether a function is drawn smooth (as a METAFONT Bézier curve), or polygonal<br />
(as line segments)—if 〈spec〉 is p, the function will be polygonal. Otherwise the 〈spec〉 should be<br />
s, followed by an optional positive number no smaller than 0.75. In this case the function will be<br />
smooth with a tension equal to the number. See the \curve command (subsection 4.2.5) for an<br />
explanation of tension. The default 〈spec〉 depends on the purpose of the macro.<br />
One compulsory argument contains three values 〈min〉, 〈max〉 and 〈step〉 separated by commas.<br />
The independent variable of a function starts at the value 〈min〉 and steps by 〈step〉 until reaching<br />
〈max〉. If (〈max〉 − 〈min〉)/〈step〉 is not a whole number, the nearest whole number of equal steps<br />
are used. One may have to experiment with the size of 〈step〉, since METAFONT merely connects the<br />
points corresponding to these steps with what it considers to be a smooth curve. Smaller 〈step〉 gives<br />
better accuracy, but too small may cause the curve to exceed METAFONT’s capacity or slow down<br />
its processing. Increasing the tension may help keep the curve in line, but at the expense of reduced<br />
smoothness.
4.6 FUNCTIONS AND PLOTTING. 43<br />
There are one or more subsequent arguments, each of which is a METAFONT function or expression<br />
as described above. All the macros are figure macros, defining a path to which prefixes may be<br />
applied.<br />
\function[〈spec〉]{〈x min 〉,〈x max 〉,〈∆x〉}{ f (x)}<br />
This figure macro produces an approximation to the graph of y = f (x), where f is a METAFONT<br />
numeric function or expression of one numeric argument, which must be denoted by a literal x. The<br />
default 〈spec〉 is s. For example<br />
\function{0,pi,pi/10}{sin x}<br />
draws the graph of sinx between 0 and π.<br />
\parafcn[〈spec〉]{〈t min 〉,〈t max 〉,〈∆t〉}{(x(t),y(t))}<br />
\parafcn[〈spec〉]{〈t min 〉,〈t max 〉,〈∆t〉}{〈pair-fcn〉}<br />
This figure macro produces the parametric path determined by the last argument. This can be<br />
a pair of expressions x(t) and y(t) enclosed in parentheses and separated by a comma, with the<br />
literal variable t. Alternatively, the last argument can be a METAFONT function or expression in t<br />
that returns a pair. 16 The default 〈spec〉 is s. For example<br />
\parafcn{0,1,.1}{(2t, t+t*t)}<br />
plots a smooth parabola from (0,0) to (2,2).<br />
\plrfcn[〈spec〉]{〈θ min 〉,〈θ max 〉,〈∆θ〉}{ f (t)}<br />
This figure macro produces the graph of the polar coordinate equation r = f (θ), where f is<br />
a METAFONT numeric function or expression of one numeric argument, and θ varies from 〈θ min 〉<br />
to 〈θ max 〉 in steps of 〈∆θ〉. Each θ value is interpreted as an angle measured in degrees. In the<br />
expression f (t), the unknown t stands for θ. The default 〈spec〉 is s. For example<br />
\plrfcn{0,90,5}{sind (2t)}<br />
draws one loop of a 4-petal rosette. Note that this function demands the variable t be in degrees.<br />
The range and step size must be in degrees and the function must operate on the numeric variable t<br />
in degrees. If one needs to measure angles in radians, use the conversion functions degrees() and<br />
radians(), as follows:<br />
\plrfcn{0,degrees(pi/2),degrees(pi/36)}{sin (radians(2t))}<br />
\btwnfcn[〈spec〉]{〈x min 〉,〈x max 〉,〈∆x〉}{ f (x)}{g(x)}<br />
\btwnplrfcn[〈spec〉]{〈θ min 〉,〈θ max 〉,〈∆θ〉}{ f (t)}{g(t)}<br />
These are figure macros. The first one produces a closed path surrounding the region between the<br />
graphs of the two functions. The second one does the same for two polar functions. That is (in both<br />
cases), the path follows the first function (in order or increasing x or θ), thence along the straight<br />
line to the end of the second one, thence backwards along the second function (decreasing x or θ)<br />
and finally along the straight line to the start. The last two mandatory arguments, the functions, are<br />
specified exactly as in \function and \plrfcn, being numeric functions of one numeric argument<br />
x or t. Unlike the previous function macros, the default 〈spec〉 is p—these macros are intended to<br />
be used for shading between drawn functions, a task for which smoothness is usually unnecessary.<br />
For example, the first line below<br />
16 There are very few of these. METAFONT provides dir t, which is essentially (cosd t, sind t). MFPIC adds cis t<br />
which is (cos t, sin t).
4.6 FUNCTIONS AND PLOTTING. 44<br />
\shade\btwnfcn{0,1,.1}{0}{x - x**2}<br />
\btwnplrfcn[s]{-30,30,5}{1}{2*cosd 2t}<br />
shades the area between the x-axis and the given parabola. The second draws the boundary of the<br />
region between the circle r = 1 and one loop of the rosette r = 2cos2θ.<br />
Note: the effect of \btwnfcn could also be accomplished with<br />
\lclosed\connect<br />
\function{〈x min 〉,〈x max 〉,〈∆x〉}{ f (x)}<br />
\reverse\function{〈x min 〉,〈x max 〉,〈∆x〉}{g(x)}<br />
\endconnect<br />
\lclosed was described in subsection 4.4.1 and the \connect. . . \endconnect pair was described<br />
in subsection 4.4.2.<br />
\belowfcn[〈spec〉]{〈x min 〉,〈x max 〉,〈∆x〉}{ f (x)}<br />
\plrregion[〈spec〉]{〈θ min 〉,〈θ max 〉,〈∆θ〉}{ f (t)}<br />
These figure macros produce identical results to \btwnfcn and \btwnplrfcn when the first<br />
function is just 0. They are, however, much more efficient. The first of these, \belowfcn, produces<br />
the path surrounding the region bounded by the x-axis, the graph of y = f (x) and the two vertical<br />
lines x = x min and x = x max . (The region is not actually below y = f (x) unless f (x) ≥ 0 throughout<br />
the interval.) The second produces the path surrounding the region bounded by the polar function<br />
r = f (θ) and the two rays θ = θ min and θ = θ max .<br />
The arguments of these command are the same as the nonclosed versions, \function and<br />
\plrfcn, except the default for the optional agument is [p]. Again, this is because it is mainly<br />
for shading. However, drawing the boundary is often needed:<br />
\shade\plrregion{0,90,5}{sind (2t)}<br />
\plrregion[s]{0,90,5}{sind (2t)}<br />
shades one loop of the 4-petal rosette, and then draws it.<br />
The next sets of macros are similar to the previous function plotting macros, but don’t fit the<br />
〈max〉, 〈min〉 〈step〉 model for the first argument. For the first (\levelcurve) this is a limitation of<br />
the task being performed. For the others (\DEgraph, \DEtrajectory) it is a design choice.<br />
\levelcurve[〈spec〉]{〈seed〉,〈step〉} {〈inequality〉}<br />
This figure macro produces a level curve of some function F(x,y). There are three requirements<br />
on the parameters for this to work correctly. First, in order to obtain the curve satisfying F(x,y) = C,<br />
the {〈inequality〉} must be either {F(x,y) > C} or {F(x,y) < C}. 17 Second, the level curve must<br />
surround the point given by the 〈seed〉 paramter, and third, the inequality must be true at this seed<br />
point.<br />
The command works by searching rightward from 〈seed〉 until it encounters the first point on<br />
the level curve. It then tries to find a nearby point on the level curve and joins it to the first one, and<br />
continues similarly until it finds it has returned near the starting point. The meaning of “nearby point<br />
on the level curve” is the intersection of the level curve with a circle of radius 〈step〉 centered at the<br />
previously found point. If the region defined by the inequality extends beyond the bounds of the<br />
picture (as set by the \<strong>mfpic</strong> command), the region is truncated and the resulting curve will follow<br />
along the picture’s border.<br />
Since the algorithm only approximates the level set, a tolerance (how close the points are to<br />
actually being on the level curve) is chosen which gives two decimal places more accuracy than<br />
17 A non-strict inequality such as >= can be used, but the result will not be significantly different.
4.6 FUNCTIONS AND PLOTTING. 45<br />
〈step〉. The value of 〈step〉 is interpreted in graph units and so should be a pure number. The [〈spec〉]<br />
is either [p], in which case the calculated points are joined with straight lines, or [s〈tension〉] as in<br />
\function. The default is [s]: a smooth curve with the current default tension.<br />
In general, choosing a 〈step〉 that corresponds to a few millimeters works reasonably well. For<br />
example, if the graph unit is 1cm (for example, \<strong>mfpic</strong>unit=1cm and no scaling is used), then<br />
〈step〉 = 0.5 might be a reasonable first choice. If the level set is reasonably smooth and [s] is used,<br />
then the result will match the actual curve to within .005cm, which is approximately .14pt, which is<br />
less than half the thickness of the standard pen used to draw it.<br />
Be warned that there is a limit: there should not be more than 2000 steps in the completed<br />
curve. In a figure which is 10-by-10 graph units, a level curve without too much oscillation would<br />
probably be less than 80 units in length and a step size of .04 would probably produce under 2000<br />
steps. This should be accurate enough for most purposes. If you really need more, the value of the<br />
METAFONT variable max_points must be changed. This can be done with \setmfvariable (see<br />
section 4.12.4).<br />
As a special case, if 〈step〉 is 0, the maximum of width and height of the figure (as given by the<br />
arguments to the <strong>mfpic</strong> environment) is divided by 100. For example, in a 5-by-10 graph, giving a<br />
step size of 0 will actually select 〈step〉 = 10/100 = 0.1.<br />
The algorithm used will produce imprecise results if there are two points on the curve closer<br />
than 〈step〉 in straight-line distance, but much further apart when measured along the curve.<br />
\DEgraph[〈spec〉]{〈x 0 〉,〈y 0 〉,〈∆s〉,〈N〉}{ f (x,y)}<br />
\DEtrajectory[〈spec〉]{〈p 0 〉,〈∆s〉,〈N〉}{F(x,y,t)}<br />
The first of these plots the graph of the solution of the differential equation<br />
dy<br />
dx = f (x,y), y(x 0) = y 0 .<br />
The 〈∆s〉 parameter is a step size and the 〈N〉 parameter is the number of steps. The step size is<br />
not an increment in the x variable. Rather is is (roughly) the distance from one point to the next<br />
along the graph as METAFONT computes them. That is, METAFONT computes using a variable x-<br />
step ∆x, chosen so that √ ∆x 2 + ∆y 2 is approximately 〈∆s〉. The algorithm used is a modified 4-step<br />
Ringe-Kutta method.<br />
The second macro, \DEtrajectory draws the path traced by the solution (x(t),y(t)) of<br />
( dx<br />
dt , dy )<br />
= F(x,y,t), (x(0),y(0)) = p 0 .<br />
dt<br />
This is not a graph, since the dependence on t cannot be shown in two dimensions (a third dimension<br />
would be needed). The parameter 〈p 0 〉 should be an ordered pair of numbers, the 〈∆s〉 and 〈N〉 are<br />
as for \DEgraph. The function F(x,y,t) should be either a pair-valued expression or an ordered pair<br />
of numeric expressions. The variables must be literally x, y and t. The expressions do not have to<br />
explicitly depend on these variables. In fact, the \DEgraph macro is implemented using the same<br />
internal macro as \DEtrajectory with F(x,y,t) = (1, f (x,y)) and p 0 = (x 0 ,y 0 ).<br />
Notice that the trajectory starts at t = 0. If you need some other starting value t = a, then replace<br />
t in the formula for F(x,y,t) with (t + a).<br />
It is possible to use a negative value of ∆s in both these macros. For \DEgraph this produces<br />
the graph to the left of x = x 0 , and for \DEtrajectory it produces the trajectory with time running<br />
backward. For the latter, it is also equivalent to replacing F(x,y,t) by its negative.<br />
The purpose of making 〈∆s〉 a distance rather than an x-increment or a t-increment (as the Runge-<br />
Kutta method is taught in the usual mathematics courses) is stability: even very simple differential
4.6 FUNCTIONS AND PLOTTING. 46<br />
equations can have graphs the tend to ∞ in finite time. These macros, however, never travel more<br />
than a distance N∆s from the starting point.<br />
If you want to use MFPIC to illustrate the results of the standard Runge-Kutta method or other<br />
methods, you can use the MFPIC4ODE package. That package also includes the Euler method and<br />
the two-step Runge-Kutta method. It loads MFPIC if it has not already been loaded. Like MFPIC, it<br />
works in plain TEX (with \input <strong>mfpic</strong>4ode) or LATEX (with \usepackage{<strong>mfpic</strong>4ode}).<br />
4.6.3 PLOTTING EXTERNAL DATA FILES<br />
\datafile[〈spec〉]{〈file〉}<br />
\smoothdata[〈tension〉]<br />
\unsmoothdata<br />
The figure macro \datafile produces a curve connecting the points listed in the file 〈file〉. (The<br />
context makes it clear whether this meaning of \datafile or that of subsection 4.2.2 is meant.) The<br />
〈spec〉 may be p to produce a polygonal path, or s followed by a tension value (as in \curve) to<br />
produce a smooth path. If no 〈spec〉 is given, the default is initially p, but \smoothdata may be used<br />
to change this. Thus, after the command \smoothdata[〈tension〉] the default [〈spec〉] is changed<br />
to [s〈tension〉]. If the tension parameter is not supplied it defaults to 1.0 (or the value set by the<br />
\settension command if one has been used).<br />
The command \unsmoothdata restores the default [〈spec〉] to [p].<br />
By default, each non-blank line in the file is assumed to contain at least two numbers, separated<br />
by whitespace (blanks or tabs). The first two numbers on each line are assumed to represent the x-<br />
and y-coordinates of a point. Initial blank lines in the file are ignored, as are comments. The comment<br />
character in the data file is assumed to be %, but it can be reset using \mfpdatacomment (below).<br />
Any blank line other than at the start of the file causes the curve to terminate. The \datafile<br />
command may be preceded by any of the prefix commands, so that, for example, a closed curve<br />
could be formed with \lclosed\datafile{data.dat}.<br />
The \datafile command has another use, independent of the above description. We saw in<br />
subsection 4.2.2 that any MFPIC command (other than one that prints text labels) that takes as its<br />
last argument a list of points (or numerical values) separated by commas, can have that list replaced<br />
with a reference to an external data file. For example, if a file ptlist.dat contains two or more<br />
numerical values per line separated by whitespace, then one can draw a dot at each of the points<br />
corresponding to the first pair of numbers on each line with the following.<br />
\point\datafile{ptlist.dat}<br />
In fact there is no essential difference between ‘\datafile[p]’ and ‘\polyline\datafile’, and<br />
no difference between ‘\datafile[s]’ and ‘\curve\datafile’. Here is the full list (omitting<br />
aliases) of MFPIC macros that allow this usage of \datafile:<br />
– Numeric data: \barchart, \dashpattern, \numericarray, \piechart, and all the axis<br />
marks commands.<br />
– Point or vector data: \cbeziers, \closedcbeziers, \closedcomputedspline,<br />
\closedcspline, \closedmfbezier, \closedqbeziers, \closedqspline,<br />
\computedspline, \convexcurve, \convexcyclic, \cspline, \curve, \cyclic,<br />
\fcncurve, \fcnspline, \mfbezier, \periodicfcnspline, \plotsymbol, \point,<br />
\polygon, \polyline, \putmfpimage, \qbeziers, \qspline, \turtle, and<br />
\pairarray.<br />
In addition \setarray and \globalsetarray (with the numeric or pair data type) allow this usage.
4.6 FUNCTIONS AND PLOTTING. 47<br />
\mfpdatacomment\〈char〉<br />
Changes 〈char〉 to a comment character and changes the usual TEX comment character % to an<br />
ordinary character while reading a datafile for drawing.<br />
\using{〈in-pattern〉}{〈out-pattern〉}<br />
Used to change the assumptions about the format of the data file. For example, if there are<br />
four numbers on each line separated by commas, to plot the third against the second (in that order)<br />
you can say \using{#1,#2,#3,#4}{(#3,#2)}. This means the following: Everything on a line<br />
up to the first comma is assigned to parameter #1, everything from there up to the second comma<br />
is assigned to parameter #2, etc. Everything from the third comma to the end of line is assigned<br />
to #4. When the line is processed by TEX a METAFONT pair is produced representing a point on<br />
the curve. METAFONT pair expressions can be used in the output portion of \using. For example<br />
\using{#1,#2,#3}{(#2,#1)/10} or even \using{#1 #2 #3}{polar(#1,#2)} if the data are<br />
polar coordinates. The default assumptions of the \datafile command (numbers separated by<br />
spaces, with the first two determining the (x,y) pair) corresponds to the following setting.<br />
\using{#1 #2 #3}{(#1,#2)}<br />
The \using command cannot normally be used in the replacement text of another command. Or<br />
rather, it can be so used, but then each # has to be doubled. If a \using declaration occurs in an<br />
<strong>mfpic</strong> environment it is local to that environment. Otherwise it affects all subsequent ones.<br />
\sequence<br />
As a special case, you can plot any number against its sequence position, with something like<br />
\using{#1 #2}{(\sequence,#1)}. Here, the macro \sequence will take on the values 1, 2, etc.<br />
as lines are read from the file.<br />
\usingpairdefault<br />
\usingnumericdefault<br />
The command \usingpairdefault restores the above described default for pair data. The<br />
command \usingnumericdefault is the equivalent of \using{#1 #2}{#1}, a useful default for<br />
numeric data.<br />
Note that the default value of \using appears to reference three arguments. If there are only two<br />
numbers on a line separated by whitespace, this will still work because of TEX’s argument matching<br />
rules. TEX’s file reading mechanism normally converts the EOL to a space, but there are exceptions<br />
so MFPIC internally adds a space at the end of each line read in to be on the safe side. Then the<br />
default definition of \using reads everything up to the first space as #1 (whitespace is normally<br />
compressed to a single space by TEX’s reading mechanism), then everything to the second space<br />
(the one added at the end of the line, perhaps) is #2, then everything to the EOL is #3. This might<br />
assign an empty argument to #3, but it is discarded anyway.<br />
If the numerical data contain percentages with explicit % signs, then choose another comment<br />
character with \mfpdatacomment. This will change % to an ordinary character in the data file.<br />
However, in your \using command it would still be read as a comment. The following allows one<br />
to overcome this.<br />
\makepercentother<br />
\makepercentcomment<br />
Here is an example or their use:<br />
\makepercentother<br />
\using{#1% #2 #3}{(#1/100,#2)}<br />
\makepercentcomment
4.6 FUNCTIONS AND PLOTTING. 48<br />
Here is an analysis of the meaning of this example: everything in a line, up to the first percent<br />
followed by a space is assigned to parameter #1, everything from there to the next space is<br />
assigned to #2 and the rest of the line (which may be empty) is #3. On the output side in the<br />
above example, the percentage is divided by 100 to convert it to a fraction, and plotted against the<br />
second parameter. Note: normal comments should not be used between \makepercentother and<br />
\makepercentcomment, for obvious reasons. Moreover, the above construction will fail inside the<br />
argument of another command.<br />
\plotdata[〈spec〉]{〈file〉}<br />
This plots several curves from a single file. The 〈spec〉 and the command \smoothdata have the<br />
same effect on each curve as in the \datafile command. The data for each curve is a succession of<br />
nonblank lines separated from the data for the next curve by a single blank line. A pair of successive<br />
blank lines is treated as the end of the data. No prefix macros are permitted in front of \plotdata.<br />
Each successive curve in the data file is drawn differently. By default, the first is drawn as a solid<br />
line the next dashed, the third dotted, etc., through a total of six different line types. A \gendashed<br />
command is used with predefined dash patterns named dashtype0 through dashtype5. This behavior<br />
can be changed with:<br />
\coloredlines<br />
\pointedlines<br />
\datapointsonly<br />
\dashedlines<br />
The command \coloredlines causes \plotdata to use the rendering command \draw with a<br />
color option that cycles through eight different colors starting with black (hey! black is a color too).<br />
The command \pointedlines causes \plotdata to use the rendering command \plot, cycling<br />
through nine symbols. The command \datapointsonly causes \plotdata to use the rendering<br />
command \plotnodes, cycling through the same nine symbols. The data points become the nodes<br />
of the paths created and so only the data points are plotted. The command \dashedlines restores<br />
the default. See appendix 5.4 for the details on the actual dash patterns, colors and symbols used.<br />
The command \coloredlines will produce a warning under the metafont option and substitute<br />
\dashedlines. Under the metapost option, this is the sole exception to the general rule that all<br />
curves are drawn in drawcolor by default: the \plotdata command after \coloredlines has<br />
been issued.<br />
Note that MFPIC always creates a path internally. It is possible that your data is not path-like<br />
and what you want is a scatter-plot. Simply use \datapointsonly and the effect is the same:<br />
METAPOST builds a polygonal path connecting all the points in your file, but when it plots the path,<br />
it only places a dot (or other symbol) at each data point.<br />
If, for some reason, you do not like the default starting line style (say you want to start with a<br />
color other than black), you can use one of the following commands.<br />
\mfplinetype{〈num〉}, or<br />
\mfplinestyle{〈num〉}<br />
Here 〈num〉 is a non-negative number, less than the number of different drawing types available.<br />
The four previous commands reset the number to 0, so if you use one of them, issue \mfplinetype<br />
after it. The different line styles are numbered starting from 0. If two or more \plotdata commands<br />
are used in the same <strong>mfpic</strong> environment, the numbering in each continues where the one before left<br />
off (unless you issue one of the commands above in between). \mfplinestyle means the same as<br />
\mfplinetype, and is included for compatibility. See appendix 5.4 to find out what dash pattern,
4.7 LABELS AND CAPTIONS. 49<br />
color or symbol corresponds to each number by default. The commands below can be used to change<br />
the default dashes, colors, or symbols.<br />
\reconfigureplot{dashes}{〈pat 1 〉,...,〈pat n 〉}<br />
\reconfigureplot{colors}{〈clr 1 〉,...,〈clr n 〉}<br />
\reconfigureplot{symbols}{〈symb 1 〉,...,〈symb n 〉}<br />
The first argument of \reconfigureplot is the rendering method to be changed: dashes,<br />
colors or symbols. The second argument is a list of dash patterns, colors, or symbols. The dash<br />
patterns should be names of patterns defined through the use of \dashpattern. The colors can be<br />
any color names already known to METAPOST, or color names defined using \mfpdefinecolor.<br />
The symbols can be any of those listed with the \plotsymbol command (see subsection 4.2.1), or<br />
any known METAFONT path variable. The colors can also be METAPOST color constants or expressions,<br />
and the symbols can be expressions of type path. In recent METAPOST these ‘colors’ can be<br />
numeric (selecting gray), rgbcolor or cmykcolor. Within a <strong>mfpic</strong> environment, the changes made<br />
are local to that environment. Outside, they affect all subsequent environments.<br />
Using \reconfigureplot{colors} under the metafont option will have no effect, but may<br />
produce an error from METAFONT unless the colors used conform to the guidelines in subsection<br />
4.3.4. This also holds for \defaultplot{colors} (below).<br />
\defaultplot{dashes}<br />
\defaultplot{colors}<br />
\defaultplot{symbols}<br />
The command \defaultplot restores the built-in defaults for the indicated method of rendering<br />
in \plotdata.<br />
The commands \using, \mfpdatacomment and \sequence have the same meaning here (for<br />
\plotdata) as they do for \datafile (above). The sequence numbering for \sequence starts over<br />
with each new curve.<br />
4.7 Labels and Captions.<br />
4.7.1 SETTING TEXT<br />
If option metafont is in effect macros \tlabel, \tlabels, \axislabels and \tcaption do not<br />
affect the METAFONT file (〈file〉.mf) at all, but are added to the picture by TEX. If metapost is in<br />
effect but mplabels is not, they do not affect the METAPOST file. In these cases, if these macros<br />
are the only changes or additions to your <strong>doc</strong>ument, there is no need to repeat the processing with<br />
METAFONT or METAPOST nor the reprocessing with TEX in order to complete your TEX <strong>doc</strong>ument.<br />
\tlabel[〈just〉](〈x〉,〈y〉){〈labeltext〉}<br />
\tlabel[〈just〉]{〈pair-list〉}{〈label text〉}<br />
\tlabels{〈params 1 〉 〈params 2 〉 ...}<br />
These place TEX text or math on the graph. The special form \tlabels (note the plural) essentially<br />
just applies \tlabel to each set of parameters listed in its argument. That is, each 〈params k 〉<br />
is a valid set of parameters for a \tlabel command. These can be separated by spaces, newlines,<br />
or nothing at all. They should not be separated by blank lines.<br />
The last required parameter is ordinary TEX text. The pair (〈x〉,〈y〉) gives the coordinates of a<br />
point in the graph where the text will be placed. It may optionally be enclosed in braces, { and }. If<br />
braces are used, any number of coordinate pairs may be listed, separated by commas. This is what<br />
is meant by 〈pair-list〉 in the above syntax. If mplabels is in effect, the 〈pair-list〉 can be any list of<br />
expressions recognized as a pair by METAPOST.
4.7 LABELS AND CAPTIONS. 50<br />
The optional parameter [〈just〉] specifies the justification, the relative placement of the label<br />
with respect to the point with coordinates (〈x〉,〈y〉). It is a two-character sequence in which the first<br />
character is one of t (top), c (center), b (bottom), or B (Baseline), to specify vertical placement, and<br />
the second character is one of l (left), c (center), or r (right), to specify horizontal placement. These<br />
letters specify what part of the text is to be placed at the given point, so r puts the right end of the<br />
text there—which means the text will be left of the point. The default justification is [Bl]: the left<br />
end of the baseline of the text is placed at the coordinates.<br />
When mplabels is in effect, the two characters may optionally be followed by a number, specifying<br />
an angle in degrees to rotate the text about the point (〈x〉,〈y〉). If the angle is supplied without<br />
mplabels it is ignored after a warning. If the angle is absent, there is no rotation. Note that the rotation<br />
takes place after the placement and uses the given point as the center of rotation. For example,<br />
[cr] will place the text left of the point, while [cr180] will rotate it around to the right side of the<br />
point (and upsidedown, of course).<br />
There should be no spaces before, between, or after the first two characters. However the number,<br />
if present, is only required to be a valid METAPOST numerical expression containing no bracket<br />
characters; as such, it may contain some spaces (e.g., around operations as in 45 + 30).<br />
A multiline \tlabel may be specified by explicit line breaks, which are indicated by the \\<br />
command or the \cr command. This is a very rudimentary feature. By default it left justifies the<br />
lines and causes \tlabel to redefine \\. One can center a line by putting \hfil as the first thing<br />
in the line, and right justify by putting \hfill there (these are TEX primitives). Redefining \\<br />
can interfere with LATEX’s definition. For better control in LATEX use \shortstack inside the label<br />
(or a tabular environment or some other environment which always initializes \\ with its own<br />
definition).<br />
If the label goes beyond the bounds of the graph in any direction, the space reserved for the<br />
graph is expanded to make room for it. (Note: this behavior is very much different from that of the<br />
LATEX picture environment.)<br />
If the mplabels option is in effect, \tlabel will write a btex ... etex group to the output<br />
file, allowing METAPOST to arrange for typesetting the label. Normally, the label becomes part of<br />
the picture, rather than being laid on top of it, and can be covered up by any filling macros that<br />
follow, or clipped off by \gclip. However, under the overlaylabels option (or after the command<br />
\overlaylabels), labels are saved and added to the picture at the very end. This may prevent<br />
some special effects, but it makes the behavior of labels much more consistent through all the 12<br />
permissable settings of the options metapost, mplabels, clip, and truebbox.<br />
There is another command, \startbacktext, which also save the labels and adds them later,<br />
but under the rest of the picture as background text. Thus, they will not be clipped, but may be<br />
covered up. Since erasing regions with \gclear actually covers up those regions with white, labels<br />
saved as background text may appear to have portions erased.<br />
\everytlabel{〈TEX-code〉}<br />
One problem with multiline \tlabels is that each line of their contents constitutes a separate<br />
group. This makes it difficult to change the \baselineskip (for example) inside a label. The command<br />
\everytlabel saves it’s contents in a token register and the code is issued in each \tlabel,<br />
as the last thing before the actual line(s) of text. Any switch you want to apply to every line can be<br />
supplied. For example<br />
\everytlabel{\bf\baselineskip 10pt}<br />
will make every line of every \tlabel’s text come out bold with 10 point baselines. The effect of<br />
\everytlabel is local to the <strong>mfpic</strong> environment, if it is issued inside one. Note that each line of a
4.7 LABELS AND CAPTIONS. 51<br />
tlabel is wrapped in a box, but the commands of \everytlabel are outside all of them, so no actual<br />
text should be produced by the contents of \everytlabel.<br />
Using \tlabel without an optional argument is equivalent to specifying [Bl]. Use the following<br />
command to change this behavior.<br />
\tlabeljustify{〈just〉}<br />
After this command the placement of all subsequent labels without optional argument will be<br />
as specified in this command. For example, \tlabeljustify{cr45} would cause all subsequent<br />
\tlabel commands lacking an optional argument to be placed as if the argument [cr45] were used<br />
in each. If mplabels is not in effect at the time of this command, the rotation part will be saved in<br />
case that option is turned on later, but a warning message will be issued. If mplabels is not turned<br />
on later, that rotation will be ignored by \tlabel.<br />
\tlabeloffset{〈hlen〉}{〈vlen〉}<br />
\tlpointsep{〈len〉}<br />
\tlpathsep{〈len〉}<br />
\tlabelsep{〈len〉}<br />
The first command causes all subsequent \tlabel commands to shift the label right by 〈hlen〉<br />
and up by 〈vlen〉 (negative lengths cause it to be shifted left and down, respectively).<br />
The \tlpointsep command causes labels to be shifted by the given amount in a direction that<br />
depends on the optional positioning parameter. For example, if the first letter is t the label is shifted<br />
down by the amount 〈len〉 and if the second letter is l it is also shifted right. In all cases it is shifted<br />
away from the point of placement (unless the dimension is negative). If c or B is the first parameter,<br />
no vertical shift takes place, and if c is the second, there is no horizontal shift. This is intended to be<br />
used in cases where something has been drawn at that particular point, in order to separate the text<br />
from the drawing.<br />
Prior to version 0.8, this separation also defined the separation between the label and those curves<br />
designed to frame the label such as \tlabelrect (subsection 4.7.2). Now the two separations are<br />
independent and \tlpathsep is used to set the separation between the label and such paths.<br />
For backward compatability, the command \tlabelsep is still available and sets both separations<br />
to the same value.<br />
\axislabels{〈axis〉}[〈just〉]{{〈text 1 〉}〈n 1 〉,{〈text 2 〉}〈n 2 〉,...}<br />
This command places the given TEX text (〈text k 〉) at the given positions (〈n k 〉) on the given axis,<br />
〈axis〉, which must be a single letter and one of l, b, r, t, x, or y. The text is placed as in \tlabels<br />
(including the taking into account of \tlpointsep and \tlableoffset), except that the default<br />
justification depends on the axis (the settings of \tlabeljustify are ignored). In the case of the<br />
border axes, the default is to place the label outside the axis and centered. So, for example, for the<br />
bottom axis it is [tc]. The defaults for the x- and y-axis are below and left, respectively. The optional<br />
〈just〉 can be used to change this. For example, to place the labels inside the left border axis, use<br />
[cl]. If mplabels is in effect, rotations can be included in the justification parameter. For example, to<br />
place the text strings ‘first’, ‘second’ and ‘third’ just below the positions 1, 2 and 3 on the x-axis, rotated<br />
so they read upwards at a 90 degree angle, one can use \axislabels{x}[cr90]{{first}1,<br />
{second}2, {third}3}.<br />
\plottext[〈just〉]{〈text〉}{(x 0 ,y 0 ), (x 1 ,y 1 ), ...}<br />
Similar in effect to \point and \plotsymbol, \plottext places a copy of 〈text〉 at each of<br />
the listed points. Since MFPIC version 0.9, when \tlabel was enhanced to allow lists of points, it
4.7 LABELS AND CAPTIONS. 52<br />
is implemented by an equivalent \tlabel command and is only kept for backward compatibility.<br />
It differs from \tlabel when the optional argument is absent: the default justification is [cc]<br />
regardless of the setting of \tlabeljustify.<br />
\mfpverbtex{〈TEX-cmds〉}<br />
This writes a verbatimtex block to the .mp file. It makes sense only if the mplabels option<br />
is used and so only for METAPOST. The 〈TEX-cmds〉 in the argument are written to the .mp file,<br />
preceded by the METAPOST command verbatimtex and followed by etex. Line breaks within the<br />
〈TEX-cmd〉 are preserved. There is also a linebreak between the end of 〈TEX-cmds〉 and the etex. The<br />
\mfpverbtex command must come before any \tlabel that is to be affected by it. Any settings<br />
common to all <strong>mfpic</strong> environments should be in a \mfpverbtex command preceding all such<br />
environments.<br />
It may be issued at any point after MFPIC is loaded, and any number of times. If it is issued<br />
after \opengraphsfile, its contents are immediately written to the .mp file. If it is issued before<br />
\opengraphsfile, its contents are saved and written when the file is opened (successive uses being<br />
cummulative). In this case its contents will precede the boilerplate TEX code that MFPIC writes. If<br />
you wish to redefine some of that code, you need to use \mfpverbtex after \opengraphsfile.<br />
Because of the way METAPOST handles verbatimtex material, the effects cannot be constrained<br />
by any grouping unless one places TEX grouping commands within 〈TEX-cmds〉. However,<br />
MFPIC itself places grouping commands into the output file at the beginning and end of each picture,<br />
so definitions written by a \mfpverbtex are local to any picture in which it occurs. Prior to version<br />
0.8, MFPIC did not write comments that occured within the 〈TEX-cmds〉. Now they will be preserved,<br />
and can be used to place the ‘%&latex’ line that some TEX distributions permit as a signal that latex<br />
should be run to produce the labels.<br />
This command attempts a near-verbatim writing of the 〈TEX-cmds〉 and, as with all verbatim-like<br />
commands, it should not be used in the argument of another command.<br />
\startbacktext . . . \stopbacktext<br />
When TEX adds labels (\nomplabels) they have to be positioned either on top of a complete<br />
figure, or placed under a complete figure. The most reasonable choice (and happily the easiest to<br />
implement) is to put them on top. When METAPOST is placing labels (option mplabel) the same<br />
can be forced with the option overlaylabels, but otherwise they are placed as they occur, with later<br />
drawing commands perhaps putting their results on top of the labels or clipping parts of them off.<br />
Sometimes it is useful to place some label as a background (not on top), and yet not have it<br />
clipped by later commands. The effect of the command \startbacktext is that \tlabel commands<br />
are saved in a special place until the command \stopbacktext. Then, at \end<strong>mfpic</strong> the<br />
rest of the figure is simply place on top of them. Since labels in METAPOST files can only consist<br />
of characters from some font, if one wants to include a graphic in the background (for example, via<br />
\includegraphics), one needs to switch off mplabels:<br />
\nomplabels<br />
\startbacktext<br />
\tlabel[cc](0,0){\includegraphics{mygraph}}<br />
\stopbacktext<br />
\usemplabels<br />
As with other labels, it is permitted to switch mplabels off and on while creating background text.<br />
If there are both kinds of labels within the background text area the ones handled by TEX will be<br />
further back than the ones handled by METAPOST. Within a given type, earlier ones are further back<br />
than later ones.
4.7 LABELS AND CAPTIONS. 53<br />
MFPIC normally uses a naming scheme like \cmd . . . \endcmd and tries to arrange that cmd can<br />
be used as an environment. As currently written, the extra grouping added by \begin{cmd} and<br />
\end{cmd} would break the code that implements background text, so we have named these in a<br />
different way to avoid suggesting this possiblity. There should be at most one of these pairs in any<br />
<strong>mfpic</strong> environment. It can occur anywhere in the environment, but the two commands must not be<br />
inside any grouping.<br />
Under the metapost option, the \gclear command doesn’t really clear a space, but rather paints<br />
the space over with white. Any background text will not be visible through such ‘holes’. This is a<br />
limitation of METAPOST.<br />
\tcaption[〈maxwd〉,〈linewd〉]{〈caption text〉}<br />
Places a TEX caption at the bottom of the graph. (Not to be confused with LATEX’s similar<br />
\caption command.) The macro will automatically break lines which are too much wider than<br />
the graph—if the \tcaption line exceeds 〈maxwd〉 times the width of the graph, then lines will be<br />
broken to form lines at most 〈linewd〉 times the width of the graph. The default settings for 〈maxwd〉<br />
and 〈linewd〉 are 1.2 and 1.0, respectively. \tcaption may typeset its argument twice (as might<br />
LATEX’s \caption), the first time as a single line to test its width, then again if that was too wide.<br />
Therefore, the user is advised not to include any global assignments in the caption text.<br />
If the \tcaption and graph have different widths, the two are centered relative to each other.<br />
If the \tcaption takes multiple lines, then the default is to set lines both left- and right-justified<br />
(except for the last line) with no indentation on the first line. If the option raggedcaptions is in effect,<br />
the lines are only left-justified and ragged on the right. Finally, if the option centeredcaptions is in<br />
effect, each line of the caption will be centered (under raggedcaptions they will be ragged on both<br />
sides).<br />
In a \tcaption, explicit line breaks may be specified by using the \\ command. The separation<br />
between the bottom of the picture and the caption can be changed by increasing or decreasing the<br />
skip \<strong>mfpic</strong>captionskip (a ‘rubber’ length in Lamport’s terminology).<br />
Many MFPIC users find the \tcaption command too limiting (one cannot, for example, place<br />
the caption to the side of the figure). It is common to use some other method (such as LATEX’s<br />
\caption command in a figure environment). The dimensions \<strong>mfpic</strong>height and \<strong>mfpic</strong>width<br />
(see section 4.11) might be a convenience for plain TEX users who want to roll their own caption<br />
macros.<br />
4.7.2 CURVES SURROUNDING TEXT<br />
\tlabelrect[〈rad〉][〈just〉]〈pair〉{〈text〉}<br />
\tlabelrect*...<br />
This figure macro and the following two methods of surounding a bit of text with a curve share<br />
some common characteristics which will be described here. The commands all take an optional argument<br />
that can modify the shape of the curve. After that come arguments exactly as for the \tlabel<br />
command except that only a single point is permitted, not a list. (So 〈pair〉 is either of the form<br />
(〈x〉,〈y〉) or the same enclosed in braces, or for mplabels a pair expression in braces.) After processing<br />
the surrounding curve, a \tlabel is applied to those arguments unless a * is present. In order<br />
for the second optional argument (the optional justification argument for the \tlabel command) to<br />
be recognized as the second, the first optional argument must also be present. An empty first optional<br />
argument is permitted, causing the default value to be used. The default for the justification<br />
argument is cc, for compatibility with past MFPIC versions, in which these commands all centered<br />
the figure around the point and no justification parameter existed. This default can be changed with<br />
the \tlpathjustify command below.
4.8 SAVING AND REUSING AN MFPIC PICTURE. 54<br />
The plain rectangle version produces a frame separated from the text on all sides by the amount<br />
defined with \tlpathsep. All other versions produce the smallest described curve that contains this<br />
rectangle.<br />
These commands may be preceded by prefix macros (see the sections 4.4 and 4.5, above). They<br />
all have a ‘star-form’ which produces the curve but omits placing the text. All have the effect of<br />
rendering the path before placing any text. For example, \gclear\tlabelrect. . . will clear the<br />
rectangle and then place the following text in the cleared space.<br />
The optional argument of \tlabelrect, 〈rad〉, is a dimension, defaulting to 0pt, that produces<br />
rounded corners made from quarter-circles of the given radius. If the corners are rounded, the sides<br />
are expanded slightly so the resulting shape still encompasses the rectangle mentioned above. There<br />
is one special case for the optional argument 〈rad〉: if the keyword ‘roundends’ is used instead of<br />
a dimension, the radius will be chosen to make the nearest quarter circles just meet, so the narrow<br />
side of the rectangle is a half circle.<br />
\tlabeloval[〈mult〉][〈just〉]〈pair〉{〈text〉}<br />
\tlabeloval*...<br />
This figure macro is similar to \tlabelrect, except it produces an ellipse. The ellipse is calculated<br />
to have the same ratio of width to height as the rectangle mentioned above. The optional 〈mult〉<br />
is a multiplier that increases or decreases this ratio. Values of 〈mult〉 larger than 1 increase the width<br />
and decrease the height.<br />
\tlabelellipse[〈ratio〉][〈just〉]〈pair〉{〈text〉}<br />
\tlabelellipse*...<br />
\tlabelcircle[〈just〉]〈pair〉{〈text〉}<br />
\tlabelcircle*...<br />
This figure macro produces the smallest ellipse centered at the point that encompasses the rectangle<br />
defined above, and that has a ratio of width to height equal to 〈ratio〉, then places the text. The default<br />
ratio is 1, which produces a circle. We also provide the command \tlabelcircle, which takes<br />
only the [〈just〉] optional argument. Internally, it just processes any * and calls \tlabelellipse<br />
with parameter 1.<br />
In the above \tlabel... curves, the optional parameter should be positive. If it is zero, all<br />
the curves silently revert to \tlabelrect. If it is negative, it is silently accepted. In the case of<br />
\tlabelrect this causes the quarter-circles at the corners to be indented rather than convex. In the<br />
other cases, there is no visible effect, but in all cases the sense of the curve is reversed.<br />
\tlpathjustify{〈just〉}<br />
This can be used to change the default justification for \tlabelrect and friends. The 〈just〉<br />
parameter is exactly as in \tlabeljustify in subsection 4.7.1.<br />
4.8 Saving and Reusing an MFPIC Picture.<br />
These commands have been changed from versions prior to 0.3.14 in order to behave more like the<br />
LATEX’s \savebox, and also to allow the reuse of an allocated box. Past files that use \savepic will<br />
have to be edited to add \newsavepic commands that allocate the TEX boxes.<br />
\newsavepic{〈picname〉}<br />
\savepic{〈picname〉}<br />
\usepic{〈picname〉}<br />
\newsavepic allocates a box (like LATEX’s \newsavebox) in which to save a picture. As in<br />
\newsavebox, 〈picname〉 is a control sequence. Example: \newsavepic{\foo}. In a LATEX <strong>doc</strong>u-
4.9 PICTURE FRAMES. 55<br />
ment, \newsavepic is actually defined to be \newsavebox.<br />
\savepic saves the next \<strong>mfpic</strong> picture in the named box, which should have been previously<br />
allocated with \newsavepic. (This command should not be used inside an <strong>mfpic</strong> environment.)<br />
The next picture will not be placed, but saved in the box for later use. This is primarily intended as<br />
a convenience. One could use<br />
\savebox{〈picname〉}{〈entire <strong>mfpic</strong> environment〉},<br />
but \savepic avoids having to place the <strong>mfpic</strong> environment in braces, and avoids one extra level<br />
of TEX grouping. It also avoids reading the entire <strong>mfpic</strong> environment as a parameter, which would<br />
nullify MFPIC’s efforts to preserve line breaks in parameters written to the METAFONT output file. If<br />
you repeat \savepic with the same 〈picname〉, the old contents are replaced with the next picture.<br />
\usepic copies the picture that had been saved in the named box. This may be repeated as often<br />
as liked to create multiple copies of one picture. The \usepic command is essentially a clone of<br />
the LATEX \usebox command. Since the contents of the saved picture are only defined during the<br />
TEX run, \usebox cannot be used in the TEX-commands argument of the \tlabel command while<br />
mplabels is in effect.<br />
4.9 Picture Frames.<br />
When TEX is run but before METAFONT or METAPOST has been run on the output file, MFPIC detects<br />
that the .tfm file is missing or that the first METAPOST figure file 〈file〉.1 is missing. In these cases,<br />
the <strong>mfpic</strong> environment draws only a rectangular frame with dimensions equal to the nominal size of<br />
the picture, containing the figure number (and any text placed by \tlabel and its relatives without<br />
mplabels in effect). The command(s) used internally to do this are made available to the user.<br />
\mfpframe[〈fsep〉]〈 material-to-be-framed 〉\endmfpframe<br />
\mfpframed[〈fsep〉]{〈material-to-be-framed〉}<br />
These commands surround their contents with a rectangular frame consisting of lines with thickness<br />
\mfpframethickness separated from the contents by the 〈fsep〉 if specified, otherwise by the<br />
value of the dimension \mfpframesep. The default value of the TEX dimensions \mfpframesep<br />
and \mfpframethickness are 2pt and 0.4pt, respectively. The \mfpframe ... \endmfpframe<br />
version is preferred around <strong>mfpic</strong> environments or verbatim material since it avoids reading the<br />
enclosed material before appropriate \catcode changes go into effect. In LATEX, one can also use<br />
environment syntax: \begin{mfpframe} ... \end{mfpframe}.<br />
An alternative way to frame <strong>mfpic</strong> pictures is to save them with \savepic (see previous section)<br />
and issue a corresponding \usepic command inside any framing environment or command of the<br />
user’s choice or devising.<br />
4.10 Affine Transforms.<br />
Coordinate transformations that keep parallel lines in parallel are called affine transforms. These include<br />
translation, rotation, reflection, scaling and skewing (slanting). For the METAFONT coordinate<br />
system only (that is, for paths, but not for \tlabel nor \tcaption) MFPIC provides the ability to<br />
apply METAFONT affine transforms.<br />
4.10.1 TRANSFORMING THE METAFONT COORDINATE SYSTEM<br />
\coords . . . \endcoords<br />
All affine transforms are restricted to the innermost enclosing \coords...\endcoords pair. If<br />
there is no such enclosure, then the transforms will apply to the rest of the <strong>mfpic</strong> environment. In<br />
LATEX, one can use the environment named coords.
4.10 AFFINE TRANSFORMS. 56<br />
Transforms provided by MFPIC:<br />
\rotate{〈θ〉}<br />
Rotate around origin by 〈θ〉 degrees.<br />
\rotatearound{〈p〉}{〈θ〉} Rotate around point 〈p〉 by 〈θ〉 degrees.<br />
\turn[〈p〉]{〈θ〉}<br />
Rotate around point 〈p〉 (origin is default) by 〈θ〉.<br />
\reflectabout{〈p 1 〉}{〈p 1 〉} Reflect in the line through points 〈p 1 〉 and 〈p 2 〉.<br />
\mirror{〈p 1 〉}{〈p 2 〉} Same as \reflectabout.<br />
\shift{〈v〉}<br />
Shift origin by the vector 〈v〉.<br />
\scale{〈s〉}<br />
Scale uniformly by a factor of 〈s〉.<br />
\xscale{〈s〉}<br />
Scale only the x coordinates by a factor of 〈s〉.<br />
\yscale{〈s〉}<br />
Scale only the y coordinates by a factor of 〈s〉.<br />
\zscale{〈pair〉}<br />
Scale by the length of vector 〈v〉, and rotate by its angle.<br />
\xslant{〈s〉} Skew in x direction by the multiple 〈s〉 of y.<br />
\yslant{〈s〉} Skew in y direction by the multiple 〈s〉 of x.<br />
\zslant{〈pair〉}<br />
See zslanted in grafbase.dtx.<br />
\boost{〈χ〉}<br />
Special relativity boost by χ, see boost in grafbase.dtx.<br />
\xyswap Exchange the values of x and y.<br />
\applyT{〈transformer〉} Apply the 〈transformer〉.<br />
\applyT is for METAFONT hackers. Any code is permitted that satisfies METAFONT’s syntax for<br />
a 〈transformer〉 (see D. E. Knuth, “The METAFONTbook”, page 73), although no effort is made to<br />
correctly write TEX special characters nor to preserve linebreaks in the code.<br />
When any of these commands is issued, the effect is to transform all subsequent figures (within<br />
the enclosing coords or <strong>mfpic</strong> environment). In particular, attention may need to be paid to whether<br />
these transformations move (part of) the figure outside the space allotted by the \<strong>mfpic</strong> command<br />
parameters.<br />
A not-so-obvious point is that if several of these transformations are applied in succession, then<br />
the most recent is applied first, so that figures are transformed as if the transformations were applied<br />
in the reverse order of their occurrence. This is similar to the application of prefix macros (as well<br />
as application of transformations in mathematics: ST z usually means to apply S to the result of T z).<br />
Finally, some of these may not produce what the unwary user might expect if the <strong>mfpic</strong> environment<br />
was started with unequal scaling. For example, in such a case a rotated rectangle will not<br />
have right angles unless the rotation is by a multiple of 90 degrees. The reason for this: the scaling<br />
given by the \<strong>mfpic</strong> command is applied last and slanted lines subjected to unequal horizontal and<br />
verical scaling will change have their angles changed.<br />
4.10.2 TRANSFORMING PATHS<br />
In the previous section we discussed transformations of the METAFONT coordinate system. Those<br />
macros affect the drawing of paths and other figures, but do not change the actual paths. We will<br />
explain the distinction after introducing two macros for storing and reusing figures.<br />
\store{〈path variable〉}{〈path〉}<br />
\store{〈path variable〉}〈path〉<br />
This stores the following 〈path〉 in the specified METAFONT 〈path variable〉. Any valid META-<br />
FONT symbolic token will do, in particular, any sequence of letters and underscores. You should be<br />
careful to make the name distinctive to avoid overwriting the definition of some internal variable.<br />
The stored path may later be used as a figure macro using \mfobj (below). The 〈path〉 may be any<br />
of the figure macros (such as \curve{(0,0),(1,0),(1,1)}) or the result of modifying it. For<br />
example:
4.10 AFFINE TRANSFORMS. 57<br />
\store{pth}\lclosed\reverse\curve{(0,0),(1,0),(1,1)}<br />
In fact, \store is a prefix macro that does nothing to the following curve except store it. It acts<br />
as a rendering macro with a null rendering, so the curve is not made visible unless other rendering<br />
macros appear before or after it. It allows the following path to be an argument, that is, enclosed<br />
in braces. This is solely to support files written for past MFPIC versions in which \store was not<br />
defined as a prefix macro.<br />
One use of \store is to create a shorthand for a path that is otherwise long and tedious to type.<br />
Another is to create ‘symbols’ or ‘arrowheads’ for use in \plotsymbol, \arrowhead and related<br />
commands.<br />
\mfobj{〈path expression〉}<br />
\mpobj{〈path expression〉}<br />
This figure macro produces the path represented by 〈path expression〉, which is either a path<br />
variable in which a path was previously stored, or a valid METAFONT expression combining such<br />
variables and constant paths. This allows the use of path variables or expressions as figure macros,<br />
permitting all prefix operations, etc.. Here are some examples of the use of \store and \mfobj.<br />
\store{my_f}{\cyclic{...}}<br />
% Store a closed curve.<br />
\dotted\mfobj{my_f}<br />
% Now draw it dotted,<br />
\hatch\mfobj{my_f}<br />
% and hatch its interior<br />
% Create two symbols<br />
% one outline:<br />
\store{MyTriang}{\polyline{(-.5,-.5),(.5,-.5),(0,.5),(-.5,-.5)}<br />
% one solid:<br />
\store{MySolidTriang}\polygon{(-.5,-.5),(.5,-.5),(0,.5)}<br />
% Use them as symbols:<br />
\plotsymbols{MyTriang}{(0,0),(2,2)}<br />
\arrowmid{MySolidTriang}\polyline{(1,1),(0,2)}<br />
Note: If a stored path has the same starting point as ending point, but is not closed then it will<br />
behave like Circle (for example) when used in \plotsymbol: only its outline is drawn, and its interior<br />
is erased when clearsymbols is in effect. If a closed path is stored, it behaves like SolidCircle:<br />
it is not drawn, but rather filled. If a path is stored that satisfies neither, it behaves like Asterisk,<br />
being simply drawn in all circumstances.<br />
The two forms \mfobj and \mpobj are absolutely equivalent; they differ only in spelling.<br />
It should be noted that every MFPIC figure is implicitly stored in the object curpath. So you<br />
can use \mfobj{curpath} and get the path defined by the most recently completed figure macro<br />
(possibly modified by prefixes).<br />
Getting back to coordinate transforms, if one changes the coordinate system and then stores and<br />
draws a curve, say by<br />
\coords<br />
\rotate{45 deg}<br />
\store{xx}{\rect{(0,0),(1,1)}}<br />
\dashed\mfobj{xx}<br />
\endcoords<br />
one will get a transformed picture, but the object \mfobj{xx} will contain the simple, unrotated<br />
rectangular path and drawing it later (outside the coords environment) will prove that. This is<br />
because the coords environment works at the drawing level, not at the definition level.
4.10 AFFINE TRANSFORMS. 58<br />
In oversimplified terms, \dashed invokes the transformation, but not \store. More precisely,<br />
the rendering macros have the side effect of adding ink to the page (or subtracting it). To know where<br />
to place this ink, a calculation is performed that translates graph coordinates to actual positions. The<br />
above transforms work by modify the parameters used in that calculation. On the other hand, \store<br />
merely stores the output of the immediately following prefix or figure macro. See the beginning of<br />
section 4.4 for a discussion of input, output and side effects of MFPIC prefix and figure macros.<br />
The following transformation prefixes provide a means of actually creating and storing a transformed<br />
path. In the terms just discussed, their input is a path, their output is the transformed path,<br />
and they have no side effects.<br />
\rotatepath{〈p〉,〈θ〉}...<br />
\shiftpath{〈v〉}...<br />
\scalepath{〈p〉,〈s〉}...<br />
\xscalepath{〈x〉,〈s〉}...<br />
\yscalepath{〈y〉,〈s〉}...<br />
\slantpath{〈y〉,〈s〉}...<br />
\xslantpath{〈y〉,〈s〉}...<br />
\yslantpath{〈x〉,〈s〉}...<br />
\reflectpath{〈p 1 〉,〈p 2 〉}...<br />
\xyswappath...<br />
\transformpath{〈transformer〉}...<br />
These are modifying macros that all return the result of applying an affine transformation to<br />
the following path. They differ in the transformation applied and the data needed in the mandatory<br />
argument. I have found them extremely useful, and better than coords environments when I need<br />
to draw a figure, together with several slightly different versions of it. If \store is used just before<br />
one of these prefixes, it stores the transformed path rather than the original.<br />
\rotatepath rotates the following path by 〈θ〉 degrees about point 〈p〉.<br />
\shiftpath shifts the following path by the vector 〈v〉.<br />
\scalepath scales (magnifies or shrinks) the following path by the factor 〈s〉, in such a way<br />
that the point 〈p〉 is kept fixed. That is<br />
\scalepath{(0,0),2}\rect{(0,0),(1,1)}<br />
is essentially the same as \rect{(0,0),(2,2)}, while<br />
\scalepath{(1,1),2}\rect{(0,0),(1,1)}<br />
is the same as \rect{(-1,-1),(1,1)}. In both cases the rectangle is doubled in size. In the first<br />
case the lower left corner stays the same, while in the second case the the upper right corner stays<br />
the same.<br />
\xscalepath is similar to \scalepath, but only the x-direction is scaled, and all points with<br />
first coordinate equal to 〈x〉 remain fixed. \yscalepath is similar, except the y-direction is affected.<br />
\slantpath applies a slant transformation to the following path, keeping points with second<br />
coordinate equal to 〈y〉 fixed. That is, a point p on the path is moved right by an amount proportional<br />
to the height of p above the line y = 〈y〉, with s being the proportionality factor. Points below that line<br />
move left. Vertical lines in the path will acquire a slope of 1/s, while horizontal lines stay horizontal.<br />
\xslantpath is an alias for \slantpath<br />
\yslantpath is similar to \xslantpath, but exchanges the roles of x and y coordinates.<br />
\reflectpath returns the mirror image of the following path, where the line determined by the<br />
points 〈p 1 〉 and 〈p 2 〉 is the mirror.
4.11 PARAMETERS. 59<br />
\xyswappath returns the path with the roles of x and y exchanged. This is similar in some<br />
respects to \reflectpath{(0,0),(1,1)}, and produces the same result if the x and y scales of the<br />
picture are the same. However, \reflectpath compensates for such different scales (so the path<br />
shape remains the same), while \xyswappath does not. However, after a swap, verticals become<br />
horizontal and horizontals become vertical. (It is impossible, when the scales are different, for an<br />
affine transform to both preserve shape and exchange horizontal and vertical lines.)<br />
This compensation for different scales is also done for \rotatepath, so the resulting path always<br />
has the same shape after the rotation as before. None of the other path transformation prefixes<br />
compensate for different scales, and none of the coordinate system transformations of the previous<br />
subsection do it.<br />
For METAFONT or METAPOST power users, \transformpath can take any ‘transformer’ and<br />
transform the following path with it. Here, a transformer is the same as in the previous section.<br />
Examples are scaled, shifted(1,1), and rotatedabout(0,1). Note that using this last transformer<br />
with \transformpath is almost like \rotatepath{(0,1)}, but it does not compensate for<br />
different scales.<br />
All these prefixes change only the path that follows, not any rendering of it that follows. For<br />
example:<br />
\gfill\rotatepath{(0,0),90}\dashed\rect{(0,0),(1,1)}<br />
will not produce a rotated dashed rectangle. Rather the original rectangle will be dashed, and the<br />
rotated rectangle will be filled.<br />
One complication is the handling of the default rendering. One expects<br />
\rect{(0,0),(1,1)}<br />
to draw a rectangle, and<br />
\rotatepath{(0,0),45}\rect{(0,0),(1,1)}<br />
to draw a rotated rectangle (but not the original). That is, a transformation + figure is treated as if it<br />
were a single figure. But what would one expect in the following?<br />
\rotatepath{(0,0),45}\dashed\rect{(0,0),(1,1)}<br />
What one will get is the original dashed and the rotated one with the default rendering (typically<br />
drawn with solid lines). That is, these prefixes cannot see the renderings that occur later in the<br />
sequence. They add the default rendering as if those didn’t exist. If something other than this is<br />
desired, one can either rearrange the prefixes or add a \norender in appropriate places. For example,<br />
to add a shifted arrowhead without drawing the shifted path:<br />
\arrow\norender\shiftpath{(0,1)}\arrow\draw\lines{(0,0),(8,8)}<br />
4.11 Parameters.<br />
There are many parameters in MFPIC which the user can modify to obtain different effects, such<br />
as different arrowhead size or shape. Most of these parameters have been described already in the<br />
context of macros they modify, but they are all described together here.<br />
Many of the parameters are stored by TEX as dimensions, and so are available even if there is<br />
no METAFONT file open; changes to them are not subject to the usual TEX rules of scope however:<br />
they are local only to <strong>mfpic</strong> environments if set inside one, otherwise they are global. This is for<br />
consistency: other parameters are stored by METAFONT (so the macros to change them will have<br />
no effect unless a METAFONT file is open) and the changes are subject to METAFONT’s rules of<br />
scope—to the MFPIC user, this means that changes inside the \<strong>mfpic</strong> ... \end<strong>mfpic</strong> environment<br />
are local to that environment, but other TEX groupings have no effect on scope. Some commands
4.11 PARAMETERS. 60<br />
(notably those that set the axismargins and \tlabel parameters) change both TEX parameters and<br />
METAFONT parameters, and it is important to keep them consistent.<br />
There are a few parameters that do obey TEX grouping, but only inside <strong>mfpic</strong> environments.<br />
These are noted where the parameter is described.<br />
All parameters are initialized when MFPIC is loaded. We give the initial value or state in each of<br />
these descriptions.<br />
\<strong>mfpic</strong>unit<br />
This dimension stores the basic unit length for MFPIC pictures. The x and y scales in the \<strong>mfpic</strong><br />
macro are multiples of this unit. The initial value is 1pt. It is global outside an <strong>mfpic</strong> environment.<br />
Changes made to it inside an <strong>mfpic</strong> environment have no effect and are lost at the end of the<br />
environment.<br />
\pointsize<br />
This dimension stores the diameter of the circle drawn by the \point macro and the diameter<br />
of the symbols drawn by \plot, \plotsymbol and \plotnodes. The initial value is 2pt.<br />
\pointfilltrue, \pointfillfalse<br />
This TEX boolean switch determines whether the circle drawn by \point will be filled or open<br />
(outline drawn, inside erased). The initial state is true: filled. This value is local to any TEX group<br />
inside an <strong>mfpic</strong> environment. Outside such it is global.<br />
\pen{〈size〉}<br />
\drawpen{〈size〉}<br />
\penwd{〈size〉}<br />
These commands establishes the width of the normal drawing pen (that is, the thickness of lines,<br />
whether solid or dashed). The initial value is 0.5bp. This width is stored by METAFONT. This has<br />
no effect on the size of dots for \dotted, \shade, \grid, etc. It also has no effect on the lines<br />
drawn for hatching. There exist three aliases for this command, the first two to maintain backward<br />
compatibility, the last one for consistency with other dimension changing commands. Publishers<br />
generally recommended authors to use at least a width of one-half point for drawings submitted for<br />
publication.<br />
\shadewd{〈diam〉}<br />
This command sets the diameter of the dots used in the shading macro. The drawing and hatching<br />
pens are unaffected by this. The initial value is 0.5bp, and the value is stored by METAFONT.<br />
\hatchwd{〈size〉}<br />
This sets the line thickness used in the hatching macros. The drawing pen and shading dots are<br />
unaffected by this. The initial value is 0.5bp, and the value is stored by METAFONT.<br />
\polkadotwd{〈diam〉}<br />
This sets the diameter of the dots used in the \polkadot macro. The initial value is 5bp, and the<br />
value is stored by METAFONT.<br />
\headlen<br />
This dimension stores the length of the arrowhead drawn by the \arrow macro. The initial value<br />
is 3pt.
4.11 PARAMETERS. 61<br />
\axisheadlen<br />
This dimension stores the length of the arrowhead drawn by the \axes, \xaxis and \yaxis<br />
macros, and by the macros \axis and \doaxes when applied to the parameters x and y. The initial<br />
value is 5pt.<br />
\sideheadlen<br />
This dimension stores the length of the arrowhead drawn by the \axis and \doaxes macros<br />
when applied to l, b, r or t. The initial value is 0pt (that is, the default is not to put arrowheads on<br />
border axes).<br />
\headshape{〈ratio〉}{〈tension〉}{〈filled〉}<br />
This establishes the shape of the Arrowhead drawn by the \arrow... and \axes macros. It<br />
also establishes the shape of Leftharpoon and Rightharpoon. The value of 〈ratio〉 is the ratio of<br />
the width of the arrowhead to its length; 〈tension〉 is the tension of the Bézier curves; and 〈filled〉 is a<br />
METAFONT boolean value indicating whether the arrowheads are to be filled (if true) or open. The<br />
initial values are 1, 1, and false, respectively. Setting 〈tension〉 to the literal keyword ‘infinity’<br />
will make the sides of the arrowheads straight lines. The harpoon heads are arranged to be exactly<br />
half of the full arrowhead. The 〈ratio〉, 〈tension〉 and 〈filled〉 values are stored by METAFONT.<br />
After \headshape is used, the symbols Arrowhead, Leftharpoon, and Rightharpoon take<br />
on the new shape if used in one of the \plot... commands.<br />
\dashlen, \dashspace<br />
These dimensions store, respectively, the length of dashes and the length of spaces between<br />
dashes, for lines drawn by the \dashed macro. The \dashed macro may adjust the dashes and the<br />
spaces between by as much as 1/n of their value, where n is the number of spaces appearing in the<br />
curve, in order not to have partial dashes at the ends. The initial values are both 4pt. The dashes will<br />
actually be longer (and the spaces shorter) by the thickness of the pen used when they are drawn.<br />
\dashlineset, \dotlineset<br />
These macros provide shorthands for certain settings of the \dashlen and \dashspace dimensions.<br />
The macro \dashlineset sets both values to 4pt, while \dotlineset sets \dashlen to<br />
1pt and \dashspace to 2pt. They are kept mainly for backward compatibility.<br />
\hashlen<br />
This dimension stores the length of the axis hash marks drawn by the \xmarks and \ymarks<br />
macros. The initial value is 4pt.<br />
\shadespace<br />
This dimension establishes the spacing between dots drawn by the \shade macro. The initial<br />
value is 1pt.<br />
\darkershade, \lightershade<br />
These macros both multiply the \shadespace dimension by constant factors, 5/6 = .833333<br />
and 6/5 = 1.2 respectively, to provide convenient standard settings for several levels of shading.<br />
Under METAFONT it is possible that using one of these macros can have no visible effect. See the<br />
discussion of the \shade macro in subsection 4.5.2.
4.11 PARAMETERS. 62<br />
\polkadotspace<br />
This dimension establishes the spacing between the centers of the dots used for the macro<br />
\polkadot. The initial value is 10pt.<br />
\dotsize, \dotspace<br />
These TEX dimensions establishes the size and spacing between the centers of the dots used in<br />
the \dotted macro. The initial values are 0.5pt and 3pt.<br />
\griddotsize<br />
This dimension gives the default sizes of dots in the \grid and \plrgridpoints commands.<br />
The initial value is 0.5pt<br />
\symbolspace<br />
Similar to \dotspace, this TEX dimension establishes the space between the centers of symbols<br />
placed by the macro \plot{〈symbol〉}.... Its initial value is 5pt.<br />
\hatchspace<br />
This dimension establishes the spacing between lines drawn by the \hatch macro. The initial<br />
value is 3pt.<br />
\tlpointsep{〈separation〉}<br />
\tlpathsep{〈separation〉}<br />
\tlabelsep{〈separation〉}<br />
The first macro establishes the separation between a label and its nominal position. It affects<br />
text written with any of the commands \tlabel, \tlabels, \axislabels or \plottext. The<br />
second sets the separation between the text and the curve defined by the commands \tlabelrect,<br />
\tlabeloval or \tlabelellipse. The third sets both of these separations to the same value. It is<br />
for backward compatibility: in the past there was only one dimension used for both purposes. The<br />
initial value of each is 0pt. The values are stored by both TEX and METAFONT.<br />
\tlabeloffset{〈hlen〉}{〈vlen〉}<br />
This macro establishes a uniform offset that applies to all labels. It affects text written with any<br />
of the commands \tlabel, \tlabels, \axislabels or \plottext. The initial state is to have<br />
both horizontal and vertical offsets of 0pt. The values are stored by both TEX and METAFONT.<br />
\mfpdataperline<br />
When MFPIC is reading from data files and writing to the output file, this macro stores the maximum<br />
number of data points that will be written on a single line in the output file. Its initial definition<br />
is \def\mfpdataperline{5}. Any such definition (or redefinition) obeys all TEX groupings.<br />
\<strong>mfpic</strong>height, \<strong>mfpic</strong>width<br />
These dimensions store the height and width of the figure created by the most recently completed<br />
<strong>mfpic</strong> environment. This might perhaps be of interest to hackers or to aid in precise positioning of<br />
the graphics. They are meant to be read-only: the \end<strong>mfpic</strong> command globally sets them equal to<br />
the height and width of the picture, but MFPIC does not otherwise make any use of them. As they are<br />
not to be changed, grouping is irrelevent, but when MFPIC sets them, it does so globally. These are<br />
set even if the picture is saved with \savepic. If they are needed for the corresponding \usepic,<br />
and that occurs after another <strong>mfpic</strong> environment, they should be copied to other length commands<br />
right after the <strong>mfpic</strong> environment that set them.
4.12 FOR ADVANCED USERS. 63<br />
\<strong>mfpic</strong>captionskip<br />
This skip register (‘rubber length’ in LATEX) stores the space between a picture and the caption<br />
produced with \tcaption. It is local to all TEX groups. If changed inside an <strong>mfpic</strong> environment<br />
it will affect only the \tcaption command in that picture. It’s initial setting is \medskipamount,<br />
producing the same space as a \medskip.<br />
4.12 For Advanced Users.<br />
4.12.1 SPLINES<br />
\qspline{〈list〉}<br />
\closedqspline{〈list〉}<br />
\cspline{〈list〉}<br />
\closedcspline{〈list〉}<br />
These figure macros use alternative ways of defining curves. In each case, 〈list〉 is a comma<br />
separated list of ordered pairs. These represent not the points the curve passes through, but the<br />
control points. The first two produce quadratic B-splines and the last two produce cubic B-splines.<br />
If you don’t know what B-splines are, or don’t know what control points are, it is recommended you<br />
not use these commands.<br />
For \qspline, the curve will pass through the midpoints of the line segments joining the points<br />
in the list, tangent to that line segment.<br />
For the \cspline, the list also defines line segments. Divide these into equal thirds at two points<br />
on each segment. Connect these division points only to obtain line segments. Each odd numbered<br />
segment is the middle third of one of the original line segments. The \cspline curve passes through<br />
the midpoint of each even numbered line segment, tangent to it.<br />
\computedspline{〈list〉}<br />
\closedcomputedspline{〈list〉}<br />
These figure macros both produce cubic splines. For these you do provide the list of points the<br />
curves are to pass through. They become the nodes, and then the control points are computed from<br />
them. The nodes do not uniquely determine the control points so extra equations are required. For<br />
the first version, the extra equations give the path zero curvature at the endpoints (a relaxed spline).<br />
For the closed version, the extra equations are those that close the curve smoothly. The portions of<br />
the spline that connect one node to the next are parametrized cubic Béziers, they are computed so<br />
that the first and second derivatives (with respect to the parameter) of adjacent curves match at the<br />
common node.<br />
\fcnspline{〈list〉}<br />
\periodicfcnspline{〈list〉}<br />
These figure macros use cubic spline equations (as in \computedspline above) to produce a<br />
smooth graph of a function based on a list of points with increasing x-values. See \fcncurve in<br />
section 4.2.5 for another way to do this. As in the computed splines, above, the spline equations at<br />
the nodes do not provide sufficient information to compute all control points. In the basic version,<br />
\fcnspline, extra equations produce a graph with zero curvature at the endpoints (a relaxed spline),<br />
while the periodic version uses equations that make the first and second derivatives at the last point<br />
match those at the first point.
4.12 FOR ADVANCED USERS. 64<br />
\cbclosed...<br />
\qbclosed...<br />
These are modifying macros that close the following path. The first closes with a cubic B-spline,<br />
the second with a quadratic B-spline. They will close any given curve, but the command \cbclosed<br />
is meant to close a cubic B-spline (see above). That is, \cbclosed\cspline should produce the<br />
same result as \closedcspline with the same argument. The corresponding statements are true of<br />
\qbclosed: it is meant to close a quadratic B-spline and \qbclosed\qspline should produce the<br />
same result as \closedqspline with the same argument.<br />
4.12.2 BÉZIERS<br />
The power user, having noticed that \curve and \cyclic insert some direction modifiers into the<br />
path created, may have decided that there is no MFPIC command to create a simple METAFONT<br />
default style path, for example (1,1)..(0,1)..(0,0)..cycle. If so, he or she has forgotten about<br />
\mfobj: the command<br />
\mfobj{(1,1)..(0,1)..(0,0)..cycle}<br />
will produce, in the .mf file, exactly this path, but surround it with the TEX wrapping needed to<br />
make MFPIC’s prefix macro system work. However, the syntax of more complicated paths can be<br />
extremely lengthy, so we offer this interface:<br />
\mfbezier[〈tens〉]{〈list〉}<br />
\closedmfbezier[〈tens〉]{〈list〉}<br />
These figure macros uses the METAFONT path join operator ‘..tension 〈tens〉..’ to connect<br />
the points in the list. If the tension option [〈tens〉] is omitted, the value set by \settension (initially<br />
1) is used. One can get a cyclic path by prepending \bclosed (with matching tension option),<br />
but it will not produce the same result as \closedmfbezier. These are cubic Bézier’s (but you<br />
know that if you are a power user). Quadratic Béziers (as in LATEX’s picture environment) can be<br />
obtained with the following:<br />
\qbeziers{〈list〉}<br />
\closedqbeziers{〈list〉}<br />
These figure macros produce quadratic Bézier curves, the equivalent of a sequence of LATEX<br />
\qbezier commands. Note the plural forms, to distinguish the first from the LATEX command, and<br />
to indicate that they can draw a series of quadratic Béziers.<br />
In the 〈list〉, the first, third, fifth, etc., are the points to connect, while the second, fourth, etc., are<br />
the control points. The open version requires an ending point, and so needs an odd number of points<br />
in the list. The closed version assumes the first point is the ending, and so requires an even number<br />
in the list. If the number of ponts is wrong, no error is produced: the last point is simply repeated to<br />
get the required number.<br />
The curve will not automatically be smooth; that depends on the choice of the control points.<br />
\cbeziers{〈list〉}<br />
\closedcbeziers{〈list〉}<br />
These figure macros produce a series of cubic Bézier curves. In the 〈list〉, the first, fourth, seventh,<br />
etc., are the points to connect, while the second and third, fifth and sixth, etc., are pairs of<br />
control points. The closed version uses the starting point as the ending point, and so needs a number<br />
of points divisible by 3 (n = 3k). The open version requires an explicitly given ending node (so<br />
n = 3k + 1). If the number of ponts is wrong, no error is produced: the last point or last two points<br />
are simply repeated to get the required number.
4.12 FOR ADVANCED USERS. 65<br />
The curves will not automatically be smooth; that depends on the choice of the control points.<br />
Cubic Béziers are how curves are represented in PostScript files, and how a number of vector drawing<br />
programs represent curves.<br />
4.12.3 RAW METAFONT CODE<br />
\mfsrc{〈metafont code〉}<br />
\mfcmd{〈metafont code〉}<br />
\mflist{〈metafont code〉}<br />
These all write the 〈metafont code〉 directly to the METAFONT file, using a TEX \write command.<br />
Line breaks within 〈metafont code〉 are preserved. 18 Almost all the MFPIC drawing macros<br />
invoke one of these. Because of the way TEX reads and processes macro arguments, not all drawing<br />
macros preserve line breaks (nor do they all need to). However, the ones that operate on long lists of<br />
pair or numeric data (for example, \point, \curve, etc.), do preserve line breaks in that data. The<br />
difference in these is minor: \mfsrc writes its argument without change, \mfcmd appends a semicolon<br />
(‘;’) to the code, while \mflist surrounds its argument with parentheses and then appends a<br />
semicolon.<br />
Using these can have some rather bizarre consequences, though, so it is not recommended to the<br />
unwary. It is, however, currently the only way to make use of METAFONT’s equation solving ability.<br />
Here’s an oversimplified example:<br />
\<strong>mfpic</strong>[20]{-0.5}{1.5}{0}{1.5}<br />
\mfsrc{z1=(0,0);<br />
z2-z3=(1,2);<br />
z2+2z3=(1,-1);} % z2=(1,1), z3=(0,-1)<br />
\arc[t]{z1,z2,z3}<br />
\end<strong>mfpic</strong><br />
Check out the sample forfun.tex for a more extensive example. It should produce the word<br />
‘<strong>mfpic</strong>’ in blue, outlined in green in a box with yellow background.<br />
4.12.4 CREATING METAFONT VARIABLES<br />
\setmfvariable{〈type〉}{〈name〉}{〈value〉}<br />
\setmpvariable{〈type〉}{〈name〉}{〈value〉}<br />
\globalsetmfvariable{〈type〉}{〈name〉}{〈value〉}<br />
\globalsetmpvariable{〈type〉}{〈name〉}{〈value〉}<br />
\setmfnumeric{〈name〉}{〈value〉}<br />
\setmfpair {〈name〉}{〈value〉}<br />
\setmfboolean{〈name〉}{〈value〉}<br />
\setmfcolor {〈name〉}{〈value〉}<br />
These formerly internal MFPIC macros can be use to define symbolic names for any META-<br />
FONT or METAPOST variable type. The last four are abbreviations for the first used with an appropriate<br />
value for 〈type〉. For example, \setmfvariable{pair}{X}{(2,0)} can be abbreviated<br />
\setmfpair{X}{(2,0)}. Note that these overwrite any variable with the specified 〈name〉. For<br />
certain internal names, METAFONT will issue an error, but usually the variable is silently redefined.<br />
The commands \setmpvariable and \globalsetmpvariable (note the mp instead of mf) are<br />
just alternative spellings . You can use either spelling with either the metafont or metapost option.<br />
18 Under most circumstances, but not if the command (plus its argument) is part of the argument of another macro.
4.12 FOR ADVANCED USERS. 66<br />
The 〈value〉 must be a constant of the appropriate type or a METAFONT expression returning the<br />
appropriate type. It can also be (or include) other variables previously defined. The \setmfcolor<br />
command has been enhanced so that in recent METAPOST the 〈value〉 can be any of the three types<br />
of colors METAPOST allows: numeric (for grayscale color), rgbcolor or cmykcolor. The data type of<br />
〈value〉 will be examined, and the variable 〈name〉 will be declared to be a variable of the appropriate<br />
type. The same is true of \setmfvariable{color}.<br />
As an example of their use, since dimensions are numeric data types in METAFONT, the command<br />
\setmfnumeric{my_spc}{5pt}<br />
\setmfnumeric{my_dia}{.8pt}<br />
would set the METAFONT variables my_spc and my_dia to the values 5pt and .8pt, respectively.<br />
After that, these variables can be used in any drawing command where a dimension is required:<br />
\plot[my_dia,my_spc]{Triangle}\rect{(0,0),(1,1)}<br />
will plot the rectangle with small triangles of diameter .8pt, spaced 5pt apart.<br />
The knowledgeable user may realize that path and picture are METAFONT data types, and<br />
may want use them in \setmfvariable. It is also true that at some level, MFPIC figure macros<br />
produce a path and \mfpimage produces a picture. However, MFPIC commands cannot be used in<br />
the value portion of \setmfvariable. The TEX code that most MFPIC commands produce would<br />
be meaningless to METAFONT. You can store the path produced by figure macros with \store, and<br />
store pictures in variables with \mfpimage or even \tile.<br />
With the obvious exception of the \globalsetmfvariable command, these commands define<br />
the variable locally. That is, the variable will revert to any previous definition (or become undefined)<br />
at the end of the <strong>mfpic</strong> environment it is defined in. It is in fact local to any METAFONT<br />
group. In MFPIC, only \connect . . . \endconnect, \mfpimage . . . \endmfpimage, and \<strong>mfpic</strong><br />
. . . \end<strong>mfpic</strong> create METAFONT groups in the graph file.<br />
A warning about variable names. METAFONT and METAPOST allow multi-part variable names<br />
like ‘arrowhead length’ or ‘X.r’ The part after the first space or ‘.’ is called a suffix. In META-<br />
FONT, variable settings are global unless explicitly made local. The code of the \set... commands<br />
does make the variable setting local. However, METAFONT syntax forbids this localization when a<br />
variable name has a suffix. Moreover, if you localize a variable, METAFONT will localize all variables<br />
with that name plus any suffix. Even more, localizing a variable renders all variables with the<br />
same name plus suffix locally undefined. The command \globalsetmfvariable simply omits the<br />
localization part, so suffixes are permitted, but it cannot ‘globalize’ something that has previously<br />
been localized within the same group.<br />
For example, suppose you use the example code in subsection 4.4.3 and define a custom arrowhead<br />
path myAH and the corresponding clearing path myAH.clear. Suppose now you try to make<br />
this head the default for the \arrow command by doing the following.<br />
\setmfvariable{path}{Arrowhead}{myAH}<br />
Then this assignments is local and makes Arrowhead.clear undefined (locally). You cannot use<br />
\setmfvariable to define Arrowhead.clear; that will produce an error from METAFONT. You<br />
need to do<br />
\setmfvariable{path}{Arrowhead}{myAH}<br />
\globalsetmfvariable{path}{Arrowhead.clear}{myAH.clear}<br />
and both assignments will be local. To make both assignments global, use the global version in both.
4.12 FOR ADVANCED USERS. 67<br />
\patharr{〈name〉}...\endpatharr<br />
This pair of macros, acting as an environment, accumulate all enclosing paths, in order, into a<br />
path array named 〈name〉. A path array is a collection of paths with a common base name indexed by<br />
integers from 1 to the number of paths. Any path in the array can be accessed by means of \mfobj.<br />
For example, after<br />
\patharr{pa}<br />
\rect{(0,0),(1,1)} \circle{(.5,.5), .5}<br />
\endpatharr<br />
then \mfobj{pa[1]} refers to the rectangle and \mfobj{pa[2]} refers to the circle. In case explicit<br />
numbers are used, METAFONT allows pa1 as an abbreviation for pa[1]. However, if a numeric<br />
variable or some expression is used (e.g., pa[n+1]) the square brackets are required.<br />
This command can only be used in an <strong>mfpic</strong> environment. For this reason, the definitions it<br />
makes are global.<br />
Note: In LATEX, this pair of macros can be used in the form of a LATEX-style environment called<br />
patharr—as in \begin{patharr}...\end{patharr}.<br />
\setarray{〈type〉}{〈var〉}{〈list〉}<br />
\globalsetarray{〈type〉}{〈var〉}{〈list〉}<br />
\pairarray{〈var〉}{〈list-of-points〉}<br />
\numericarray{〈var〉}{〈list-of-numbers〉}<br />
\colorarray{〈var〉}{〈list-of-colors〉}<br />
\rgbcolorarray{〈var〉}{〈list-of-rgbcolors〉}<br />
\cmykcolorarray{〈var〉}{〈list-of-cmykcolors〉}<br />
These enable the simultaneous definition of variables. For example, after<br />
\pairarray{X}{(0,1),(1,1),(0,0),(1,0)}<br />
the variables X1, X2, X3, and X4 are equal to the given points in that order. And then<br />
\polyline{X1,X2,X3,X4}<br />
will draw the lines connecting these four points. The index may optionally be put in square brackets<br />
and may be separated from the name by any number of spaces. That is, \polyline{X[1],X[2]}<br />
and \polyline{X 1,X 2} are the same as \polyline{X1,X2} to METAFONT. If a numeric expression<br />
is used instead of an explicit number, square brackets must surround it: X[1+1], X[2], X2<br />
and X 2 are all the same. For all these array commands, the variable X by itself (not followed by<br />
any digit or brackets) becomes a numeric variable equal to the number of elements in the array.<br />
Except for \globalsetarray, the arrays are defined locally if these commands occur in an <strong>mfpic</strong><br />
environment, global otherwise.<br />
Array variables may be used only where the values are processed only by METAFONT or META-<br />
POST, they are unknown to TEX. In particular, they cannot be used in commands that position text<br />
unless mplabels is in effect. Variables may be used in the 〈list〉 parameters of commands, but they<br />
must have been previously defined or otherwise known to METAFONT.<br />
Since arrays must all be variables of the same type, one cannot mix rgb and cmyk colors. The<br />
\colorarray command requires rgb colors (for compatibility with early METAPOST).<br />
Several commands in MFPIC define arrays of objects that can be used in other commands. The<br />
main ones are \regpolygon, \piechart and \barchart. These arrays are always global (either<br />
because their use is restricted to an <strong>mfpic</strong> environment or for backward compatibility with the time<br />
when they were so restricted).
4.12 FOR ADVANCED USERS. 68<br />
Using \regpolygon{〈num〉}{X}{...}{...} causes a pair array named X to be defined having<br />
〈num〉 elements (and the additional pair X0 for the center). This is in addition to creating the actual<br />
figure. The variable X alone becomes a numeric equated to 〈num〉.<br />
Using \piechart (or \mfppiechart) causes the following arrays to become defined (or redefined):<br />
– piewedge, a path array describing the wedges of the chart. To access piewedge[1], for example,<br />
one could use \mfobj{piewedge[1]}. This is almost exactly the same as the MFPIC<br />
command \piewdge{1} without optional arguments.<br />
– pieangle, a numeric array, gives the starting angles of the wedges.<br />
– piedirection, a pair array, gives the unit vectors pointing from the center of the piechart<br />
through middles of the wedges. For example, if \pieangle1 is 0 and pieangle2 is 90 degrees,<br />
then piedirection1 is (cos45,sin45), the unit vector whose angle is 45 degrees.<br />
Using \barchart (or \mfpbarchart or any of its aliases) causes the following arrays to become<br />
defined (or redefined). The exact meaning depends on whether bars are horizontal or vertical. The<br />
following describes horizontal bars; exchange the roles of x and y if they are vertical (also change<br />
‘right’ to ‘top’, etc.):<br />
– barstart, a numeric array, gives the position on the y-axis of the leading edge of the bars.<br />
– barbegin, numeric, gives the x-coordinate of the leftmost end of the bars.<br />
– barend, numeric, gives the x-coordinate of the rightmost end of the bars.<br />
– chartbar, a path array, gives the actual bars. For example, chartbar2 is the rectangle with<br />
opposite corners (barbegin2,barstart2) and (barend2,barstart2+barwd), where the<br />
numeric variable barwd is the thickness of the bar (which is a height for horizontal bars).<br />
– barlength, the same as barend. This is for backward compatibility; the name was chosen at<br />
a time when all the bars had one side on an axis.<br />
4.12.5 MISCELANEOUS PAIR EXPRESSIONS<br />
A useful METAFONT operator that produces points is the intermediation operator, whose syntax is<br />
(〈num〉)[〈p 1 〉,〈p 2 〉]<br />
That is, a number or numeric expression in parentheses followed by literal brackets (this is not<br />
an optional argument) containing two points or pair expressions separated by a comma. It returns<br />
an intermediate point on the line through 〈p 1 〉 and 〈p 2 〉. The formula for the returned value is p 1 +<br />
〈num〉(p 2 − p 1 ). The midpoint is obtained with 〈num〉 = .5. If the 〈num〉 is a pure number, the<br />
parentheses can be omitted, but they are required if it is any other numeric expression. Values of<br />
〈num〉 larger than 1 or less than zero produce points on the line that lie outside the segment from p 1<br />
to p 2 . This operator can also be applied to numbers or (in METAPOST) to colors (of the same type).<br />
So that (2/3)[3,6] = 5 and .7[green,blue] = (0,.3,.7). See section 4.3 for a description<br />
of colors in METAPOST and METAFONT.<br />
pathpoint(〈frac〉,〈name〉)<br />
This is another useful METAFONT command. It requires a number, 〈frac〉, and the name of a<br />
previously defined METAFONT path variable. (Defined, for example, using \store; see subsection<br />
4.10.2). It returns the point on the path that is approximately that fraction of the path’s length<br />
from the start of the path. For example to draw a line from (0,0) to the midpoint of an arc, do the<br />
following:<br />
\store{myarc}\draw\arc{(1,0),(0,2),90}<br />
\polyline{(0,0), pathpoint(.5,myarc)}
4.12 FOR ADVANCED USERS. 69<br />
METAFONT has no general command for calculating the lengths of paths; METAPOST does, but it is<br />
quite slow. Thus neither program has an efficient method for finding the described point, so MFPIC<br />
uses METAFONT/METAPOST macros that are faster, but less accurate than they could be. Still, the<br />
results should (except in pathological cases) be accurate to within a couple of percent of the length<br />
of the path. If they are not, adjust the value of the fraction. These remarks about accuracy also hold<br />
for any other command (such as \partpath in subsection 4.4.2) that take the fraction of a path<br />
length as a parameter.<br />
The pathpoint command is not a basic METAFONT command, but is defined by the GRAFBASE<br />
macros that accompany MFPIC.<br />
METAFONT pairs can conveniently be viewed as complex numbers. So grafbase also contains<br />
some functions useful in complex analysis (my research field). In what follows a, z and w denote<br />
pair variables or constants, and each function interprets them as complex numbers. Also t denotes<br />
an angle in radians. There are both numeric and pair valued functions, the type of each is noted after<br />
the description:<br />
Arg z The principle argument of z in radians (numeric).<br />
Log z The principle logarithm of z (pair).<br />
cis t (cost,sint), same as dir degrees(t) (pair).<br />
zexp w The complex exponential, e w (pair).<br />
zsqrt w The (principal) complex square root: that z with −π/2 ≤ Argz ≤ π/2 and<br />
z 2 = w (pair).<br />
sgn z The signum, sgn(0,0) = (0,0) otherwise sgnz = z/|z| (pair).<br />
conj z The complex conjugate, ¯z (pair).<br />
Moebius(a) z The Möbius transformation (z + a)/(1 + āz) (pair)<br />
pshdist(z,w) The pseudohyperbolic distance between z and w: |z−w|/|1− ¯wz| (numeric).<br />
kelvin(z) The Kelvin transform 1/¯z (pair)<br />
METAFONT will happily add and subtract pairs but to multiply and divide complex numbers<br />
requires new operations. These are given by (z zmul w) and (z zdiv w). They operate on pairs<br />
and produce pairs.<br />
4.12.6 MANIPULATING METAFONT PICTURE VARIABLES<br />
\tile{〈tilename〉,〈unit〉,〈wd〉,〈ht〉,〈clip〉}<br />
〈MFPIC drawing commands〉<br />
\endtile<br />
In this environment, all drawing commands contribute to a tile. A tile is a rectangular picture<br />
which may be used to fill the interior of closed paths. Actually, a tile is a composite object. After<br />
\tile{Nick, ... } ... \endtile a picture variable Nick.pic is created as well as numeric<br />
variable Nick.wd and Nick.ht. These are needed by the \tess command, below.<br />
The units of drawing are given by 〈unit〉, which should be an explicit dimension (like 1pt or<br />
.2in). The tile’s horizontal dimensions are 0 to 〈wd〉 · 〈unit〉 and its vertical dimensions 0 to 〈ht〉 ·<br />
〈unit〉, so 〈wd〉 and 〈ht〉 should be pure numbers. If 〈clip〉 is true then the drawing is clipped to be<br />
within the tile’s boundary.<br />
By using this macro, you can design your own fill patterns (to use them, see the \tess macro<br />
below), but see the warning about memory use by the \tess command. The 〈tilename〉 is globally<br />
defined by this command.<br />
\tess{〈tilename〉}...<br />
This rendering macro tiles the interior of a closed path with a tessellation comprised of copies of<br />
the tile specified by 〈tilename〉. The tile must have been previously created by \tile{〈tilename〉,
4.12 FOR ADVANCED USERS. 70<br />
... }. Tiling an open curve is technically an error, but the METAFONT code responds by drawing<br />
the path and not doing any tiling. The METAFONT code places shifted copies of the tile picture in a<br />
rectangular grid sufficient to cover the region, then clips it to the closed path before drawing it.<br />
Tiling large regions with complicated tiles can exceed the capacity of some versions of META-<br />
POST. There is less of a problem with METAFONT. This is not because METAFONT has greater<br />
capacity, but because of the natural difference between bitmaps and vector graphics.<br />
In METAPOST, the tiles are copied with whatever color they are given when they are defined.<br />
They can be multicolored.<br />
Before version 0.8, \tile was the only way to create a picture variable, and the only way to<br />
draw this picture was with the \tess command. Now we have the following command to place<br />
multiple copies of a picture:<br />
\putmfpimage{〈name〉}{〈list〉}<br />
This take the name of a picture variable and copies the picture at each location in the 〈list〉, which<br />
should be a comma-separated list of coordinate pairs in graph coordinates. The picture is copied so<br />
that its reference point is placed at each of the locations. The reference point of a picture created<br />
with \tile is its lower left corner.<br />
\mfpimage[〈refpt〉]{〈picname〉}<br />
〈MFPIC drawing commands〉<br />
\endmfpimage<br />
This is another way to create a picture variable. The drawing commands within the mfpimage<br />
environment contribute not to the current MFPIC picture, but rather to the picture variable named in<br />
〈picname〉. Otherwise, they operate exactly as they would outside this environment, using the same<br />
coordinate system and the same default values of all parameters, etc. (unlike the tile environment,<br />
which defines its own coordinate system). The picture is created with its reference point at the point<br />
〈refpt〉 given in the optional argument. The default is (0,0). For example:<br />
\mfpimage[(1,1)]{Jan}<br />
\fill\rect{(0,0),(1,1)}<br />
\fill\rect{(1,1),(2,2)}<br />
\rect{(0,0),(2,2)}<br />
\endmfpimage<br />
produces a simple 2-by-2 chessboard with its reference point at the center point (1,1). One can then<br />
write something like<br />
\putmfpimage{Jan}{(1,1),(3,1),(1,3),(3,3)}<br />
to get a 4-by-4 chessboard: the picture Jan copied with its center at each of the listed points.<br />
The behavior of \tlabel in an mfpimage environment depends on the setting. If mplabels is<br />
turned off, then labels are added by TEX and are not included as part of the named METAFONT or<br />
METAPOST picture variable. They are placed on the current picture as if the mfpimage environment<br />
were not there at all. If mplabels is turned on and overlaylabels is also turned on, or if the mfpimage<br />
environment is between \startbacktext and \stopbacktext, then the labels will be saved and<br />
placed when the <strong>mfpic</strong> environment ends and not added to the named picture variable. Thus, to<br />
include text labels in the named picture variable, you must have mplabels on, overlaylabels off, and<br />
mfpimage outside any \startbacktext/\stopbacktext.<br />
The picture created by \mfpimage is locally defined. That is, it becomes undefined at the end of<br />
the current <strong>mfpic</strong> environment. If one needs it to be global, one can use \globalsetmfvariable<br />
(see subsection 4.12.4) to copy it to another variable. For example. the command
4.12 FOR ADVANCED USERS. 71<br />
\globalsetmfvariable{picture}{Dan}{Jan}<br />
would make Dan globally defined to be equal to the current value of the picture Jan. Note that picture<br />
variables can consume a lot of METAFONT’s memory. Copying one variable to another doubles the<br />
amount of memory, at least until the end of the <strong>mfpic</strong> environment.<br />
You can use \putmfpimage inside a mfpimage environment, provided the picture being placed<br />
has been previously defined. Nesting a mfpimage inside another has not been tested at all and<br />
so is not recommended. But if it works, the inner image would be local to the environment created<br />
by the outer one, and so would be of limited use. One can use the LATEX environment construct<br />
\begin{mfpimage} ... \end{mfpimage} in a LaTeX <strong>doc</strong>ument instead of \mfpimage ...<br />
\endmfpimage.<br />
4.12.7 METAFONT LOOPS<br />
All the MFPIC loop commands create a loop (in the METAFONT language) in the output file. The<br />
METAFONT commands in that loop are executed repeatedly by METAFONT or METAPOST. From the<br />
point of view of TEX, however each command occurs only once. Starting with version 0.9, these<br />
loops can be created inside or outside the <strong>mfpic</strong> drawing environment. If outside, they must not<br />
contain any drawing commands, but can contain commands that set variables, perform computations,<br />
etc.<br />
\mfpfor{〈for-loop header〉}<br />
〈MFPIC commands〉<br />
\endmfpfor<br />
This creates a for-loop in the METAFONT output file. The \mfpfor writes the start of the loop and<br />
\endmfpfor writes the end. Any code written in the output file between them is executed repeatedly<br />
by METAFONT, according to the information in 〈for-loop header〉. There are two types of headers<br />
possible, illustrated by the following examples.<br />
\mfpfor{center = (0,0), (1,0), (0,1)}<br />
\gfill\circle{center,1}<br />
\endmfpfor<br />
This example will fill three circles of radius 1 with centers at the three given points. This type of<br />
header has the format<br />
〈variable〉 = 〈list〉<br />
where 〈variable〉 should be a simple variable name and 〈list〉 is a comma separated list of items of<br />
the appropriate data type. In the above, center is equated to pairs, but in the following<br />
\mfpfor{radius = 1,3,4}<br />
\dotted\circle{(0,0),radius}<br />
\endmfpfor<br />
radius gets numeric values.<br />
The other type of header uses a stepped variable:<br />
\mfpfor{level = 3 step 2 until 9}<br />
\circle{(0,0),sqrt(level)}<br />
\endmfpfor<br />
This will cause the METAFONT variable level to step through the values 3, 5, 7 and 9 and the circles<br />
with radius √ 3, √ 5, etc. will be drawn. This type of header has the format<br />
〈variable〉 = 〈start〉 step 〈delta〉 until 〈stop〉
4.12 FOR ADVANCED USERS. 72<br />
where 〈variable〉 is as before, while 〈start〉, 〈delta〉 and 〈stop〉 are numeric values. If 〈delta〉 is<br />
positive the loop is skipped entirely if 〈stop〉 is less than 〈start〉. Otherwise the loop is executed<br />
successively with the variable equal to 〈start〉, then 〈start〉 + 〈delta〉 then 〈start〉 + 2〈delta〉, etc., as<br />
long as the variable is not greater than 〈stop〉. The behavior is similar if 〈delta〉 is negative, except<br />
the loop is repeated only as long as the variable is not less than 〈stop〉. If 〈delta〉 is 0, then the<br />
METAFONT run will generate an error.<br />
Note that the index variable (center and radius in the above two examples) is a temporary<br />
METAFONT variable. If mplabels is turned on, this variable will work as expected in the location<br />
parameter of a \tlabel command, but if it is used in the label part, it will be interpreted as TEX<br />
code and printed as is. The index variable reverts to its previous state outside the loop. That is, if it<br />
existed before the loop, it regains its previous value after the loop, and if it was undefined before the<br />
loop, it is again undefined after.<br />
The single word ‘upto’ can be used as an abbreviation for “step 1 until” and ‘downto’ for<br />
“step -1 until” in for-loop headers. Spaces are not significant in for-loop headers, except to<br />
distinguish the keywords (e.g. step) from variable names that might be used (e.g., for 〈start〉).<br />
\mfpwhile{〈condition〉}<br />
〈MFPIC commands〉<br />
\endmfpwhile<br />
The 〈condition〉 should be an expression that can be either true or false about a METAFONT<br />
variable that changes at some time during the loop body. The loop body is executed (by METAFONT)<br />
as long as the condition is true. Example:<br />
\setmfvariable{numeric}{R}{20}<br />
\mfpwhile{R > 1}<br />
\rect{(0,0), (R,3R)}<br />
\mfcmd{R:=R/2}<br />
\endmfpwhile<br />
There are no MFPIC commands to systematically change a variable, so in this example we have<br />
resorted to directly writing a METAFONT assignment command via \mfcmd (see subsection 4.12.3<br />
above) that reduces R by half. The loop will be executed with R having the successive values 20,<br />
10, 5, 2.5, and 1.25. The resulting picture could have been achieved with \mfpfor using this list of<br />
values.<br />
\mfploop<br />
〈MFPIC commands〉<br />
\mfpuntil{〈condition〉}<br />
〈MFPIC commands〉<br />
\endmfploop<br />
The body of this loop will be repeated until the 〈condition〉 becomes true. The condition should<br />
be some expression that can be either true or false about a variable that changes during the loop execution.<br />
It should eventually become true. If an mfploop environment does not contain an \mfpuntil<br />
command, then the \endmfploop command will generate a warning message. If the warning is ignored,<br />
and the user has not otherwise arranged for loop termination, 19 the .mf file will contain an<br />
infinite loop. The \mfpuntil command will break the loop at whatever point it occurs. Example:<br />
19 Perhaps by means of \mfsrc commands. It is because of this possibility that only a warning is produced and not an error.<br />
If the warning becomes annoying, adding \mfpuntil{false} to the loop will silence it. This command will never break the<br />
loop because the condition false (of course) never becomes true.
4.12 FOR ADVANCED USERS. 73<br />
\setmfvariable{numeric}{R}{20}<br />
\mfploop<br />
\mfcmd{R:=R/2}<br />
\mfpuntil{R
4.12 FOR ADVANCED USERS. 74<br />
\assignmfvalue{〈TEX-macro〉}{〈MF-expr〉}<br />
\assignmpvalue{〈TEX-macro〉}{〈MF-expr〉}<br />
\globalassignmfvalue{〈TEX-macro〉}{〈MF-expr〉}<br />
\globalassignmpvalue{〈TEX-macro〉}{〈MF-expr〉}<br />
The command names spelled with ‘mp’ are no different than the ones spelled with ‘mf’. You can<br />
use either spelling with either the metafont or metapost option.<br />
These commands causes the 〈MF-expr〉 to be written to the output file for METAFONT to evaluate.<br />
The resulting value is then written to the .log file of that METAFONT run. On the next TEX run,<br />
if mfpreadlog (see section 2.11) is in effect, the macro 〈TEX-macro〉 will be defined to produce the<br />
resulting value. For example:<br />
\setmfnumeric{s}{2}<br />
\assignmfvalue{\val}{exp s}<br />
\tlabel(1,2){$e^s = \val$}<br />
After METAFONT is run and then TEX run a second time, \val will acquire the definition ‘7.38905’,<br />
the value of exp s when s=2 (i.e., e 2 , correct to at least the fourth decimal place). If mplabels is<br />
in effect, the correct label is written to the figure file only during this second run, and a second<br />
METAPOST run will be required. In many cases (when using <strong>pdf</strong>TEX, for example, or when the label<br />
changes the figure dimensions), a third TEX run will be required to make the figure correct when it<br />
is included in the <strong>doc</strong>ument.<br />
Before METAFONT is run to evaluate the expression, the macro produces ‘???’. Thus, it cannot<br />
be used in places where a number is needed (as in the position arguments of a \tlabel command).<br />
Note also that if a command defined by \assignmfvalue is used in a tlabel with mplabels in effect,<br />
then mplabels must be in effect during the \assignmfvalue command as well.<br />
The ‘global’ version makes the definition of the 〈TEX-macro〉 global, surviving the current<br />
group. In particular, it can be used in other pictures. The plain versions create commands that are<br />
only locally defined. Past versions of this manual stated that you can say<br />
\global\assignmfvalue<br />
to define the macro globally. This turns out not to be true in all cases. If a global definition is needed,<br />
use the global versions above.<br />
Because of the asynchronous nature of the definition process, using \assignmfvalue with the<br />
same macro name more than once in the same <strong>mfpic</strong> environment will not work. The macro becomes<br />
defined upon reading the logfile during the execution of \opengraphsfile, and it will end<br />
up with the last definition encountered. (The same is true for uses outside <strong>mfpic</strong> environments: the<br />
macro acquires the last such definition.) Moreover, the definition is associated to a picture by number.<br />
Which means that reordering the environments or changing the numbering by any means will<br />
require the TEX-METAFONT-TEX sequence (or more) to be repeated.<br />
If the 〈TEX-macro〉 is already defined, no warning will be issued and the command will be redefined,<br />
so be careful in the name chosen. If mplabels is turned off when \assignmfvalue is used,<br />
but turned on before the 〈TEX-macro〉 is used in a \tlabel command, the macro definition will not<br />
be written to the .mp file, and either an error message, or incorrect label will result when METAPOST<br />
tries to make the tlabel.<br />
The concept and much of the code for \assignmfvalue came from Werner Lemberg. However,<br />
I have rewritten it substantially to conform to MFPIC conventions and so any errors are my<br />
responsibility.
4.12 FOR ADVANCED USERS. 75<br />
\cutoffafter{〈obj〉}. . .<br />
\cutoffbefore{〈obj〉}. . .<br />
These prefix macros modify the following path by cutting part of it off. They take an ‘object’<br />
(a variable in which a path was previously stored using \store) and uses it to trim off one end of<br />
the following path. \cutoffbefore cuts off the part of the path before its first intersection with the<br />
object, while \cutoffafter cuts off the part after the last intersection. If the path does not intersect<br />
the object, nothing is cut off. If the object and the path intersect in more than one point, as little as<br />
possible (usually 20 ) is cut off. This is reliable only when there is a unique point of intersection.<br />
These macros can be used to create a curve that starts or ends right at another figure without<br />
having to know the point where the two curves intersect.<br />
\randomlines{〈maxshift〉}. . .<br />
\randomizepath{〈maxshift〉, 〈weirdness〉}. . .<br />
These modify the following path by applying random shifts to the nodes of a path. The first one,<br />
\randomlines then simply connects those new points by straight lines, while the second one also<br />
applies randomization to the control vectors. The 〈maxshift〉 argument is either a positive number<br />
(in graph units) that limits the distance a node can be moved, or it is an ordered pair of positive<br />
numbers, in which case the first limits the horizontal distance and the second limits the vertical. If<br />
〈maxshift〉 is larger than the distance between nodes, cusps or loops are likely in the result.<br />
For \randomizepath the 〈weirdness〉 parameter controls how the control vectors are modified.<br />
Roughly speaking the control vectors are randomly rotated up to 30〈weirdness〉 degrees and randomly<br />
scaled up or down by a factor of 2 〈weirdness〉 . (A “control vector” is a vector pointing from a<br />
node to one of its control points.) However, this is done in a way that preserves smoothness at each<br />
node where the path is smooth. Values of 〈weirdness〉 greater than 1 are probably much too weird.<br />
\brownianmotion{〈start〉,〈num〉,〈scale〉}<br />
\browniangraph{〈num〉,〈scale〉}<br />
\randomwalk{〈start〉,〈num〉,〈scale〉}<br />
These figure macros build a few standard kinds of random paths. The \brownianmotion path<br />
starts at the point 〈start〉, then proceeds in a straight line in a random direction a random distance.<br />
This is repeated 〈num〉 times to form a polyline. The random process used is a Gaussian in each<br />
coordinate, scaled so that the random distance has a standard deviation equal to 〈scale〉. Thus, 〈start〉<br />
is a coordinate pair in graph coordinates, 〈num〉 is a positive whole number and 〈scale〉 is a positive<br />
real number (in graph units). In rare cases, the random distance can become quite large, but on<br />
average it will be about 0.56 × 〈scale〉. The size of the resultant path (its bounding box) can also be,<br />
in rare cases, quite large, but it is usually on the order of √ 〈num〉 times 〈scale〉.<br />
The second path, \browniangraph, represents the graph of a one-dimensional Brownian motion.<br />
It is random only in the vertical direction as the rightward motion represents the uniform passage<br />
of time. It starts at (0,0) and the 〈scale〉 is both the constant rightward step as well as the<br />
standard deviation for the y-coordinate. Users will need to apply a shift if they want to change the<br />
starting point, and a vertical scaling if they want a scale factor different from the step size.<br />
Despite their names, the paths produced are technically not Brownian motion, but rather ‘Gaussian<br />
random walks’. However, for small 〈scale〉 and large 〈num〉 they can be used to approximate<br />
Brownian motion.<br />
20 METAFONT’s methods for finding the ‘first’ point of intersection do not always find the actual first one.
4.12 FOR ADVANCED USERS. 76<br />
Finally, \randomwalk is just like \brownianmotion except that only the direction is random.<br />
The distance is always equal to 〈scale〉. 21<br />
There can be a problem with the size of 〈num〉 in these three macros. Numbers greater than a<br />
certain METAFONT/METAPOST parameter called max_points (see the discussing at \levelcurve<br />
in section 4.6.2) will produce an error from METAFONT or METAPOST. But also sharp turns will take<br />
up space in something called the rounding table. This has no bearing on METAPOST, and in META-<br />
FONT it only matters if the parameter autorounding is positive. MFPIC leaves autorounding at<br />
the default of 2, since this value makes drawings in METAFONT look best. In this case, the value of<br />
〈num〉 should be less than about 500.<br />
\mftitle{〈title〉}<br />
Write the string 〈title〉 to the METAFONT file, and use it as a METAFONT message. (See The<br />
METAFONTbook, chapter 22, page 187, for two uses of this.)<br />
\tmtitle{〈title〉}<br />
Write the text 〈title〉 to the TEX <strong>doc</strong>ument, and to the log file, and use it implicitly in \mftitle.<br />
This macro forms a local group around its argument.<br />
Since TEX is limited to 256 dimension registers, and since dimensions are so important to typesetting<br />
and drawing, it is common to use up all 256 when drawing packages are loaded. Therefore<br />
MFPIC uses font dimensions to store dimension values. The following is the command that handles<br />
the allocation of these dimensions.<br />
\newfdim{〈fdim〉}<br />
This create a new global font dimension named 〈fdim〉, which is a TEX control sequence (with<br />
backslash). It can be used almost like an ordinary TEX dimension. One exception is that the TEX<br />
commands \advance, \multiply and \divide cannot be applied directly to font dimensions (nor<br />
LATEX’s \addtolength); however, the font dimension can be copied to a temporary TEX dimension<br />
register, which can then be manipulated and copied back (using \setlength in LATEX, if desired).<br />
Another exception is that all changes to a font dimension are global in scope. Also beware that<br />
\newfdim uses font dimensions from a single font, the dummy font, which most TEX systems ought<br />
to have. (You’ll know if yours doesn’t, because MFPIC will fail upon loading!) Also, implementations<br />
of TEX differ in the number of font dimensions allowed per font. MFPIC currently uses font<br />
dimensions 23 through 52, which should be OK.<br />
Almost all of MFPIC’s basic dimension parameters are font dimensions. We arrange for them to<br />
be local to <strong>mfpic</strong> environments by saving their values at the start and restoring them at the end.<br />
\set<strong>mfpic</strong>graphic{〈filename〉}<br />
This is the command that is invoked to place the graphic created. See appendix 5.6.3 for a<br />
discussion of its use and its default definition. It is a user-level macro so that it can be redefined in<br />
unusual cases. It operates on the output of the following macro:<br />
\setfilename{〈file〉}{〈num〉}<br />
MFPIC’s figure inclusion code ultimately executes \set<strong>mfpic</strong>graphic on the result of applying<br />
\setfilename to two arguments: the file name specified in the \opengraphsfile command and<br />
the number of the current picture. Normally \setfilename just puts them together with the ‘.’<br />
21 This is only one kind of an infinite variety of possible random walks. See http://en.wikipedia.org/wiki/Random_<br />
walk for a discussion. MFPIC implementation of other kinds is left to the interested user (for example, using \turtle with<br />
random displacements).
4.12 FOR ADVANCED USERS. 77<br />
separator (because that is usually the way METAPOST names its output), but this can be redefined<br />
if the METAPOST output undergoes further processing or conversion to another format in which the<br />
name is changed. Any redefinition of \setfilename must come before \opengraphsfile because<br />
that command tests for the existence of the first figure. After any redefinition, \setfilename must<br />
be a macro with two arguments that creates the actual filename from the above two parts. It should<br />
also be completely expandable. See the appendices, subsection 5.6.3 for further dicussion.<br />
\setfilenametemplate{〈template〉}<br />
With the metapost option, when you write \opengraphsfile{figs}, a file figs.mp is created.<br />
By default, running METAPOST on it results in files named figs.1, figs.2, etc. Recent META-<br />
POST allows the output filenames to be modified. As of MFPIC version 1.00, you can do this to some<br />
extent from your .tex file. One needs to define a template that tells METAPOST how to construct the<br />
output file name from the ‘jobname’ and the figure number. This is done with the above command.<br />
In 〈template〉 you can put any plain characters, plus the two special tokens: \_ and \#. Each figure’s<br />
filename is constructed by replacing these tokens with the METAPOST jobname and the figure<br />
number, respectively. For example, with the jobname figs,<br />
\setfilenametemplate{my\_-\#.mps}<br />
will cause the figure files to have names myfigs-1.mps, myfigs-2.mps, etc., instead of the defaults.<br />
MFPIC adjusts the definition of \setfilename accordingly, so that the correct filenames are<br />
used.<br />
Do not use this command unless you know your version of METAPOST is recent enough to have<br />
this capability. Under the metafont option, this command is simply ignored, but MFPIC has no way<br />
of checking the METAPOST version on its own.<br />
If you are using LATEX, the \includegraphics command requires that the included figure file<br />
be recognized as METAPOST output. In practice, this usually means its extension must be .mps. As<br />
an exception, it may also be the current figure number (the default if \setfilenametemplate is<br />
not used), because MFPIC has always arranged for that to be recognized. The user may also issue a<br />
\DeclareGraphicsRule command to get other extensions recognized. See the <strong>doc</strong>umentation of<br />
the GRAPHICS package.<br />
\prepare<strong>mfpic</strong>graphic{〈filename〉}<br />
This command is automatically invoked before \set<strong>mfpic</strong>graphic to make any preparations<br />
needed. The default definition is to do nothing except when the GRAPHICS package is used. That<br />
package provides no clean way to determine the bounding box of the graphic after it is included.<br />
Since MFPIC needs this information, this command redefines an internal command of the GRAPHICS<br />
package to make the data available. If \set<strong>mfpic</strong>graphic is redefined then this may also have to<br />
be redefined.<br />
\get<strong>mfpic</strong>offset{〈filename〉}<br />
This command is automatically invoked after \set<strong>mfpic</strong>graphic to store the offset of the lower<br />
left corner of the figure in the macros \<strong>mfpic</strong>llx and \<strong>mfpic</strong>lly. If \set<strong>mfpic</strong>graphic is redefined<br />
then this may also have to be redefined.<br />
\ifmfpmpost<br />
Users wishing to write code that adjusts its behavior to the graph file processor can use this<br />
to test which option is in effect. The macro \usemetapost sets it true and \usemetafont sets it<br />
false. There are no commands \mfpmposttrue nor \mfpmpostfalse, since the user should not be
4.12 FOR ADVANCED USERS. 78<br />
changing the setting once it is set: a great deal of MFPIC internal code depends on them, and on<br />
keeping them consistent with the \opengraphsfile commands reading of these booleans.<br />
\<strong>mfpic</strong>version<br />
This expands to the current MFPIC version multiplied by 100. At this writing, it produces ‘110’<br />
because the version is 1.10. It can be used to test the version:<br />
\ifx\<strong>mfpic</strong>version\undefined \def\<strong>mfpic</strong>version{0}\fi<br />
\ifnum\<strong>mfpic</strong>version
5 Appendices<br />
5.1 Acknowledgements.<br />
Tom would like to thank all of the people at Dartmouth as well as out in the network world for<br />
testing MFPIC and sending him back comments. He would particularly like to thank:<br />
Geoffrey Tobin for his many suggestions, especially about cleaning up the METAFONT code,<br />
enforcing dimensions, fixing the dotted line computations, and speeding up the shading routines<br />
(through this process, Geoffrey and Tom managed to teach each other many of the subtleties of<br />
METAFONT), and for keeping track of MFPIC for nearly a year while Tom finished his thesis;<br />
Bryan Green for his many suggestions, some of which (including his rewriting the \tcaption<br />
macro) ultimately led to the current version’s ability to put graphs in-line or side-by-side; and<br />
Uwe Bonnes and Jaromír Kuben, who worked out rewrites of MFPIC during Tom’s working<br />
hiatus and who each contributed several valuable ideas.<br />
Some credit also belongs to Anthony Stark, whose work on a FIG to METAFONT converter has<br />
had a serious impact on the development of many of MFPIC’s capabilities.<br />
Finally, Tom would like to thank Alan Vlach, the other TEXnician at Berry College, for helping<br />
him decide on the format of many of the macros, and for helping with testing.<br />
Dan Luecking would like to echo Tom’s thanks to all of the above, especially Geoffrey Tobin<br />
and Jaromír Kuben. And to add the names Taco Hoekwater, for comments, advice and suggestions,<br />
Werner Lemberg, for the \assignmfvalue command, and Zaimi Sami Alex for suggestions.<br />
But mostly, he’d like to thank Tom Leathrum for starting it all.<br />
5.2 Changes History.<br />
See the file changes.txt for a somewhat sporadic history of changes to MFPIC. See the file README<br />
for changes added since the previous version, and for any known problems.<br />
5.3 Summary of Options.<br />
Unless otherwise stated, any of the command forms will be local to the current <strong>mfpic</strong> environment<br />
if used inside. Otherwise it will affect all later environments.<br />
OPTION: COMMAND FORM(S): RESTRICTIONS:<br />
metapost \usemetapost Command must come before \opengraphsfile.<br />
Incompatible with metafont option.<br />
metafont \usemetafont The default. Command must come before<br />
\opengraphsfile. Incompatible with metapost<br />
option.<br />
mplabels<br />
overlaylabels<br />
truebbox<br />
clip<br />
\usemplabels,<br />
\nomplabels<br />
\overlaylabels,<br />
\nooverlaylabels<br />
\usetruebbox,<br />
\notruebbox<br />
\clip<strong>mfpic</strong>,<br />
\noclip<strong>mfpic</strong><br />
Requires metapost. If command is used inside an<br />
<strong>mfpic</strong> environment, it should come before<br />
\tlabel commands to be affected.<br />
Has no effect without metapost.<br />
Has no effect without metapost.<br />
No restrictions.<br />
79
5 APPENDICES 80<br />
clearsymbols<br />
centeredcaptions<br />
raggedcaptions<br />
debug<br />
draft<br />
final<br />
nowrite<br />
\clearsymbols,<br />
\noclearsymbols<br />
\usecenteredcaptions,<br />
\nocenteredcaptions<br />
\useraggedcaptions,<br />
\noraggedcaptions<br />
\<strong>mfpic</strong>debugtrue,<br />
\<strong>mfpic</strong>debugfalse<br />
\<strong>mfpic</strong>draft<br />
\<strong>mfpic</strong>final<br />
\<strong>mfpic</strong>nowrite<br />
No restrictions.<br />
If command is used inside an <strong>mfpic</strong><br />
environment, it should come before the<br />
\tcaption command.<br />
To turn on debugging while <strong>mfpic</strong>.tex is<br />
loading, issue \def\<strong>mfpic</strong>debug{true}.<br />
Should not be used together. Command forms<br />
should come before \opengraphsfile<br />
mfpreadlog \mfpreadlog Needed for \assignmfvalue. Must occur before<br />
\opengraphsfile.<br />
5.4 Plotting Styles for \plotdata.<br />
When \plotdata passes from one curve to the next, it increments a counter and uses that counter to<br />
select a dash pattern, color, or symbol. It uses predefined dash patterns named dashtype0 through<br />
dashtype5, or predefined colors named colortype0 through colortype7, or predefined symbols<br />
named pointtype0 through pointtype8. Here follows a description of each of these variables.<br />
These variables must not be used in the second argument of \reconfigureplot, whose purpose is<br />
to redefine these variables.<br />
Under \dashedlines, we have the following dash patterns:<br />
NAME PATTERN MEANING<br />
dashtype0 0bp solid line<br />
dashtype1 3bp,4bp dashes<br />
dashtype2 0bp,4bp dots<br />
dashtype3 0bp,4bp,3bp,4bp dot-dash<br />
dashtype4 0bp,4bp,3bp,4bp,0bp,4bp dot-dash-dot<br />
dashtype5 0bp,4bp,3bp,4bp,3bp,4bp dot-dash-dash<br />
Under \coloredlines, we have the following colors. Except for black and red, each color is<br />
altered as indicated. This is an attempt to make the colors more equal in visibility against a white<br />
background. (The success of this attempt varies greatly with the output or display device.) Four of<br />
the eight colors use the cmyk model when the METAPOST version is at least 1.000.<br />
NAME COLOR (R,G,B) (C,M,Y,K)<br />
colortype0 black (0,0,0) (0,0,0,1)<br />
colortype1 red (1,0,0)<br />
colortype2 blue (.2,.2,1)<br />
colortype3 orange (.66,.34,0)<br />
colortype4 green (0,.8,0)<br />
colortype5 magenta (.85,0,.85) (0,.85,0,.15)<br />
colortype6 cyan (0,.85,.85) (.85,0,0,.15)<br />
colortype7 yellow (.85,.85,0) (0,0,.85,.15)<br />
Under \pointedlines and \datapointsonly, the following symbols are used. Internally each<br />
is referred to by the numeric name, but they are identical to the more descriptive name. Syntactically,<br />
all are METAFONT path variables. (The order changed between versions 0.6 and 0.7.)
5 APPENDICES 81<br />
NAME<br />
pointtype0<br />
pointtype1<br />
pointtype2<br />
pointtype3<br />
pointtype4<br />
pointtype5<br />
pointtype6<br />
pointtype7<br />
pointtype8<br />
DESCRIPTION<br />
Circle<br />
Cross<br />
SolidDiamond<br />
Square<br />
Plus<br />
Triangle<br />
SolidCircle<br />
Star<br />
SolidTriangle<br />
5.5 Special Considerations When Using METAFONT.<br />
The most important restriction in METAFONT is on the size of a picture. Coordinates in METAFONT<br />
ultimately refer to pixel units in the font that is output. These are required to be less than 4096, so an<br />
absolute limit on the size of a picture is whatever length a row of 4095 pixels is. In fonts prepared<br />
for a LaserJet4 (600 DPI), this means 6.825 inches (17.3355cm). For a 1200 DPI pronter, the limit<br />
is 3.4125 inches.<br />
A similar limit holds for numbers input, and the values of variables: METAFONT will return an<br />
error for ‘sin 4096’. Intermediate values can be greater (sin (2*2048) will cause no error), but<br />
final, stored results are subject to the limit. An MFPIC example that generated an error recently was:<br />
\<strong>mfpic</strong>unit 1mm<br />
\<strong>mfpic</strong>[10]{-3}{7}{-3.5}{5}<br />
\function{-4.5,4,.1}{x*x}<br />
\end<strong>mfpic</strong><br />
The problem was the value of 4.5 ∗ 4.5 = 20.25: after multiplying by the \<strong>mfpic</strong> scaling factor, the<br />
\<strong>mfpic</strong>unit in inches, and the DPI value, this produces 20.25 × 10 × 0.03937 × 600 > 4783 pixel<br />
units. The error did not occur at the point of creating the font, but merely at the point of storing the<br />
path in an internal variable for manipulation and drawing. Thus, the fact that this particular picture<br />
was clipped to a much smaller size for printing did not help.<br />
In METAPOST, the limit on numeric values is only 8 times as high: 32768. However, that is<br />
independent of printer resolution and is interpreted as POSTSCRIPT points (TEX’s ‘big points’). At<br />
72 points to the inch, this allows figures to be about 12.64 yards (11.56m).<br />
5.6 Special Considerations When Using METAPOST.<br />
5.6.1 REQUIRED SUPPORT<br />
To use MFPIC with METAPOST, the following support is needed (besides a working METAPOST<br />
installation):<br />
TEX format<br />
plain TEX<br />
LATEX209<br />
LATEX<br />
<strong>pdf</strong>LATEX<br />
plain <strong>pdf</strong>TEX<br />
In all cases<br />
support needed<br />
The file epsf.tex or epsf.sty<br />
(No longer supported, but plain TEX methods might work)<br />
The package GRAPHICS or GRAPHICX<br />
The package GRAPHICS or GRAPHICX with option <strong>pdf</strong>tex<br />
The files supp-<strong>pdf</strong>.mkii or supp-<strong>pdf</strong>.tex and (possibly)<br />
supp-mis.tex<br />
The files grafbase.mp, dvipsnam.mp and <strong>mfpic</strong>def.tex plus, of course,<br />
<strong>mfpic</strong>.tex (and <strong>mfpic</strong>.sty for LATEX)
5 APPENDICES 82<br />
The files grafbase.mp and dvipsnam.mp should be in a directory searched by METAPOST. If<br />
METAPOST cannot find the file grafbase.mp, then by default it will try to input grafbase.mf,<br />
which is generally fatal (and always futile).<br />
The remaining files should be in directories searched by the appropriate TEX variant. The file<br />
<strong>mfpic</strong>def.tex is input by TEX when METAPOST is processing labels in .mp files created by MF-<br />
PIC. The user is free to add commands of his own to that file, but be warned that updates to MF-<br />
PIC will overwrite it. Better to create ones own file (say mydefs.tex) and arrange its input via<br />
\mfpverbtex{\input mydefs.tex}<br />
In case <strong>pdf</strong>LATEX is used, the GRAPHICS package is given the <strong>pdf</strong>tex option. This option requires<br />
the file <strong>pdf</strong>tex.def which currently inputs one of the supp-<strong>pdf</strong> files. Early versions of<br />
supp-<strong>pdf</strong>.tex will input supp-mis.tex. These three files should be supplied with most TEX installations.<br />
22 Older versions had some bugs in connection with the BABEL package. One workaround<br />
was to load the GRAPHICS package and MFPIC before BABEL.<br />
If the user loads one of the above required files or packages before the MFPIC macros are loaded<br />
then MFPIC will not reload them. MFPIC will load whichever one it decides is required. In the<br />
LATEX 2ε case, MFPIC will load the GRAPHICS package. If the user wishes GRAPHICX, then that<br />
package must be loaded before MFPIC.<br />
5.6.2 METAPOST IS NOT METAFONT<br />
POSTSCRIPT is not a pixel oriented language and so neither is METAPOST. The model for drawing<br />
objects is completely different between METAFONT and METAPOST, and so one cannot always<br />
expect the same results. METAPOST support in MFPIC was carefully written so that files successfully<br />
printed with MFPIC using METAFONT would be just as successfully printed using METAPOST.<br />
Nevertheless, it frequently chokes on files that make use of the \mfsrc command for writing code<br />
directly to the .mf file. While grafbase.mp is closely based on grafbase.mf, some of the code<br />
had to be completely rewritten.<br />
Pictures in METAPOST are stored as (possibly nested) sequences of objects, where objects are<br />
things like points, paths, contours, sub-pictures, etc. In METAFONT, pictures are stored as a grid of<br />
pixels. Pictures that are relatively simple in one program might be very complex in the other and<br />
even exceed memory allocated for their storage. Two examples are the \polkadot and \hatch<br />
commands. When the polkadot space and size are both too small, a \polkadot-ed region has been<br />
known to exceed METAPOST capacity, while being well within METAFONT capacity. In METAPOST<br />
the memory consumed by \hatch goes up in direct proportion to the linear dimensions of the figure<br />
being hatched, while in METAFONT it goes up in proportion to the area (except in horizontal<br />
hatching), and then the reverse can happen, with METAFONT’s capacity exeeded far sooner that<br />
METAPOST’s.<br />
In METAPOST it is important to note that each prefix modifies the result of the entire following<br />
sequence. In essence prefixes can be viewed as being applied in the opposite order to their occurrence.<br />
Example:<br />
\dashed\gfill\rect{(0,0),(1,1)}<br />
This adds the dashed outline to the filled rectangle. That is, first the rectangle is defined, then it is<br />
filled, then the outline is drawn in dashed lines. This makes a difference when colors other than black<br />
are used. Drawing is done with the center of the virtual pen stroked along the boundary curve(s), so<br />
half of its width falls inside the rectangle. On the other hand, filling is done right up to the boundary.<br />
In this example, the dashed lines are drawn on top of part of the fill. In the reverse order, the fill<br />
would cover part of the dashed outline.<br />
22 They are part of the ConTEXt distribuition. At this writing, these files, plus a few others, can also be found at<br />
CTAN/graphics/metapost/contrib/tools/mpto<strong>pdf</strong>/tex/context/base/.
5 APPENDICES 83<br />
5.6.3 GRAPHIC INCLUSION<br />
It may be impossible to completely cater to all possible methods of graphic inclusions with automatic<br />
tests. The macro that is invoked to include the POSTSCRIPT graphic is \set<strong>mfpic</strong>graphic and the<br />
user may (carefully!) redefine this to suit special circumstances. Actually, MFPIC runs the following<br />
sequence:<br />
\prepare<strong>mfpic</strong>graphic{〈filename〉}<br />
\set<strong>mfpic</strong>graphic{〈filename〉}<br />
\get<strong>mfpic</strong>offset{〈filename〉}<br />
The following are the default definitions for \set<strong>mfpic</strong>graphic:<br />
plain TEX<br />
LATEX209<br />
LATEX<br />
<strong>pdf</strong>LATEX<br />
<strong>pdf</strong>TEX<br />
\def\set<strong>mfpic</strong>graphic#1{\epsfbox{#1}}<br />
(No longer supported, but likely the plain TEX definition will be selected.)<br />
\def\set<strong>mfpic</strong>graphic#1{\includegraphics{#1}}<br />
\def\set<strong>mfpic</strong>graphic#1{\includegraphics{#1}}<br />
\def\set<strong>mfpic</strong>graphic#1{\convertMPtoPDF{#1}{1}{1}}<br />
Moreover, since METAPOST by default writes files with numeric extensions, we add code to each<br />
figure, so that these graphics are correctly recognized as EPS or MPS. For example, to the figure<br />
with extension .1, we add the equivalent of one of the following<br />
\DeclareGraphicsRule{.1}{eps}{.1}{} in LATEX 2ε .<br />
\DeclareGraphicsRule{.1}{mps}{.1}{} in <strong>pdf</strong>LATEX.<br />
After running the command \set<strong>mfpic</strong>graphic, MFPIC runs \get<strong>mfpic</strong>offset to store the<br />
lower left corner of the bounding box of the figure in two macros \<strong>mfpic</strong>llx and \<strong>mfpic</strong>lly.<br />
All the above versions of \set<strong>mfpic</strong>graphic (except \includegraphics) make this information<br />
available; the definition of \get<strong>mfpic</strong>offset merely copies it into these two macros. What<br />
MFPIC does in the case of \includegraphics is to modify (locally) the definition of an internal<br />
command of the GRAPHICS package so that it copies the information to those macros, and<br />
then \get<strong>mfpic</strong>offset does nothing. This internal modification is accomplished by the macro<br />
\prepare<strong>mfpic</strong>graphic. Changes to \set<strong>mfpic</strong>graphic might require changing either or both<br />
of \prepare<strong>mfpic</strong>graphic and \get<strong>mfpic</strong>offset. All three of these commands are fed the<br />
graphic’s file name as the only argument, although only \set<strong>mfpic</strong>graphic currently does anything<br />
with it.<br />
One possible reason for wanting to redefine \set<strong>mfpic</strong>graphic might be to rescale all pictures.<br />
This is definitely not a good idea. A good deal of MFPIC’s figure placemant code assumes that the<br />
size of the figure is consistent with the coordinate system set up by the \<strong>mfpic</strong> command. With<br />
mplabels plus truebbox it might work, but (i) it has not been considered in writing the MFPIC code,<br />
(ii) it will then scale all the text as well as the figure, and (iii) it will scale all line thickness, which<br />
should normally be a design choice independent of the size of a picture. To rescale all pictures, one<br />
need only change \<strong>mfpic</strong>unit and rerun TEX and METAPOST.<br />
A better reason might be to allow the conversion of your METAPOST figures to some other format.<br />
Then redefining \set<strong>mfpic</strong>graphic could enable including the appropriate file in the appropriate<br />
format.<br />
The filename argument mentioned above is actually the result obtained by running the macro<br />
\setfilename. The command \setfilename gets two arguments: the name of the METAPOST<br />
output file (set in the \opengraphsfile command) without extension, and the number of the picture.<br />
The default definition of \setfilename merely inserts a dot between the two arguments. 23<br />
23 Unless modified by \setfilenametemplate, of course. See subsection 4.12.8.
5 APPENDICES 84<br />
That is \setfilename{fig}{1} produces fig.1. You can redefine this behavior also. Any changes<br />
to \setfilename must come after the MFPIC macros are input and before the \opengraphsfile<br />
command. Any changes to \set<strong>mfpic</strong>graphic must come after the MFPIC macros are input and<br />
before any \<strong>mfpic</strong> commands, but it is best to place it before the \opengraphsfile command.<br />
As MFPIC is currently written, \setfilename must be completely expandable, which means it<br />
should contain no definitions, no assignments such as \setcounter, and no calculations. 24 To test<br />
whether a proposed definition is completely expandable, put<br />
\message{***\setfilename{file}{1}***}<br />
after the definition in a .tex file and view the result on the terminal or in the .log file. You should<br />
see only your expected filename between the asterisks.<br />
5.7 MFPIC and the Rest of the World.<br />
5.7.1 THE LITERATURE<br />
This author has personal knowledge of one mathematical article which definitely uses MFPIC to<br />
create diagrams, and that is this author’s joint paper with J. Duncan and C. M. McGregor: On the<br />
value of pi for norms in R 2 in the College Mathematics Journal, vol. 35, pages 84–92. Oddly enough,<br />
it was McGregor and not I who chose to use MFPIC for the illustrations.<br />
There also exists a book that makes use of MFPIC: Introduction to functional equations: theory<br />
and problem solving strategies for mathematical competitions and beyond by Costas Efthimiou,<br />
MSRI/Mathematical Circles Library, vol. 6, 2011.<br />
There are at least two major publications where MFPIC has garnered more than a cursory mention.<br />
The most up-to-date is a section in The LATEX Graphics Companion by Michel Goossens, Sebastian<br />
Rahtz and Frank Mittelbach. It describes a version prior to the introduction of METAPOST<br />
support, but it correctly describes a subset of its current commands and abilities. The LATEX Companion<br />
(Second Edition) mentions MFPIC, but only in its annotation of the bibliography entry for TEX<br />
Unbound (see below).<br />
The other is TEX Unbound by Alan Hoenig, which contains a chapter on MFPIC. Unfortunately,<br />
it describes a version that was replaced in 1996 with version 0.2.10.9. The following summarizes<br />
the differences between the description 25 found in Chapter 15 and MFPIC versions 0.2.10.9 through<br />
the current one:<br />
\wedge is now renamed \sector to avoid conflict with the TEX command of the same name.<br />
The syntax is slightly different from that given for \wedge:<br />
\sector{(〈x〉,〈y〉), 〈radius〉, 〈angle1〉, 〈angle2〉}<br />
The macro \plr{(〈r 0 〉,〈θ 0 〉),(〈r 1 〉,〈θ 1 〉),...} is now used to convert polar coordinate pairs to<br />
rectangular coordinates and the commands \plrcurve, \plrcyclic, \plrlines and \plrpoint<br />
were dropped from MFPIC. Now use<br />
instead of<br />
\curve{\plr{(〈r 0 〉,〈θ 0 〉),(〈r 1 〉,〈θ 1 〉),...}}<br />
\plrcurve{(〈r 0 〉,〈θ 0 〉),(〈r 1 〉,〈θ 1 〉),...}<br />
and similarly for \plrcyclic, \plrlines and \plrpoint.<br />
\fill is now renamed \gfill to avoid conflict with the LATEX command of the same name.<br />
24 But appropriate use of \numexpr (in eTEX) for calculations is probably OK.<br />
25 While I’m at it: TEX Unbound occasionally refers to MFPIC using a logo-like formatting in which the ‘MF’ is in a special<br />
font and the ‘I’ is lowered. This ‘logo’ may suggest a relationship between MFPIC and PICTEX. There is no such relationship,<br />
and there is no official logo-like designation for MFPIC.
5 APPENDICES 85<br />
\rotate, which rotates a following figure about a point, is now renamed \rotatepath to avoid<br />
confusion with a similar name for a transformation (see below).<br />
\white is now renamed \gclear because \white is too likely to be chosen for, or confused<br />
with, a color command.<br />
The following affine transform commands were changed from a third person indicative form<br />
(which could be confused with a plural noun) to an imperative form:<br />
Old name:<br />
\boosts<br />
\reflectsabout<br />
\rotatesaround<br />
\rotates<br />
\scales<br />
\shifts<br />
\xscales<br />
\xslants<br />
\xyswaps<br />
\yscales<br />
\yslants<br />
\zscales<br />
\zslants<br />
New name:<br />
\boost<br />
\reflectabout<br />
\rotatearound<br />
\rotate<br />
\scale<br />
\shift<br />
\xscale<br />
\xslant<br />
\xyswap<br />
\yscale<br />
\yslant<br />
\zscale<br />
\zslant<br />
\caption and \label are now renamed \tcaption and \tlabel to avoid conflict with the<br />
LATEX commands.<br />
\mfcmd was renamed \mfsrc for clarity, and (in version 0.7) a new \mfcmd was defined, which<br />
is pretty much the same except it appends a semicolon to its argument.<br />
There is a misprint: \axisheadlin should be \axisheadlen.<br />
Finally, the LATEX template on page 496 is no longer the only possiblity: recent MFPIC may be<br />
loaded with \usepackage.<br />
5.7.2 OTHER PROGRAMS<br />
There exists a program, FIG2MFPIC that produces MFPIC code as output. The code produced (as of<br />
this writing) is somewhat old and mostly incompatible with the description in this manual. Fortunately,<br />
it is accompanied by the appropriate versions of files <strong>mfpic</strong>.tex and grafbase.mf. Unfortunately,<br />
the names conflict with the current filenames and so they should only be used in circumstances<br />
where no substitution will occur, say in a local directory together with the other sources for<br />
the <strong>doc</strong>ument being produced. Moreover, the <strong>doc</strong>umentation in this manual may not apply to the<br />
code produced. However the information in TEX Unbound may apply.<br />
There exist a package, CIRCUIT_MACROS, that can produce a variety of output formats, one of<br />
which is MFPIC code. One writes a file (don’t ask me what it consists of) and apparently processes<br />
it with M4 and then (perhaps) DPIC to produce the output. The MFPIC code produced appears to be<br />
compatible with the current MFPIC.
5 APPENDICES 86<br />
5.8 Index of commands, options and parameters.<br />
a<br />
\applyT, 56<br />
\arc, 21<br />
\arccomplement, 32<br />
\areagradient, 40<br />
\arrow, 33<br />
Arrowhead, 14, 34<br />
\arrowhead, 34<br />
\arrowmid, 34<br />
\arrowtail, 34<br />
\assignmfvalue, 74<br />
\assignmpvalue, 74<br />
Asterisk, 14<br />
\axes, 16<br />
\axis, 16<br />
\axisheadlen, 61<br />
\axislabels, 51<br />
\axisline, 16<br />
\axismargin, 17<br />
\axismarks, 17<br />
b<br />
\backgroundcolor, 28<br />
\barchart, 24<br />
\bargraph, 24<br />
\bclosed, 30<br />
\begin{<strong>mfpic</strong>}, 13<br />
\belowfcn, 44<br />
\bmarks, 17<br />
\boost, 56<br />
\border, 16<br />
\browniangraph, 75<br />
\brownianmotion, 75<br />
\btwnfcn, 43<br />
\btwnplrfcn, 43<br />
c<br />
\cbclosed, 64<br />
\cbeziers, 64<br />
centeredcaptions, 6<br />
\chartbar, 25<br />
Circle, 14<br />
\circle, 20<br />
\clearsymbols, 7, 14<br />
clearsymbols, 7<br />
clip, 6<br />
\clip<strong>mfpic</strong>, 6<br />
\closedcbeziers, 64<br />
\closedcomputedspline, 63<br />
\closedconvexcurve, 24<br />
\closedcspline, 63<br />
\closedcurve, 23<br />
\closedmfbezier, 64<br />
\closedpolyline, 15<br />
\closedqbeziers, 64<br />
\closedqspline, 63<br />
\closegraphsfile, 11<br />
cmyk(c,m,y,k), 27<br />
\cmykcolorarray, 67<br />
\coil, 37<br />
\colorarray, 67<br />
\coloredlines, 48<br />
\computedspline, 63<br />
\connect, 31<br />
\convexcurve, 24<br />
\convexcyclic, 24<br />
\coords, 55<br />
\corkscrew, 37<br />
Cross, 14<br />
Crossbar, 14, 34<br />
\cspline, 63<br />
\curve, 23<br />
\cutoffafter, 75<br />
\cutoffbefore, 75<br />
\cyclic, 23<br />
d<br />
\darkershade, 61<br />
\dashed, 35<br />
\dashedlines, 48<br />
\dashlen, 61<br />
\dashlineset, 61<br />
\dashpattern, 36<br />
\datafile, 16, 46<br />
\datapointsonly, 48<br />
debug, 7<br />
\defaultplot, 49<br />
\DEgraph, 45<br />
\DEtrajectory, 45<br />
Diamond, 14<br />
\doaxes, 16<br />
\dotlineset, 61
5 APPENDICES 87<br />
\dotsize, 62<br />
\dotspace, 62<br />
\dotted, 36<br />
\doubledraw, 35<br />
draft, 7<br />
\draw, 35<br />
\drawcolor, 28<br />
\drawpen, 60<br />
e<br />
\ellipse, 22<br />
\endconnect, 31<br />
\endcoords, 55<br />
\endmfpfor, 71<br />
\endmfpframe, 55<br />
\end<strong>mfpic</strong>, 12<br />
\endmfpimage, 70<br />
\endmfploop, 72<br />
\endmfpwhile, 72<br />
\endpatharr, 67<br />
\endtile, 69<br />
\everyend<strong>mfpic</strong>, 13<br />
\every<strong>mfpic</strong>, 13<br />
\everytlabel, 50<br />
f<br />
\fcncurve, 24<br />
\fcnspline, 63<br />
\fdef, 41<br />
figure macro, 30<br />
\fillcolor, 28<br />
fillcolor, 38, 39<br />
final, 7<br />
\fullellipse, 22<br />
\function, 43<br />
g<br />
\gantt, 24<br />
\ganttbar, 25<br />
\gclear, 38<br />
\gclip, 38<br />
\gendashed, 36<br />
\get<strong>mfpic</strong>offset, 77, 83<br />
\gfill, 38<br />
\globalassignmfvalue, 74<br />
\globalassignmpvalue, 74<br />
\globalsetarray, 67<br />
\globalsetmfvariable, 65<br />
\globalsetmpvariable, 65<br />
\gradient, 39<br />
\graphbar, 25<br />
gray(g), 27<br />
\gbrace, 26<br />
\grid, 18<br />
\gridarcs, 19<br />
\griddotsize, 62<br />
\gridlines, 18<br />
\gridpoints, 18<br />
\gridrays, 19<br />
h<br />
\halfellipse, 22<br />
\hashlen, 61<br />
\hatch, 39<br />
\hatchcolor, 28<br />
\hatchspace, 62<br />
\hatchwd, 60<br />
\headcolor, 28<br />
\headlen, 60<br />
\headshape, 61<br />
\hgridlines, 18<br />
\histobar, 25<br />
\histogram, 24<br />
\hypergeodesic, 23<br />
i<br />
\ifmfpmpost, 77<br />
\interpolatepath, 33<br />
l<br />
\lattice, 18<br />
\lclosed, 30<br />
Leftbar, 14, 34<br />
Leftharpoon, 14, 34<br />
Lefthook, 14, 34<br />
\levelcurve, 44<br />
\lhatch, 39<br />
\lightershade, 61<br />
\lines, 15<br />
\lmarks, 17<br />
m<br />
makecmyk, 27<br />
makegray, 27<br />
\makepercentcomment, 47<br />
\makepercentother, 47
5 APPENDICES 88<br />
makergb, 27<br />
\makesector, 31<br />
metafont, 5<br />
metapost, 5<br />
\mfbezier, 64<br />
\mfcmd, 65<br />
\mflist, 65<br />
\mfobj, 57<br />
\mfpdatacomment, 47<br />
\mfpdataperline, 62<br />
\mfpdefinecolor, 29<br />
\mfpfor, 71<br />
\mfpframe, 55<br />
\mfpframed, 55<br />
\<strong>mfpic</strong>, 12<br />
\<strong>mfpic</strong>captionskip, 53, 63<br />
\<strong>mfpic</strong>debugfalse, 7<br />
\<strong>mfpic</strong>debugtrue, 7<br />
\<strong>mfpic</strong>draft, 7, 8<br />
\<strong>mfpic</strong>final, 7, 8<br />
\<strong>mfpic</strong>height, 62<br />
\<strong>mfpic</strong>nowrite, 7, 8<br />
\<strong>mfpic</strong>number, 12<br />
\<strong>mfpic</strong>unit, 60<br />
\<strong>mfpic</strong>version, 78<br />
\<strong>mfpic</strong>width, 62<br />
\mfpimage, 70<br />
\mfplinestyle, 48<br />
\mfplinetype, 48<br />
\mfploop, 72<br />
\mfpreadlog, 8<br />
mfpreadlog, 8<br />
\mfpuntil, 72<br />
\mfpverbtex, 52<br />
\mfpwhile, 72<br />
\mfsrc, 65<br />
\mftitle, 76<br />
\mirror, 56<br />
mplabels, 5<br />
\mpobj, 57<br />
n<br />
named(〈name〉), 27<br />
\newfdim, 76<br />
\newsavepic, 54<br />
\nocenteredcaptions, 6<br />
\noclearsymbols, 7, 14<br />
\noclip<strong>mfpic</strong>, 6<br />
\nomplabels, 5<br />
\nooverlaylabels, 6<br />
\noraggedcaptions, 7<br />
\norender, 35<br />
\noship, 73<br />
\notruebbox, 6<br />
nowrite, 7<br />
\numericarray, 67<br />
o<br />
\opengraphsfile, 11<br />
\overlaylabels, 6<br />
overlaylabels, 6<br />
p<br />
\pairarray, 67<br />
\parafcn, 43<br />
\parallelpath, 32<br />
\partpath, 32<br />
\patharr, 67<br />
\pen, 60<br />
\penwd, 60<br />
\periodicfcnspline, 63<br />
\piechart, 25<br />
\piewedge, 26<br />
\plot, 36<br />
\plotdata, 48<br />
\plotnodes, 36<br />
\plotsymbol, 14<br />
\plottext, 51<br />
\plr, 22<br />
\plrfcn, 43<br />
\plrgrid, 19<br />
\plrgridpoints, 19<br />
\plrpatch, 19<br />
\plrregion, 44<br />
\plrvectorfield, 19<br />
Plus, 14<br />
\point, 14<br />
\pointcolor, 28<br />
\pointdef, 14<br />
\pointedlines, 48<br />
\pointfillfalse, 60<br />
\pointfilltrue, 60<br />
\pointsize, 60<br />
\polkadot, 38<br />
\polkadotspace, 62<br />
\polkadotwd, 60
5 APPENDICES 89<br />
\polygon, 15<br />
\polyline, 15<br />
prefix macro, 13, 30<br />
\prepare<strong>mfpic</strong>graphic, 77, 83<br />
\pshcircle, 23<br />
\putmfpimage, 70<br />
q<br />
\qbclosed, 64<br />
\qbeziers, 64<br />
\qspline, 63<br />
\quarterellipse, 22<br />
r<br />
\radialgradient, 40<br />
raggedcaptions, 7<br />
\randomizepath, 75<br />
\randomlines, 75<br />
\randomwalk, 75<br />
\reconfigureplot, 49<br />
\rect, 15<br />
\reflectabout, 56<br />
\reflectpath, 58<br />
\regpolygon, 15<br />
\resumeshipping, 73<br />
\reverse, 31<br />
\reversepath, 31<br />
RGB(R,G,B), 27<br />
rgb(r,g,b), 27<br />
\rgbcolorarray, 67<br />
\rhatch, 39<br />
Rightbar, 14, 34<br />
Rightharpoon, 14, 34<br />
Righthook, 14, 34<br />
\rmarks, 17<br />
\rotate, 56<br />
\rotatearound, 56<br />
\rotatepath, 58<br />
s<br />
\savepic, 54<br />
\scale, 56<br />
\scalepath, 58<br />
\sclosed, 30<br />
\sector, 22<br />
\sequence, 47<br />
\setallaxismargins, 17<br />
\setallbordermarks, 18<br />
\setarray, 67<br />
\setaxismargins, 17<br />
\setaxismarks, 18<br />
\setbordermarks, 18<br />
\setfilename, 76, 83<br />
\setfilenametemplate, 77<br />
\setmfboolean, 65<br />
\setmfcolor, 65<br />
\setmfnumeric, 65<br />
\setmfpair, 65<br />
\set<strong>mfpic</strong>graphic, 76, 83<br />
\setmfvariable, 65<br />
\setmpvariable, 65<br />
\setrender, 41<br />
\settension, 23<br />
\setxmarks, 18<br />
\setymarks, 18<br />
\shade, 38<br />
\shadespace, 61<br />
\shadewd, 60<br />
\shift, 56<br />
\shiftpath, 58<br />
\sideheadlen, 61<br />
\sinewave, 37<br />
\slantpath, 58<br />
\smoothdata, 46<br />
SolidCircle, 14<br />
SolidDiamond, 14<br />
SolidSquare, 14<br />
SolidStar, 14<br />
SolidTriangle, 14<br />
Square, 14<br />
Star, 14<br />
\startbacktext, 52<br />
\stopbacktext, 52<br />
\stopshipping, 73<br />
\store, 56<br />
\subpath, 32<br />
\symbolspace, 62<br />
t<br />
\tcaption, 53<br />
\tess, 69<br />
\thatch, 39<br />
\tile, 69<br />
\tlabel, 49<br />
\tlabelcircle, 54<br />
\tlabelcolor, 28
5 APPENDICES 90<br />
\tlabelellipse, 54<br />
\tlabeljustify, 51<br />
\tlabeloffset, 51, 62<br />
\tlabeloval, 54<br />
\tlabelrect, 53<br />
\tlabels, 49<br />
\tlabelsep, 51, 62<br />
\tlpathjustify, 54<br />
\tlpathsep, 51, 62<br />
\tlpointsep, 51, 62<br />
\tmarks, 17<br />
\tmtitle, 76<br />
\transformpath, 58<br />
Triangle, 14<br />
\trimpath, 32<br />
truebbox, 6<br />
\turn, 56<br />
\turtle, 24<br />
\ymarks, 17<br />
\yscale, 56<br />
\yscalepath, 58<br />
\yslant, 56<br />
\yslantpath, 58<br />
z<br />
\zigzag, 37<br />
\zscale, 56<br />
\zslant, 56<br />
u<br />
\unsmoothdata, 46<br />
\usecenteredcaptions, 6<br />
\usemetafont, 5, 8<br />
\usemetapost, 5, 8<br />
\usemplabels, 5<br />
\usepic, 54<br />
\useraggedcaptions, 7<br />
\usetruebbox, 6<br />
\using, 47<br />
\usingnumericdefault, 47<br />
\usingpairdefault, 47<br />
v<br />
\vectorfield, 19<br />
\vgridlines, 18<br />
x<br />
\xaxis, 16<br />
\xhatch, 39<br />
\xmarks, 17<br />
\xscale, 56<br />
\xscalepath, 58<br />
\xslant, 56<br />
\xslantpath, 58<br />
\xyswap, 56<br />
\xyswappath, 58<br />
y<br />
\yaxis, 16
5 APPENDICES 91<br />
5.9 List of commands by type.<br />
5.9.1 FIGURES<br />
\arc, 21<br />
\axis, 16<br />
\axisline, 16<br />
\belowfcn, 44<br />
\border, 16<br />
\brownianmotion, 75<br />
\browniangraph, 75<br />
\btwnfcn, 43<br />
\btwnplrfcn, 43<br />
\cbeziers, \closedcbeziers, 64<br />
\chartbar, 25<br />
\circle, 20<br />
\computedspline,<br />
\closedcomputedspline, 63<br />
\convexcurve, \closedconvexcurve, 24<br />
\convexcyclic, 24<br />
\cspline, \closedcspline, 63<br />
\curve, \closedcurve, 23<br />
\cyclic, 23<br />
\datafile, 46<br />
\DEgraph, 45<br />
\DEtrajectory, 45<br />
\ellipse, 22<br />
\fcncurve, 24<br />
\fcnspline, 63<br />
\fullellipse, 22<br />
\function, 43<br />
\ganttbar, 25<br />
\gbrace, 26<br />
\graphbar, 25<br />
\halfellipse, 22<br />
\histobar, 25<br />
\hypergeodesic, 23<br />
\levelcurve, 44<br />
\lines, 15<br />
\mfbezier, \closedmfbezier, 64<br />
\mfobj, \mpobj, 57<br />
\parafcn, 43<br />
\periodicfcnspline, 63<br />
\piewedge, 26<br />
\plrfcn, 43<br />
\plrregion, 44<br />
\polygon, 15<br />
\polyline, 15<br />
\pshcircle, 23<br />
\qbeziers, \closedqbeziers, 64<br />
\quarterellipse, 22<br />
\qspline, \closedqspline, 63<br />
\randomwalk, 75<br />
\rect, 15<br />
\regpolygon, 15<br />
\sector, 22<br />
\tlabelcircle, 54<br />
\tlabelellipse, 54<br />
\tlabeloval, 54<br />
\tlabelrect, 53<br />
\turtle, 24<br />
5.9.2 RENDERINGS<br />
\areagradient, 40<br />
\corkscrew, 37<br />
\dashed, 35<br />
\dotted, 36<br />
\doubledraw, 35<br />
\draw, 35<br />
\gclear, 38<br />
\gclip, 38<br />
\gendashed, 36<br />
\gfill, 38<br />
\gradient, 39<br />
\hatch, 39<br />
\lhatch, 39<br />
\plot, 36<br />
\plotdata, 48<br />
\plotnodes, 36<br />
\polkadot, 38<br />
\radialgradient, 40<br />
\rhatch, 39<br />
\sinewave, 37<br />
\shade, 38<br />
\tess, 69<br />
\thatch, 39<br />
\xhatch, 39<br />
\zigzag, 37<br />
5.9.3 ARROWS<br />
\arrow, 33<br />
\arrowhead, 34<br />
\arrowmid, 34<br />
\arrowtail, 34
5 APPENDICES 92<br />
5.9.4 MODIFYING FIGURES<br />
\bclosed, 30<br />
\cbclosed, 64<br />
\connect, \endconnect, 31<br />
\cutoffafter, 75<br />
\cutoffbefore, 75<br />
\interpolatepath, 33<br />
\lclosed, 30<br />
\makesector, 31<br />
\parallelpath, 32<br />
\partpath, 32<br />
\qbclosed, 64<br />
\randomizepath, 75<br />
\randomlines, 75<br />
\reflectpath, 58<br />
\reverse, 31<br />
\reversepath, 31<br />
\rotatepath, 58<br />
\scalepath, 58<br />
\sclosed, 30<br />
\shiftpath, 58<br />
\slantpath, 58<br />
\subpath, 32<br />
\transformpath, 58<br />
\trimpath, 32<br />
\xscalepath, 58<br />
\xslantpath, 58<br />
\xyswappath, 58<br />
\yscalepath, 58<br />
\yslantpath, 58<br />
5.9.5 LENGTHS<br />
\axisheadlen, 61<br />
\dashlen, 61<br />
\dotsize, 62<br />
\dotspace, 62<br />
\griddotsize, 62<br />
\hashlen, 61<br />
\hatchspace, 62<br />
\headlen, 60<br />
\<strong>mfpic</strong>captionskip, 63<br />
\<strong>mfpic</strong>height, 62<br />
\<strong>mfpic</strong>unit, 60<br />
\<strong>mfpic</strong>width, 62<br />
\pointsize, 60<br />
\polkadotspace, 62<br />
\shadespace, 61<br />
\sideheadlen, 61<br />
\symbolspace, 62<br />
5.9.6 COORDINATE TRANSFORMATION<br />
\applyT, 56<br />
\boost, 56<br />
\coords, \endcoords, 55<br />
\mirror, 56<br />
\reflectabout, 56<br />
\rotate, 56<br />
\rotatearound, 56<br />
\scale, 56<br />
\shift, 56<br />
\turn, 56<br />
\xscale, 56<br />
\xslant, 56<br />
\xyswap, 56<br />
\yscale, 56<br />
\yslant, 56<br />
\zscale, 56<br />
\zslant, 56<br />
5.9.7 SYMBOLS, AXES, GRIDS, MARKS<br />
\axes, 16<br />
\axis, 16<br />
\axismarks, 17<br />
\bmarks, 17<br />
\doaxes, 16<br />
\grid, 18<br />
\gridarcs, 19<br />
\gridlines, 18<br />
\gridpoints, 18<br />
\gridrays, 19<br />
\hgridlines, 18<br />
\lattice, 18<br />
\lmarks, 17<br />
\plotsymbol, 14<br />
\plrgridpoints, 19<br />
\plrgrid, 19<br />
\plrpatch, 19<br />
\plrvectorfield, 19<br />
\point, 14<br />
\putmfpimage, 70<br />
\rmarks, 17<br />
\tmarks, 17<br />
\vectorfield, 19<br />
\vgridlines, 18<br />
\xaxis, 16<br />
\xmarks, 17
5 APPENDICES 93<br />
\yaxis, 16<br />
\ymarks, 17<br />
5.9.8 SYMBOL NAMES<br />
Arrowhead, 34<br />
Asterisk, 14<br />
Circle, 14<br />
Crossbar, 34<br />
Cross, 14<br />
Diamond, 14<br />
Leftbar, 34<br />
Leftharpoon, 34<br />
Lefthook, 34<br />
Plus, 14<br />
Rightbar, 34<br />
Rightharpoon, 34<br />
Righthook, 34<br />
SolidCircle, 14<br />
SolidDiamond, 14<br />
SolidSquare, 14<br />
SolidStar, 14<br />
SolidTriangle, 14<br />
Square, 14<br />
Star, 14<br />
Triangle, 14<br />
5.9.9 SETTING OPTIONS<br />
\clearsymbols, 14<br />
\clip<strong>mfpic</strong>, 6<br />
\<strong>mfpic</strong>debugfalse, 7<br />
\<strong>mfpic</strong>debugtrue, 7<br />
\<strong>mfpic</strong>draft, 7<br />
\<strong>mfpic</strong>final, 7<br />
\<strong>mfpic</strong>nowrite, 7<br />
\mfpreadlog, 8<br />
\nocenteredcaptions, 6<br />
\noclearsymbols, 14<br />
\noclip<strong>mfpic</strong>, 6<br />
\nomplabels, 5<br />
\nooverlaylabels, 6<br />
\noraggedcaptions, 7<br />
\notruebbox, 6<br />
\overlaylabels, 6<br />
\usecenteredcaptions, 6<br />
\usemetafont, 5<br />
\usemetapost, 5<br />
\usemplabels, 5<br />
\useraggedcaptions, 7<br />
\usetruebbox, 6<br />
5.9.10 SETTING VALUES<br />
\axismargin, 17<br />
\darkershade, 61<br />
\dashlineset, 61<br />
\dashpattern, 36<br />
\dotlineset, 61<br />
\drawpen, 60<br />
\globalsetmfvariable, 65<br />
\hatchwd, 60<br />
\headshape, 61<br />
\lightershade, 61<br />
\<strong>mfpic</strong>number, 12<br />
\mfplinestyle, 48<br />
\mfplinetype, 48<br />
\pen, 60<br />
\penwd, 60<br />
\polkadotwd, 60<br />
\setallaxismargins, 17<br />
\setallbordermarks, 18<br />
\setaxismargins, 17<br />
\setaxismarks, 18<br />
\setbordermarks, 18<br />
\setmfboolean, 65<br />
\setmfcolor, 65<br />
\setmfnumeric, 65<br />
\setmfpair, 65<br />
\setmfvariable, 65<br />
\settension, 23<br />
\setxmarks, 18<br />
\setymarks, 18<br />
\shadewd, 60<br />
5.9.11 SETTING COLORS<br />
\backgroundcolor, 28<br />
\drawcolor, 28<br />
\fillcolor, 28<br />
\hatchcolor, 28<br />
\headcolor, 28<br />
\mfpdefinecolor, 29<br />
\pointcolor, 28<br />
\tlabelcolor, 28<br />
5.9.12 DEFINING ARRAYS<br />
\barchart, 24<br />
\bargraph, 24<br />
\colorarray, 67<br />
\gantt, 24
5 APPENDICES 94<br />
\globalsetarray, 67<br />
\histogram, 24<br />
\mfpbarchart, 24<br />
\mfpbargraph, 24<br />
\mfpgantt, 24<br />
\mfphistogram, 24<br />
\mfppiechart, 25<br />
\numericarray, 67<br />
\pairarray, 67<br />
\patharr, \endpatharr, 67<br />
\piechart, 25<br />
\setarray, 67<br />
5.9.13 CHANGING BEHAVIOR<br />
\coloredlines, 48<br />
\dashedlines, 48<br />
\datapointsonly, 48<br />
\defaultplot, 49<br />
\everytlabel, 50<br />
\every<strong>mfpic</strong>, \everyend<strong>mfpic</strong>, 13<br />
\makepercentcomment, 47<br />
\makepercentother, 47<br />
\mfpdatacomment, 47<br />
\mfpdataperline, 62<br />
\mfpverbtex, 52<br />
\noship, 73<br />
\pointedlines, 48<br />
\pointfillfalse, \pointfilltrue, 60<br />
\reconfigureplot, 49<br />
\resumeshipping, 73<br />
\setrender, 41<br />
\smoothdata, 46<br />
\stopshipping, 73<br />
\tlabeljustify, 51<br />
\tlabeloffset, 51<br />
\tlabelsep, 51<br />
\tlpathjustify, 54<br />
\tlpathsep, 51<br />
\tlpointsep, 51<br />
\unsmoothdata, 46<br />
\using, 47<br />
\usingnumericdefault, 47<br />
\usingpairdefault, 47<br />
5.9.14 FILES AND ENVIRONMENTS<br />
\closegraphsfile, 11<br />
\mfpframe, \endmfpframe, 55<br />
\<strong>mfpic</strong>, \end<strong>mfpic</strong>, 12<br />
\opengraphsfile, 11<br />
\setfilename, 76<br />
\setfilenametemplate, 77<br />
5.9.15 TEXT<br />
\axislabels, 51<br />
\plottext, 51<br />
\startbacktext, 52<br />
\stopbacktext, 52<br />
\tcaption, 53<br />
\tlabel, 49<br />
\tlabels, 49<br />
5.9.16 MISCELLANEOUS<br />
\assignmfvalue, \assignmpvalue, 74<br />
\fdef, 41<br />
\get<strong>mfpic</strong>offset, 77<br />
\globalassignmfvalue,<br />
\globalassignmpvalue, 74<br />
\ifmfpmpost, 77<br />
\mfcmd, 65<br />
\mflist, 65<br />
\mfmode, 73<br />
\mfpfor, \endmfpfor, 71<br />
\mfpframed, 55<br />
\<strong>mfpic</strong>version, 78<br />
\mfpimage, \endmfpimage, 70<br />
\mfploop, \endmfploop, 72<br />
\mfpuntil, 72<br />
\mfpwhile, \endmfpwhile, 72<br />
\mfresolution, 73<br />
\mfsrc, 65<br />
\mftitle, 76<br />
\newfdim, 76<br />
\newsavepic, 54<br />
\plr, 22<br />
\pointdef, 14<br />
\prepare<strong>mfpic</strong>graphic, 77<br />
\savepic, 54<br />
\sequence, 47<br />
\set<strong>mfpic</strong>graphic, 76<br />
\store, 56<br />
\tile, \endtile, 69<br />
\tmtitle, 76<br />
\usepic, 54