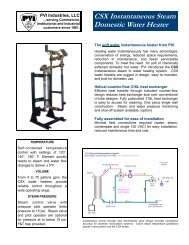
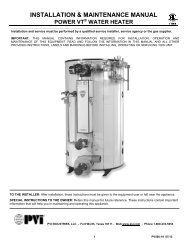
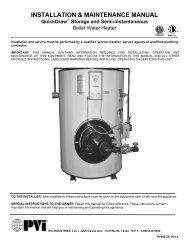
Water Heater Manual - Pvi.com
Water Heater Manual - Pvi.com
Water Heater Manual - Pvi.com

You also want an ePaper? Increase the reach of your titles
YUMPU automatically turns print PDFs into web optimized ePapers that Google loves.
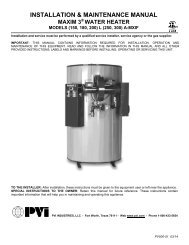
MAXIM<br />
AXIAL FLOW GAS BURNER START-UP<br />
(Refer to Figure 17-2, page 8 to identify burner parts)<br />
1. Remove the enclosure panel cover on the<br />
water heater or boiler to expose the control<br />
circuit. A wiring diagram, included in this<br />
packet, will show the controls used in our<br />
circuitry.<br />
2. Visually check that all <strong>com</strong>ponents are<br />
intact and no damage has occurred during<br />
transit.<br />
3. Check all connections within the control<br />
cabinet. A loose connection could cause<br />
intermittent shutdowns.<br />
4. Some burners will use direct spark ignition.<br />
They may use a single gas pressure<br />
regulator and gas valve or multiple valves<br />
and regulators. On a call for heat, the<br />
motor starts, the gas primary control is<br />
energized, and after a short delay (prepurge)<br />
the gas valve(s) opens and ignition<br />
should occur.<br />
IMPORTANT<br />
Do not tamper with or readjust program<br />
dipswitch settings. This will cause the<br />
control to be<strong>com</strong>e inoperable. Damage<br />
resulting from tampering will be<br />
excluded from coverage under the<br />
warranty of this unit.<br />
7. With the electrodes exposed, check them<br />
for the proper settings as called for in<br />
Figure 17-3, page 10. Check for any hairline<br />
cracks in the insulators. Should<br />
replacement of burner electrodes be<br />
required, certain procedures must be<br />
followed. In all cases, removal of the<br />
electrodes is ac<strong>com</strong>plished by loosening<br />
the electrode mounting clamps. Draw the<br />
electrodes out of the nozzle assembly<br />
through the holes in the pressure plate.<br />
8. Inspect the electrodes for cracked ceramic<br />
or loose retaining studs that hold the wire<br />
within the ceramic. Select the proper<br />
pressure plate hole to place each electrode<br />
and insert the electrode through the hole,<br />
retaining stud end first.<br />
9. Tighten electrode mounting clamp slightly<br />
until electrode ceramics are seated firmly<br />
and <strong>com</strong>pletely in the mounting bracket<br />
without gaps between ceramics and<br />
mounting bracket at the bearing faces.<br />
10. Measure and set electrodes according to<br />
Figure 17-3, page 10. After the gaps and<br />
setting are <strong>com</strong>plete, fully tighten the<br />
electrode mounting clamp. Do not<br />
overtighten or the insulation may crack.<br />
5. Remove the flame safeguard control from<br />
its base. Check the connections in control<br />
mounting base; loose connections can<br />
cause nuisance shutdowns. Check the<br />
time card or programmer, when applicable,<br />
for good connection.<br />
IMPORTANT<br />
Always secure gas lines and tag "Out of<br />
Service" before servicing burner nozzle<br />
or electrodes.<br />
6. Pull the nozzle assembly to check the<br />
flame and ignition electrodes. This is done<br />
by first disconnecting the gas train by<br />
breaking at the unions. Then removing the<br />
nozzle assembly which will have the<br />
electrodes and pressure plate attached.<br />
Disconnect the electrode wires and take<br />
care not to damage the insulation on the<br />
electrodes.<br />
11. Replace nozzle assembly; be sure to<br />
connect the flame and spark rod wires<br />
before installing nozzle assembly fully into<br />
blast tube. Check connectors on the ends of<br />
the flame and spark rod wires for good<br />
contact. Look for properly stripped wire<br />
ends. Be sure connectors are firmly<br />
attached to the flame and ignition rod ends.<br />
Insulating boots can give a false feeling of<br />
proper seating. DO NOT MOVE<br />
ELECTRODES. Be careful not to bump<br />
electrodes. Check fan wheel for free<br />
rotation.<br />
12. Reinstall orifices in unions (if required).<br />
Reinstall gas nozzle assembly.<br />
PV500-17 07/13 9<br />
Section 17