You also want an ePaper? Increase the reach of your titles
YUMPU automatically turns print PDFs into web optimized ePapers that Google loves.
<strong>RTC</strong>-2<br />
Aviation UTC Real Time Clock and<br />
OAT display<br />
Operating <strong>Manual</strong> – English 1.06<br />
Introduction<br />
The <strong>RTC</strong>-2 is a 2 1/4” aviation Real Time Clock featuring a two time zone system, stopwatch, countdown timer, alarm and<br />
OAT (Outside Air Temperature) display. It is primarily intended to show UTC time (also known as Greenwich Mean Time,<br />
GMT or Zulu time) together with a local time to facilitate ordinary ATC time reporting.<br />
Each time zone may be programmed with an additional hour offset to allow for summer time or similar variances. Local<br />
offsets may be added or subtracted. Stopwatch and timers can be operated simultaneously to a programmable alarm,<br />
making the <strong>RTC</strong>-2 particularly suitable for sport flying competitions. OAT can be shown in either degrees Celsius or<br />
degrees Fahrenheit. Time is maintained by an internal lithium battery which can be replaced by the user.<br />
1 Features<br />
• Features a 2 time zone system, stopwatch, countdown timer, alarm and OAT (outside air temperature)<br />
display<br />
• Stopwatch and timers can operate simultaneously to a programmable alarm<br />
• Local time offsets can be added or subtracted e.g. summer time or similar variances<br />
• OAT can be shown in degrees Celsius or degrees Fahrenheit<br />
• Records maximum and minimum OAT in permanent memory<br />
• Replaceable lithium battery<br />
• Standard 2 1/4” aircraft enclosure (can be front or rear mounted)<br />
• Rotary control plus 2 independent buttons for easy menu navigation and user input<br />
• Alarm output as well as a red LED that illuminates when the alarm has been activated<br />
• Large backlit graphic LCD with adjustable contrast<br />
• Wide input supply voltage range of 8 to 30V DC with built in voltage reversal and over voltage protection<br />
for harsh electrical environments<br />
• Light weight design<br />
• 1 year limited warranty
<strong>RTC</strong>-2 Operating <strong>Manual</strong> Page 2<br />
2 <strong>RTC</strong>-2 Layout<br />
Backlit Graphic LCD Display:<br />
Contrast and backlight<br />
can be adjusted in the menu<br />
system<br />
LED Alarm:<br />
The red LED will illuminate if the<br />
alarm is activated or any of the<br />
timers have been reached<br />
Harness:<br />
Harness connects to<br />
power and OAT sender<br />
Up/F1 Button:<br />
Up button in menu system<br />
Various functions in normal mode:<br />
Time Display: Increase time zone<br />
Stopwatch: Start/Stop<br />
Countdown Timer: Start/Stop<br />
Alarm: Enable/Disable<br />
OAT: Reset Max/Min values<br />
Down/F2 Button:<br />
Down button in menu system<br />
Various functions in normal mode:<br />
Time Display: Decrease time zone<br />
Stopwatch: Zero time<br />
Count down Timer: Load preset time<br />
Alarm: Enable/Disable<br />
OAT: Reset Max/Min values<br />
Rotary Control (Up/Down) & Enter Button:<br />
Press the rotary control during normal mode to access the menu system.<br />
Rotate anti/clockwise for up/down menu scrolling. During normal mode the<br />
rotary control is used to scroll through the various display screens.<br />
3 Main Display<br />
There are 5 main displays that can be setup to be displayed on the <strong>RTC</strong>-2: UTC time, stopwatch, countdown timer, alarm<br />
and OAT display.<br />
3.1 UTC Time<br />
UTC display showing two independent time zones. The top display is normally used to display UTC time but this can be<br />
changed using the “Main Time Zone” selection<br />
Main time zone<br />
Local time zone<br />
Press the F1 key to<br />
change the local time<br />
zone<br />
Press the F2 key<br />
to change the<br />
local time zone
<strong>RTC</strong>-2 Operating <strong>Manual</strong> Page 3<br />
3.2 Stopwatch<br />
This screen shows the stopwatch. The stopwatch can be started and stopped at any time and reset to zero.<br />
Main time zone<br />
Indicates that the<br />
stopwatch is running<br />
Press the F1 Key<br />
to Start/Stop the<br />
stopwatch<br />
Press the F2 key<br />
to reset the<br />
stopwatch time to<br />
zero<br />
3.3 Countdown Timer<br />
This screen shows the countdown timer. The timer is loaded from a preset value that can be adjusted in the menu. Once<br />
loaded, the timer can be started and counts down. It can be stopped and restarted at any time.<br />
Indicates that the<br />
countdown timer is<br />
running<br />
Main time zone<br />
Press the F1 Key to<br />
Start/Stop the timer<br />
Press the F2 key<br />
to load the preset<br />
time<br />
3.4 Alarm<br />
This screen shows the alarm time. The alarm time is set in the menu.<br />
Main time zone<br />
Indicates that the<br />
alarm is enabled<br />
Press the F1 or F2<br />
key to enable/disable<br />
the alarm
<strong>RTC</strong>-2 Operating <strong>Manual</strong> Page 4<br />
3.5 OAT Display<br />
This screen shows the OAT (Outside Air Temperature) value. The OAT can be setup in the menu to be displayed in either<br />
degrees Fahrenheit (ºF) or in degrees Celcius (ºC).<br />
Main time zone<br />
Outside air<br />
temperature<br />
(OAT) value<br />
Min OAT<br />
temperature<br />
Max OAT<br />
temperature<br />
OAT temperature<br />
unit<br />
Press the F1 or F2 keys<br />
to reset the max/min<br />
temperature values<br />
OAT Maximum/Minimum reset<br />
Press the F1 or F2 keys during the OAT display to reset the maximum/minimum temperature values to the current OAT<br />
temperature. To avoid false recordings, the maximum/minimum OAT function is only activated 10 seconds after the<br />
instrument has powered up.<br />
Note: The permanent maximum values are stored in non-volatile<br />
memory and are recalled on power-up.<br />
4 Menu System<br />
Pressing the rotary control button during the normal display mode will cause the <strong>RTC</strong>-2 to enter the menu system. Use<br />
the up/down keys or the rotary control to navigate through the menu system.
<strong>RTC</strong>-2 Operating <strong>Manual</strong> Page 5<br />
Note: (ADC Values and Calibrate Menus are only visible when powering up the unit and pressing the<br />
Rotary Control). The text “CALIBRATE” will appear on the intro screen when entering this mode.<br />
Warning: The Calibrate Menu is for technical personnel only. Changing any values in this menu may<br />
cause the instrument to display incorrect information, and may require the instrument to be returned to<br />
the factory for recalibration.<br />
4.1 Exit Menu<br />
Pressing the rotary control on this menu item will cause the <strong>RTC</strong>-2 to exit the menu system. All<br />
changes made during navigation of the menu system will be saved in non-volatile memory on exiting<br />
the menu system. If you remove power before exiting the menu the instrument will not save any<br />
changes.<br />
4.2 Display Setup<br />
Move the highlight over the “DONE” menu item and press the rotary button to return to the main<br />
menu<br />
Select this menu option to adjust the display contrast<br />
Select this menu option to turn the backlight on or off<br />
Select whether you want the OAT to be displayed in degress Fahrenheit (ºF) or in degrees Celcius<br />
(ºC)<br />
4.3 Preset Timer<br />
Enter the timer preset value. This is the value that is loaded into the timer when you perform a timer<br />
load. The timer counts down to zero when started, starting from this value. When zero is reached<br />
the alarm is activated.
<strong>RTC</strong>-2 Operating <strong>Manual</strong> Page 6<br />
4.4 Set Alarm<br />
Enter the local time that will activate the alarm<br />
Note: Alarms are based on the time of your selected local time zone<br />
4.5 Time Setup<br />
Move the highlight over the “DONE” menu item and press the rotary button to return to the main<br />
menu<br />
This function is used to set the internal real time clock. The time to be entered<br />
must be UTC in order for the system to operate correctly. Do not enter local<br />
time (unless it is the same as UTC).<br />
UTC is the same as Greenwich Mean Time (GMT) or Zulu time.<br />
Select the main time zone that is to be displayed on the top section of the<br />
display. Normally this would be set to UTC.<br />
Each of the time zones can be individually modified by adding or subtracting<br />
one or more hours from its ordinary time. Offsets can range from –12 to +12<br />
hours. For normal operation of the time zone this value should be set to zero.<br />
Use the F1 and F2 keys to select the time zone to change. Use the rotary<br />
control to edit the menu items hour and minute of the offset.<br />
4.6 ADC Values<br />
Note: This menu item is for technical personnel only, and is not displayed during the normal<br />
operation of the instrument. Please see section 4 above on how to access this menu item.<br />
This menu displays the ADC value that has been read from the temperature sensor.
<strong>RTC</strong>-2 Operating <strong>Manual</strong> Page 7<br />
4.7 Calibrate<br />
Note: This menu item is for technical personnel only, and is not displayed during the normal<br />
operation of the instrument. Please see section 4 above on how to access this menu item. Consult<br />
your local dealer or factory before entering this menu.<br />
Move the highlight over this menu item and press the rotary button to return to the main menu<br />
The <strong>RTC</strong>-2 is calibrated in degrees Celcius. The <strong>RTC</strong>-2 is calibrated at the factory using a precision<br />
laboratory thermometer. If recalibration is required then adjust the value using the up/down keys or<br />
the rotary control until the temperature matches the reference ambient temperature. The <strong>RTC</strong>-2 is<br />
now calibrated.<br />
5 Loading Factory default settings<br />
Pressing and holding the F1 and F2 keys simultaneously on power up will cause the <strong>RTC</strong>-2 to load preprogrammed<br />
factory default settings. The following screen will be displayed:<br />
6 Operating the alarms<br />
If the alarm is activated, the corresponding item on the display will flash. At the same time the externally available alarm<br />
switch will close. The switch will remain closed until any button is pressed to acknowledge the alarm or until the<br />
condition(s) that activated the alarm no longer exist. The alarm output can be used to switch an external alarm indicator.<br />
The external alarm switch is an open collector transistor switch to ground with a maximum rating of 0.5A DC. It is possible<br />
to wire the alarm contacts of several Stratomaster instruments in parallel should this be desired. To avoid false activation<br />
of the alarms, the alarm function is only active 10 seconds after the instrument has powered up.<br />
7 Cleaning<br />
The unit should not be cleaned with any abrasive substances. The screen is very sensitive to certain cleaning materials<br />
and should only be cleaned using a clean, damp cloth.<br />
Warning: The <strong>RTC</strong>-2 is not waterproof. Serious damage could occur if the unit is exposed to<br />
water and/or spray jets.
<strong>RTC</strong>-2 Operating <strong>Manual</strong> Page 8<br />
8 <strong>RTC</strong>-2 Specifications<br />
Operating Temperature Range<br />
Storage Temperature Range<br />
Humidity<br />
Power Supply<br />
Current Consumption<br />
Display<br />
ADC<br />
Dimensions<br />
Enclosure<br />
Weight<br />
Alarm contact current rating<br />
Non-volatile memory storage<br />
Ambient Temperature Sender type<br />
Internal battery type<br />
-10ºC to 50ºC (14ºF to 122ºF)<br />
-20ºC to 80ºC (-4ºF to 176ºF)<br />
<strong>RTC</strong>-2 Operating <strong>Manual</strong> Page 9<br />
9.2 <strong>RTC</strong>-2 DB9 Cable connections<br />
DB 9 Pin Color Function<br />
1 Black Ground<br />
2 Orange OAT Sensor<br />
4 NC Airtalk communication (Not connected)<br />
Used for firmware upgrading<br />
6 Red 8-30Vdc power<br />
9 White Alarm Output<br />
10 Changing the internal battery<br />
The <strong>RTC</strong>-2 uses an internal Lithium battery to supply power to run the internal clock. If you find the <strong>RTC</strong>-2 looses time<br />
when you switch off main power you should replace the battery. This battery is of type CR2032. It is used in many<br />
calculators and similar equipment and is easy to obtain. Remove the 2 securing nuts next to the DB-9 connector and<br />
remove the unit from its enclosure. The battery holder is located on the circuit board behind the display. Observe correct<br />
polarity when installing a new battery. The side marked “+” will be viewable once the battery is inserted.<br />
11 Warranty<br />
This product carries a warranty for a period of one year from date of purchase against faulty workmanship or defective<br />
materials, provided there is no evidence that the unit has been misused or manhandled. Warranty is limited to the<br />
replacement of faulty components and includes the cost of labour. Shipping costs are for the account of the purchaser.<br />
Note: Product warranty excludes damages caused by unprotected, unsuitable or incorrectly wired<br />
electrical supplies and/or sensors, and damage caused by inductive loads.<br />
12 Disclaimer<br />
Operation of this instrument is the sole responsibility of the purchaser of the unit. The user must make themselves familiar<br />
with the operation of this instrument and the effect of any possible failure or malfunction.<br />
This instrument is not certified by the FAA. Fitting of this instrument to certified aircraft is subject to the rules and<br />
conditions pertaining to such in your country. Please check with your local aviation authorities if in doubt. This instrument<br />
is intended for ultralight, microlight, homebuilt and experimental aircraft. Operation of this instrument is the sole<br />
responsibility of the pilot in command (PIC) of the aircraft. This person must be proficient and carry a valid and relevant<br />
pilot’s license. This person has to make themselves familiar with the operation of this instrument and the effect of any<br />
possible failure or malfunction. Under no circumstances does the manufacturer condone usage of this instrument for IFR<br />
flights.<br />
The manufacturer reserves the right to alter any specification without notice.
<strong>RTC</strong>-2 Operating <strong>Manual</strong> Page 10<br />
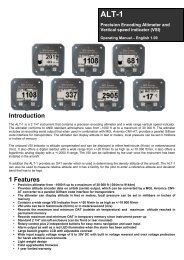
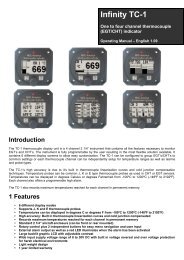
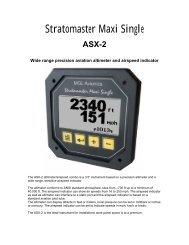
Other instruments in the Stratomaster Infinity series<br />
ALT-1 Precision encoding altimeter and vertical speed indicator<br />
ALT-2 Precision encoding altimeter and vertical speed indicator with a serial RS232<br />
transponder output<br />
ASI-1 Airspeed indicator (ASI) with automatic flight log<br />
ASX-1 Encoding aviation altimeter with serial output and airspeed indicator (ASI)<br />
AV-1 Artificial horizon and magnetic compass indicator<br />
BAT-1 Battery voltage and current monitor<br />
E-3 Universal engine monitor<br />
FF-1 Fuel Computer (single or dual fuel tanks)<br />
GF-1 +-10G tilt compensated dual range G-force meter<br />
MAP-1 Manifold pressure and RPM Indicator<br />
RV-1 Universal engine RPM and rotor RPM Indicator<br />
RV-2 Universal turbine RPM / RPM factor display<br />
<strong>RTC</strong>-2 Aviation real time clock (<strong>RTC</strong>) and outside air temperature (OAT) display<br />
TC-1 4-Channel thermocouple indicator<br />
TP-1 Universal temperature and pressure gauge