User's manual RS RS - Sup'Air
User's manual RS RS - Sup'Air
User's manual RS RS - Sup'Air
You also want an ePaper? Increase the reach of your titles
YUMPU automatically turns print PDFs into web optimized ePapers that Google loves.
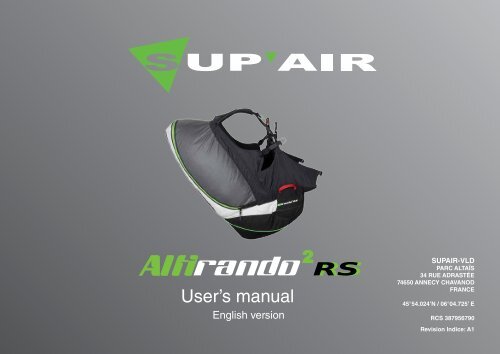
User’s <strong>manual</strong><br />
English version<br />
<strong>RS</strong><br />
SUPAIR-VLD<br />
PARC ALTAÏS<br />
34 RUE ADRASTÉE<br />
74650 ANNECY CHAVANOD<br />
FRANCE<br />
45°54.024’N / 06°04.725’ E<br />
RCS 387956790<br />
Revision Indice: A1
<strong>RS</strong><br />
Thank you for your choice of a ALTIRANDO². We are proud to join you on your<br />
journey in our common passion : paragliding.<br />
SUP’AIR has been designing, producing and selling accessories for free flying activities<br />
since 1984. By choosing a SUP’AIR product you benefit from almost thirty<br />
years of expertise, innovation and listening. This is also our philosophy : working<br />
endlessly to develop better products and to maintain a high quality production in<br />
Europe.<br />
We trust that you will find this user’s <strong>manual</strong> comprehensive, explicit and hopefully<br />
pleasant to read. We advise you to read it carefully !<br />
On our website www.supair.com, you will find the last up to date information about<br />
this product. If you have any further questions, feel free to ask one of our retailers.<br />
And of course, the entire SUP’AIR team are at your disposal through info@supair.<br />
com<br />
We wish you many safe flying and enjoyable hours, and happy landings<br />
The SUP’AIR team<br />
2
List of contents<br />
<strong>RS</strong><br />
List of contents 3<br />
Introduction4<br />
Technical specifications 5<br />
Size choice 6<br />
Components7<br />
Harness overview 8<br />
Backpack mode overall view. 9<br />
Speed-Bar ready ( Optional ). 10<br />
Foot-rest installation. 11<br />
Rescue parachute setup assembly. 12<br />
Position setting 16<br />
Flight behavior 19<br />
Pre-Flight control 20<br />
Take-off21<br />
Complements/Accessories23<br />
Care24<br />
Service Book 27<br />
Pictures credits : Philippe Vernerey,<br />
SUP’AIR<br />
3
Introduction<br />
<strong>RS</strong><br />
Welcome to the travel, hikking and paragliding world !<br />
With the Altirando2 you are equipped with a light but complete product enabling you to widen any<br />
mountain flying experience due to great comfort, a full Air-Bag protection and a reserve parachute<br />
container beneath the seat. It is the perfect harness to thermal up anywhere in the world...<br />
After reading this <strong>manual</strong>, we suggest you check your harness by hanging in it before flying.<br />
N.B : Three important icons will help you when reading this <strong>manual</strong><br />
Advice Caution ! Danger !!<br />
4
Technical specifications<br />
Technical sheet<br />
A<br />
B<br />
C<br />
D<br />
A<br />
B<br />
C<br />
D<br />
E<br />
F<br />
Back height (cm)<br />
Leaning setting height (cm)<br />
Seat length (cm)<br />
Seat width (cm)<br />
Carabiners height (cm)<br />
Carabiners distance (cm)<br />
Hauteur du dos<br />
Hauteur réglage de<br />
l'inclinaison du<br />
dossier<br />
Longueur d'assise<br />
Largeur d'assise<br />
E<br />
F<br />
Hauteur des points<br />
Distance entre les<br />
points<br />
<strong>RS</strong><br />
Pilot size 155-170<br />
cm<br />
Pilot’s weight<br />
S M L XL<br />
165-180<br />
cm<br />
175-195<br />
cm<br />
195-205<br />
cm<br />
50-70 kg 60-85 kg 70-95 kg 80-110<br />
kg<br />
Harness weight (+ carabiners+speedbar) 3900 g 3960 g 4150 g 4260 g<br />
Designed for<br />
Paragliding only<br />
Back height (cm) 64 68 72 75<br />
Leaning setting height (cm) 38 38 39 40<br />
Seat length (cm) 47 48 49 51<br />
Seat width (cm) 33 35 37 39<br />
Carabiners height (cm) 44 44 44 44<br />
Carabiners distance (cm) 39-53 39-53 39-53 39-53<br />
Impact damping system : Airbag (Volume)<br />
Yes<br />
Impact damping system : Bumpair (Thickness)<br />
Homologation<br />
Flight : tandem (Pilot- Passenger)<br />
Flight : acrobatic flying<br />
Take-off : Winching<br />
Quick-out carabiners compatibility<br />
No<br />
EN 1651 - LTF<br />
possible<br />
No<br />
Yes<br />
Yes<br />
F<br />
E<br />
A<br />
B<br />
C<br />
D<br />
This harness is delivered with two 30 mm Biners ( 138 g. for the set ). An<br />
overall weight decrease is possible to obtain by swapping the Biners with a<br />
«Connect» set ( 24 g. for the set ).<br />
5
Size choice<br />
<strong>RS</strong><br />
Choosing your harness’ size is important. You will find here below a height/weight table that will<br />
help you in your size choice. Nonetheless we advise you to try out the harness under a hanging<br />
device and in different sizes at one of our retailers in order to choose the correct size.<br />
For a complete list of our retailers, please click here : www.supair.com<br />
Size<br />
1m45 1m50 1m55 1m60 1m65 1m70 1m75 1m80 1m85 1m90 1m95 2m 2m05<br />
Weight<br />
50 S S S<br />
55 S S S S<br />
60 S S S M<br />
65 S S M M<br />
70 S M M M M L<br />
75 M M M M L L<br />
80 M M M L L L<br />
85 M L L L<br />
90 L L XL XL XL<br />
95 L L XL XL XL XL<br />
100 XL XL XL XL<br />
105 XL XL XL XL<br />
110 XL XL XL XL<br />
XS<br />
XS/S<br />
S<br />
S/M<br />
M<br />
M/L<br />
L<br />
L/ XL<br />
XL<br />
6
Components<br />
<strong>RS</strong><br />
1<br />
Rescue parachute handle<br />
2<br />
2<br />
Rescue parachute risers<br />
1<br />
3<br />
30 mm Aluminium self-locking biner<br />
4<br />
Reserve parachute handle (AX2-R)<br />
3<br />
4<br />
FLIGHT<br />
DIRECTION<br />
Label<br />
5<br />
Dyneema risers<br />
6<br />
Maillon Rapide ® Inox 6mm (x2)<br />
5<br />
7<br />
O-Rings (x2)<br />
6<br />
7<br />
Option<br />
8<br />
Double stage speed-bar<br />
8<br />
9<br />
9<br />
Foot rest retractable<br />
7
Harness overview<br />
<strong>RS</strong><br />
This illustration will help you during your reading.<br />
10<br />
11<br />
1<br />
2<br />
3<br />
Automatic ventral buckle<br />
Safe-T-bar (Sup’Air patent A1-1832/981)<br />
Automatic thigh strap buckle<br />
1<br />
4<br />
Ventral width adjustment<br />
4<br />
2<br />
5<br />
6<br />
Leaning setting<br />
Shoulders’straps adjustment<br />
11<br />
6<br />
3<br />
7<br />
Dorsal Air-Bag with storage compartment.<br />
8<br />
Buckles for foot-rest<br />
7<br />
9<br />
5<br />
13<br />
8<br />
5<br />
9<br />
9<br />
10<br />
11<br />
12<br />
Speed system pulleys.<br />
Hiking poles hooking points.<br />
Hydration hose passage.<br />
Air-Bag locking system<br />
12<br />
3 1 Reserve parachute handle (AX2-<br />
R)<br />
6<br />
12<br />
8
Backpack mode overall view.<br />
<strong>RS</strong><br />
4<br />
1<br />
Compression straps.<br />
2<br />
Elastic hiking pole lanyards.<br />
5<br />
3<br />
Stretchable netted side pockets.<br />
1<br />
2<br />
8<br />
6<br />
4<br />
Adjustable load distribution<br />
straps.<br />
5<br />
Chest strap.<br />
3<br />
2<br />
9<br />
7<br />
6<br />
7<br />
Hand-rest straps.<br />
Adjustable waist strap.<br />
8 Adjustable chest straps.<br />
10<br />
9<br />
10<br />
Waist strap pocket.<br />
Lite pack<br />
9
Speed-Bar ready ( Optional ).<br />
<strong>RS</strong><br />
The Altirando² <strong>RS</strong> is pre-equipped to receive most speed-bar systems found on today’s<br />
market. Within the SUP’AIR accelerator product range, the double stage speed system is<br />
best suited for being light and self-retractable.<br />
1<br />
Push the speed-bar line through<br />
the the D ring. D<br />
A<br />
C<br />
A<br />
B<br />
C<br />
Line.<br />
Locking hook.<br />
Elastic self-retractable<br />
speed-system.<br />
2<br />
3<br />
Push the speed-bar line between<br />
the outer webbing side and the harness<br />
skirt.<br />
Push the speed-bar line through<br />
the pulley.<br />
4<br />
6<br />
4<br />
5<br />
Attach the end of the speed-bar line<br />
to the crimped hook which is to be<br />
connected to the riser’s crimped<br />
hook. Adjust the line length and securely<br />
knot it.<br />
Self-retracting speed-system: push<br />
the elastic cords through the D ring<br />
to connect them to the metal grommets<br />
stitched on the inner sides of<br />
the harness.<br />
5<br />
3<br />
E<br />
6<br />
Push through and close the harness<br />
side skirt holding strap into<br />
the seat guide.<br />
A<br />
1<br />
2<br />
C<br />
Harness seating area inner view.<br />
D<br />
10
Foot-rest installation.<br />
<strong>RS</strong><br />
A<br />
The Altirando2 is pre-equipped<br />
to accept a retractable<br />
foot-rest ( A ).<br />
C<br />
Push the elastic under the<br />
guide ( C ).<br />
2<br />
B<br />
Push the foot-rest strap<br />
through buckle ( B ) located<br />
at the front of the harness’s<br />
side skirt.<br />
Wrap and connect the<br />
elastic around the main<br />
strap while pushing it<br />
through buckle ( D ).<br />
D<br />
1<br />
D<br />
3<br />
B<br />
Adjust the foot-rest length during<br />
a hang-test and stow away the<br />
straps excess in the elasticated<br />
holder.<br />
4<br />
11
Rescue parachute setup assembly.<br />
<strong>RS</strong><br />
Thank you for comprehensively reading the following ! We will recommend you to have your reserve<br />
parachute initially installed by someone competent and familiar with the procedure.<br />
Connecting the risers to the harness<br />
1<br />
Rescue parachute Dyneema<br />
or standard risers<br />
1<br />
1. Make a lark’s head<br />
between the risers and<br />
the webbing loop for<br />
rescue attachment.<br />
2. Fasten the lark’s head<br />
neatly<br />
2<br />
Webbing loop for rescue risers<br />
attachment<br />
2<br />
3. Neatly stow any surplus risers<br />
under the flaps.<br />
12
<strong>RS</strong><br />
Connecting the handle to the rescue parachute’s deployment bag<br />
B<br />
Label<br />
FLIGHT<br />
DIRECTION<br />
A<br />
FLIGHT<br />
DIRECTION<br />
Label<br />
1. Place the handle inside<br />
the middle webbing<br />
loop and make a lark’s<br />
head knot with the handle.<br />
2. Fasten tightly the lark’s<br />
head knot and verify the solidity<br />
of the link.<br />
The handle must be connected to the central<br />
loop, except for large reserve parachute<br />
( use side loop ). Must be checked at the<br />
end of the installation procedure by gently<br />
pulling on the handle and make certain to<br />
disengage both safety loops held in place<br />
by the cable.<br />
Connecting the rescue to the Dyneema risers<br />
A<br />
Altirando² <strong>RS</strong> rescue parachute<br />
handle<br />
Label<br />
FLIGHT<br />
DIRECTION<br />
B<br />
Parachute folded according to<br />
manufacturers specification<br />
and in deployment bag.<br />
C<br />
Dyneema risers<br />
E<br />
B<br />
D<br />
Maillon Rapide ® Inox 6mm<br />
(x2)<br />
D<br />
C<br />
BE<br />
O-Rings (x2)<br />
13
<strong>RS</strong><br />
Adjustable reserve parachute pocket.<br />
The reserve parachute pocket volume is<br />
variable in size.You first must adjust its<br />
volume according to that of your reserve<br />
parachute.<br />
With the inner flap setting positioned atop the<br />
velcro at the pocket center : the volume is<br />
reduced and will accept the reserve parachute<br />
X-Light.<br />
With the furthest pocket inner flap<br />
setting : the reserve parachute pocket<br />
offers maximum capacity to accept<br />
standard solo parachutes.<br />
The inner flap can have two positions<br />
Reserve parachute installation in the pocket.<br />
1 2 3<br />
4<br />
1 / Insert the reserve parachute inside the harness parachute<br />
pocket by opening all the flaps. The POD must be<br />
positioned with the handle at the top with risers and lines at<br />
the bottom. Push the risers through the guiding sleeves ( the<br />
risers must be located behind the parachute ).<br />
Push a piece of cord through the line loop #1<br />
Push the cord through the grommets 2 and 3 and<br />
pull it to force the line loop through the grommets.<br />
Push the handle’s yellow cable ( front section )<br />
through line loop #1. Then delicately remove the<br />
cord from the underside of the loop.<br />
14
<strong>RS</strong><br />
5 6 7<br />
Stow away the yellow cable’s end piece in its protective sleeve.<br />
Push the end of the cord through the elasticated loop #4, then<br />
guide it through the grommets #5 and #6<br />
Pull the cord to guide the elasticated line through the grommets.<br />
8 9 10<br />
Push the handle’s yellow cable ( rear section ) through the<br />
elasticated line and delicately remove the cord.<br />
Close the Cordura flaps over the cable and push them through<br />
to the pocket’s top lid .<br />
Fold the Cordura flap over the handle and insert it underneath<br />
the handle’s flap to fasten it to the velcros.<br />
Upon setup completion, conduct an<br />
extraction sequence during a hang-test to<br />
verify that all works properly before duplicating<br />
the installation procedure again...<br />
15
Position setting<br />
<strong>RS</strong><br />
All harness adjustments must be made prior the first flight during a hang-test session. It is of utmost importance<br />
to adopt a proper flying posture, check all basic adjustments and have easy access to in-flight<br />
adjustments.<br />
1<br />
2<br />
Chest strap finger-loop tension tightening<br />
adjustment.<br />
Chest strap finger-loop tension release<br />
adjustment.<br />
6<br />
3<br />
Tightening snapper (leaning setting)<br />
2<br />
1<br />
4<br />
Loosening strap (leaning setting)<br />
5<br />
Tightening snapper (shoulder<br />
strap)<br />
6<br />
Loosening strap ( shoulder strap)<br />
3<br />
5<br />
4<br />
16
A<br />
Leaning angle setting<br />
<strong>RS</strong><br />
B<br />
Set the angle of leaning by tightening the snapper (towards a more<br />
vertical position) or the black webbing (towards a more horizontal<br />
position). You can extend the lumbar support by tightening the #5<br />
buckle.<br />
Shoulders’ straps adjustments.<br />
loosen<br />
tighten<br />
Tighten the shoulder straps by pulling the finger loop down. Pull up<br />
to release. The shoulder straps support, greatly helps the comfort<br />
level. It should be set precisely. You must find the correct tension<br />
between the side and shoulder straps adjustments. When adopting<br />
a reclined flying posture, the shoulder straps must enhance<br />
in-flight comfort levels by supporting the upper back.<br />
loosen<br />
C<br />
Chest strap adjustment.<br />
tighten<br />
This adjustment is important as it acts on the ABS and the harness overall stability. The tighter the more stable. The<br />
opposite is true while enabling weight-shift steering.<br />
To tighten the chest strap:<br />
Place your left hand in front of and pass the risers to grab the right self-locking Biner.<br />
With the right hand, grab the chest strap finger-loop and pull it to tighten the chest strap.<br />
To loosen the chest strap:<br />
Place your left hand in front of and pass the risers to grab the right self-locking Biner.<br />
With the left arm, shorten the distance between the risers and pull the finger-loop in the opposite direction to loosen<br />
the chest strap.<br />
17
<strong>RS</strong><br />
Reversible Harness / Backpack.<br />
How to turn the Altirando2 harness mode into the backpack<br />
mode:<br />
1 / Completely open the Air-Bag.<br />
2 / Flip the Air-Bag inside-out.<br />
3 / Place the seat-plate vertically against the back<br />
wall - stow away your gear inside the newly made<br />
backpack.<br />
How to turn the Altirando2 backpack mode into the harness<br />
mode:<br />
1 / Completely loosen the backpack’s upper<br />
weight distribution straps or the Air-Bag will be<br />
pinched at the its top section.<br />
2 / Completely unzip the Air-Bag.<br />
3 / Empty the backpack’s content.<br />
4 / Unfold the seat-pate toward the outside.<br />
5 / Zip the Air-Bag and activate the pressure locking<br />
system located right onto the harness - designed<br />
to fully close the envelope and ensure its<br />
proper inflation.<br />
A<br />
A<br />
18
Flight behavior<br />
<strong>RS</strong><br />
The Altirando² <strong>RS</strong> is a safe and sound harness. Its ABS ( Anti Ballance System ) is very efficient, especially<br />
due to high crossed connection points. The stiffened but yet flexible backrest, the well padded<br />
shoulder straps give an excellent comfort level during long XC flights. This harness broadens the hiking<br />
and flying possibilities while being perfectly suited to tackle any local site flying.<br />
19
Pre-Flight control<br />
<strong>RS</strong><br />
Conduct a thorough pre-flight check before each takeoff.<br />
• Check the harness and Biners integrity.<br />
• Check that the (optionnal) front parachute pocket is correctly closed.<br />
• Check that your harness adjustments have not changed.<br />
• Check the connexion risers / harness as well as the self-locking Biners ( locked and secured ).<br />
• Check your speed-bar system if your harness is equipped with one.<br />
• Make certain to close all buckles, pockets and especially the Air-Bag zipper with its locking mechanism.<br />
After a thorough weather conditions analysis, when the decision to fly has been taken, fit into the harness :<br />
• Fasten the buckles (thigh straps, safe-T-bar and ventral buckles) with application.<br />
• Double check that all buckles are fully locked and secured by pulling firmly on them. Check that no line, tab or cloth<br />
is stuck / jammed in the buckles.<br />
• Be absolutely certain that there is not a line or other object in contact with or caught in the reserve parachute handle.<br />
3<br />
1<br />
Thigh strap automatic<br />
buckles<br />
2<br />
2<br />
Safe-T-Bar® Sup’air patent<br />
A-1832/981<br />
1<br />
3<br />
Chest strap automatic<br />
buckles<br />
20
Take-off<br />
<strong>RS</strong><br />
Takeoff is a simple and straight forward. The transition from running to seating is easy.<br />
If the transition is a bit more demanding then, raise your knees and push with your shoulders<br />
against the risers while wiggling your waist to help your body slide into the bottom of<br />
the seat. It is also possible when setting up, to tighten the leg straps slightly more to prevent<br />
them from riding up along your thighs while running.<br />
Never forced yourself into the harness with your toggles in hands. Doing so, could<br />
slow the glider down and stall it.<br />
Do not release your hands from the brakes when you are close to the ridge.<br />
21
In flight<br />
<strong>RS</strong><br />
As soon as you are airborne, the behaviour is very instinctive and precise.<br />
Please set the distance between the two carabiners according to the aerology and to the wing manufacturer’s<br />
recommendations. The average distance / spacing for most gliders from the center of<br />
the right Biner to the center of the left Biner where the risers connect, is between 36 cm and 45 cm.<br />
Tightening the chest strap provides more stability but less harness piloting efficiency. Doing so, increases<br />
the risk of riser twisting. On the contrary, loosening the strap provides more efficiency but<br />
can be dangerous in turbulent aerology while increasing the risk of falling towards the collapsed<br />
side of your glider and without being able to efficiently counteract the situation.<br />
Speedbar use<br />
We recommend a careful use of the speedbar because of an increased risk of massive collapse.<br />
Please read carefully the <strong>manual</strong> of your glider.<br />
Landing<br />
Stand up inside the harness and adopt an upright position in order to run to dissipate horizontal<br />
speed.<br />
Do not land whilst in the seated position, this is dangerous.<br />
NB : Frequents landings on the Airbag can damage the fabrics and the sewings and may<br />
decrease its efficience.<br />
22
Complements/Accessories<br />
<strong>RS</strong><br />
We propose you optional accessories that combine perfectly to your ALTIRANDO² <strong>RS</strong> harness.<br />
Function Code Description Code<br />
Speed bar ACCELSOUPLE Soft speed bar 100 g<br />
CALEPIEDRETRACT<br />
150 g<br />
All the information for the accessories are provided with the product or are easy to access on our<br />
website www.supair.com<br />
23
Care<br />
<strong>RS</strong><br />
Wash and care of your harness<br />
It is a good idea to wash your harness from time to time. To do this, we recommend to use a soft solvent (such as soap),<br />
use a brush and rinse thoroughly. In any case, do not use chemicals such as detergents or strong solvent because it may<br />
deteriorate the webbing, stitching and fabrics of your harness.<br />
The zip fasteners should be lubricated from time to time, using a silicon spray.<br />
If your harness gets wet, it is advisable to treat your automatic buckles and carabiners with silicone grease from time to<br />
time.<br />
Storage and transport When you don’t use your harness, store it inside your paragliding rucksack, in a dry, cool and clean place, protected from<br />
UVs exposure. If your harness is wet, please dry it thoroughly before storing.<br />
For transport, protect the harness from any mechanical or UV deterioration (use a bag). Please avoid long transports in<br />
wet conditions.<br />
Lifetime<br />
Independently of the pre-flight check-out, you have to open and unfold your rescue parachute once every 6 months.<br />
Once every 2 years, you need to perform a complete check of your harness :<br />
• Carbon seat plate : no crack, no asperity.<br />
• webbings (no excessive wear, no rip beginning, no unwanted folds)<br />
• buckles and carabiners ( no structural cracks / works fine ).<br />
The threads that compose the webbing and fabrics used in the ALTIRANDO² have been selected in order to ensure the<br />
best possible lightness/lifetime compromise. Nonetheless, in some conditions, after a long term exposure to UV and/or<br />
significant abrasion or exposure to chemicals, it is compulsory to check your harness in a certified repair centre. It is about<br />
your safety.<br />
These carabiners must never be used for anything else else than paragliding (not for climbing, no towing, etc.).<br />
The carabiners must be replaced by new ones every 5 years.<br />
24
<strong>RS</strong><br />
Repair<br />
Though we use the highest quality materials, it is possible that your harness may eventually deteriorate through general<br />
use. If its is showing any signs of significant wear and tear, you should check it and repair it in an certified repair centre.<br />
SUP’AIR offer a repair facility for their products beyond the end of the warranty period. Please contact us either by telephone<br />
or by E-mail sav@supair.com in order to receive a quotation.<br />
Materials<br />
Fabrics<br />
DYNEEMA® RIPSTOP<br />
CORDURA®<br />
Webbings<br />
Polyamide 20 mm (500DaN)<br />
Polyester 25 mm (1250 DaN)<br />
Recycling<br />
All our materials are selected for their technical and environmental characteristics. No components of our harnesses may<br />
harm nature. Most of our components are recyclable.<br />
If you judge your harness has finished its life, you can separate all the plastic and metallic parts and apply up-to-date sorting<br />
rules in effect in your community. For recycling of the fabric parts, we advise you to contact your local authority that<br />
deals with fabric recycling.<br />
25
<strong>RS</strong><br />
Environmental friendly practices<br />
We highly recommend you to respect as much as possible our environment while practicing<br />
paragliding and especially : not to go outside tracks, do not make unwanted noise and do<br />
not disturb the mountain areas’ balance. We advise you to do this starting from the take-off.<br />
Disclaimer<br />
Paragliding is an activity that requires, skill, specific knowledge and sound judgement. Be careful, learn in certified<br />
schools, subscribe an adequate insurance policy as well as a flying license and make sure your skill match the conditions.<br />
SUP’AIR cannot be held responsible for your paragliding decisions or activities<br />
This SUP’AIR product has been designed exclusively for paragliding. Any other activity such as skydiving or<br />
BASE jumping is absolutely forbidden.<br />
Pilot’s gear<br />
This is essential that you carry a helmet, suitable boots and clothing. Taking a reserve parachute suitable for your weight<br />
and correctly connected to your harness is also very important.<br />
26
Service Book<br />
<strong>RS</strong><br />
This page will help you to record all the life stages of your ALTIRANDO 2 harness.<br />
Serial number :<br />
Purchase date<br />
Owner’s name<br />
Name and stamp of the shop<br />
Care<br />
Resale<br />
date<br />
Workshop’s name/ Buyer’s name<br />
Care<br />
Resale<br />
date<br />
Workshop’s name/ Buyer’s name<br />
Care<br />
Resale<br />
date<br />
Workshop’s name/ Buyer’s name<br />
Care<br />
Resale<br />
date<br />
Workshop’s name/ Buyer’s name<br />
27
User’s <strong>manual</strong><br />
<strong>RS</strong><br />
SUPAIR-VLD<br />
PARC ALTAÏS<br />
34 RUE ADRASTÉE<br />
74650 ANNECY CHAVANOD<br />
FRANCE<br />
45°54.024’N / 06°04.725’ E<br />
RCS 387956790


