bruel & kjaer 2240 sound level meter
bruel & kjaer 2240 sound level meter
bruel & kjaer 2240 sound level meter

You also want an ePaper? Increase the reach of your titles
YUMPU automatically turns print PDFs into web optimized ePapers that Google loves.
16<br />
Integrating-averaging Sound Level Meter Type <strong>2240</strong> – User Guide<br />
There is no pre-configuration necessary before making a measurement with Type <strong>2240</strong>. The<br />
instrument is ready as soon as you turn it on. It is suggested, however, that you calibrate your<br />
instrument before a measurement to ensure correct measurement and display values, as well as<br />
complying to specific measurement standards. Your <strong>sound</strong> <strong>level</strong> <strong>meter</strong> is delivered factory calibrated,<br />
so you can begin your first measurement immediately. Instructions for calibrating at a<br />
later time can be found in Chapter 4, “Basic Operation” on page 17.<br />
Measurement Procedure<br />
Setup and measurement are quick and simple:<br />
1) Switch the <strong>sound</strong> <strong>level</strong> <strong>meter</strong> on using the Power switch on the side panel.<br />
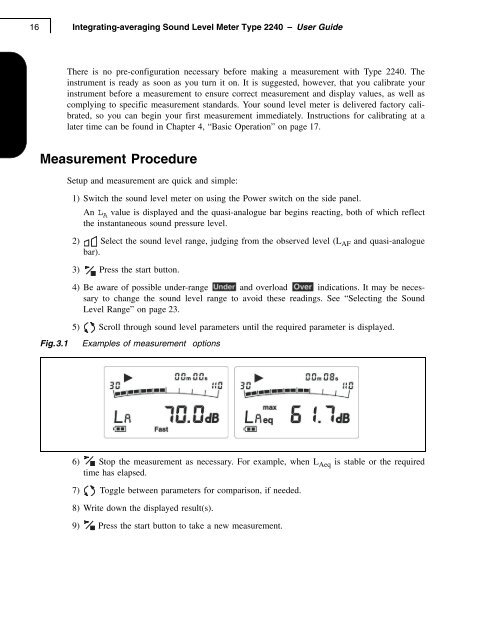
An L A value is displayed and the quasi-analogue bar begins reacting, both of which reflect<br />
the instantaneous <strong>sound</strong> pressure <strong>level</strong>.<br />
2) Select the <strong>sound</strong> <strong>level</strong> range, judging from the observed <strong>level</strong> (L AF and quasi-analogue<br />
bar).<br />
3) Press the start button.<br />
4) Be aware of possible under-range and overload indications. It may be necessary<br />
to change the <strong>sound</strong> <strong>level</strong> range to avoid these readings. See “Selecting the Sound<br />
Level Range” on page 23.<br />
5) Scroll through <strong>sound</strong> <strong>level</strong> para<strong>meter</strong>s until the required para<strong>meter</strong> is displayed.<br />
Fig.3.1<br />
Examples of measurement options<br />
6) Stop the measurement as necessary. For example, when L Aeq is stable or the required<br />
time has elapsed.<br />
7) Toggle between para<strong>meter</strong>s for comparison, if needed.<br />
8) Write down the displayed result(s).<br />
9) Press the start button to take a new measurement.