bruel & kjaer 2240 sound level meter
bruel & kjaer 2240 sound level meter
bruel & kjaer 2240 sound level meter

You also want an ePaper? Increase the reach of your titles
YUMPU automatically turns print PDFs into web optimized ePapers that Google loves.
20<br />
Integrating-averaging Sound Level Meter Type <strong>2240</strong> – User Guide<br />
Note: Type 4231 can also provide a 114 dB signal (see Type 4231 User Manual BB 0910).<br />
Normally, this signal should not be used; however, if a calibration must be performed in a<br />
very noisy environment, you can use this <strong>level</strong> for calibration. In such a case you must<br />
select the 60 – 140 dB range and adjust the reading to 113.9 dB.<br />
7) Remove the calibrator. It switches off automatically after a few seconds.<br />
Electrical Calibration<br />
An electrical calibration calibrates your <strong>sound</strong> <strong>level</strong> <strong>meter</strong>’s electronics only (not the microphone<br />
and preamplifier) and is based on a built-in reference signal.<br />
The procedure is as follows:<br />
1) Switch on the <strong>sound</strong> <strong>level</strong> <strong>meter</strong>.<br />
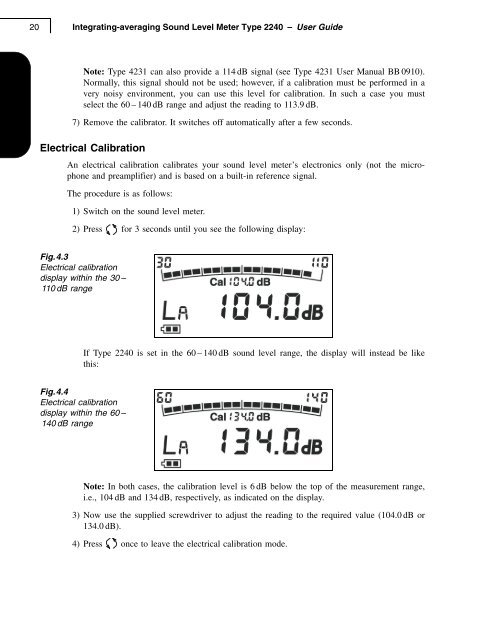
2) Press for 3 seconds until you see the following display:<br />
Fig.4.3<br />
Electrical calibration<br />
display within the 30 –<br />
110 dB range<br />
If Type <strong>2240</strong> is set in the 60 – 140 dB <strong>sound</strong> <strong>level</strong> range, the display will instead be like<br />
this:<br />
Fig.4.4<br />
Electrical calibration<br />
display within the 60 –<br />
140 dB range<br />
Note: In both cases, the calibration <strong>level</strong> is 6 dB below the top of the measurement range,<br />
i.e., 104 dB and 134 dB, respectively, as indicated on the display.<br />
3) Now use the supplied screwdriver to adjust the reading to the required value (104.0 dB or<br />
134.0 dB).<br />
4) Press once to leave the electrical calibration mode.